low BMW 228I COUPE 2016 Owners Manual
[x] Cancel search | Manufacturer: BMW, Model Year: 2016, Model line: 228I COUPE, Model: BMW 228I COUPE 2016Pages: 232, PDF Size: 5.76 MB
Page 210 of 232
Steptronic transmission: transporting
your vehicle
Note Your vehicle is not permitted to be towed.
Therefore, contact a service center in the
event of a breakdown.
Do not have the vehicle towed
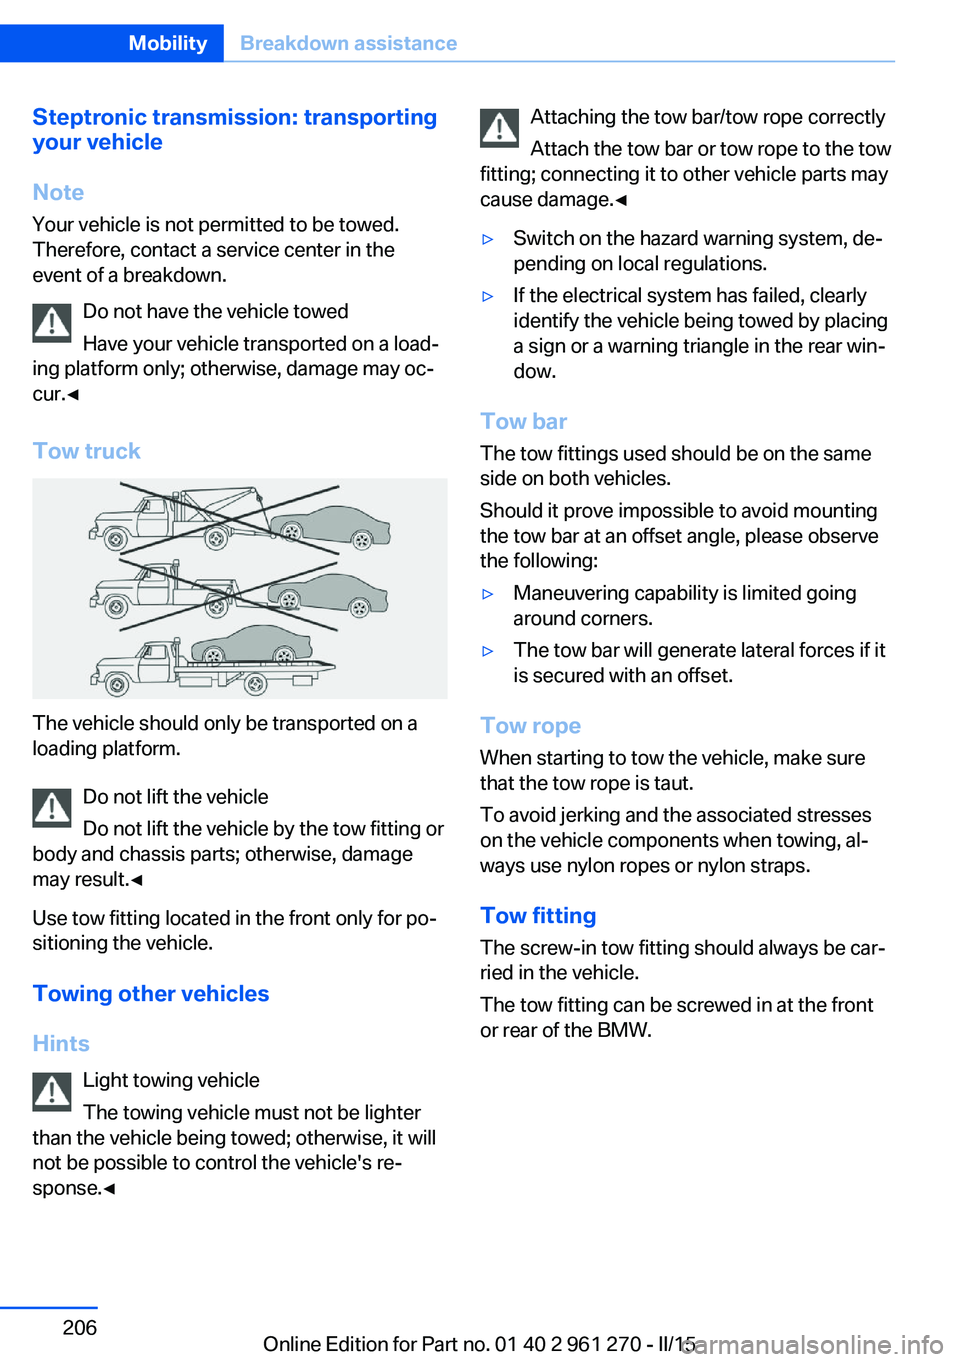
Have your vehicle transported on a load‐
ing platform only; otherwise, damage may oc‐
cur.◀
Tow truck
The vehicle should only be transported on a
loading platform.
Do not lift the vehicle
Do not lift the vehicle by the tow fitting or
body and chassis parts; otherwise, damage
may result.◀
Use tow fitting located in the front only for po‐
sitioning the vehicle.
Towing other vehicles
Hints Light towing vehicle
The towing vehicle must not be lighter
than the vehicle being towed; otherwise, it will
not be possible to control the vehicle's re‐
sponse.◀
Attaching the tow bar/tow rope correctly
Attach the tow bar or tow rope to the tow
fitting; connecting it to other vehicle parts may
cause damage.◀▷Switch on the hazard warning system, de‐
pending on local regulations.▷If the electrical system has failed, clearly
identify the vehicle being towed by placing
a sign or a warning triangle in the rear win‐
dow.
Tow bar
The tow fittings used should be on the same
side on both vehicles.
Should it prove impossible to avoid mounting
the tow bar at an offset angle, please observe
the following:
▷Maneuvering capability is limited going
around corners.▷The tow bar will generate lateral forces if it
is secured with an offset.
Tow rope
When starting to tow the vehicle, make sure
that the tow rope is taut.
To avoid jerking and the associated stresses
on the vehicle components when towing, al‐
ways use nylon ropes or nylon straps.
Tow fitting
The screw-in tow fitting should always be car‐
ried in the vehicle.
The tow fitting can be screwed in at the front
or rear of the BMW.
Seite 206MobilityBreakdown assistance206
Online Edition for Part no. 01 40 2 961 270 - II/15
Page 211 of 232
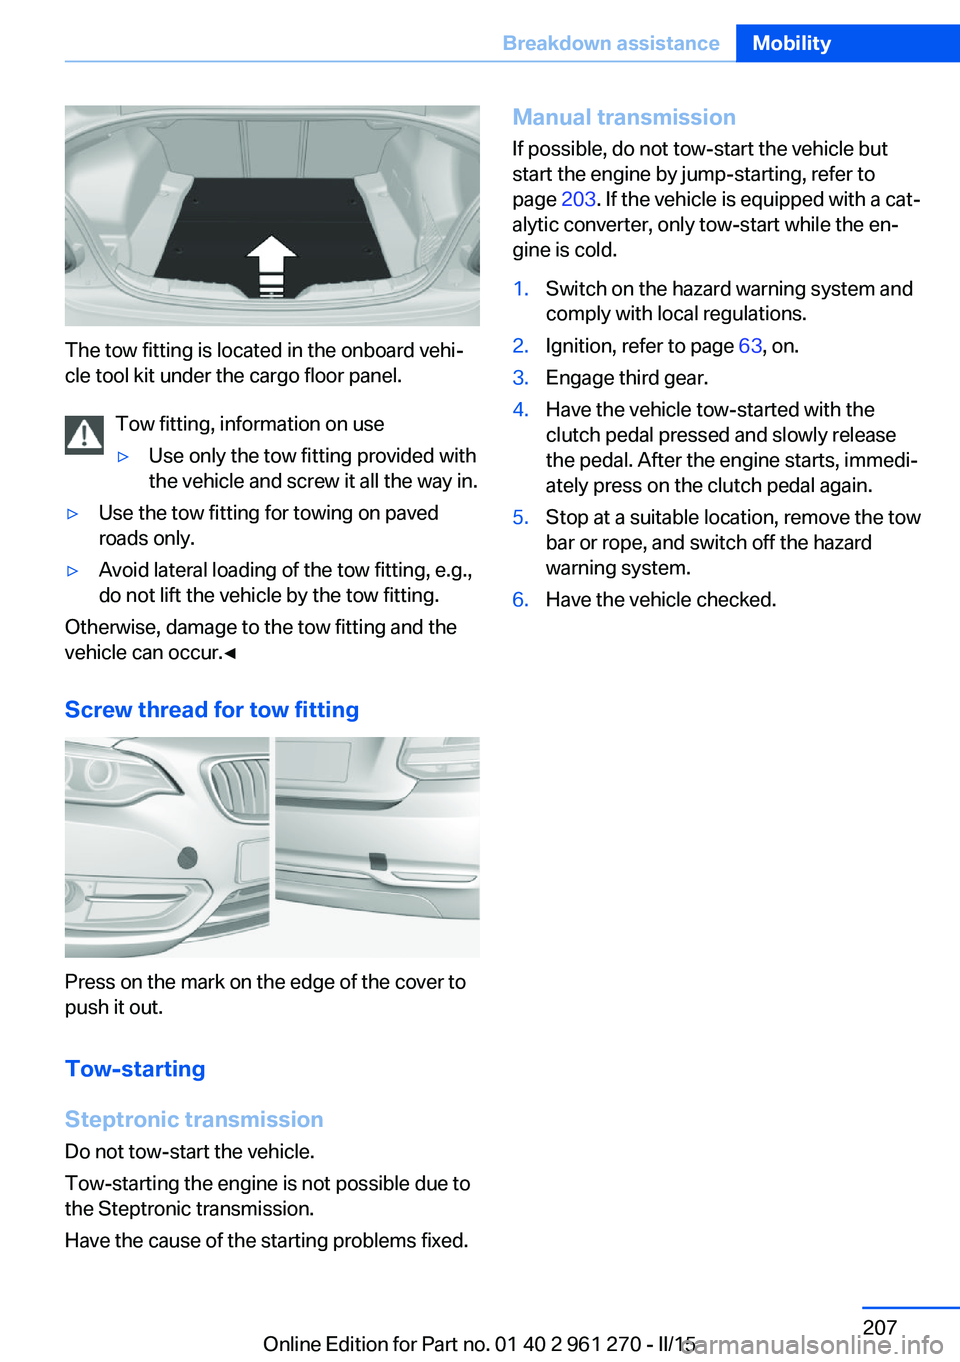
The tow fitting is located in the onboard vehi‐
cle tool kit under the cargo floor panel.
Tow fitting, information on use
▷Use only the tow fitting provided with
the vehicle and screw it all the way in.▷Use the tow fitting for towing on paved
roads only.▷Avoid lateral loading of the tow fitting, e.g.,
do not lift the vehicle by the tow fitting.
Otherwise, damage to the tow fitting and the
vehicle can occur.◀
Screw thread for tow fitting
Press on the mark on the edge of the cover to
push it out.
Tow-starting
Steptronic transmission
Do not tow-start the vehicle.
Tow-starting the engine is not possible due to
the Steptronic transmission.
Have the cause of the starting problems fixed.
Manual transmission If possible, do not tow-start the vehicle but
start the engine by jump-starting, refer to
page 203. If the vehicle is equipped with a cat‐
alytic converter, only tow-start while the en‐
gine is cold.1.Switch on the hazard warning system and
comply with local regulations.2.Ignition, refer to page 63, on.3.Engage third gear.4.Have the vehicle tow-started with the
clutch pedal pressed and slowly release
the pedal. After the engine starts, immedi‐
ately press on the clutch pedal again.5.Stop at a suitable location, remove the tow
bar or rope, and switch off the hazard
warning system.6.Have the vehicle checked.Seite 207Breakdown assistanceMobility207
Online Edition for Part no. 01 40 2 961 270 - II/15
Page 212 of 232
CareVehicle features and optionsThis chapter describes all standard, country-
specific and optional features offered with the
series. It also describes features that are not
necessarily available in your car, e. g., due to
the selected options or country versions. This
also applies to safety-related functions and
systems. The respectively applicable country
provisions must be observed when using the
respective features and systems.
Car washes General information
Regularly remove foreign objects such as
leaves in the area below the windshield when
the hood is raised.
Wash your vehicle frequently, particularly in
winter. Intense soiling and road salt can dam‐
age the vehicle.
Hints Steam jets or high-pressure washers
When using steam jets or high-pressure
washers, hold them a sufficient distance away
and use a maximum temperature of
140 ℉/60 ℃.
If the vehicle has a glass sunroof, ensure that a
distance of at least 31.5 inches/80 cm is main‐
tained. Holding them too close or using exces‐
sively high pressures or temperatures can
cause damage or preliminary damage that may
then lead to long-term damage.
Follow the user's manual for the high-pressure
washer.◀Cleaning sensors/camera lenses with
high-pressure washers
When using high-pressure washers, do not
spray the sensors and camera lenses on the
outside of the vehicle for long periods and
maintain a distance of at least 12 in/30 cm.◀
Automatic car washes
Hints Do not use high pressure washing sys‐
tems
With washing systems operating at high pres‐
sures and nozzle positions close to the win‐
dows, drops of water can penetrate.◀▷Give preference to cloth car washes or
those that use soft brushes in order to
avoid paint damage.▷Make sure that the wheels and tires are not
damaged by the transport mechanisms.▷Fold in the exterior mirrors; otherwise, they
may be damaged, depending on the width
of the vehicle.▷Deactivate the rain sensor, refer to
page 69, to avoid unintentional wiper acti‐
vation.▷In some cases, an unintentional alarm can
be triggered by the interior motion sensor
of the alarm system. Follow the instruc‐
tions on avoiding an unintentional alarm,
refer to page 45.
Guide rails in car washes
Avoid car washes with guide rails higher
than 4 in/10 cm; otherwise, the vehicle body
could be damaged.◀
Before driving into a car wash In order to ensure that the vehicle can roll in a
car wash, take the following steps:
Seite 208MobilityCare208
Online Edition for Part no. 01 40 2 961 270 - II/15
Page 213 of 232

Manual transmission:1.Drive into the car wash.2.Shift to neutral.3.Switch the engine off.4.Switch on the ignition.
Steptronic transmission:
1.Drive into the car wash.2.Engage selector lever position N.3.Switch the engine off.
In this way, the ignition remains switched
on, and a Check-Control message is dis‐
played.
Do not turn off the ignition in the car
wash
Do not turn off the ignition in the car wash;
otherwise, selector lever position P is en‐
gaged and damages can result.◀
The vehicle cannot be locked from the outside
when in selector lever position N. A signal
sounds when an attempt is made to lock the
vehicle.
To start the engine with manual transmission:
1.Press on the clutch pedal.2.Press the Start/Stop button.
To start the engine with Steptronic transmis‐
sion:
1.Depress the brake pedal.2.Press the Start/Stop button.
Pressing the Start/Stop button without step‐
ping on the brake turns the ignition off.
Selector lever positionSelector lever position P is engaged automati‐
cally:
▷When the ignition is switched off.▷After approx. 15 minutes.Headlights▷Do not rub dry and do not use abrasive or
acidic cleansers.▷Soak areas that have been dirtied e. g.,
from insects, with shampoo and wash off
with water.▷Thaw ice with de-icing spray; do not use an
ice scraper.
After washing the vehicle
After washing the vehicle, apply the brakes
briefly to dry them; otherwise, braking action
can be reduced and corrosion of the brake
discs can occur.
Completely remove all residues on the win‐
dows, to minimize loss of visibility due to
smearing and to reduce wiper noises and
wiper blade wear.
Vehicle care
Car care products BMW recommends using care and cleaning
products from BMW, since these have been
tested and approved.
Car care and cleaning products
Follow the instructions on the container.
When cleaning the interior, open the doors or
windows.
Only use products intended for cleaning vehi‐
cles.
Cleansers can contain substances that are
dangerous and harmful to your health.◀
Vehicle paint
Regular care contributes to driving safety and
value retention. Environmental influences in
areas with elevated air pollution or natural con‐
taminants, such as tree resin or pollen can af‐
fect the vehicle's paintwork. Tailor the fre‐
quency and extent of your car care to these
influences.
Seite 209CareMobility209
Online Edition for Part no. 01 40 2 961 270 - II/15
Page 214 of 232
Aggressive substances such as spilled fuel, oil,
grease or bird droppings, must be removed im‐
mediately to prevent the finish from being al‐
tered or discolored.
Leather care Remove dust from the leather often, using a
cloth or vacuum cleaner.
Otherwise, particles of dust and road grime
chafe in pores and folds, and lead to increased
wear and premature degradation of the leather
surface.
To guard against discoloration, such as from
clothing, provide leather care roughly every
two months.
Clean light-colored leather more frequently be‐
cause soiling on such surfaces is substantially
more visible.
Use leather care products; otherwise, dirt and
grease will gradually break down the protective
layer of the leather surface.
Suitable care products are available from the
service center.
Upholstery material care Vacuum regularly with a vacuum cleaner.
If upholstery is very dirty, e.g., with beverage
stains, use a soft sponge or microfiber cloth
with a suitable interior cleaner.
Clean the upholstery down to the seams using
large sweeping motions. Avoid rubbing the
material vigorously.
Damage from Velcro® fasteners
Open Velcro® fasteners on pants or
other articles of clothing can damage the seat
covers. Ensure that any Velcro® fasteners are
closed.◀
Caring for special components
Light-alloy wheels
When cleaning the vehicle, use only neutral
wheel cleaners having a pH value from 5 to 9.Do not use abrasive cleaning agents or steam
jets above 140 ℉/60 ℃. Follow the manufac‐
turer's instructions.
Aggressive, acidic or alkaline cleaning agents
can destroy the protective layer of adjacent
components, such as the brake disk.
Chrome surfaces
Carefully clean components such as the radia‐
tor grille or door handles with an ample supply
of water, possibly with shampoo added, partic‐
ularly when they have been exposed to road
salt.
Rubber components Aside from water, treat only with rubber
cleansers.
When cleaning rubber seals, do not use any
silicon-containing car care products in order to
avoid damage or noises.
Fine wood partsClean fine wood facing and fine wood compo‐
nents only with a moist rag. Then dry with a
soft cloth.
Plastic components
These include:▷Imitation leather surfaces.▷Roofliner.▷Lamp lenses.▷Instrument cluster cover.▷Matt black spray-coated components.▷Painted parts in the interior.
Clean with a microfiber cloth.
Dampen cloth lightly with water.
Do not soak the roofliner.
No cleansers that contain alcohol or sol‐
vents
Do not use cleansers that contain alcohol or
solvents, such as lacquer thinners, heavy-duty
Seite 210MobilityCare210
Online Edition for Part no. 01 40 2 961 270 - II/15
Page 215 of 232
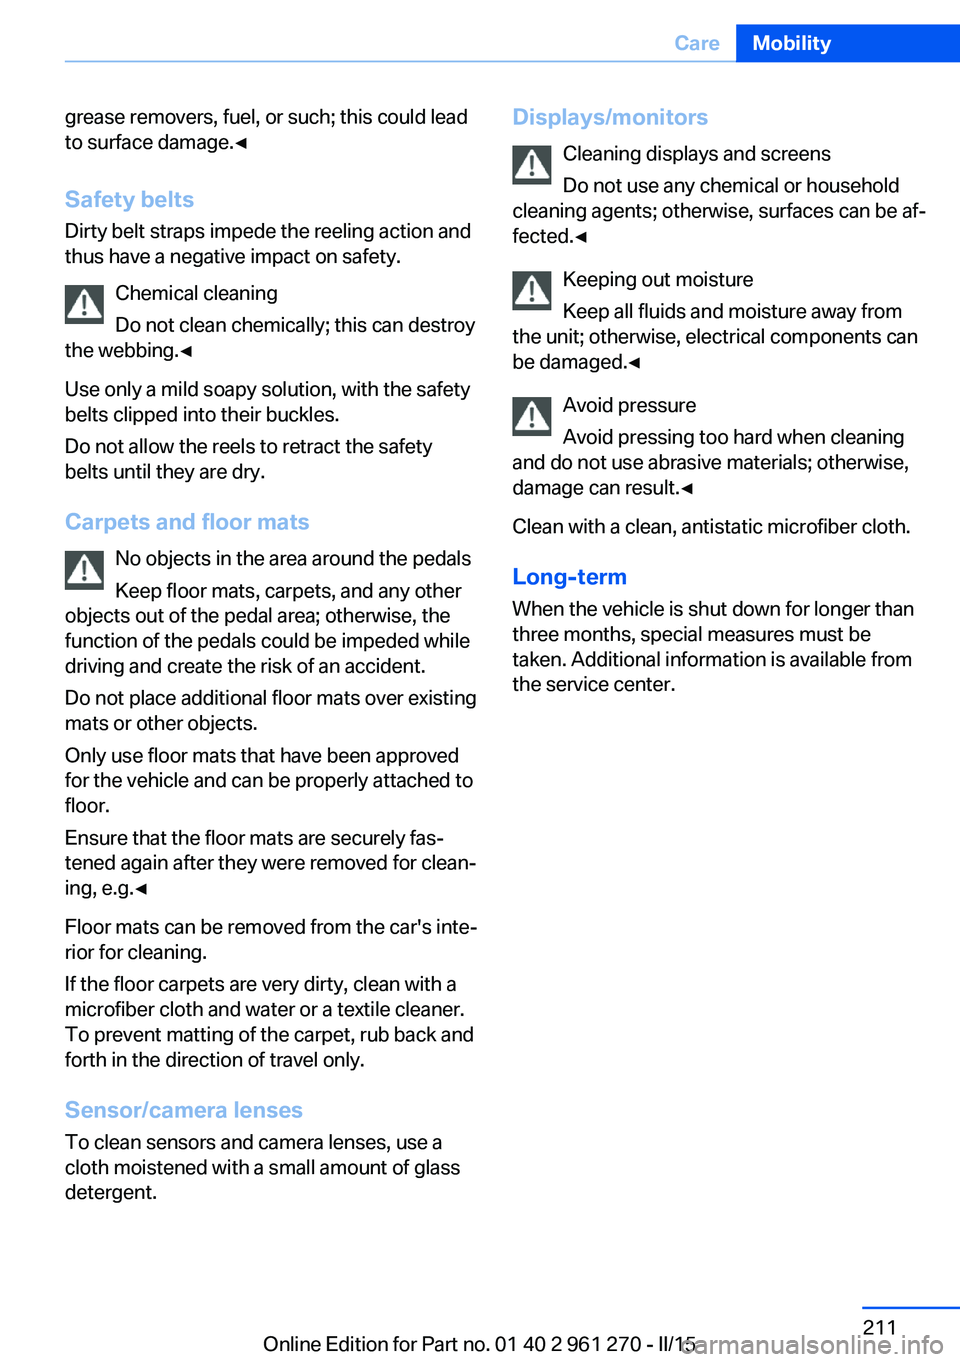
grease removers, fuel, or such; this could lead
to surface damage.◀
Safety belts
Dirty belt straps impede the reeling action and
thus have a negative impact on safety.
Chemical cleaning
Do not clean chemically; this can destroy
the webbing.◀
Use only a mild soapy solution, with the safety
belts clipped into their buckles.
Do not allow the reels to retract the safety
belts until they are dry.
Carpets and floor mats No objects in the area around the pedals
Keep floor mats, carpets, and any other
objects out of the pedal area; otherwise, the
function of the pedals could be impeded while
driving and create the risk of an accident.
Do not place additional floor mats over existing
mats or other objects.
Only use floor mats that have been approved
for the vehicle and can be properly attached to
floor.
Ensure that the floor mats are securely fas‐
tened again after they were removed for clean‐
ing, e.g.◀
Floor mats can be removed from the car's inte‐
rior for cleaning.
If the floor carpets are very dirty, clean with a
microfiber cloth and water or a textile cleaner.
To prevent matting of the carpet, rub back and
forth in the direction of travel only.
Sensor/camera lenses
To clean sensors and camera lenses, use a
cloth moistened with a small amount of glass
detergent.Displays/monitors
Cleaning displays and screens
Do not use any chemical or household
cleaning agents; otherwise, surfaces can be af‐
fected.◀
Keeping out moisture
Keep all fluids and moisture away from
the unit; otherwise, electrical components can
be damaged.◀
Avoid pressure
Avoid pressing too hard when cleaning
and do not use abrasive materials; otherwise,
damage can result.◀
Clean with a clean, antistatic microfiber cloth.
Long-term
When the vehicle is shut down for longer than
three months, special measures must be
taken. Additional information is available from
the service center.Seite 211CareMobility211
Online Edition for Part no. 01 40 2 961 270 - II/15
Page 218 of 232
Technical dataVehicle features and options
This chapter describes all standard, country-
specific and optional features offered with the
series. It also describes features that are not
necessarily available in your car, e. g., due tothe selected options or country versions. This
also applies to safety-related functions and
systems. The respectively applicable country
provisions must be observed when using the
respective features and systems.
Note
The technical data and specifications in this
Owner's Manual are used as guidance values.
The vehicle-specific data can deviate from this,
for example, due to the selected special equip‐
ment, country version or country-specific
measurement method. Detailed values can befound in the approval documents, on informa‐
tion signs on the vehicle or can be obtained
from the service center.
The information in the vehicle documents al‐
ways has priority.
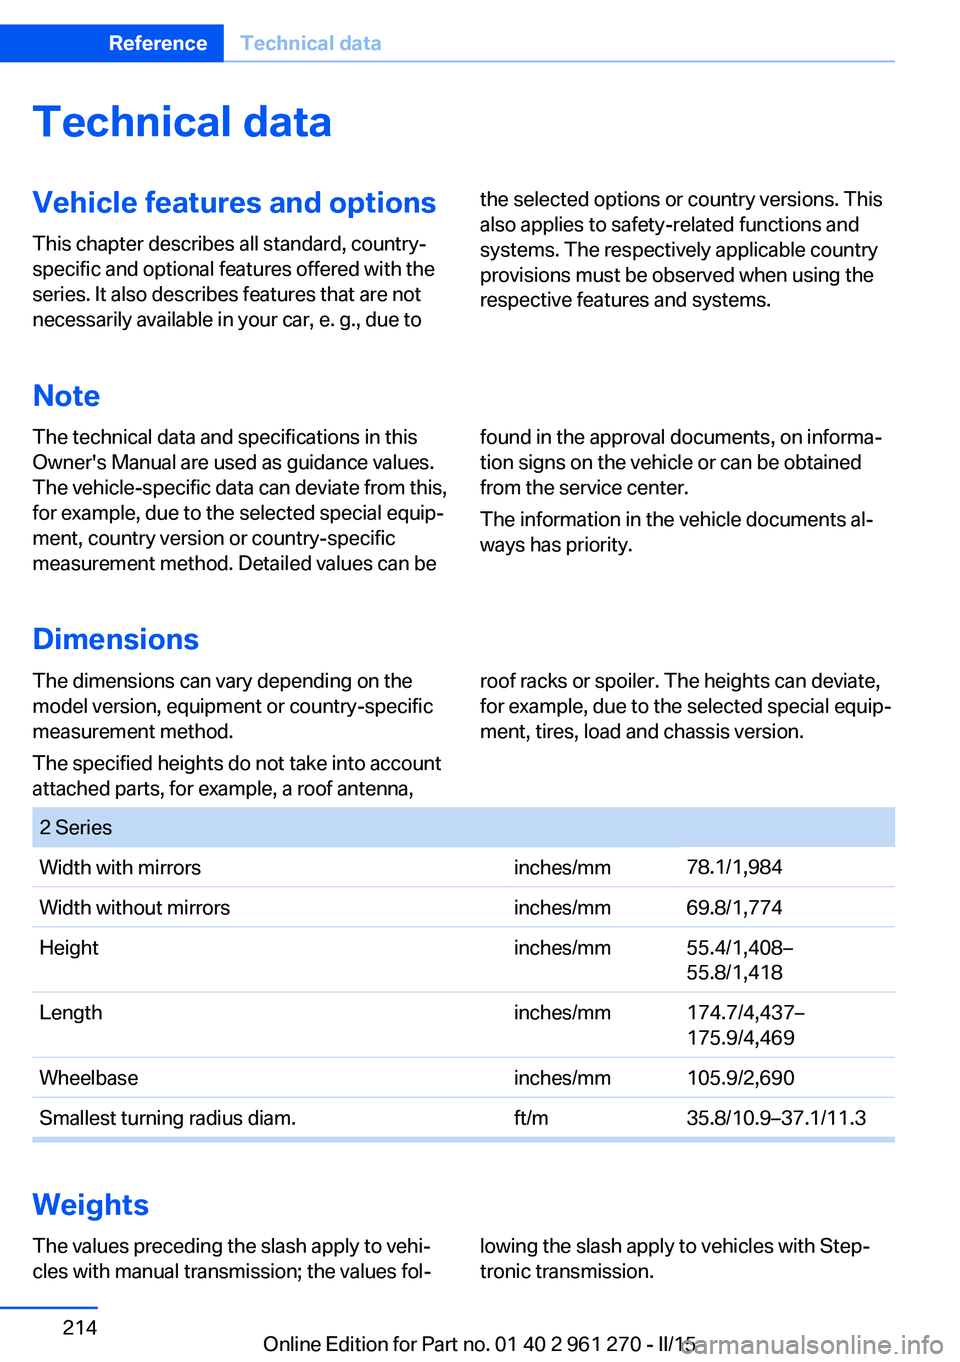
Dimensions
The dimensions can vary depending on the
model version, equipment or country-specific
measurement method.
The specified heights do not take into account
attached parts, for example, a roof antenna,roof racks or spoiler. The heights can deviate,
for example, due to the selected special equip‐
ment, tires, load and chassis version. 2 SeriesWidth with mirrorsinches/mm78.1/1,984Width without mirrorsinches/mm69.8/1,774Heightinches/mm55.4/1,408–
55.8/1,418Lengthinches/mm174.7/4,437–
175.9/4,469Wheelbaseinches/mm105.9/2,690Smallest turning radius diam.ft/m35.8/10.9–37.1/11.3
Weights
The values preceding the slash apply to vehi‐
cles with manual transmission; the values fol‐lowing the slash apply to vehicles with Step‐
tronic transmission.Seite 214ReferenceTechnical data214
Online Edition for Part no. 01 40 2 961 270 - II/15
Page 222 of 232
Everything from A to Z
IndexA ABS, Antilock Brake Sys‐ tem 112
Acceleration Assistant, refer to Launch Control 74
Accessories and parts 7
Activated-charcoal filter 135
Adaptive brake lights, refer to Brake force display 111
Adaptive Light Control 91
Additives, oil 188
Adjustments, seats/head re‐ straints 48
After washing vehicle 209
Airbags 95
Airbags, indicator/warning light 96
Air circulation, refer to Recir‐ culated-air mode 131, 134
Air, dehumidifying, refer to Cooling function 131, 134
Air distribution, manual 131, 134
Air flow, air conditioner 131
Air flow, automatic climate control 134
Air pressure, tires 172
Air vents, refer to Ventila‐ tion 135
Alarm system 44
Alarm, unintentional 45
All around the center con‐ sole 16
All around the roofliner 17
All around the steering wheel 14
All-season tires, refer to Win‐ ter tires 179
All-wheel-drive 113 Alternating-code hand-held
transmitter 138
Alternative oil types 189
Ambient light 94
Antifreeze, washer fluid 70
Antilock Brake System, ABS 112
Anti-slip control, refer to DSC 112
Approved axle load 214
Approved engine oils, see Suitable engine oil
types 189
Arrival time 86
Ash tray 141
Assistance when driving off 116
Attentiveness assistant 111
AUTO intensity 133
Automatic car wash 208
Automatic climate con‐ trol 130
Automatic climate control with enhanced features 132
Automatic Curb Monitor 56
Automatic deactivation, front- seat passenger airbags 97
Automatic headlight con‐ trol 91
Automatic locking 43
Automatic recirculated-air control 134
Automatic transmission, see Steptronic transmission 71
AUTO program, automatic cli‐ mate control 133
AUTO program, climate con‐ trol 131
AUTO program, intensity 133
Auto Start/Stop function 65
Average fuel consumption 86 Average speed 86
Axle loads, weights 214
B Backrest curvature, refer to Lumbar support 50
Backrest, width 50
Band-aids, refer to First aid kit 203
Bar for tow-starting/ towing 206
Battery replacement, vehicle battery 200
Battery replacement, vehicle remote control 35
Battery, vehicle 200
Belts, safety belts 52
Beverage holder, cu‐ pholder 147
BMW Assist, see user's manual for Navigation, En‐
tertainment and Communi‐
cation
BMW Driver’s Guide App 6
BMW Homepage 6
BMW Internet page 6
BMW maintenance sys‐ tem 191
Bonus range, ECO PRO 160
Bottle holder, refer to Cu‐ pholder 147
Brake assistant 112
Brake discs, break-in 152
Brake force display 111
Brake lights, adaptive 111
Brake lights, brake force dis‐ play 111
Brake pads, break-in 152
Braking, hints 153
Breakdown assistance 202 Seite 218ReferenceEverything from A to Z218
Online Edition for Part no. 01 40 2 961 270 - II/15
Page 225 of 232
Exterior mirror, automaticdimming feature 57
Exterior mirrors 55
External start 203
External temperature dis‐ play 81
External temperature warn‐ ing 81
Eyes for securing cargo 156
F
Failure message, see Check Control 77
False alarm, refer to Uninten‐ tional alarm 45
Fan, refer to Air flow 131, 134
Filler neck for engine oil 188
Fine wood, care 210
First aid kit 203
Fitting for towing, see Tow fit‐ ting 206
Flat tire, changing wheels 199
Flat Tire Monitor FTM 102
Flat tire, Tire Pressure Moni‐ tor TPM 98
Flat tire, warning lamp 99, 102
Flooding 153
Floor carpet, care 211
Floor mats, care 211
Fogged up windows 131
Fold down the rear seat back‐ rest, see Though-loading
system 143
Fold-out position, wiper 70
Foot brake 153
Front airbags 95
Front-end collision warning with City Braking func‐
tion 104
Front fog lights 93
Front fog lights, front, bulb re‐ placement 197 Front lights 194
front-seat passenger airbags, automatic deactivation 97
Front-seat passenger airbags, indicator lamp 97
FTM Flat Tire Monitor 102
Fuel 170
Fuel consumption, refer to Average fuel consump‐
tion 86
Fuel filler flap 168
Fuel gauge 80
Fuel lid 168
Fuel quality 170
Fuel recommendation 170
Fuel, tank capacity 216
Fuse 201
G
Garage door opener, refer to Universal Integrated Remote
Control 137
Gasoline 170
Gear change, Steptronic transmission 72
Gear shift indicator 83
General driving notes 152
Glare shield 141
Glass sunroof, powered 46
Glove compartment 145
Gross vehicle weight, ap‐ proved 214
H
Halogen headlights, bulb re‐ placement 194
Handbrake, refer to parking brake 67
Hand-held transmitter, alter‐ nating code 138
Hazard warning flashers 202
Head airbags 95
Headlight control, auto‐ matic 91 Headlight courtesy delay fea‐
ture 91
Headlight flasher 68
Headlight flasher, bulb re‐ placement 196
Headlight glass 194
Headlights 194
Headlights, care 209
Headlight washer system 68
Head restraints 48
Head restraints, front 53
Head restraints, rear 54
Heavy cargo, stowing 156
High-beam Assistant 92
High beams 68
High beams/low beams, refer to High-beam Assistant 92
High beams, bulb replace‐ ment 196
Hills 154
Hill start assistant, refer to Drive-off assistant 116
Hints 6
Holder for beverages 147
Homepage 6
Hood 186
Horn 14
Hotel function, trunk lid 41
Hot exhaust system 153
Hydroplaning 153
I Ice warning, see External temperature warning 81
Icy roads, see External tem‐ perature warning 81
Identification marks, tires 176
Identification number, see ve‐ hicle identification num‐
ber 9
iDrive 18
Ignition key, refer to Remote control 34
Ignition off 63
Ignition on 63 Seite 221Everything from A to ZReference221
Online Edition for Part no. 01 40 2 961 270 - II/15
Page 226 of 232
Indication of a flat tire 99, 102
Indicator and alarm lamps, see Check Control 77
Indicator lamp, see Check Control 77
Individual air distribu‐ tion 131, 134
Individual settings, refer to Personal Profile 35
Inflation pressure, tires 172
Inflation pressure warning, tires 102
Info display, refer to On- Board computer 85
Initialize, Tire Pressure Moni‐ tor TPM 99
Initializing, Flat Tire Monitor FTM 102
Instrument cluster 76
Instrument cluster, electronic displays 76
Instrument lighting 93
Integrated key 34
Integrated Owner's Manual in the vehicle 30
Intelligent Emergency Re‐ quest 202
Intelligent Safety 103
Intensity, AUTO pro‐ gram 133
Interior equipment 137
Interior lights 93
Interior lights during unlock‐ ing 37
Interior lights with the vehicle locked 38
Interior motion sensor 45
Interior rearview mirror, auto‐ matic dimming feature 57
Interior rearview mirror, com‐ pass 139
Interior rearview mirror, man‐ ually dimmable 57
Internet page 6
Interval display, service re‐ quirements 82 Interval mode 69
J Jacking points for the vehicle jack 200
Joystick, Steptronic transmis‐ sion 72
Jump-starting 203
K
Key/remote control 34
Keyless Go, refer to Comfort Access 41
Key Memory, refer to Per‐ sonal Profile 35
Kickdown, Steptronic trans‐ mission 71
Knee airbag 96
L Lamp replacement 193
Lamp replacement, front 194
Lamp replacement, rear 198
Lane departure warning 109
Lane margin, warning 109
Language on Control Dis‐ play 88
Lashing eyes, securing cargo 156
LATCH child restraint sys‐ tem 61
Launch Control 74
Leather, care 210
LEDs, light-emitting di‐ odes 194
Letters and numbers, enter‐ ing 25
Light alloy wheels, care 210
Light control 91
Light-emitting diodes, LEDs 194
Lighter 141
Lighting 90 Lights 90
Lights and bulbs 193
Light switch 90
Load 156
Loading 155
Lock, door 39
Locking/unlocking via door lock 39
Locking/unlocking with re‐ mote control 37
Locking, automatic 43
Locking, settings 43
Locking via trunk lid 40
Low beams 90
Low beams, automatic, refer to High-beam Assistant 92
Lower back support 50
Luggage rack, see Roof- mounted luggage rack 157
Lumbar support 50
M
Maintenance 191
Maintenance require‐ ments 191
Maintenance, service require‐ ments 82
Maintenance system, BMW 191
Make-up mirror 141
Malfunction displays, see Check Control 77
Manual air distribu‐ tion 131, 134
Manual air flow 131, 134
Manual mode, Steptronic transmission 72
Manual operation, door lock 39
Manual operation, exterior mirrors 56
Manual operation, fuel filler flap 168
Manual operation, Park Dis‐ tance Control PDC 121 Seite 222ReferenceEverything from A to Z222
Online Edition for Part no. 01 40 2 961 270 - II/15