service BMW 3.0i ROADSTER 2003 Owners Manual
[x] Cancel search | Manufacturer: BMW, Model Year: 2003, Model line: 3.0i ROADSTER, Model: BMW 3.0i ROADSTER 2003Pages: 106, PDF Size: 2.47 MB
Page 4 of 106
Contents
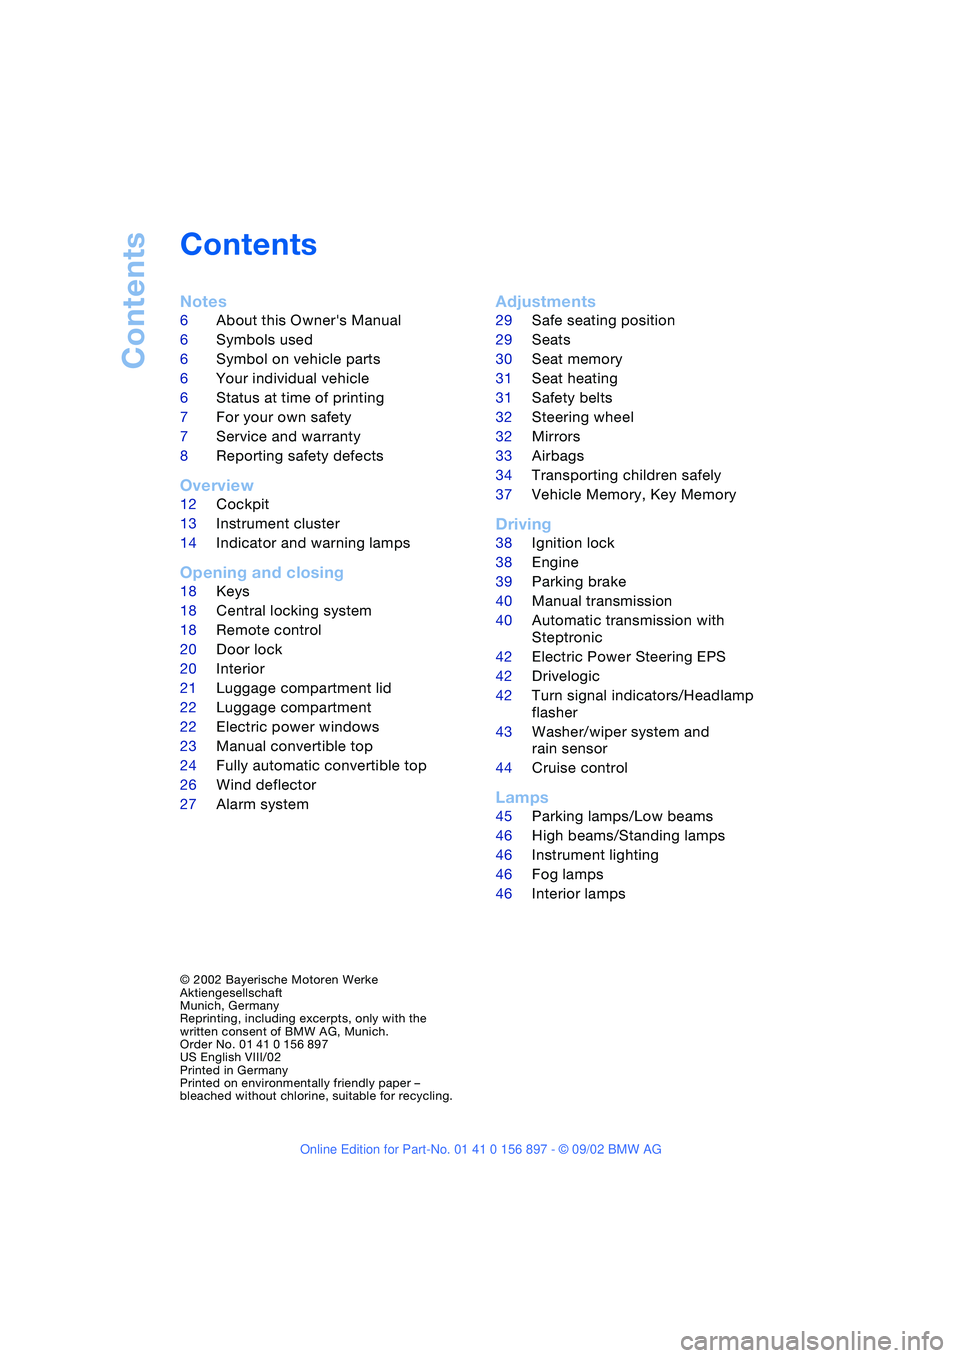
Contents
Notes
6About this Owner's Manual
6Symbols used
6Symbol on vehicle parts
6Your individual vehicle
6Status at time of printing
7For your own safety
7Service and warranty
8Reporting safety defects
Overview
12Cockpit
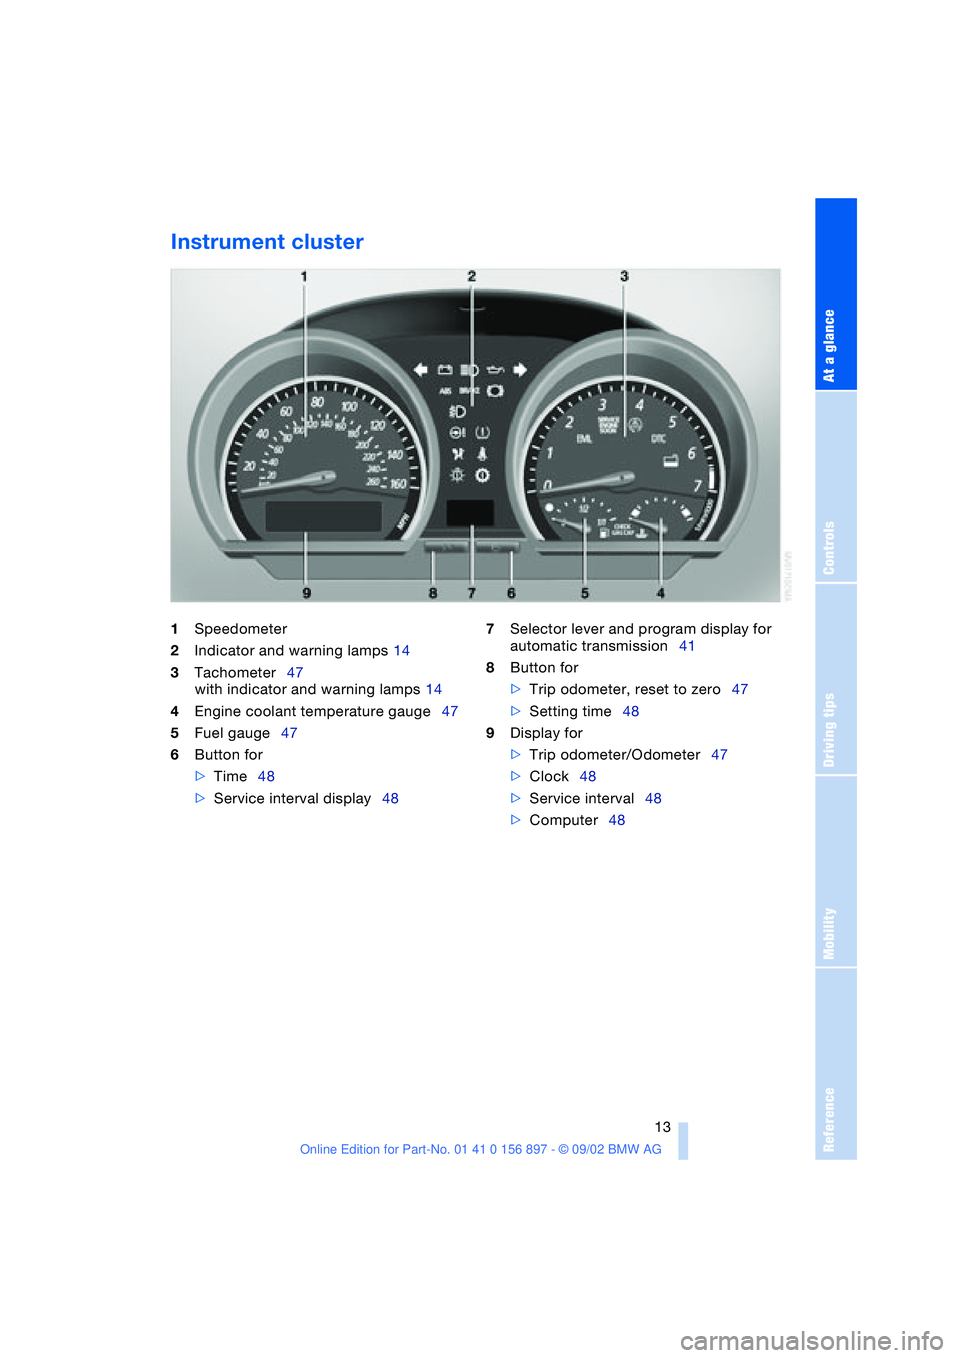
13Instrument cluster
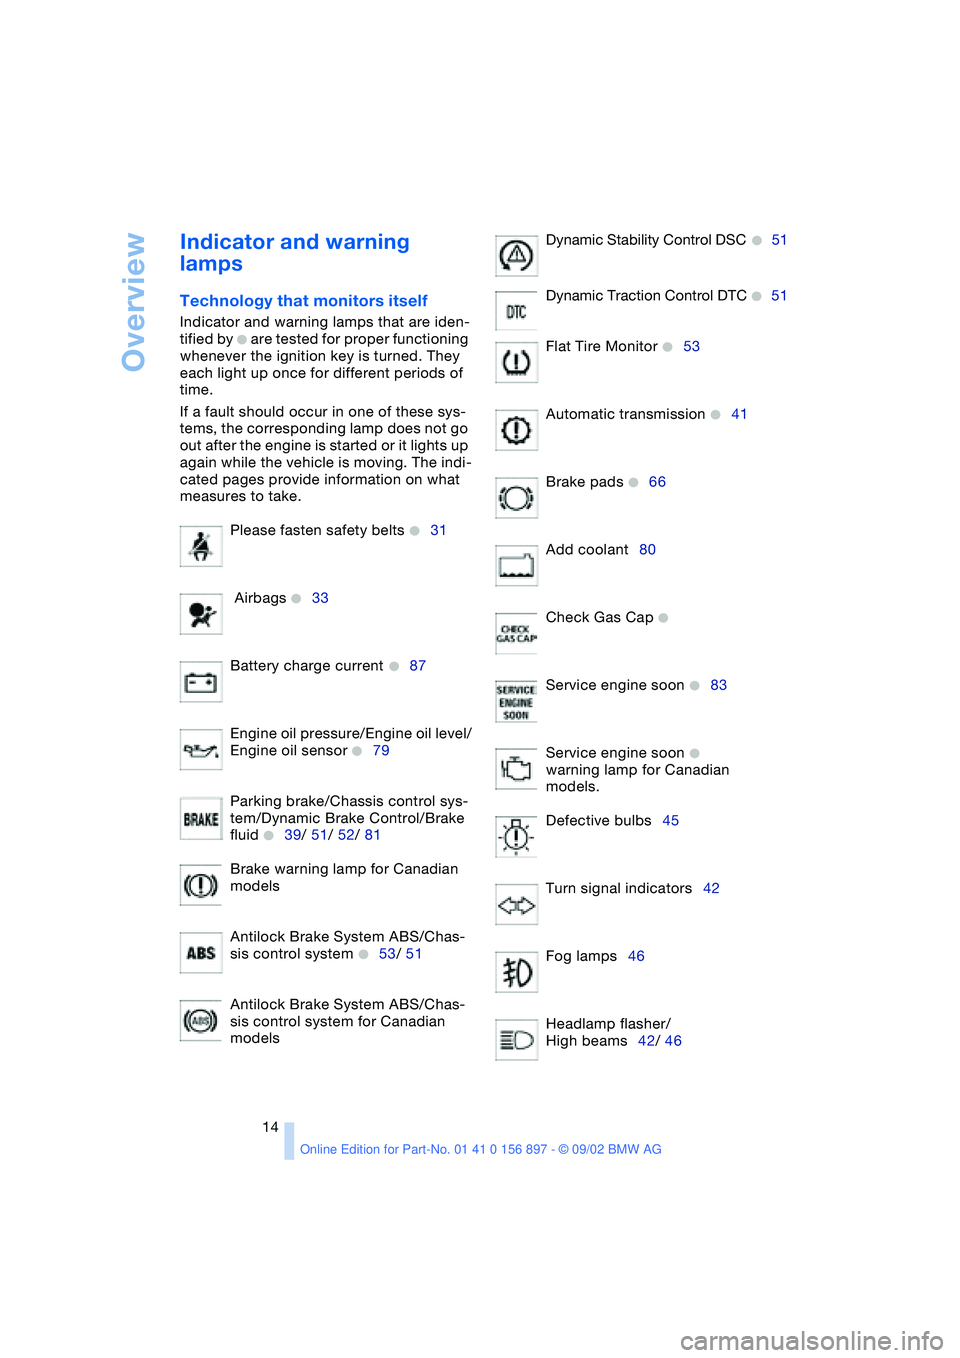
14Indicator and warning lamps
Opening and closing
18Keys
18Central locking system
18Remote control
20Door lock
20Interior
21Luggage compartment lid
22Luggage compartment
22Electric power windows
23Manual convertible top
24Fully automatic convertible top*
26Wind deflector*
27Alarm system*
Adjustments
29Safe seating position
29Seats
30Seat memory*
31Seat heating*
31Safety belts
32Steering wheel
32Mirrors
33Airbags
34Transporting children safely
37Vehicle Memory, Key Memory
Driving
38Ignition lock
38Engine
39Parking brake
40Manual transmission
40Automatic transmission with
Steptronic*
42Electric Power Steering EPS
42Drivelogic*
42Turn signal indicators/Headlamp
flasher
43Washer/wiper system and
rain sensor*
44Cruise control*
Lamps
45Parking lamps/Low beams
46High beams/Standing lamps
46Instrument lighting
46Fog lamps
46Interior lamps
© 2002 Bayerische Motoren Werke
Aktiengesellschaft
Munich, Germany
Reprinting, including excerpts, only with the
written consent of BMW AG, Munich.
Order No. 01 41 0 156 897
US English VIII/02
Printed in Germany
Printed on environmentally friendly paper –
bleached without chlorine, suitable for recycling.
Page 5 of 106
At a glance
Controls
Driving tips
Mobility
Reference
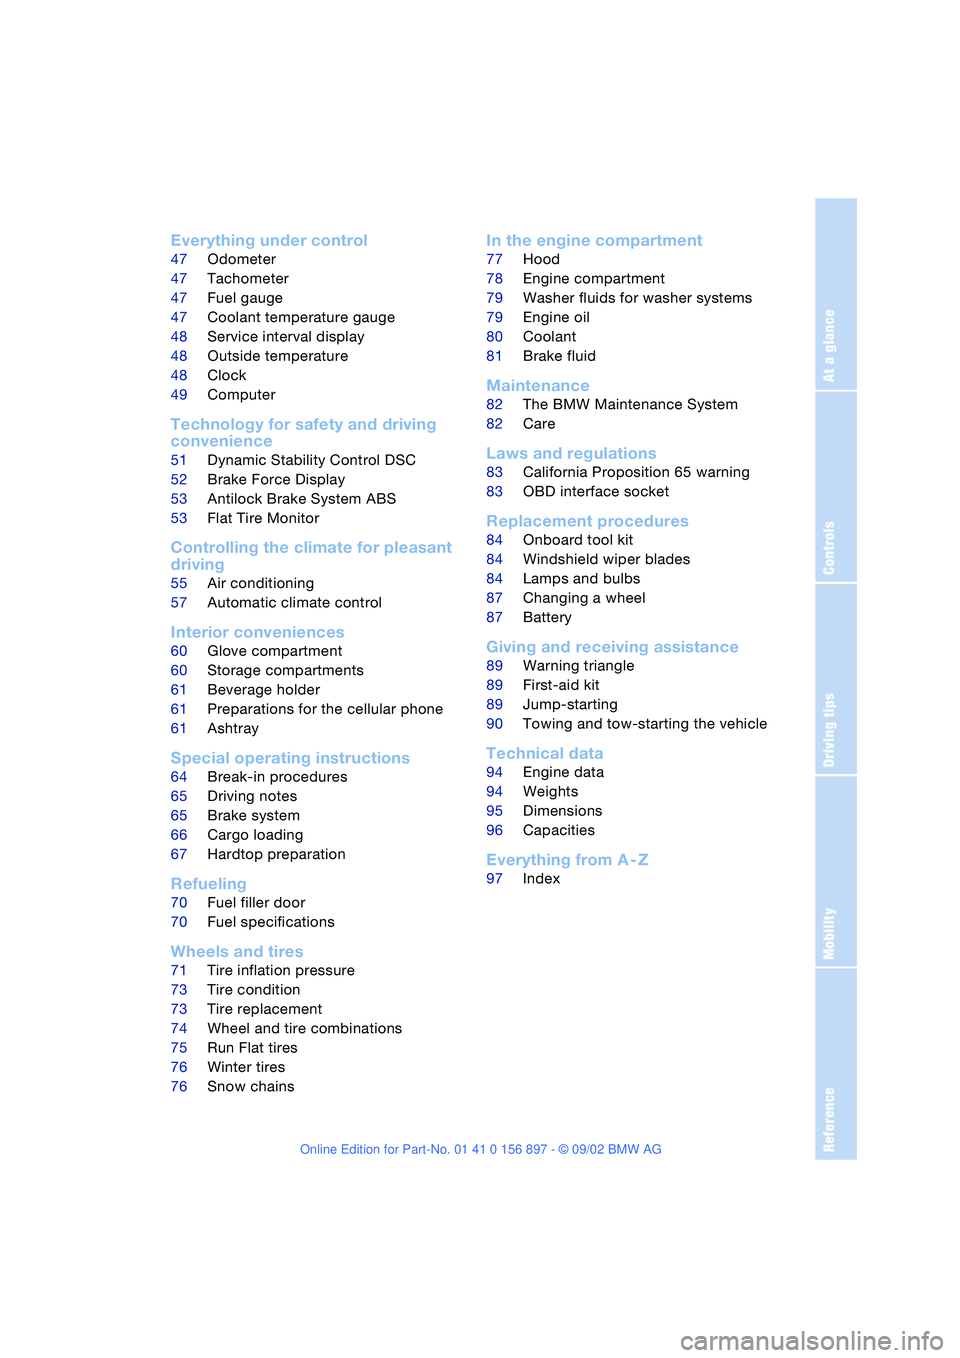
Everything under control
47Odometer
47Tachometer
47Fuel gauge
47Coolant temperature gauge
48Service interval display
48Outside temperature
48Clock
49Computer*
Technology for safety and driving
convenience
51Dynamic Stability Control DSC
52Brake Force Display
53Antilock Brake System ABS
53Flat Tire Monitor
Controlling the climate for pleasant
driving
55Air conditioning
57Automatic climate control*
Interior conveniences
60Glove compartment
60Storage compartments
61Beverage holder
61Preparations for the cellular phone*
61Ashtray*
Special operating instructions
64Break-in procedures
65Driving notes
65Brake system
66Cargo loading
67Hardtop preparation*
Refueling
70Fuel filler door
70Fuel specifications
Wheels and tires
71Tire inflation pressure
73Tire condition
73Tire replacement
74Wheel and tire combinations
75Run Flat tires
76Winter tires
76Snow chains*
In the engine compartment
77Hood
78Engine compartment
79Washer fluids for washer systems
79Engine oil
80Coolant
81Brake fluid
Maintenance
82The BMW Maintenance System
82Care
Laws and regulations
83California Proposition 65 warning
83OBD interface socket
Replacement procedures
84Onboard tool kit
84Windshield wiper blades
84Lamps and bulbs
87Changing a wheel
87Battery
Giving and receiving assistance
89Warning triangle*
89First-aid kit*
89Jump-starting
90Towing and tow-starting the vehicle
Technical data
94Engine data
94Weights
95Dimensions
96Capacities
Everything from A - Z
97Index
Page 7 of 106
At a glance
Controls
Driving tips
Mobility
Reference
7
For your own safety
Use unleaded gasoline only. Fuels
containing up to and including 10 %
ethanol or other oxygenates with up to
2.8 % oxygen by weight – i.e. 15 % MTBE or
3% methanol plus an equivalent amount of
co-solvent – will not void the applicable
warranties respecting defects in materials
or workmanship. Field experience has indi-
cated significant differences in fuel quality –
i.e. volatility, composition, additives, etc. –
among gasolines offered for sale in the
United States and Canada. The use of poor
quality fuels may result in drivability, start-
ing and stalling problems especially under
certain environmental conditions, such as
high ambient temperature and high alti-
tude.
Should you encounter driveability prob-
lems that you suspect could be related to
the fuel you are using, we recommend that
you respond by switching to a recognized
high-quality brand.
Failure to comply with these recommenda-
tions may result in unscheduled mainte-
nance.
Follow the relevant safety rules when you
are handling gasoline.<
Important safety information!
For your own safety, use parts and
accessories approved by BMW.
When you purchase accessories tested
and approved by BMW and Original BMW
Parts, you simultaneously acquire the
assurance that they have been thoroughly
tested by BMW to ensure optimum perfor-
mance when installed on your vehicle.
BMW warrants these parts to be free from
defects in material and workmanship.
BMW will not accept any liability for dam-
age resulting from installation of parts and
accessories not approved by BMW.
BMW cannot test every product made by
other manufacturers to verify if it can be
used on a BMW safely and without risk to
either the vehicle, its operation, or its occu-
pants.Original BMW Parts, BMW Accessories
and other products approved by BMW,
together with professional advice on using
these items, are available from all BMW
retailers.
Installation and operation of non-BMW
approved accessories such as alarms,
radios, amplifiers, radar detectors, wheels,
suspension components, brake dust
shields, telephones – including operation of
any portable cellular phone from within the
vehicle without using an externally mounted
antenna – or transceiver equipment – e.g.
C.B., walkie-talkie, ham radio or similar –
may cause extensive damage to the vehicle,
compromise its safety, interfere with the
vehicle's electrical system or affect the
validity of the BMW Limited Warranty. See
your BMW center for additional information.
Do not use key or remote control to lock
doors or luggage compartment with any-
one inside the car. Refer to the Owner's
Manual for more details.<
Maintenance, replacement or repair
of the emission control devices and
systems may be performed by any automo-
tive repair establishment or individual using
any certified automotive part.
and Warranty Information Booklet for US
models or a Warranty and Service Guide
Booklet for Canadian models.
We recommend that you read this publica-
tion thoroughly.
Your BMW is covered by the following war-
ranties:
>New Vehicle Limited Warranty
>Rust Perforation Limited Warranty
>Federal Emissions System Defect
Warranty
>Federal Emissions Performance
Warranty
>California Emission Control System
Limited Warranty.
Page 8 of 106
Notes
8 Detailed information about these warran-
ties is listed in the Service and Warranty
Information Booklet for US models or in the
Warranty and Service Guide Booklet for
Canadian models.
Reporting safety defects
The following only applies to vehicles
owned and operated in the US.
If you believe that your vehicle has a defect
which could cause a crash or could cause
injury or death, you should immediately
inform the National Highway Traffic Safety
Administration – NHTSA – in addition to
notifying BMW of North America, LLC,
P.O. Box 1227, Westwood, New Jersey
07675-1227,
Telephone toll-free 1-800-831-1117.
If NHTSA receives similar complaints, it
may open an investigation, and if it finds
that a safety defect exists in a group of
vehicles, it may order a recall and remedy
campaign. However, NHTSA cannot
become involved in individual problems
between you, your retailer, or BMW of
North America, LLC.
To contact NHTSA, you may either call the
Auto Safety Hotline toll-free at
1-800-424-9393 or 366-0123 in
Washington, D.C. area, or write to: NHTSA,
U.S. Department of Transportation, Wash-
ington, D.C. 20590. You can also obtain
other information about motor vehicle
safety from the Hotline.
Page 13 of 106
At a glance
Controls
Driving tips
Mobility
Reference
13
Instrument cluster
1Speedometer
2Indicator and warning lamps 14
3Tachometer47
with indicator and warning lamps 14
4Engine coolant temperature gauge47
5Fuel gauge47
6Button for
>Time48
>Service interval display48 7Selector lever and program display for
automatic transmission41
8Button for
>Trip odometer, reset to zero47
>Setting time48
9Display for
>Trip odometer/Odometer47
>Clock48
>Service interval48
>Computer48
Page 14 of 106
Overview
14
Indicator and warning
lamps
Technology that monitors itself
Indicator and warning lamps that are iden-
tified by
+ are tested for proper functioning
whenever the ignition key is turned. They
each light up once for different periods of
time.
If a fault should occur in one of these sys-
tems, the corresponding lamp does not go
out after the engine is started or it lights up
again while the vehicle is moving. The indi-
cated pages provide information on what
measures to take.
Please fasten safety belts
+31
Airbags
+33
Battery charge current
+87
Engine oil pressure/Engine oil level/
Engine oil sensor
+79
Parking brake/Chassis control sys-
tem/Dynamic Brake Control/Brake
fluid
+39/ 51/ 52/ 81
Brake warning lamp for Canadian
models
Antilock Brake System ABS/Chas-
sis control system
+53/ 51
Antilock Brake System ABS/Chas-
sis control system for Canadian
modelsDynamic Stability Control DSC
+51
Dynamic Traction Control DTC
+51
Flat Tire Monitor
+53
Automatic transmission
+41
Brake pads
+66
Add coolant80
Check Gas Cap
+
Service engine soon +83
Service engine soon
+
warning lamp for Canadian
models.
Defective bulbs45
Turn signal indicators42
Fog lamps46
Headlamp flasher/
High beams42/ 46
Page 38 of 106
Driving
38
Driving
Ignition lock
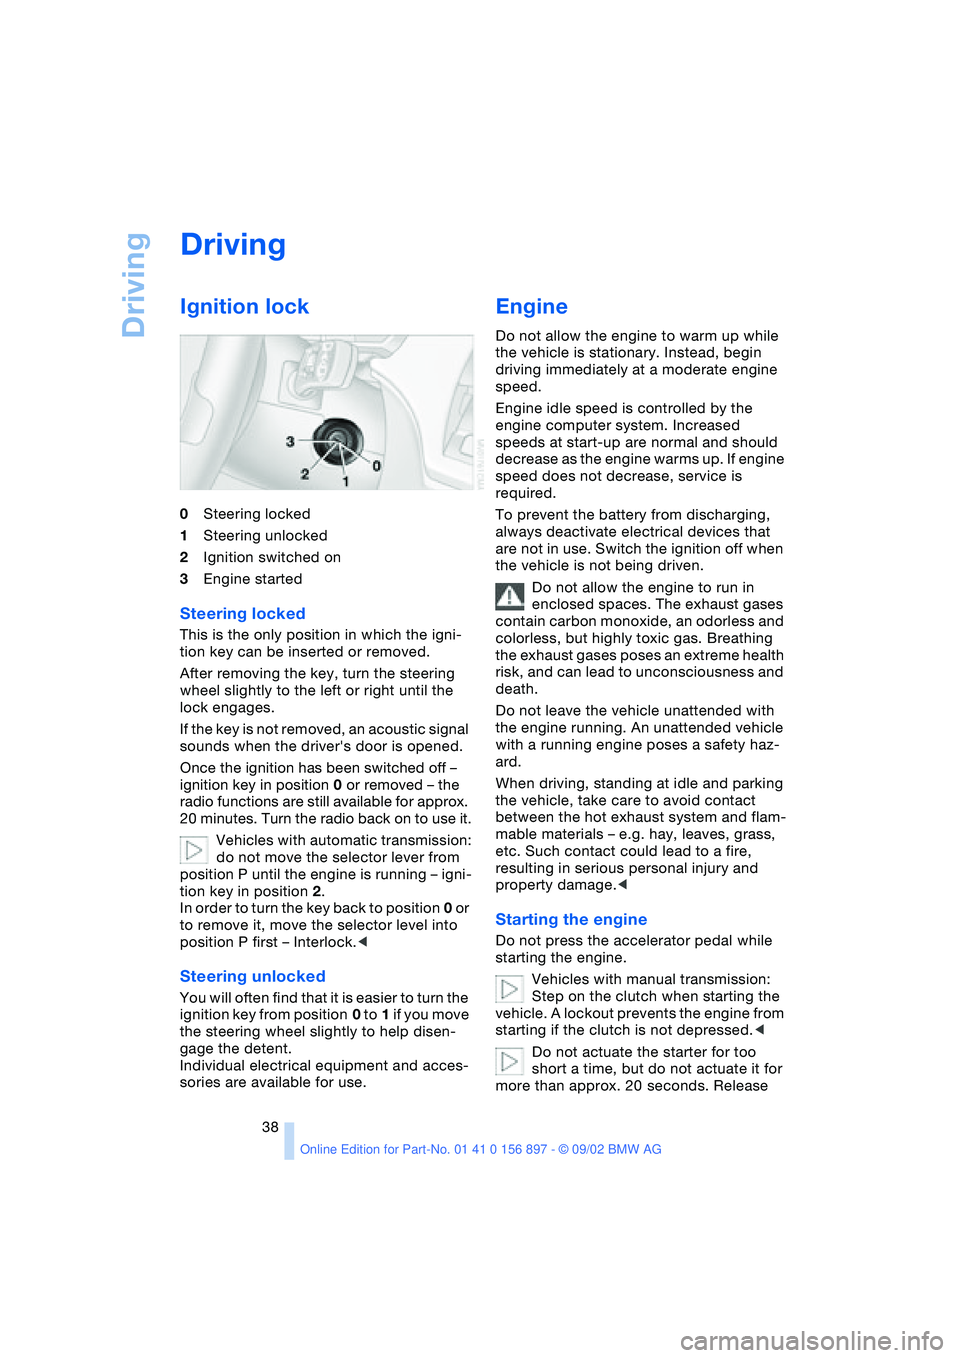
0Steering locked
1Steering unlocked
2Ignition switched on
3Engine started
Steering locked
This is the only position in which the igni-
tion key can be inserted or removed.
After removing the key, turn the steering
wheel slightly to the left or right until the
lock engages.
If the key is not removed, an acoustic signal
sounds when the driver's door is opened.
Once the ignition has been switched off –
ignition key in position 0 or removed – the
radio functions are still available for approx.
20 minutes. Turn the radio back on to use it.
Vehicles with automatic transmission:
do not move the selector lever from
position P until the engine is running – igni-
tion key in position 2.
In order to turn the key back to position 0 or
to remove it, move the selector level into
position P first – Interlock.<
Steering unlocked
You will often find that it is easier to turn the
ignition key from position 0 to 1 if you move
the steering wheel slightly to help disen-
gage the detent.
Individual electrical equipment and acces-
sories are available for use.
Engine
Do not allow the engine to warm up while
the vehicle is stationary. Instead, begin
driving immediately at a moderate engine
speed.
Engine idle speed is controlled by the
engine computer system. Increased
speeds at start-up are normal and should
decrease as the engine warms up. If engine
speed does not decrease, service is
required.
To prevent the battery from discharging,
always deactivate electrical devices that
are not in use. Switch the ignition off when
the vehicle is not being driven.
Do not allow the engine to run in
enclosed spaces. The exhaust gases
contain carbon monoxide, an odorless and
colorless, but highly toxic gas. Breathing
the exhaust gases poses an extreme health
risk, and can lead to unconsciousness and
death.
Do not leave the vehicle unattended with
the engine running. An unattended vehicle
with a running engine poses a safety haz-
ard.
When driving, standing at idle and parking
the vehicle, take care to avoid contact
between the hot exhaust system and flam-
mable materials – e.g. hay, leaves, grass,
etc. Such contact could lead to a fire,
resulting in serious personal injury and
property damage.<
Starting the engine
Do not press the accelerator pedal while
starting the engine.
Vehicles with manual transmission:
Step on the clutch when starting the
vehicle. A lockout prevents the engine from
starting if the clutch is not depressed.<
Do not actuate the starter for too
short a time, but do not actuate it for
more than approx. 20 seconds. Release
Page 48 of 106
Everything under control
48
Between the blue and red zones
Normal operating range. The needle may
rise as far as the edge of the red sector dur-
ing normal operation.
Red
When you switch on the ignition, warning
lamp 1 comes on briefly to indicate an
operational check.
Comes on while driving:
The engine has overheated. Switch off the
engine immediately and allow it to cool
down.
For checking the coolant level, refer to
page 80.
Service interval display
Remaining distance to next service
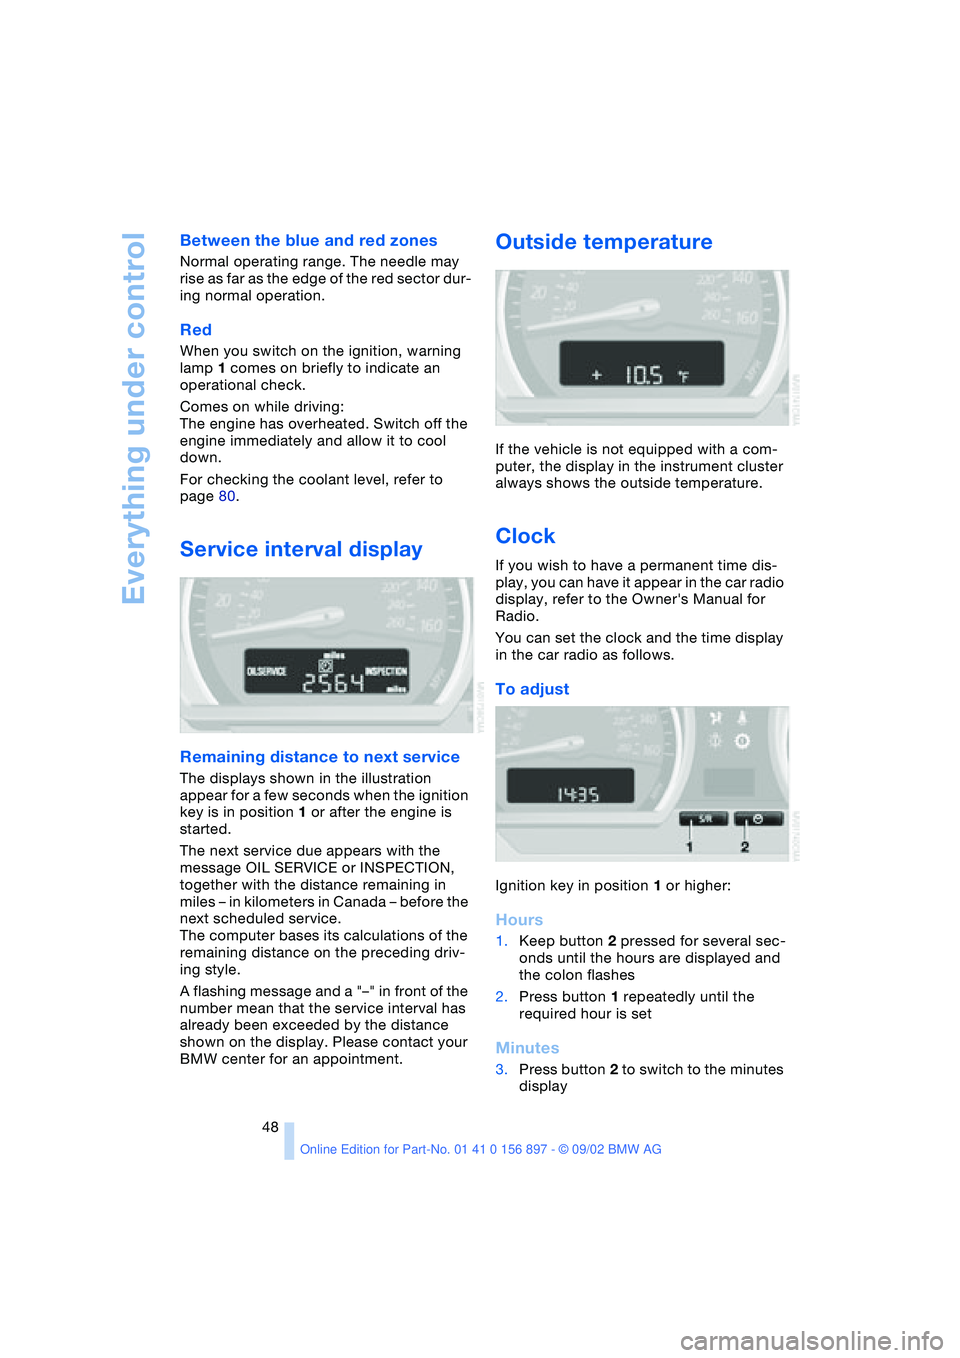
The displays shown in the illustration
appear for a few seconds when the ignition
key is in position 1 or after the engine is
started.
The next service due appears with the
message OIL SERVICE or INSPECTION,
together with the distance remaining in
miles – in kilometers in Canada – before the
next scheduled service.
The computer bases its calculations of the
remaining distance on the preceding driv-
ing style.
A flashing message and a "–" in front of the
number mean that the service interval has
already been exceeded by the distance
shown on the display. Please contact your
BMW center for an appointment.
Outside temperature
If the vehicle is not equipped with a com-
puter, the display in the instrument cluster
always shows the outside temperature.
Clock
If you wish to have a permanent time dis-
play, you can have it appear in the car radio
display, refer to the Owner's Manual for
Radio.
You can set the clock and the time display
in the car radio as follows.
To adjust
Ignition key in position 1 or higher:
Hours
1.Keep button 2 pressed for several sec-
onds until the hours are displayed and
the colon flashes
2.Press button 1 repeatedly until the
required hour is set
Minutes
3.Press button 2 to switch to the minutes
display
Page 52 of 106
Technology for safety and driving convenience
52 For more information on the various
systems, refer to the "Technology"
brochure.<
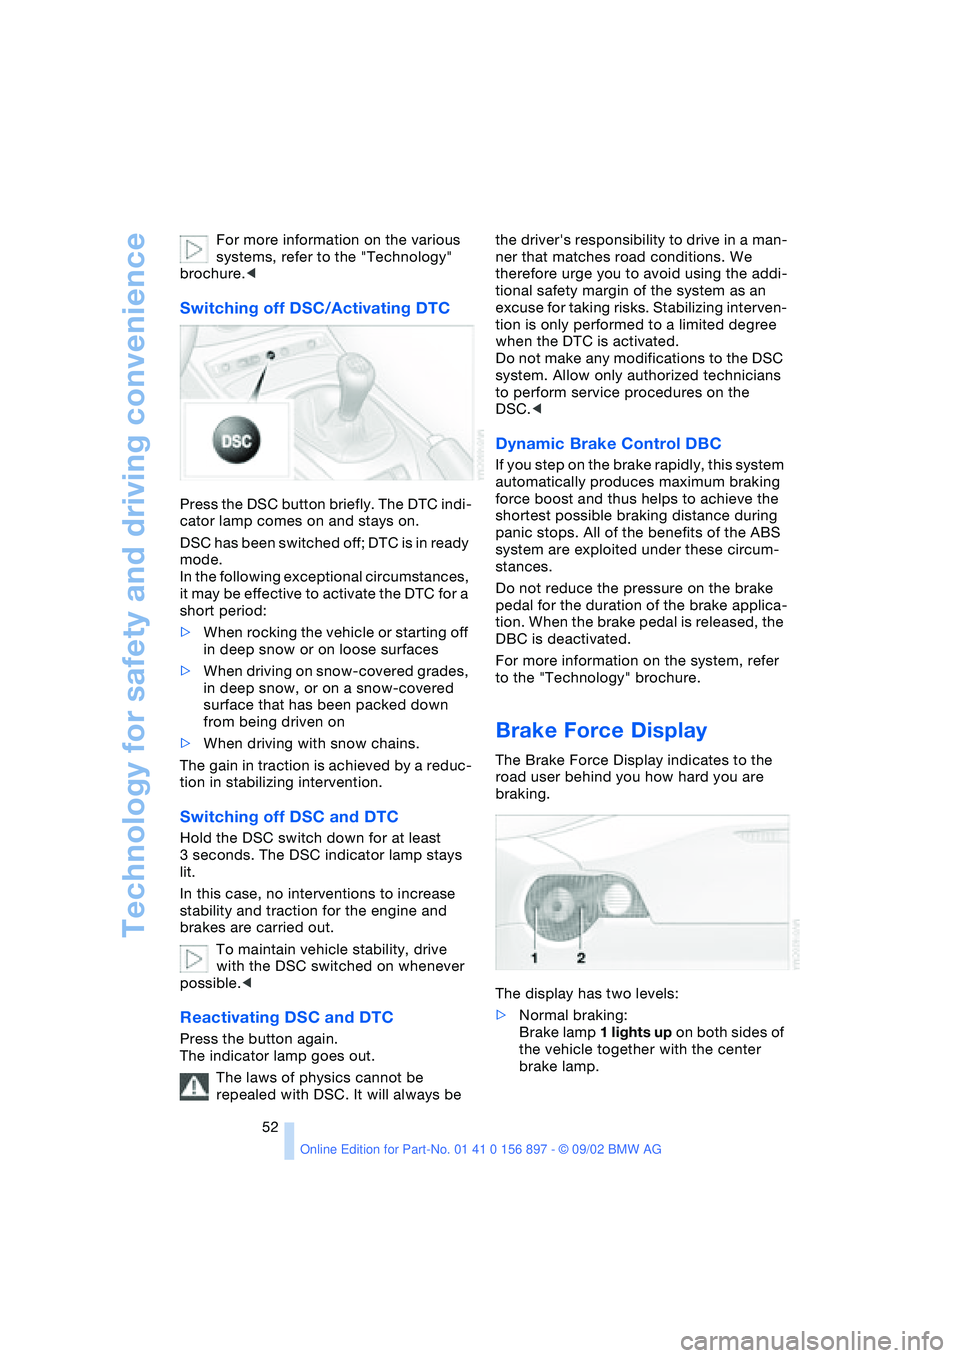
Switching off DSC/Activating DTC
Press the DSC button briefly. The DTC indi-
cator lamp comes on and stays on.
DSC has been switched off; DTC is in ready
mode.
In the following exceptional circumstances,
it may be effective to activate the DTC for a
short period:
>When rocking the vehicle or starting off
in deep snow or on loose surfaces
>When driving on snow-covered grades,
in deep snow, or on a snow-covered
surface that has been packed down
from being driven on
>When driving with snow chains.
The gain in traction is achieved by a reduc-
tion in stabilizing intervention.
Switching off DSC and DTC
Hold the DSC switch down for at least
3 seconds. The DSC indicator lamp stays
lit.
In this case, no interventions to increase
stability and traction for the engine and
brakes are carried out.
To maintain vehicle stability, drive
with the DSC switched on whenever
possible.<
Reactivating DSC and DTC
Press the button again.
The indicator lamp goes out.
The laws of physics cannot be
repealed with DSC. It will always be the driver's responsibility to drive in a man-
ner that matches road conditions. We
therefore urge you to avoid using the addi-
tional safety margin of the system as an
excuse for taking risks. Stabilizing interven-
tion is only performed to a limited degree
when the DTC is activated.
Do not make any modifications to the DSC
system. Allow only authorized technicians
to perform service procedures on the
DSC.<
Dynamic Brake Control DBC
If you step on the brake rapidly, this system
automatically produces maximum braking
force boost and thus helps to achieve the
shortest possible braking distance during
panic stops. All of the benefits of the ABS
system are exploited under these circum-
stances.
Do not reduce the pressure on the brake
pedal for the duration of the brake applica-
tion. When the brake pedal is released, the
DBC is deactivated.
For more information on the system, refer
to the "Technology" brochure.
Brake Force Display
The Brake Force Display indicates to the
road user behind you how hard you are
braking.
The display has two levels:
>Normal braking:
Brake lamp 1 lights up on both sides of
the vehicle together with the center
brake lamp.
Page 64 of 106
Special operating instructions
64
Special operating instructions
Break-in procedures
To ensure that your vehicle provides maxi-
mum economy throughout a long service
life, we request that you observe the fol-
lowing:
Engine and differential
Up to 1,250 miles / 2,000 km:
Drive at varying engine and road speeds,
but do not exceed the following engine or
road speed:
4,500/min or 100 mph / 160 km/h:
Obey your local and state maximum speed
limits.
Refrain from using full throttle and avoid
pressing the accelerator beyond the kick-
down point.
After you have driven 1,250 miles /
2,000 km, you can gradually increase the
engine or road speeds.
You should also comply with these break-in
procedures if the engine or differential is
replaced later in the course of the vehicle's
service life.
Tires
Due to technical factors associated with
their manufacture, tires do not achieve their
full traction potential until an initial break-in
period has elapsed. You should therefore
drive with extra caution during the first
200 miles / 300 km.
Obey your local and state maximum speed
limits.
When the vehicle is operated on wet
or slushy roads, a wedge of water
may form between the tire and the road
surface. This phenomenon is referred to as
hydroplaning and can lead to partial or
complete loss of traction, vehicle control
and braking effectiveness. Reduce your
speed on wet roads.<
Brake system
Approx. 300 miles / 500 km must elapse
before the brake pads and rotors achieve
their optimal surface and wear pattern.
To break in the separate parking brake
drums, apply the parking brake lightly when
coasting to a standstill – at a traffic signal,
for instance; use caution to avoid posing a
danger to other road users.
To avoid corrosion, repeat this procedure
from time to time.
The brake lamps do not come on when the
parking brake is set.
Vacuum for the brake system servo
unit on your BMW is available only
when the engine is running. When you
move the car with the engine off – e.g., by
towing – substantially higher levels of pedal
force will be required to brake the vehicle.<
Clutch
The clutch will achieve its optimal function-
ality after approx. 300 miles / 500 km. Shift
gears carefully during the break-in period.