Driveshaft BMW 3 SERIES 1988 E30 User Guide
[x] Cancel search | Manufacturer: BMW, Model Year: 1988, Model line: 3 SERIES, Model: BMW 3 SERIES 1988 E30Pages: 228, PDF Size: 7.04 MB
Page 145 of 228
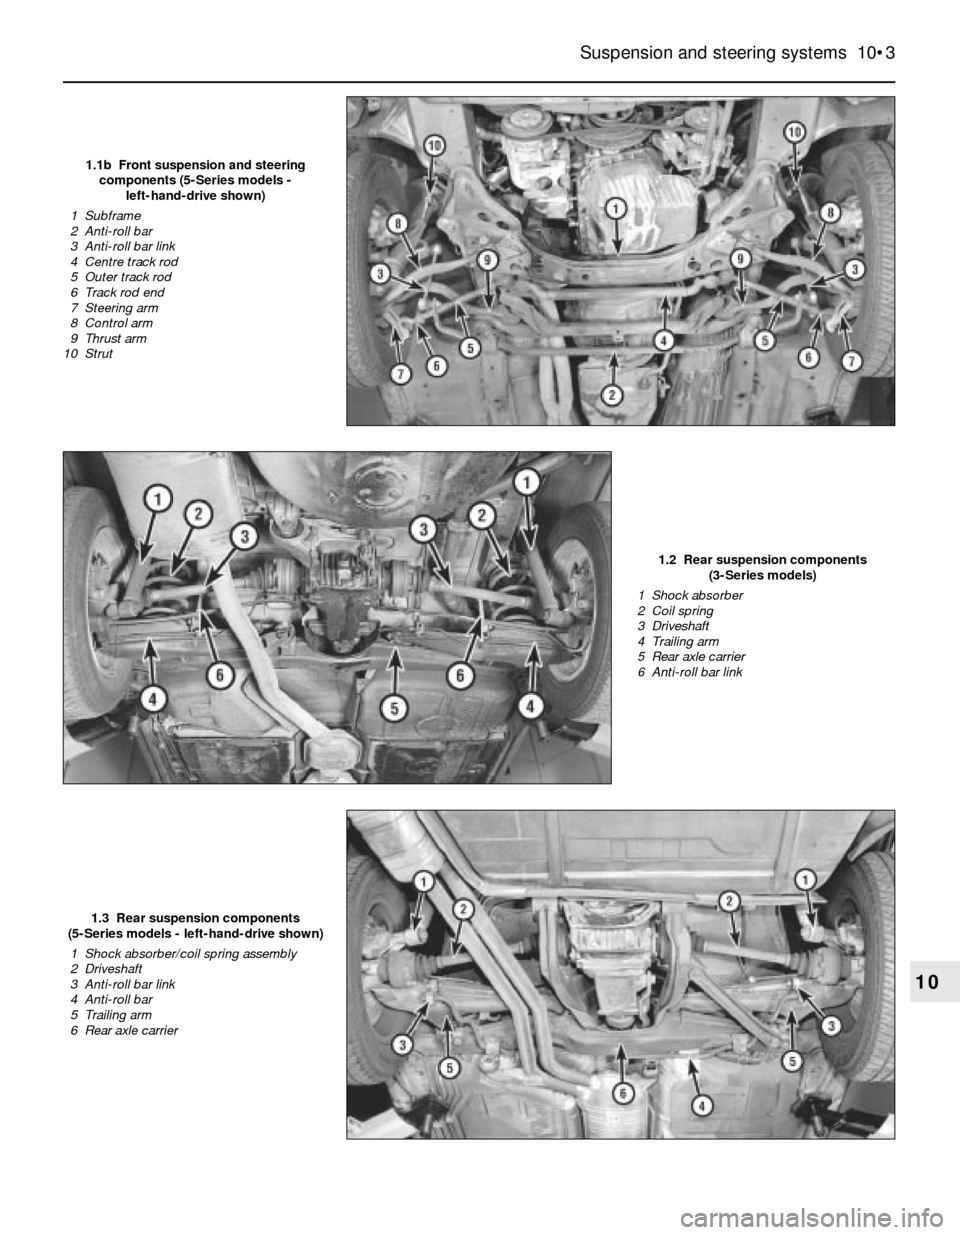
Suspension and steering systems 10•3
1.1b Front suspension and steering
components (5-Series models -
left-hand-drive shown)
1 Subframe
2 Anti-roll bar
3 Anti-roll bar link
4 Centre track rod
5 Outer track rod
6 Track rod end
7 Steering arm
8 Control arm
9 Thrust arm
10 Strut
1.2 Rear suspension components
(3-Series models)
1 Shock absorber
2 Coil spring
3 Driveshaft
4 Trailing arm
5 Rear axle carrier
6 Anti-roll bar link
1.3 Rear suspension components
(5-Series models - left-hand-drive shown)
1 Shock absorber/coil spring assembly
2 Driveshaft
3 Anti-roll bar link
4 Anti-roll bar
5 Trailing arm
6 Rear axle carrier
10
Page 152 of 228
4Inspect and, if necessary, renew any worn
or defective bolts, washers, bushes or links.
Refitting
5Refitting is the reverse of removal. Tighten
all fasteners securely.
13 Rear trailing arms (3-Series)
- removal and refitting
3
Removal
1Loosen the wheel bolts, then chock the
front wheels. Raise the rear of the vehicle, and
support it securely on axle stands. Remove
the wheel(s).
2Remove the driveshaft (see Chapter 8), or
disconnect it from the final drive output
flange.
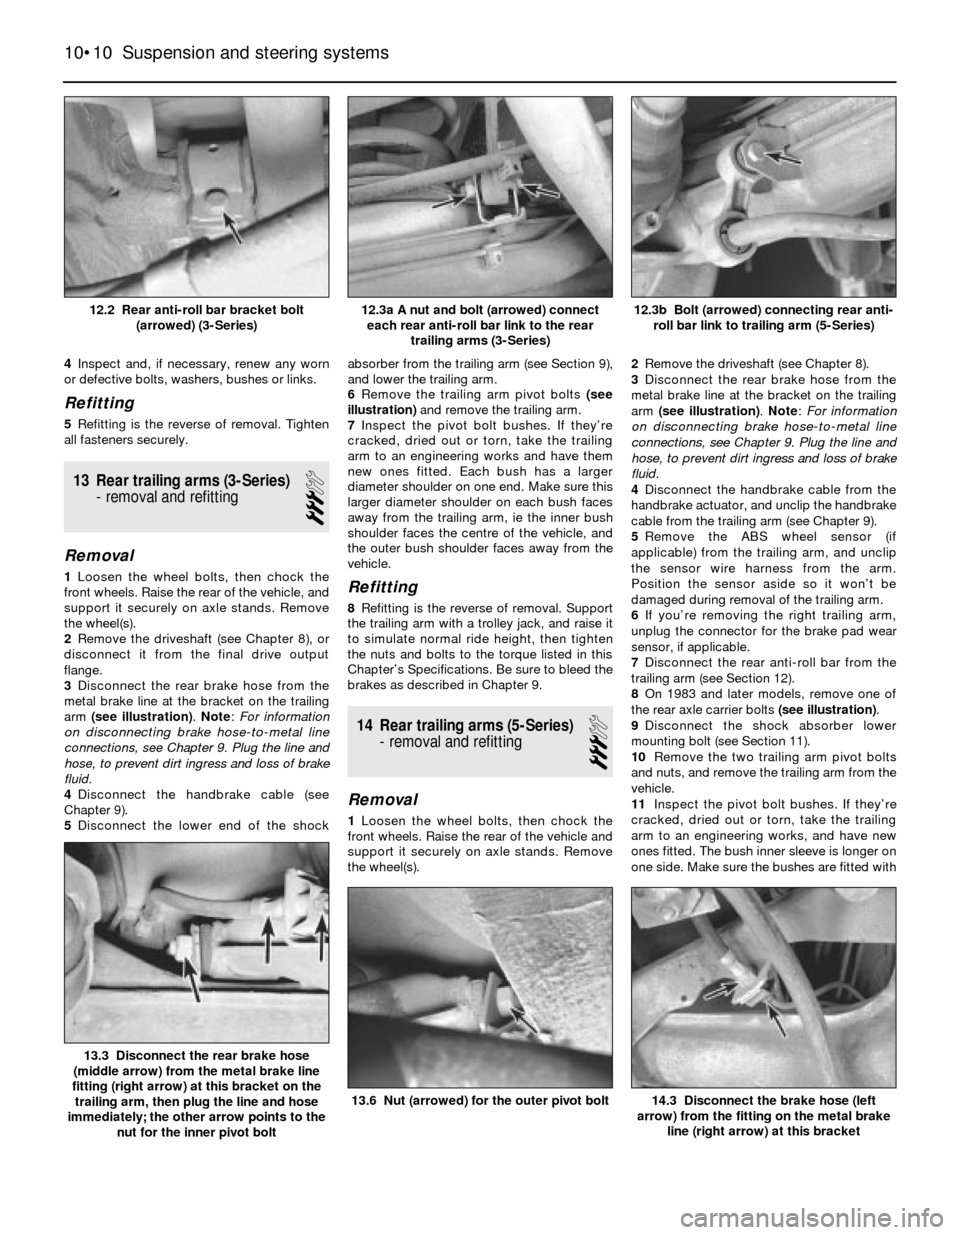
3Disconnect the rear brake hose from the
metal brake line at the bracket on the trailing
arm (see illustration). Note: For information
on disconnecting brake hose-to-metal line
connections, see Chapter 9. Plug the line and
hose, to prevent dirt ingress and loss of brake
fluid.
4Disconnect the handbrake cable (see
Chapter 9).
5Disconnect the lower end of the shockabsorber from the trailing arm (see Section 9),
and lower the trailing arm.
6Remove the trailing arm pivot bolts (see
illustration)and remove the trailing arm.
7Inspect the pivot bolt bushes. If they’re
cracked, dried out or torn, take the trailing
arm to an engineering works and have them
new ones fitted. Each bush has a larger
diameter shoulder on one end. Make sure this
larger diameter shoulder on each bush faces
away from the trailing arm, ie the inner bush
shoulder faces the centre of the vehicle, and
the outer bush shoulder faces away from the
vehicle.Refitting
8Refitting is the reverse of removal. Support
the trailing arm with a trolley jack, and raise it
to simulate normal ride height, then tighten
the nuts and bolts to the torque listed in this
Chapter’s Specifications. Be sure to bleed the
brakes as described in Chapter 9.
14 Rear trailing arms (5-Series)
- removal and refitting
3
Removal
1Loosen the wheel bolts, then chock the
front wheels. Raise the rear of the vehicle and
support it securely on axle stands. Remove
the wheel(s).2Remove the driveshaft (see Chapter 8).
3Disconnect the rear brake hose from the
metal brake line at the bracket on the trailing
arm (see illustration). Note: For information
on disconnecting brake hose-to-metal line
connections, see Chapter 9. Plug the line and
hose, to prevent dirt ingress and loss of brake
fluid.
4Disconnect the handbrake cable from the
handbrake actuator, and unclip the handbrake
cable from the trailing arm (see Chapter 9).
5Remove the ABS wheel sensor (if
applicable) from the trailing arm, and unclip
the sensor wire harness from the arm.
Position the sensor aside so it won’t be
damaged during removal of the trailing arm.
6If you’re removing the right trailing arm,
unplug the connector for the brake pad wear
sensor, if applicable.
7Disconnect the rear anti-roll bar from the
trailing arm (see Section 12).
8On 1983 and later models, remove one of
the rear axle carrier bolts (see illustration).
9Disconnect the shock absorber lower
mounting bolt (see Section 11).
10Remove the two trailing arm pivot bolts
and nuts, and remove the trailing arm from the
vehicle.
11Inspect the pivot bolt bushes. If they’re
cracked, dried out or torn, take the trailing
arm to an engineering works, and have new
ones fitted. The bush inner sleeve is longer on
one side. Make sure the bushes are fitted with
10•10 Suspension and steering systems
14.3 Disconnect the brake hose (left
arrow) from the fitting on the metal brake
line (right arrow) at this bracket13.6 Nut (arrowed) for the outer pivot bolt
13.3 Disconnect the rear brake hose
(middle arrow) from the metal brake line
fitting (right arrow) at this bracket on the
trailing arm, then plug the line and hose
immediately; the other arrow points to the
nut for the inner pivot bolt
12.3b Bolt (arrowed) connecting rear anti-
roll bar link to trailing arm (5-Series)12.3a A nut and bolt (arrowed) connect
each rear anti-roll bar link to the rear
trailing arms (3-Series)12.2 Rear anti-roll bar bracket bolt
(arrowed) (3-Series)
Page 153 of 228
the longer side of the sleeve facing towards
the centre of the vehicle.
Refitting
12Refitting is the reverse of removal. Refit
the inner pivot bolt first. Don’t fully tighten the
nuts on the pivot bolts or the shock absorber
yet.
13Bleed the brakes as described in Chap-
ter 9.
14Support the trailing arm with a trolley jack,
and raise it to simulate normal ride height.
Tighten the bolts and nuts to the torques
listed in this Chapter’s Specifications.
15 Rear wheel bearings-
renewal
4
3-Series models
1Loosen the driveshaft nut and the rear
wheel bolts, then chock the front wheels.
Raise the rear of the vehicle and place it
securely on axle stands. Remove the rear
wheel. Note: Depending on the type of rear
wheel, it may be necessary to remove the
wheel first, remove the hubcap, then refit the
wheel and loosen the driveshaft nut.
2Remove the driveshaft (see Chapter 8).3On models with rear brake drums, remove
the drum. On models with rear disc brakes,
remove the brake caliper and mounting
bracket. Don’t disconnect the hose. Hang the
caliper out of the way with a piece of wire.
Remove the brake disc (see Chapter 9).
Working from behind, drive the wheel hub out
of the wheel bearing with a large socket or a
piece of pipe.
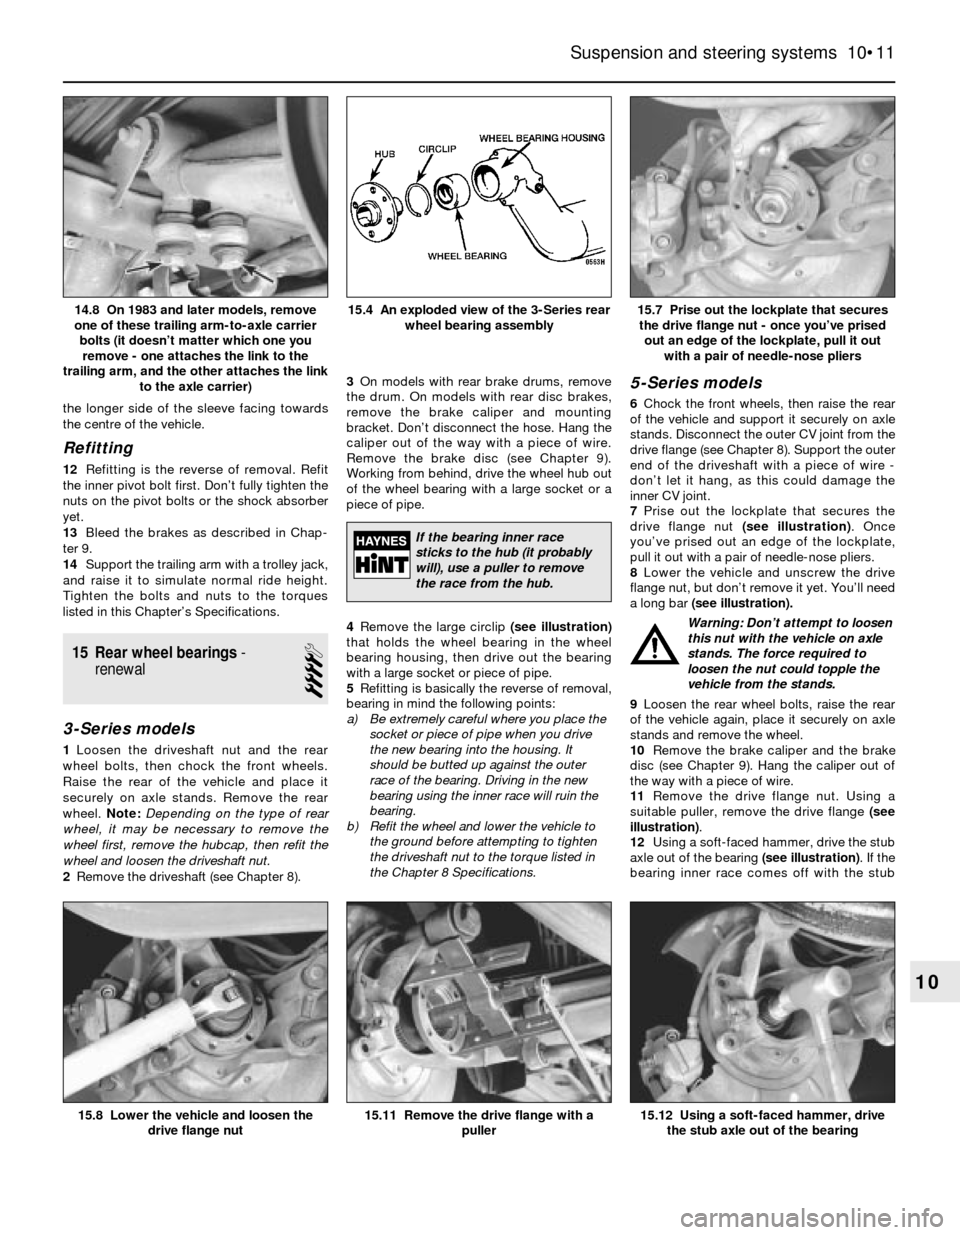
4Remove the large circlip (see illustration)
that holds the wheel bearing in the wheel
bearing housing, then drive out the bearing
with a large socket or piece of pipe.
5Refitting is basically the reverse of removal,
bearing in mind the following points:
a) Be extremely careful where you place the
socket or piece of pipe when you drive
the new bearing into the housing. It
should be butted up against the outer
race of the bearing. Driving in the new
bearing using the inner race will ruin the
bearing.
b) Refit the wheel and lower the vehicle to
the ground before attempting to tighten
the driveshaft nut to the torque listed in
the Chapter 8 Specifications.
5-Series models
6Chock the front wheels, then raise the rear
of the vehicle and support it securely on axle
stands. Disconnect the outer CV joint from the
drive flange (see Chapter 8). Support the outer
end of the driveshaft with a piece of wire -
don’t let it hang, as this could damage the
inner CV joint.
7Prise out the lockplate that secures the
drive flange nut (see illustration). Once
you’ve prised out an edge of the lockplate,
pull it out with a pair of needle-nose pliers.
8Lower the vehicle and unscrew the drive
flange nut, but don’t remove it yet. You’ll need
a long bar (see illustration).
Warning: Don’t attempt to loosen
this nut with the vehicle on axle
stands. The force required to
loosen the nut could topple the
vehicle from the stands.
9Loosen the rear wheel bolts, raise the rear
of the vehicle again, place it securely on axle
stands and remove the wheel.
10Remove the brake caliper and the brake
disc (see Chapter 9). Hang the caliper out of
the way with a piece of wire.
11Remove the drive flange nut. Using a
suitable puller, remove the drive flange (see
illustration).
12Using a soft-faced hammer, drive the stub
axle out of the bearing (see illustration). If the
bearing inner race comes off with the stub
Suspension and steering systems 10•11
15.7 Prise out the lockplate that secures
the drive flange nut - once you’ve prised
out an edge of the lockplate, pull it out
with a pair of needle-nose pliers15.4 An exploded view of the 3-Series rear
wheel bearing assembly14.8 On 1983 and later models, remove
one of these trailing arm-to-axle carrier
bolts (it doesn’t matter which one you
remove - one attaches the link to the
trailing arm, and the other attaches the link
to the axle carrier)
15.12 Using a soft-faced hammer, drive
the stub axle out of the bearing15.11 Remove the drive flange with a
puller15.8 Lower the vehicle and loosen the
drive flange nut
10
If the bearing inner race
sticks to the hub (it probably
will), use a puller to remove
the race from the hub.
Page 204 of 228
REF•3
REF
MOT Test Checks
Exhaust system
MStart the engine. With your assistant
holding a rag over the tailpipe, check the
entire system for leaks. Repair or renew
leaking sections.
Jack up the front and rear of the vehicle,
and securely support it on axle stands.
Position the stands clear of the suspension
assemblies. Ensure that the wheels are
clear of the ground and that the steering
can be turned from lock to lock.
Steering mechanism
MHave your assistant turn the steering from
lock to lock. Check that the steering turns
smoothly, and that no part of the steering
mechanism, including a wheel or tyre, fouls
any brake hose or pipe or any part of the body
structure.
MExamine the steering rack rubber gaiters
for damage or insecurity of the retaining clips.
If power steering is fitted, check for signs of
damage or leakage of the fluid hoses, pipes or
connections. Also check for excessive
stiffness or binding of the steering, a missing
split pin or locking device, or severe corrosion
of the body structure within 30 cm of any
steering component attachment point.
Front and rear suspension and
wheel bearings
MStarting at the front right-hand side, grasp
the roadwheel at the 3 o’clock and 9 o’clock
positions and shake it vigorously. Check for
free play or insecurity at the wheel bearings,
suspension balljoints, or suspension mount-
ings, pivots and attachments.
MNow grasp the wheel at the 12 o’clock and
6 o’clock positions and repeat the previous
inspection. Spin the wheel, and check for
roughness or tightness of the front wheel
bearing.
MIf excess free play is suspected at a
component pivot point, this can be confirmed
by using a large screwdriver or similar tool and
levering between the mounting and the
component attachment. This will confirm
whether the wear is in the pivot bush, its
retaining bolt, or in the mounting itself (the bolt
holes can often become elongated).
MCarry out all the above checks at the other
front wheel, and then at both rear wheels.
Springs and shock absorbers
MExamine the suspension struts (when
applicable) for serious fluid leakage, corrosion,
or damage to the casing. Also check the
security of the mounting points.
MIf coil springs are fitted, check that the
spring ends locate in their seats, and that the
spring is not corroded, cracked or broken.
MIf leaf springs are fitted, check that all
leaves are intact, that the axle is securely
attached to each spring, and that there is no
deterioration of the spring eye mountings,
bushes, and shackles.MThe same general checks apply to vehicles
fitted with other suspension types, such as
torsion bars, hydraulic displacer units, etc.
Ensure that all mountings and attachments are
secure, that there are no signs of excessive
wear, corrosion or damage, and (on hydraulic
types) that there are no fluid leaks or damaged
pipes.
MInspect the shock absorbers for signs of
serious fluid leakage. Check for wear of the
mounting bushes or attachments, or damage
to the body of the unit.
Driveshafts
(fwd vehicles only)
MRotate each front wheel in turn and inspect
the constant velocity joint gaiters for splits or
damage. Also check that each driveshaft is
straight and undamaged.
Braking system
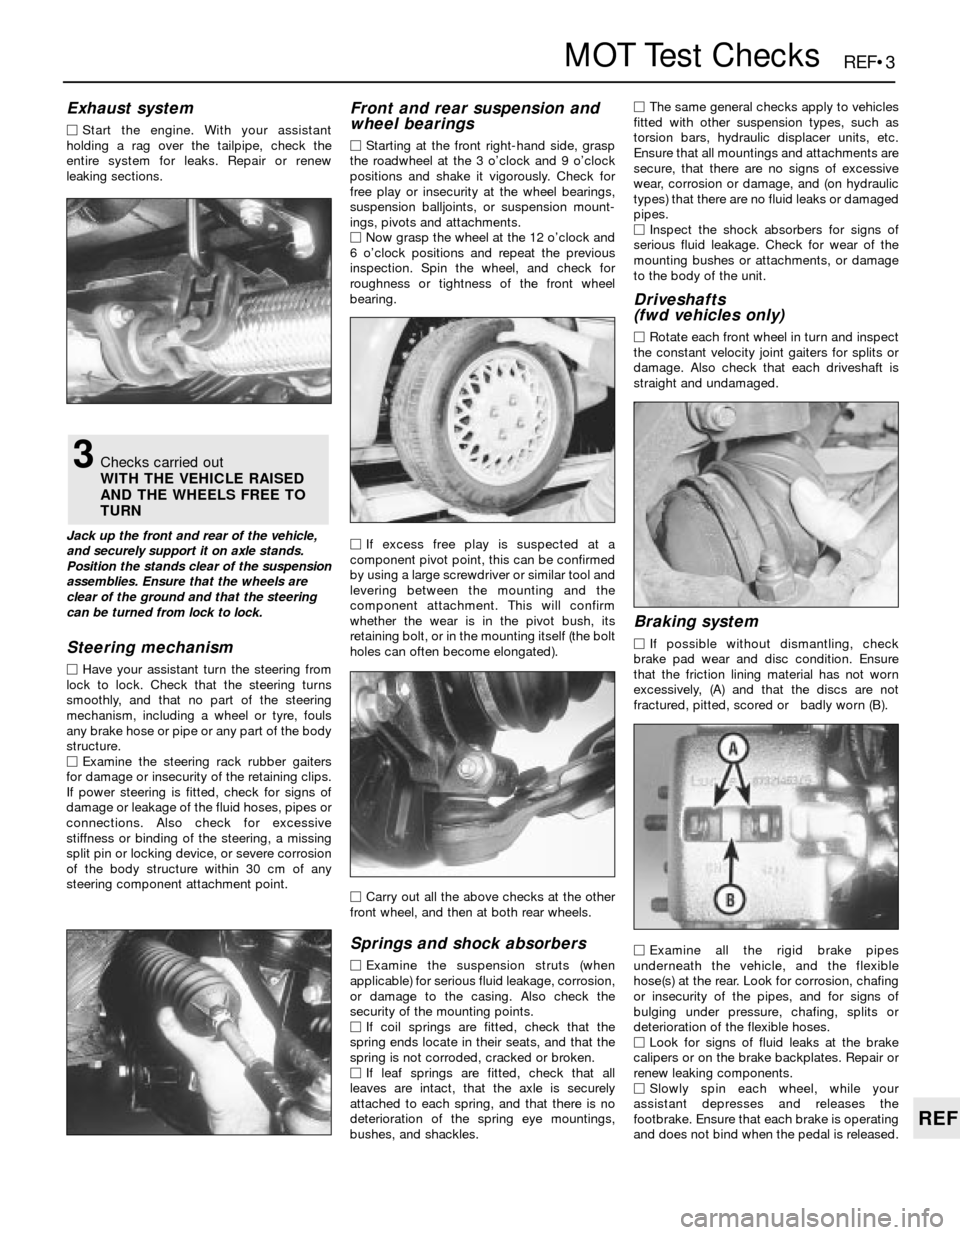
MIf possible without dismantling, check
brake pad wear and disc condition. Ensure
that the friction lining material has not worn
excessively, (A) and that the discs are not
fractured, pitted, scored or badly worn (B).
MExamine all the rigid brake pipes
underneath the vehicle, and the flexible
hose(s) at the rear. Look for corrosion, chafing
or insecurity of the pipes, and for signs of
bulging under pressure, chafing, splits or
deterioration of the flexible hoses.
MLook for signs of fluid leaks at the brake
calipers or on the brake backplates. Repair or
renew leaking components.
MSlowly spin each wheel, while your
assistant depresses and releases the
footbrake. Ensure that each brake is operating
and does not bind when the pedal is released.
3Checks carried out
WITH THE VEHICLE RAISED
AND THE WHEELS FREE TO
TURN
Page 220 of 228
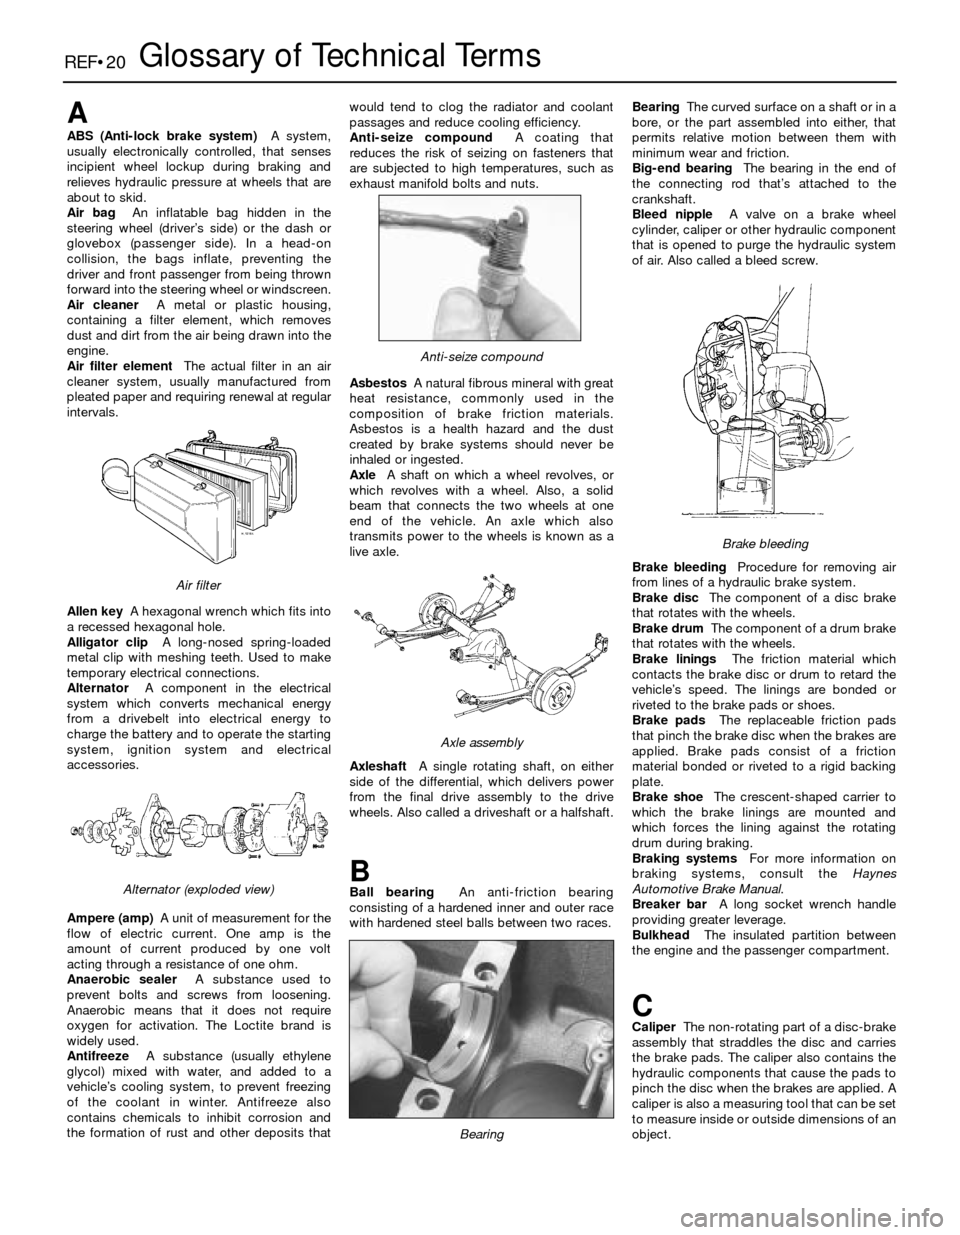
REF•20Glossary of Technical Terms
A
ABS (Anti-lock brake system)A system,
usually electronically controlled, that senses
incipient wheel lockup during braking and
relieves hydraulic pressure at wheels that are
about to skid.
Air bag An inflatable bag hidden in the
steering wheel (driver’s side) or the dash or
glovebox (passenger side). In a head-on
collision, the bags inflate, preventing the
driver and front passenger from being thrown
forward into the steering wheel or windscreen.
Air cleanerA metal or plastic housing,
containing a filter element, which removes
dust and dirt from the air being drawn into the
engine.
Air filter elementThe actual filter in an air
cleaner system, usually manufactured from
pleated paper and requiring renewal at regular
intervals.
Allen keyA hexagonal wrench which fits into
a recessed hexagonal hole.
Alligator clipA long-nosed spring-loaded
metal clip with meshing teeth. Used to make
temporary electrical connections.
AlternatorA component in the electrical
system which converts mechanical energy
from a drivebelt into electrical energy to
charge the battery and to operate the starting
system, ignition system and electrical
accessories.
Ampere (amp)A unit of measurement for the
flow of electric current. One amp is the
amount of current produced by one volt
acting through a resistance of one ohm.
Anaerobic sealerA substance used to
prevent bolts and screws from loosening.
Anaerobic means that it does not require
oxygen for activation. The Loctite brand is
widely used.
AntifreezeA substance (usually ethylene
glycol) mixed with water, and added to a
vehicle’s cooling system, to prevent freezing
of the coolant in winter. Antifreeze also
contains chemicals to inhibit corrosion and
the formation of rust and other deposits thatwould tend to clog the radiator and coolant
passages and reduce cooling efficiency.
Anti-seize compoundA coating that
reduces the risk of seizing on fasteners that
are subjected to high temperatures, such as
exhaust manifold bolts and nuts.
AsbestosA natural fibrous mineral with great
heat resistance, commonly used in the
composition of brake friction materials.
Asbestos is a health hazard and the dust
created by brake systems should never be
inhaled or ingested.
AxleA shaft on which a wheel revolves, or
which revolves with a wheel. Also, a solid
beam that connects the two wheels at one
end of the vehicle. An axle which also
transmits power to the wheels is known as a
live axle.
AxleshaftA single rotating shaft, on either
side of the differential, which delivers power
from the final drive assembly to the drive
wheels. Also called a driveshaft or a halfshaft.
BBall bearingAn anti-friction bearing
consisting of a hardened inner and outer race
with hardened steel balls between two races.BearingThe curved surface on a shaft or in a
bore, or the part assembled into either, that
permits relative motion between them with
minimum wear and friction.
Big-end bearingThe bearing in the end of
the connecting rod that’s attached to the
crankshaft.
Bleed nippleA valve on a brake wheel
cylinder, caliper or other hydraulic component
that is opened to purge the hydraulic system
of air. Also called a bleed screw.
Brake bleedingProcedure for removing air
from lines of a hydraulic brake system.
Brake discThe component of a disc brake
that rotates with the wheels.
Brake drumThe component of a drum brake
that rotates with the wheels.
Brake liningsThe friction material which
contacts the brake disc or drum to retard the
vehicle’s speed. The linings are bonded or
riveted to the brake pads or shoes.
Brake padsThe replaceable friction pads
that pinch the brake disc when the brakes are
applied. Brake pads consist of a friction
material bonded or riveted to a rigid backing
plate.
Brake shoeThe crescent-shaped carrier to
which the brake linings are mounted and
which forces the lining against the rotating
drum during braking.
Braking systemsFor more information on
braking systems, consult the Haynes
Automotive Brake Manual.
Breaker barA long socket wrench handle
providing greater leverage.
BulkheadThe insulated partition between
the engine and the passenger compartment.
CCaliperThe non-rotating part of a disc-brake
assembly that straddles the disc and carries
the brake pads. The caliper also contains the
hydraulic components that cause the pads to
pinch the disc when the brakes are applied. A
caliper is also a measuring tool that can be set
to measure inside or outside dimensions of an
object.
Brake bleeding
Bearing
Axle assembly
Anti-seize compound
Alternator (exploded view)
Air filter
Page 221 of 228
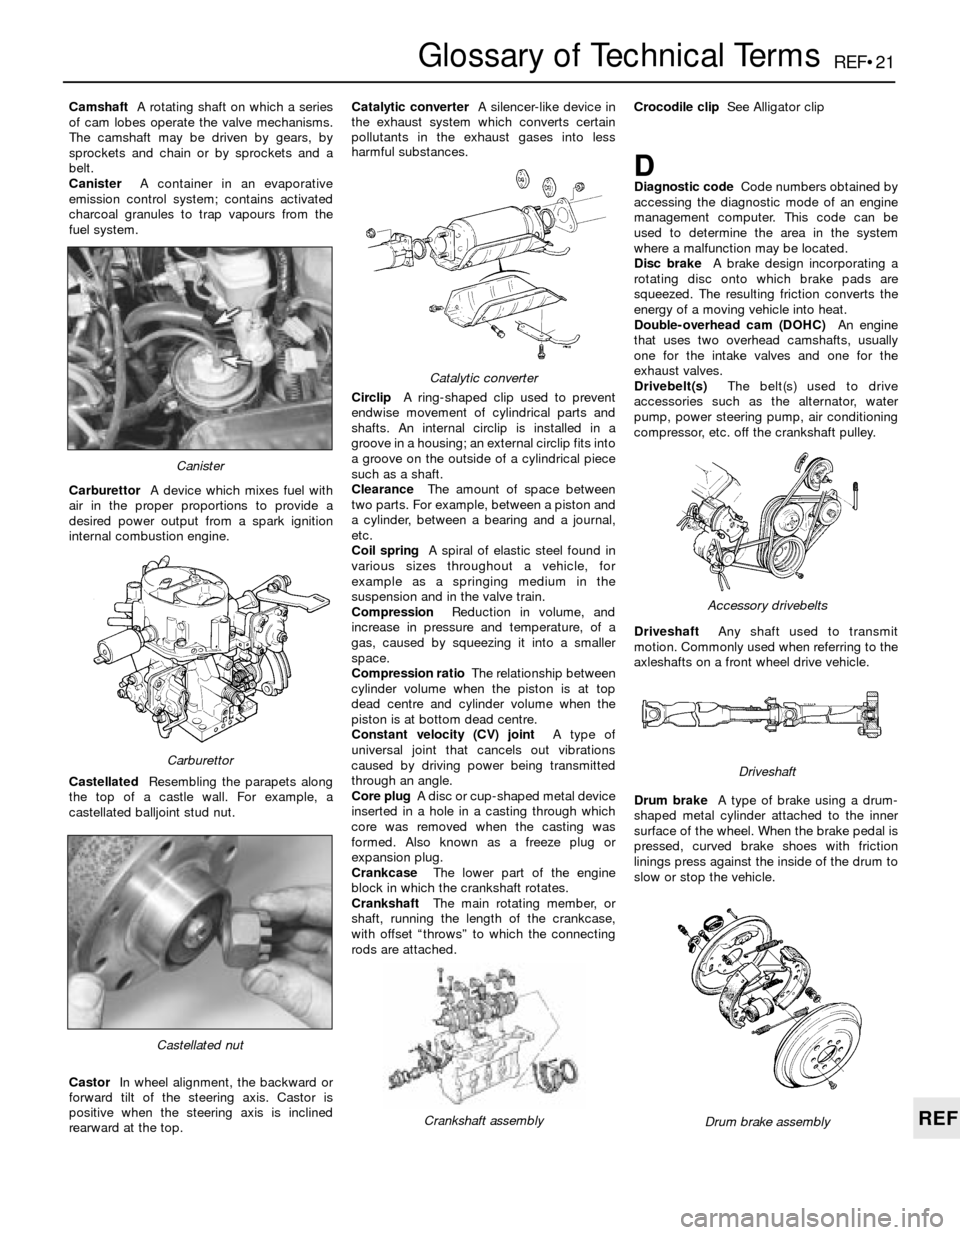
REF•21
REF
Glossary of Technical Terms
CamshaftA rotating shaft on which a series
of cam lobes operate the valve mechanisms.
The camshaft may be driven by gears, by
sprockets and chain or by sprockets and a
belt.
CanisterA container in an evaporative
emission control system; contains activated
charcoal granules to trap vapours from the
fuel system.
CarburettorA device which mixes fuel with
air in the proper proportions to provide a
desired power output from a spark ignition
internal combustion engine.
CastellatedResembling the parapets along
the top of a castle wall. For example, a
castellated balljoint stud nut.
CastorIn wheel alignment, the backward or
forward tilt of the steering axis. Castor is
positive when the steering axis is inclined
rearward at the top.Catalytic converterA silencer-like device in
the exhaust system which converts certain
pollutants in the exhaust gases into less
harmful substances.
CirclipA ring-shaped clip used to prevent
endwise movement of cylindrical parts and
shafts. An internal circlip is installed in a
groove in a housing; an external circlip fits into
a groove on the outside of a cylindrical piece
such as a shaft.
ClearanceThe amount of space between
two parts. For example, between a piston and
a cylinder, between a bearing and a journal,
etc.
Coil springA spiral of elastic steel found in
various sizes throughout a vehicle, for
example as a springing medium in the
suspension and in the valve train.
CompressionReduction in volume, and
increase in pressure and temperature, of a
gas, caused by squeezing it into a smaller
space.
Compression ratioThe relationship between
cylinder volume when the piston is at top
dead centre and cylinder volume when the
piston is at bottom dead centre.
Constant velocity (CV) jointA type of
universal joint that cancels out vibrations
caused by driving power being transmitted
through an angle.
Core plugA disc or cup-shaped metal device
inserted in a hole in a casting through which
core was removed when the casting was
formed. Also known as a freeze plug or
expansion plug.
CrankcaseThe lower part of the engine
block in which the crankshaft rotates.
CrankshaftThe main rotating member, or
shaft, running the length of the crankcase,
with offset “throws” to which the connecting
rods are attached.Crocodile clipSee Alligator clip
DDiagnostic codeCode numbers obtained by
accessing the diagnostic mode of an engine
management computer. This code can be
used to determine the area in the system
where a malfunction may be located.
Disc brakeA brake design incorporating a
rotating disc onto which brake pads are
squeezed. The resulting friction converts the
energy of a moving vehicle into heat.
Double-overhead cam (DOHC)An engine
that uses two overhead camshafts, usually
one for the intake valves and one for the
exhaust valves.
Drivebelt(s)The belt(s) used to drive
accessories such as the alternator, water
pump, power steering pump, air conditioning
compressor, etc. off the crankshaft pulley.
DriveshaftAny shaft used to transmit
motion. Commonly used when referring to the
axleshafts on a front wheel drive vehicle.
Drum brakeA type of brake using a drum-
shaped metal cylinder attached to the inner
surface of the wheel. When the brake pedal is
pressed, curved brake shoes with friction
linings press against the inside of the drum to
slow or stop the vehicle.
Castellated nut
Catalytic converter
Crankshaft assembly
Carburettor
Canister
Drum brake assembly
Accessory drivebelts
Driveshaft
Page 225 of 228

REF•25
REF
Index
Note: References throughout this index relate to Chapter•page number
A
ABS - 9•2
Accelerator cable - 4•9
Acknowledgements - 0•4
Aerial - 12•4
Air bags - 0•5
Air cleaner - 4•8
Air conditioning system - 3•2, 3•7, 3•8,
3•9, 3•10
Air filter - 1•20
Air gap - 5•7
Air intake system - 4•2, 4•14
Airflow meter - 4•15, 6•4
Alternator - 5•10
Anti-lock Braking system (ABS) - 9•2
Anti-roll bar - 10•4, 10•9
Anti-theft audio system - 0•7
Antifreeze - 1•3, 1-8, 3•2
Asbestos - 0•5
ATF - 1•3, 1•13, 1•23
Automatic choke - 4•13
Automatic transmission- 7B•1et seq
Automatic transmission fault finding -
7B•4, REF•13
Automatic transmission fluid - 1•3, 1•13,
1•23
B
Backfire - REF•11
Balljoints - 10•7
Battery - 0•5, 1•16, 5•2
Battery fault - REF•11
Big-end bearings - 2B•17, 2B•21
Bleeding brakes - 9•14
Bleeding clutch - 8•4
Bleeding power steering - 10•16Block - 2B•14, 2B•15
Blower motor - 3•7
Body corrosion - REF•4
Body electrical systems- 12•1et seq
Bodywork and fittings- 11•1et seq
Bonnet - 11•4
Boot lid - 11•6
Boots - 8•9, 10•13
Brake fluid - 1•3, 1•9
Brake lines and hoses - 1•22, 9•13
Braking system- 1•22, 9•1et seq,REF•1,
REF•2, REF•3
Braking system fault finding - REF•14
Bulbs - 12•6
Bumpers - 11•6
Burning - 0•5
C
Cables - 4•9, 5•2, 7B•3, 9•12
Calipers - 9•4
Cam followers - 2B•11
Camshaft - 2A•12, 2B•11
Carburettor - 4•10, 4•11
Carpets - 11•2
Catalytic converter - 4•20, 6•6
Central locking - 12•8
Charging - 1•17, 5•9
Chemicals - REF•18
Choke - 4•13
Clutch and driveline- 8•1et seq
Clutch fault finding - REF•12
Clutch fluid - 1•3, 1•9
CO level adjustment - 1•15, REF•4
Coil - 5•5
Coil springs - 10•7, 10•9
Cold start injectors - 4•17, 4•18
Compression check - 2B•4Compressor - 3•8
Condenser - 3•9
Connecting rods -2B•12, 2B•16, 2B•21
Constant velocity (CV) joint - 8•2, 8•8, 8•9
Continuity check - 12•2
Control arm - 10•4, 10•5
Conversion factors - REF•17
Coolant - 1•3, 1•8
Coolant pump - 3•5
Coolant temperature sender unit - 3•6
Coolant temperature sensor - 6•2
Cooling fan - 3•4
Cooling, heating and air conditioning
systems- 1•21, 1•24, 3•1et seq
Cooling system fault finding - REF•12
Crankshaft - 2A•12, 2A•13, 2A•19, 2B•13,
2B•17, 2B•19, 2B•20
Cruise control - 12•3, 12•8
Crushing - 0•5
Cushion - 11•9
CV joints - 8•2, 8•8, 8•9
Cylinder head - 2A•13, 2B•7, 2B•10, 2B•12
Cylinder honing - 2B•15
D
Dents in bodywork - 11•2
Differential (final drive) - 8•2, 8•10, 8•11
Differential oil -1•3, 1•19, 1•26
Direction indicators - 12•2, 12•3
Discs - 1•22, 9•5
Distributor - 1•18, 5•4
Door - 11•6, 11•8, REF•2
Drivebelts - 1•14
Driveplate - 2A•18
Driveshafts - 1•22, 8•2, 8•9
Drums - 1•23