check engine BMW 3 SERIES CONVERTIBLE 2013 E93 User Guide
[x] Cancel search | Manufacturer: BMW, Model Year: 2013, Model line: 3 SERIES CONVERTIBLE, Model: BMW 3 SERIES CONVERTIBLE 2013 E93Pages: 311, PDF Size: 7.05 MB
Page 142 of 311
137
Things to remember when driving
Driving tips
Check tire inflation pressure regularly
Check the tire inflation pr
essure at least twice a
month and before embarking on a long journey,
and correct it if necessary.
Low tire inflation pressure causes higher rolling
resistance and thus increases fuel consumption
and tire wear.
Set off immediately
Do not let the engine wa rm up while the car is
still standing, but set off immediately at moder-
ate engine speed. This is the fastest way for the
cold engine to reach its operating temperature.
Drive defensively
Avoid unnecessary acceleration and braking
maneuvers. To do so, keep an adequate dis-
tance between you and th e vehicle in front of
you. A defensive and smooth driving style
keeps fuel consumption down.
Avoid high engine speeds
Only use first gear when setting off. In second
and higher gears, accele rate without hesitation
or pauses. When accelera ting, shift up before
reaching high engine speeds.
When you reach the desi red speed, shift into
the highest applicable ge ar and drive with the
engine speed as low as possible and at a
constant speed.
As a rule: driving at low engine speeds lowers
fuel consumption and reduces wear.
Coasting
When approaching a red lig ht, take your foot off
the accelerator and coast to a stop in the high-
est applicable gear.
On a downhill slope, take your foot off the
accelerator and coast in a suitable gear.
The fuel supply is interrupted when coasting.
Switch off the engine during lengthy
stops
Switch off the engine when stopping for lengthy
periods, e.g. at traffic lights, railroad crossings
or in traffic congestions.
Switch off functions you do not need at
the moment
Functions such as the air conditioner, seat
heating or rear window defroster draw large
amounts of power and consume additional fuel.
Especially in city traffic and in stop-and-go driv-
ing they have a considerable impact. Therefore,
switch these functions off when they are not
really needed.
Have the vehicle serviced
Have the vehicle serviced regularly to achieve
good economy and a long vehicle life. BMW
recommends having the vehicle serviced at
your BMW center. Also note the BMW Mainte-
nance System, refer to page 260.
General driving notes
Close the trunk lid
Only drive with the trunk closed. Failure to
do so may endanger passengers or other
road users or may damage the vehicle in the
event of an accident or a braking and evasive
maneuver. In addition, exhaust gas may flow
into the passenger compartment. <
If special circumstance s make it absolutely
necessary to drive wi th the trunk open:
1. Close all windows and the glass roof.
2. Greatly increase the air volume of the
automatic climate cont rol system, refer to
page 117.
3. Drive cautiously.
00320051004F004C00510048000300280047004C0057004C005200510003
Page 261 of 311
256
MobilityEngine compartment
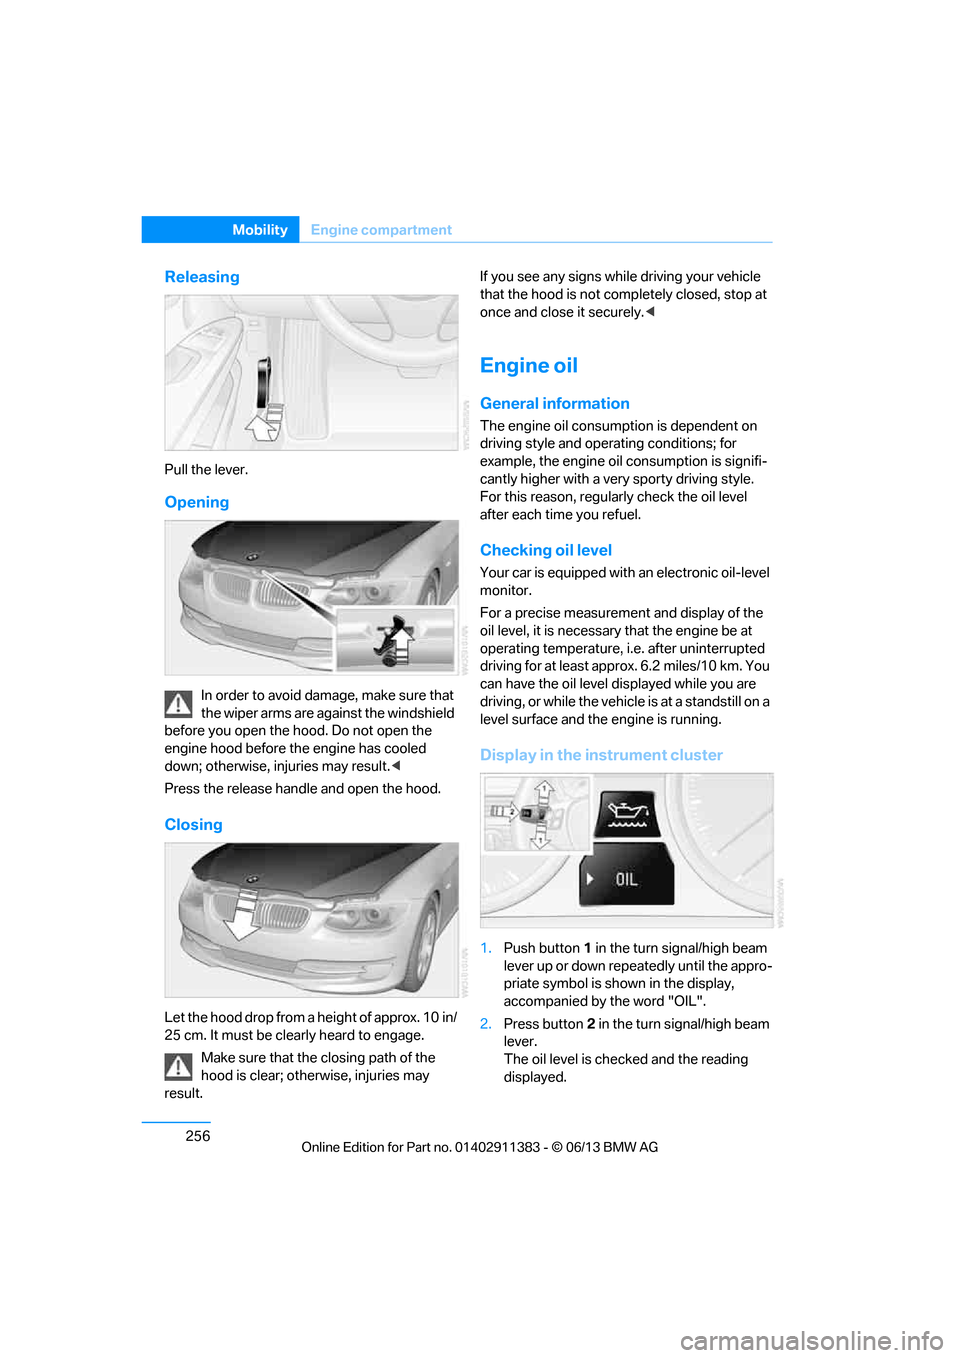
Releasing
Pull the lever.
Opening
In order to avoid damage, make sure that
the wiper arms are against the windshield
before you open the hood. Do not open the
engine hood before the engine has cooled
down; otherwise, injuries may result. <
Press the release handle and open the hood.
Closing
Let the hood drop from a height of approx. 10 in/
25 cm. It must be clearly heard to engage. Make sure that the closing path of the
hood is clear; otherwise, injuries may
result. If you see any signs while driving your vehicle
that the hood is not comp
letely closed, stop at
once and close it securely. <
Engine oil
General information
The engine oil consumption is dependent on
driving style and operating conditions; for
example, the engine oil consumption is signifi-
cantly higher with a very sporty driving style.
For this reason, regularly check the oil level
after each time you refuel.
Checking oil level
Your car is equipped with an electronic oil-level
monitor.
For a precise measurement and display of the
oil level, it is necessar y that the engine be at
operating temperature, i.e. after uninterrupted
driving for at least approx. 6.2 miles/10 km. You
can have the oil level displayed while you are
driving, or while the vehicle is at a standstill on a
level surface and the engine is running.
Display in the instrument cluster
1.Push button 1 in the turn signal/high beam
lever up or down repe atedly until the appro-
priate symbol is shown in the display,
accompanied by the word "OIL".
2. Press button 2 in the turn signal/high beam
lever.
The oil level is chec ked and the reading
displayed.
00320051004F004C00510048000300280047004C0057004C005200510003
Page 262 of 311
257
Engine compartment
Mobility
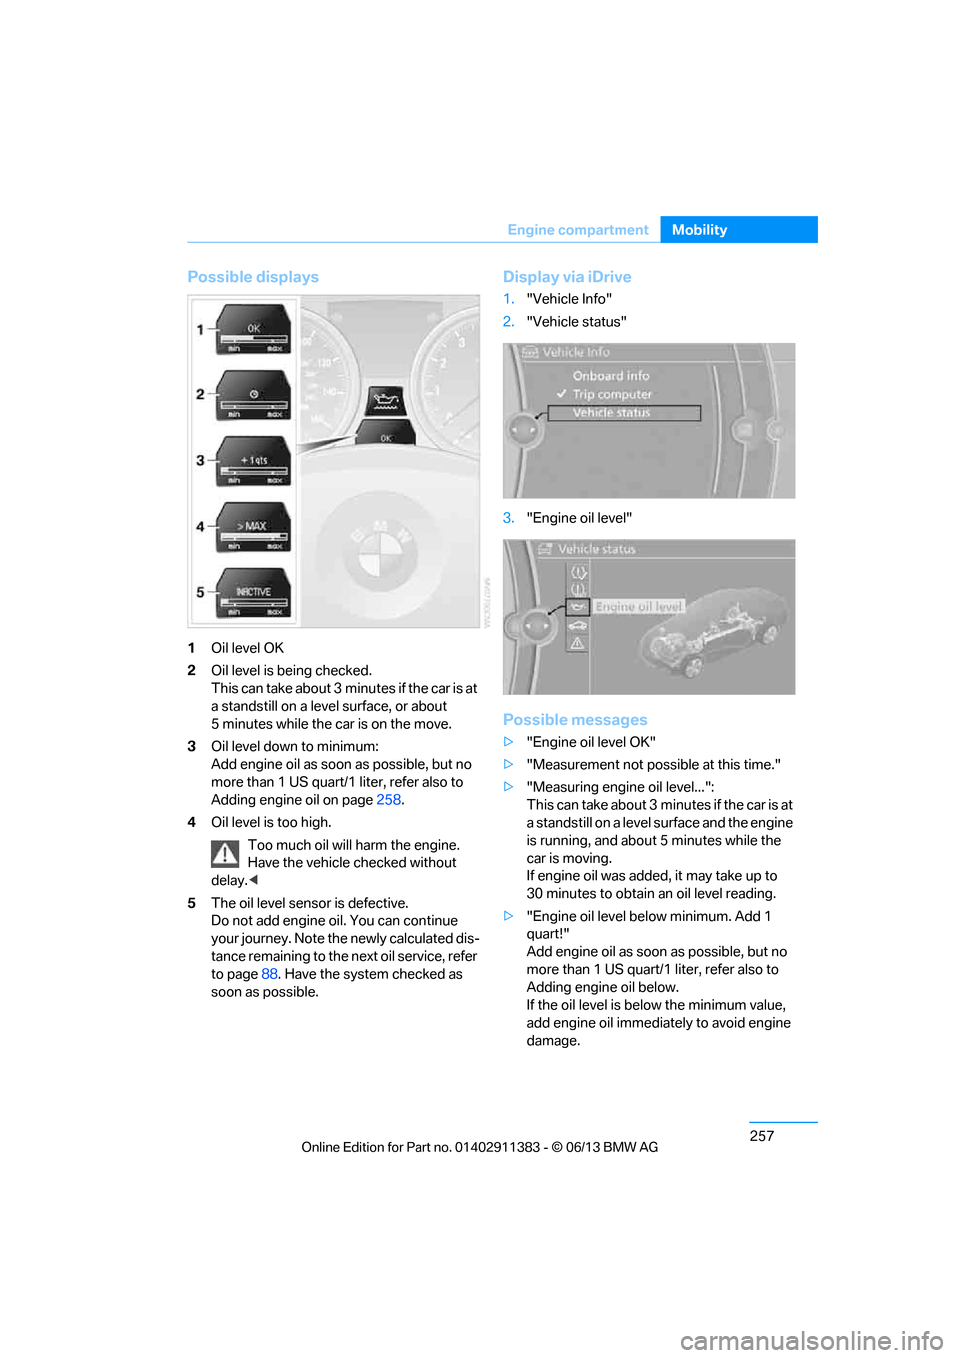
Possible displays
1
Oil level OK
2 Oil level is being checked.
This can take about 3 min utes if the car is at
a standstill on a level surface, or about
5 minutes while the car is on the move.
3 Oil level down to minimum:
Add engine oil as soon as possible, but no
more than 1 US quart/1 liter, refer also to
Adding engine oil on page 258.
4 Oil level is too high.
Too much oil will harm the engine.
Have the vehicle checked without
delay. <
5 The oil level sens or is defective.
Do not add engine oil. You can continue
your journey. Note the newly calculated dis-
tance remaining to the ne xt oil service, refer
to page 88. Have the system checked as
soon as possible.
Display via iDrive
1. "Vehicle Info"
2. "Vehicle status"
3. "Engine oil level"
Possible messages
>"Engine oil level OK"
> "Measurement not possible at this time."
> "Measuring engine oil level...":
This can take about 3 minutes if the car is at
a standstill on a level surface and the engine
is running, and about 5 minutes while the
car is moving.
If engine oil was added, it may take up to
30 minutes to obtain an oil level reading.
> "Engine oil level below minimum. Add 1
quart!"
Add engine oil as soon as possible, but no
more than 1 US quart/1 liter, refer also to
Adding engine oil below.
If the oil level is below the minimum value,
add engine oil immediately to avoid engine
damage.
00320051004F004C00510048000300280047004C0057004C005200510003
Page 263 of 311
258
MobilityEngine compartment
>"Engine oil level too high! Have this
checked."
Too much oil will harm the engine.
Have the vehicle checked without
delay. <
> "Measurement inactive. Have this
checked."
Do not add engine oil. You can continue
your journey. Note the newly calculated
distance remaining to the next oil service,
refer to page 88. Have the system checked
as soon as possible.
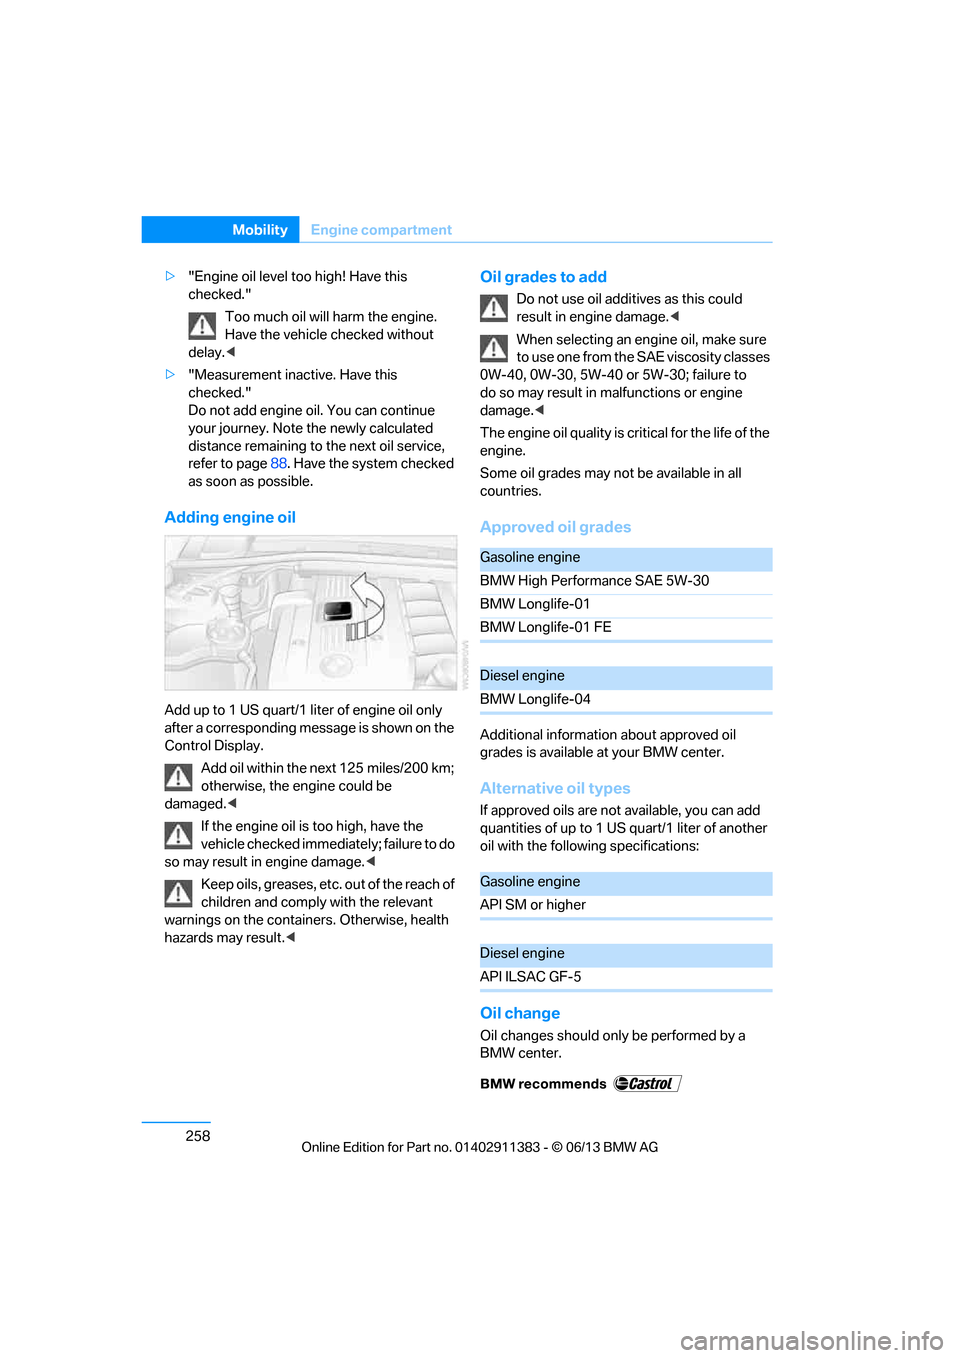
Adding engine oil
Add up to 1 US quart/1 liter of engine oil only
after a corresponding message is shown on the
Control Display.
Add oil within the next 125 miles/200 km;
otherwise, the engine could be
damaged. <
If the engine oil is too high, have the
vehicle checked immediately; failure to do
so may result in engine damage. <
Keep oils, greases, etc. out of the reach of
children and comply with the relevant
warnings on the containers. Otherwise, health
hazards may result. <
Oil grades to add
Do not use oil additives as this could
result in engine damage.<
When selecting an engi ne oil, make sure
to use one from the SAE viscosity classes
0W-40, 0W-30, 5W-40 or 5W-30; failure to
do so may result in malfunctions or engine
damage. <
The engine oil quality is critical for the life of the
engine.
Some oil grades may no t be available in all
countries.
Approved oil grades
Additional information about approved oil
grades is available at your BMW center.
Alternative oil types
If approved oils are not available, you can add
quantities of up to 1 US quart/1 liter of another
oil with the following specifications:
Oil change
Oil changes should only be performed by a
BMW center.
Gasoline engine
BMW High Performance SAE 5W-30
BMW Longlife-01
BMW Longlife-01 FE
Diesel engine
BMW Longlife-04
Gasoline engine
API SM or higher
Diesel engine
API ILSAC GF-5
00320051004F004C00510048000300280047004C0057004C005200510003
Page 264 of 311
259
Engine compartment
Mobility
Coolant
Coolant consists of half water and half additive.
Not all commercially availa
ble additives are suit-
able for your BMW. Ask your BMW center about
suitable additives.
Only use suitable a dditives; otherwise,
engine damage may result. Because
additives are harmful to your health, it is
important to follow the instructions on the
containers. <
Comply with the appropriate environ-
mental protection regulations when
disposing of coolant additives. <
Coolant temperature
If the coolant and therefore the engine over-
heats, a warning lamp lights up. A message
appears on the Control Display.
Checking coolant level
Do not add coolant to the cooling system
when the engine is hot. Escaping coolant
can cause burns. <
1. Do not open the engine hood before the
engine has cooled down.
2. Turn the cap of the expansion tank a little
counterclockwise to allow any accumulated
pressure to escape, then continue turning
to open.
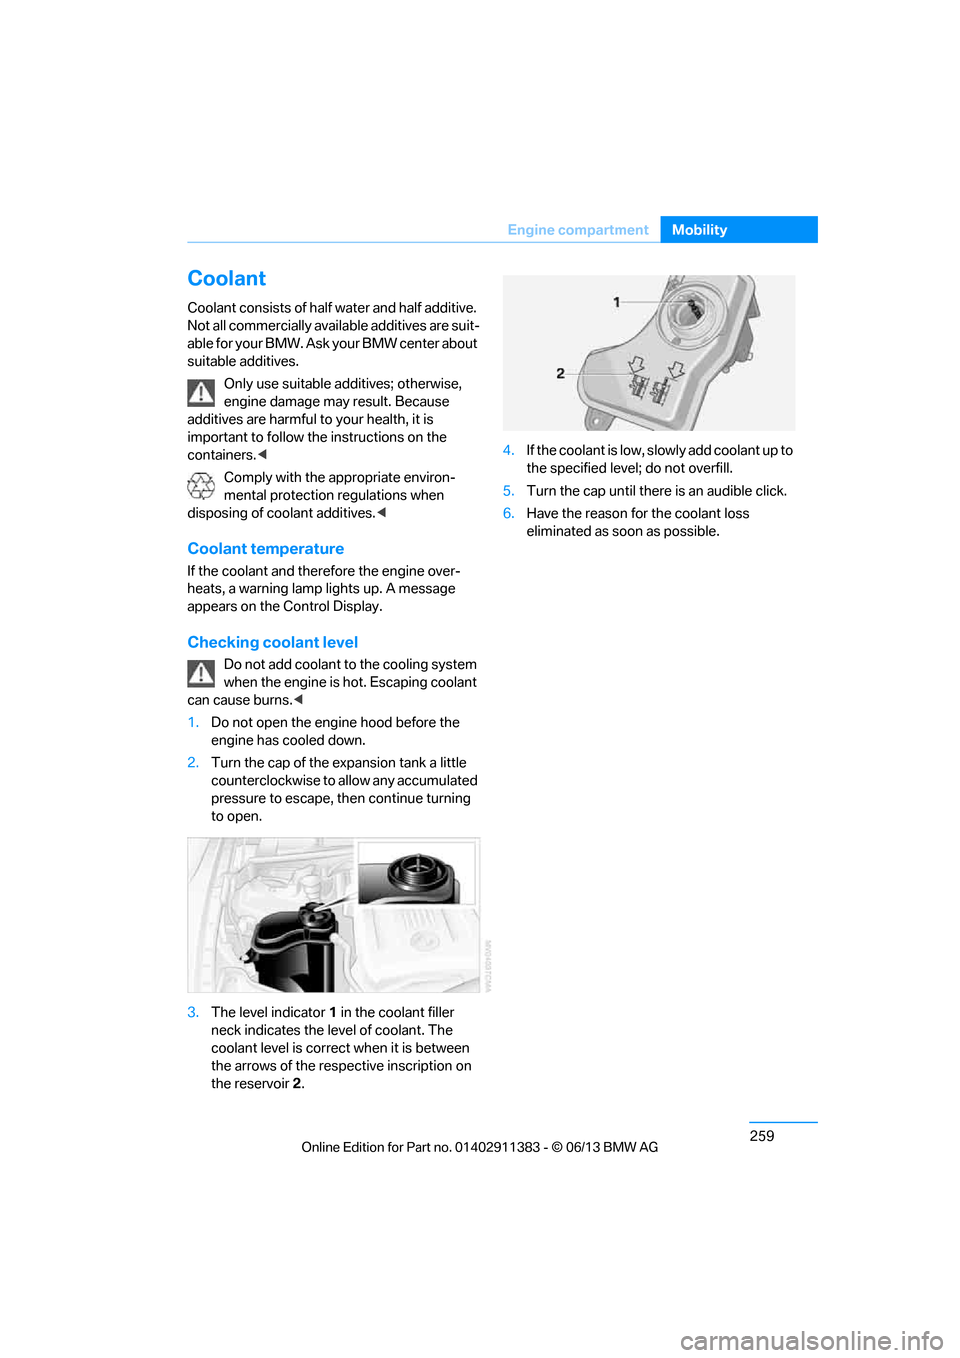
3. The level indicator 1 in the coolant filler
neck indicates the le vel of coolant. The
coolant level is correct when it is between
the arrows of the resp ective inscription on
the reservoir 2. 4.
If the coolant is low, slowly add coolant up to
the specified level; do not overfill.
5. Turn the cap until there is an audible click.
6. Have the reason for the coolant loss
eliminated as soon as possible.
00320051004F004C00510048000300280047004C0057004C005200510003
Page 265 of 311
260
MobilityMaintenance
Maintenance
Vehicle equipment
In this chapter, all pr oduction, country, and
optional equipment that is offered in the model
range is described. For this reason, descrip-
tions will be given of some equipment that may
not be available in a vehi cle, for example due to
the special options or national-market version
selected. This also app lies to safety related
functions and systems.
BMW Maintenance System
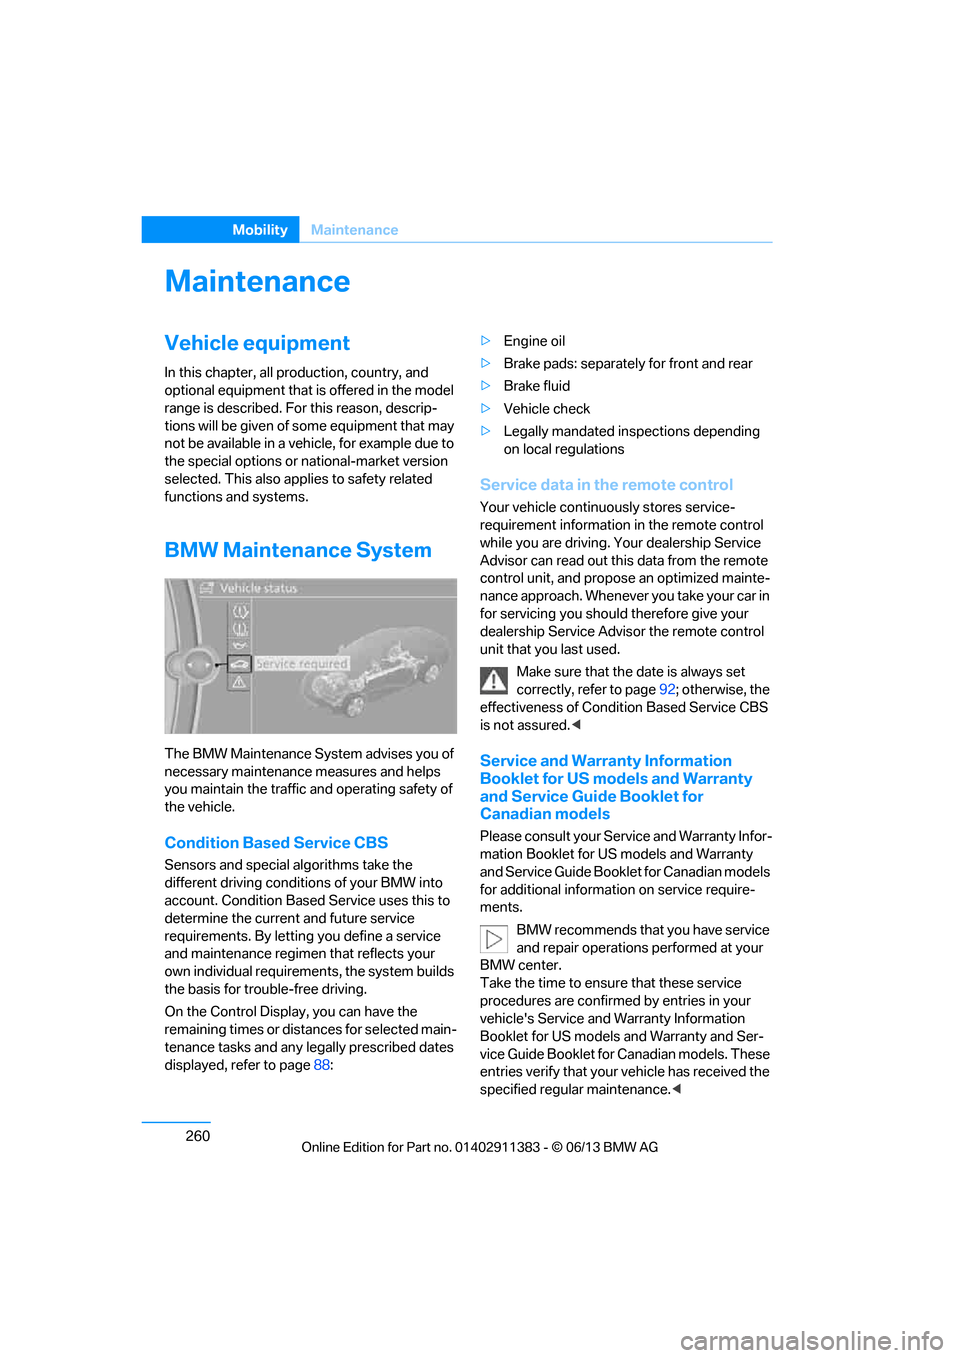
The BMW Maintenance System advises you of
necessary maintenance measures and helps
you maintain the traffic and operating safety of
the vehicle.
Condition Based Service CBS
Sensors and special al gorithms take the
different driving conditions of your BMW into
account. Condition Based Service uses this to
determine the current and future service
requirements. By letting you define a service
and maintenance regimen that reflects your
own individual requirem ents, the system builds
the basis for trouble-free driving.
On the Control Display, you can have the
remaining times or distances for selected main-
tenance tasks and any legally prescribed dates
displayed, refer to page 88: >
Engine oil
> Brake pads: separately for front and rear
> Brake fluid
> Vehicle check
> Legally mandated in spections depending
on local regulations
Service data in the remote control
Your vehicle continuously stores service-
requirement information in the remote control
while you are driving. Your dealership Service
Advisor can read out this data from the remote
control unit, and propose an optimized mainte-
nance approach. Whenever you take your car in
for servicing you should therefore give your
dealership Service Advisor the remote control
unit that you last used.
Make sure that the date is always set
correctly, refer to page 92; otherwise, the
effectiveness of Condit ion Based Service CBS
is not assured. <
Service and Warranty Information
Booklet for US models and Warranty
and Service Guide Booklet for
Canadian models
Please consult your Service and Warranty Infor-
mation Booklet for US models and Warranty
and Service Guide Booklet for Canadian models
for additional information on service require-
ments.
BMW recommends that you have service
and repair operations performed at your
BMW center.
Take the time to ensu re that these service
procedures are confirmed by entries in your
vehicle's Service and Warranty Information
Booklet for US models and Warranty and Ser-
vice Guide Booklet for Canadian models. These
entries verify that your vehicle has received the
specified regula r maintenance.<
00320051004F004C00510048000300280047004C0057004C005200510003
Page 266 of 311
261
Maintenance
Mobility
Socket for Onboard
Diagnosis OBD
The socket for onboard diagnosis should
only be used by your BMW center or at a
workshop that works according to BMW repair
procedures with corres pondingly trained per-
sonnel and by otherwise authorized personnel;
otherwise, use can result in malfunctioning of
the vehicle. <
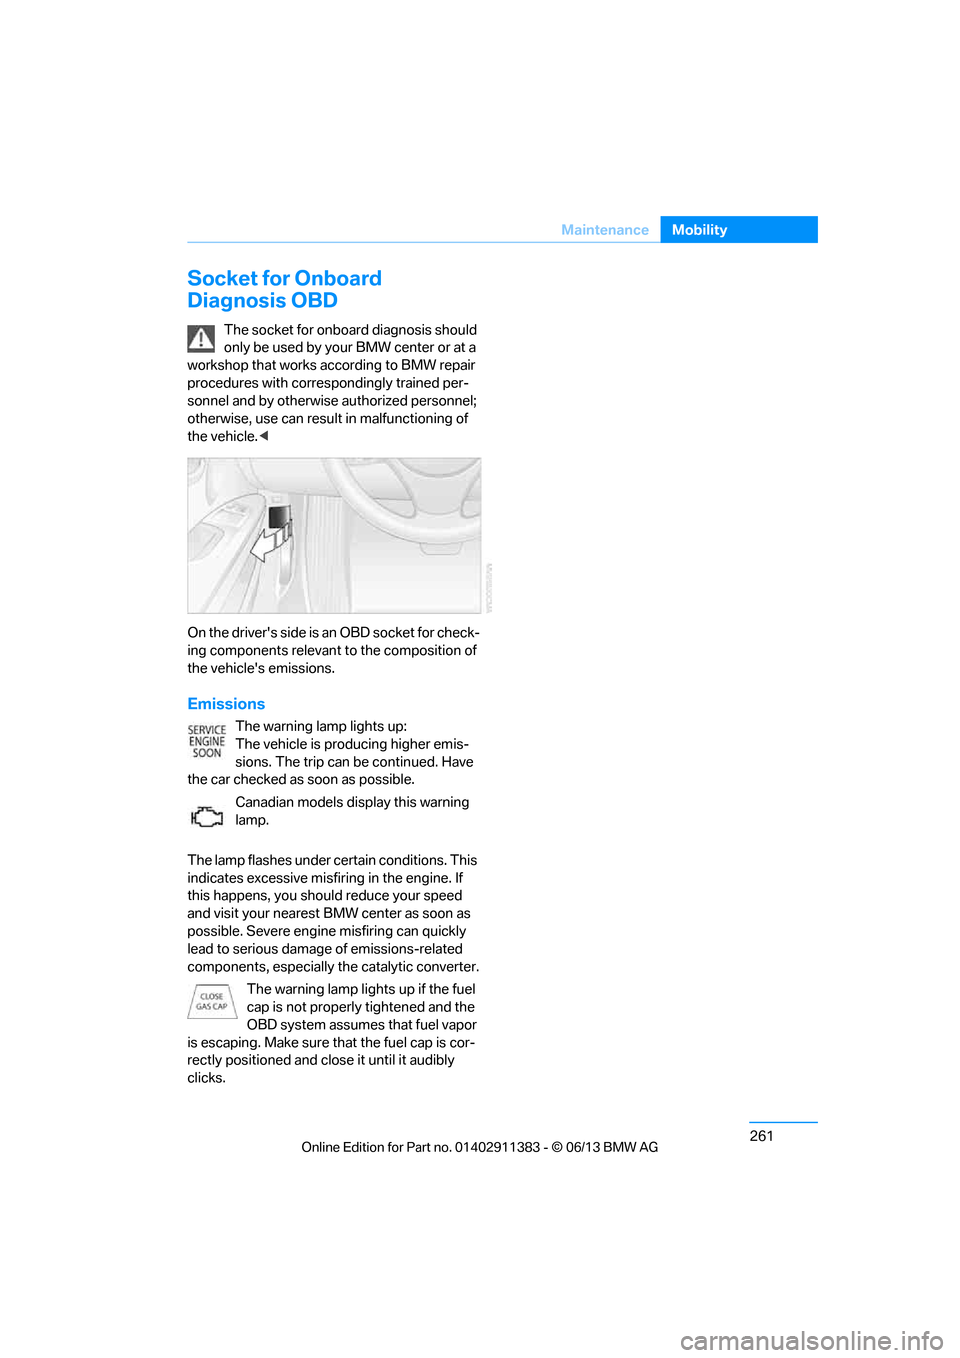
On the drive r's side is a n OBD so cket f or check-
ing components relevant to the composition of
the vehicle's emissions.
Emissions
The warning lamp lights up:
The vehicle is producing higher emis-
sions. The trip can be continued. Have
the car checked as soon as possible.
Canadian models display this warning
lamp.
The lamp flashes under ce rtain conditions. This
indicates excessive misfiring in the engine. If
this happens, you should reduce your speed
and visit your nearest BMW center as soon as
possible. Severe engine misfiring can quickly
lead to serious damage of emissions-related
components, especially the catalytic converter.
The warning lamp lights up if the fuel
cap is not properly tightened and the
OBD system assumes that fuel vapor
is escaping. Make sure that the fuel cap is cor-
rectly positioned and close it until it audibly
clicks.
00320051004F004C00510048000300280047004C0057004C005200510003
Page 279 of 311
274
MobilityGiving and receiving assistance
Jump starting
If the car's own battery is flat, your BMW's
engine can be starte d by connecting two
jumper cables to another vehicle's battery. You
can also use the same method to help start
another vehicle. Only use jumper cables with
fully-insulated clamp handles.
Do not touch any electrically live parts
when the engine is running, or a fatal
accident may occur. Ca refully adhere to the
following sequence, both to prevent damage
to one or both vehicles, and to guard against
possible personal injuries. <
Preparation
1.Check whether the ba ttery of the other
vehicle has a voltage of 12 volts and
approximately the same capacitance in Ah.
This information can be found on the
battery.
2. Switch off the engine of the assisting
vehicle.
3. Switch off any consumers in both vehicles.
There must not be any contact between
the bodies of the two vehicles; otherwise,
there is a danger of shorting. <
Connecting jumper cables
Connect the jumper cables in the correct
order, so that no sparks which could
cause injury occur. <
Your BMW has a jump-starting connection in
the engine compartment which acts as the bat-
tery's positive terminal, refer also to the Engine
compartment overview on page 255. The cap is
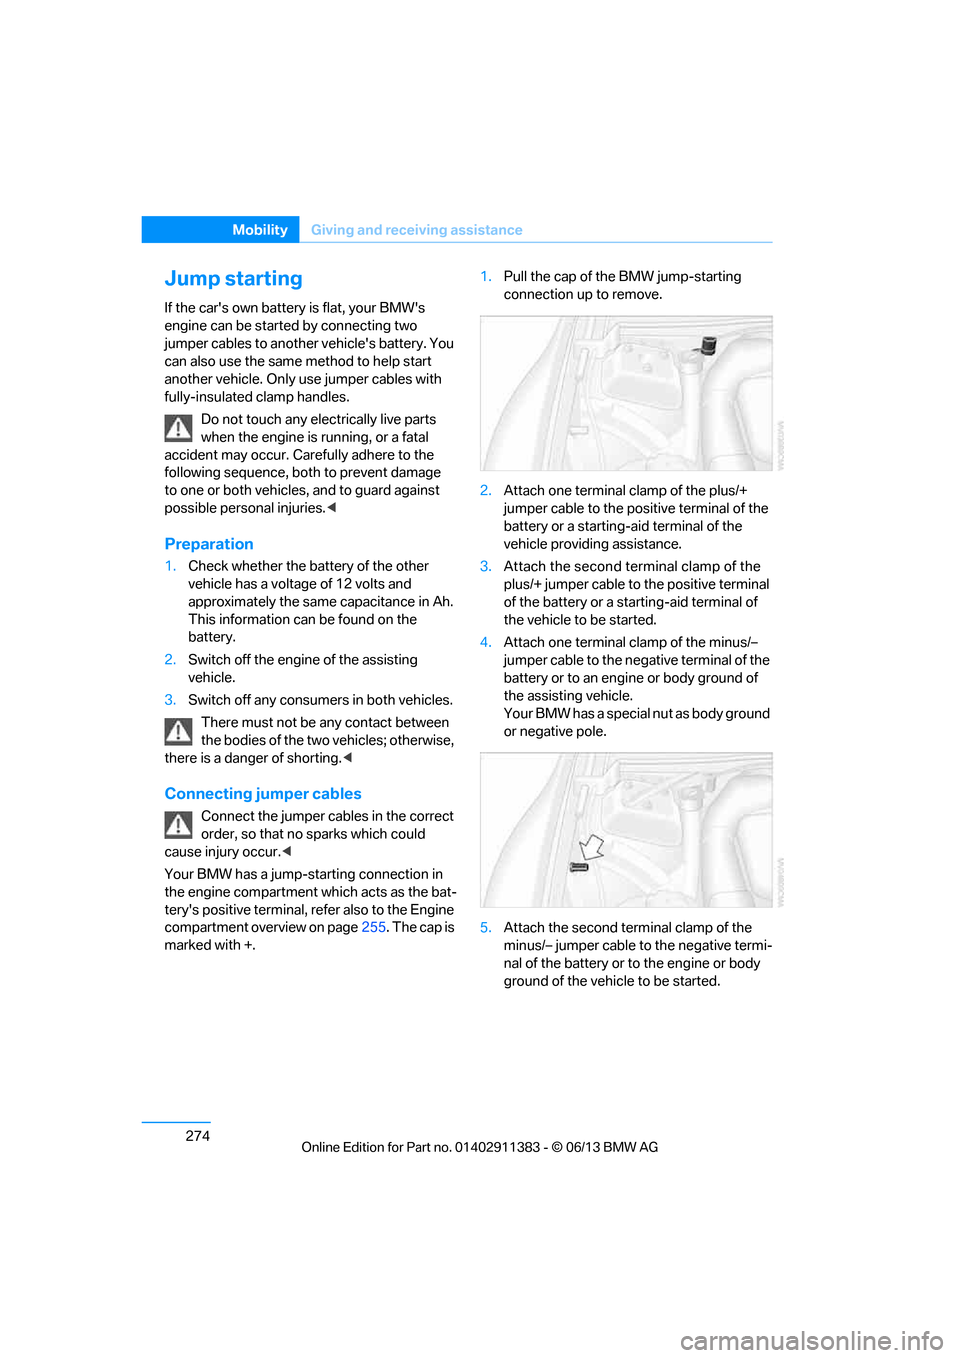
marked with +. 1.
Pull the cap of the BMW jump-starting
connection up to remove.
2. Attach one terminal clamp of the plus/+
jumper cable to the positive terminal of the
battery or a starting-a id terminal of the
vehicle providing assistance.
3. Attach the second terminal clamp of the
plus/+ jumper cable to the positive terminal
of the battery or a star ting-aid terminal of
the vehicle to be started.
4. Attach one terminal clamp of the minus/–
jumper cable to the nega tive terminal of the
battery or to an engine or body ground of
the assisting vehicle.
Your BMW has a special nut as body ground
or negative pole.
5. Attach the second te rminal clamp of the
minus/– jumper cable to the negative termi-
nal of the battery or to the engine or body
ground of the vehicle to be started.
00320051004F004C00510048000300280047004C0057004C005200510003
Page 280 of 311
275
Giving and receiving assistance
Mobility
Starting the engine
1.
Start the engine of the donor vehicle and
allow it to run for a fe w minutes at slightly
increased idle speed.
2. Start the engine on the other vehicle in the
usual way.
If the first start attempt is not successful,
wait a few minutes be fore another attempt
in order to allow the discharged battery to
recharge.
3. Let the engines run for a few minutes.
4. Disconnect the jumper cables by reversing
the above connecting sequence.
If necessary, have th e battery checked and
recharged.
Never use spray fluids to start the
engine. <
Tow-starting, towing away
Observe the applicable laws and
regulations for tow-starting and towing
vehicles.<
Do not transport any passengers other
than the driver in a vehicle that is being
towed. <
Using a tow fitting
The screw-in tow fitting must always be carried
in the car. It can be sc rewed in at the front or
rear of the BMW.
Coupe: it is stored in the onboard vehicle tool kit
underneath the cover on the right-hand side of
the trunk, refer to page 266.
Convertible: it is stored in the onboard vehicle
tool kit underneath the trunk floor, refer to
page 266.
Use only the tow fitting provided with the
vehicle and screw it a ll the way in. Use the
tow fitting for towing on paved roads only. Avoid
lateral loading of the tow fitting, e.g. do not lift
the vehicle by the tow fitting. Otherwise, the
tow fitting and the vehicle could be damaged. <
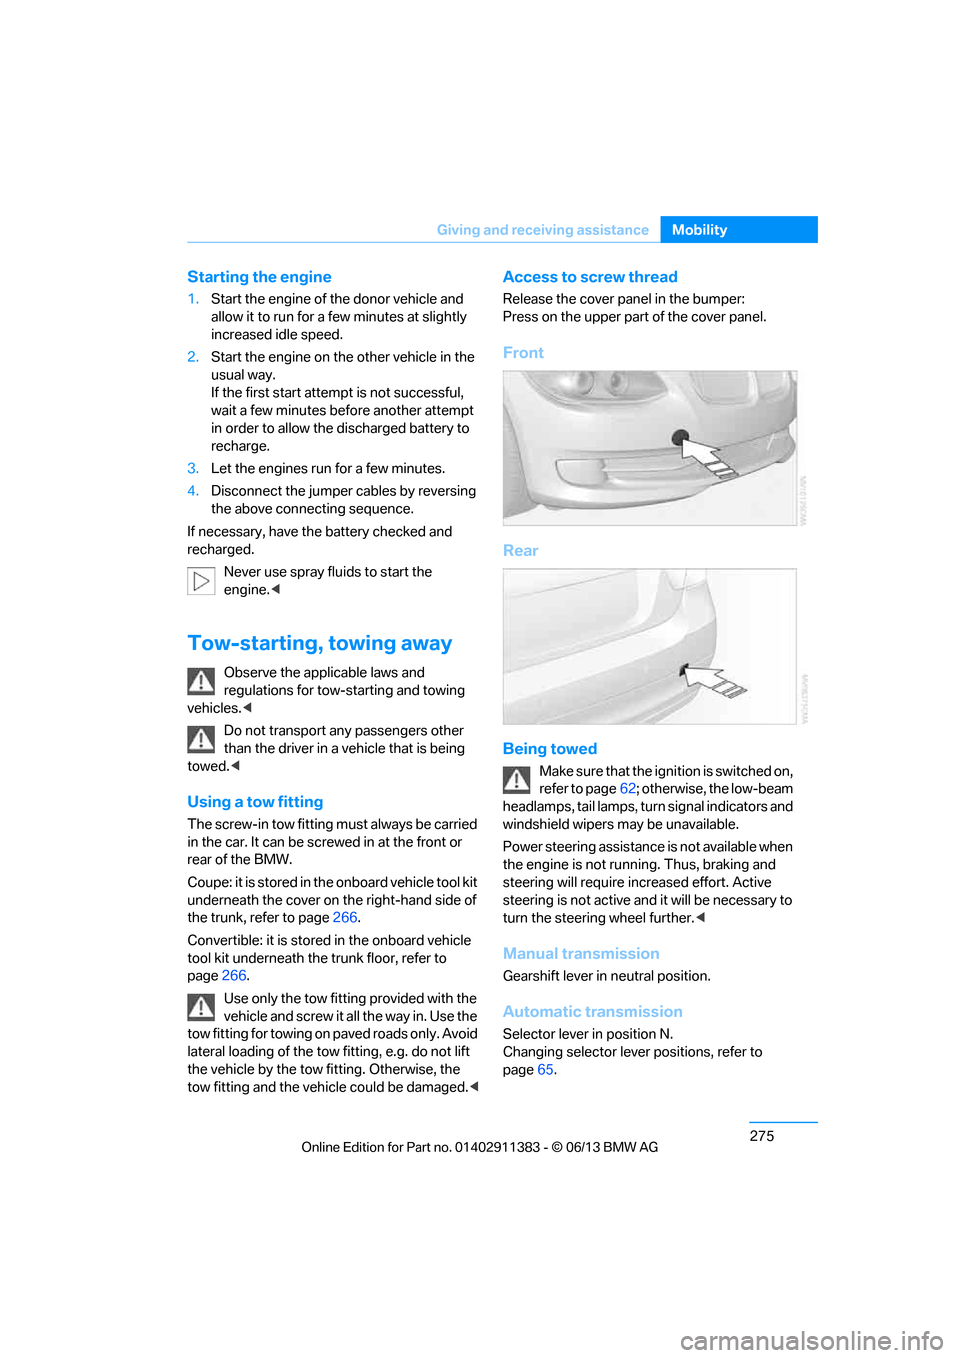
Access to screw thread
Release the cover panel in the bumper:
Press on the upper part of the cover panel.
Front
Rear
Being towed
Make sure that the ignition is switched on,
refer to page62; otherwise, the low-beam
headlamps, tail lamps, turn signal indicators and
windshield wipers may be unavailable.
Power steering assistance is not available when
the engine is not running. Thus, braking and
steering will require in creased effort. Active
steering is not active an d it will be necessary to
turn the steering wheel further. <
Manual transmission
Gearshift lever in neutral position.
Automatic transmission
Selector lever in position N.
Changing selector lever positions, refer to
page65.
00320051004F004C00510048000300280047004C0057004C005200510003
Page 282 of 311
277
Giving and receiving assistance
Mobility
With a tow truck: vehicle with xDrive
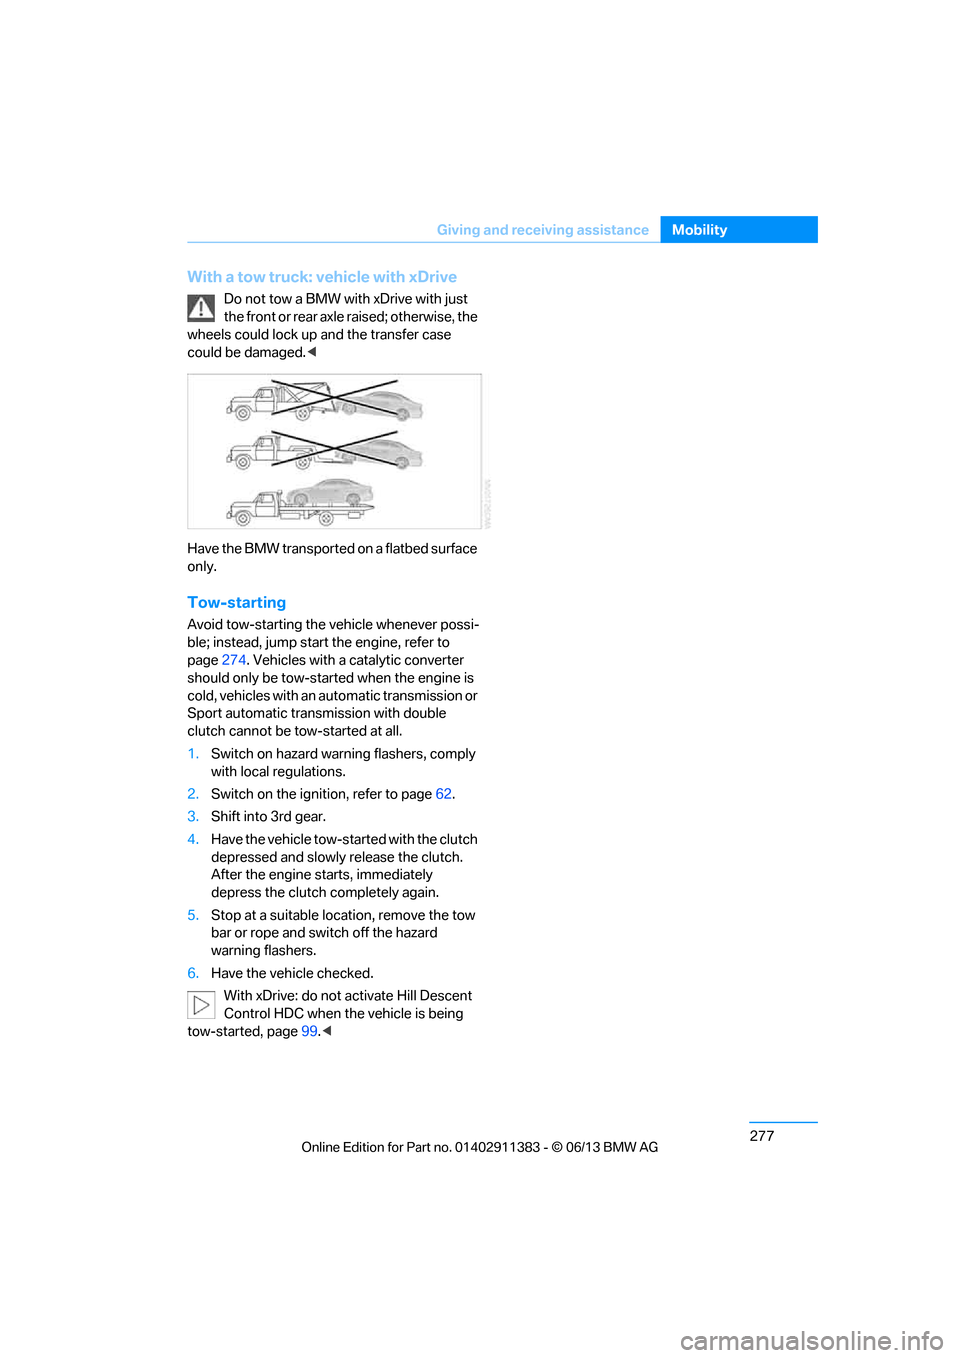
Do not tow a BMW with xDrive with just
the front or rear axle raised; otherwise, the
wheels could lock up and the transfer case
could be damaged. <
Have the BMW transported on a flatbed surface
only.
Tow-starting
Avoid tow-starting the vehicle whenever possi-
ble; instead, jump start the engine, refer to
page 274. Vehicles with a catalytic converter
should only be tow-star ted when the engine is
cold, vehicles with an automatic transmission or
Sport automatic transmission with double
clutch cannot be tow-started at all.
1. Switch on hazard warning flashers, comply
with local regulations.
2. Switch on the ignition, refer to page 62.
3. Shift into 3rd gear.
4. Have the vehicle tow-st arted with the clutch
depressed and slowly release the clutch.
After the engine starts, immediately
depress the clutch completely again.
5. Stop at a suitable location, remove the tow
bar or rope and switch off the hazard
warning flashers.
6. Have the vehicle checked.
With xDrive: do not activate Hill Descent
Control HDC when the vehicle is being
tow-started, page 99.<
00320051004F004C00510048000300280047004C0057004C005200510003