inflation pressure BMW 320i SEDAN 2015 User Guide
[x] Cancel search | Manufacturer: BMW, Model Year: 2015, Model line: 320i SEDAN, Model: BMW 320i SEDAN 2015Pages: 257, PDF Size: 5.55 MB
Page 176 of 257
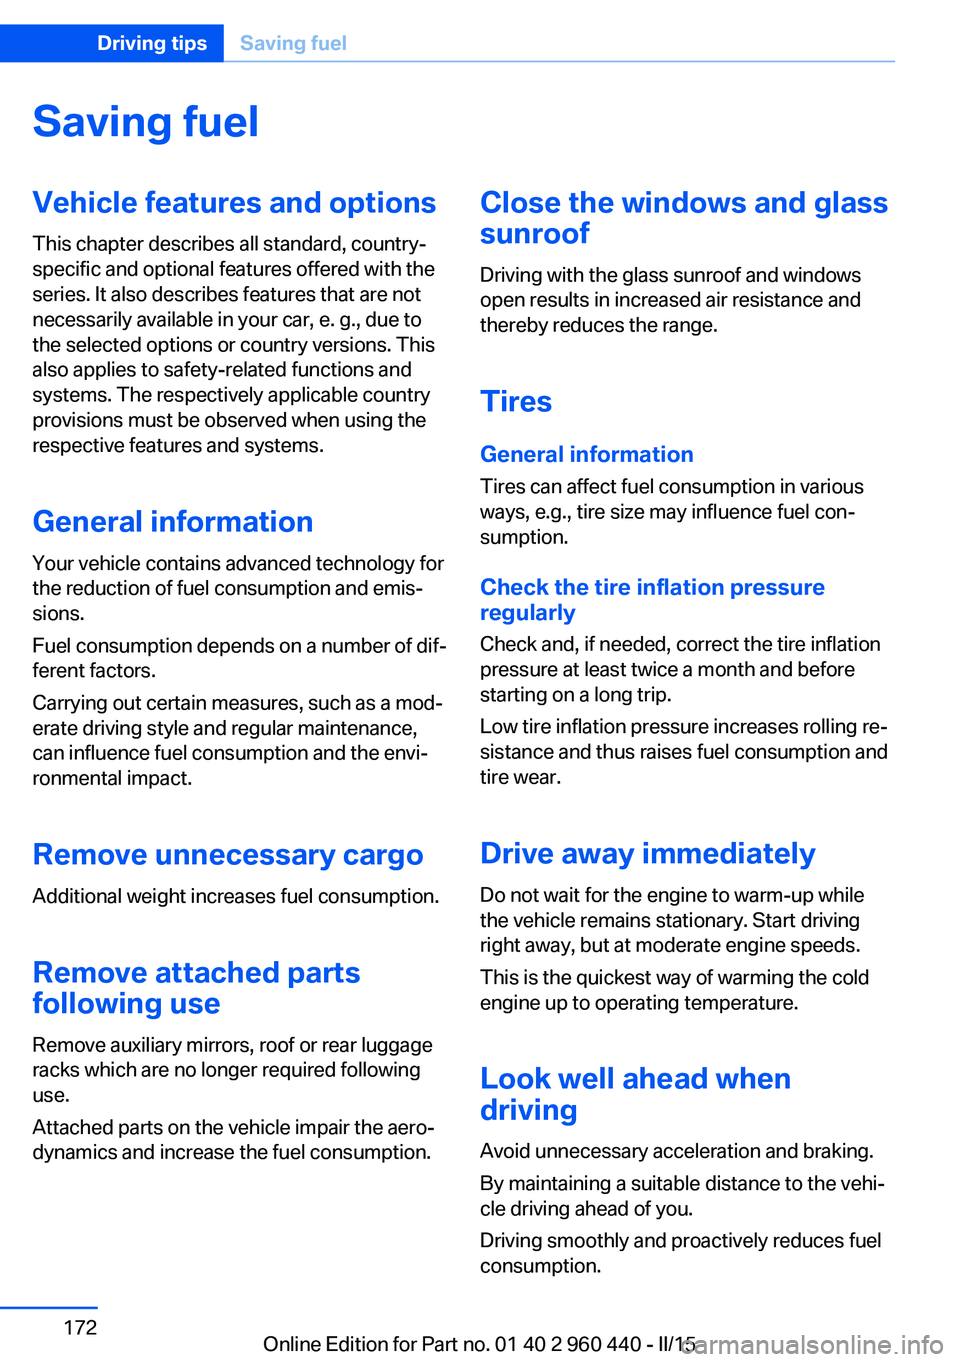
Saving fuelVehicle features and optionsThis chapter describes all standard, country-
specific and optional features offered with the
series. It also describes features that are not
necessarily available in your car, e. g., due to
the selected options or country versions. This
also applies to safety-related functions and
systems. The respectively applicable country
provisions must be observed when using the
respective features and systems.
General information Your vehicle contains advanced technology for
the reduction of fuel consumption and emis‐
sions.
Fuel consumption depends on a number of dif‐
ferent factors.
Carrying out certain measures, such as a mod‐
erate driving style and regular maintenance,
can influence fuel consumption and the envi‐
ronmental impact.
Remove unnecessary cargo
Additional weight increases fuel consumption.
Remove attached parts
following use
Remove auxiliary mirrors, roof or rear luggage
racks which are no longer required following use.
Attached parts on the vehicle impair the aero‐
dynamics and increase the fuel consumption.Close the windows and glass
sunroof
Driving with the glass sunroof and windows
open results in increased air resistance and
thereby reduces the range.
Tires
General information Tires can affect fuel consumption in various
ways, e.g., tire size may influence fuel con‐
sumption.
Check the tire inflation pressure
regularly
Check and, if needed, correct the tire inflation
pressure at least twice a month and before
starting on a long trip.
Low tire inflation pressure increases rolling re‐
sistance and thus raises fuel consumption and
tire wear.
Drive away immediately
Do not wait for the engine to warm-up while
the vehicle remains stationary. Start driving
right away, but at moderate engine speeds.
This is the quickest way of warming the cold
engine up to operating temperature.
Look well ahead when
driving
Avoid unnecessary acceleration and braking.
By maintaining a suitable distance to the vehi‐
cle driving ahead of you.
Driving smoothly and proactively reduces fuel
consumption.Seite 172Driving tipsSaving fuel172
Online Edition for Part no. 01 40 2 960 440 - II/15
Page 193 of 257
Wheels and tiresVehicle features and options
This chapter describes all standard, country-
specific and optional features offered with the
series. It also describes features that are not
necessarily available in your car, e. g., due to
the selected options or country versions. This
also applies to safety-related functions and
systems. The respectively applicable country
provisions must be observed when using the
respective features and systems.
Tire inflation pressure Safety information
The tire characteristics and tire inflation pres‐
sure influence the following:▷The service life of the tires.▷Road safety.▷Driving comfort.
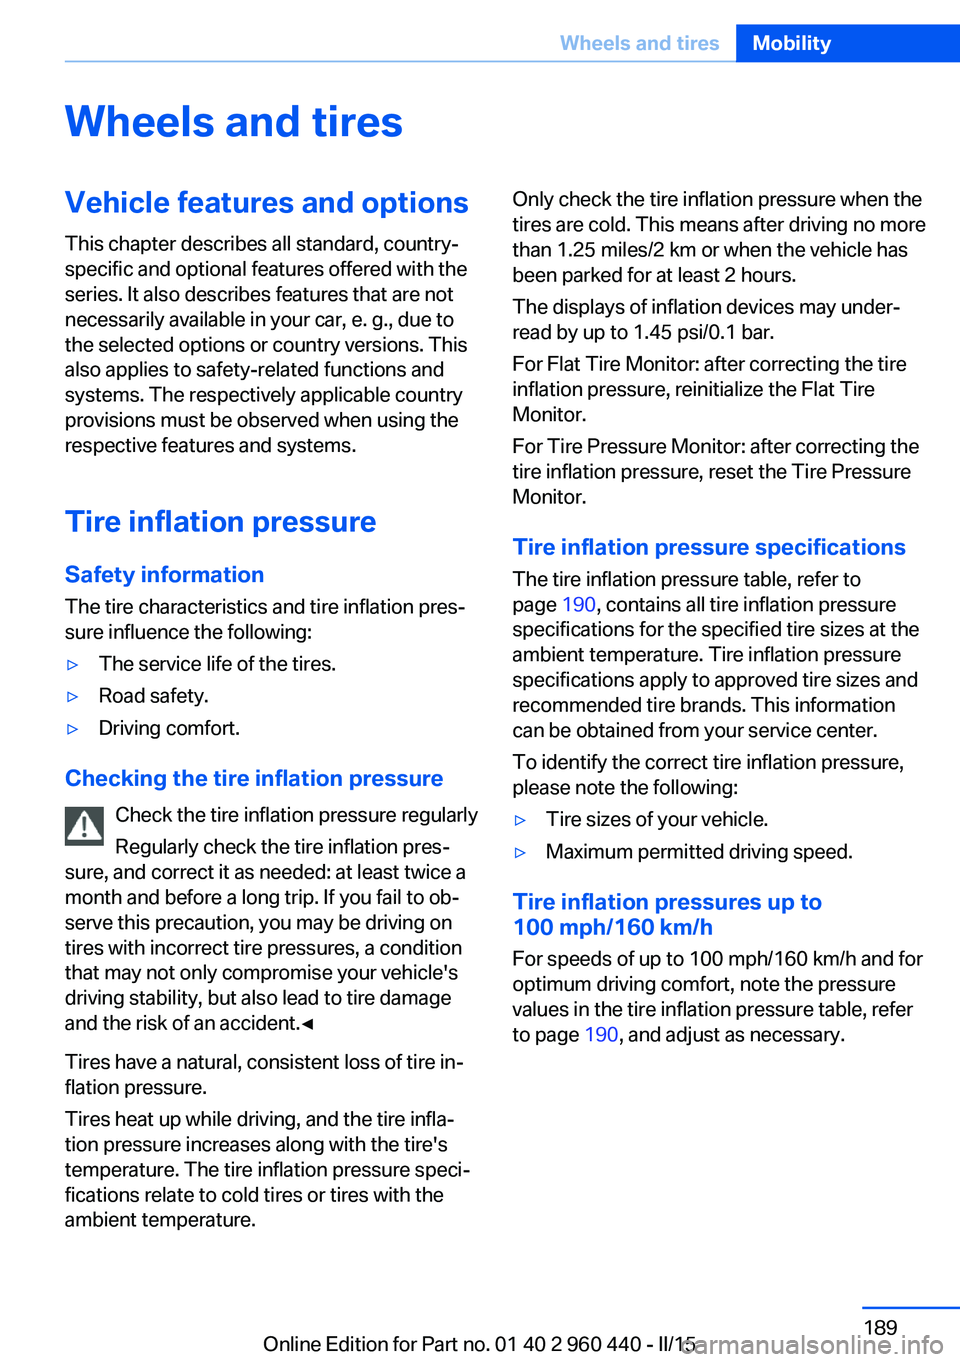
Checking the tire inflation pressure
Check the tire inflation pressure regularly
Regularly check the tire inflation pres‐
sure, and correct it as needed: at least twice a
month and before a long trip. If you fail to ob‐
serve this precaution, you may be driving on
tires with incorrect tire pressures, a condition
that may not only compromise your vehicle's
driving stability, but also lead to tire damage
and the risk of an accident.◀
Tires have a natural, consistent loss of tire in‐
flation pressure.
Tires heat up while driving, and the tire infla‐
tion pressure increases along with the tire's
temperature. The tire inflation pressure speci‐
fications relate to cold tires or tires with the
ambient temperature.
Only check the tire inflation pressure when the
tires are cold. This means after driving no more
than 1.25 miles/2 km or when the vehicle has
been parked for at least 2 hours.
The displays of inflation devices may under-
read by up to 1.45 psi/0.1 bar.
For Flat Tire Monitor: after correcting the tire
inflation pressure, reinitialize the Flat Tire
Monitor.
For Tire Pressure Monitor: after correcting the
tire inflation pressure, reset the Tire Pressure
Monitor.
Tire inflation pressure specifications
The tire inflation pressure table, refer to
page 190, contains all tire inflation pressure
specifications for the specified tire sizes at the
ambient temperature. Tire inflation pressure
specifications apply to approved tire sizes and
recommended tire brands. This information
can be obtained from your service center.
To identify the correct tire inflation pressure,
please note the following:▷Tire sizes of your vehicle.▷Maximum permitted driving speed.
Tire inflation pressures up to
100 mph/160 km/h
For speeds of up to 100 mph/160 km/h and for
optimum driving comfort, note the pressure
values in the tire inflation pressure table, refer
to page 190, and adjust as necessary.
Seite 189Wheels and tiresMobility189
Online Edition for Part no. 01 40 2 960 440 - II/15
Page 194 of 257
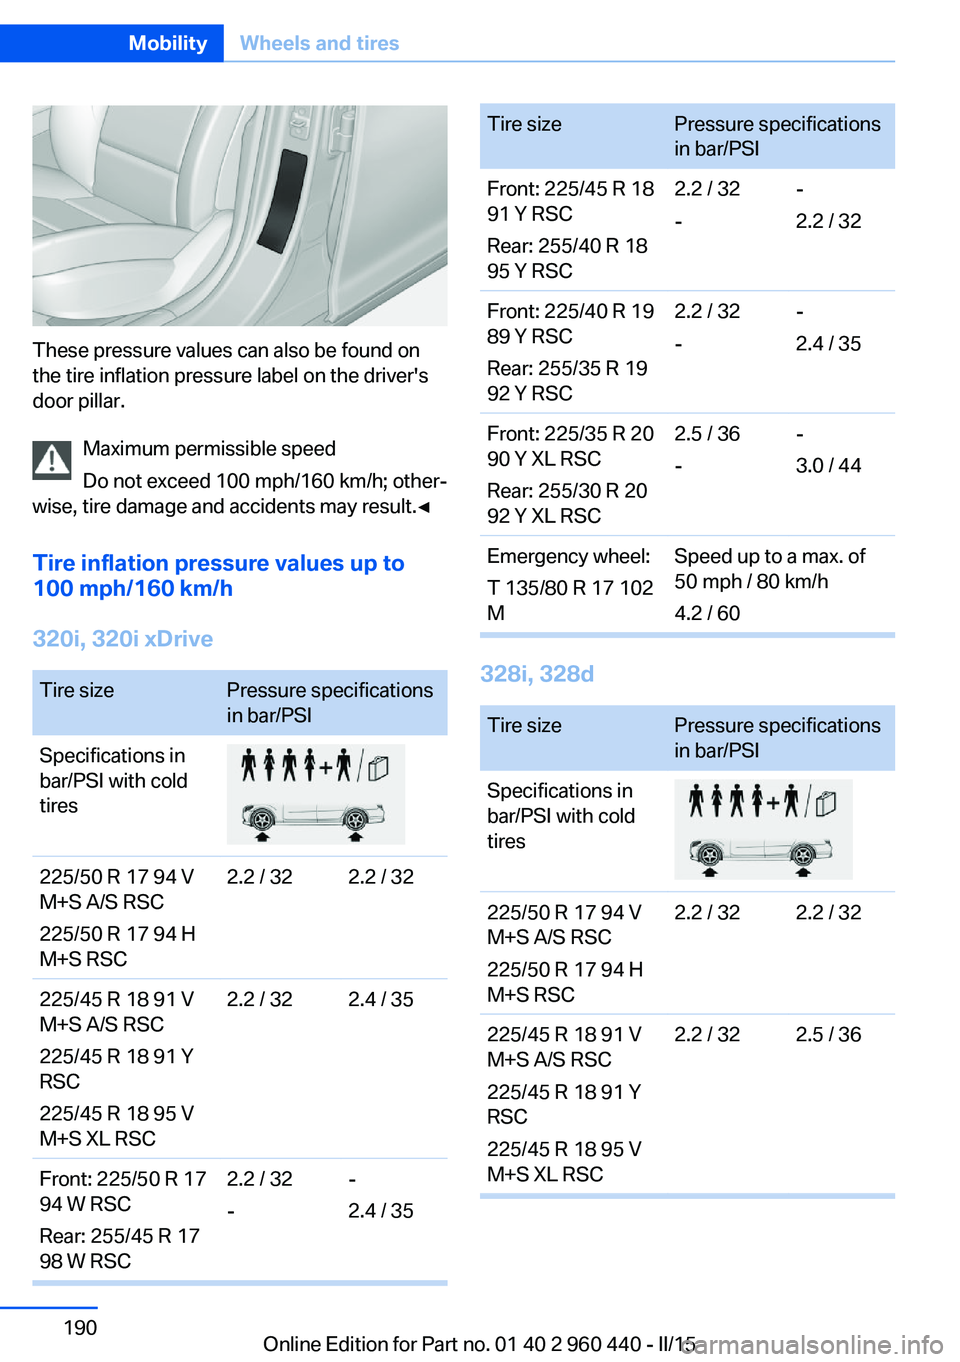
These pressure values can also be found on
the tire inflation pressure label on the driver's
door pillar.
Maximum permissible speed
Do not exceed 100 mph/160 km/h; other‐
wise, tire damage and accidents may result.◀
Tire inflation pressure values up to
100 mph/160 km/h
320i, 320i xDrive
Tire sizePressure specifications
in bar/PSISpecifications in
bar/PSI with cold
tires225/50 R 17 94 V
M+S A/S RSC
225/50 R 17 94 H
M+S RSC2.2 / 322.2 / 32225/45 R 18 91 V
M+S A/S RSC
225/45 R 18 91 Y
RSC
225/45 R 18 95 V
M+S XL RSC2.2 / 322.4 / 35Front: 225/50 R 17
94 W RSC
Rear: 255/45 R 17
98 W RSC2.2 / 32
--
2.4 / 35Tire sizePressure specifications
in bar/PSIFront: 225/45 R 18
91 Y RSC
Rear: 255/40 R 18
95 Y RSC2.2 / 32
--
2.2 / 32Front: 225/40 R 19
89 Y RSC
Rear: 255/35 R 19
92 Y RSC2.2 / 32
--
2.4 / 35Front: 225/35 R 20
90 Y XL RSC
Rear: 255/30 R 20
92 Y XL RSC2.5 / 36
--
3.0 / 44Emergency wheel:
T 135/80 R 17 102
MSpeed up to a max. of
50 mph / 80 km/h
4.2 / 60
328i, 328d
Tire sizePressure specifications
in bar/PSISpecifications in
bar/PSI with cold
tires225/50 R 17 94 V
M+S A/S RSC
225/50 R 17 94 H
M+S RSC2.2 / 322.2 / 32225/45 R 18 91 V
M+S A/S RSC
225/45 R 18 91 Y
RSC
225/45 R 18 95 V
M+S XL RSC2.2 / 322.5 / 36Seite 190MobilityWheels and tires190
Online Edition for Part no. 01 40 2 960 440 - II/15
Page 196 of 257
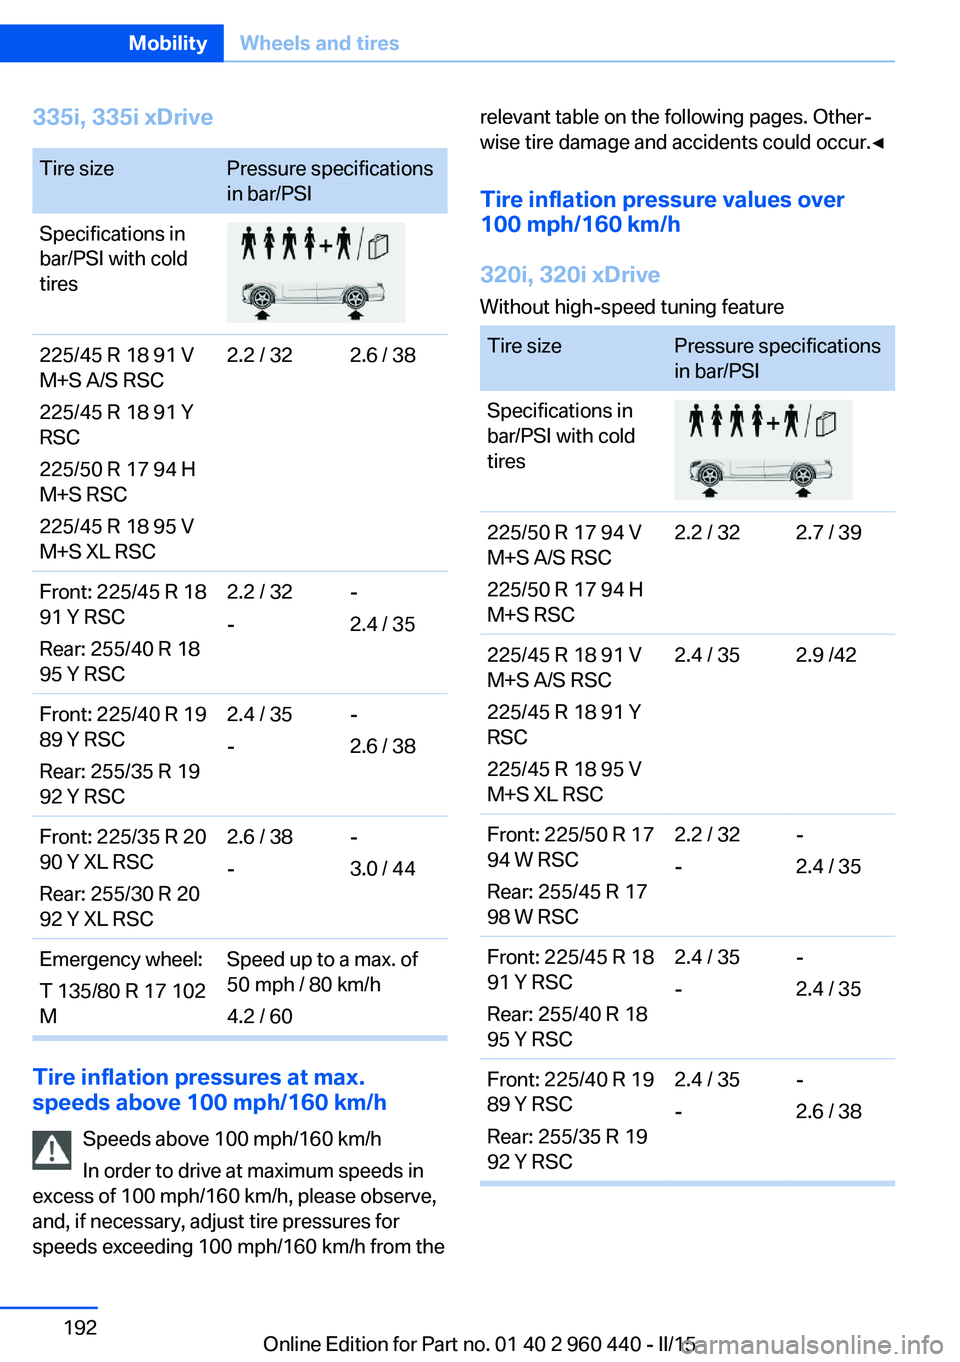
335i, 335i xDriveTire sizePressure specifications
in bar/PSISpecifications in
bar/PSI with cold
tires225/45 R 18 91 V
M+S A/S RSC
225/45 R 18 91 Y
RSC
225/50 R 17 94 H
M+S RSC
225/45 R 18 95 V
M+S XL RSC2.2 / 322.6 / 38Front: 225/45 R 18
91 Y RSC
Rear: 255/40 R 18
95 Y RSC2.2 / 32
--
2.4 / 35Front: 225/40 R 19
89 Y RSC
Rear: 255/35 R 19
92 Y RSC2.4 / 35
--
2.6 / 38Front: 225/35 R 20
90 Y XL RSC
Rear: 255/30 R 20
92 Y XL RSC2.6 / 38
--
3.0 / 44Emergency wheel:
T 135/80 R 17 102
MSpeed up to a max. of
50 mph / 80 km/h
4.2 / 60
Tire inflation pressures at max.
speeds above 100 mph/160 km/h
Speeds above 100 mph/160 km/h
In order to drive at maximum speeds in
excess of 100 mph/160 km/h, please observe,
and, if necessary, adjust tire pressures for
speeds exceeding 100 mph/160 km/h from the
relevant table on the following pages. Other‐
wise tire damage and accidents could occur.◀
Tire inflation pressure values over
100 mph/160 km/h
320i, 320i xDrive Without high-speed tuning featureTire sizePressure specifications
in bar/PSISpecifications in
bar/PSI with cold
tires225/50 R 17 94 V
M+S A/S RSC
225/50 R 17 94 H
M+S RSC2.2 / 322.7 / 39225/45 R 18 91 V
M+S A/S RSC
225/45 R 18 91 Y
RSC
225/45 R 18 95 V
M+S XL RSC2.4 / 352.9 /42Front: 225/50 R 17
94 W RSC
Rear: 255/45 R 17
98 W RSC2.2 / 32
--
2.4 / 35Front: 225/45 R 18
91 Y RSC
Rear: 255/40 R 18
95 Y RSC2.4 / 35
--
2.4 / 35Front: 225/40 R 19
89 Y RSC
Rear: 255/35 R 19
92 Y RSC2.4 / 35
--
2.6 / 38Seite 192MobilityWheels and tires192
Online Edition for Part no. 01 40 2 960 440 - II/15
Page 203 of 257
Rotating wheels between axlesDifferent wear patterns can occur on the frontand rear axles depending on individual driving
conditions. The tires can be rotated between
the axles to achieve even wear. Your service
center will be glad to advise you. After rotating,
check the tire pressure and correct if needed.
Rotating the tires is not permissible on vehi‐
cles with different tire sizes or rim sizes on the
front and rear axles.
Storage
Store wheels and tires in a cool, dry place with
as little exposure to light as possible.
Always protect tires against all contact with oil,
grease and fuels.
Do not exceed the maximum tire inflation pres‐
sure indicated on the side wall of the tire.
Run-flat tires
Label
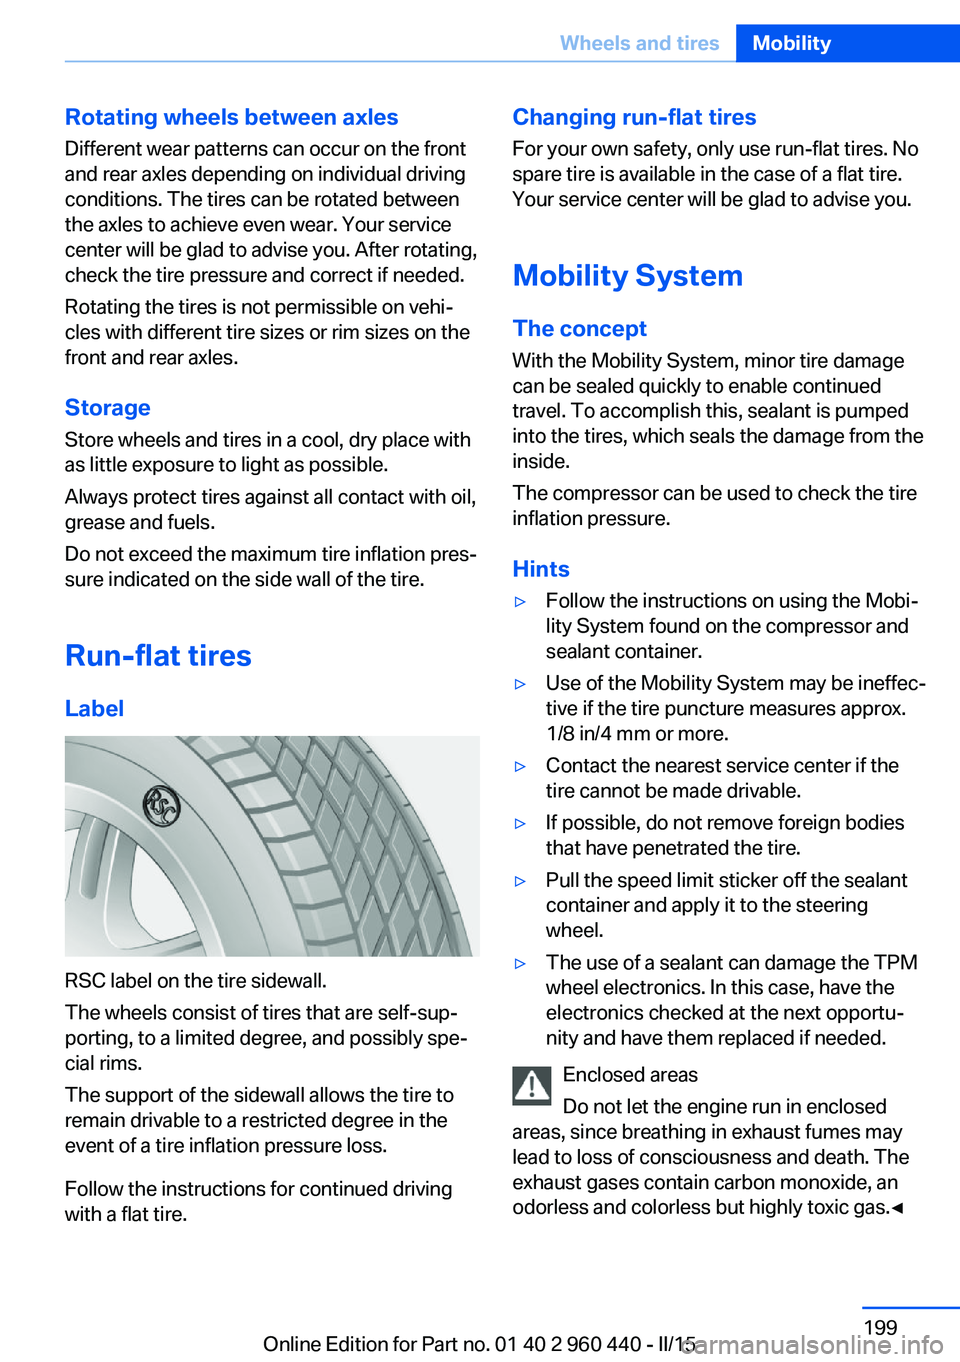
RSC label on the tire sidewall.
The wheels consist of tires that are self-sup‐
porting, to a limited degree, and possibly spe‐
cial rims.
The support of the sidewall allows the tire to
remain drivable to a restricted degree in the
event of a tire inflation pressure loss.
Follow the instructions for continued driving
with a flat tire.
Changing run-flat tires
For your own safety, only use run-flat tires. No
spare tire is available in the case of a flat tire.
Your service center will be glad to advise you.
Mobility System
The concept With the Mobility System, minor tire damagecan be sealed quickly to enable continued
travel. To accomplish this, sealant is pumped
into the tires, which seals the damage from the
inside.
The compressor can be used to check the tire
inflation pressure.
Hints▷Follow the instructions on using the Mobi‐
lity System found on the compressor and
sealant container.▷Use of the Mobility System may be ineffec‐
tive if the tire puncture measures approx.
1/8 in/4 mm or more.▷Contact the nearest service center if the
tire cannot be made drivable.▷If possible, do not remove foreign bodies
that have penetrated the tire.▷Pull the speed limit sticker off the sealant
container and apply it to the steering
wheel.▷The use of a sealant can damage the TPM
wheel electronics. In this case, have the
electronics checked at the next opportu‐
nity and have them replaced if needed.
Enclosed areas
Do not let the engine run in enclosed
areas, since breathing in exhaust fumes may
lead to loss of consciousness and death. The
exhaust gases contain carbon monoxide, an
odorless and colorless but highly toxic gas.◀
Seite 199Wheels and tiresMobility199
Online Edition for Part no. 01 40 2 960 440 - II/15
Page 204 of 257
StorageThe Mobility System is located under the
cargo floor panel.
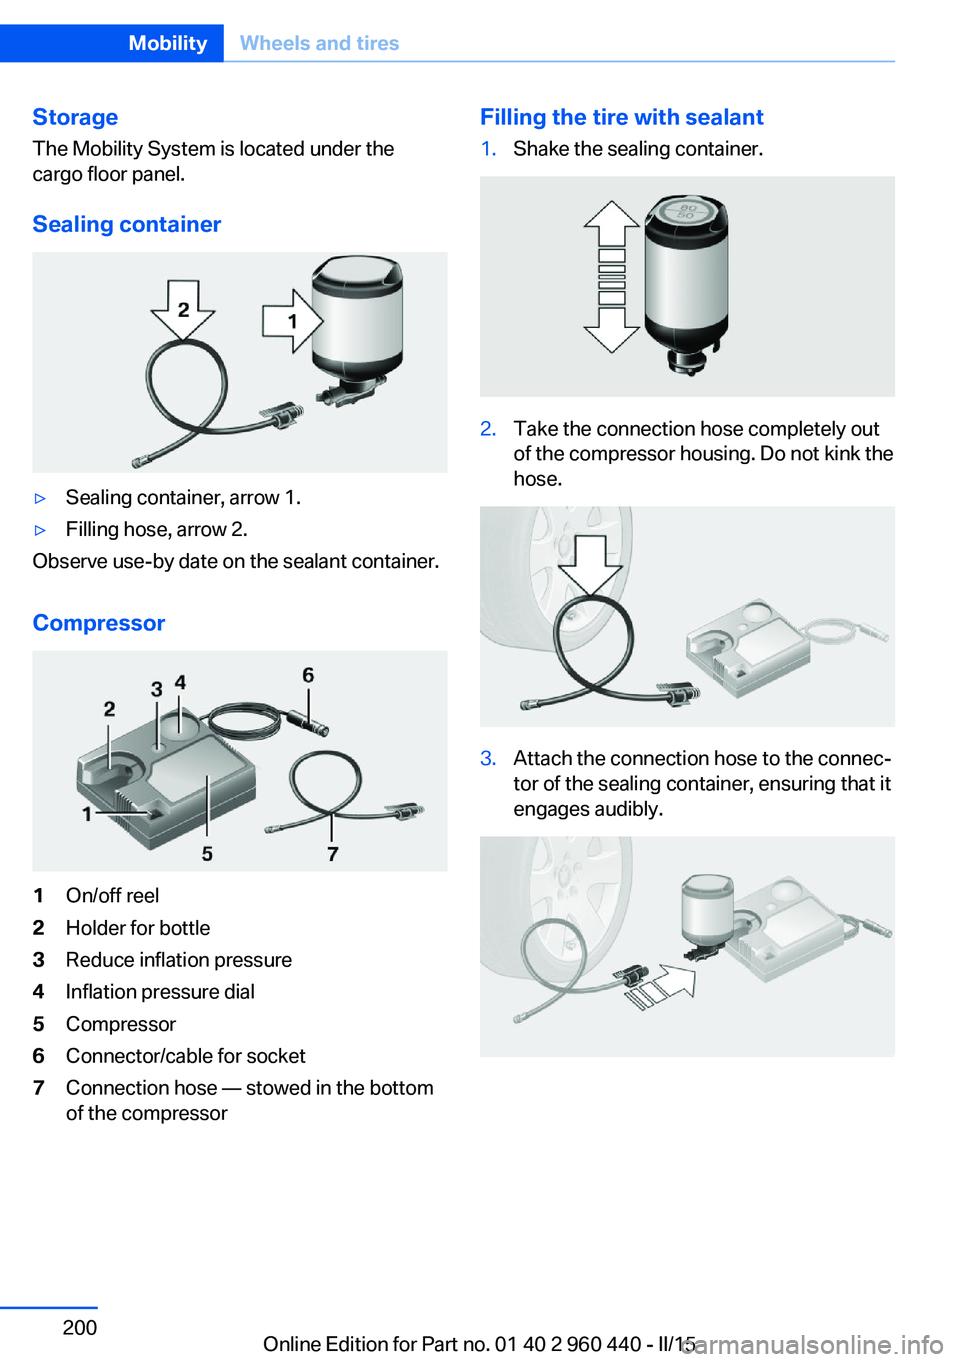
Sealing container▷Sealing container, arrow 1.▷Filling hose, arrow 2.
Observe use-by date on the sealant container.
Compressor
1On/off reel2Holder for bottle3Reduce inflation pressure4Inflation pressure dial5Compressor6Connector/cable for socket7Connection hose — stowed in the bottom
of the compressorFilling the tire with sealant1.Shake the sealing container.2.Take the connection hose completely out
of the compressor housing. Do not kink the
hose.3.Attach the connection hose to the connec‐
tor of the sealing container, ensuring that it
engages audibly.Seite 200MobilityWheels and tires200
Online Edition for Part no. 01 40 2 960 440 - II/15
Page 205 of 257
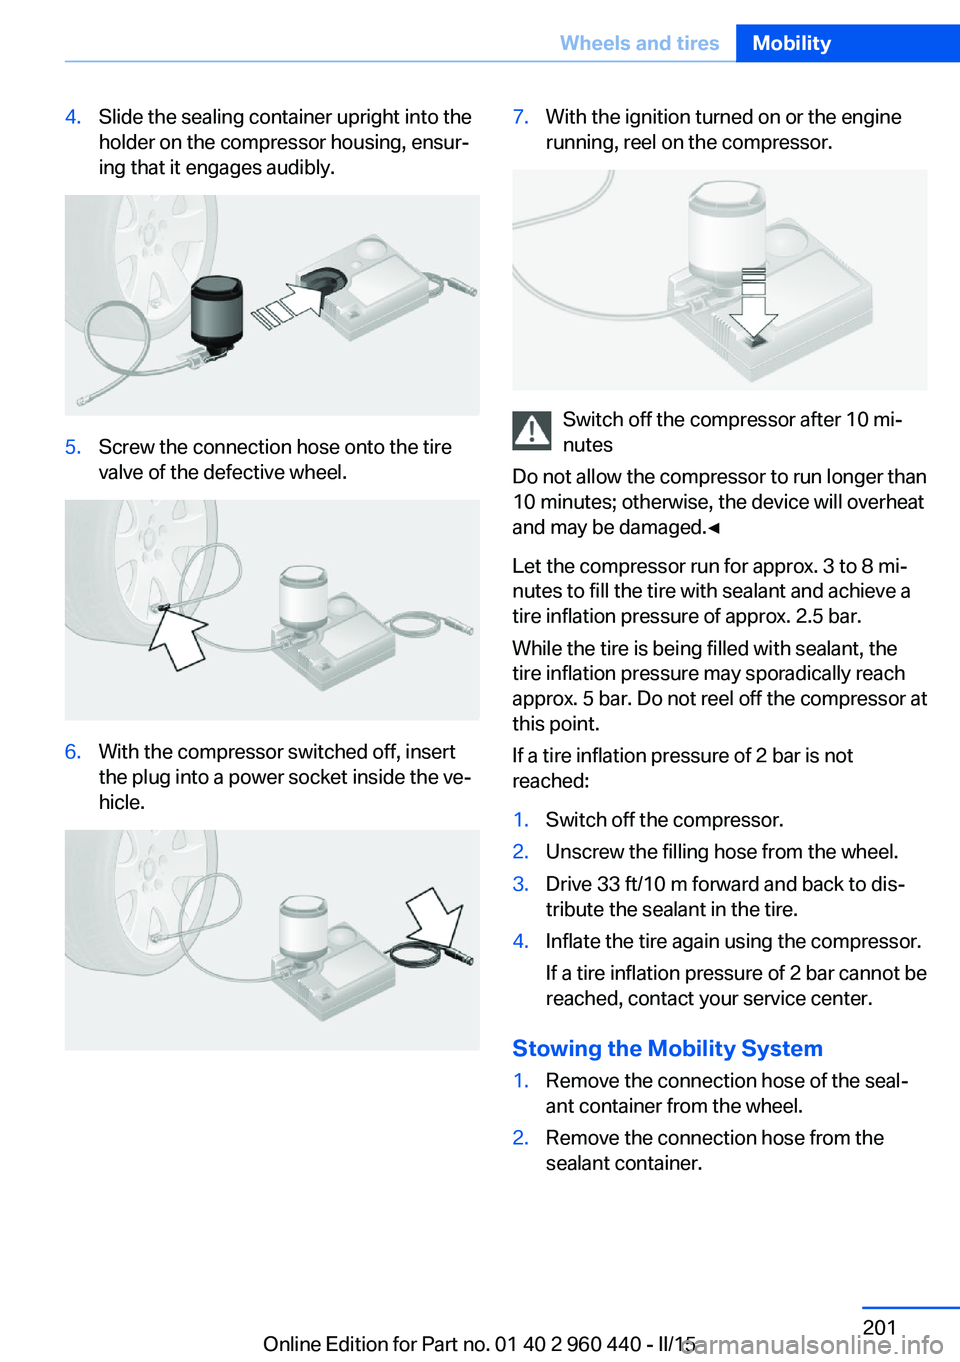
4.Slide the sealing container upright into the
holder on the compressor housing, ensur‐
ing that it engages audibly.5.Screw the connection hose onto the tire
valve of the defective wheel.6.With the compressor switched off, insert
the plug into a power socket inside the ve‐
hicle.7.With the ignition turned on or the engine
running, reel on the compressor.
Switch off the compressor after 10 mi‐
nutes
Do not allow the compressor to run longer than
10 minutes; otherwise, the device will overheat
and may be damaged.◀
Let the compressor run for approx. 3 to 8 mi‐
nutes to fill the tire with sealant and achieve a
tire inflation pressure of approx. 2.5 bar.
While the tire is being filled with sealant, the
tire inflation pressure may sporadically reach
approx. 5 bar. Do not reel off the compressor at
this point.
If a tire inflation pressure of 2 bar is not
reached:
1.Switch off the compressor.2.Unscrew the filling hose from the wheel.3.Drive 33 ft/10 m forward and back to dis‐
tribute the sealant in the tire.4.Inflate the tire again using the compressor.
If a tire inflation pressure of 2 bar cannot be
reached, contact your service center.
Stowing the Mobility System
1.Remove the connection hose of the seal‐
ant container from the wheel.2.Remove the connection hose from the
sealant container.Seite 201Wheels and tiresMobility201
Online Edition for Part no. 01 40 2 960 440 - II/15
Page 206 of 257
3.Wrap the empty sealant container and con‐
nection hose in suitable material to avoid
dirtying the cargo area.4.Stow the Mobility System back in the vehi‐
cle.
Distributing the sealant
Immediately drive approx. 5 miles/10 km to en‐
sure that the sealant is evenly distributed in the
tire.
Do not exceed a speed of 50 mph/80 km/h.
If possible, do not drive at speeds less than
12 mph/20 km/h.
To correct the tire inflation pressure
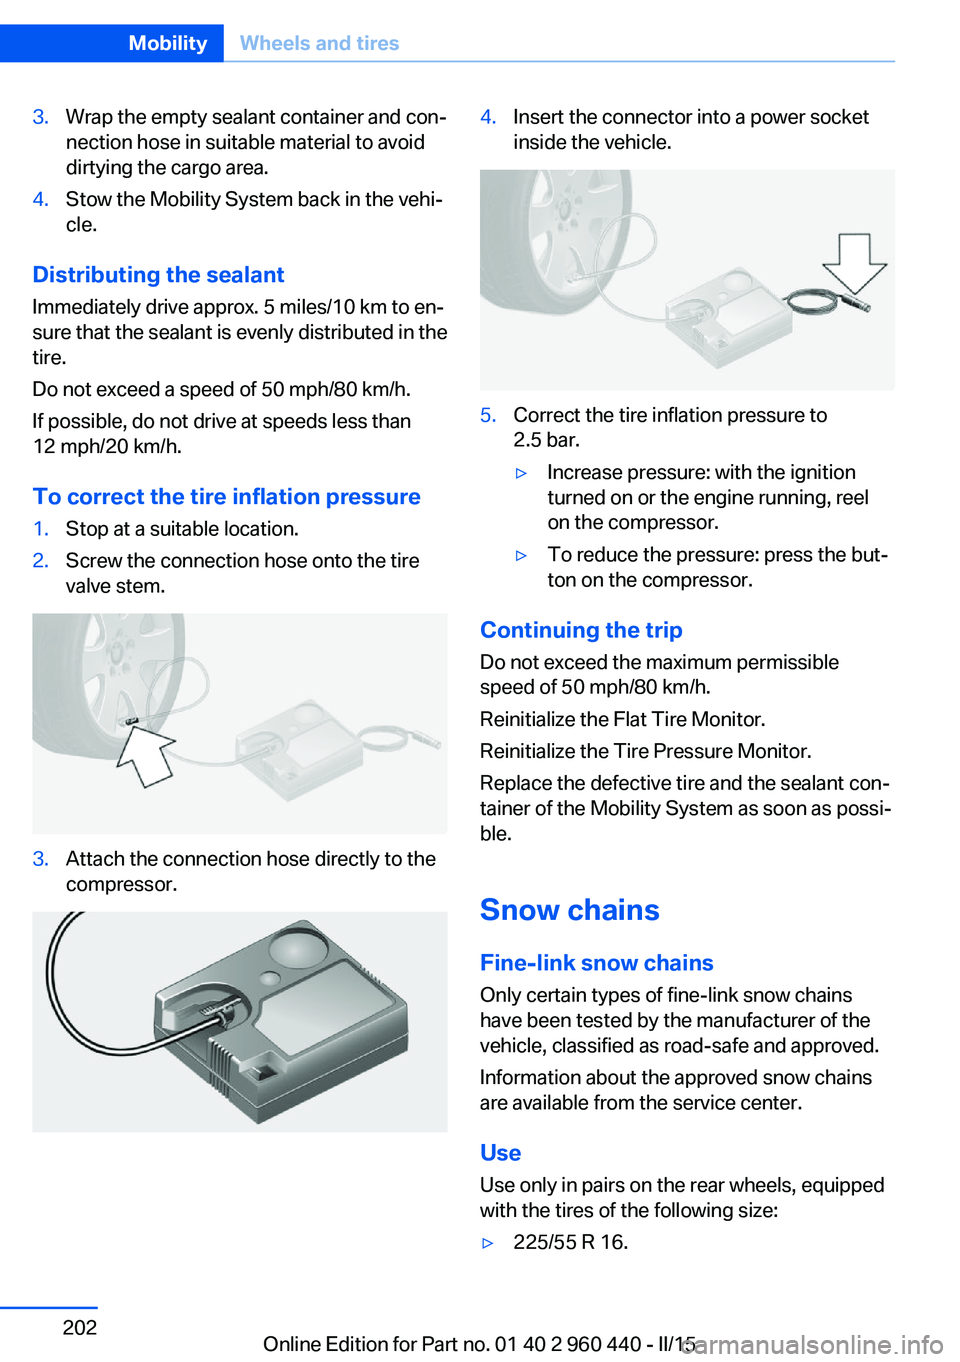
1.Stop at a suitable location.2.Screw the connection hose onto the tire
valve stem.3.Attach the connection hose directly to the
compressor.4.Insert the connector into a power socket
inside the vehicle.5.Correct the tire inflation pressure to
2.5 bar.▷Increase pressure: with the ignition
turned on or the engine running, reel
on the compressor.▷To reduce the pressure: press the but‐
ton on the compressor.
Continuing the trip
Do not exceed the maximum permissible
speed of 50 mph/80 km/h.
Reinitialize the Flat Tire Monitor.
Reinitialize the Tire Pressure Monitor.
Replace the defective tire and the sealant con‐
tainer of the Mobility System as soon as possi‐
ble.
Snow chains Fine-link snow chains
Only certain types of fine-link snow chains
have been tested by the manufacturer of the
vehicle, classified as road-safe and approved.
Information about the approved snow chains
are available from the service center.
Use
Use only in pairs on the rear wheels, equipped
with the tires of the following size:
▷225/55 R 16.Seite 202MobilityWheels and tires202
Online Edition for Part no. 01 40 2 960 440 - II/15
Page 250 of 257
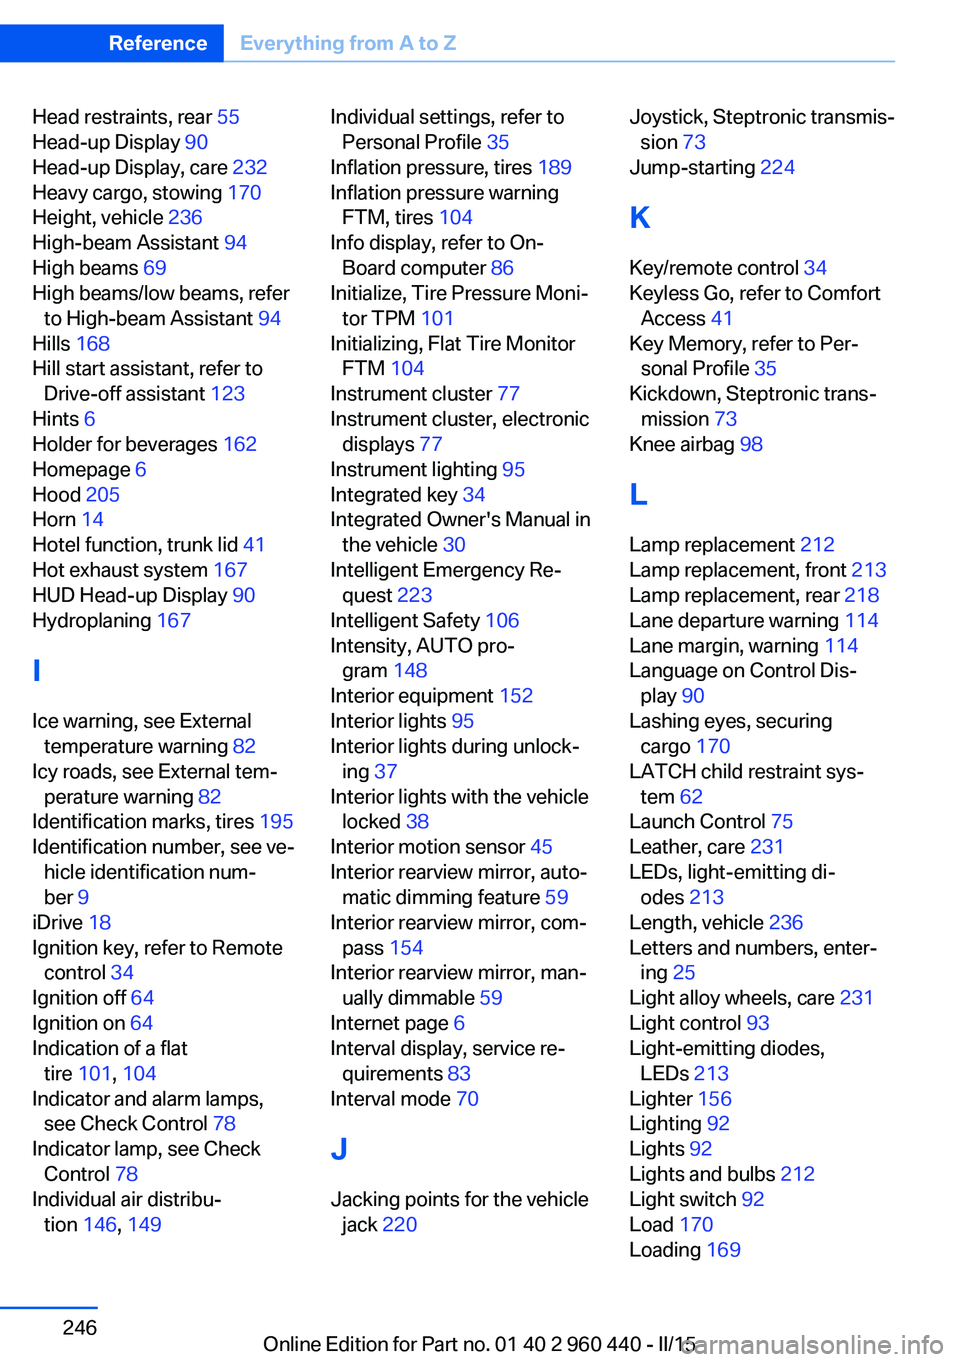
Head restraints, rear 55
Head-up Display 90
Head-up Display, care 232
Heavy cargo, stowing 170
Height, vehicle 236
High-beam Assistant 94
High beams 69
High beams/low beams, refer to High-beam Assistant 94
Hills 168
Hill start assistant, refer to Drive-off assistant 123
Hints 6
Holder for beverages 162
Homepage 6
Hood 205
Horn 14
Hotel function, trunk lid 41
Hot exhaust system 167
HUD Head-up Display 90
Hydroplaning 167
I Ice warning, see External temperature warning 82
Icy roads, see External tem‐ perature warning 82
Identification marks, tires 195
Identification number, see ve‐ hicle identification num‐
ber 9
iDrive 18
Ignition key, refer to Remote control 34
Ignition off 64
Ignition on 64
Indication of a flat tire 101 , 104
Indicator and alarm lamps, see Check Control 78
Indicator lamp, see Check Control 78
Individual air distribu‐ tion 146, 149 Individual settings, refer to
Personal Profile 35
Inflation pressure, tires 189
Inflation pressure warning FTM, tires 104
Info display, refer to On- Board computer 86
Initialize, Tire Pressure Moni‐ tor TPM 101
Initializing, Flat Tire Monitor FTM 104
Instrument cluster 77
Instrument cluster, electronic displays 77
Instrument lighting 95
Integrated key 34
Integrated Owner's Manual in the vehicle 30
Intelligent Emergency Re‐ quest 223
Intelligent Safety 106
Intensity, AUTO pro‐ gram 148
Interior equipment 152
Interior lights 95
Interior lights during unlock‐ ing 37
Interior lights with the vehicle locked 38
Interior motion sensor 45
Interior rearview mirror, auto‐ matic dimming feature 59
Interior rearview mirror, com‐ pass 154
Interior rearview mirror, man‐ ually dimmable 59
Internet page 6
Interval display, service re‐ quirements 83
Interval mode 70
J
Jacking points for the vehicle jack 220 Joystick, Steptronic transmis‐
sion 73
Jump-starting 224
K
Key/remote control 34
Keyless Go, refer to Comfort Access 41
Key Memory, refer to Per‐ sonal Profile 35
Kickdown, Steptronic trans‐ mission 73
Knee airbag 98
L
Lamp replacement 212
Lamp replacement, front 213
Lamp replacement, rear 218
Lane departure warning 114
Lane margin, warning 114
Language on Control Dis‐ play 90
Lashing eyes, securing cargo 170
LATCH child restraint sys‐ tem 62
Launch Control 75
Leather, care 231
LEDs, light-emitting di‐ odes 213
Length, vehicle 236
Letters and numbers, enter‐ ing 25
Light alloy wheels, care 231
Light control 93
Light-emitting diodes, LEDs 213
Lighter 156
Lighting 92
Lights 92
Lights and bulbs 212
Light switch 92
Load 170
Loading 169 Seite 246ReferenceEverything from A to Z246
Online Edition for Part no. 01 40 2 960 440 - II/15
Page 254 of 257
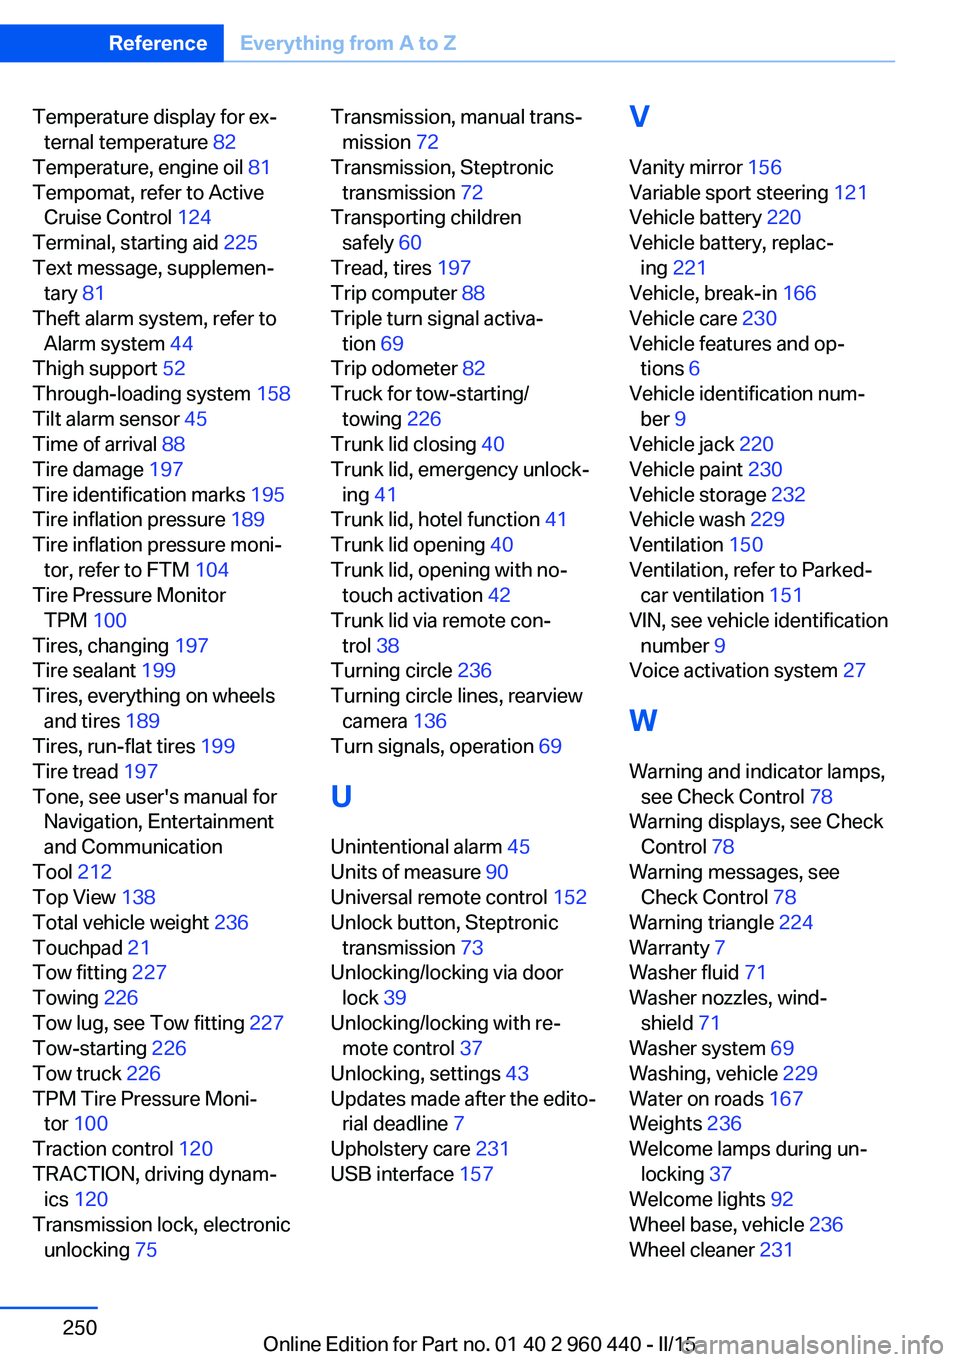
Temperature display for ex‐ternal temperature 82
Temperature, engine oil 81
Tempomat, refer to Active Cruise Control 124
Terminal, starting aid 225
Text message, supplemen‐ tary 81
Theft alarm system, refer to Alarm system 44
Thigh support 52
Through-loading system 158
Tilt alarm sensor 45
Time of arrival 88
Tire damage 197
Tire identification marks 195
Tire inflation pressure 189
Tire inflation pressure moni‐ tor, refer to FTM 104
Tire Pressure Monitor TPM 100
Tires, changing 197
Tire sealant 199
Tires, everything on wheels and tires 189
Tires, run-flat tires 199
Tire tread 197
Tone, see user's manual for Navigation, Entertainment
and Communication
Tool 212
Top View 138
Total vehicle weight 236
Touchpad 21
Tow fitting 227
Towing 226
Tow lug, see Tow fitting 227
Tow-starting 226
Tow truck 226
TPM Tire Pressure Moni‐ tor 100
Traction control 120
TRACTION, driving dynam‐ ics 120
Transmission lock, electronic unlocking 75 Transmission, manual trans‐
mission 72
Transmission, Steptronic transmission 72
Transporting children safely 60
Tread, tires 197
Trip computer 88
Triple turn signal activa‐ tion 69
Trip odometer 82
Truck for tow-starting/ towing 226
Trunk lid closing 40
Trunk lid, emergency unlock‐ ing 41
Trunk lid, hotel function 41
Trunk lid opening 40
Trunk lid, opening with no- touch activation 42
Trunk lid via remote con‐ trol 38
Turning circle 236
Turning circle lines, rearview camera 136
Turn signals, operation 69
U Unintentional alarm 45
Units of measure 90
Universal remote control 152
Unlock button, Steptronic transmission 73
Unlocking/locking via door lock 39
Unlocking/locking with re‐ mote control 37
Unlocking, settings 43
Updates made after the edito‐ rial deadline 7
Upholstery care 231
USB interface 157 V
Vanity mirror 156
Variable sport steering 121
Vehicle battery 220
Vehicle battery, replac‐ ing 221
Vehicle, break-in 166
Vehicle care 230
Vehicle features and op‐ tions 6
Vehicle identification num‐ ber 9
Vehicle jack 220
Vehicle paint 230
Vehicle storage 232
Vehicle wash 229
Ventilation 150
Ventilation, refer to Parked- car ventilation 151
VIN, see vehicle identification number 9
Voice activation system 27
W Warning and indicator lamps, see Check Control 78
Warning displays, see Check Control 78
Warning messages, see Check Control 78
Warning triangle 224
Warranty 7
Washer fluid 71
Washer nozzles, wind‐ shield 71
Washer system 69
Washing, vehicle 229
Water on roads 167
Weights 236
Welcome lamps during un‐ locking 37
Welcome lights 92
Wheel base, vehicle 236
Wheel cleaner 231 Seite 250ReferenceEverything from A to Z250
Online Edition for Part no. 01 40 2 960 440 - II/15