light BMW 325I 2002 Owner's Manual
[x] Cancel search | Manufacturer: BMW, Model Year: 2002, Model line: 325I, Model: BMW 325I 2002Pages: 155, PDF Size: 2.17 MB
Page 82 of 155
82n
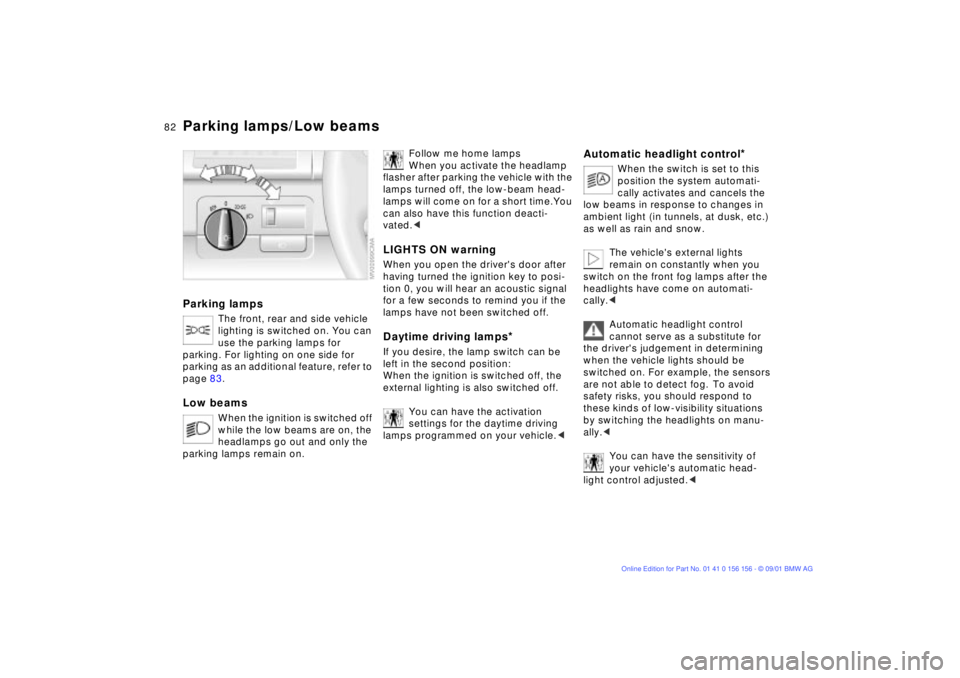
Parking lamps/Low beamsParking lamps
The front, rear and side vehicle
lighting is switched on. You can
use the parking lamps for
parking. For lighting on one side for
parking as an additional feature, refer to
page 83.
Low beams
When the ignition is switched off
while the low beams are on, the
headlamps go out and only the
parking lamps remain on.
Follow me home lamps
When you activate the headlamp
flasher after parking the vehicle with the
lamps turned off, the low-beam head-
lamps will come on for a short time.You
can also have this function deacti-
vated.<
LIGHTS ON warningWhen you open the driver's door after
having turned the ignition key to posi-
tion 0, you will hear an acoustic signal
for a few seconds to remind you if the
lamps have not been switched off.Daytime driving lamps
*
If you desire, the lamp switch can be
left in the second position:
When the ignition is switched off, the
external lighting is also switched off.
You can have the activation
settings for the daytime driving
lamps programmed on your vehicle.<
Automatic headlight control
*
When the switch is set to this
position the system automati-
cally activates and cancels the
low beams in response to changes in
ambient light ( in tunnels, at dusk, etc.)
as well as rain and snow.
The vehicle's external lights
remain on constantly when you
switch on the front fog lamps after the
headlights have come on automati-
cally.<
Automatic headlight control
cannot serve as a substitute for
the driver's judgement in determining
when the vehicle lights should be
switched on. For example, the sensors
are not able to detect fog. To avoid
safety risks, you should respond to
these kinds of low-visibility situations
by switching the headlights on manu-
ally.< You can have the sensitivity of
your vehicle's automatic head-
light control adjusted.<
Page 83 of 155
83n
OverviewControlsMaintenanceRepairsDataIndex
Instrument lighting
High beams/Standing lamps
Fog lamps
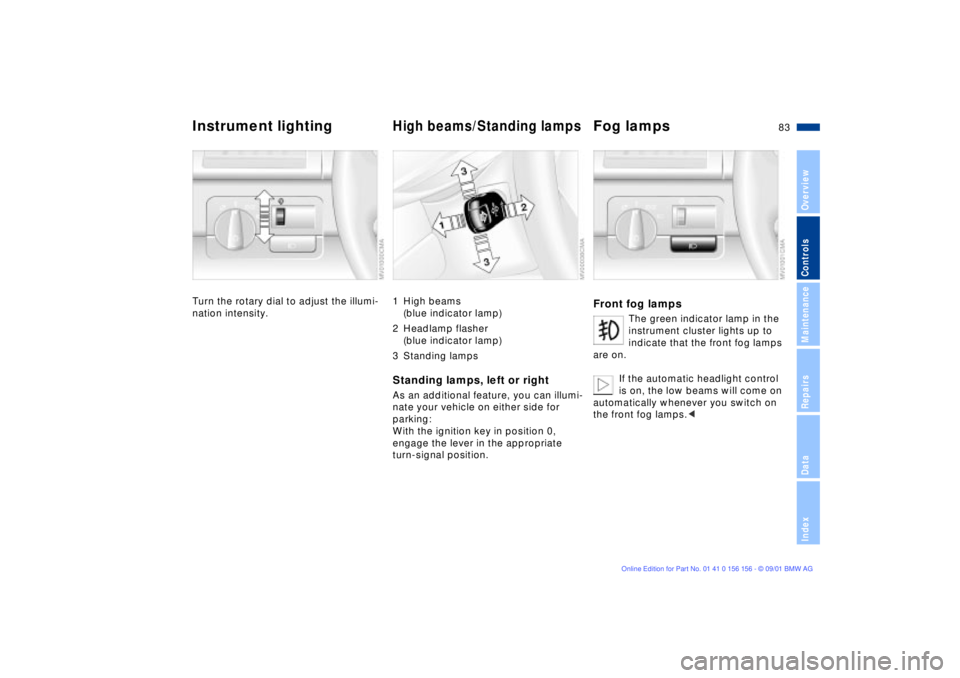
Turn the rotary dial to adjust the illumi-
nation intensity.
1 High beams
(blue indicator lamp)
2 Headlamp flasher
(blue indicator lamp)
3 Standing lampsStanding lamps, left or rightAs an additional feature, you can illumi-
nate your vehicle on either side for
parking:
With the ignition key in position 0,
engage the lever in the appropriate
turn-signal position.
Front fog lamps
The green indicator lamp in the
instrument cluster lights up to
indicate that the front fog lamps
are on.
If the automatic headlight control
is on, the low beams will come on
automatically whenever you switch on
the front fog lamps.<
Page 92 of 155
92n
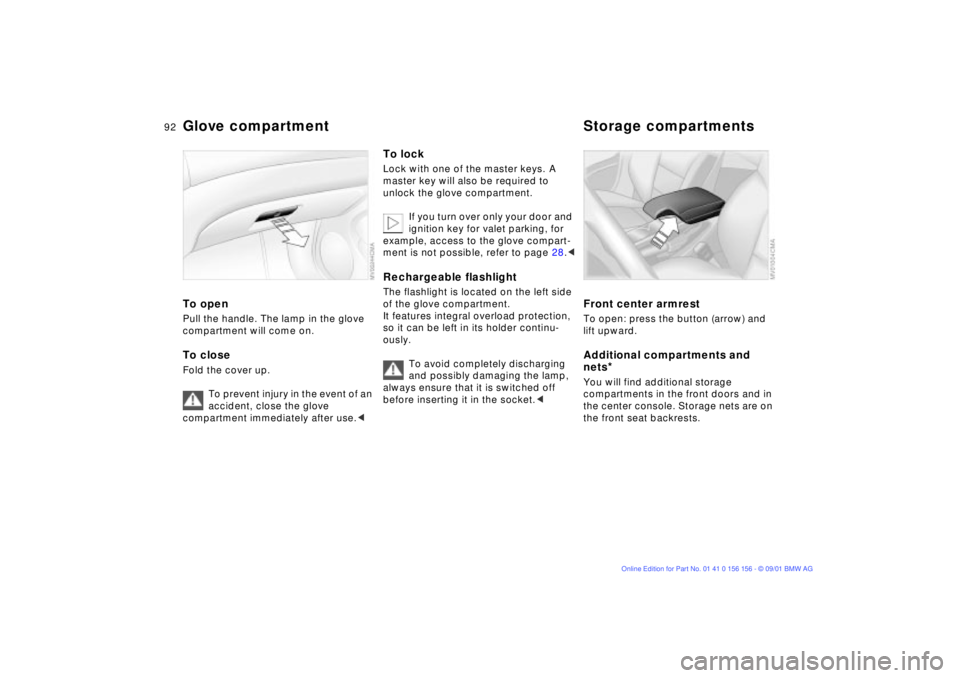
Glove compartment Storage compartmentsTo openPull the handle. The lamp in the glove
compartment will come on.To closeFold the cover up.
To prevent injury in the event of an
accident, close the glove
compartment immediately after use.<
To lockLock with one of the master keys. A
master key will also be required to
unlock the glove compartment.
If you turn over only your door and
ignition key for valet parking, for
example, access to the glove compart-
ment is not possible, refer to page 28.
It features integral overload protection,
so it can be left in its holder continu-
ously.
To avoid completely discharging
and possibly damaging the lamp,
always ensure that it is switched off
before inserting it in the socket.<
Front center armrest To open: press the button (arrow) and
lift upward.Additional compartments and
nets
*
You will find additional storage
compartments in the front doors and in
the center console. Storage nets are on
the front seat backrests.
Page 94 of 155
94n
Cellular phone
*
Ashtray, front
*
Hands-free systemOn vehicles with telephone prepara-
tion
* or communications package
* the
cover for the hands-free microphone is
located in the headliner near the interior
lamp.
For further information on using your
cellular phone, refer to the separate
"Owner's Manual".
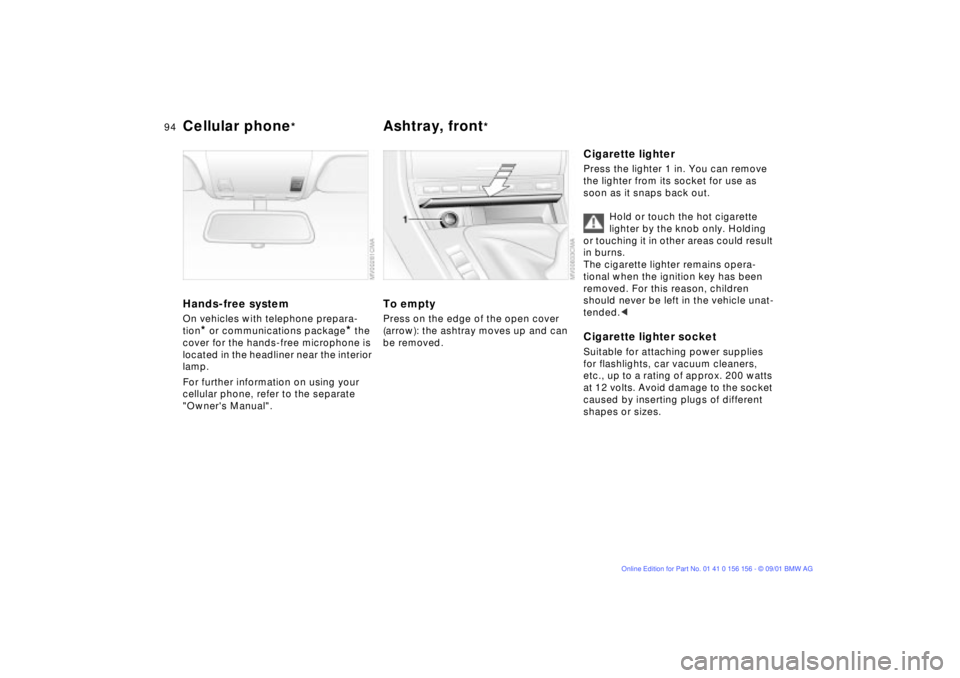
To emptyPress on the edge of the open cover
(arrow): the ashtray moves up and can
be removed.
Cigarette lighterPress the lighter 1 in. You can remove
the lighter from its socket for use as
soon as it snaps back out.
Hold or touch the hot cigarette
lighter by the knob only. Holding
or touching it in other areas could result
in burns.
The cigarette lighter remains opera-
tional when the ignition key has been
removed. For this reason, children
should never be left in the vehicle unat-
tended.
etc., up to a rating of approx. 200 watts
at 12 volts. Avoid damage to the socket
caused by inserting plugs of different
shapes or sizes.
Page 97 of 155
97n
OverviewControlsMaintenanceRepairsDataIndex
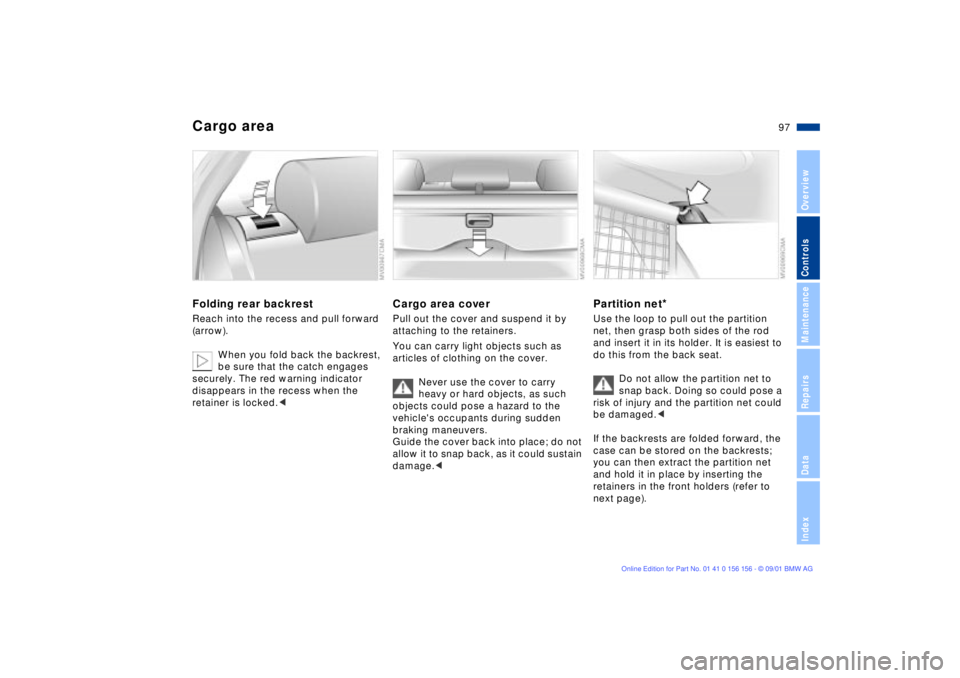
Cargo areaFolding rear backrestReach into the recess and pull forward
(arrow).
When you fold back the backrest,
be sure that the catch engages
securely. The red warning indicator
disappears in the recess when the
retainer is locked.<
Cargo area coverPull out the cover and suspend it by
attaching to the retainers.
You can carry light objects such as
articles of clothing on the cover.
Never use the cover to carry
heavy or hard objects, as such
objects could pose a hazard to the
vehicle's occupants during sudden
braking maneuvers.
Guide the cover back into place; do not
allow it to snap back, as it could sustain
damage.<
Partition net
*
Use the loop to pull out the partition
net, then grasp both sides of the rod
and insert it in its holder. It is easiest to
do this from the back seat.
Do not allow the partition net to
snap back. Doing so could pose a
risk of injury and the partition net could
be damaged.<
If the backrests are folded forward, the
case can be stored on the backrests;
you can then extract the partition net
and hold it in place by inserting the
retainers in the front holders (refer to
next page).
Page 100 of 155
100n
Cargo loading Roof-mounted luggage rack
*
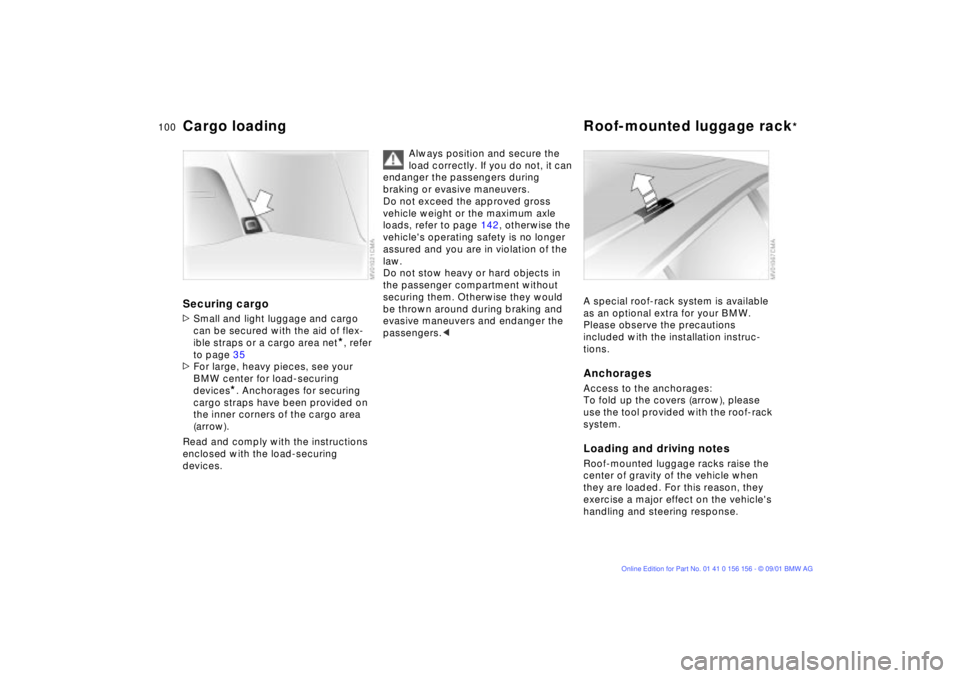
Securing cargo >Small and light luggage and cargo
can be secured with the aid of flex-
ible straps or a cargo area net
*, refer
to page 35
>For large, heavy pieces, see your
BMW center for load-securing
devices
*. Anchorages for securing
cargo straps have been provided on
the inner corners of the cargo area
(arrow).
Read and comply with the instructions
enclosed with the load-securing
devices.
Always position and secure the
load correctly. If you do not, it can
endanger the passengers during
braking or evasive maneuvers.
Do not exceed the approved gross
vehicle weight or the maximum axle
loads, refer to page 142, otherwise the
vehicle's operating safety is no longer
assured and you are in violation of the
law.
Do not stow heavy or hard objects in
the passenger compartment without
securing them. Otherwise they would
be thrown around during braking and
evasive maneuvers and endanger the
passengers.<
A special roof-rack system is available
as an optional extra for your BMW.
Please observe the precautions
included with the installation instruc-
tions.AnchoragesAccess to the anchorages:
To fold up the covers (arrow), please
use the tool provided with the roof-rack
system.Loading and driving notesRoof-mounted luggage racks raise the
center of gravity of the vehicle when
they are loaded. For this reason, they
exercise a major effect on the vehicle's
handling and steering response.
Page 104 of 155

104n
To ensure that your vehicle provides
maximum economy throughout a long
service life, we request that you
observe the following information.
Engine and differentialUp to 1,200 miles (2,000 km):
Constantly vary both engine and vehicle
speed, remembering not to exceed
4,500 rpm or 100 mph (160 km/h)
during this period.
Always obey all official speed limits.
Do not use full throttle, and avoid
pressing the accelerator beyond the
kickdown point during these initial
miles.
You can then proceed to increase both
engine and vehicle speed once the
initial 1,200 miles (2,000 km) have
elapsed.
You should also observe the same
break-in procedures if the engine or
differential is replaced later in the
course of the vehicle's life.
TiresDue to technical factors associated
with their manufacture, tires do not
achieve their full traction potential until
after an initial break-in period. We thus
ask you to drive with extra care during
the first 200 miles (300 km).
Always obey all official speed limits.
When the vehicle is operated on
wet or slushy roads, a wedge of
water may form between the tire and
the road surface. This phenomenon is
referred to as aquaplaning, or hydro-
planing, and can lead to partial or
complete loss of traction, vehicle
control and braking effectiveness.
Reduce your speed on wet roads.
rotors achieve the optimal pad-surface
and wear patterns required for trouble-
free operation and an extended service
life later on.
To break-in the separate parking brake
drums, apply the parking brake lightly
when coasting to a standstill (at a traffic
signal, for instance), provided that
traffic conditions allow you to do so.
To avoid corrosion, repeat this proce-
dure from time to time.
The brake lamps do not come on
when the parking brake is
engaged.
Vacuum for the brake system servo unit
on your BMW is available only when the
engine is running. When you move the
vehicle with the engine switched off Ð
when towing, for example Ð substan-
tially higher levels of pedal force will be
required to brake the vehicle.
operate at optimum efficiency.
Remember to engage the clutch care-
fully during this initial period.
Break-in procedures
Page 105 of 155

105n
OverviewControlsMaintenanceRepairsDataIndex
Driving notes Antilock Brake System
Brakes: do not drive with your foot
resting on the brake pedal. Even
light but consistent pressure on the
brake pedal can lead to high tempera-
tures, accelerated brake wear and
possibly even brake failure.
Aquaplaning: when driving on wet or
slushy roads, reduce your speed. If you
do not, a wedge of water may form
between tires and road surface. This
phenomenon can lead to partial or
complete loss of contact between the
tires and road surface, vehicle control
and braking ability.
Driving through water: do not drive
through water on the road if it is deeper
than 1 ft (30 cm), and then only at
walking speed. Otherwise, the vehicle's
engine, the electrical systems and the
transmission may be damaged.
Cargo area cover: never use it to store
heavy or hard objects, as otherwise
occupants could be injured during
braking maneuvers.
Clothes hooks: when hanging clothing
from the hooks, be sure that they will
not obstruct the driver's vision. Do not
hang heavy objects on the hooks. If you
do so, they could cause personal injury
during braking or evasive maneuvers.<
The conceptThe Antilock Brake System (ABS) keeps
the wheels from locking during braking,
thereby enhancing active driving safety.Braking with ABSIf you are in a situation that requires full
braking, you will exploit the full benefits
of the ABS system if you apply
maximum pedal pressure ("panic stop").
Since the vehicle maintains steering
responsiveness, you can avoid possible
obstacles with a minimum of steering
effort, despite the full brake application.
Pulsation at the brake pedal combined
with sounds from the hydraulic circuits
indicates to the driver that ABS is in its
active mode.
Page 106 of 155

106n
Brake systemBrake fluid level If the brake fluid level is too low and
brake pedal travel has become longer,
there may be a defect in one of the two
brake system's hydraulic circuits.
Proceed to the nearest BMW
center. It may be necessary to
apply higher levels of pressure to the
pedal when stopping and braking
distances may also be longer. Please
remember to adapt your driving style
accordingly.
and operating conditions in which
braking is restricted to gentle, low-
pressure applications will all increase
the tendency for corrosion to form on
the rotors; this is often accompanied by
a simultaneous accumulation of
contamination on the brake pads. The
pads must exert a certain minimal level
of pressure against the rotors for the
disc brakes' inherent self-cleaning
effect to remain effective; the pressure
available under the above conditions
may not provide adequate cleansing.
If the brake rotors are corroded, they
will tend to respond to braking with a
pulsating effect that even extended
brake applications will fail to cure.
When driving in heavy rain and on wet
roads it is useful to apply light pressure
to the brake pedal every few miles.
Monitor traffic conditions to ensure that
this maneuver does not pose a hazard
to you or to other road users. The heat
generated in this process helps dry the
pads and rotors to ensure that your
brake system will respond with undi-
minished efficiency when you need it.
When descending steep hills and
extended grades, downshift to a gear
that will allow you to continue safely
with only a minimal amount of braking.
By minimizing the loads placed on the
brake system, this strategy helps
ensure that optimal brake system
response will remain available at all
times. Use care to avoid exceeding the
approved engine-speed range, refer to
page 65.Do not coast with the clutch
depressed or with the transmis-
sion or selector lever in neutral. Do not
coast with the engine switched off. The
engine provides no braking effect when
the clutch is depressed and there is no
power-assist for braking or steering
when the engine is not running.
BMW 325xi: always refer all brake
inspection and service work to your
BMW center, as failure to observe the
special procedures could result in
damage to brake system components.
Never allow floor mats, carpets or any
other objects to protrude into the area
around the accelerator, clutch and
brake pedals and obstruct their move-
ment.<
Brake pads
For your own safety: use only
brake pads that the manufacturer
has released for your particular vehicle
model. The manufacturer cannot eval-
uate non-approved brake pads to
determine if they are suited for use, and
therefore cannot ensure the operating
safety of the vehicle if they are
installed.<
Page 111 of 155

111n
OverviewControlsMaintenanceRepairsDataIndex
Winter tiresChoosing the right tireBMW recommends winter tires (M+S
radial tires) for operation under
inclement winter driving conditions.
While all-season tires (M+S designa-
tion) provide better winter traction than
summer tires with the load ratings H, V,
W, Y and ZR, they generally do not
achieve the performance of winter tires.
In the interest of safe tracking and
steering response, install winter tires
made by the same manufacturer having
the same tread configuration on all four
wheels.Never exceed the maximum
speed for which the winter tires
are rated.
Unprofessional attempts by laymen to
service tires can lead to damage and
accidents.
Have this work performed by trained
professionals only. Any BMW center
has the required technical knowledge
and the proper equipment and will be
happy to assist you.<
Tire condition, tire pressureOnce the tire wears to below 0.16 in
(4 mm), winter tires display a percep-
tible decrease in their ability to cope
with winter driving conditions, and
should be replaced in the interest of
safety.
Comply with the specified tire inflation
pressures Ñ and be sure to have the
wheel and tire assemblies balanced
every time you change the tires.
StorageAlways store tires in a cool, dry place.
Store them away from light whenever
possible. Protect the tires against
contact with oil, grease and fuel.Snow chains
*
Use BMW narrow-link snow chains on
summer or winter tires in pairs only and
only on the rear wheels.
BMW 325xi: in an extreme emergency Ð
for instance, with the vehicle stuck on
one side, or when obstructions make it
impossible to reach one tire Ð a chain
may also be mounted on just one tire
for the limited period needed to resolve
the problem.
Comply with all manufacturer's safety
precautions when mounting the chains.
You cannot mount snow chains on the
following tires:
225/50 R 16 92
225/45 R 17 91
245/40 ZR 17