buttons BMW 325XI TOURING 2006 E91 Owner's Manual
[x] Cancel search | Manufacturer: BMW, Model Year: 2006, Model line: 325XI TOURING, Model: BMW 325XI TOURING 2006 E91Pages: 160, PDF Size: 4.86 MB
Page 11 of 160
At a glance
This overview of buttons, switches and displays
is intended to familiarize you with your vehicle's
operating environment. The section will also
assist you in becoming acquainted with the
control concepts and options available for
operating the various systems.
At a glance
Page 13 of 160
At a glance
Controls
Driving tips
Mobility Reference
11
7Instrument cluster12
10Ignition lock42
11Buttons
* on the steering wheel12Horn: the entire surface
13Steering wheel adjustment38
15Releasing the hood112
16Opening the tailgate
*
6
Turn signals46
High beams, headlamp flasher76
Roadside parking lamps
*76
Computer58
Settings and information about the
vehicle59
Instrument lighting76
8
Windshield wipers47
Rain sensor
*47
Rear window wiper48
9Switching the ignition on/off and
starting/stopping the engine42
Telephone
*:
>Press: accepting and ending a
call, starting dialing
* for a
selected phone number and
redialing if no phone number is
selected
>Press longer: redialing
Volume
Changing radio station
Selecting music track
Scrolling through phone book and
lists with stored phone numbers
Next entertainment source
Recirculated-air mode79
14
Cruise control
*48
Active cruise control
*50
Page 21 of 160
Reference
At a glance
Controls
Driving tips
Mobility
19
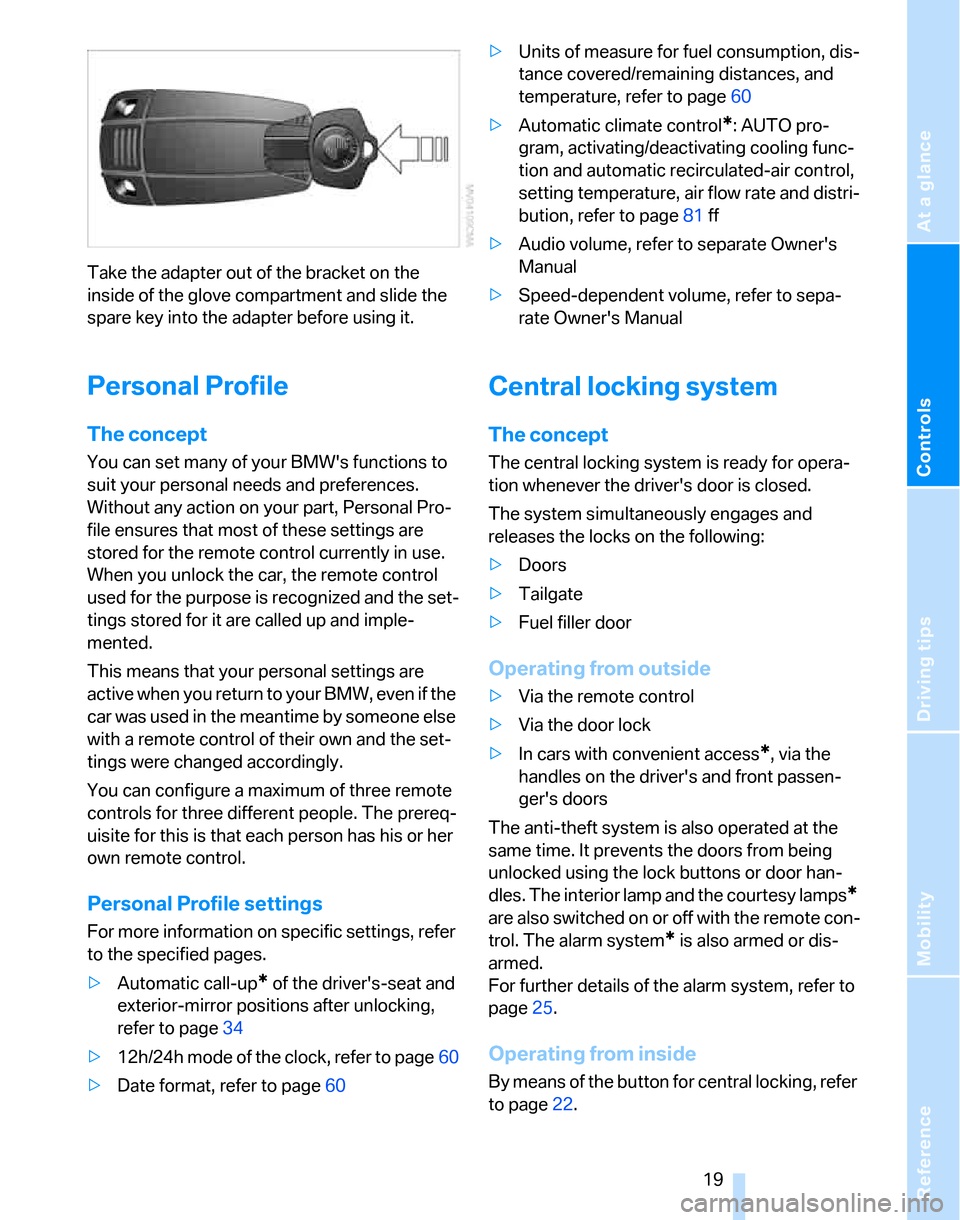
Take the adapter out of the bracket on the
inside of the glove compartment and slide the
spare key into the adapter before using it.
Personal Profile
The concept
You can set many of your BMW's functions to
suit your personal needs and preferences.
Without any action on your part, Personal Pro-
file ensures that most of these settings are
stored for the remote control currently in use.
When you unlock the car, the remote control
used for the purpose is recognized and the set-
tings stored for it are called up and imple-
mented.
This means that your personal settings are
active when you return to your BMW, even if the
car was used in the meantime by someone else
with a remote control of their own and the set-
tings were changed accordingly.
You can configure a maximum of three remote
controls for three different people. The prereq-
uisite for this is that each person has his or her
own remote control.
Personal Profile settings
For more information on specific settings, refer
to the specified pages.
>Automatic call-up
* of the driver's-seat and
exterior-mirror positions after unlocking,
refer to page34
>12h/24h mode of the clock, refer to page60
>Date format, refer to page60>Units of measure for fuel consumption, dis-
tance covered/remaining distances, and
temperature, refer to page60
>Automatic climate control
*: AUTO pro-
gram, activating/deactivating cooling func-
tion and automatic recirculated-air control,
setting temperature, air flow rate and distri-
bution, refer to page81 ff
>Audio volume, refer to separate Owner's
Manual
>Speed-dependent volume, refer to sepa-
rate Owner's Manual
Central locking system
The concept
The central locking system is ready for opera-
tion whenever the driver's door is closed.
The system simultaneously engages and
releases the locks on the following:
>Doors
>Tailgate
>Fuel filler door
Operating from outside
>Via the remote control
>Via the door lock
>In cars with convenient access
*, via the
handles on the driver's and front passen-
ger's doors
The anti-theft system is also operated at the
same time. It prevents the doors from being
unlocked using the lock buttons or door han-
dles. The interior lamp and the courtesy lamps
*
are also switched on or off with the remote con-
trol. The alarm system
* is also armed or dis-
armed.
For further details of the alarm system,
refer to
page25.
Operating from inside
By means of the button for central locking, refer
to page22.
Page 28 of 160
Opening and closing
26 >When transporting on car-carrying trains
>When animals are to remain in the vehicle
Switching off tilt alarm sensor and
interior motion sensor
Press the button on the remote control
twice in a row.
The indicator lamp comes on for approx. two
seconds, then begins to flash steadily. The tilt
alarm sensor and the interior motion sensor are
switched off until the next time the vehicle is
unlocked and subsequently locked again.
Convenient access*
Convenient access enables you to enter your
vehicle without needing to hold the remote con-
trol in your hand. All you need to do is wear the
remote control close to your body, e.g. in your
jacket pocket. The vehicle automatically
detects the corresponding remote control
within the immediate vicinity or in the passen-
ger compartment.
Convenient access supports the following
functions:
>Unlocking/locking the vehicle
>Unlocking the tailgate separately
>Engine starting
>Convenient closure
Functional requirement
>The vehicle or the tailgate can only be
locked when the vehicle detects that the
remote control currently in use is outside of
the vehicle.
>The vehicle cannot be locked or unlocked
again until after approx. 2 seconds.
>The engine can only be started when the
vehicle detects that the remote control cur-
rently in use is inside the vehicle.
Special features in comparison to
conventional remote controls
In general, there is no difference between using
convenient access or pressing the buttons on the remote control to carry out the functions
mentioned above. You should therefore first
familiarize yourself with the instructions on
opening and closing starting on page18.
Special features regarding the use of conve-
nient access are described below.
Unlocking
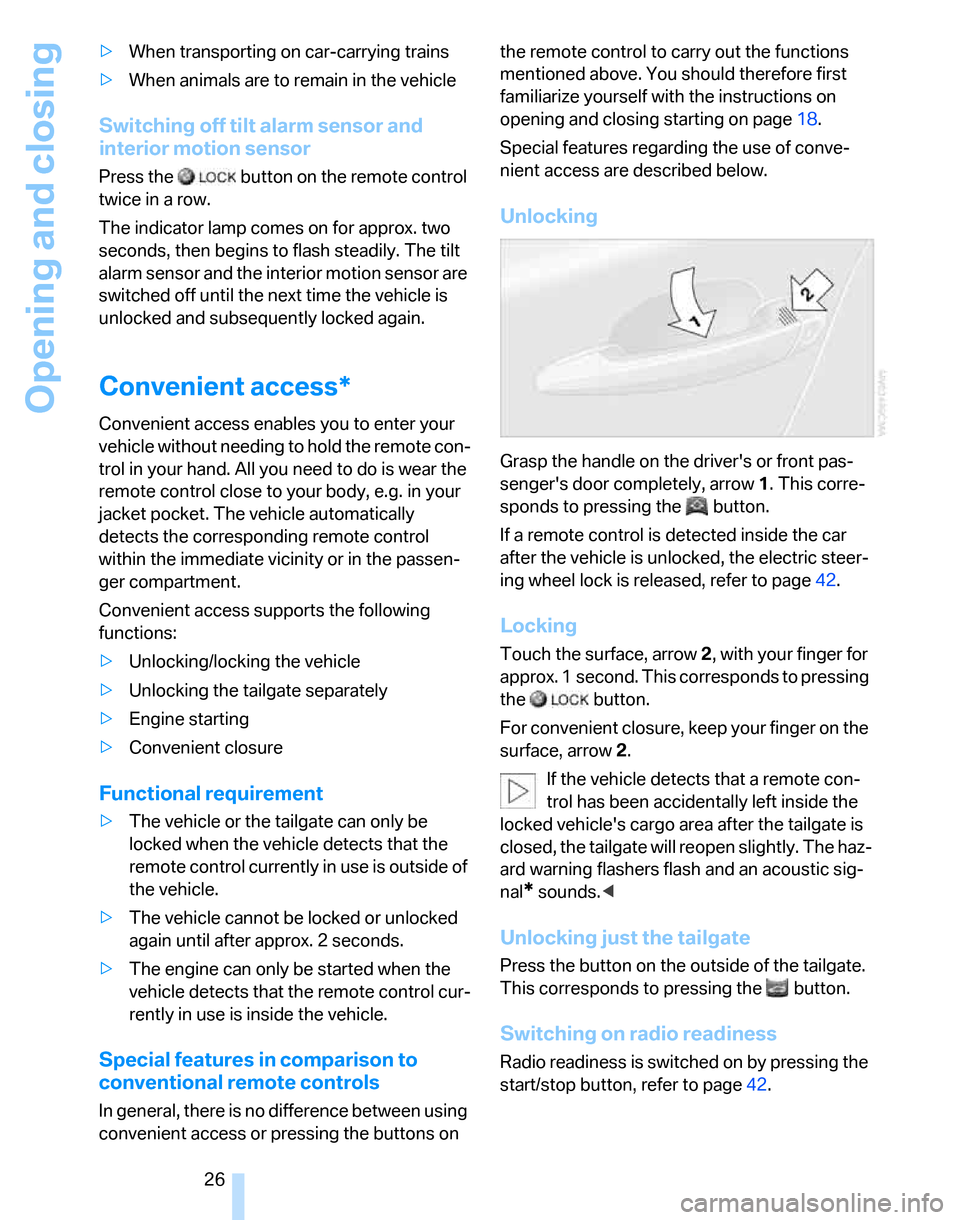
Grasp the handle on the driver's or front pas-
senger's door completely, arrow 1. This corre-
sponds to pressing the button.
If a remote control is detected inside the car
after the vehicle is unlocked, the electric steer-
ing wheel lock is released, refer to page42.
Locking
Touch the surface, arrow 2, with your finger for
approx. 1 second. This corresponds to pressing
the button.
For convenient closure, keep your finger on the
surface, arrow 2.
If the vehicle detects that a remote con-
trol has been accidentally left inside the
locked vehicle's cargo area after the tailgate is
closed, the tailgate will reopen slightly. The haz-
ard warning flashers flash and an acoustic sig-
nal
* sounds.<
Unlocking just the tailgate
Press the button on the outside of the tailgate.
This corresponds to pressing the button.
Switching on radio readiness
Radio readiness is switched on by pressing the
start/stop button, refer to page42.
Page 29 of 160
Reference
At a glance
Controls
Driving tips
Mobility
27
Do not depress the brake or the clutch,
otherwise the engine will start immedi-
ately.<
Starting the engine
You can start the engine or switch on the igni-
tion when a remote control is inside the vehicle.
It is not necessary to insert a remote control into
the ignition switch, refer to page42.
Switching off the engine in vehicles
with automatic transmission
The engine can only be switched off when the
selector lever is in position P, refer to page43.
To switch the engine off when the selector lever
is in position N, the remote control must be in
the ignition switch.
Before driving a vehicle with automatic
transmission into a car wash
1.Insert remote control into ignition switch.
2.Depress the brake.
3.Move the selector lever to position N.
4.Switch off the engine.
The vehicle can roll.
Malfunction
Convenient access may malfunction due to
local radio waves. If this happens, open or close
the vehicle via the buttons on the remote con-
trol or using the integrated key. To start the
engine afterward, insert the remote control into
the ignition switch.
Warning lamps
The warning lamp in the instrument
cluster lights up when you attempt to
start the engine: the engine cannot
be started. The remote control is not inside the
vehicle or is malfunctioning. Take the remote
control with you inside the vehicle or have it
checked. If necessary, insert another remote
control into the ignition switch.
The warning lamp in the instrument
cluster lights up while the engine is
running: the remote control is no longer inside the vehicle. After the engine is
switched off, the engine can only be restarted
within approx. 10 seconds.
The indicator lamp in the instrument
cluster comes on: replace the battery
in the remote control.
Replacing the battery
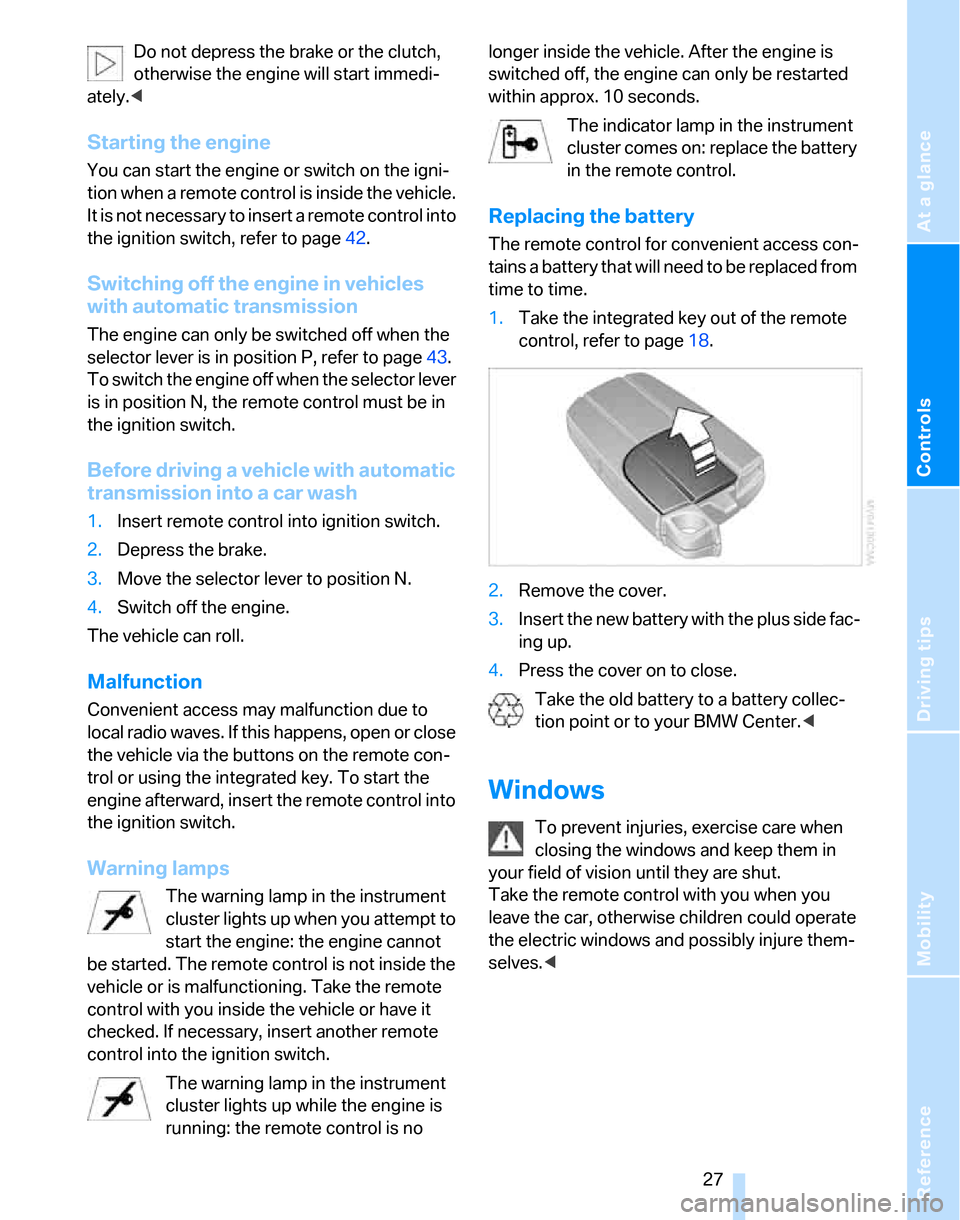
The remote control for convenient access con-
tains a battery that will need to be replaced from
time to time.
1.Take the integrated key out of the remote
control, refer to page18.
2.Remove the cover.
3.Insert the new battery with the plus side fac-
ing up.
4.Press the cover on to close.
Take the old battery to a battery collec-
tion point or to your BMW Center.<
Windows
To prevent injuries, exercise care when
closing the windows and keep them in
your field of vision until they are shut.
Take the remote control with you when you
leave the car, otherwise children could operate
the electric windows and possibly injure them-
selves.<
Page 37 of 160
Reference
At a glance
Controls
Driving tips
Mobility
35
Settings for the seat back width and lumbar
support are not stored in memory.
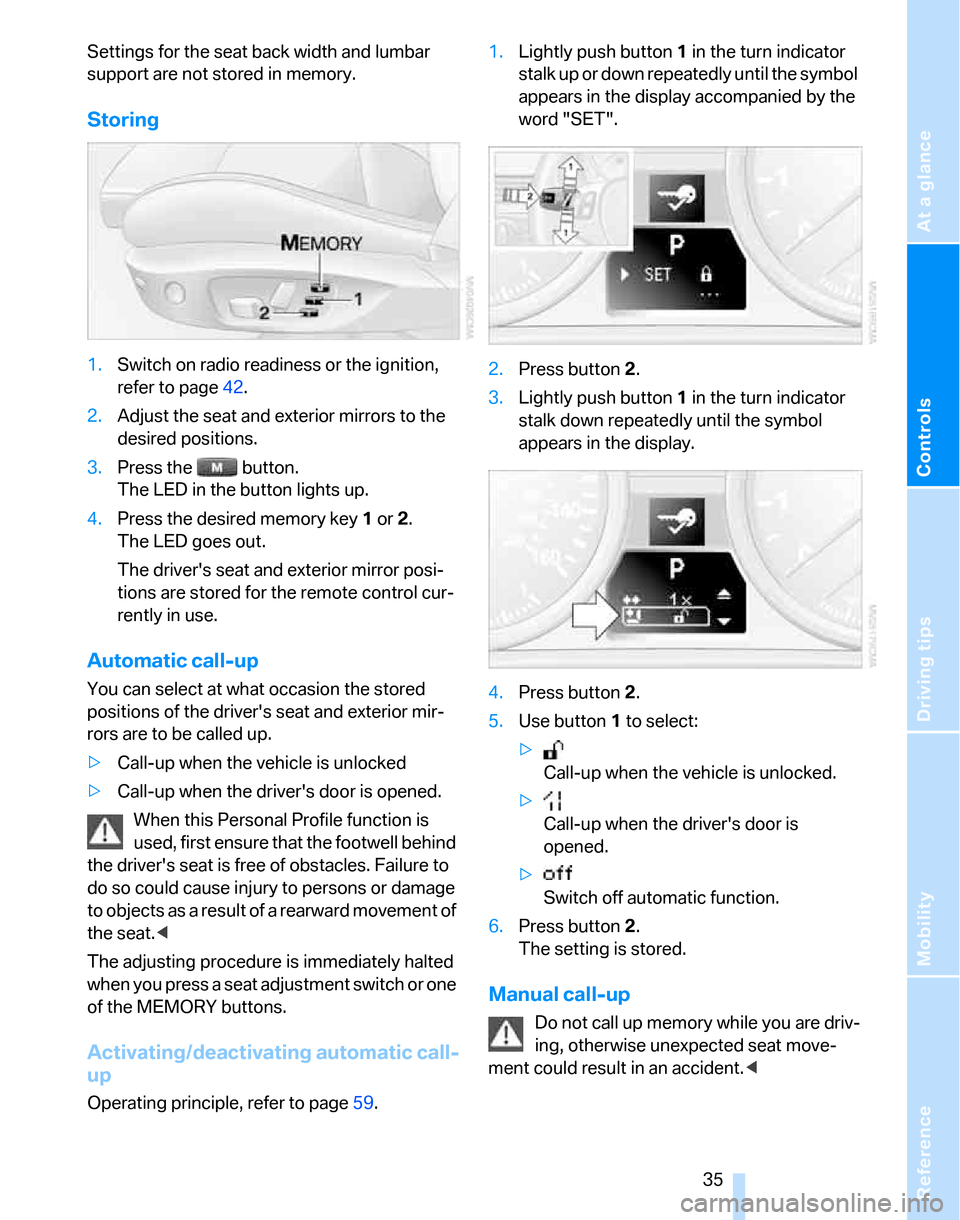
Storing
1.Switch on radio readiness or the ignition,
refer to page42.
2.Adjust the seat and exterior mirrors to the
desired positions.
3.Press the button.
The LED in the button lights up.
4.Press the desired memory key 1 or 2.
The LED goes out.
The driver's seat and exterior mirror posi-
tions are stored for the remote control cur-
rently in use.
Automatic call-up
You can select at what occasion the stored
positions of the driver's seat and exterior mir-
rors are to be called up.
>Call-up when the vehicle is unlocked
>Call-up when the driver's door is opened.
When this Personal Profile function is
used, first ensure that the footwell behind
the driver's seat is free of obstacles. Failure to
do so could cause injury to persons or damage
to objects as a result of a rearward movement of
the seat.<
The adjusting procedure is immediately halted
when you press a seat adjustment switch or one
of the MEMORY buttons.
Activating/deactivating automatic call-
up
Operating principle, refer to page59.1.Lightly push button1 in the turn indicator
stalk up or down repeatedly until the symbol
appears in the display accompanied by the
word "SET".
2.Press button 2.
3.Lightly push button1 in the turn indicator
stalk down repeatedly until the symbol
appears in the display.
4.Press button 2.
5.Use button 1 to select:
>
Call-up when the vehicle is unlocked.
>
Call-up when the driver's door is
opened.
>
Switch off automatic function.
6.Press button 2.
The setting is stored.
Manual call-up
Do not call up memory while you are driv-
ing, otherwise unexpected seat move-
ment could result in an accident.<
Page 38 of 160
Adjustments
36
Convenience mode
1.Unlock and open the driver's door or switch
on radio readiness, refer to page42.
2.Briefly press the desired memory button1
or 2.
The adjusting procedure is immediately halted
when you touch a seat adjustment switch or
one of the MEMORY buttons.
Safety feature
1.Close the driver's door and switch the igni-
tion on or off, refer to page42.
2.Press the desired memory button1 or2
and maintain pressure until the adjustment
process has been completed.
If the button was pressed accidentally:
press the button again; the LED goes out.
Safety belts
Observe the adjustment instructions on
page31 to ensure the best possible per-
sonal protection.<
Before every drive, make sure that all occupants
wear their safety belts. Airbags complement the
safety belt as an additional safety device, but
they do not represent a substitute.
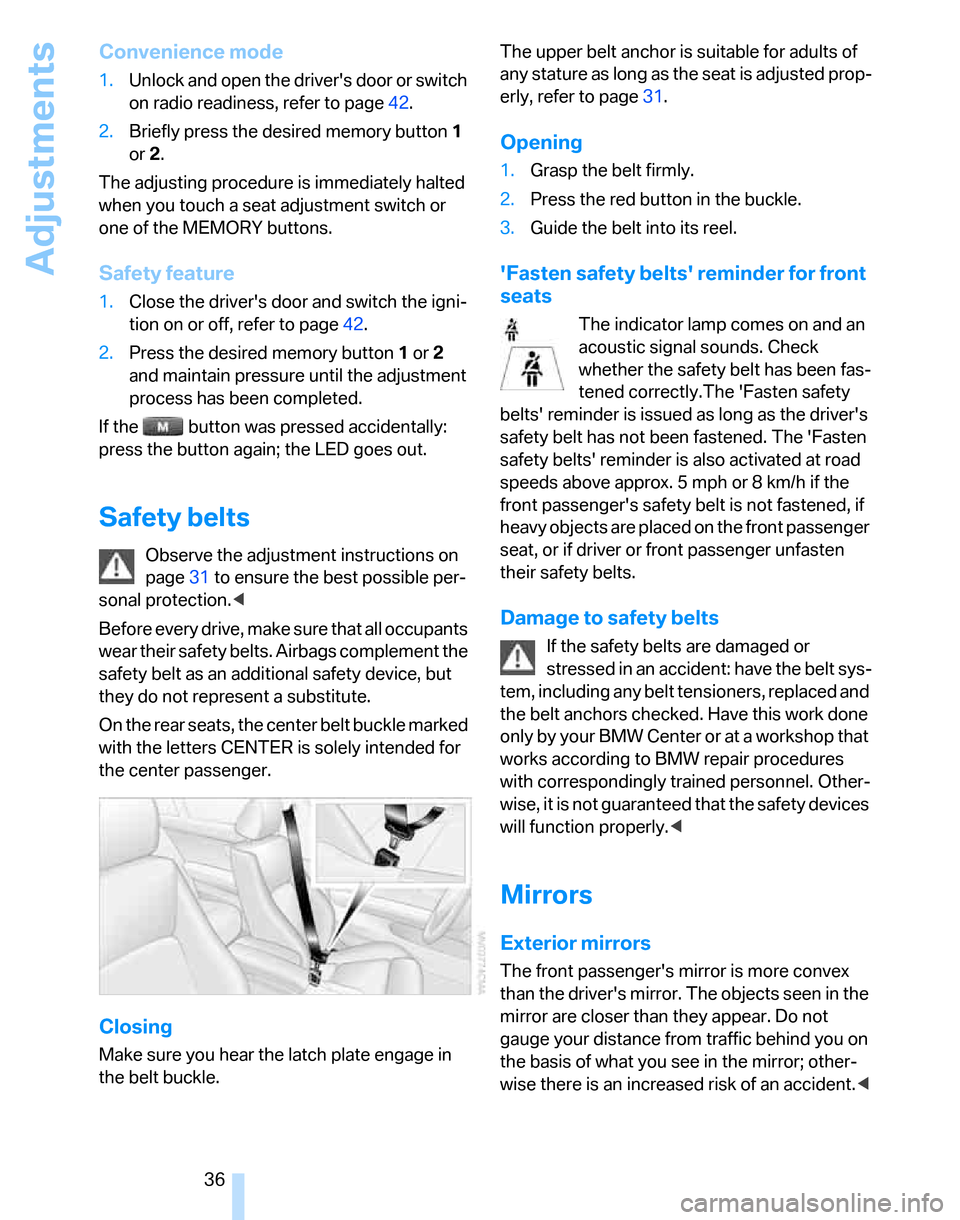
On the rear seats, the center belt buckle marked
with the letters CENTER is solely intended for
the center passenger.
Closing
Make sure you hear the latch plate engage in
the belt buckle.The upper belt anchor is suitable for adults of
any stature as long as the seat is adjusted prop-
erly, refer to page31.
Opening
1.Grasp the belt firmly.
2.Press the red button in the buckle.
3.Guide the belt into its reel.
'Fasten safety belts' reminder for front
seats
The indicator lamp comes on and an
acoustic signal sounds. Check
whether the safety belt has been fas-
tened correctly.The 'Fasten safety
belts' reminder is issued as long as the driver's
safety belt has not been fastened. The 'Fasten
safety belts' reminder is also activated at road
speeds above approx. 5 mph or 8 km/h if the
front passenger's safety belt is not fastened, if
heavy objects are placed on the front passenger
seat, or if driver or front passenger unfasten
their safety belts.
Damage to safety belts
If the safety belts are damaged or
stressed in an accident: have the belt sys-
tem, including any belt tensioners, replaced and
the belt anchors checked. Have this work done
only by your BMW Center or at a workshop that
works according to BMW repair procedures
with correspondingly trained personnel. Other-
wise, it is not guaranteed that the safety devices
will function properly.<
Mirrors
Exterior mirrors
The front passenger's mirror is more convex
than the driver's mirror. The objects seen in the
mirror are closer than they appear. Do not
gauge your distance from traffic behind you on
the basis of what you see in the mirror; other-
wise there is an increased risk of an accident.<
Page 86 of 160
Practical interior accessories
84
Practical interior accessories
Integrated universal remote
control*
The concept
The integrated universal remote control can
replace as many as three hand-held transmit-
ters for various remote-controlled devices,
such as door openers and house alarm sys-
tems. The integrated universal remote control
registers and stores signals from the original
hand-held transmitters.
The signal of an original hand-held transmitter
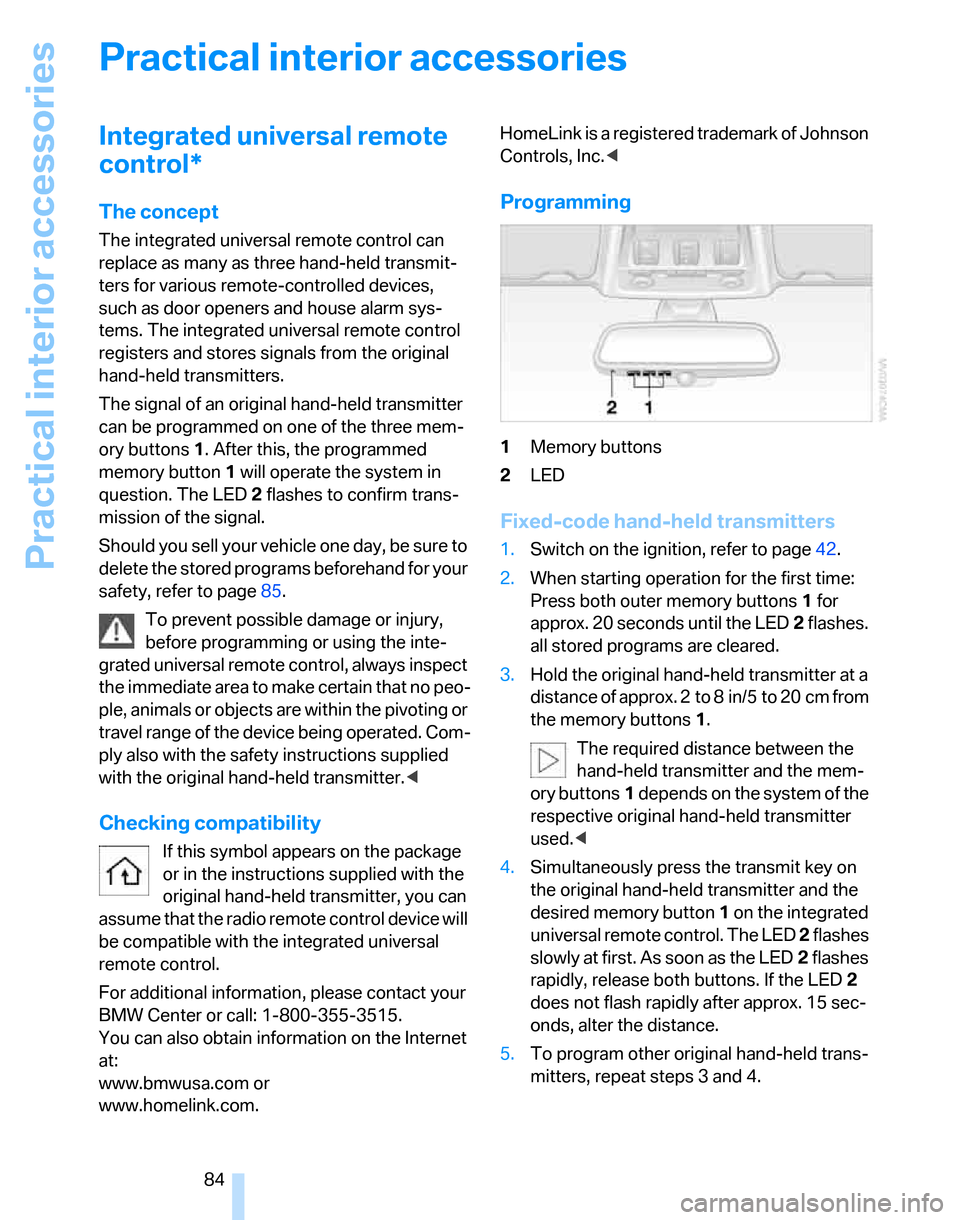
can be programmed on one of the three mem-
ory buttons1. After this, the programmed
memory button1 will operate the system in
question. The LED2 flashes to confirm trans-
mission of the signal.
Should you sell your vehicle one day, be sure to
delete the stored programs beforehand for your
safety, refer to page85.
To prevent possible damage or injury,
before programming or using the inte-
grated universal remote control, always inspect
the immediate area to make certain that no peo-
ple, animals or objects are within the pivoting or
travel range of the device being operated. Com-
ply also with the safety instructions supplied
with the original hand-held transmitter.<
Checking compatibility
If this symbol appears on the package
or in the instructions supplied with the
original hand-held transmitter, you can
assume that the radio remote control device will
be compatible with the integrated universal
remote control.
For additional information, please contact your
BMW Center or call: 1-800-355-3515.
You can also obtain information on the Internet
at:
www.bmwusa.com or
www.homelink.com. HomeLink is a registered trademark of Johnson
Controls, Inc.<
Programming
1Memory buttons
2LED
Fixed-code hand-held transmitters
1.Switch on the ignition, refer to page42.
2.When starting operation for the first time:
Press both outer memory buttons1 for
approx. 20 seconds until the LED2 flashes.
all stored programs are cleared.
3.Hold the original hand-held transmitter at a
distance of approx. 2 to 8 in/5 to 20 cm from
the memory buttons1.
The required distance between the
hand-held transmitter and the mem-
ory buttons1 depends on the system of the
respective original hand-held transmitter
used.<
4.Simultaneously press the transmit key on
the original hand-held transmitter and the
desired memory button 1 on the integrated
universal remote control. The LED 2 flashes
slowly at first. As soon as the LED2 flashes
rapidly, release both buttons. If the LED2
does not flash rapidly after approx. 15 sec-
onds, alter the distance.
5.To program other original hand-held trans-
mitters, repeat steps 3 and 4.
Page 87 of 160
Reference
At a glance
Controls
Driving tips
Mobility
85
The corresponding memory button 1 is now
programmed with the signal of the original
hand-held transmitter.
You can operate the system when the engine is
running or when the ignition is switched on.
If the system fails to function even after
repeated programming, check whether
the original hand-held transmitter uses an alter-
nating-code system. To do so, either read the
instructions for the original hand-held transmit-
ter or hold down the programmed memory
button1 of the integrated universal remote
control. If the LED2 on the integrated universal
remote control flashes rapidly for a short while
and then remains lit for about two seconds, the
original hand-held transmitter uses an alternat-
ing-code system. If it uses an alternating-code
system, program the memory buttons1 as
described under Alternating-code hand-held
transmitters.<
Alternating-code hand-held
transmitters
To program the integrated universal remote
control, consult the operating instructions for
the device to be set. You will find information
there on the possibilities for synchronization.
When programming hand-held transmitters that employ an alternating code, please observe
the following supplementary instructions:
Programming will be easier with the aid of
a second person.<
1.Park your vehicle within the range of the
remote-controlled device.
2.Program the integrated universal remote
control as described above in the section
Fixed-code hand-held transmitters.
3.Locate the button on the receiver of the
device to be set, e.g. on the drive unit.
4.Press the button on the receiver of the
device to be set. After step 4, you have
approx. 30 seconds for step 5.
5.Press the programmed memory button1 of
the integrated universal remote control
three times.
The corresponding memory button 1 is now
programmed with the signal of the original
hand-held transmitter.
If you have any questions, please contact
your BMW Center.<
Deleting stored programs
Press both outer memory buttons1 for approx.
20 seconds until the LED2 flashes: all stored
programs are cleared.
It is not possible to clear individual programs.
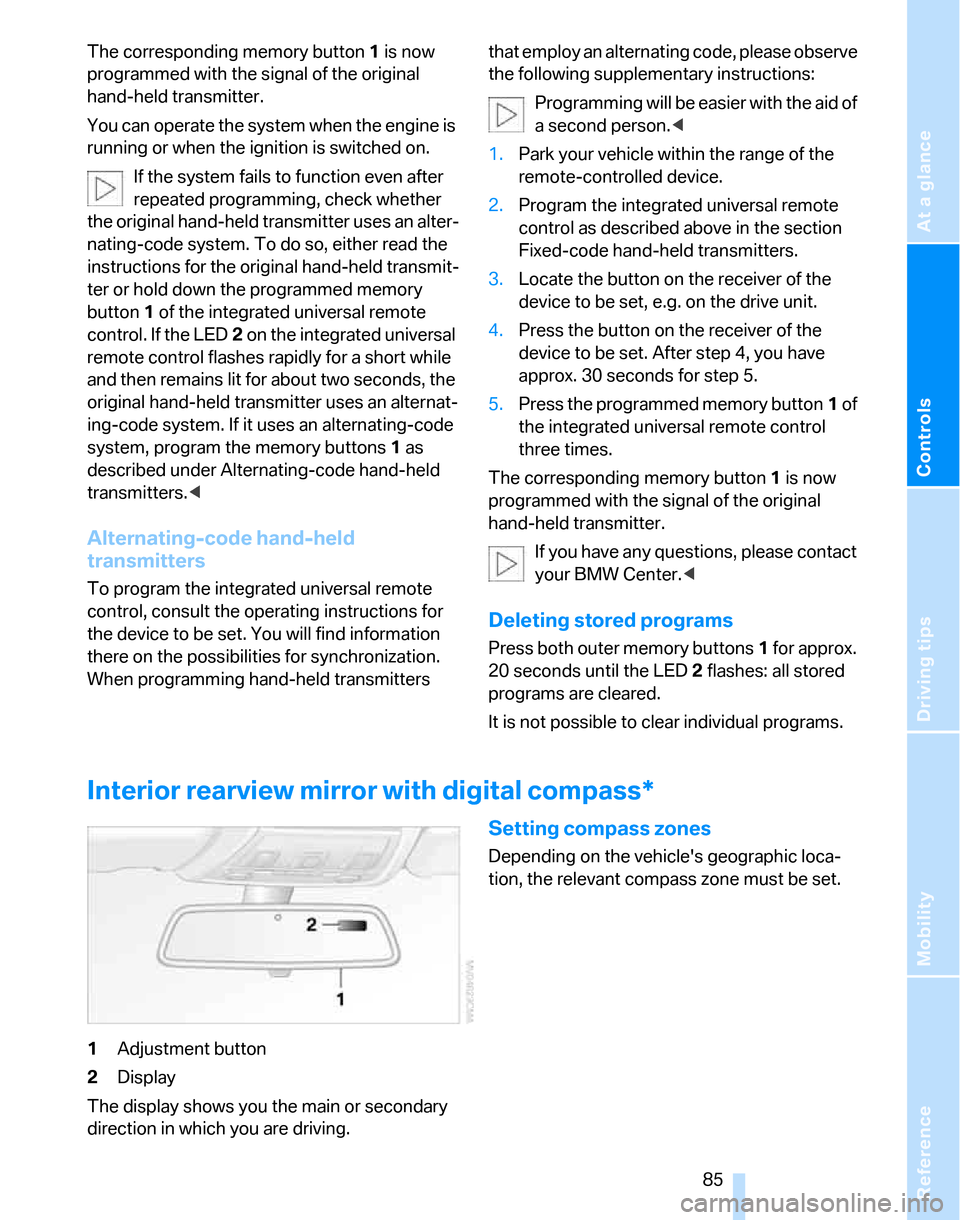
Interior rearview mirror with digital compass*
1Adjustment button
2Display
The display shows you the main or secondary
direction in which you are driving.
Setting compass zones
Depending on the vehicle's geographic loca-
tion, the relevant compass zone must be set.
Page 93 of 160
Reference
At a glance
Controls
Driving tips
Mobility
91
With an expanded cargo area
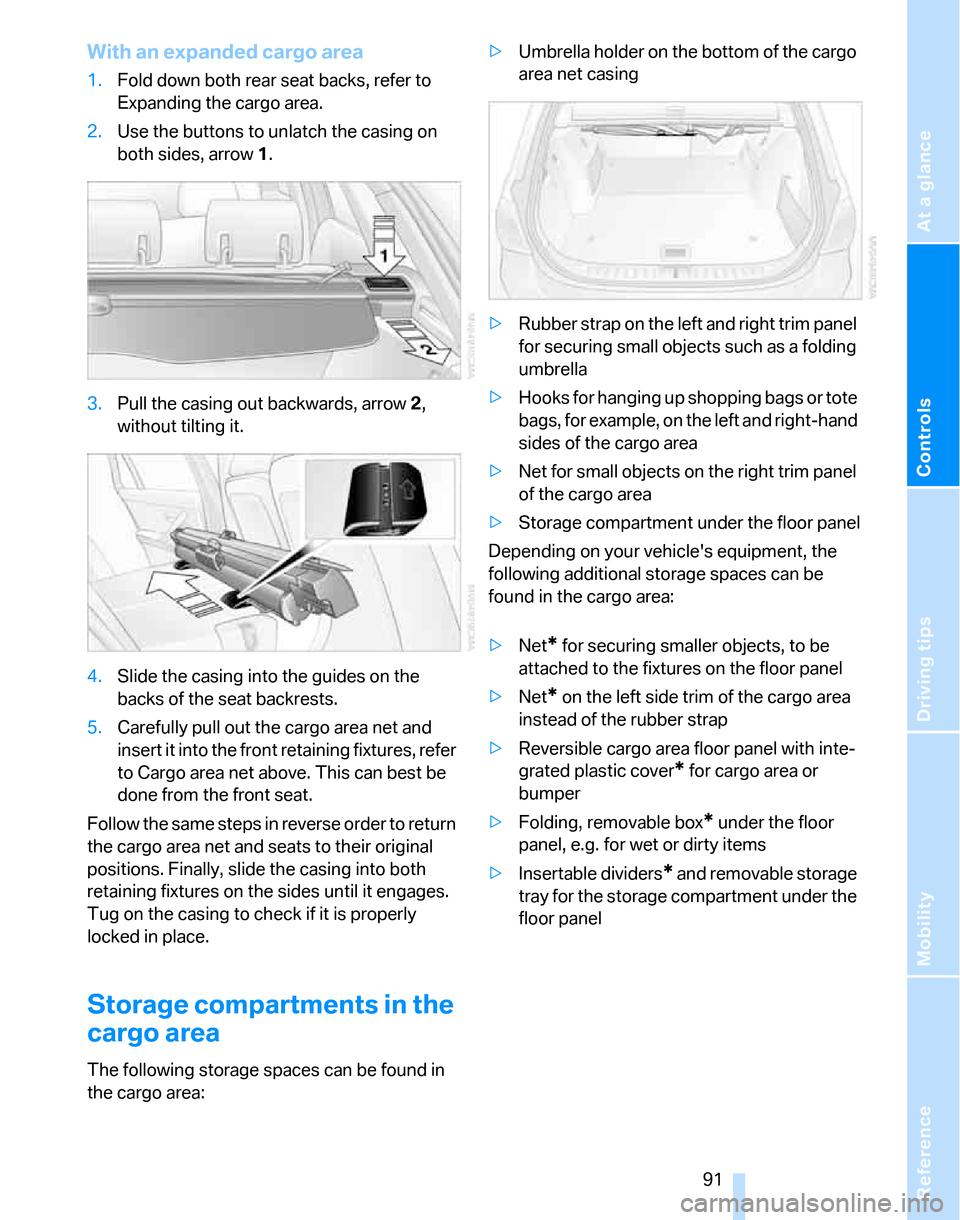
1.Fold down both rear seat backs, refer to
Expanding the cargo area.
2.Use the buttons to unlatch the casing on
both sides, arrow 1.
3.Pull the casing out backwards, arrow 2,
without tilting it.
4.Slide the casing into the guides on the
backs of the seat backrests.
5.Carefully pull out the cargo area net and
insert it into the front retaining fixtures, refer
to Cargo area net above. This can best be
done from the front seat.
Follow the same steps in reverse order to return
the cargo area net and seats to their original
positions. Finally, slide the casing into both
retaining fixtures on the sides until it engages.
Tug on the casing to check if it is properly
locked in place.
Storage compartments in the
cargo area
The following storage spaces can be found in
the cargo area:>Umbrella holder on the bottom of the cargo
area net casing
>Rubber strap on the left and right trim panel
for securing small objects such as a folding
umbrella
>Hooks for hanging up shopping bags or tote
bags, for example, on the left and right-hand
sides of the cargo area
>Net for small objects on the right trim panel
of the cargo area
>Storage compartment under the floor panel
Depending on your vehicle's equipment, the
following additional storage spaces can be
found in the cargo area:
>Net
* for securing smaller objects, to be
attached to the fixtures on the floor panel
>Net
* on the left side trim of the cargo area
instead of the rubber strap
>Reversible cargo area floor panel with inte-
grated plastic cover
* for cargo area or
bumper
>Folding, removable box
* under the floor
panel, e.g. for wet or dirty items
>Insertable dividers
* and removable storage
tray for the storage compartment under the
floor panel