stop start BMW 328I XDRIVE 2013 User Guide
[x] Cancel search | Manufacturer: BMW, Model Year: 2013, Model line: 328I XDRIVE, Model: BMW 328I XDRIVE 2013Pages: 242, PDF Size: 5.38 MB
Page 98 of 242
‚Ė∑A wheel without TPM electronics is fitted:
have the service center check it if necessary.‚Ė∑Malfunction: have the system checked by
your service center.‚Ė∑TPM was unable to complete the reset. Re‚Äź
set the system again.‚Ė∑Disturbance by systems or devices with the
same radio frequency: after leaving the area
of the disturbance, the system automatically
becomes active again.
Declaration according to NHTSA/
FMVSS 138 Tire Pressure Monitoring
System
Each tire, including the spare (if provided)
should be checked monthly when cold and in‚Äź
flated to the inflation pressure recommended by
the vehicle manufacturer on the vehicle placard
or tire inflation pressure label. (If your vehicle has
tires of a different size than the size indicated on
the vehicle placard or tire inflation pressure la‚Äź
bel, you should determine the proper tire infla‚Äź
tion pressure for those tires.) As an added safety
feature, your vehicle has been equipped with a
tire pressure monitoring system (TPMS) that il‚Äź
luminates a low tire pressure telltale when one
or more of your tires is significantly under-in‚Äź
flated. Accordingly, when the low tire pressure
telltale illuminates, you should stop and check
your tires as soon as possible, and inflate them
to the proper pressure. Driving on a significantly
under-inflated tire causes the tire to overheat
and can lead to tire failure. Under-inflation also
reduces fuel efficiency and tire tread life, and
may affect the vehicle's handling and stopping
ability. Please note that the TPMS is not a sub‚Äź
stitute for proper tire maintenance, and it is the
driver's responsibility to maintain correct tire
pressure, even if under-inflation has not reached
the level to trigger illumination of the TPMS low
tire pressure telltale. Your vehicle has also been
equipped with a TPMS malfunction indicator to
indicate when the system is not operating prop‚Äź
erly. The TPMS malfunction indicator is com‚Äź
bined with the low tire pressure telltale. When
the system detects a malfunction, the telltale will
flash for approximately one minute and then re‚Äź
main continuously illuminated. This sequence
will continue upon subsequent vehicle start-ups
as long as the malfunction exists. When the mal‚Äź
function indicator is illuminated, the system may
not be able to detect or signal low tire pressure
as intended. TPMS malfunctions may occur for
a variety of reasons, including the installation of
replacement or alternate tires or wheels on the
vehicle that prevent the TPMS from functioning
properly. Always check the TPMS malfunction
telltale after replacing one or more tires or
wheels on your vehicle to ensure that the re‚Äź
placement or alternate tires and wheels allow
the TPMS to continue to function properly.
FTM Flat Tire Monitor
The concept
The system does not measure the actual infla‚Äź
tion pressure in the tires.
It detects a pressure loss in a tire by comparing
the rotational speeds of the individual wheels
while moving.
In the event of a pressure loss, the diameter and
therefore the rotational speed of the corre‚Äź
sponding wheel change. This is detected and
reported as a flat tire.
Functional requirements
The system must have been initialized when the
tire inflation pressure was correct; otherwise,
reliable signaling of a flat tire is not ensured. In‚Äź
itialize the system after each correction of the
tire inflation pressure and after every tire or
wheel change.
Status display
The current status of the Flat Tire Monitor can
be displayed on the Control Display, e.g.,
whether or not the FTM is active.1."Vehicle Info"Seite 98ControlsSafety98
Online Edition for Part no. 01 40 2 917 801 - II/13
Page 99 of 242
2."Vehicle status"3. "Flat Tire Monitor"
The status is displayed.
Initialization
The initialization process adopts the set inflation
tire pressures as reference values for the detec‚Äź
tion of a flat tire. Initialization is started by con‚Äź
firming the inflation pressures.
Do not initialize the system when driving with
snow chains.
1."Vehicle Info"2."Vehicle status"3. "Reset"4.Start the engine - do not drive away.5.Start the initialization with "Reset".6.Drive away.
The initialization is completed while driving,
which can be interrupted at any time.
The initialization automatically continues when
driving resumes.
Indication of a flat tire The yellow warning lamp lights up. A
Check Control message is displayed.
There is a flat tire or a major loss in tire
inflation pressure.
1.Reduce your speed and stop cautiously.
Avoid sudden braking and steering maneu‚Äź
vers.2.Check whether the vehicle is fitted with reg‚Äź
ular tires or run-flat tires.
Run-flat tires, refer to page 192, are labeled
with a circular symbol containing the letters
RSC marked on the tire sidewall.
Do not continue driving without run-flat
tires
Do not continue driving if the vehicle is not
equipped with run-flat tires; continued driving
may result in serious accidents.‚óÄ
When a flat tire is indicated, DSC Dynamic Sta‚Äź
bility Control is switched on if necessary.
System limits Sudden tire damage
Sudden serious tire damage caused by
external influences cannot be indicated in ad‚Äź
vance.‚óÄ
A natural, even pressure loss in all four tires can‚Äź
not be detected. Therefore, check the tire infla‚Äź
tion pressure regularly.
The system could be delayed or malfunction in
the following situations:‚Ė∑When the system has not been initialized.‚Ė∑When driving on a snowy or slippery road
surface.‚Ė∑Sporty driving style: slip in the drive wheels,
high lateral acceleration.‚Ė∑When driving with snow chains.
Actions in the event of a flat tire
Normal tires
1.Identify the damaged tire.
Do this by checking the air pressure in all
four tires.
If the tire inflation pressure in all four tires is
correct, the Flat Tire Monitor may not have
been initialized. In this case, initialize the
system.
If an identification is not possible, please
contact the service center.2.Rectify the flat tire.
Run-flat tires
Maximum speed
You can continue driving with a damaged tire at
speeds up to 50 mph/80 km/h.
Seite 99SafetyControls99
Online Edition for Part no. 01 40 2 917 801 - II/13
Page 104 of 242
Functional limitations
The system may not be fully functional in the
following situations:‚Ė∑In heavy fog, rain, sprayed water or snowfall.‚Ė∑In tight curves.‚Ė∑If the camera view field or the front wind‚Äź
shield are dirty or covered.‚Ė∑When driving toward bright lights.‚Ė∑In the case of vehicles with insufficiently visi‚Äź
ble tail lamps.‚Ė∑In the case of partially covered vehicles.‚Ė∑Up to 10 seconds after the start of the en‚Äź
gine, via the Start/Stop knob.‚Ė∑During the calibration process of the camera
immediately after vehicle shipment.
Prewarning sensitivity
Depending on the set prewarning time, this may
result in increased false warnings.
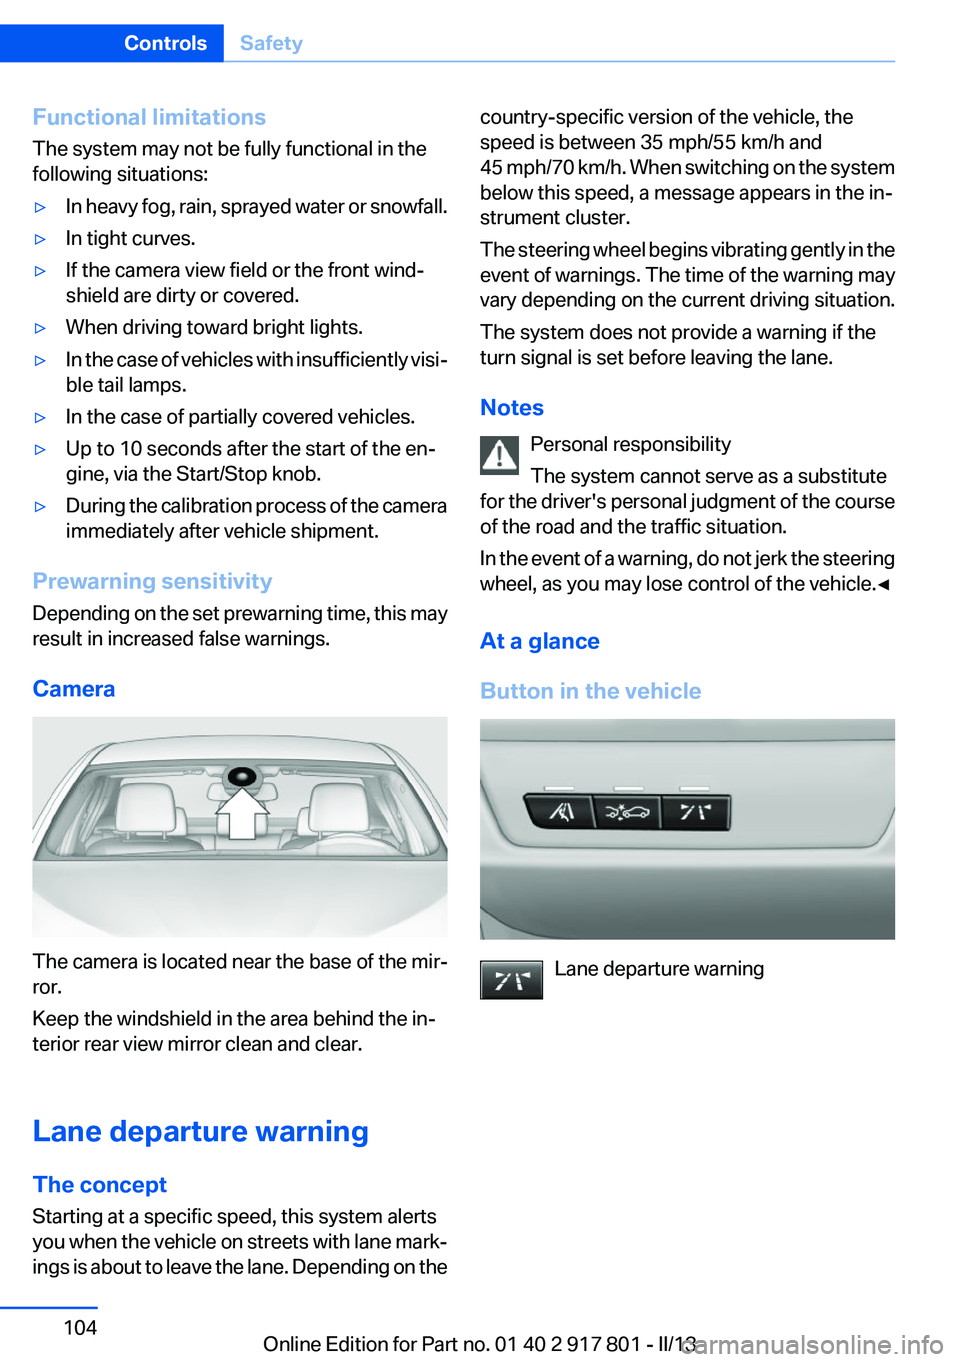
Camera
The camera is located near the base of the mir‚Äź
ror.
Keep the windshield in the area behind the in‚Äź
terior rear view mirror clean and clear.
Lane departure warning
The concept
Starting at a specific speed, this system alerts
you when the vehicle on streets with lane mark‚Äź
ings is about to leave the lane. Depending on the
country-specific version of the vehicle, the
speed is between 35 mph/55 km/h and
45 mph/70 km/h. When switching on the system
below this speed, a message appears in the in‚Äź
strument cluster.
The steering wheel begins vibrating gently in the
event of warnings. The time of the warning may
vary depending on the current driving situation.
The system does not provide a warning if the
turn signal is set before leaving the lane.
Notes Personal responsibility
The system cannot serve as a substitute
for the driver's personal judgment of the course
of the road and the traffic situation.
In the event of a warning, do not jerk the steering
wheel, as you may lose control of the vehicle.‚óÄ
At a glance
Button in the vehicle
Lane departure warning
Seite 104ControlsSafety104
Online Edition for Part no. 01 40 2 917 801 - II/13
Page 108 of 242
After travel has begun, the system is trained
about the driver, so that increasing lack of alert‚Äź
ness or fatigue can be detected.
This procedure takes the following criteria into
account:‚Ė∑Personal driving style, for example, steering
behavior.‚Ė∑Driving conditions, for example, length of
trip.
Starting at approximately 43 mph/70 km/h, the
system is active and can display a recommen‚Äź
dation to take a break.
Break recommendation
If the driver becomes increasingly less alert or
fatigued, a message is displayed in the Control
Display with the recommendation to take a
break.
A recommendation to take a break is displayed
only once during an uninterrupted trip.
After a break, another recommendation to take
a break cannot be displayed until after approxi‚Äź
mately 45 minutes.
System limits
The function may be limited in the following sit‚Äź
uations, for instance, and will either output an
incorrect warning or no warning at all:
‚Ė∑When the clock is set incorrectly.‚Ė∑When the vehicle speed is mainly below
about 43 mph/70 km/h.‚Ė∑With a sporty driving style, such as during
rapid acceleration or when cornering
quickly.‚Ė∑In active driving situations, such as when
changing lanes frequently.‚Ė∑When the road surface is poor.‚Ė∑In the event of strong side winds.PreCrash
The concept
The system is used to detect critical driving sit‚Äź
uations that might lead to an accident. In these
situations, preventative protection measures
are automatically undertaken to minimize the
risk in the event of an accident as much as pos‚Äź
sible.
Critical driving situations may include:‚Ė∑Full brake applications.‚Ė∑Severe understeering.‚Ė∑Severe oversteering.
If the vehicle includes the collision warning or
collision warning with braking feature, impend‚Äź
ing collisions with vehicles driving ahead or
stopped in front of you can also be detected
within the system's range.
Personal responsibility
The system cannot serve as a substitute
for the driver's personal judgment of the traffic
situation. The system may not always detect
critical situations reliably and in a timely manner.
Adapt speed to traffic situation and drive alertly;
otherwise, a risk to safety may result.‚óÄ
Function
After the safety belt is buckled, the front belts
are automatically pretensioned once after the
vehicle is driven is away.
In critical driving situations, the following indi‚Äź
vidual functions become active as needed:
‚Ė∑The front belts are automatically preten‚Äź
sioned.‚Ė∑Automatic closing of the windows.‚Ė∑Automatic closing of the glass sunroof.‚Ė∑For vehicles equipped with power seat ad‚Äź
justment: automatic positioning of the back‚Äź
rest for the front passenger seat.
After a critical driving situation without an acci‚Äź
dent, the front belts are loosened again. All other
systems can be restored to the desired setting.
Seite 108ControlsSafety108
Online Edition for Part no. 01 40 2 917 801 - II/13
Page 133 of 242
A component of the parking assistant is the PDC
Park Distance Control, refer to page 123.
Notes Personal responsibility
The parking assistant does not relieve the
driver of responsibility for the vehicle during the
parking procedure.
Watch the parking space and parking procedure
closely and intervene if necessary; otherwise,
there is the danger of an accident.‚óÄ
Changes to the parking space
Changes to the parking space after it was
measured are not taken into account by the sys‚Äź
tem.
Therefore, always be alert and ready to inter‚Äź
vene; otherwise, there is the danger of an acci‚Äź
dent occurring.‚óÄ
Transporting loads
Loads that extend beyond the perimeter
of the vehicle are not taken into account by the
system during the parking procedure.
Therefore, always be alert and ready to inter‚Äź
vene; otherwise, there is the danger of an acci‚Äź
dent occurring.‚óÄ
Curbs
The parking assistant may steer the vehi‚Äź
cle over or onto curbs.
Therefore, always be alert and ready to inter‚Äź
vene; otherwise, the wheels, tires, or the vehicle
may become damaged.‚óÄ
An engine that has been switched off by the
Auto Start Stop function is restarted automati‚Äź
cally when the parking assistant is activated.
Requirements
For measuring parking spaces‚Ė∑Maximum speed while driving forward ap‚Äź
prox. 22 mph/35 km/h.‚Ė∑Maximum distance to row of parked vehi‚Äź
cles: 5 ft/1.5 m.‚Ė∑When parking in parking spaces on the driv‚Äź
er's side, the corresponding turn signal must
be set.
Suitable parking space
‚Ė∑Gap between two objects with a minimum
length of approx. 5 ft/1.5 m.‚Ė∑Minimum length of the gap: own vehicle's
length plus approx 4 ft/1.2 m.‚Ė∑Minimum depth: approx. 5 ft/1.5 m.
For parking procedure
Closed doors.
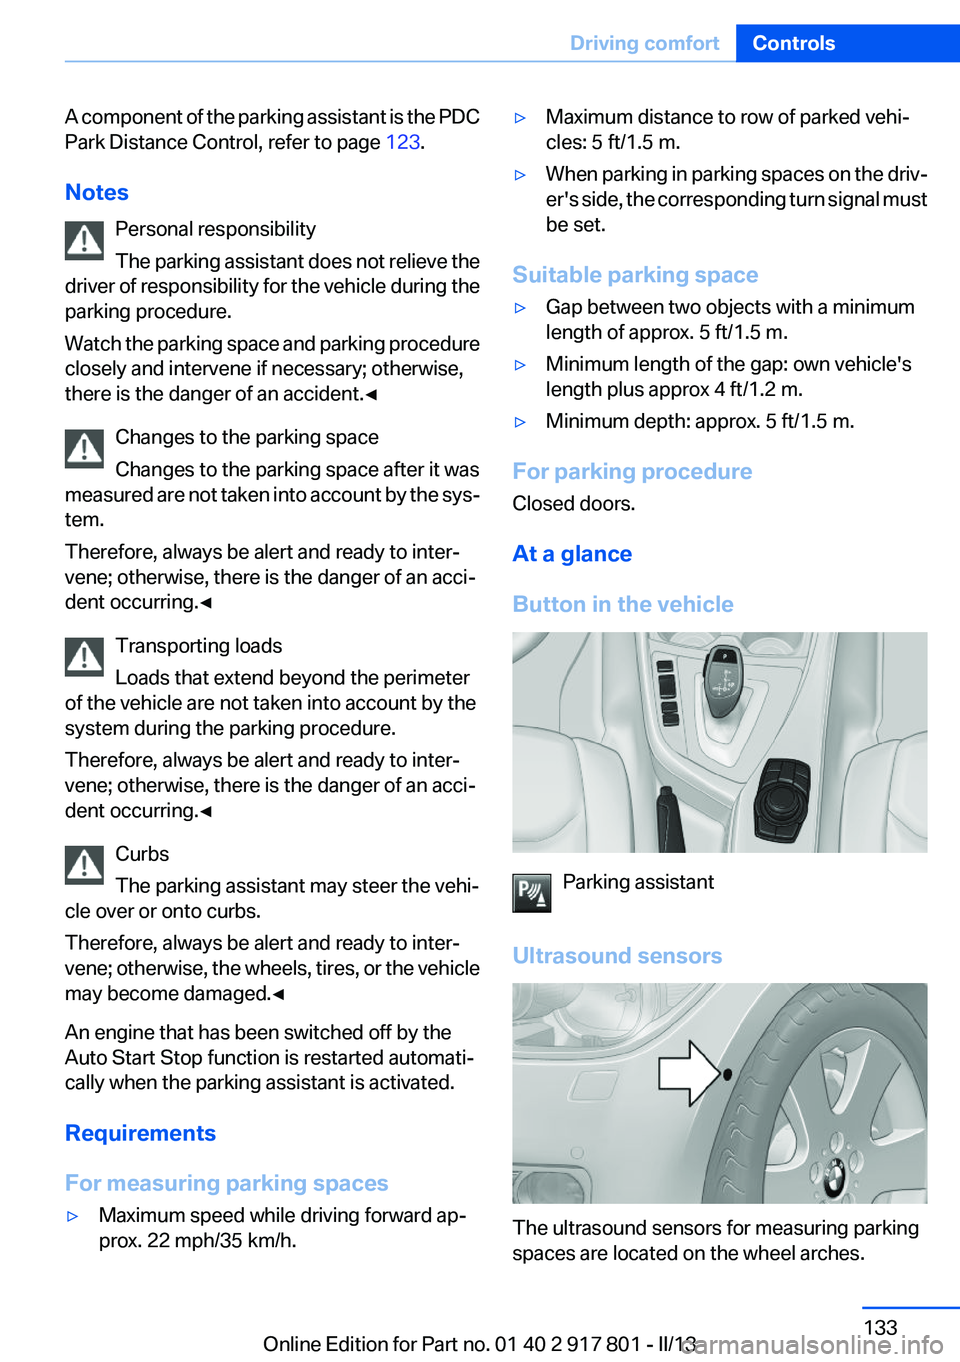
At a glance
Button in the vehicle
Parking assistant
Ultrasound sensors
The ultrasound sensors for measuring parking
spaces are located on the wheel arches.
Seite 133Driving comfortControls133
Online Edition for Part no. 01 40 2 917 801 - II/13
Page 165 of 242

Avoid high engine speeds
Use 1st gear to get the vehicle in motion. Be‚Äź
ginning with 2nd gear, accelerate rapidly. When
accelerating, shift up before reaching high en‚Äź
gine speeds.
When you reach the desired speed, shift into the
highest applicable gear and drive with the en‚Äź
gine speed as low as possible and at a constant
speed.
As a rule: driving at low engine speeds lowers
fuel consumption and reduces wear.
The gear shift indicator of your vehicle indicates
the most fuel efficient gear.
Use coasting conditions
When approaching a red light, take your foot off
the accelerator and let the vehicle coast to a halt.
On a downhill gradient, take your foot off the ac‚Äź
celerator and let the vehicle roll.
The flow of fuel is interrupted while coasting.
Switch off the engine during
longer stops
Switch off the engine during longer stops, e.g.,
at traffic lights, railroad crossings or in traffic
congestion.
Auto Start/Stop function
The Auto Start/Stop function of your vehicle au‚Äź
tomatically switches off the engine during a
stop.
If the engine is switched off and then restarted
rather than leaving the engine running con‚Äź
stantly, fuel consumption and emissions are re‚Äź
duced. Savings can begin within a few seconds
of switching off the engine.
Using this system can cause certain compo‚Äź
nents of the vehicle to become worn prema‚Äź
turely.In addition, fuel consumption is also determined
by other factors, such as driving style, road con‚Äź
ditions, maintenance or environmental factors.
Switch off any functions that
are not currently needed
Functions such as seat heating and the rear win‚Äź
dow defroster require a lot of energy and con‚Äź
sume additional fuel, especially in city and stop-
and-go traffic.
Therefore, switch off these functions if they are
not actually needed.
Have maintenance carried out
Have vehicles maintained regularly to achieve
optimal vehicle economy and operating life.
Have the maintenance carried out by your serv‚Äź
ice center.
Please also note the BMW Maintenance Sys‚Äź
tem, refer to page 200.
ECO PRO
The concept
ECO PRO supports a driving style that saves on
fuel consumption. For this purpose, the engine
control and comfort functions, e. g. the climate
control output, are adjusted.
In addition, context-sensitive instructions can
be displayed that assist in driving in a manner
that optimizes fuel consumption.
The extension of the range that is achieved as a
result can be displayed in the instrument cluster.
At a glance
The system includes the following
EfficientDynamics functions and displays:‚Ė∑ECO PRO bonus range, refer to page 166Seite 165Saving fuelDriving tips165
Online Edition for Part no. 01 40 2 917 801 - II/13
Page 168 of 242
"Consumption history"
Adjusting fuel consumption history
time frame
Select the symbol.
Resetting fuel consumption history
1.Open "Options".2."Reset consumption history"
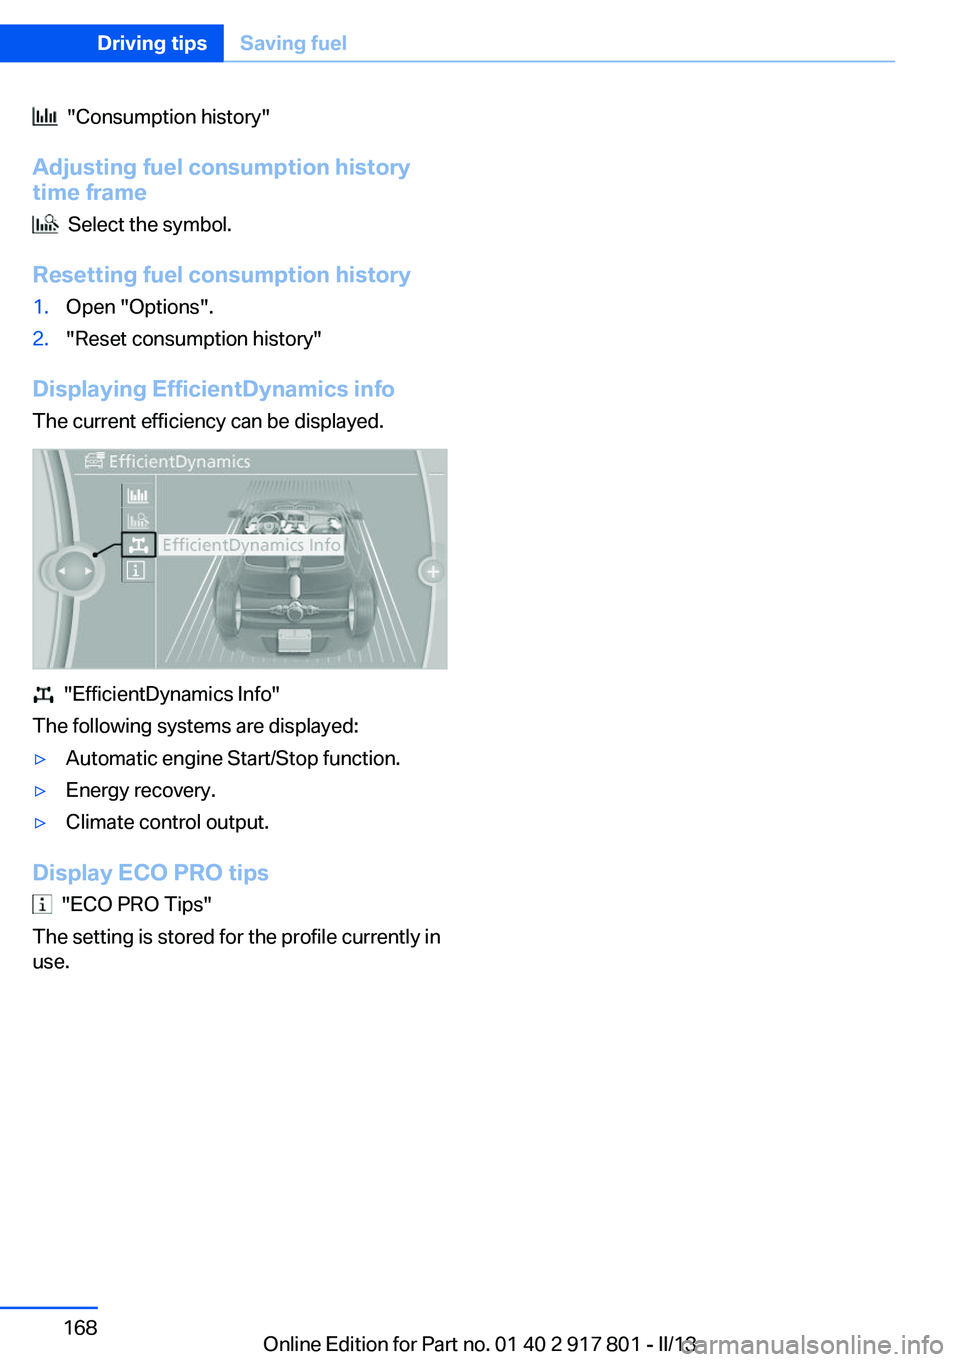
Displaying EfficientDynamics info
The current efficiency can be displayed.
"EfficientDynamics Info"
The following systems are displayed:
‚Ė∑Automatic engine Start/Stop function.‚Ė∑Energy recovery.‚Ė∑Climate control output.
Display ECO PRO tips
"ECO PRO Tips"
The setting is stored for the profile currently in
use.
Seite 168Driving tipsSaving fuel168
Online Edition for Part no. 01 40 2 917 801 - II/13
Page 216 of 242
If the first starting attempt is not successful,
wait a few minutes before making another
attempt in order to allow the discharged bat‚Äź
tery to recharge.3.Let both engines run for several minutes.4.Disconnect the jumper cables in the reverse
order.
Check the battery and recharge if necessary.
Tow-starting and towing
Automatic transmission: transporting
your vehicle
Note
Your vehicle is not permitted to be towed.
Therefore, contact a service center in the event
of a breakdown.
Do not have the vehicle towed
Have your vehicle transported on a loading
platform only; otherwise, damage may occur.‚óÄ
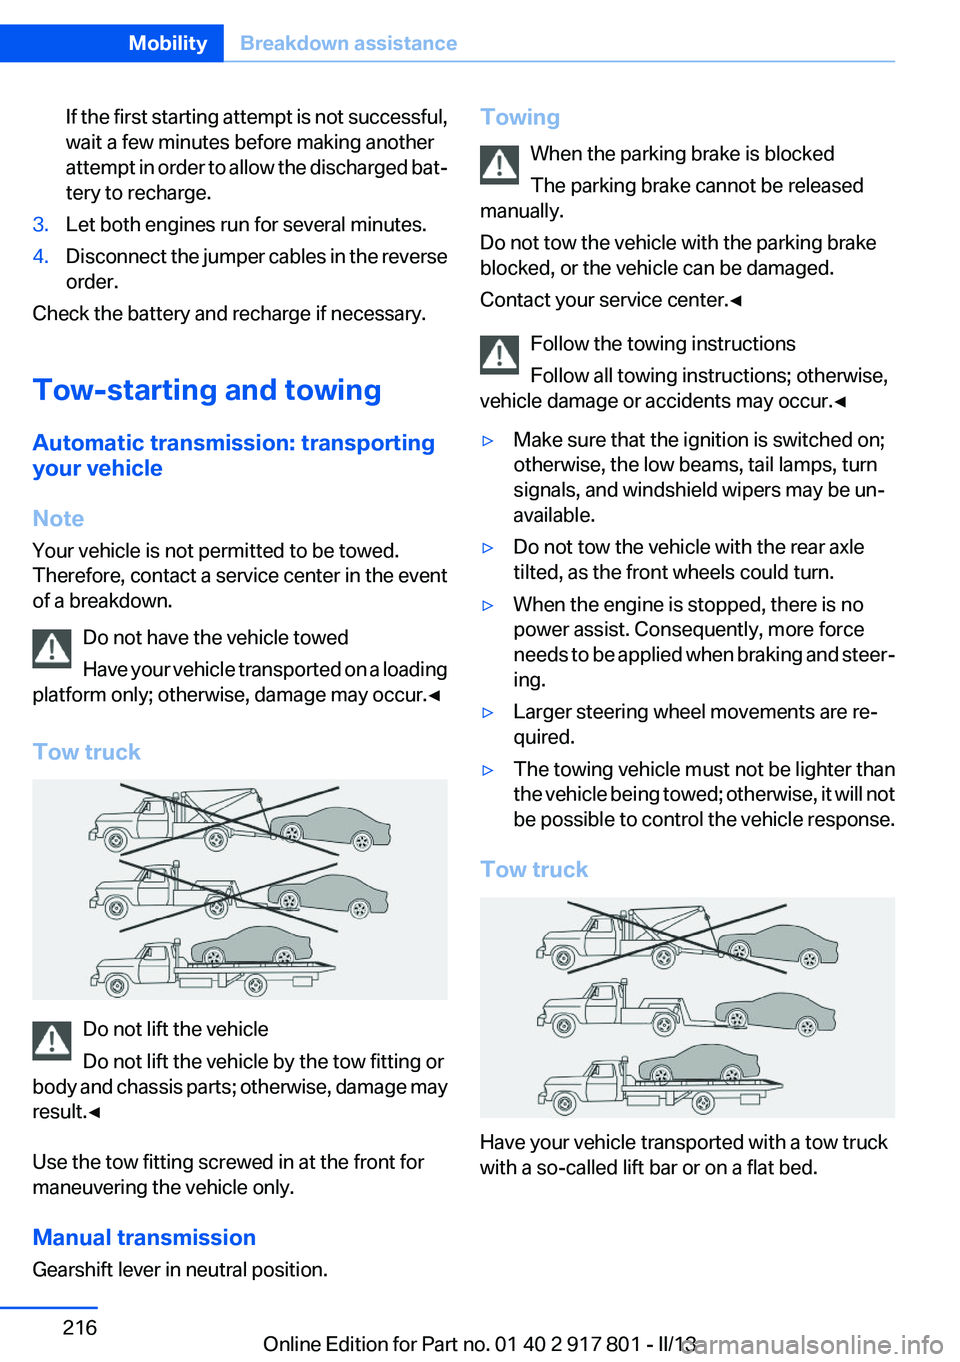
Tow truck
Do not lift the vehicle
Do not lift the vehicle by the tow fitting or
body and chassis parts; otherwise, damage may
result.‚óÄ
Use the tow fitting screwed in at the front for
maneuvering the vehicle only.
Manual transmission
Gearshift lever in neutral position.
Towing
When the parking brake is blocked
The parking brake cannot be released
manually.
Do not tow the vehicle with the parking brake
blocked, or the vehicle can be damaged.
Contact your service center.‚óÄ
Follow the towing instructions
Follow all towing instructions; otherwise,
vehicle damage or accidents may occur.‚óÄ‚Ė∑Make sure that the ignition is switched on;
otherwise, the low beams, tail lamps, turn
signals, and windshield wipers may be un‚Äź
available.‚Ė∑Do not tow the vehicle with the rear axle
tilted, as the front wheels could turn.‚Ė∑When the engine is stopped, there is no
power assist. Consequently, more force
needs to be applied when braking and steer‚Äź
ing.‚Ė∑Larger steering wheel movements are re‚Äź
quired.‚Ė∑The towing vehicle must not be lighter than
the vehicle being towed; otherwise, it will not
be possible to control the vehicle response.
Tow truck
Have your vehicle transported with a tow truck
with a so-called lift bar or on a flat bed.
Seite 216MobilityBreakdown assistance216
Online Edition for Part no. 01 40 2 917 801 - II/13
Page 218 of 242
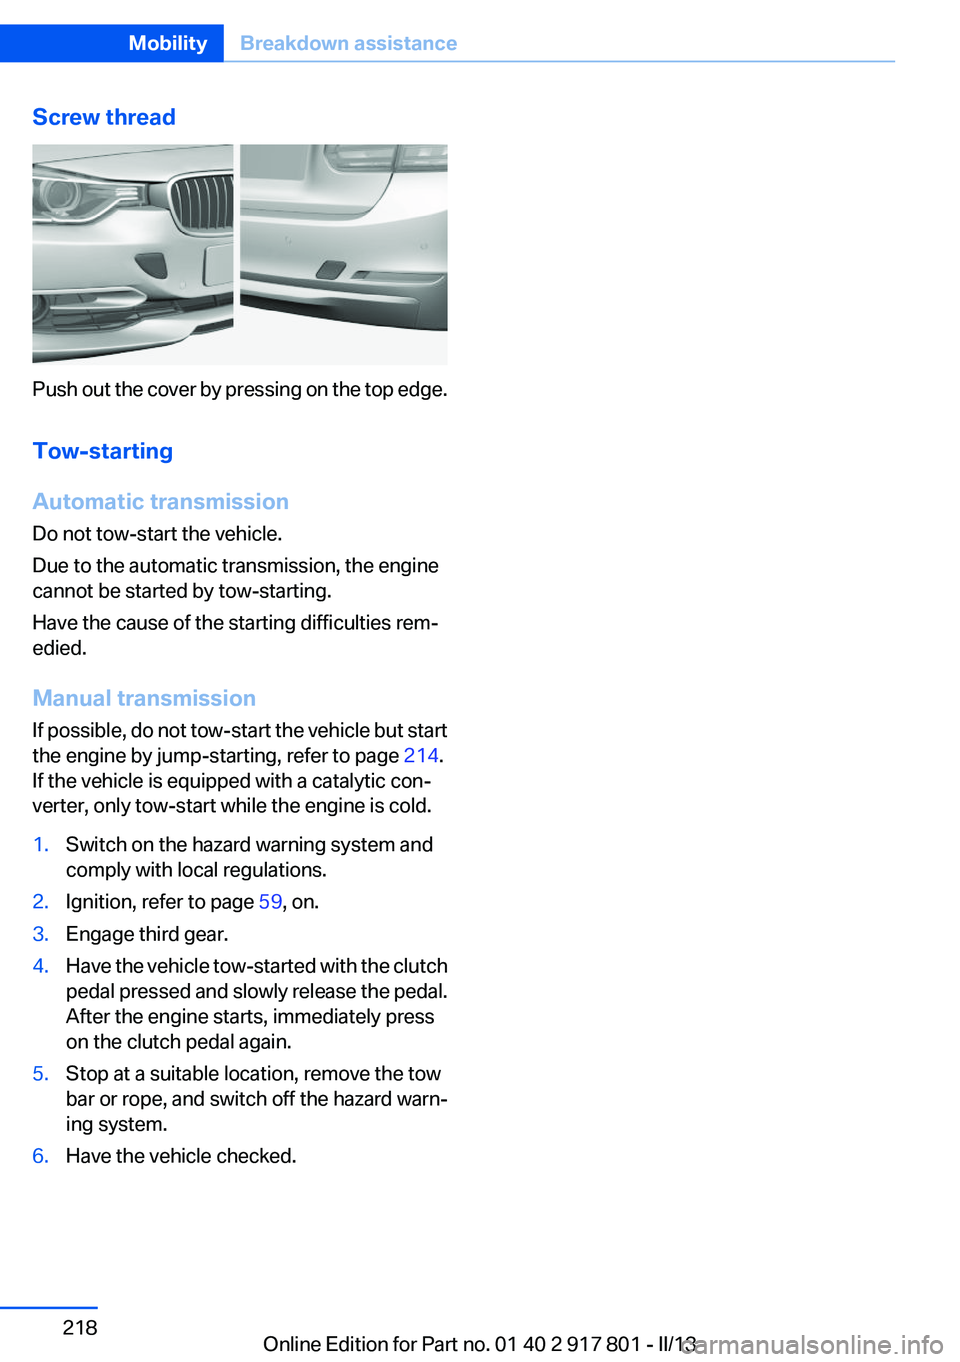
Screw thread
Push out the cover by pressing on the top edge.
Tow-starting
Automatic transmission
Do not tow-start the vehicle.
Due to the automatic transmission, the engine
cannot be started by tow-starting.
Have the cause of the starting difficulties rem‚Äź
edied.
Manual transmission
If possible, do not tow-start the vehicle but start
the engine by jump-starting, refer to page 214.
If the vehicle is equipped with a catalytic con‚Äź
verter, only tow-start while the engine is cold.
1.Switch on the hazard warning system and
comply with local regulations.2.Ignition, refer to page 59, on.3.Engage third gear.4.Have the vehicle tow-started with the clutch
pedal pressed and slowly release the pedal.
After the engine starts, immediately press
on the clutch pedal again.5.Stop at a suitable location, remove the tow
bar or rope, and switch off the hazard warn‚Äź
ing system.6.Have the vehicle checked.Seite 218MobilityBreakdown assistance218
Online Edition for Part no. 01 40 2 917 801 - II/13
Page 232 of 242
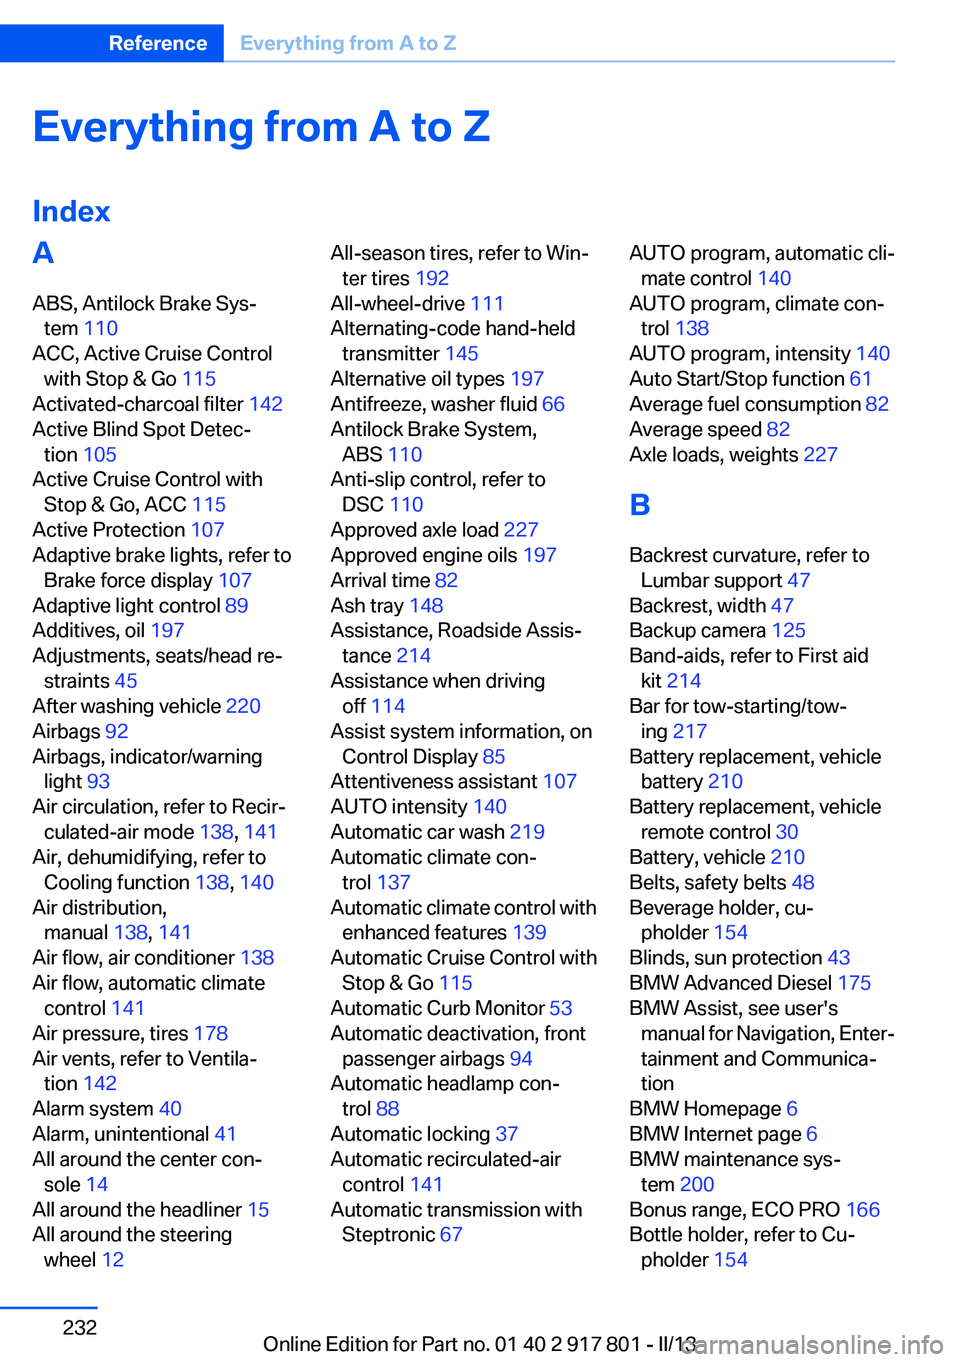
Everything from A to Z
IndexA
ABS, Antilock Brake Sys‚Äź tem 110
ACC, Active Cruise Control with Stop & Go 115
Activated-charcoal filter 142
Active Blind Spot Detec‚Äź tion 105
Active Cruise Control with Stop & Go, ACC 115
Active Protection 107
Adaptive brake lights, refer to Brake force display 107
Adaptive light control 89
Additives, oil 197
Adjustments, seats/head re‚Äź straints 45
After washing vehicle 220
Airbags 92
Airbags, indicator/warning light 93
Air circulation, refer to Recir‚Äź culated-air mode 138, 141
Air, dehumidifying, refer to Cooling function 138, 140
Air distribution, manual 138, 141
Air flow, air conditioner 138
Air flow, automatic climate control 141
Air pressure, tires 178
Air vents, refer to Ventila‚Äź tion 142
Alarm system 40
Alarm, unintentional 41
All around the center con‚Äź sole 14
All around the headliner 15
All around the steering wheel 12 All-season tires, refer to Win‚Äź
ter tires 192
All-wheel-drive 111
Alternating-code hand-held transmitter 145
Alternative oil types 197
Antifreeze, washer fluid 66
Antilock Brake System, ABS 110
Anti-slip control, refer to DSC 110
Approved axle load 227
Approved engine oils 197
Arrival time 82
Ash tray 148
Assistance, Roadside Assis‚Äź tance 214
Assistance when driving off 114
Assist system information, on Control Display 85
Attentiveness assistant 107
AUTO intensity 140
Automatic car wash 219
Automatic climate con‚Äź trol 137
Automatic climate control with enhanced features 139
Automatic Cruise Control with Stop & Go 115
Automatic Curb Monitor 53
Automatic deactivation, front passenger airbags 94
Automatic headlamp con‚Äź trol 88
Automatic locking 37
Automatic recirculated-air control 141
Automatic transmission with Steptronic 67 AUTO program, automatic cli‚Äź
mate control 140
AUTO program, climate con‚Äź trol 138
AUTO program, intensity 140
Auto Start/Stop function 61
Average fuel consumption 82
Average speed 82
Axle loads, weights 227
B
Backrest curvature, refer to Lumbar support 47
Backrest, width 47
Backup camera 125
Band-aids, refer to First aid kit 214
Bar for tow-starting/tow‚Äź ing 217
Battery replacement, vehicle battery 210
Battery replacement, vehicle remote control 30
Battery, vehicle 210
Belts, safety belts 48
Beverage holder, cu‚Äź pholder 154
Blinds, sun protection 43
BMW Advanced Diesel 175
BMW Assist, see user's manual for Navigation, Enter‚Äź
tainment and Communica‚Äź
tion
BMW Homepage 6
BMW Internet page 6
BMW maintenance sys‚Äź tem 200
Bonus range, ECO PRO 166
Bottle holder, refer to Cu‚Äź pholder 154 Seite 232ReferenceEverything from A to Z232
Online Edition for Part no. 01 40 2 917 801 - II/13