lights BMW 330Ci CONVERTIBLE 2002 E46 Owner's Manual
[x] Cancel search | Manufacturer: BMW, Model Year: 2002, Model line: 330Ci CONVERTIBLE, Model: BMW 330Ci CONVERTIBLE 2002 E46Pages: 159, PDF Size: 2.28 MB
Page 17 of 159
17n
OverviewControlsMaintenanceRepairsDataIndex
Indicator and warning lamps
Technology that monitors itself
The system runs an operational check
on the indicator and warning lamps
identified with the
l
symbol each time
you switch on the ignition. They each
light up once for different periods of
time.
If a fault should occur in one of these
systems, the corresponding lamp does
not go out after the engine is started, or
it lights up while the vehicle is moving.
You will see how to react in the
following section.
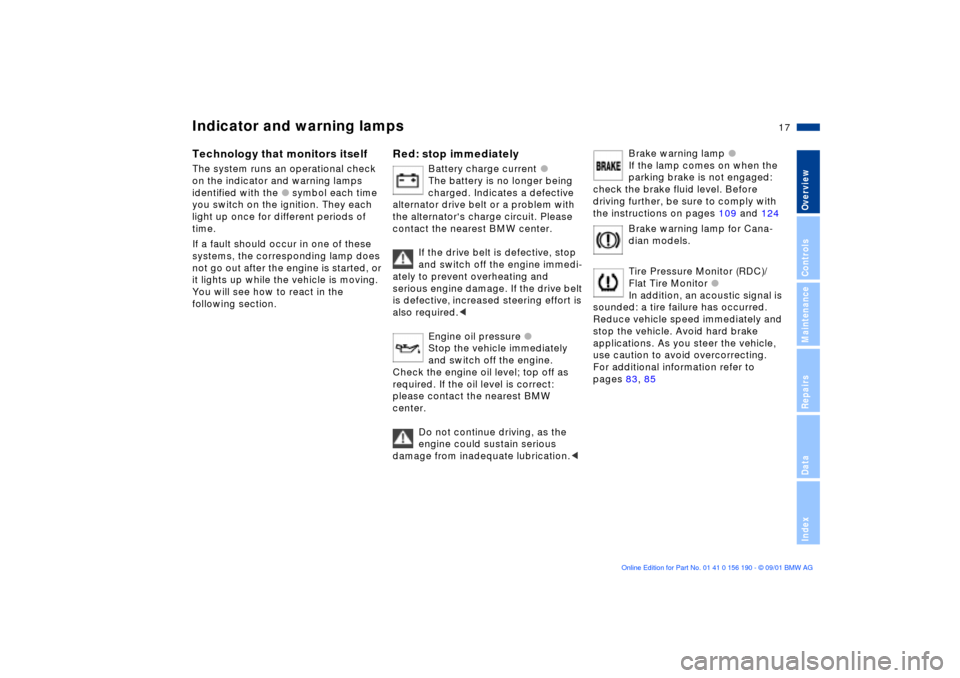
Red: stop immediately
Battery charge current
l
The battery is no longer being
charged. Indicates a defective
alternator drive belt or a problem with
the alternator's charge circuit. Please
contact the nearest BMW center.
If the drive belt is defective, stop
and switch off the engine immedi-
ately to prevent overheating and
serious engine damage. If the drive belt
is defective, increased steering effort is
also required.
<
Engine oil pressure
l
Stop the vehicle immediately
and switch off the engine.
Check the engine oil level; top off as
required. If the oil level is correct:
please contact the nearest BMW
center.
Do not continue driving, as the
engine could sustain serious
damage from inadequate lubrication.
<
Brake warning lamp
l
If the lamp comes on when the
parking brake is not engaged:
check the brake fluid level. Before
driving further, be sure to comply with
the instructions on pages 109 and 124
Brake warning lamp for Cana-
dian models.
Tire Pressure Monitor (RDC)/
Flat Tire Monitor
l
In addition, an acoustic signal is
sounded: a tire failure has occurred.
Reduce vehicle speed immediately and
stop the vehicle. Avoid hard brake
applications. As you steer the vehicle,
use caution to avoid overcorrecting.
For additional information refer to
pages 83, 85
Page 18 of 159
18n
Indicator and warning lamps
Red and yellow: continue driving
cautiously
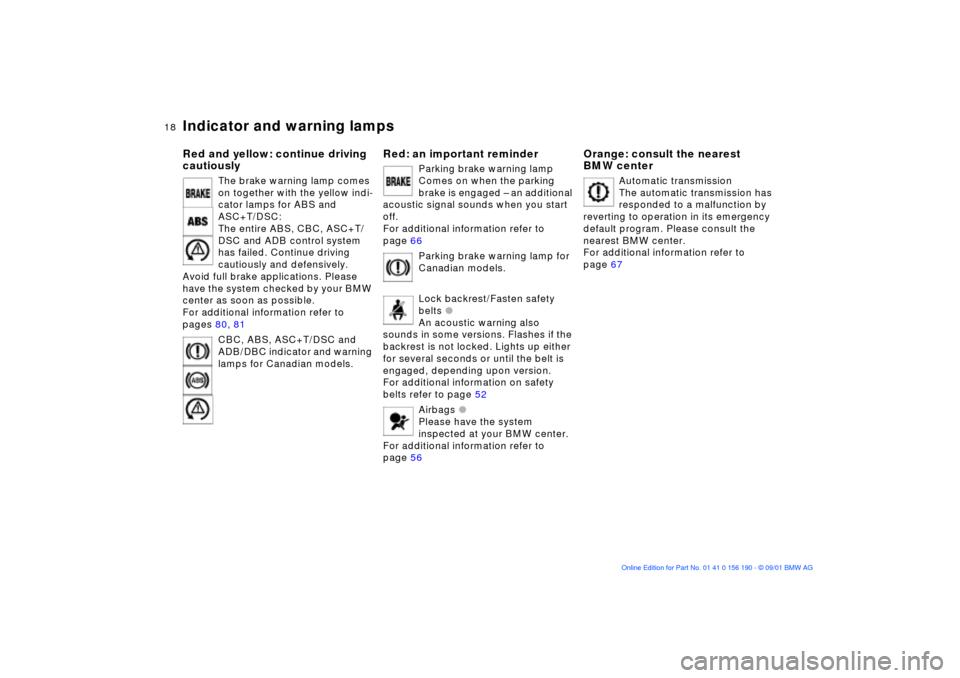
The brake warning lamp comes
on together with the yellow indi-
cator lamps for ABS and
ASC+T/DSC:
The entire ABS, CBC, ASC+T/
DSC and ADB control system
has failed. Continue driving
cautiously and defensively.
Avoid full brake applications. Please
have the system checked by your BMW
center as soon as possible.
For additional information refer to
pages 80, 81
CBC, ABS, ASC+T/DSC and
ADB/DBC indicator and warning
lamps for Canadian models.
Red: an important reminder
Parking brake warning lamp
Comes on when the parking
brake is engaged Ð an additional
acoustic signal sounds when you start
off.
For additional information refer to
page 66
Parking brake warning lamp for
Canadian models.
Lock backrest/Fasten safety
belts
l
An acoustic warning also
sounds in some versions. Flashes if the
backrest is not locked. Lights up either
for several seconds or until the belt is
engaged, depending upon version.
For additional information on safety
belts refer to page 52
Airbags
l
Please have the system
inspected at your BMW center.
For additional information refer to
page 56
Orange: consult the nearest
BMW center
Automatic transmission
The automatic transmission has
responded to a malfunction by
reverting to operation in its emergency
default program. Please consult the
nearest BMW center.
For additional information refer to
page 67
Page 20 of 159

20n
Indicator and warning lamps
Add washer fluid
The washer fluid is too low. Top
off the fluid at the earliest
opportunity. For additional information
refer to page 120
SERVICE ENGINE SOON
l
If the indicator lamp comes on
either continuously or intermit-
tently, this indicates a fault in the emis-
sions-related electronic systems.
Although the vehicle remains opera-
tional, you should have the systems
checked at your BMW center at the
earliest possible opportunity. For addi-
tional information refer to page 127
SERVICE ENGINE SOON
warning lamp for Canadian
models.
Engine electronics
l
There is a fault in the electronic
engine-management system.
You can continue to drive with reduced
engine output or engine speed. Please
have the system inspected at your
BMW center.
Add coolant
The coolant level is too low. Add
coolant at the earliest opportu-
nity. For additional information refer to
page 123
Green: for your information
Turn signal indicator
Flashes when the turn signal is
operated.
Rapid flashing indicates a system
malfunction.
For additional information refer to
page 69
Cruise control
Lights up when the cruise
control is activated: available for
operation via the multifunction steering
wheel.
For additional information refer to
page 72
Fog lamps
Lights up whenever you switch
on the fog lamps.
For additional information refer to
page 88
Blue: for your information
High beams
Comes on when the high beams
are on or the headlamp flasher
is actuated.
For additional information refer to
pages 69, 88
Page 37 of 159
37n
OverviewControlsMaintenanceRepairsDataIndex
Alarm system
*
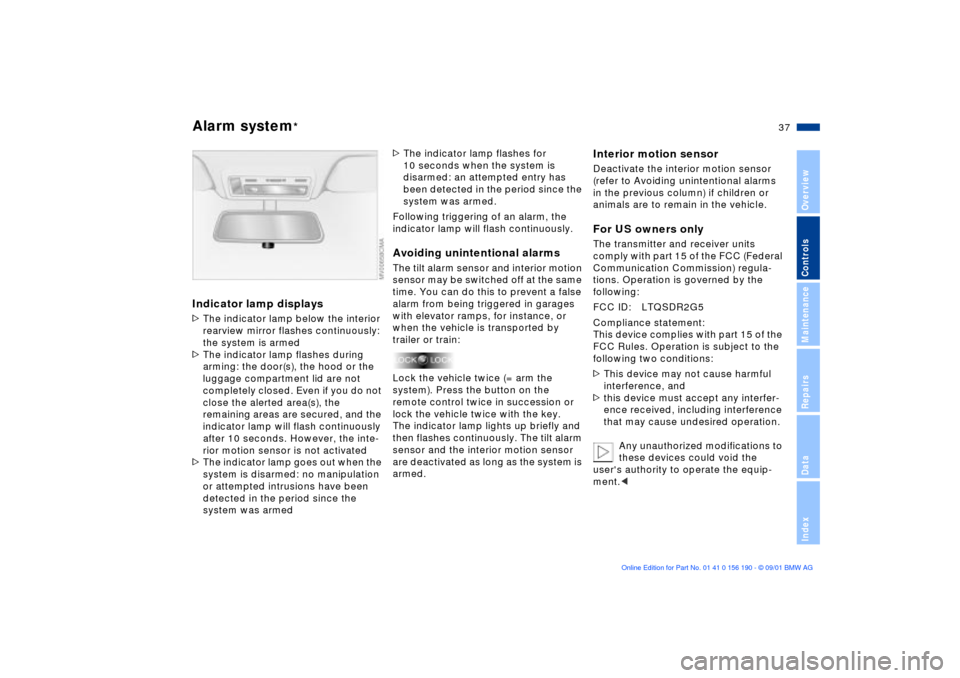
Indicator lamp displays>The indicator lamp below the interior
rearview mirror flashes continuously:
the system is armed
>The indicator lamp flashes during
arming: the door(s), the hood or the
luggage compartment lid are not
completely closed. Even if you do not
close the alerted area(s), the
remaining areas are secured, and the
indicator lamp will flash continuously
after 10 seconds. However, the inte-
rior motion sensor is not activated
>The indicator lamp goes out when the
system is disarmed: no manipulation
or attempted intrusions have been
detected in the period since the
system was armed
>The indicator lamp flashes for
10 seconds when the system is
disarmed: an attempted entry has
been detected in the period since the
system was armed.
Following triggering of an alarm, the
indicator lamp will flash continuously.Avoiding unintentional alarmsThe tilt alarm sensor and interior motion
sensor may be switched off at the same
time. You can do this to prevent a false
alarm from being triggered in garages
with elevator ramps, for instance, or
when the vehicle is transported by
trailer or train:
Lock the vehicle twice (= arm the
system). Press the button on the
remote control twice in succession or
lock the vehicle twice with the key.
The indicator lamp lights up briefly and
then flashes continuously. The tilt alarm
sensor and the interior motion sensor
are deactivated as long as the system is
armed.
Interior motion sensorDeactivate the interior motion sensor
(refer to Avoiding unintentional alarms
in the previous column) if children or
animals are to remain in the vehicle.For US owners onlyThe transmitter and receiver units
comply with part 15 of the FCC (Federal
Communication Commission) regula-
tions. Operation is governed by the
following:
FCC ID: LTQSDR2G5
Compliance statement:
This device complies with part 15 of the
FCC Rules. Operation is subject to the
following two conditions:
>This device may not cause harmful
interference, and
>this device must accept any interfer-
ence received, including interference
that may cause undesired operation.
Any unauthorized modifications to
these devices could void the
user's authority to operate the equip-
ment.<
Page 39 of 159
39n
OverviewControlsMaintenanceRepairsDataIndex
Manual convertible topThe fabric top offers the perfect protec-
tion against weather and one person
can open and close it easily and simply.
So that you will get the most out of
enjoying your convertible, here are a
few tips: it is advisable to close the
convertible top when the vehicle is
being parked. The closed convertible
top not only protects the passenger
compartment from unforeseeable
damage from the weather, it also
provides a certain degree of theft
protection.
In addition, keep valuables only in the
locked luggage compartment, even
with the convertible top closed.
Never mount a roof-mounted luggage
rack on the convertible top.
Closing the electric power
windows: to help ensure that the
windows seal securely, you should
either close the rear windows first or
close all four windows at the same
time.<
To open the convertible top
Never attempt to open or close
the convertible top unless the
vehicle is completely stationary. To
prevent vehicle damage the top
compartment's lock will not disengage
unless the luggage compartment lid is
closed.<
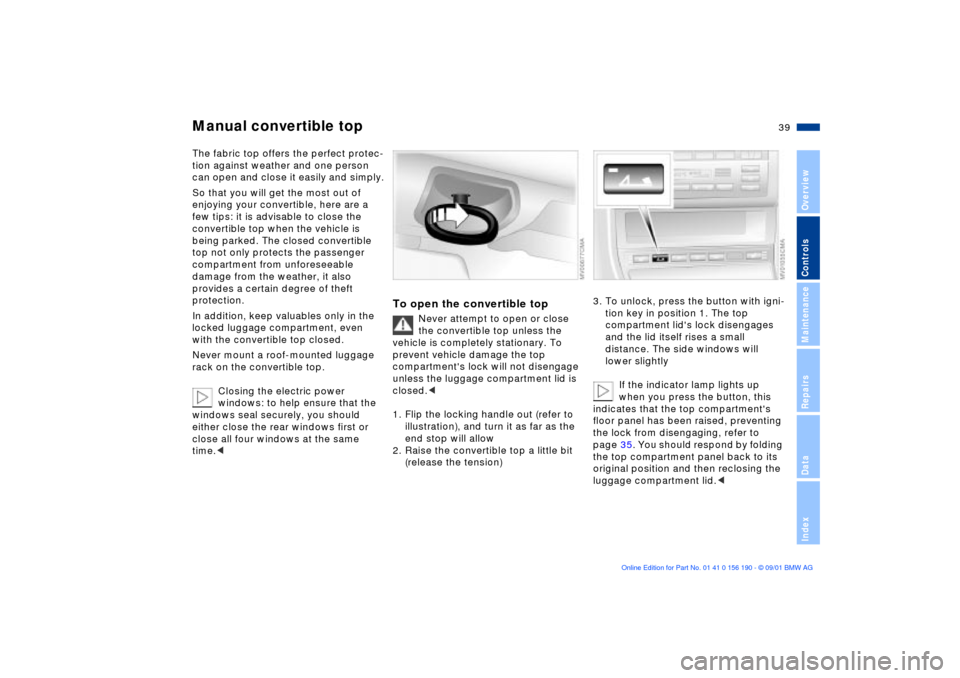
1. Flip the locking handle out (refer to
illustration), and turn it as far as the
end stop will allow
2. Raise the convertible top a little bit
(release the tension)
3. To unlock, press the button with igni-
tion key in position 1. The top
compartment lid's lock disengages
and the lid itself rises a small
distance. The side windows will
lower slightly
If the indicator lamp lights up
when you press the button, this
indicates that the top compartment's
floor panel has been raised, preventing
the lock from disengaging, refer to
page 35. You should respond by folding
the top compartment panel back to its
original position and then reclosing the
luggage compartment lid.<
Page 43 of 159
43n
OverviewControlsMaintenanceRepairsDataIndex
Fully-automatic convertible top
*
When closing the electric power
windows while underway, always
remember to either start by closing the
rear windows or to close all of them at
once. Failure to adhere to this
sequence can prevent the windows
from sealing tightly at high speeds.<
At higher speeds, the ensuing
vacuum in the passenger
compartment can cause the convertible
top to begin fluttering. Increase the air
supply via the ventilation controls so
that a vacuum does not occur in the
vehicle.<
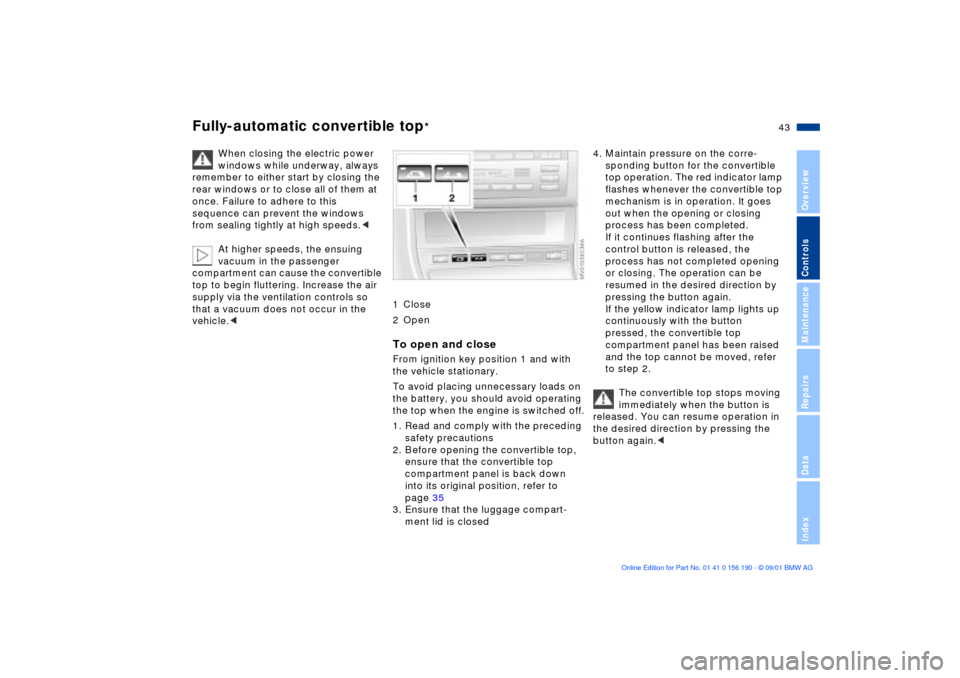
1 Close
2 OpenTo open and closeFrom ignition key position 1 and with
the vehicle stationary.
To avoid placing unnecessary loads on
the battery, you should avoid operating
the top when the engine is switched off.
1. Read and comply with the preceding
safety precautions
2. Before opening the convertible top,
ensure that the convertible top
compartment panel is back down
into its original position, refer to
page 35
3. Ensure that the luggage compart-
ment lid is closed
4. Maintain pressure on the corre-
sponding button for the convertible
top operation. The red indicator lamp
flashes whenever the convertible top
mechanism is in operation. It goes
out when the opening or closing
process has been completed.
If it continues flashing after the
control button is released, the
process has not completed opening
or closing. The operation can be
resumed in the desired direction by
pressing the button again.
If the yellow indicator lamp lights up
continuously with the button
pressed, the convertible top
compartment panel has been raised
and the top cannot be moved, refer
to step 2.
The convertible top stops moving
immediately when the button is
released. You can resume operation in
the desired direction by pressing the
button again.<
Page 53 of 159
53n
OverviewControlsMaintenanceRepairsDataIndex
Seat and mirror memory
*
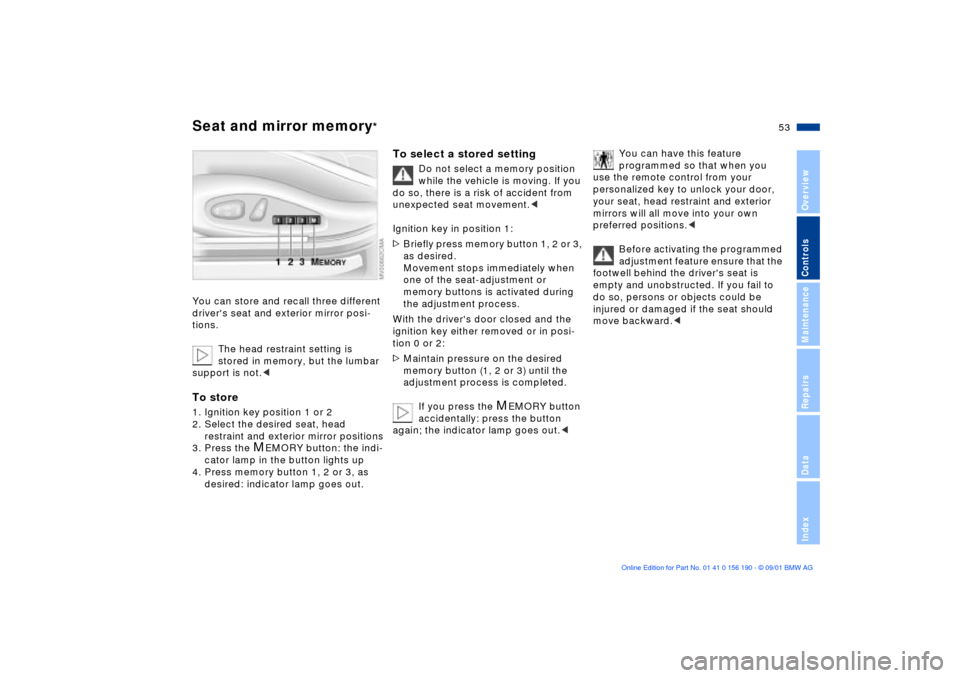
You can store and recall three different
driver's seat and exterior mirror posi-
tions.
The head restraint setting is
stored in memory, but the lumbar
support is not.
restraint and exterior mirror positions
3. Press the
M
EMORY button: the indi-
cator lamp in the button lights up
4. Press memory button 1, 2 or 3, as
desired: indicator lamp goes out.
To select a stored setting
Do not select a memory position
while the vehicle is moving. If you
do so, there is a risk of accident from
unexpected seat movement.<
Ignition key in position 1:
>Briefly press memory button 1, 2 or 3,
as desired.
Movement stops immediately when
one of the seat-adjustment or
memory buttons is activated during
the adjustment process.
With the driver's door closed and the
ignition key either removed or in posi-
tion 0 or 2:
>Maintain pressure on the desired
memory button (1, 2 or 3) until the
adjustment process is completed.
If you press the
M
EMORY button
accidentally: press the button
again; the indicator lamp goes out.<
You can have this feature
programmed so that when you
use the remote control from your
personalized key to unlock your door,
your seat, head restraint and exterior
mirrors will all move into your own
preferred positions.<
Before activating the programmed
adjustment feature ensure that the
footwell behind the driver's seat is
empty and unobstructed. If you fail to
do so, persons or objects could be
injured or damaged if the seat should
move backward.<
Page 75 of 159
75n
OverviewControlsMaintenanceRepairsDataIndex
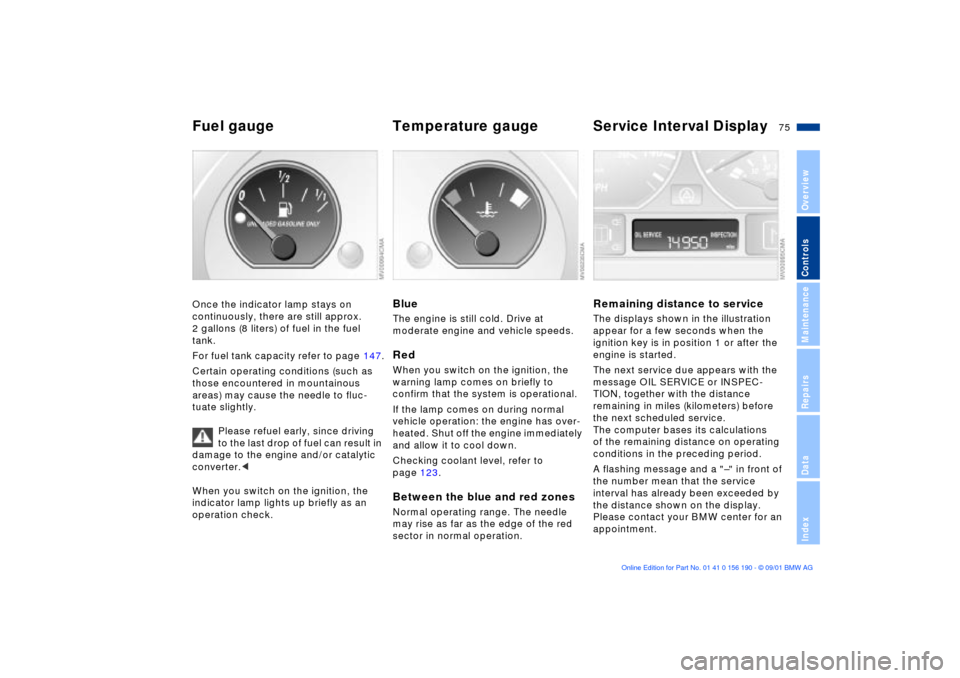
Fuel gauge Temperature gauge Service Interval DisplayOnce the indicator lamp stays on
continuously, there are still approx.
2 gallons (8 liters) of fuel in the fuel
tank.
For fuel tank capacity refer to page 147.
Certain operating conditions (such as
those encountered in mountainous
areas) may cause the needle to fluc-
tuate slightly.
Please refuel early, since driving
to the last drop of fuel can result in
damage to the engine and/or catalytic
converter.<
When you switch on the ignition, the
indicator lamp lights up briefly as an
operation check.
BlueThe engine is still cold. Drive at
moderate engine and vehicle speeds.RedWhen you switch on the ignition, the
warning lamp comes on briefly to
confirm that the system is operational.
If the lamp comes on during normal
vehicle operation: the engine has over-
heated. Shut off the engine immediately
and allow it to cool down.
Checking coolant level, refer to
page 123.Between the blue and red zonesNormal operating range. The needle
may rise as far as the edge of the red
sector in normal operation.
Remaining distance to serviceThe displays shown in the illustration
appear for a few seconds when the
ignition key is in position 1 or after the
engine is started.
The next service due appears with the
message OIL SERVICE or INSPEC-
TION, together with the distance
remaining in miles (kilometers) before
the next scheduled service.
The computer bases its calculations
of the remaining distance on operating
conditions in the preceding period.
A flashing message and a "Ð" in front of
the number mean that the service
interval has already been exceeded by
the distance shown on the display.
Please contact your BMW center for an
appointment.
Page 85 of 159
85n
OverviewControlsMaintenanceRepairsDataIndex
Flat Tire Monitor
*
The conceptAs you drive, the Flat Tire Monitor
keeps track of pressure levels in all four
tires in order to detect and warn of any
substantial pressure loss.
The system actually detects pressure
loss by monitoring differences in the
relative speeds of the four wheels. It
interprets variations outside specified
limits as severe pressure loss, and then
responds by generating a warning.
Initializing the systemInitializing is necessary to familiarize the
system with the correct inflation pres-
sure.
Repeat this process after any changes
in tire inflation pressure, tire rotation or
replacement. Do not carry out further
system initialization after adjusting the
inflation pressure and letting the system
"learn" the correct pressures.
1. Check the tire inflation pressures in
all the tires, comparing them with the
inflation pressure table on page 25,
and adjusting if necessary
2. Turn the ignition key to position 2
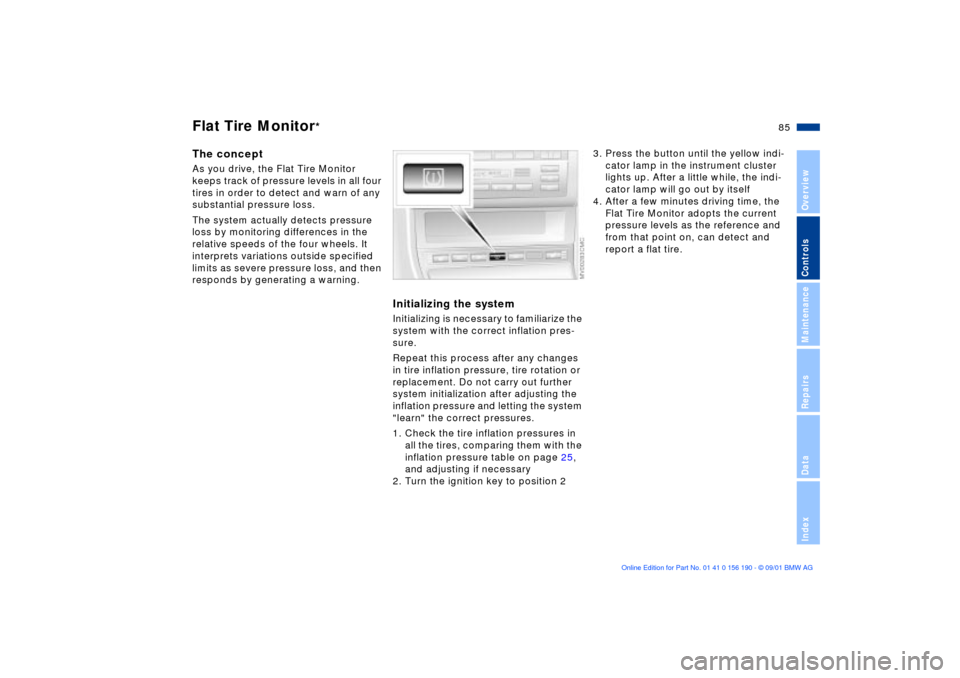
3. Press the button until the yellow indi-
cator lamp in the instrument cluster
lights up. After a little while, the indi-
cator lamp will go out by itself
4. After a few minutes driving time, the
Flat Tire Monitor adopts the current
pressure levels as the reference and
from that point on, can detect and
report a flat tire.
Page 86 of 159
86n
Flat Tire Monitor
*
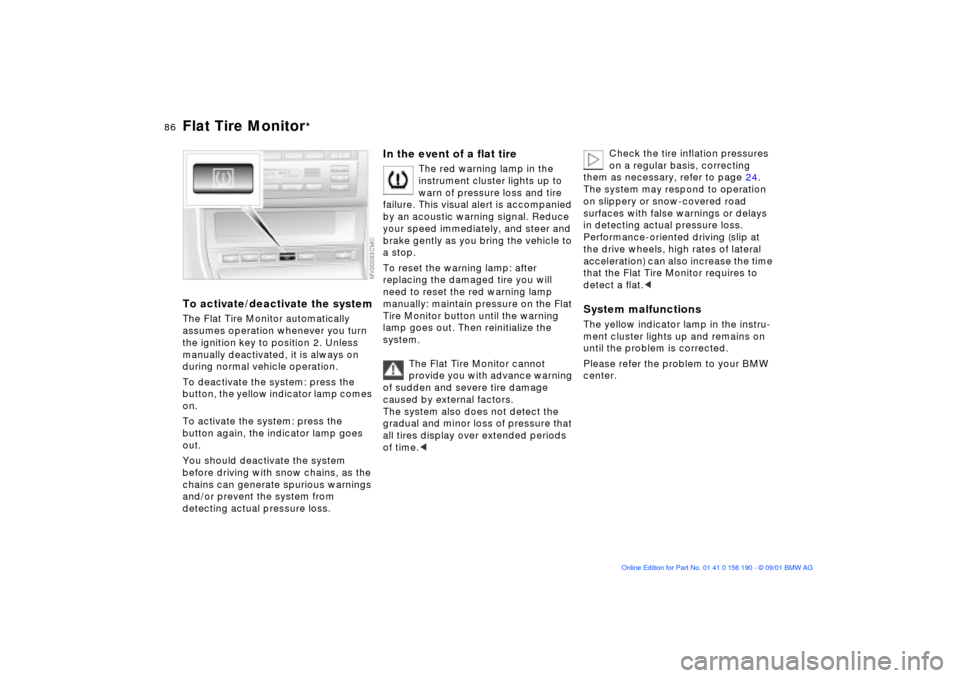
To activate/deactivate the systemThe Flat Tire Monitor automatically
assumes operation whenever you turn
the ignition key to position 2. Unless
manually deactivated, it is always on
during normal vehicle operation.
To deactivate the system: press the
button, the yellow indicator lamp comes
on.
To activate the system: press the
button again, the indicator lamp goes
out.
You should deactivate the system
before driving with snow chains, as the
chains can generate spurious warnings
and/or prevent the system from
detecting actual pressure loss.
In the event of a flat tire
The red warning lamp in the
instrument cluster lights up to
warn of pressure loss and tire
failure. This visual alert is accompanied
by an acoustic warning signal. Reduce
your speed immediately, and steer and
brake gently as you bring the vehicle to
a stop.
To reset the warning lamp: after
replacing the damaged tire you will
need to reset the red warning lamp
manually: maintain pressure on the Flat
Tire Monitor button until the warning
lamp goes out. Then reinitialize the
system.
The Flat Tire Monitor cannot
provide you with advance warning
of sudden and severe tire damage
caused by external factors.
The system also does not detect the
gradual and minor loss of pressure that
all tires display over extended periods
of time.<
Check the tire inflation pressures
on a regular basis, correcting
them as necessary, refer to page 24.
The system may respond to operation
on slippery or snow-covered road
surfaces with false warnings or delays
in detecting actual pressure loss.
Performance-oriented driving (slip at
the drive wheels, high rates of lateral
acceleration) can also increase the time
that the Flat Tire Monitor requires to
detect a flat.<
System malfunctionsThe yellow indicator lamp in the instru-
ment cluster lights up and remains on
until the problem is corrected.
Please refer the problem to your BMW
center.