BMW 330Ci COUPE 2001 E46 Repair Manual
Manufacturer: BMW, Model Year: 2001, Model line: 330Ci COUPE, Model: BMW 330Ci COUPE 2001 E46Pages: 203, PDF Size: 2.03 MB
Page 61 of 203
61n
IndexDataTechnologyRepairsCar careControlsOverview
Transporting children safelyCommercially available child seats
complying with the legal standard are
designed to be secured with a lap belt
or with the lap belt portion of a combi-
nation lap/shoulder belt.
Improperly or inadequately installed
restraint systems can increase the risk
of injury to children. Always read and
follow the instructions that come with
the system.
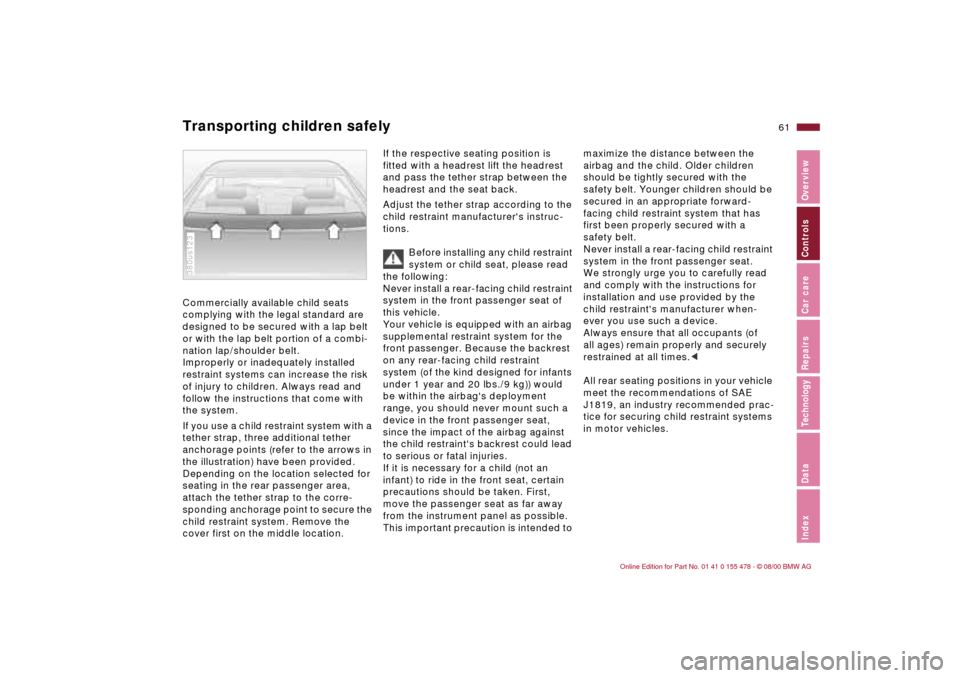
If you use a child restraint system with a
tether strap, three additional tether
anchorage points (refer to the arrows in
the illustration) have been provided.
Depending on the location selected for
seating in the rear passenger area,
attach the tether strap to the corre-
sponding anchorage point to secure the
child restraint system. Remove the
cover first on the middle location.380us123
If the respective seating position is
fitted with a headrest lift the headrest
and pass the tether strap between the
headrest and the seat back.
Adjust the tether strap according to the
child restraint manufacturer's instruc-
tions.
Before installing any child restraint
system or child seat, please read
the following:
Never install a rear-facing child restraint
system in the front passenger seat of
this vehicle.
Your vehicle is equipped with an airbag
supplemental restraint system for the
front passenger. Because the backrest
on any rear-facing child restraint
system (of the kind designed for infants
under 1 year and 20 lbs./9 kg)) would
be within the airbag's deployment
range, you should never mount such a
device in the front passenger seat,
since the impact of the airbag against
the child restraint's backrest could lead
to serious or fatal injuries.
If it is necessary for a child (not an
infant) to ride in the front seat, certain
precautions should be taken. First,
move the passenger seat as far away
from the instrument panel as possible.
This important precaution is intended to
maximize the distance between the
airbag and the child. Older children
should be tightly secured with the
safety belt. Younger children should be
secured in an appropriate forward-
facing child restraint system that has
first been properly secured with a
safety belt.
Never install a rear-facing child restraint
system in the front passenger seat.
We strongly urge you to carefully read
and comply with the instructions for
installation and use provided by the
child restraint's manufacturer when-
ever you use such a device.
Always ensure that all occupants (of
all ages) remain properly and securely
restrained at all times.<
All rear seating positions in your vehicle
meet the recommendations of SAE
J1819, an industry recommended prac-
tice for securing child restraint systems
in motor vehicles.
Page 62 of 203
62n
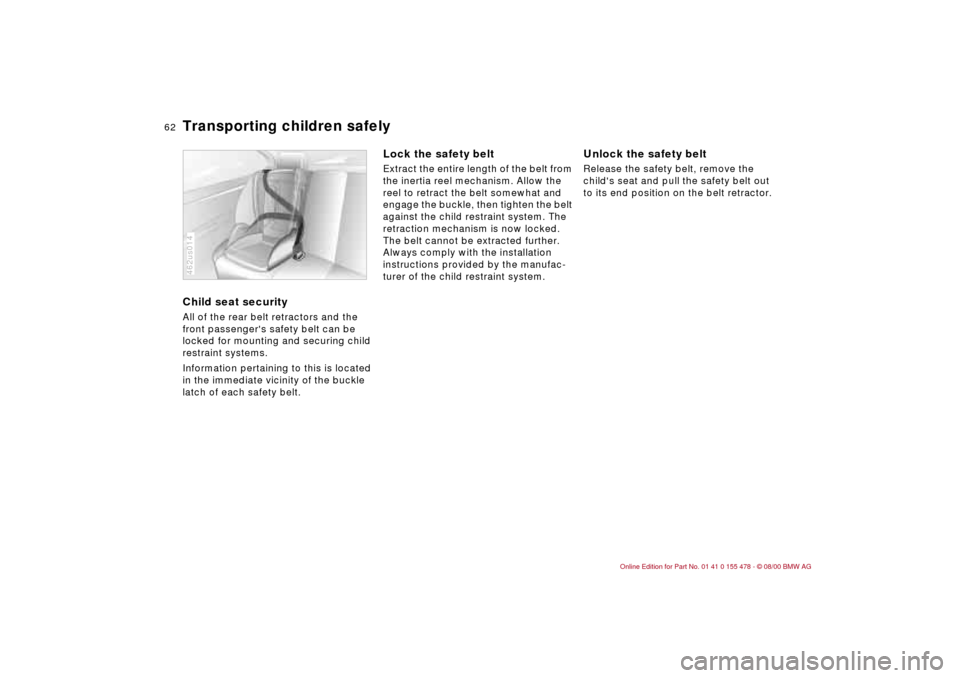
Transporting children safelyChild seat securityAll of the rear belt retractors and the
front passenger's safety belt can be
locked for mounting and securing child
restraint systems.
Information pertaining to this is located
in the immediate vicinity of the buckle
latch of each safety belt.462us014
Lock the safety beltExtract the entire length of the belt from
the inertia reel mechanism. Allow the
reel to retract the belt somewhat and
engage the buckle, then tighten the belt
against the child restraint system. The
retraction mechanism is now locked.
The belt cannot be extracted further.
Always comply with the installation
instructions provided by the manufac-
turer of the child restraint system.
Unlock the safety beltRelease the safety belt, remove the
child's seat and pull the safety belt out
to its end position on the belt retractor.
Page 63 of 203
63n
IndexDataTechnologyRepairsCar careControlsOverview
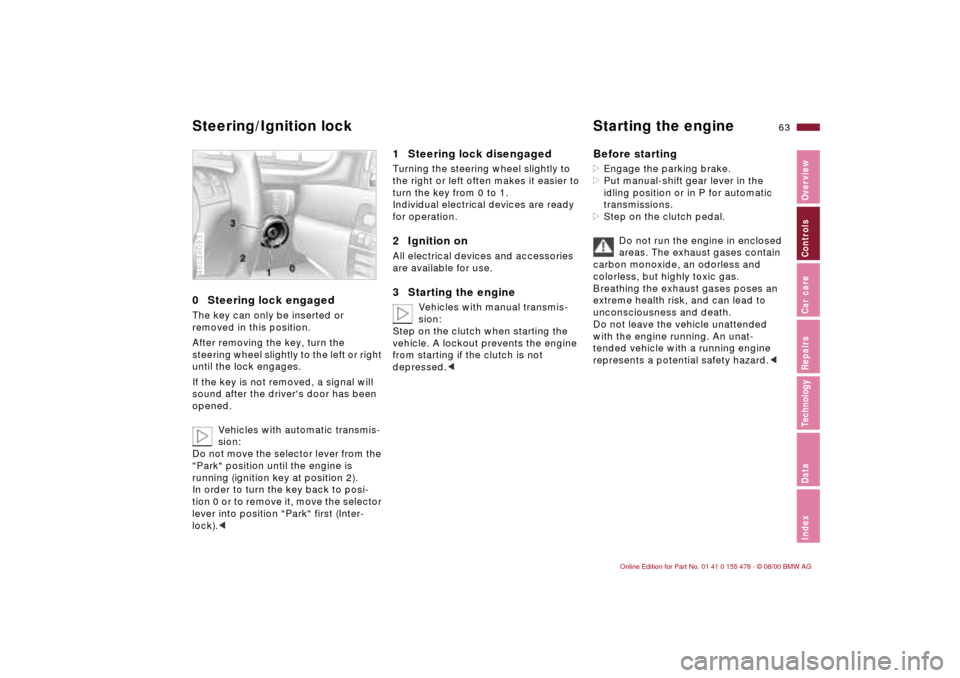
0 Steering lock engaged The key can only be inserted or
removed in this position.
After removing the key, turn the
steering wheel slightly to the left or right
until the lock engages.
If the key is not removed, a signal will
sound after the driver's door has been
opened.
Vehicles with automatic transmis-
sion:
Do not move the selector lever from the
"Park" position until the engine is
running (ignition key at position 2).
In order to turn the key back to posi-
tion 0 or to remove it, move the selector
lever into position "Park" first (Inter-
lock).<46cde093
1 Steering lock disengaged Turning the steering wheel slightly to
the right or left often makes it easier to
turn the key from 0 to 1.
Individual electrical devices are ready
for operation.2 Ignition onAll electrical devices and accessories
are available for use.3 Starting the engine
Vehicles with manual transmis-
sion:
Step on the clutch when starting the
vehicle. A lockout prevents the engine
from starting if the clutch is not
depressed.<
Before starting>Engage the parking brake.
>Put manual-shift gear lever in the
idling position or in P for automatic
transmissions.
>Step on the clutch pedal.
Do not run the engine in enclosed
areas. The exhaust gases contain
carbon monoxide, an odorless and
colorless, but highly toxic gas.
Breathing the exhaust gases poses an
extreme health risk, and can lead to
unconsciousness and death.
Do not leave the vehicle unattended
with the engine running. An unat-
tended vehicle with a running engine
represents a potential safety hazard.<
Steering/Ignition lock Starting the engine
Page 64 of 203

64n
Starting the engine Switching off the engine Do not press the accelerator pedal
while starting the engine.
Do not actuate the starter for too
short a time, but do not actuate it
for more than approx. 20 seconds.
Release the ignition key immediately
when the engine starts.
Do not allow the engine to warm up by
leaving it running while the vehicle
remains stationary. Instead, begin
driving immediately at a moderate
engine speed.<
If the engine does not start on the first
attempt (if it is very cold or hot, for
instance):
>Press the accelerator pedal halfway
down while engaging the starter.
Cold starts at very low temperatures,
starting at about +57 (Ð156) and
at high altitudes above 3,300 ft
(1,000 meters):
>On the first start attempt, engage the
starter for a longer period (approx.
10 seconds).
>Press the accelerator pedal halfway
down while engaging the starter.
Engine idle speed is controlled by the
engine computer system. Increased
speeds at start-up are normal and
should decrease as the engine warms
up. If engine speed does not decrease,
service is required.
To prevent the battery from
discharging, always deactivate
electrical devices that are not in
use. Switch the ignition off when the
vehicle is not being driven.Turn the ignition key to position 1 or 0.
Do not remove the ignition key
while the vehicle is still moving.
If you did so, the steering lock would
engage when the steering wheel is
turned.
Whenever you leave the vehicle, always
remove the ignition key and lock the
steering wheel.
Vehicles with manual transmission:
Always apply the parking brake when
parking on slopes and inclined
surfaces, since placing the shift lever in
1st gear or reverse may not provide
adequate resistance to rolling.
Vehicles with automatic transmission:
Place the selector lever in "Park."<
Page 65 of 203
65n
IndexDataTechnologyRepairsCar careControlsOverview
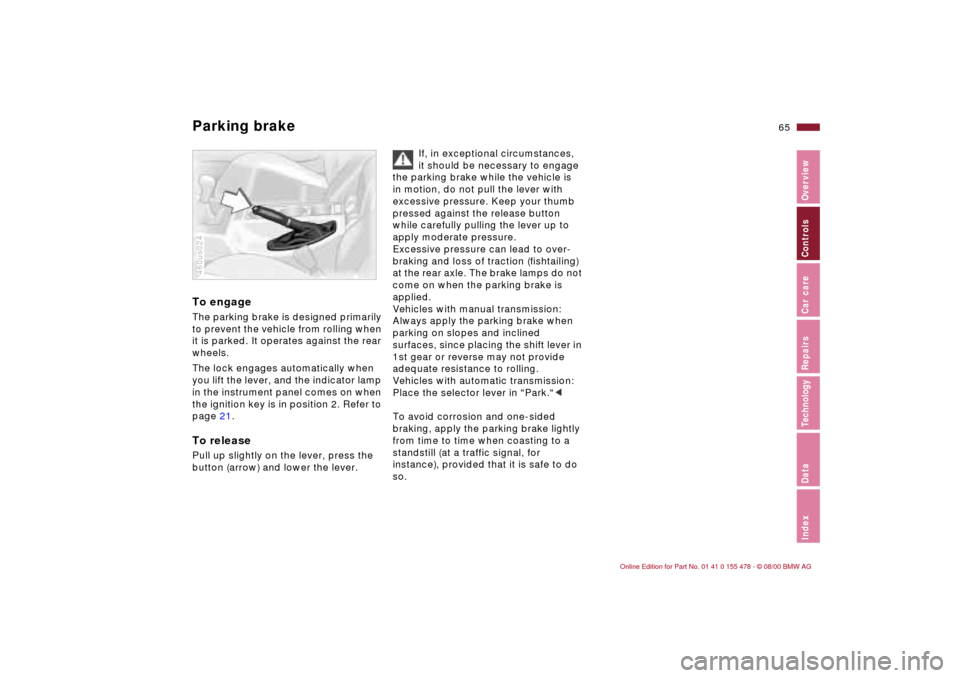
Parking brake To engageThe parking brake is designed primarily
to prevent the vehicle from rolling when
it is parked. It operates against the rear
wheels.
The lock engages automatically when
you lift the lever, and the indicator lamp
in the instrument panel comes on when
the ignition key is in position 2. Refer to
page 21.To releasePull up slightly on the lever, press the
button (arrow) and lower the lever.460us024
If, in exceptional circumstances,
it should be necessary to engage
the parking brake while the vehicle is
in motion, do not pull the lever with
excessive pressure. Keep your thumb
pressed against the release button
while carefully pulling the lever up to
apply moderate pressure.
Excessive pressure can lead to over-
braking and loss of traction (fishtailing)
at the rear axle. The brake lamps do not
come on when the parking brake is
applied.
Vehicles with manual transmission:
Always apply the parking brake when
parking on slopes and inclined
surfaces, since placing the shift lever in
1st gear or reverse may not provide
adequate resistance to rolling.
Vehicles with automatic transmission:
Place the selector lever in "Park."<
To avoid corrosion and one-sided
braking, apply the parking brake lightly
from time to time when coasting to a
standstill (at a traffic signal, for
instance), provided that it is safe to do
so.
Page 66 of 203
66n
Manual transmission Press the clutch pedal all the way down
each time you shift, pressing the
manual-shift gear lever into its proper
end position.
Depress the clutch when starting the
vehicle, too, otherwise, lockout will
prevent the engine from starting if the
clutch is not depressed.
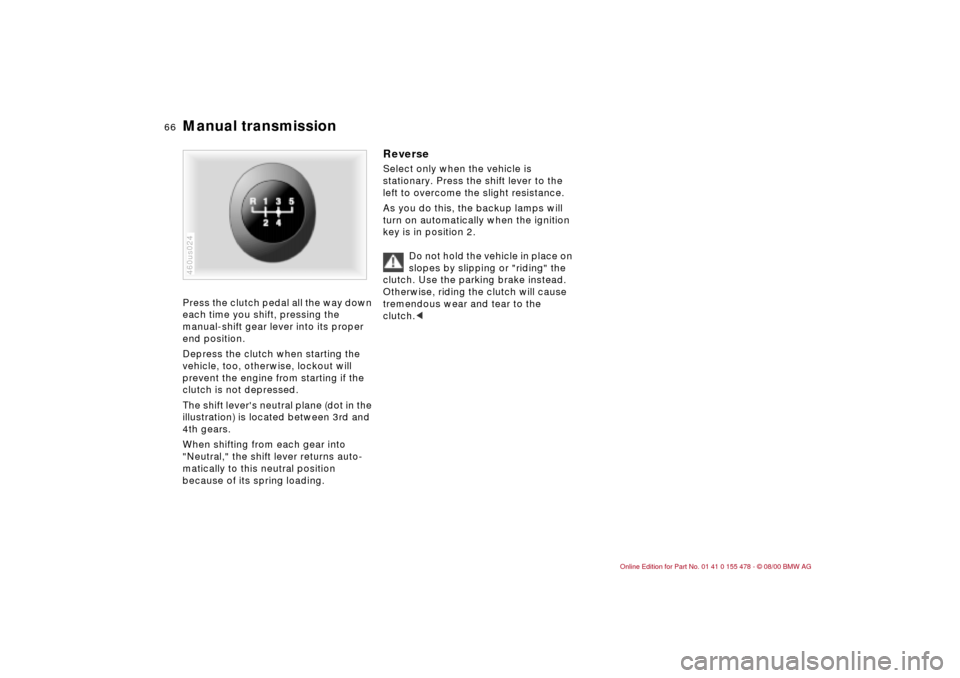
The shift lever's neutral plane (dot in the
illustration) is located between 3rd and
4th gears.
When shifting from each gear into
"Neutral," the shift lever returns auto-
matically to this neutral position
because of its spring loading.460us024
Reverse Select only when the vehicle is
stationary. Press the shift lever to the
left to overcome the slight resistance.
As you do this, the backup lamps will
turn on automatically when the ignition
key is in position 2.
Do not hold the vehicle in place on
slopes by slipping or "riding" the
clutch. Use the parking brake instead.
Otherwise, riding the clutch will cause
tremendous wear and tear to the
clutch.<
Page 67 of 203
67n
IndexDataTechnologyRepairsCar careControlsOverview
Automatic transmission with Steptronic
*
You have the option of driving with a
normal automatic transmission or
switching to manual.
When you move the selector lever from
the "D" position to the left into the M/S
range, the performance-oriented shift
programs of the automatic transmission
are engaged. As soon as you even
begin to move the selector lever toward
the "+" or tap "Ð", Steptronic shifts the
gear and manual operation becomes
active. Whenever you want to use the
automatic mode again, move the
selector lever to the right into posi-
tion "D."
The automatic transmission with Step-
tronic is equipped with Adaptive Trans-
mission Control (ATC). ATC reacts with
precision to your individual driving style
and the current driving conditions. It is
for this reason that various shift
programs are used.
You will find additional information
about ATC in the chapter called
"Advanced Technology" on page 174.
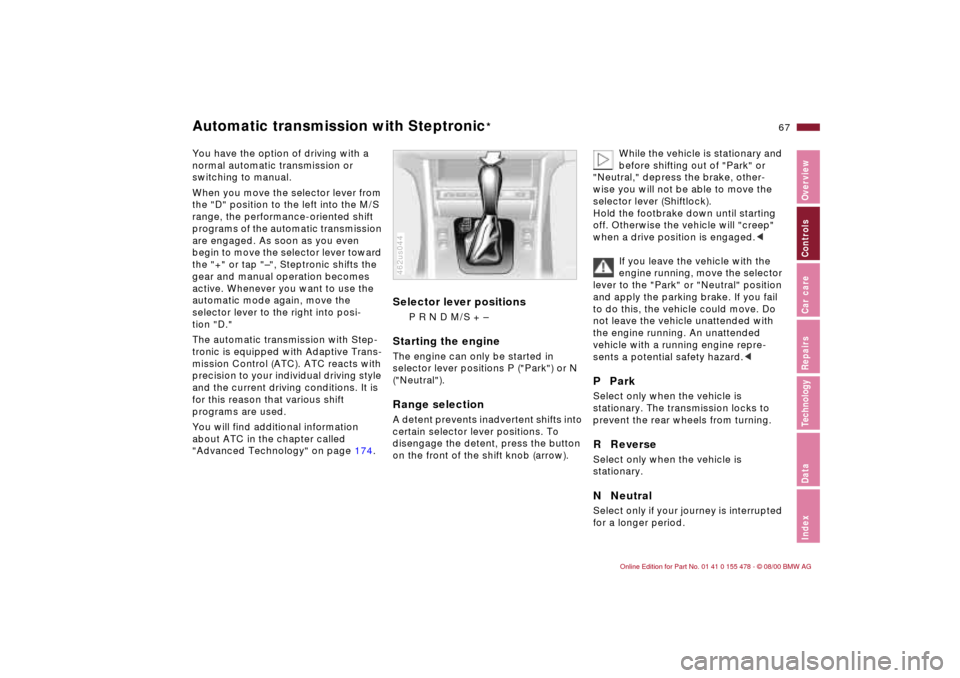
Selector lever positions
P R N D M/S + Ð
Starting the engineThe engine can only be started in
selector lever positions P ("Park") or N
("Neutral").Range selectionA detent prevents inadvertent shifts into
certain selector lever positions. To
disengage the detent, press the button
on the front of the shift knob (arrow).462us044
While the vehicle is stationary and
before shifting out of "Park" or
"Neutral," depress the brake, other-
wise you will not be able to move the
selector lever (Shiftlock).
Hold the footbrake down until starting
off. Otherwise the vehicle will "creep"
when a drive position is engaged.<
If you leave the vehicle with the
engine running, move the selector
lever to the "Park" or "Neutral" position
and apply the parking brake. If you fail
to do this, the vehicle could move. Do
not leave the vehicle unattended with
the engine running. An unattended
vehicle with a running engine repre-
sents a potential safety hazard.<
P ParkSelect only when the vehicle is
stationary. The transmission locks to
prevent the rear wheels from turning.R ReverseSelect only when the vehicle is
stationary.N NeutralSelect only if your journey is interrupted
for a longer period.
Page 68 of 203
68n
Automatic transmission with Steptronic
*
D Drive (automatic shift program)This position is designed for driving
under all normal operating conditions.
All forward gears are available, the
Adaptive Transmission Control (ATC) is
fully operational."Kickdown"In the "Kickdown" mode, you achieve
maximum performance. To activate this
mode, depress the accelerator pedal
beyond the full-throttle position, at
which a resistance point must be
overcome.
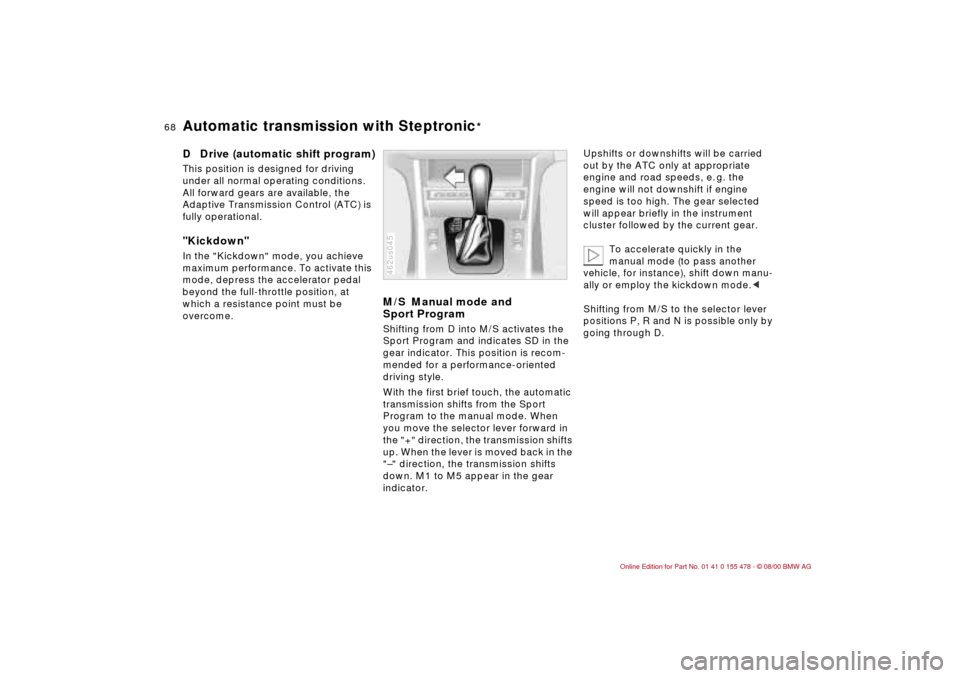
M/S Manual mode and
Sport ProgramShifting from D into M/S activates the
Sport Program and indicates SD in the
gear indicator. This position is recom-
mended for a performance-oriented
driving style.
With the first brief touch, the automatic
transmission shifts from the Sport
Program to the manual mode. When
you move the selector lever forward in
the "+" direction, the transmission shifts
up. When the lever is moved back in the
"Ð" direction, the transmission shifts
down. M1 to M5 appear in the gear
indicator.462us045
Upshifts or downshifts will be carried
out by the ATC only at appropriate
engine and road speeds, e. g. the
engine will not downshift if engine
speed is too high. The gear selected
will appear briefly in the instrument
cluster followed by the current gear.
To accelerate quickly in the
manual mode (to pass another
vehicle, for instance), shift down manu-
ally or employ the kickdown mode.<
Shifting from M/S to the selector lever
positions P, R and N is possible only by
going through D.
Page 69 of 203
69n
IndexDataTechnologyRepairsCar careControlsOverview
Automatic transmission with Steptronic
*
In the following situations, the Step-
tronic "thinks" for you in the manual
mode:
>In order to prevent the engine from
overrevving, the transmission shifts
automatically to the next higher gear
just before the engine speed cutoff
point.
>If you do not do anything to inter-
vene, it will automatically downshift
at lower speeds.
>In the kickdown mode, the transmis-
sion shifts down to the lowest gear
which is possible, depending on the
engine speed.
>Depending on the situation Ñ when
driving in adverse winter conditions,
for example Ñ you may also start out
in 2nd or 3rd gear.
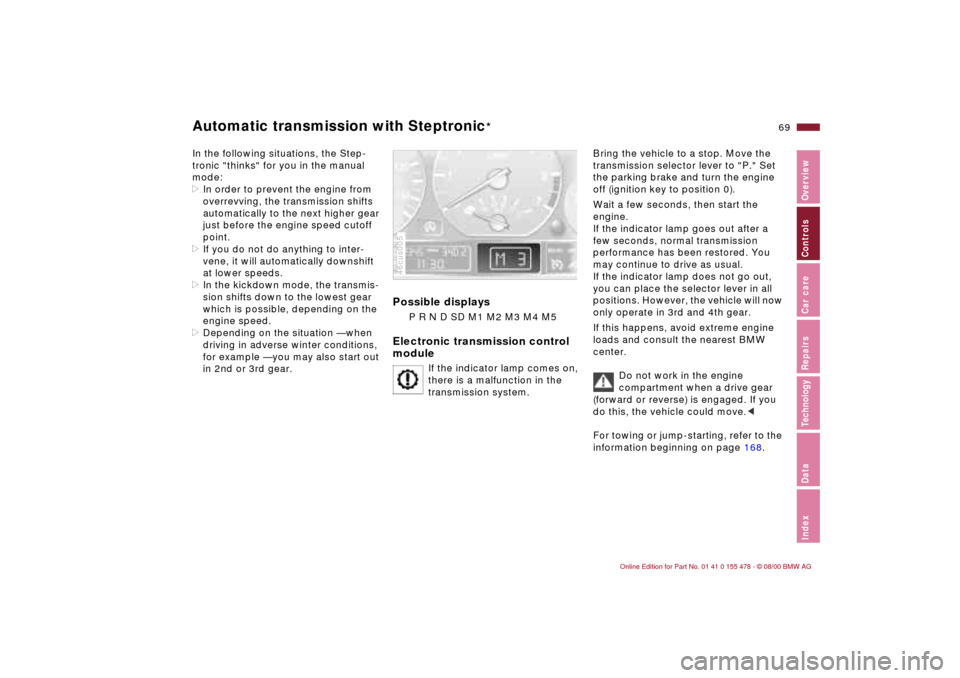
Possible displays
P R N D SD M1 M2 M3 M4 M5
Electronic transmission control
module
If the indicator lamp comes on,
there is a malfunction in the
transmission system.
46cus005
Bring the vehicle to a stop. Move the
transmission selector lever to "P." Set
the parking brake and turn the engine
off (ignition key to position 0).
Wait a few seconds, then start the
engine.
If the indicator lamp goes out after a
few seconds, normal transmission
performance has been restored. You
may continue to drive as usual.
If the indicator lamp does not go out,
you can place the selector lever in all
positions. However, the vehicle will now
only operate in 3rd and 4th gear.
If this happens, avoid extreme engine
loads and consult the nearest BMW
center.
Do not work in the engine
compartment when a drive gear
(forward or reverse) is engaged. If you
do this, the vehicle could move.<
For towing or jump-starting, refer to the
information beginning on page 168.
Page 70 of 203
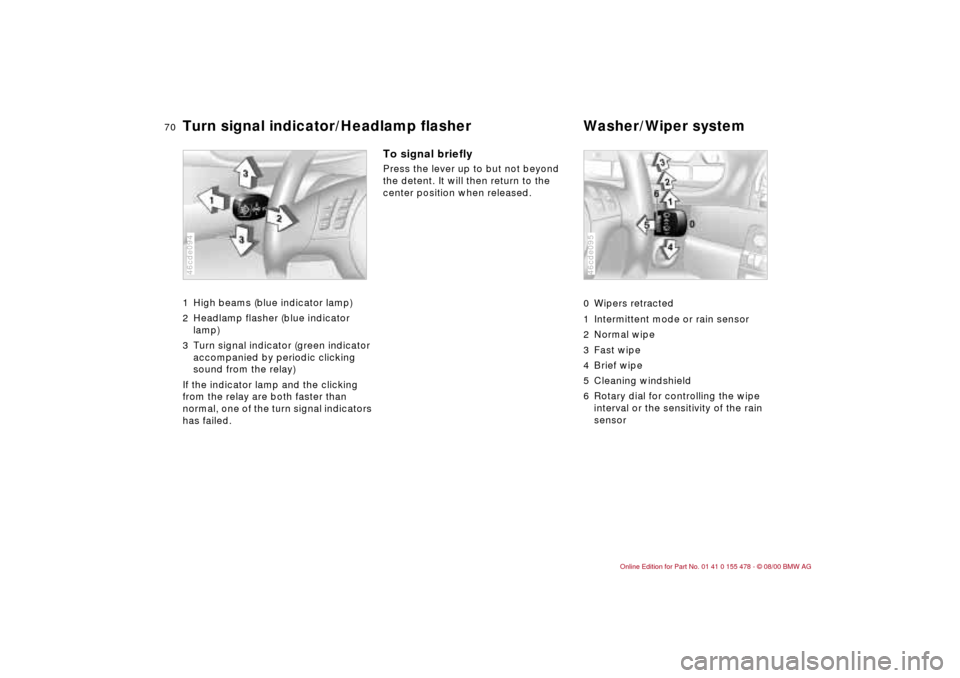
70n
Turn signal indicator/Headlamp flasher Washer/Wiper system 1 High beams (blue indicator lamp)
2 Headlamp flasher (blue indicator
lamp)
3 Turn signal indicator (green indicator
accompanied by periodic clicking
sound from the relay)
If the indicator lamp and the clicking
from the relay are both faster than
normal, one of the turn signal indicators
has failed.46cde094
To signal brieflyPress the lever up to but not beyond
the detent. It will then return to the
center position when released.
0 Wipers retracted
1 Intermittent mode or rain sensor
2 Normal wipe
3 Fast wipe
4 Brief wipe
5 Cleaning windshield
6 Rotary dial for controlling the wipe
interval or the sensitivity of the rain
sensor
46cde095