Indicator light BMW 330Ci COUPE 2002 E46 Owner's Manual
[x] Cancel search | Manufacturer: BMW, Model Year: 2002, Model line: 330Ci COUPE, Model: BMW 330Ci COUPE 2002 E46Pages: 147, PDF Size: 2.2 MB
Page 17 of 147

17n
OverviewControlsMaintenanceRepairsDataIndex
Indicator and warning lamps
Technology that monitors itself
Indicator and warning lamps that are
identified by
l
are tested for proper
functioning whenever the ignition key is
turned. They each light up once for
different periods of time.
If a fault should occur in one of these
systems, the corresponding lamp does
not go out after the engine is started, or
it lights up while the vehicle is moving.
You will see how to react to this below.
Red: stop immediately
Battery charge current
l
The battery is no longer being
charged. Indicates a defective
alternator drive belt or a problem with
the alternator's charge circuit. Please
contact the nearest BMW center.
If the drive belt is defective, stop
and switch off the engine immedi-
ately to prevent overheating and
serious engine damage. If the drive belt
is defective, increased steering effort is
also required.
<
Engine oil pressure
l
Stop the vehicle immediately
and switch off engine. Check
the engine oil level and top off as
required. If the oil level is correct,
please contact the nearest BMW
center.
Do not continue driving, as the
engine could sustain serious
damage from inadequate lubrication.
<
Brake warning lamp
l
If the lamp comes on when the
parking brake is not engaged:
check the brake fluid level. Before
driving further, be sure to comply with
the instructions on pages 100 and 112
Brake warning lamp for Cana-
dian models.
Tire Pressure Monitor (RDC)/
Flat Tire Monitor
l
In addition, an acoustic signal is
sounded: a tire failure has occurred.
Reduce vehicle speed immediately to
stop the vehicle. Avoid hard brake
applications. As you steer the vehicle,
use caution and avoid overcorrecting.
For additional information: refer to
pages 73, 75
Page 18 of 147
18n
Indicator and warning lamps
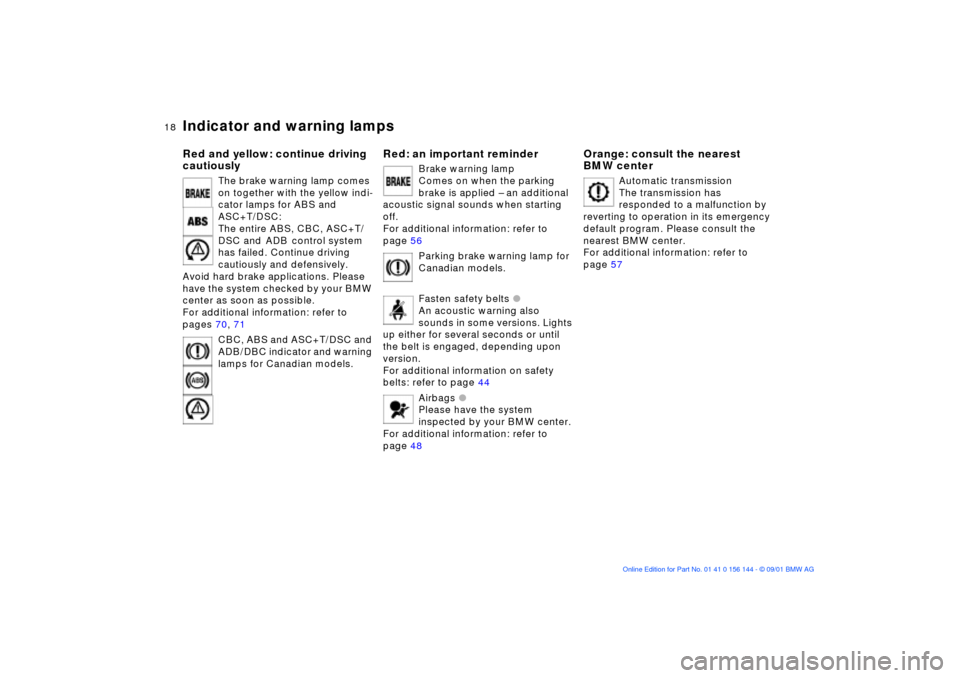
Red and yellow: continue driving
cautiously
The brake warning lamp comes
on together with the yellow indi-
cator lamps for ABS and
ASC+T/DSC:
The entire ABS, CBC, ASC+T/
DSC and
ADB
control system
has failed. Continue driving
cautiously and defensively.
Avoid hard brake applications. Please
have the system checked by your BMW
center as soon as possible.
For additional information: refer to
pages 70, 71
CBC, ABS and ASC+T/DSC and
ADB/DBC indicator and warning
lamps for Canadian models.
Red: an important reminder
Brake warning lamp
Comes on when the parking
brake is applied Ð an additional
acoustic signal sounds when starting
off.
For additional information: refer to
page 56
Parking brake warning lamp for
Canadian models.
Fasten safety belts
l
An acoustic warning also
sounds in some versions. Lights
up either for several seconds or until
the belt is engaged, depending upon
version.
For additional information on safety
belts: refer to page 44
Airbags
l
Please have the system
inspected by your BMW center.
For additional information: refer to
page 48
Orange: consult the nearest
BMW center
Automatic transmission
The transmission has
responded to a malfunction by
reverting to operation in its emergency
default program. Please consult the
nearest BMW center.
For additional information: refer to
page 57
Page 20 of 147

20n
Indicator and warning lamps
Add washer fluid
The washer fluid is too low. Top
off the fluid at the earliest
opportunity. For additional information:
refer to page 108
SERVICE ENGINE SOON
l
If the indicator lamp comes on
either continuously or intermit-
tently, this indicates a fault in the emis-
sions-related electronic systems.
Although the vehicle remains opera-
tional, you should have the systems
checked by your BMW center at the
earliest possible opportunity.
For additional information: refer to
page 115
SERVICE ENGINE SOON
warning lamp for Canadian
models.
Engine electronics
l
There is a fault in the electronic
engine-management system.
You can continue to drive with reduced
engine output or engine speed. Please
have the system inspected at your
BMW center.
Add coolant
The coolant level is too low.
Add coolant at the earliest
opportunity. For additional information:
refer to page 111
Green: for your information
Turn signal indicator
Flashes when the turn signal is
operated.
Rapid flashing indicates a system
malfunction.
For additional information: refer to
page 59
Cruise control
Lights up when the cruise
control is activated. Available for
operation via the multifunction steering
wheel.
For additional information: refer to
page 62
Front fog lamps
Lights up whenever you switch
on the front fog lamps.
For additional information: refer to
page 78
Blue: for your information
High beams
Comes on when the high beams
are on or the headlamp flasher
is actuated.
For additional information: refer to
pages 59, 78
Page 37 of 147
37n
OverviewControlsMaintenanceRepairsDataIndex
Alarm system
*
Electric power windows
>The indicator lamp goes out when the
system is disarmed: no manipulation
or attempted intrusions have been
detected in the period since the
system was armed
>The indicator lamp flashes for
10 seconds when the system is
disarmed: an attempted entry has
been detected in the period since the
system was armed.
Following triggering of an alarm, the
indicator lamp will flash continuously.Avoiding unintentional alarmsThe tilt alarm sensor and interior motion
sensor may be switched off at the same
time. You can do this to prevent a false
alarm from being triggered in garages
with elevator ramps, for instance, or
when the vehicle is transported by train:
Lock the vehicle twice (= arm the
system). Press the button on the
remote control twice in succession or
lock the vehicle twice with the key.
The indicator lamp lights up briefly and
then flashes continuously. The tilt alarm
sensor and interior motion sensor are
deactivated for as long as the system
remains armed.
Interior motion sensorIn order for the interior motion sensor to
function properly, the windows and the
sliding/tilt sunroof must be completely
closed.
Nevertheless, you should deactivate
the interior motion sensor (refer to
previous column) if
>children or animals are left in the
vehicle
>the windows or the sliding/tilt sunroof
are being left open.
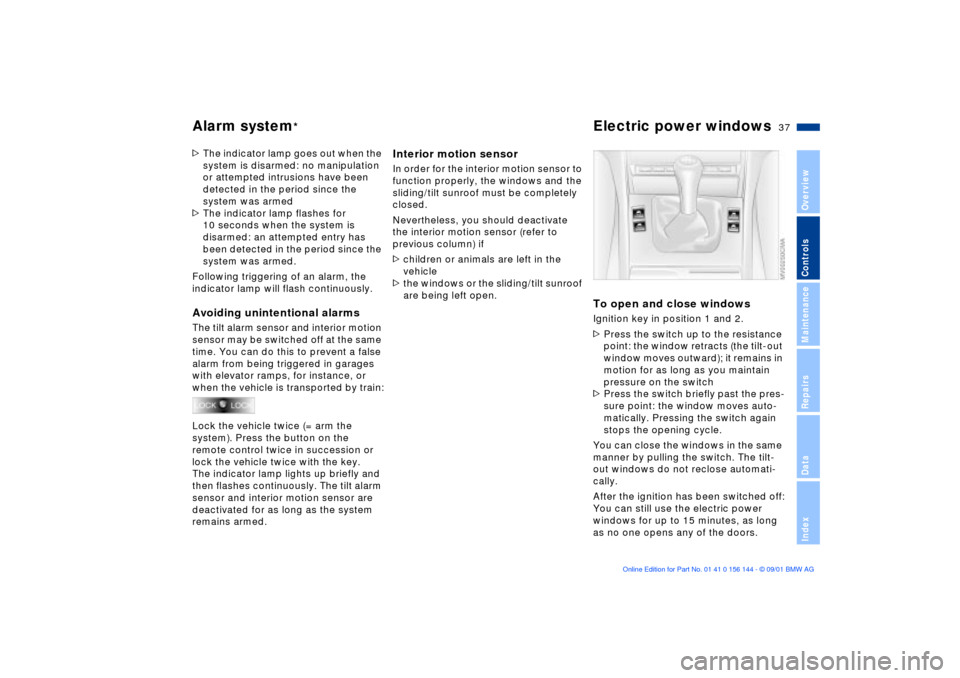
To open and close windowsIgnition key in position 1 and 2.
>Press the switch up to the resistance
point: the window retracts (the tilt-out
window moves outward); it remains in
motion for as long as you maintain
pressure on the switch
>Press the switch briefly past the pres-
sure point: the window moves auto-
matically. Pressing the switch again
stops the opening cycle.
You can close the windows in the same
manner by pulling the switch. The tilt-
out windows do not reclose automati-
cally.
After the ignition has been switched off:
You can still use the electric power
windows for up to 15 minutes, as long
as no one opens any of the doors.
Page 45 of 147
45n
OverviewControlsMaintenanceRepairsDataIndex
Seat and mirror memory
*
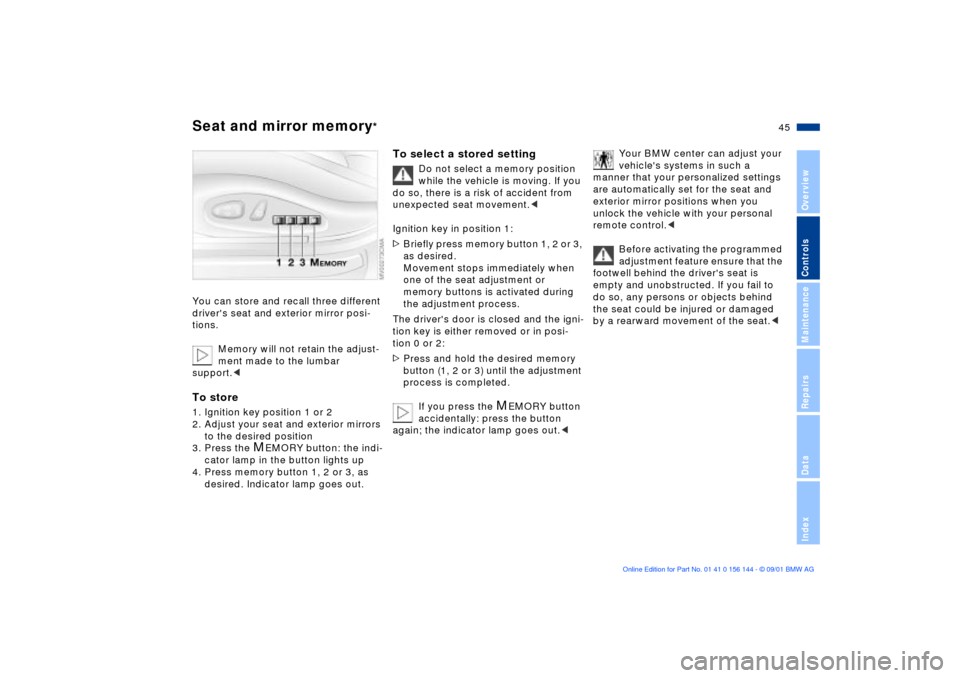
You can store and recall three different
driver's seat and exterior mirror posi-
tions.
Memory will not retain the adjust-
ment made to the lumbar
support.
to the desired position
3. Press the
M
EMORY button: the indi-
cator lamp in the button lights up
4. Press memory button 1, 2 or 3, as
desired. Indicator lamp goes out.
To select a stored setting
Do not select a memory position
while the vehicle is moving. If you
do so, there is a risk of accident from
unexpected seat movement.<
Ignition key in position 1:
>Briefly press memory button 1, 2 or 3,
as desired.
Movement stops immediately when
one of the seat adjustment or
memory buttons is activated during
the adjustment process.
The driver's door is closed and the igni-
tion key is either removed or in posi-
tion 0 or 2:
>Press and hold the desired memory
button (1, 2 or 3) until the adjustment
process is completed.
If you press the
M
EMORY button
accidentally: press the button
again; the indicator lamp goes out.<
Your BMW center can adjust your
vehicle's systems in such a
manner that your personalized settings
are automatically set for the seat and
exterior mirror positions when you
unlock the vehicle with your personal
remote control.<
Before activating the programmed
adjustment feature ensure that the
footwell behind the driver's seat is
empty and unobstructed. If you fail to
do so, any persons or objects behind
the seat could be injured or damaged
by a rearward movement of the seat.<
Page 48 of 147
48n
Mirrors AirbagsInterior rearview mirror with
automatic dimming feature
*
This mirror automatically responds to
ambient light and headlamp glare from
following vehicles by dimming through
an infinitely-variable range and auto-
matically reverts to its clear, undimmed
setting whenever you select reverse.
To ensure that the mirror continues to
operate efficiently, ensure that the
photocells remain clear and unob-
structed. One photocell is integrated in
the mirror's lens (arrow), while the other
is located at an offset position on the
rear of the mirror. Refrain from
attaching stickers to the windshield in
the area immediately in front of the
mirror.
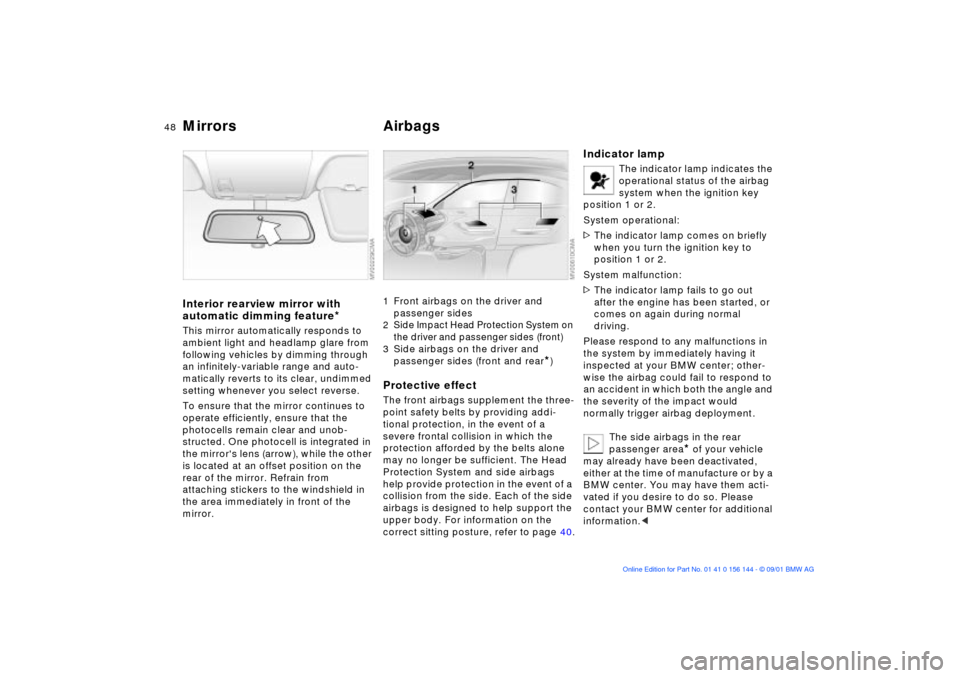
1 Front airbags on the driver and
passenger sides2 Side Impact Head Protection System on
the driver and passenger sides (front)3 Side airbags on the driver and
passenger sides (front and rear
*)
Protective effectThe front airbags supplement the three-
point safety belts by providing addi-
tional protection, in the event of a
severe frontal collision in which the
protection afforded by the belts alone
may no longer be sufficient. The Head
Protection System and side airbags
help provide protection in the event of a
collision from the side. Each of the side
airbags is designed to help support the
upper body. For information on the
correct sitting posture, refer to page 40.
Indicator lamp
The indicator lamp indicates the
operational status of the airbag
system when the ignition key
position 1 or 2.
System operational:
>The indicator lamp comes on briefly
when you turn the ignition key to
position 1 or 2.
System malfunction:
>The indicator lamp fails to go out
after the engine has been started, or
comes on again during normal
driving.
Please respond to any malfunctions in
the system by immediately having it
inspected at your BMW center; other-
wise the airbag could fail to respond to
an accident in which both the angle and
the severity of the impact would
normally trigger airbag deployment.
The side airbags in the rear
passenger area
* of your vehicle
may already have been deactivated,
either at the time of manufacture or by a
BMW center. You may have them acti-
vated if you desire to do so. Please
contact your BMW center for additional
information.<
Page 56 of 147
56n
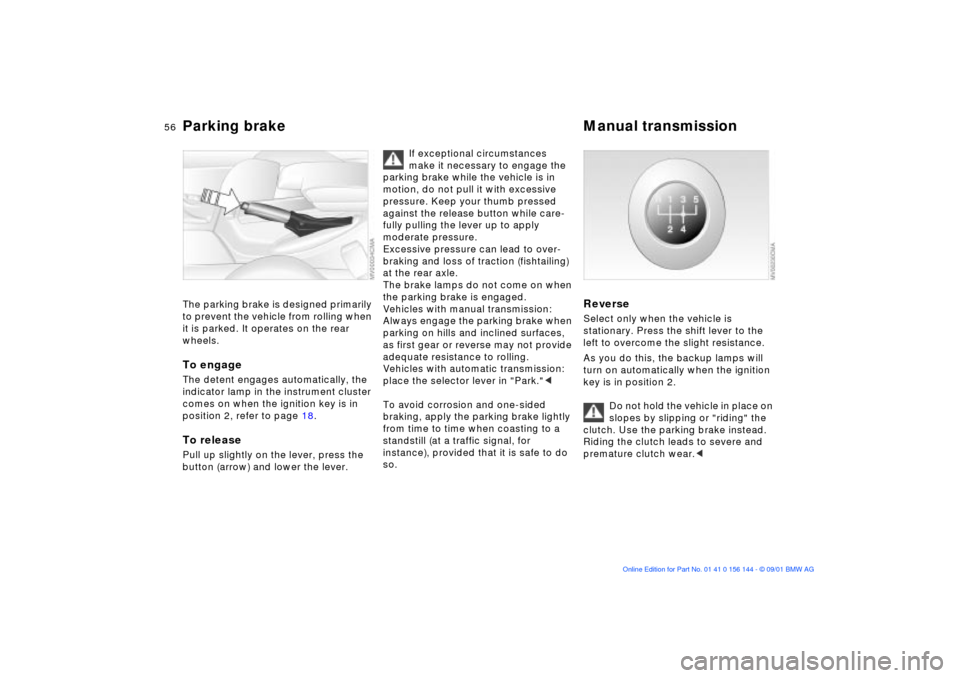
Parking brake Manual transmission The parking brake is designed primarily
to prevent the vehicle from rolling when
it is parked. It operates on the rear
wheels.To engageThe detent engages automatically, the
indicator lamp in the instrument cluster
comes on when the ignition key is in
position 2, refer to page 18.To releasePull up slightly on the lever, press the
button (arrow) and lower the lever.
If exceptional circumstances
make it necessary to engage the
parking brake while the vehicle is in
motion, do not pull it with excessive
pressure. Keep your thumb pressed
against the release button while care-
fully pulling the lever up to apply
moderate pressure.
Excessive pressure can lead to over-
braking and loss of traction (fishtailing)
at the rear axle.
The brake lamps do not come on when
the parking brake is engaged.
Vehicles with manual transmission:
Always engage the parking brake when
parking on hills and inclined surfaces,
as first gear or reverse may not provide
adequate resistance to rolling.
Vehicles with automatic transmission:
place the selector lever in "Park."<
To avoid corrosion and one-sided
braking, apply the parking brake lightly
from time to time when coasting to a
standstill (at a traffic signal, for
instance), provided that it is safe to do
so.
Reverse Select only when the vehicle is
stationary. Press the shift lever to the
left to overcome the slight resistance.
As you do this, the backup lamps will
turn on automatically when the ignition
key is in position 2.
Do not hold the vehicle in place on
slopes by slipping or "riding" the
clutch. Use the parking brake instead.
Riding the clutch leads to severe and
premature clutch wear.<
Page 65 of 147
65n
OverviewControlsMaintenanceRepairsDataIndex
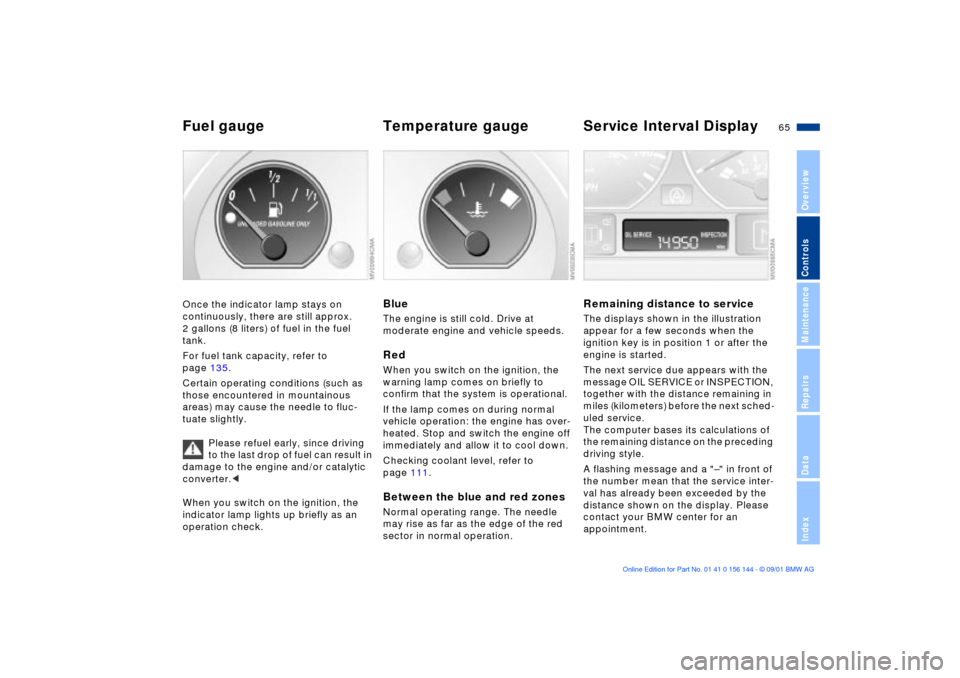
Fuel gauge Temperature gauge Service Interval DisplayOnce the indicator lamp stays on
continuously, there are still approx.
2 gallons (8 liters) of fuel in the fuel
tank.
For fuel tank capacity, refer to
page 135.
Certain operating conditions (such as
those encountered in mountainous
areas) may cause the needle to fluc-
tuate slightly.
Please refuel early, since driving
to the last drop of fuel can result in
damage to the engine and/or catalytic
converter.<
When you switch on the ignition, the
indicator lamp lights up briefly as an
operation check.
BlueThe engine is still cold. Drive at
moderate engine and vehicle speeds.RedWhen you switch on the ignition, the
warning lamp comes on briefly to
confirm that the system is operational.
If the lamp comes on during normal
vehicle operation: the engine has over-
heated. Stop and switch the engine off
immediately and allow it to cool down.
Checking coolant level, refer to
page 111.Between the blue and red zonesNormal operating range. The needle
may rise as far as the edge of the red
sector in normal operation.
Remaining distance to serviceThe displays shown in the illustration
appear for a few seconds when the
ignition key is in position 1 or after the
engine is started.
The next service due appears with the
message OIL SERVICE or INSPECTION,
together with the distance remaining in
miles (kilometers) before the next sched-
uled service.
The computer bases its calculations of
the remaining distance on the preceding
driving style.
A flashing message and a "Ð" in front of
the number mean that the service inter-
val has already been exceeded by the
distance shown on the display. Please
contact your BMW center for an
appointment.
Page 73 of 147
73n
OverviewControlsMaintenanceRepairsDataIndex
Tire Pressure Monitor (RDC)
*
The conceptRDC monitors the tire pressures at all
four wheels while the vehicle is moving.
The system provides an alert whenever
the inflation pressure drops significantly
below the specified pressure in one or
more tires.
In order for the system to "learn" the
correct tire inflation pressure, check the
inflation pressures in all tires according
to the inflation pressure table on
page 25 and make corrections as
necessary. Then activate the system.
This indicator lamp in the instru-
ment cluster will inform you if
the tire pressure is not correct.
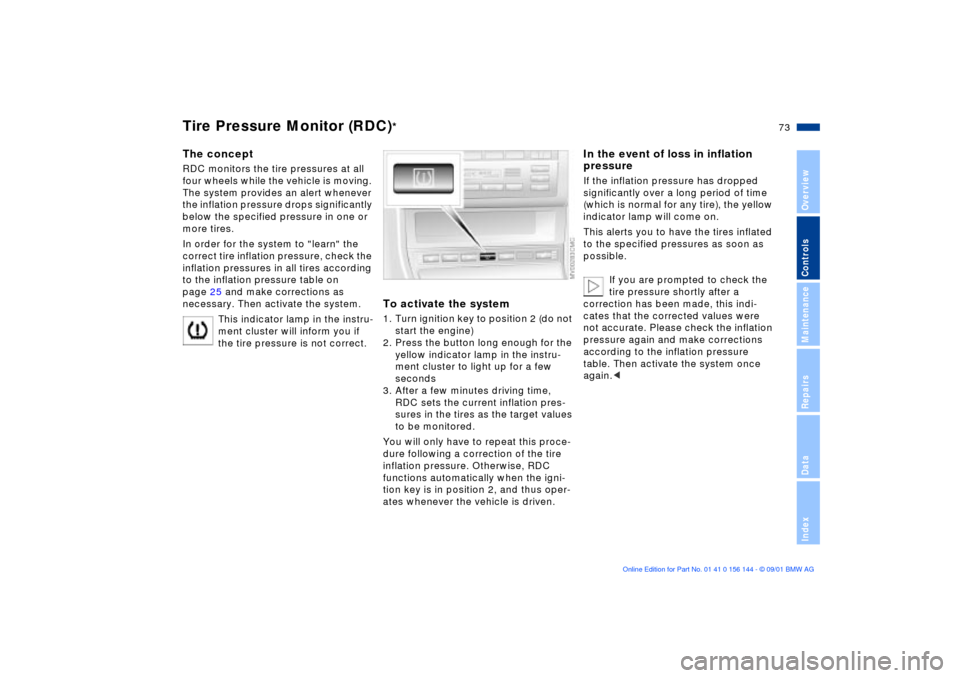
To activate the system1. Turn ignition key to position 2 (do not
start the engine)
2. Press the button long enough for the
yellow indicator lamp in the instru-
ment cluster to light up for a few
seconds
3. After a few minutes driving time,
RDC sets the current inflation pres-
sures in the tires as the target values
to be monitored.
You will only have to repeat this proce-
dure following a correction of the tire
inflation pressure. Otherwise, RDC
functions automatically when the igni-
tion key is in position 2, and thus oper-
ates whenever the vehicle is driven.
In the event of loss in inflation
pressureIf the inflation pressure has dropped
significantly over a long period of time
(which is normal for any tire), the yellow
indicator lamp will come on.
This alerts you to have the tires inflated
to the specified pressures as soon as
possible.
If you are prompted to check the
tire pressure shortly after a
correction has been made, this indi-
cates that the corrected values were
not accurate. Please check the inflation
pressure again and make corrections
according to the inflation pressure
table. Then activate the system once
again.<
Page 75 of 147
75n
OverviewControlsMaintenanceRepairsDataIndex
Flat Tire Monitor
*
The conceptAs you drive, the Flat Tire Monitor
keeps track of pressure levels in all four
tires in order to detect and warn of any
substantial pressure loss.
The system actually detects pressure
loss by monitoring differences in the
relative speeds of the four wheels. It
interprets variations outside specified
limits as severe pressure loss, and then
responds by generating a warning.
Initializing the systemInitializing is necessary to familiarize the
system with the correct inflation pres-
sure.
Repeat this process after any changes
in tire inflation pressure, tire rotation or
replacement. Do not carry out further
system initialization after adjusting the
inflation pressure and letting the system
"learn" the correct pressures.
1. Check the tire inflation pressures in
all the tires, comparing them with the
inflation pressure chart on page 25
and adjusting their pressure if neces-
sary
2. Turn the ignition key to position 2
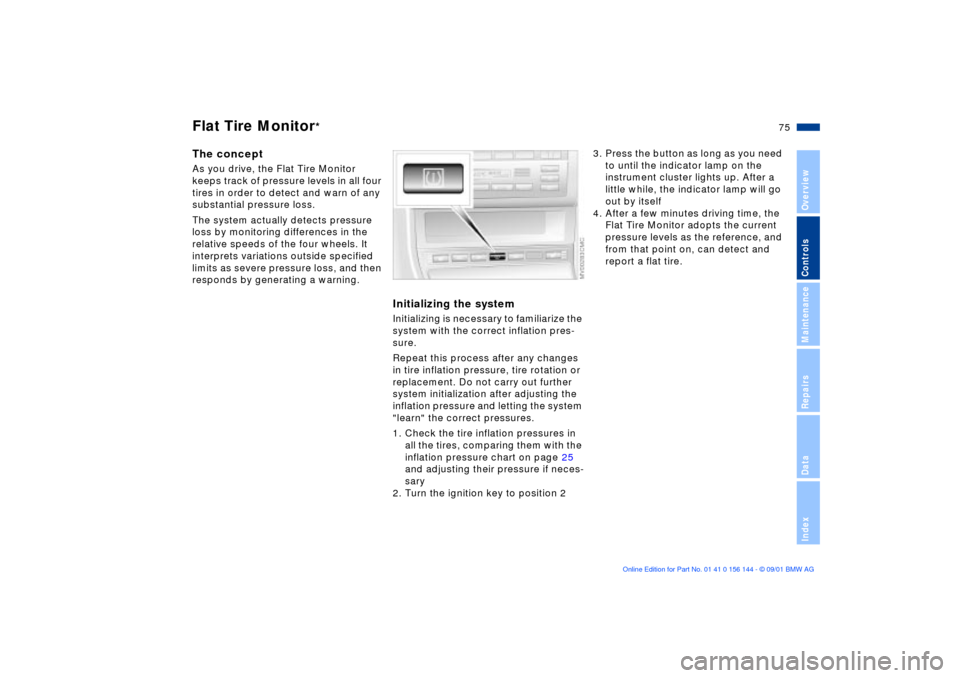
3. Press the button as long as you need
to until the indicator lamp on the
instrument cluster lights up. After a
little while, the indicator lamp will go
out by itself
4. After a few minutes driving time, the
Flat Tire Monitor adopts the current
pressure levels as the reference, and
from that point on, can detect and
report a flat tire.