manual transmission BMW 330i SEDAN 2001 E46 Owner's Manual
[x] Cancel search | Manufacturer: BMW, Model Year: 2001, Model line: 330i SEDAN, Model: BMW 330i SEDAN 2001 E46Pages: 211, PDF Size: 2.1 MB
Page 10 of 211
Contents
Overview
Controls and features
Cockpit16
Instrument cluster18
Indicator and warning lamps20
Multifunction steering wheel
(MFL)24
Sports steering wheel with
multifunction buttons25
Hazard warning flashers26
Warning triangle26
First-aid kit26
Refueling27
Fuel specifications28
Tire inflation pressure28
Locks and security systems:
Keys32
Electronic vehicle
immobilizer33
Central locking system34
Opening and closing Ð from the
outside34
Opening and closing Ð from the
inside38
Luggage compartment lid39
Luggage compartment41
Alarm system42
Electric power windows44
Sliding/tilt sunroof45
Adjustments:
Seats47
Seat and mirror memory50
Steering wheel51
Mirrors52
Car Memory, Key Memory53
Passenger safety systems:
Safety belts54
Airbags55
Transporting children safely59
Driving:
Steering/Ignition lock62
Starting the engine62
Switching off the engine63
Parking brake64
Manual transmission65
Automatic transmission with
Steptronic66
Turn signal indicator/Headlamp
flasher69
Wiper/Washer system69
Rear window defroster71
Cruise control72
Everything under control:
Odometer74
Tachometer74
Energy Control74
Fuel gauge75
Temperature gauge75
Service Interval Display75
Check Control76
Clock76
Computer77
Technology for safety and
convenience:
Park Distance Control (PDC)79
Automatic Stability Control plus
Traction (ASC+T)80
Dynamic Stability Control
(DSC)82
Tire Pressure Control (RDC)86
Contents
Page 17 of 211

17n
IndexDataTechnologyRepairsCar careControlsOverview
Cockpit
1 Parking lamps/Low beams88
2
>
Turn signal indicator69
>
Parking lamps89
>
High beams89
>
Headlamp flasher69
>
Computer
*
77
3 Wiper/Washer system69
4 Shift lever/Selector lever
*
65
For vehicles equipped with manual
transmission:
To shift into reverse, push the gear
shift lever to the left, overcoming
the resistance
5 Hazard warning flashers26
6 Central locking system34
7 Rear window defroster71
8 Horn sports steering wheel
*
, the
entire surface functions as the horn
9 Adjusting steering wheel51
10 Front fog lamps
*
89
Page 31 of 211
Overview
Controls and features
Operation, care
and maintenance
Owner service procedures
Technical data
Index Advanced technology
31n
IndexDataTechnologyRepairsCar careControlsOverview
Driving:
Steering/Ignition lock62
Starting the engine62
Switching off the engine63
Parking brake64
Manual transmission65
Automatic transmission with
Steptronic66
Turn signal indicator/Headlamp
flasher69
Wiper/Washer system69
Rear window defroster71
Cruise control72
Everything under control:
Odometer74
Tachometer74
Energy Control74
Fuel gauge75
Temperature gauge75
Service Interval Display75
Check Control76
Clock76
Computer77
Technology for safety and
convenience:
Park Distance Control (PDC)79
Automatic Stability Control plus
Traction (ASC+T)80
Dynamic Stability Control
(DSC)82
Tire Pressure Control (RDC)86Lamps:
Side lamps/Low beams88
Instrument lightning88
High beams/Parking lamps89
Fog lamps89
Interior lamps89
Controlling the climate for
pleasant driving:
Air conditioner92
Automatic climate control98
Seat heating103
Roller sun blind103
Interior conveniences:
HiFi system104
Glove compartment104
Storage compartments105
Cellular phones107
Ashtray, front107
Cigarette lighter108
Ashtray, rear108
Loading and transporting:
Through-loading system109
Ski bag110
Cargo loading112
Roof-mounted luggage rack113
Page 63 of 211

63n
IndexDataTechnologyRepairsCar careControlsOverview
Starting the engine Switching off the engine Do not press the accelerator pedal
while starting the engine.
Do not actuate the starter for too
short a time, but do not turn it for
more than approx. 20 seconds. Release
the ignition key immediately when the
engine starts.
Do not allow the engine to warm up by
leaving it running while the vehicle
remains stationary. Instead, begin
driving immediately at a moderate
engine speed.<
If the engine does not start on the first
attempt (if it is very hot or cold, for
instance):
>Press the accelerator pedal halfway
down while engaging the starter.
Cold start at extremely low tempera-
tures, from approx. +5 7 (-15 6)
and at elevations above 3,300 feet
(above 1,000 meters):
>On the first start attempt, engage the
starter for a longer period (approx.
10 seconds).
>Press the accelerator pedal halfway
down while engaging the starter.
Engine idle speed is controlled by the
engine computer system. Increased
speeds at startup are normal and
should decrease as the engine warms
up. If engine speed does not decrease,
service is required.
To prevent the battery from
discharging, always deactivate elec-
trical devices that are not in use. Switch
the ignition off when the vehicle is not
being driven.Turn the ignition key to position 1 or 0.
Do not remove the ignition key
while the vehicle is still moving.
If you did so, the steering lock would
engage when the steering wheel is
turned.
When you leave the vehicle, always
remove the ignition key and engage the
steering lock.
Vehicles with manual transmission:
Always engage the parking brake when
parking on slopes and inclined
surfaces. Placing the lever in 1st gear
or reverse may not provide adequate
resistance to rolling.
Vehicles with automatic transmission:
Place the selector lever in "Park."<
Page 64 of 211
64n
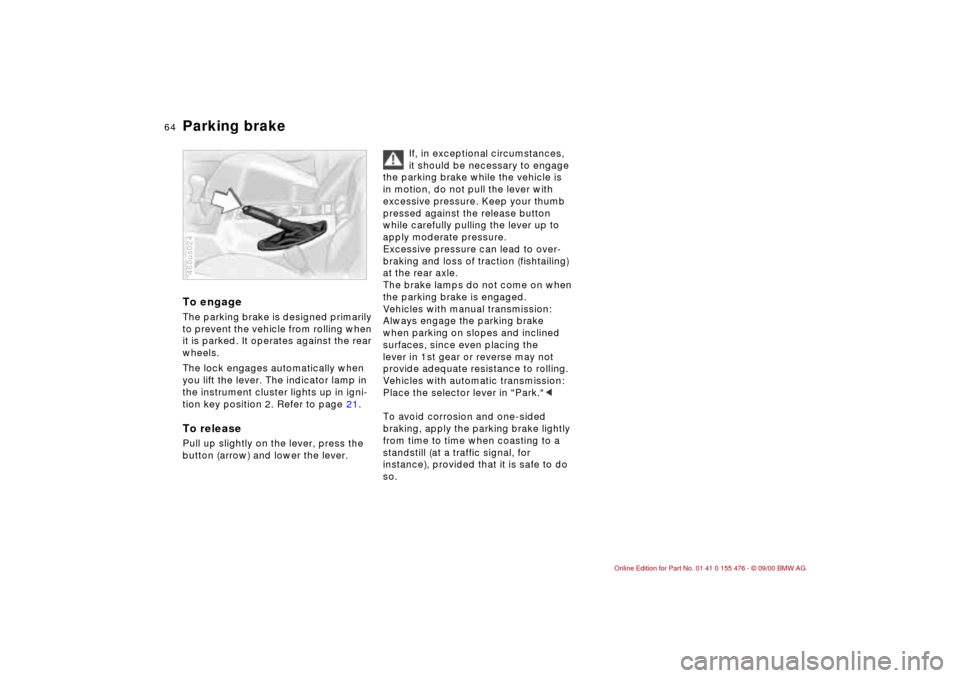
Parking brake To engageThe parking brake is designed primarily
to prevent the vehicle from rolling when
it is parked. It operates against the rear
wheels.
The lock engages automatically when
you lift the lever. The indicator lamp in
the instrument cluster lights up in igni-
tion key position 2. Refer to page 21.To releasePull up slightly on the lever, press the
button (arrow) and lower the lever.460us024
If, in exceptional circumstances,
it should be necessary to engage
the parking brake while the vehicle is
in motion, do not pull the lever with
excessive pressure. Keep your thumb
pressed against the release button
while carefully pulling the lever up to
apply moderate pressure.
Excessive pressure can lead to over-
braking and loss of traction (fishtailing)
at the rear axle.
The brake lamps do not come on when
the parking brake is engaged.
Vehicles with manual transmission:
Always engage the parking brake
when parking on slopes and inclined
surfaces, since even placing the
lever in 1st gear or reverse may not
provide adequate resistance to rolling.
Vehicles with automatic transmission:
Place the selector lever in "Park."<
To avoid corrosion and one-sided
braking, apply the parking brake lightly
from time to time when coasting to a
standstill (at a traffic signal, for
instance), provided that it is safe to do
so.
Page 65 of 211
65n
IndexDataTechnologyRepairsCar careControlsOverview
Manual transmission Press the clutch pedal all the way down
each time you shift, pressing the
manual-shift gear lever into its proper
end position.
Depress the clutch when starting the
vehicle, too, otherwise, lockout will
prevent the engine from starting if the
clutch is not depressed.
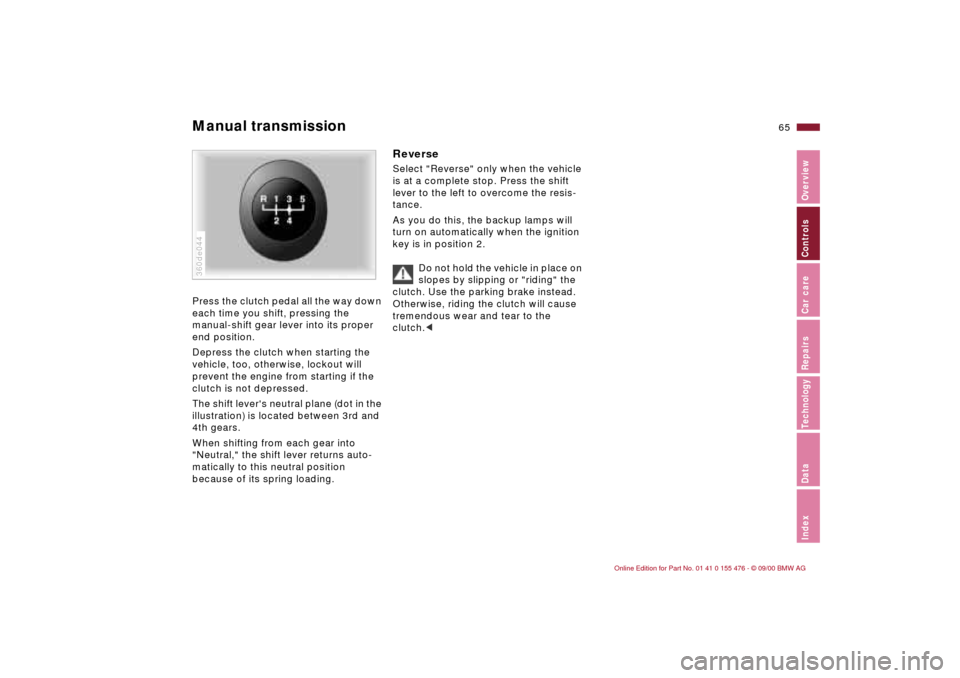
The shift lever's neutral plane (dot in the
illustration) is located between 3rd and
4th gears.
When shifting from each gear into
"Neutral," the shift lever returns auto-
matically to this neutral position
because of its spring loading.360de044
Reverse Select "Reverse" only when the vehicle
is at a complete stop. Press the shift
lever to the left to overcome the resis-
tance.
As you do this, the backup lamps will
turn on automatically when the ignition
key is in position 2.
Do not hold the vehicle in place on
slopes by slipping or "riding" the
clutch. Use the parking brake instead.
Otherwise, riding the clutch will cause
tremendous wear and tear to the
clutch.<
Page 66 of 211
66n
Automatic transmission with Steptronic
*
You have the option of driving with a
normal automatic transmission or
switching to manual.
When you move the selector lever from
the "D" position to the left into the M/S
range, the performance-oriented shift
programs of the automatic transmission
are engaged. As soon as you briefly
touch the selector lever in the "+" or "Ð"
direction, Steptronic changes the gear.
The manual mode is engaged. When-
ever you want to use automatic again,
just shift the selector lever toward the
right to position D.
The automatic transmission with Step-
tronic is equipped with ATC (Adaptive
Transmission Control). ATC reacts with
precision to your individual driving style
and the current driving conditions. It is
for this reason that various shift
programs are used.
For additional details concerning the
ATC, please refer to the chapter
"Advanced technology" on page 178.
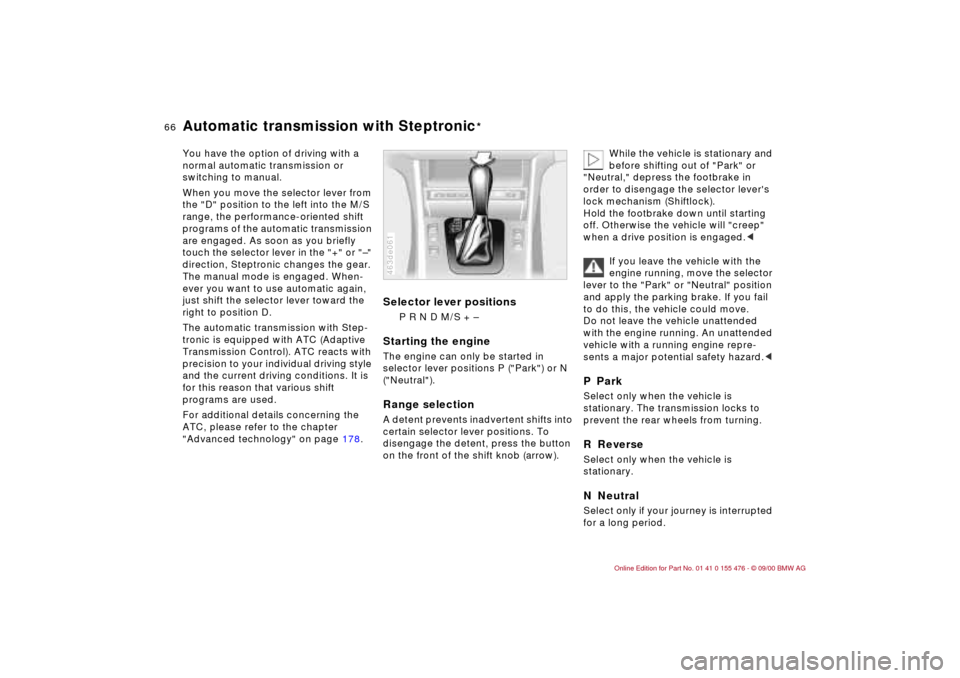
Selector lever positions
P R N D M/S + Ð
Starting the engineThe engine can only be started in
selector lever positions P ("Park") or N
("Neutral").Range selectionA detent prevents inadvertent shifts into
certain selector lever positions. To
disengage the detent, press the button
on the front of the shift knob (arrow).463de061
While the vehicle is stationary and
before shifting out of "Park" or
"Neutral," depress the footbrake in
order to disengage the selector lever's
lock mechanism (Shiftlock).
Hold the footbrake down until starting
off. Otherwise the vehicle will "creep"
when a drive position is engaged.<
If you leave the vehicle with the
engine running, move the selector
lever to the "Park" or "Neutral" position
and apply the parking brake. If you fail
to do this, the vehicle could move.
Do not leave the vehicle unattended
with the engine running. An unattended
vehicle with a running engine repre-
sents a major potential safety hazard.<
P ParkSelect only when the vehicle is
stationary. The transmission locks to
prevent the rear wheels from turning.R ReverseSelect only when the vehicle is
stationary.N NeutralSelect only if your journey is interrupted
for a long period.
Page 67 of 211
67n
IndexDataTechnologyRepairsCar careControlsOverview
Automatic transmission with Steptronic
*
D Drive (automatic shift program)This position is designed for driving
under all normal operating conditions.
All forward gears are available, the
Adaptive Transmission Control (ATC) is
fully operational."Kickdown"In the "Kickdown" mode, you achieve
the maximum performance.
To activate this mode, depress the
accelerator pedal beyond the full-
throttle position, at which a resistance
point must be overcome.
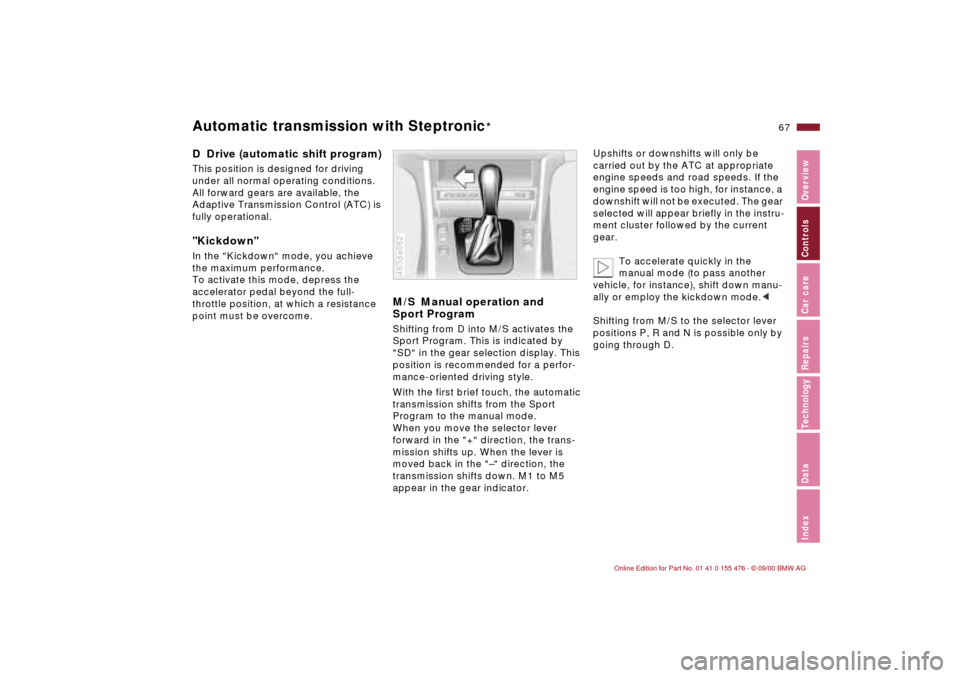
M/S Manual operation and
Sport ProgramShifting from D into M/S activates the
Sport Program. This is indicated by
"SD" in the gear selection display. This
position is recommended for a perfor-
mance-oriented driving style.
With the first brief touch, the automatic
transmission shifts from the Sport
Program to the manual mode.
When you move the selector lever
forward in the "+" direction, the trans-
mission shifts up. When the lever is
moved back in the "Ð" direction, the
transmission shifts down. M1 to M5
appear in the gear indicator.463de062
Upshifts or downshifts will only be
carried out by the ATC at appropriate
engine speeds and road speeds. If the
engine speed is too high, for instance, a
downshift will not be executed. The gear
selected will appear briefly in the instru-
ment cluster followed by the current
gear.
To accelerate quickly in the
manual mode (to pass another
vehicle, for instance), shift down manu-
ally or employ the kickdown mode.<
Shifting from M/S to the selector lever
positions P, R and N is possible only by
going through D.
Page 68 of 211
68n
Automatic transmission with Steptronic
*
In the following situations, the Step-
tronic "thinks" for you in the manual
mode:
>In order to prevent the engine from
overrevving, the transmission shifts
automatically to the next higher gear
just before the engine speed cutoff
point.
>If you do not do anything to inter-
vene, it will automatically downshift
at lower speeds.
>In kickdown, it will downshift into
the lowest gear possible, depending
on the engine speed.
>According to the situation, for
instance in wintry conditions, the
vehicle can be started in 2nd or
3rd gear.
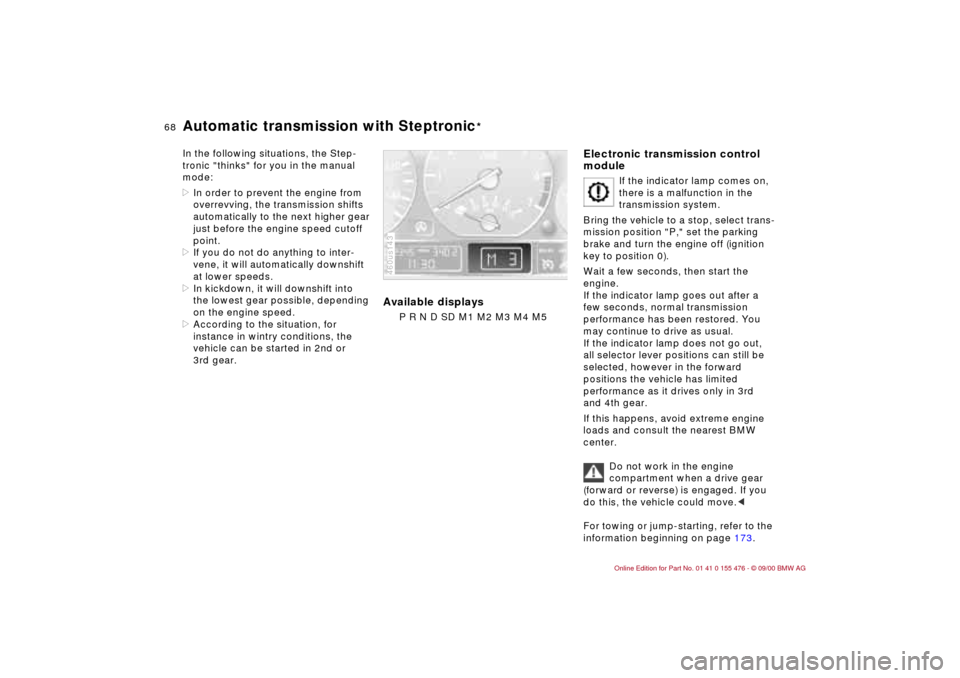
Available displays
P R N D SD M1 M2 M3 M4 M5460us143
Electronic transmission control
module
If the indicator lamp comes on,
there is a malfunction in the
transmission system.
Bring the vehicle to a stop, select trans-
mission position "P," set the parking
brake and turn the engine off (ignition
key to position 0).
Wait a few seconds, then start the
engine.
If the indicator lamp goes out after a
few seconds, normal transmission
performance has been restored. You
may continue to drive as usual.
If the indicator lamp does not go out,
all selector lever positions can still be
selected, however in the forward
positions the vehicle has limited
performance as it drives only in 3rd
and 4th gear.
If this happens, avoid extreme engine
loads and consult the nearest BMW
center.
Do not work in the engine
compartment when a drive gear
(forward or reverse) is engaged. If you
do this, the vehicle could move.<
For towing or jump-starting, refer to the
information beginning on page 173.
Page 120 of 211

120n
Disc brakesDisc brakes furnish optimum decelera-
tion and braking control and greater
fade resistance under heavy use.
When the vehicle is driven only occa-
sionally, during extended periods when
the vehicle is not used at all, and in oper-
ating conditions where brake applica-
tions are less frequent, there is an
increased tendency for corrosion of the
discs and accumulation of contamina-
tion on the brake pads. This occurs
because the minimal pressure that must
be exerted by the pads to clean the
discs by brake applications is not
reached.
If the brake discs are corroded, they will
tend to respond to braking with a
pulsating effect that even extended
brake applications will fail to cure.
For your own safety: use only
brake pads that BMW has
approved for your particular vehicle
model. BMW cannot evaluate non-
approved brake pads to determine if
they are suited for use, and therefore
cannot ensure the operating safety of
the vehicle if they are installed.<
Driving notesWhen driving in wet conditions and in
heavy rain, it is effective to apply light
pressure to the brakes every few miles
or kilometers. Be aware of traffic condi-
tions to ensure that this maneuver does
not endanger other road users. The
heat that is generated by the brake
applications helps to dry the brake
pads and discs.
Maximum braking force is obtained
while the wheels are not locked, but
rather when they are still barely turning
immediately prior to locking. ABS main-
tains this state automatically. If the ABS
fails, you should revert to the staggered
braking technique described on
page 122.
Extended or steep mountain descents
should be driven in the gear in which
only minimal periodic brake application
is required. This avoids excessive strain
on the brakes and possible
impairment of the braking effect.
The braking effect of the engine can be
further increased by downshifting, into
first gear, if necessary. In the manual
mode of the automatic transmission,
you can also downshift into first gear.
Refer to page 66.Should engine braking prove inade-
quate, you should still avoid extended,
continuous braking. Instead of main-
taining low to moderate pressure over
an extended period of time, you should
decelerate by applying more substantial
pressure to the brake pedal (watch for
following traffic), releasing the pedal,
and then repeating the application
(staggered braking). The cooling
phases between active braking inter-
vals prevent the brakes from over-
heating, thus ensuring that full braking
capacity remains available at all times.
Do not coast with the clutch
depressed or with the shift lever
or selector lever in neutral. Do not drive
with the engine shut off. The engine
provides no braking effect when the
clutch is depressed or the transmission
is in neutral, and there is no power-
assist for braking or steering when the
engine is not running.
BMW 325xi, 330xi: have brake inspec-
tions performed at a BMW center only.
If you do not, parts of the four-wheel
drive system could be damaged.
Do not allow floor mats, carpets or any
other objects to protrude into the area
around the brake pedal, the clutch or
the accelerator which could obstruct
their freedom of movement.<