BMW 330i SEDAN 2002 E46 Owner's Manual
Manufacturer: BMW, Model Year: 2002, Model line: 330i SEDAN, Model: BMW 330i SEDAN 2002 E46Pages: 155, PDF Size: 2.24 MB
Page 121 of 155
121n
OverviewControlsMaintenanceRepairsDataIndex
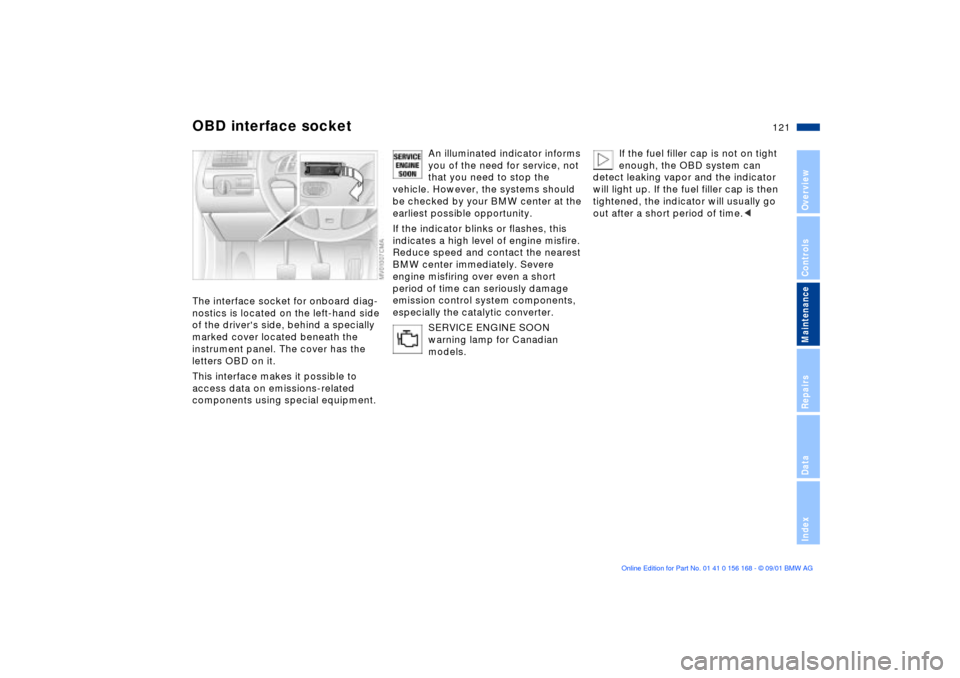
OBD interface socketThe interface socket for onboard diag-
nostics is located on the left-hand side
of the driver's side, behind a specially
marked cover located beneath the
instrument panel. The cover has the
letters OBD on it.
This interface makes it possible to
access data on emissions-related
components using special equipment.
An illuminated indicator informs
you of the need for service, not
that you need to stop the
vehicle. However, the systems should
be checked by your BMW center at the
earliest possible opportunity.
If the indicator blinks or flashes, this
indicates a high level of engine misfire.
Reduce speed and contact the nearest
BMW center immediately. Severe
engine misfiring over even a short
period of time can seriously damage
emission control system components,
especially the catalytic converter.
SERVICE ENGINE SOON
warning lamp for Canadian
models.
If the fuel filler cap is not on tight
enough, the OBD system can
detect leaking vapor and the indicator
will light up. If the fuel filler cap is then
tightened, the indicator will usually go
out after a short period of time.<
Page 122 of 155
122n
Page 123 of 155
123n
Overview
Controls
Maintenance
Repairs
Data
Index
Overview
Controls and features
Operation, maintenance
Owner service procedures
Index
Technical data
Page 124 of 155
124n
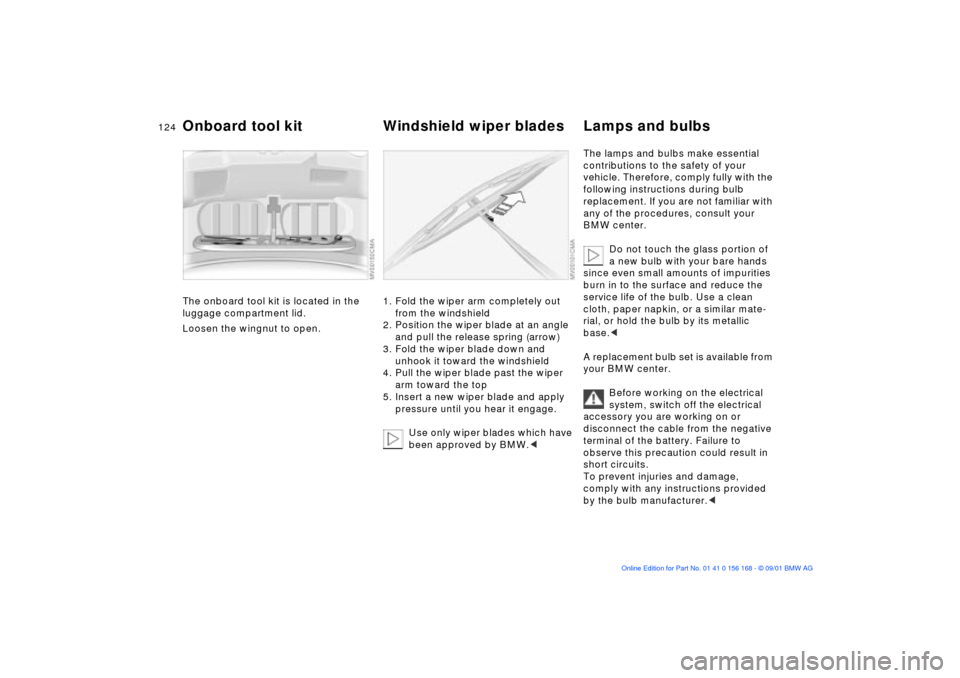
The onboard tool kit is located in the
luggage compartment lid.
Loosen the wingnut to open.
1. Fold the wiper arm completely out
from the windshield
2. Position the wiper blade at an angle
and pull the release spring (arrow)
3. Fold the wiper blade down and
unhook it toward the windshield
4. Pull the wiper blade past the wiper
arm toward the top
5. Insert a new wiper blade and apply
pressure until you hear it engage.
Use only wiper blades which have
been approved by BMW.<
The lamps and bulbs make essential
contributions to the safety of your
vehicle. Therefore, comply fully with the
following instructions during bulb
replacement. If you are not familiar with
any of the procedures, consult your
BMW center.
Do not touch the glass portion of
a new bulb with your bare hands
since even small amounts of impurities
burn in to the surface and reduce the
service life of the bulb. Use a clean
cloth, paper napkin, or a similar mate-
rial, or hold the bulb by its metallic
base.<
A replacement bulb set is available from
your BMW center.
Before working on the electrical
system, switch off the electrical
accessory you are working on or
disconnect the cable from the negative
terminal of the battery. Failure to
observe this precaution could result in
short circuits.
To prevent injuries and damage,
comply with any instructions provided
by the bulb manufacturer.<
Onboard tool kit Windshield wiper blades Lamps and bulbs
Page 125 of 155
125n
OverviewControlsMaintenanceRepairsDataIndex
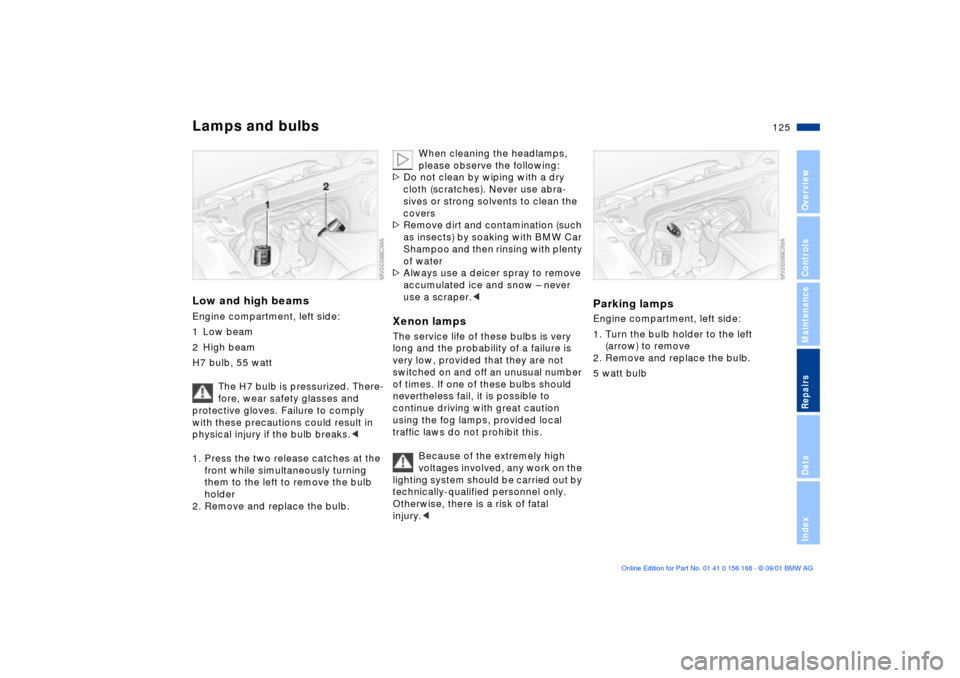
Lamps and bulbsLow and high beamsEngine compartment, left side:
1 Low beam
2 High beam
H7 bulb, 55 watt
The H7 bulb is pressurized. There-
fore, wear safety glasses and
protective gloves. Failure to comply
with these precautions could result in
physical injury if the bulb breaks.<
1. Press the two release catches at the
front while simultaneously turning
them to the left to remove the bulb
holder
2. Remove and replace the bulb.
When cleaning the headlamps,
please observe the following:
>Do not clean by wiping with a dry
cloth (scratches). Never use abra-
sives or strong solvents to clean the
covers
>Remove dirt and contamination (such
as insects) by soaking with BMW Car
Shampoo and then rinsing with plenty
of water
>Always use a deicer spray to remove
accumulated ice and snow Ð never
use a scraper.<
Xenon lamps
The service life of these bulbs is very
long and the probability of a failure is
very low, provided that they are not
switched on and off an unusual number
of times. If one of these bulbs should
nevertheless fail, it is possible to
continue driving with great caution
using the fog lamps, provided local
traffic laws do not prohibit this.
Because of the extremely high
voltages involved, any work on the
lighting system should be carried out by
technically-qualified personnel only.
Otherwise, there is a risk of fatal
injury.<
Parking lampsEngine compartment, left side:
1. Turn the bulb holder to the left
(arrow) to remove
2. Remove and replace the bulb.
5 watt bulb
Page 126 of 155
126n
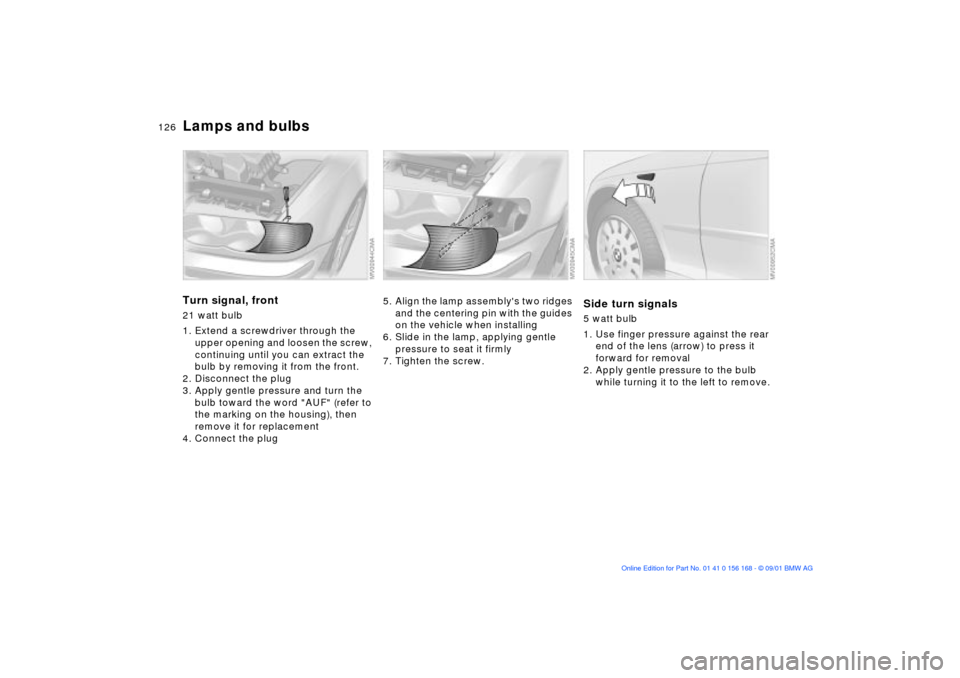
Lamps and bulbsTurn signal, front 21 watt bulb
1. Extend a screwdriver through the
upper opening and loosen the screw,
continuing until you can extract the
bulb by removing it from the front.
2. Disconnect the plug
3. Apply gentle pressure and turn the
bulb toward the word "AUF" (refer to
the marking on the housing), then
remove it for replacement
4. Connect the plug
5. Align the lamp assembly's two ridges
and the centering pin with the guides
on the vehicle when installing
6. Slide in the lamp, applying gentle
pressure to seat it firmly
7. Tighten the screw.
Side turn signals5 watt bulb
1. Use finger pressure against the rear
end of the lens (arrow) to press it
forward for removal
2. Apply gentle pressure to the bulb
while turning it to the left to remove.
Page 127 of 155
127n
OverviewControlsMaintenanceRepairsDataIndex
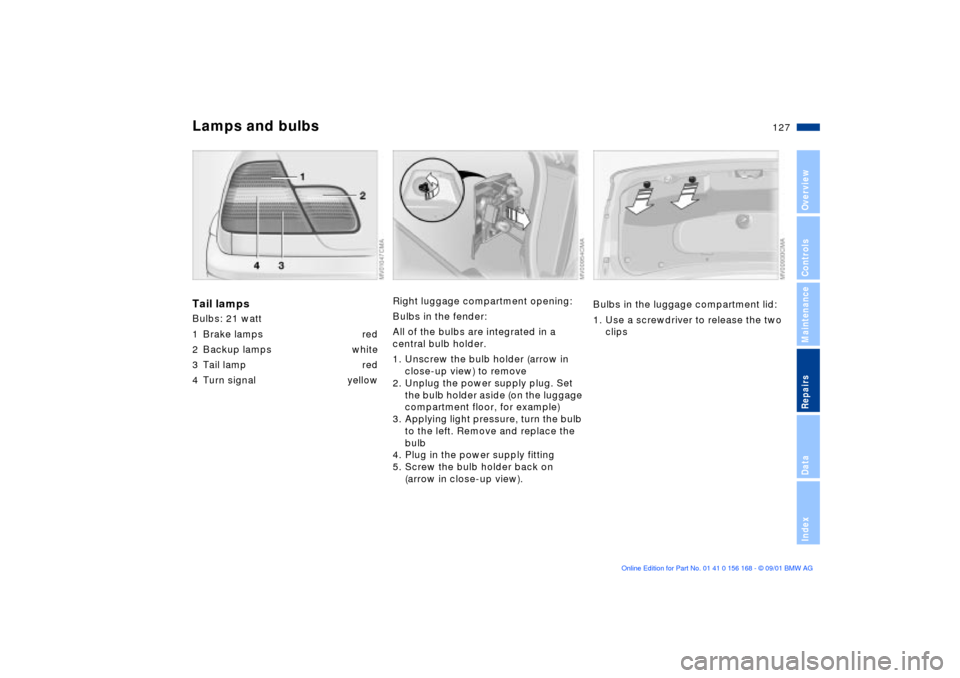
Lamps and bulbsTail lampsBulbs: 21 watt
1 Brake lamps red
2 Backup lamps white
3 Tail lamp red
4 Turn signal yellow
Right luggage compartment opening:
Bulbs in the fender:
All of the bulbs are integrated in a
central bulb holder.
1. Unscrew the bulb holder (arrow in
close-up view) to remove
2. Unplug the power supply plug. Set
the bulb holder aside (on the luggage
compartment floor, for example)
3. Applying light pressure, turn the bulb
to the left. Remove and replace the
bulb
4. Plug in the power supply fitting
5. Screw the bulb holder back on
(arrow in close-up view).
Bulbs in the luggage compartment lid:
1. Use a screwdriver to release the two
clips
Page 128 of 155
128n
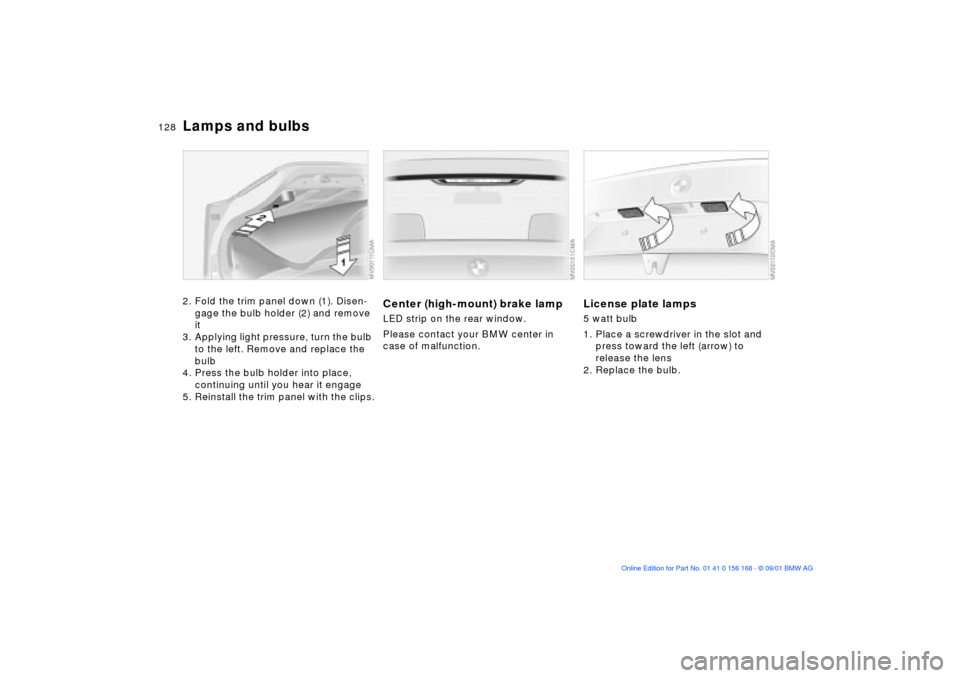
Lamps and bulbs2. Fold the trim panel down (1). Disen-
gage the bulb holder (2) and remove
it
3. Applying light pressure, turn the bulb
to the left. Remove and replace the
bulb
4. Press the bulb holder into place,
continuing until you hear it engage
5. Reinstall the trim panel with the clips.
Center (high-mount) brake lampLED strip on the rear window.
Please contact your BMW center in
case of malfunction.
License plate lamps5 watt bulb
1. Place a screwdriver in the slot and
press toward the left (arrow) to
release the lens
2. Replace the bulb.
Page 129 of 155
129n
OverviewControlsMaintenanceRepairsDataIndex
Changing a wheel
Safety precautions in the event of
a flat tire or wheel change:
Stop the vehicle as far as possible from
passing traffic. Park on a firm, flat,
surface. Switch on the hazard warning
flashers. Turn the steering wheel to the
straight-ahead position and engage the
steering lock. Shift into 1st or reverse
(selector lever in Park with automatic
transmission) and engage the parking
brake.
All passengers should be outside the
vehicle and well away from your imme-
diate working area (behind a guardrail,
for example).
If a warning triangle or portable hazard
warning lamp is available, set it up on
the roadside at an appropriate distance
from the rear of the vehicle. Comply
with all safety guidelines and regula-
tions.
Change the wheel only on a level, firm
surface which is not slippery. Avoid
jacking the vehicle on a soft or slippery
support surface (snow, ice, loose
gravel, etc.), as either the vehicle or the
jack could slip sideways.
Position the jack on a firm support
surface.
Do not place wooden blocks or similar
objects under the jack. They could
prevent the jack from extending to its
full height and reduce its support
capacity.
Do not lie under the vehicle or start the
engine when the vehicle is supported
by the jack Ð risk of fatal injury.<
Your BMW is equipped with a spare tire
or a space-saver spare tire designed for
temporary use in maintaining the
vehicle's mobility in an emergency.
To remove the spare tire, lift the
floor panel in the luggage
compartment completely out, refer to
page 35.<
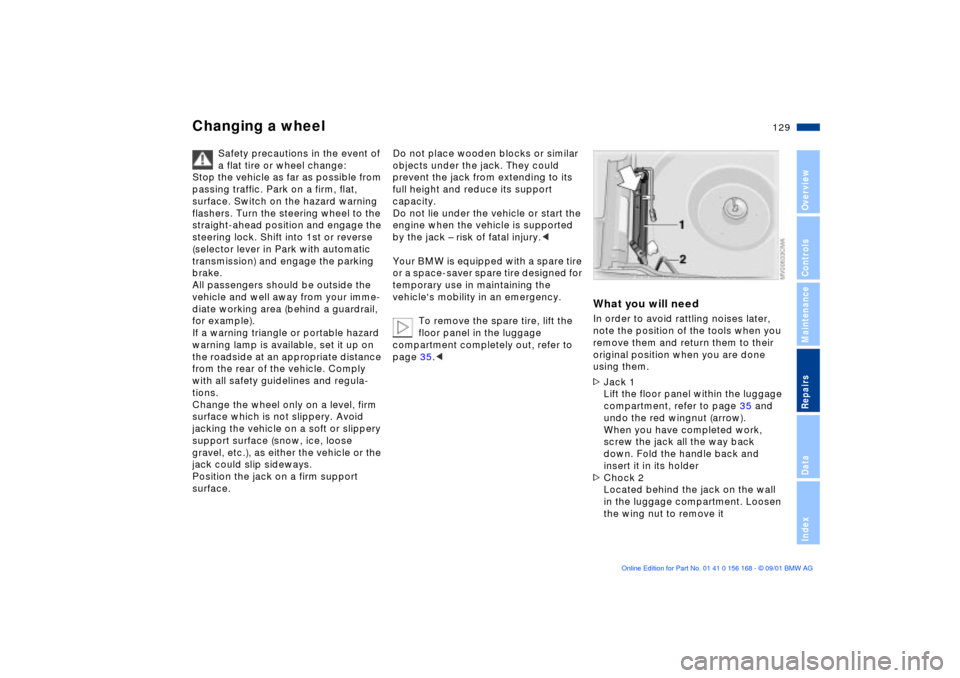
What you will needIn order to avoid rattling noises later,
note the position of the tools when you
remove them and return them to their
original position when you are done
using them.
>Jack 1
Lift the floor panel within the luggage
compartment, refer to page 35 and
undo the red wingnut (arrow).
When you have completed work,
screw the jack all the way back
down. Fold the handle back and
insert it in its holder
>Chock 2
Located behind the jack on the wall
in the luggage compartment. Loosen
the wing nut to remove it
Page 130 of 155
130n
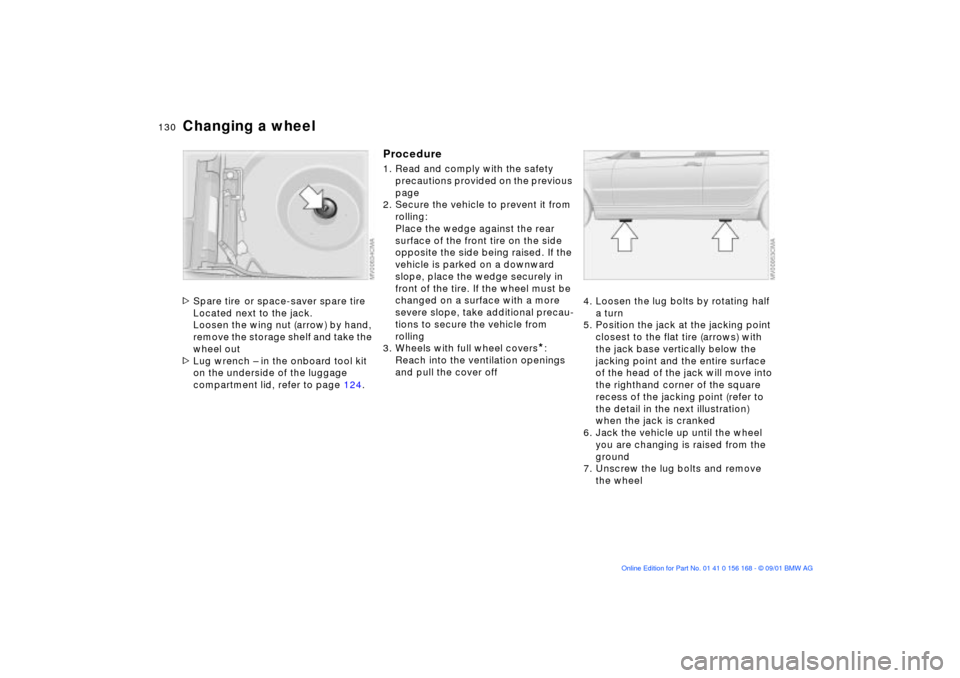
Changing a wheel>Spare tire
or space-saver spare tire
Located next to the jack.
Loosen the wing nut (arrow) by hand,
remove the storage shelf and take the
wheel out
>Lug wrench Ð in the onboard tool kit
on the underside of the luggage
compartment lid, refer to page 124.
Procedure1. Read and comply with the safety
precautions provided on the previous
page
2. Secure the vehicle to prevent it from
rolling:
Place the wedge against the rear
surface of the front tire on the side
opposite the side being raised. If the
vehicle is parked on a downward
slope, place the wedge securely in
front of the tire. If the wheel must be
changed on a surface with a more
severe slope, take additional precau-
tions to secure the vehicle from
rolling
3. Wheels with full wheel covers
*:
Reach into the ventilation openings
and pull the cover off4. Loosen the lug bolts by rotating half
a turn
5. Position the jack at the jacking point
closest to the flat tire (arrows) with
the jack base vertically below the
jacking point and the entire surface
of the head of the jack will move into
the righthand corner of the square
recess of the jacking point (refer to
the detail in the next illustration)
when the jack is cranked
6. Jack the vehicle up until the wheel
you are changing is raised from the
ground
7. Unscrew the lug bolts and remove
the wheel