Symbol BMW 335I CONVERTIBLE 2009 E93 User Guide
[x] Cancel search | Manufacturer: BMW, Model Year: 2009, Model line: 335I CONVERTIBLE, Model: BMW 335I CONVERTIBLE 2009 E93Pages: 260, PDF Size: 7.95 MB
Page 80 of 260
Everything under control
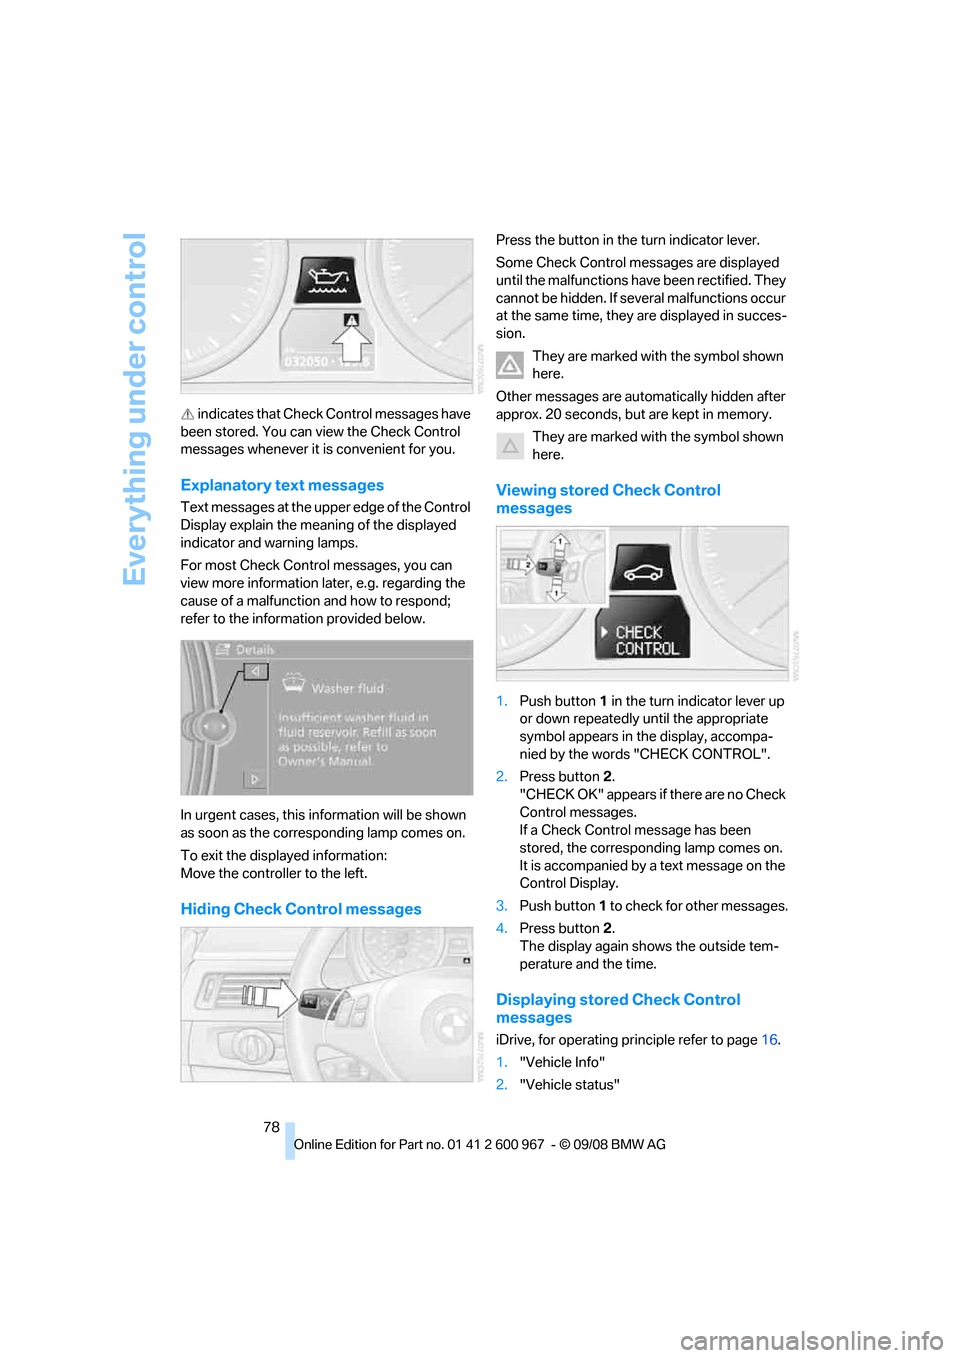
78 indicates that Check Control messages have
been stored. You can view the Check Control
messages whenever it is convenient for you.
Explanatory text messages
Text messages at the upper edge of the Control
Display explain the meaning of the displayed
indicator and warning lamps.
For most Check Control messages, you can
view more information later, e.g. regarding the
cause of a malfunction and how to respond;
refer to the information provided below.
In urgent cases, this information will be shown
as soon as the corresponding lamp comes on.
To exit the displayed information:
Move the controller to the left.
Hiding Check Control messages
Press the button in the turn indicator lever.
Some Check Control messages are displayed
until the malfunctions have been rectified. They
cannot be hidden. If several malfunctions occur
at the same time, they are displayed in succes-
sion.
They are marked with the symbol shown
here.
Other messages are automatically hidden after
approx. 20 seconds, but are kept in memory.
They are marked with the symbol shown
here.
Viewing stored Check Control
messages
1.Push button 1 in the turn indicator lever up
or down repeatedly until the appropriate
symbol appears in the display, accompa-
nied by the words "CHECK CONTROL".
2.Press button 2.
"CHECK OK" appears if there are no Check
Control messages.
If a Check Control message has been
stored, the corresponding lamp comes on.
It is accompanied by a text message on the
Control Display.
3.Push button 1 to check for other messages.
4.Press button 2.
The display again shows the outside tem-
perature and the time.
Displaying stored Check Control
messages
iDrive, for operating principle refer to page16.
1."Vehicle Info"
2."Vehicle status"
Page 95 of 260
Controls
93Reference
At a glance
Driving tips
Communications
Navigation
Entertainment
Mobility
Lamps
Parking lamps/low beams
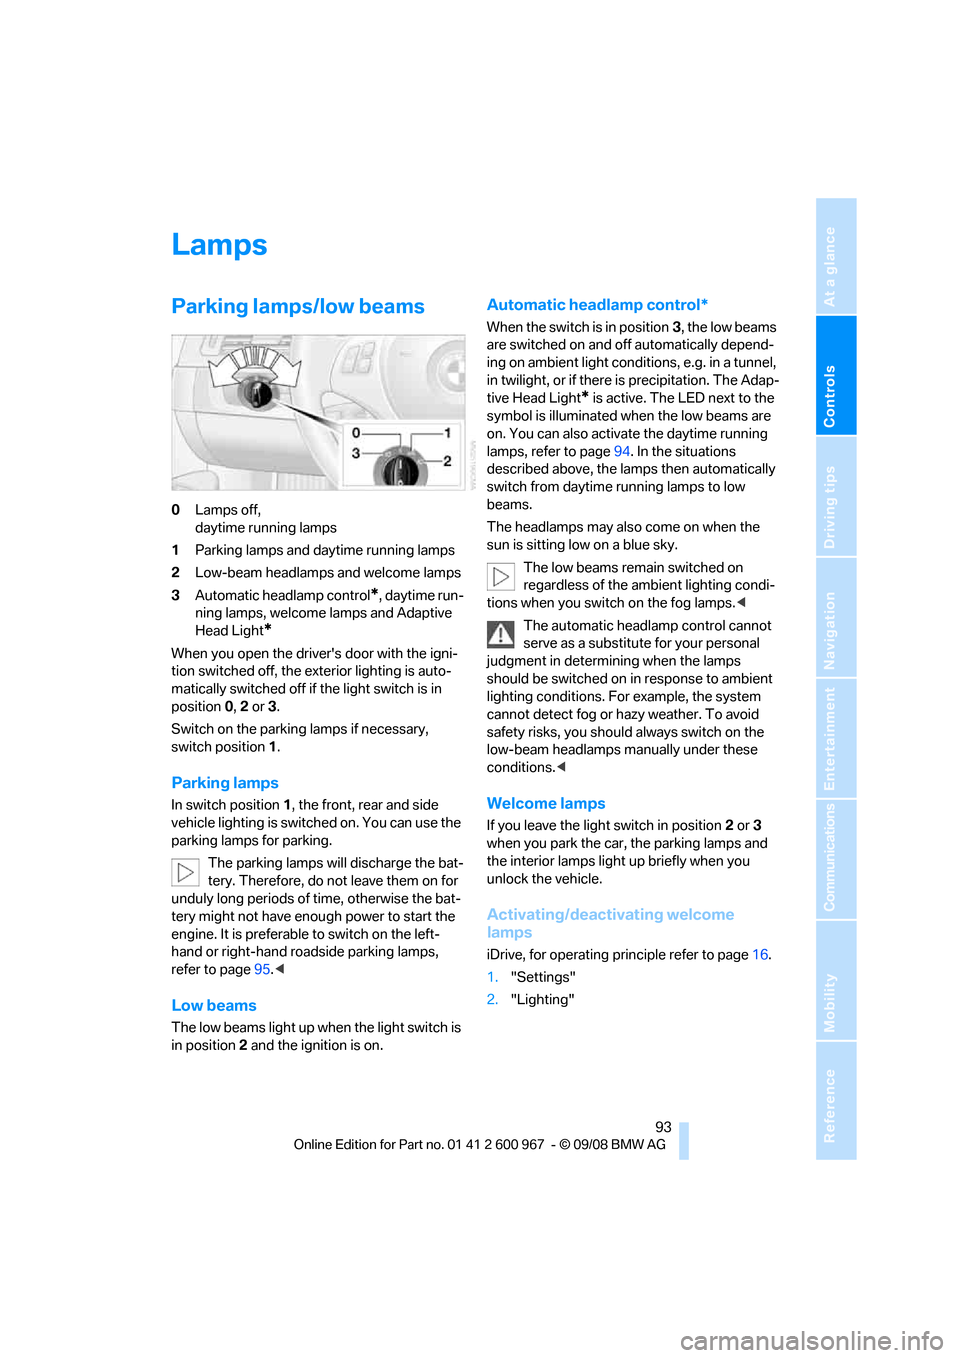
0Lamps off,
daytime running lamps
1Parking lamps and daytime running lamps
2Low-beam headlamps and welcome lamps
3Automatic headlamp control
*, daytime run-
ning lamps, welcome lamps and Adaptive
Head Light
*
When you open the driver's door with the igni-
tion switched off, the exterior lighting is auto-
matically switched off if the light switch is in
position 0, 2 or 3.
Switch on the parking lamps if necessary,
switch position 1.
Parking lamps
In switch position1, the front, rear and side
vehicle lighting is switched on. You can use the
parking lamps for parking.
The parking lamps will discharge the bat-
tery. Therefore, do not leave them on for
unduly long periods of time, otherwise the bat-
tery might not have enough power to start the
engine. It is preferable to switch on the left-
hand or right-hand roadside parking lamps,
refer to page95.<
Low beams
The low beams light up when the light switch is
in position 2 and the ignition is on.
Automatic headlamp control*
When the switch is in position3, the low beams
are switched on and off automatically depend-
ing on ambient light conditions, e.g. in a tunnel,
in twilight, or if there is precipitation. The Adap-
tive Head Light
* is active. The LED next to the
symbol is illuminated when the low beams are
on. You can also activate the daytime running
lamps, refer to page94. In the situations
described above, the lamps then automatically
switch from daytime running lamps to low
beams.
The headlamps may also come on when the
sun is sitting low on a blue sky.
The low beams remain switched on
regardless of the ambient lighting condi-
tions when you switch on the fog lamps.<
The automatic headlamp control cannot
serve as a substitute for your personal
judgment in determining when the lamps
should be switched on in response to ambient
lighting conditions. For example, the system
cannot detect fog or hazy weather. To avoid
safety risks, you should always switch on the
low-beam headlamps manually under these
conditions.<
Welcome lamps
If you leave the light switch in position 2 or 3
when you park the car, the parking lamps and
the interior lamps light up briefly when you
unlock the vehicle.
Activating/deactivating welcome
lamps
iDrive, for operating principle refer to page16.
1."Settings"
2."Lighting"
Page 97 of 260
Controls
95Reference
At a glance
Driving tips
Communications
Navigation
Entertainment
Mobility
Malfunction
The LED next to the symbol for automatic head-
lamp control flashes. Adaptive Head Light is
malfunctioning or has failed. Have the system
checked as soon as possible.
High beams/roadside parking
lamps
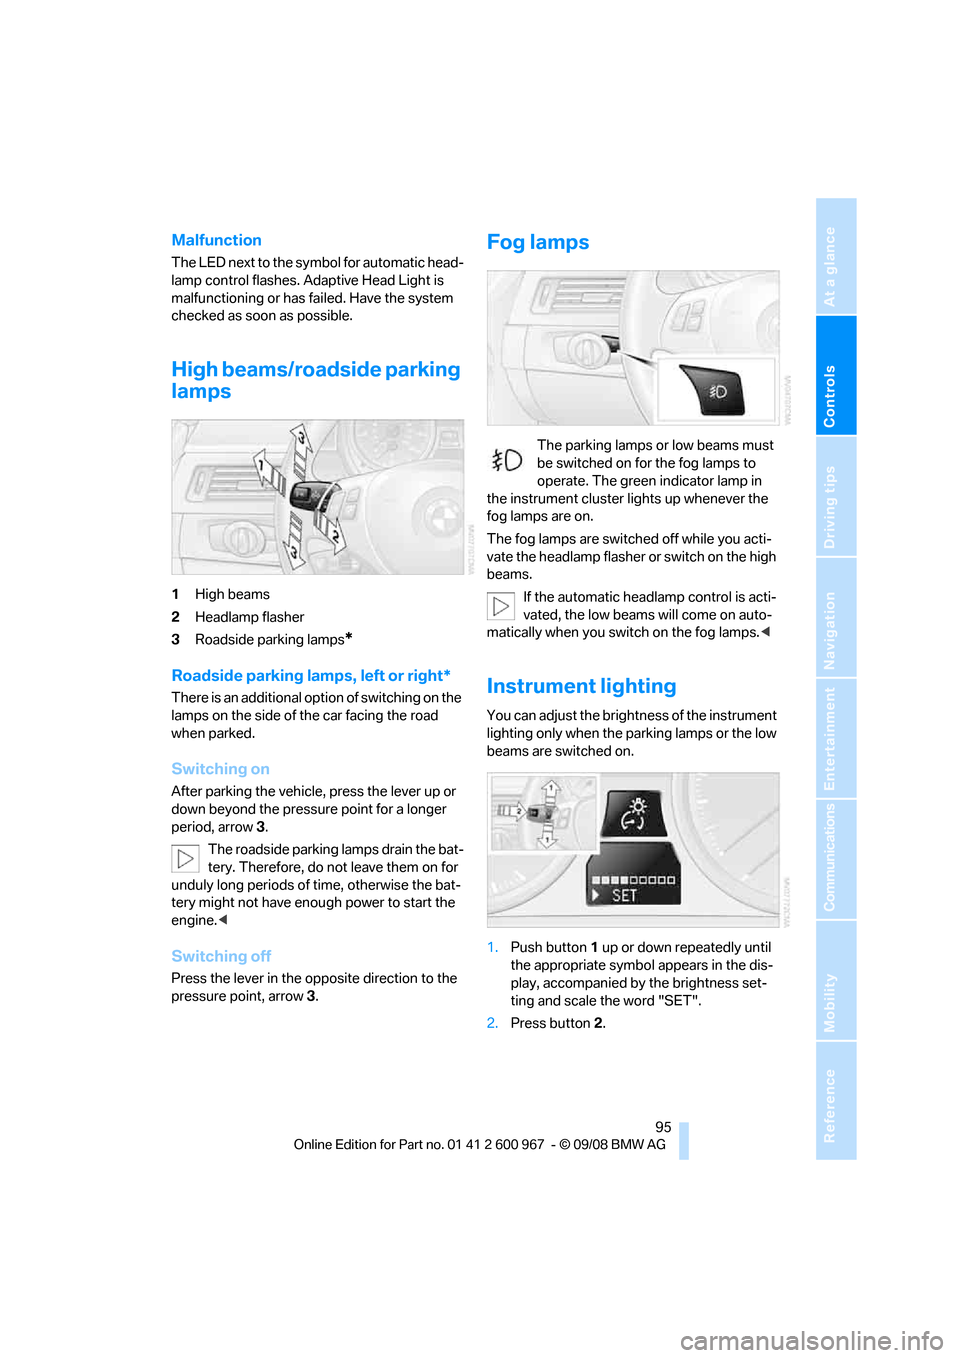
1High beams
2Headlamp flasher
3Roadside parking lamps
*
Roadside parking lamps, left or right*
There is an additional option of switching on the
lamps on the side of the car facing the road
when parked.
Switching on
After parking the vehicle, press the lever up or
down beyond the pressure point for a longer
period, arrow 3.
The roadside parking lamps drain the bat-
tery. Therefore, do not leave them on for
unduly long periods of time, otherwise the bat-
tery might not have enough power to start the
engine.<
Switching off
Press the lever in the opposite direction to the
pressure point, arrow 3.
Fog lamps
The parking lamps or low beams must
be switched on for the fog lamps to
operate. The green indicator lamp in
the instrument cluster lights up whenever the
fog lamps are on.
The fog lamps are switched off while you acti-
vate the headlamp flasher or switch on the high
beams.
If the automatic headlamp control is acti-
vated, the low beams will come on auto-
matically when you switch on the fog lamps.<
Instrument lighting
You can adjust the brightness of the instrument
lighting only when the parking lamps or the low
beams are switched on.
1.Push button 1 up or down repeatedly until
the appropriate symbol appears in the dis-
play, accompanied by the brightness set-
ting and scale the word "SET".
2.Press button 2.
Page 103 of 260
Controls
101Reference
At a glance
Driving tips
Communications
Navigation
Entertainment
Mobility
not be switched on twice in a row without driv-
ing in between to allow the battery to recharge.
The air emerges from the air vents for the upper
body area in the instrument panel. The air vents
must therefore be open.
The parked car ventilation system is operated
via iDrive.
Switching on/off directly
iDrive, for operating principle refer to page16.
1."Settings"
2."Climate"
3."Activate parked-car vent."
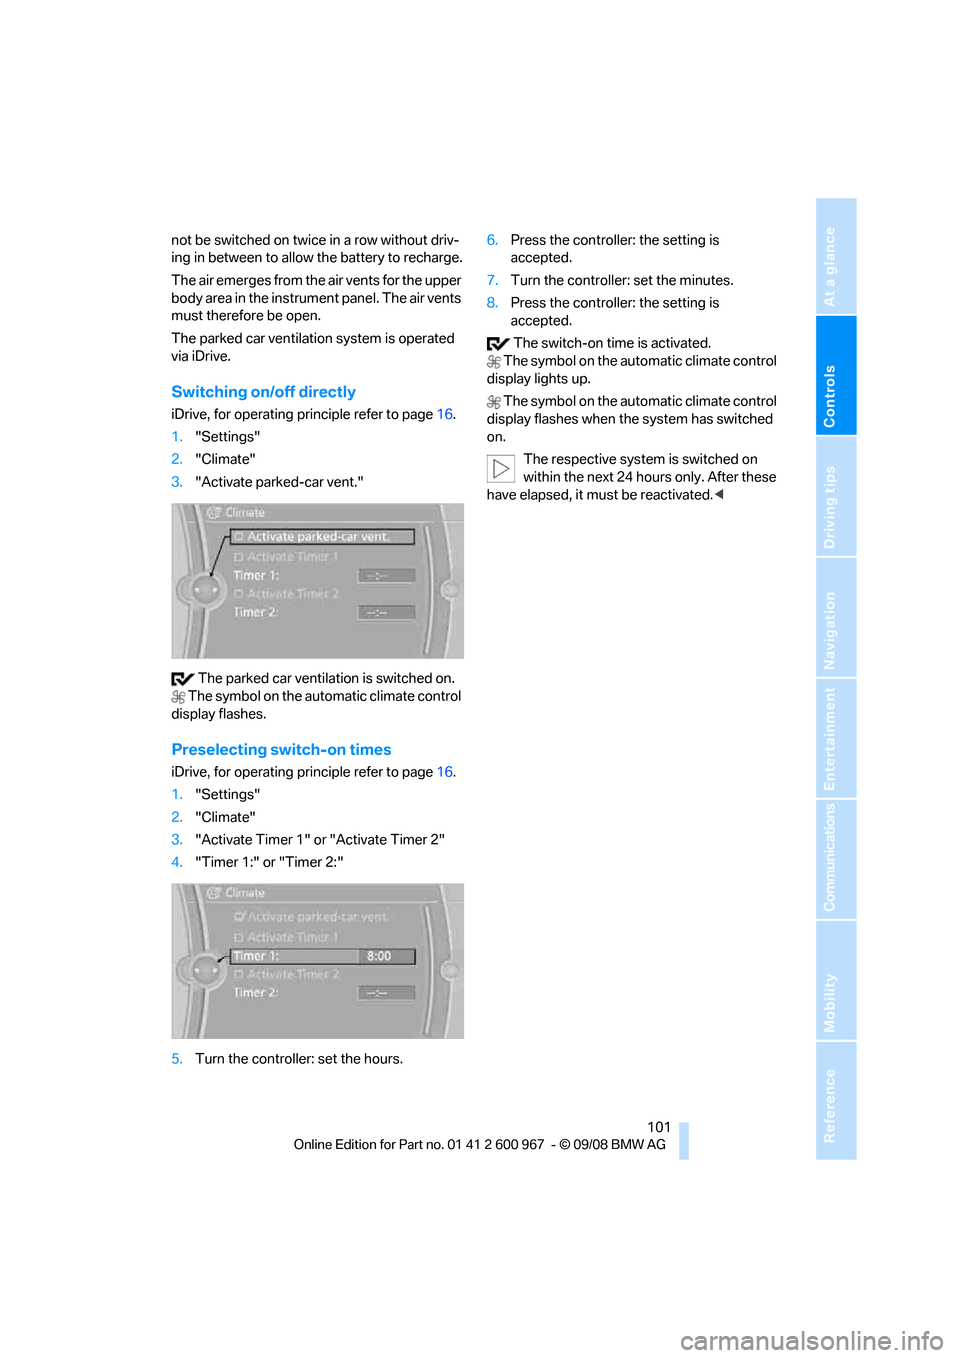
The parked car ventilation is switched on.
The symbol on the automatic climate control
display flashes.
Preselecting switch-on times
iDrive, for operating principle refer to page16.
1."Settings"
2."Climate"
3."Activate Timer 1" or "Activate Timer 2"
4."Timer 1:" or "Timer 2:"
5.Turn the controller: set the hours.6.Press the controller: the setting is
accepted.
7.Turn the controller: set the minutes.
8.Press the controller: the setting is
accepted.
The switch-on time is activated.
The symbol on the automatic climate control
display lights up.
The symbol on the automatic climate control
display flashes when the system has switched
on.
The respective system is switched on
within the next 24 hours only. After these
have elapsed, it must be reactivated.<
Page 104 of 260
Practical interior accessories
102
Practical interior accessories
Integrated universal remote
control*
The concept
The integrated universal remote control can
replace as many as three hand-held transmit-
ters for various remote-controlled devices,
such as garage doors and gates or lighting sys-
tems. The integrated universal remote control
registers and stores signals from the original
hand-held transmitters.
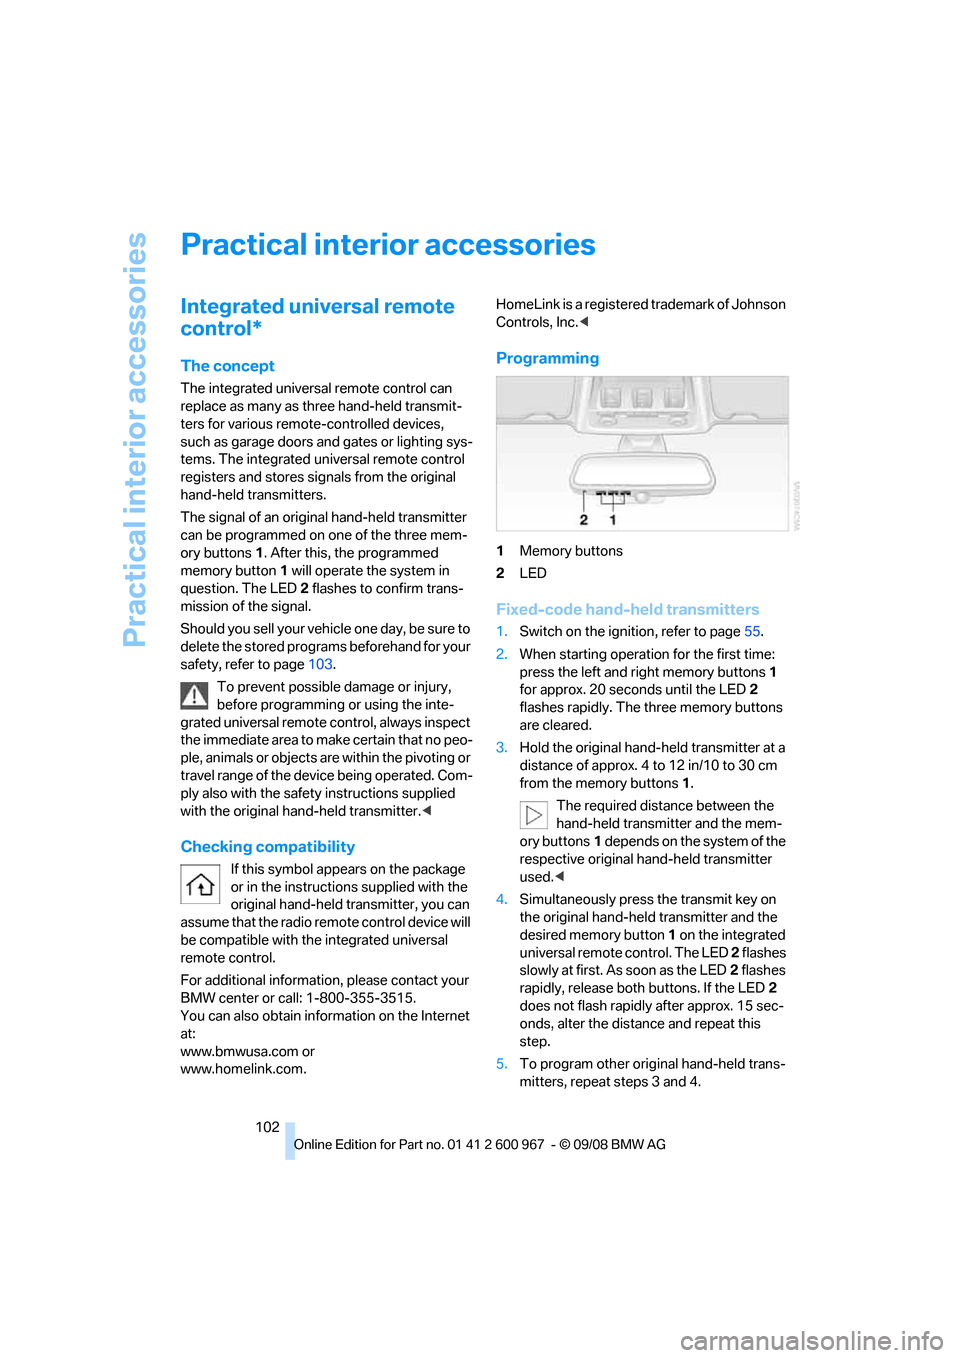
The signal of an original hand-held transmitter
can be programmed on one of the three mem-
ory buttons1. After this, the programmed
memory button1 will operate the system in
question. The LED2 flashes to confirm trans-
mission of the signal.
Should you sell your vehicle one day, be sure to
delete the stored programs beforehand for your
safety, refer to page103.
To prevent possible damage or injury,
before programming or using the inte-
grated universal remote control, always inspect
the immediate area to make certain that no peo-
ple, animals or objects are within the pivoting or
travel range of the device being operated. Com-
ply also with the safety instructions supplied
with the original hand-held transmitter.<
Checking compatibility
If this symbol appears on the package
or in the instructions supplied with the
original hand-held transmitter, you can
assume that the radio remote control device will
be compatible with the integrated universal
remote control.
For additional information, please contact your
BMW center or call: 1-800-355-3515.
You can also obtain information on the Internet
at:
www.bmwusa.com or
www.homelink.com. HomeLink is a registered trademark of Johnson
Controls, Inc.<
Programming
1Memory buttons
2LED
Fixed-code hand-held transmitters
1.Switch on the ignition, refer to page55.
2.When starting operation for the first time:
press the left and right memory buttons1
for approx. 20 seconds until the LED2
flashes rapidly. The three memory buttons
are cleared.
3.Hold the original hand-held transmitter at a
distance of approx. 4 to 12 in/10 to 30 cm
from the memory buttons1.
The required distance between the
hand-held transmitter and the mem-
ory buttons1 depends on the system of the
respective original hand-held transmitter
used.<
4.Simultaneously press the transmit key on
the original hand-held transmitter and the
desired memory button 1 on the integrated
universal remote control. The LED 2 flashes
slowly at first. As soon as the LED2 flashes
rapidly, release both buttons. If the LED2
does not flash rapidly after approx. 15 sec-
onds, alter the distance and repeat this
step.
5.To program other original hand-held trans-
mitters, repeat steps 3 and 4.
Page 128 of 260
Destination entry
126 Delete letters, if necessary:
>To delete individual letters:
Turn the controller to select , and
then press the controller.
>To delete all letters:
Turn the controller to select , and
then press the controller for an extended
period.
>To enter spaces:
Select the symbol.
The list gradually grows smaller each time
you enter a new letter.
2.Move the controller to the right.
3.Select the name of the town/city from the
list. The three destinations stored last are
displayed.
If there are several towns/cities with the same
name:
1.Change to the list of town/city names.
2.Highlight the town/city: a preview map is
displayed.
3.Select the town/city.
Entering the postal code
1.Select "Town/City/Zip Code" or the dis-
played town/city.
2.Select the symbol.
3.Select the digits.
4.Change to the list of postal codes and
towns/cities.
5.Highlight the postal code. A preview map is
displayed in the assistance window.
6.Select the postal code.
Entering street and intersection
1.Select "Street" or the displayed street.
2.Enter a street and intersection as you would
the town/city.
After the street you can also enter the intersec-
tion or the house number.
If there are several streets with the same name:1.Change to the list of street names.
2.Highlight the street: a preview map is dis-
played.
3.Select the street.
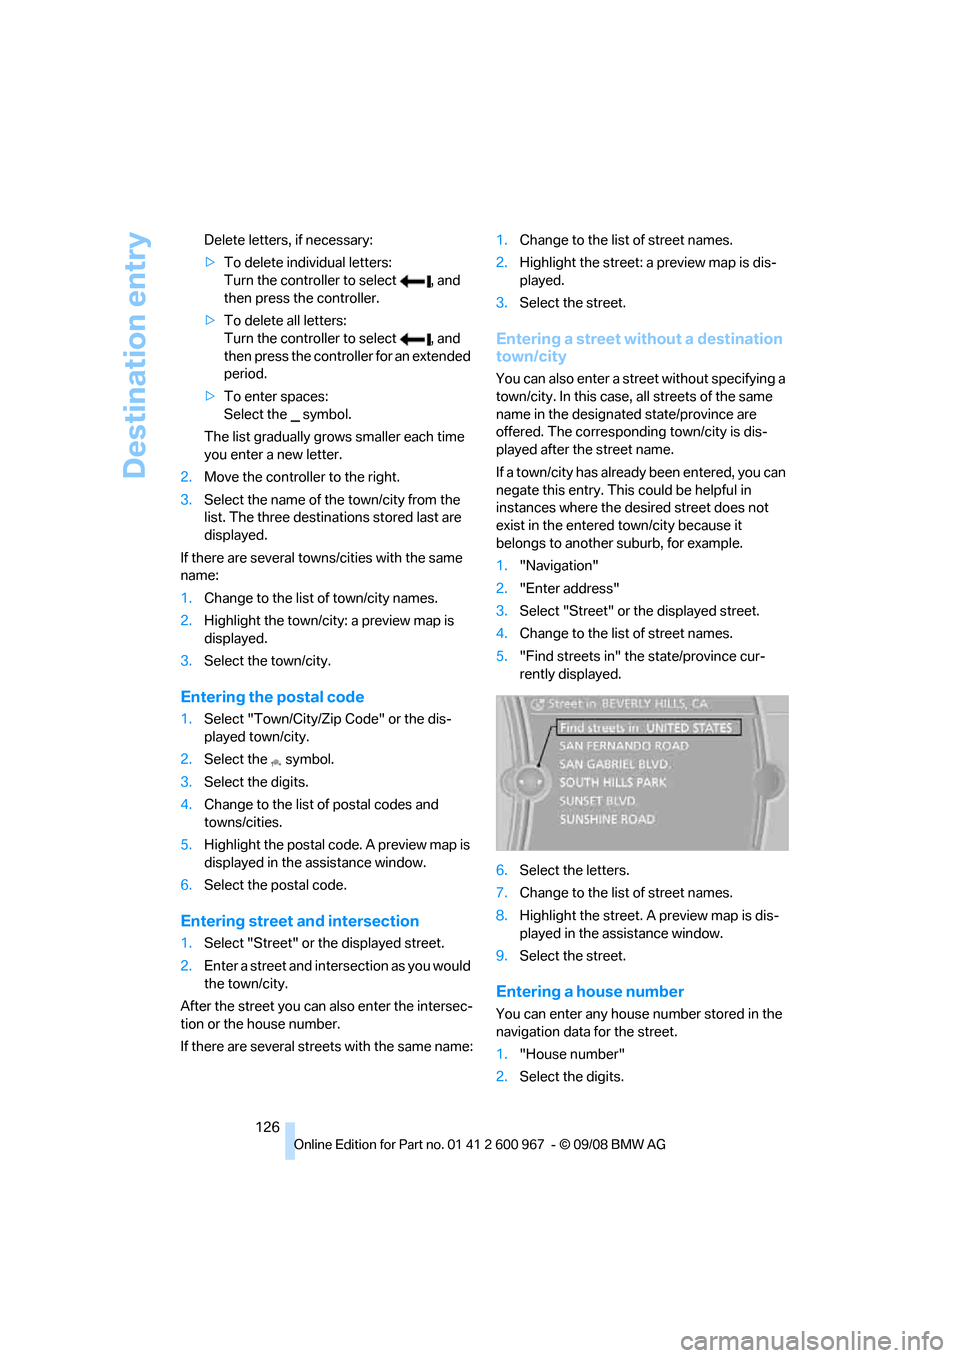
Entering a street without a destination
town/city
You can also enter a street without specifying a
town/city. In this case, all streets of the same
name in the designated state/province are
offered. The corresponding town/city is dis-
played after the street name.
If a town/city has already been entered, you can
negate this entry. This could be helpful in
instances where the desired street does not
exist in the entered town/city because it
belongs to another suburb, for example.
1."Navigation"
2."Enter address"
3.Select "Street" or the displayed street.
4.Change to the list of street names.
5."Find streets in" the state/province cur-
rently displayed.
6.Select the letters.
7.Change to the list of street names.
8.Highlight the street. A preview map is dis-
played in the assistance window.
9.Select the street.
Entering a house number
You can enter any house number stored in the
navigation data for the street.
1."House number"
2.Select the digits.
Page 131 of 260
Navigation
Driving tips
129Reference
At a glance
Controls
Communications
Entertainment
Mobility
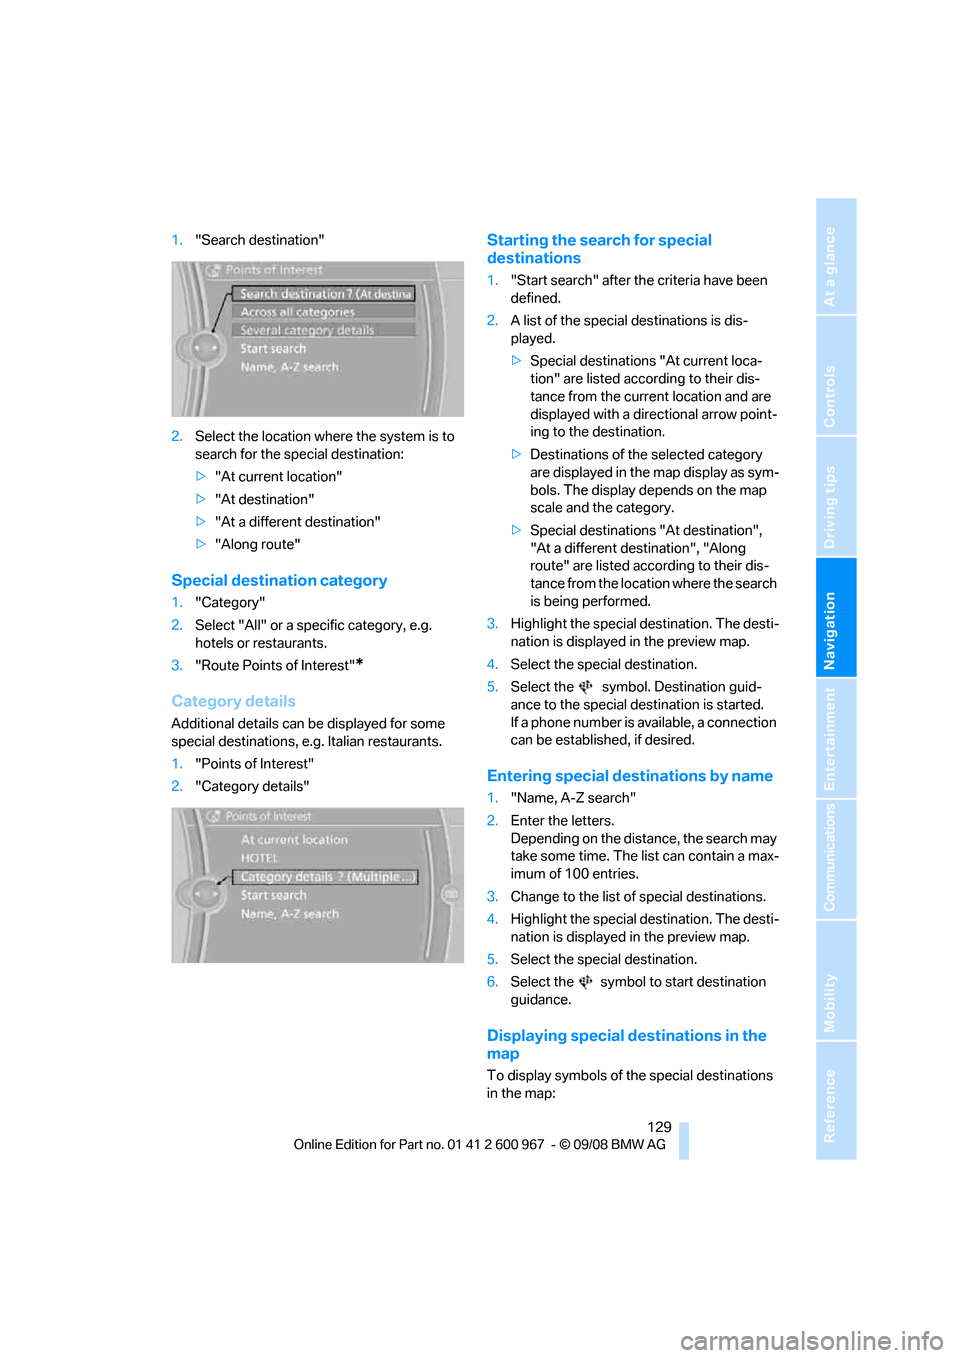
1."Search destination"
2.Select the location where the system is to
search for the special destination:
>"At current location"
>"At destination"
>"At a different destination"
>"Along route"
Special destination category
1."Category"
2.Select "All" or a specific category, e.g.
hotels or restaurants.
3."Route Points of Interest"
*
Category details
Additional details can be displayed for some
special destinations, e.g. Italian restaurants.
1."Points of Interest"
2."Category details"
Starting the search for special
destinations
1."Start search" after the criteria have been
defined.
2.A list of the special destinations is dis-
played.
>Special destinations "At current loca-
tion" are listed according to their dis-
tance from the current location and are
displayed with a directional arrow point-
ing to the destination.
>Destinations of the selected category
are displayed in the map display as sym-
bols. The display depends on the map
scale and the category.
>Special destinations "At destination",
"At a different destination", "Along
route" are listed according to their dis-
tance from the location where the search
is being performed.
3.Highlight the special destination. The desti-
nation is displayed in the preview map.
4.Select the special destination.
5.Select the symbol. Destination guid-
ance to the special destination is started.
If a phone number is available, a connection
can be established, if desired.
Entering special destinations by name
1."Name, A-Z search"
2.Enter the letters.
Depending on the distance, the search may
take some time. The list can contain a max-
imum of 100 entries.
3.Change to the list of special destinations.
4.Highlight the special destination. The desti-
nation is displayed in the preview map.
5.Select the special destination.
6.Select the symbol to start destination
guidance.
Displaying special destinations in the
map
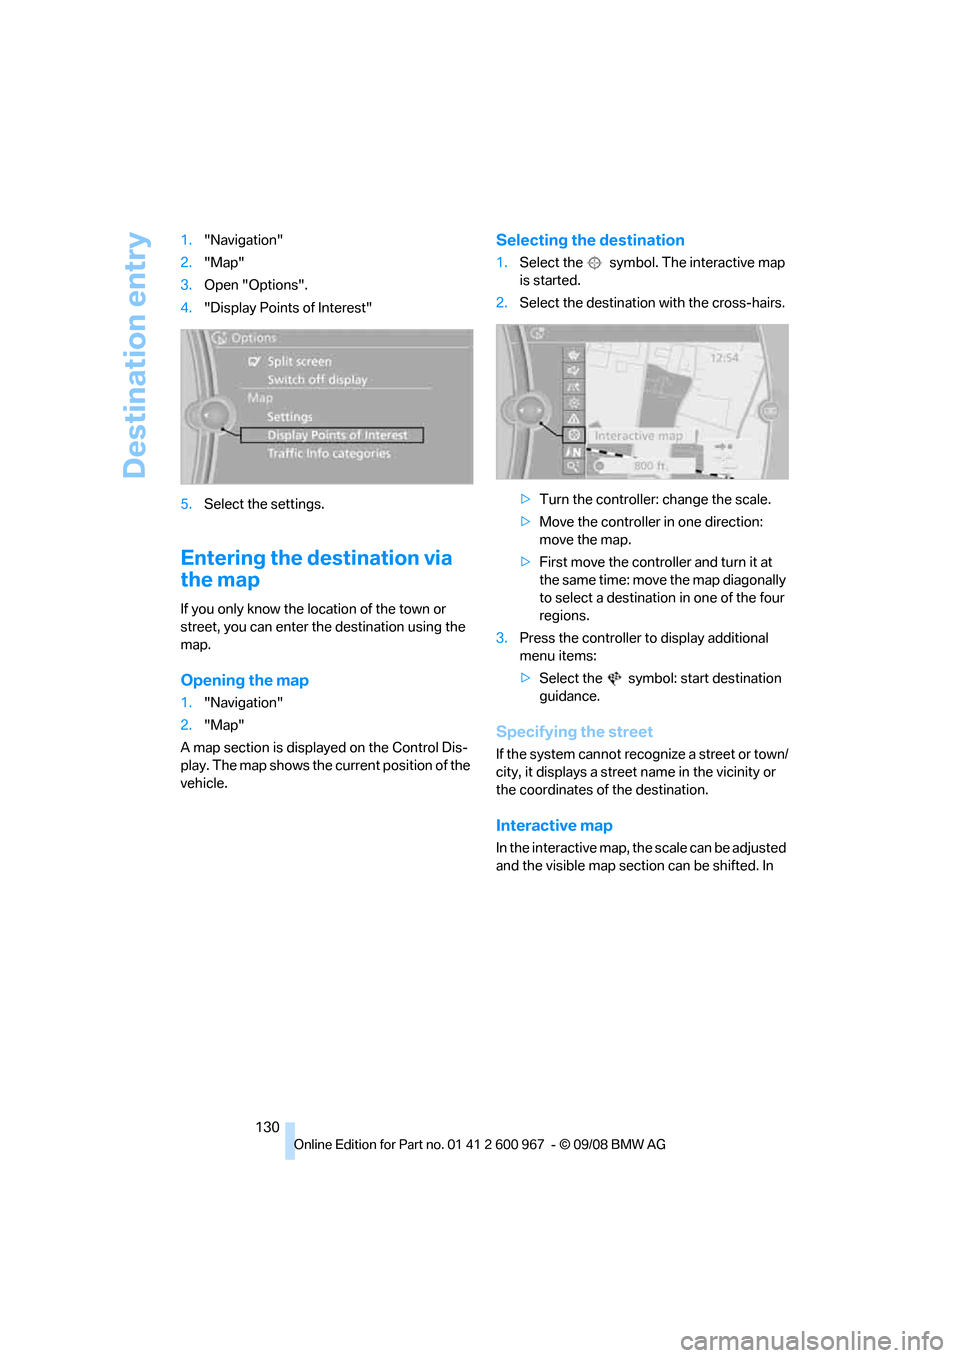
To display symbols of the special destinations
in the map:
Page 132 of 260
Destination entry
130 1."Navigation"
2."Map"
3.Open "Options".
4."Display Points of Interest"
5.Select the settings.
Entering the destination via
the map
If you only know the location of the town or
street, you can enter the destination using the
map.
Opening the map
1."Navigation"
2."Map"
A map section is displayed on the Control Dis-
play. The map shows the current position of the
vehicle.
Selecting the destination
1.Select the symbol. The interactive map
is started.
2.Select the destination with the cross-hairs.
>Turn the controller: change the scale.
>Move the controller in one direction:
move the map.
>First move the controller and turn it at
the same time: move the map diagonally
to select a destination in one of the four
regions.
3.Press the controller to display additional
menu items:
>Select the symbol: start destination
guidance.
Specifying the street
If the system cannot recognize a street or town/
city, it displays a street name in the vicinity or
the coordinates of the destination.
Interactive map
In the interactive map, the scale can be adjusted
and the visible map section can be shifted. In
Page 133 of 260
Navigation
Driving tips
131Reference
At a glance
Controls
Communications
Entertainment
Mobility
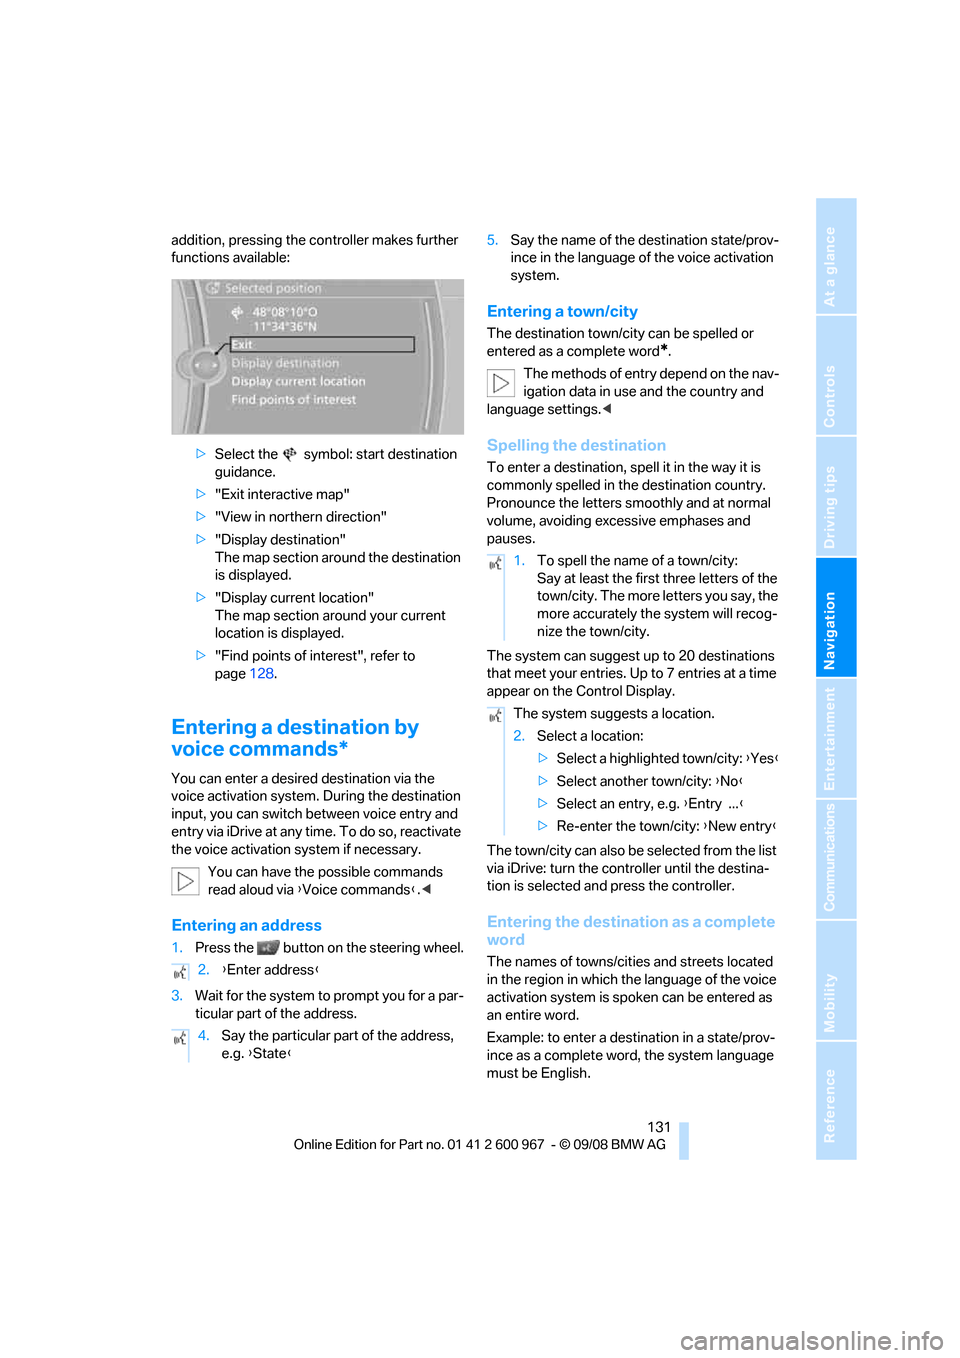
addition, pressing the controller makes further
functions available:
>Select the symbol: start destination
guidance.
>"Exit interactive map"
>"View in northern direction"
>"Display destination"
The map section around the destination
is displayed.
>"Display current location"
The map section around your current
location is displayed.
>"Find points of interest", refer to
page128.
Entering a destination by
voice commands*
You can enter a desired destination via the
voice activation system. During the destination
input, you can switch between voice entry and
entry via iDrive at any time. To do so, reactivate
the voice activation system if necessary.
You can have the possible commands
read aloud via {Voice commands}.<
Entering an address
1.Press the button on the steering wheel.
3.Wait for the system to prompt you for a par-
ticular part of the address.5.Say the name of the destination state/prov-
ince in the language of the voice activation
system.
Entering a town/city
The destination town/city can be spelled or
entered as a complete word
*.
The methods of entry depend on the nav-
igation data in use and the country and
language settings.<
Spelling the destination
To enter a destination, spell it in the way it is
commonly spelled in the destination country.
Pronounce the letters smoothly and at normal
volume, avoiding excessive emphases and
pauses.
The system can suggest up to 20 destinations
that meet your entries. Up to 7 entries at a time
appear on the Control Display.
The town/city can also be selected from the list
via iDrive: turn the controller until the destina-
tion is selected and press the controller.
Entering the destination as a complete
word
The names of towns/cities and streets located
in the region in which the language of the voice
activation system is spoken can be entered as
an entire word.
Example: to enter a destination in a state/prov-
ince as a complete word, the system language
must be English. 2.{Enter address}
4.Say the particular part of the address,
e.g. {State}
1.To spell the name of a town/city:
Say at least the first three letters of the
town/city. The more letters you say, the
more accurately the system will recog-
nize the town/city.
The system suggests a location.
2.Select a location:
>Select a highlighted town/city: {Yes}
>Select another town/city: {No}
>Select an entry, e.g. {Entry ...}
>Re-enter the town/city: {New entry}
Page 137 of 260
Navigation
Driving tips
135Reference
At a glance
Controls
Communications
Entertainment
Mobility
Destination guidance
Starting destination
guidance
1."Navigation"
2."Enter address"
3.Select the destination.
4."Start guidance"
After the route is calculated, the route is dis-
played in the map on the Control Display.
Terminating destination
guidance
1."Navigation"
2."Map"
3.Select the symbol
Continuing destination
guidance
If the destination was not reached at the end of
the last trip, the system asks whether it should
continue destination guidance.
Select "Resume guidance" or "Stop guidance".
Route criteria
General information
You can influence the calculated route by
choosing certain route criteria. You can change
the route criteria as often as you like during des-
tination entry or during destination guidance.
The route is planned according to fixed rules.
The type of road is taken into account, e.g.
whether it is a highway or a winding road. As a
result, the routes recommended by the naviga-
tion system may not always be the same ones
that you would choose based on personal expe-
rience.The settings are stored for the remote control
currently in use.
Changing route criteria
1."Navigation"
2."Map"
3."Route preference"
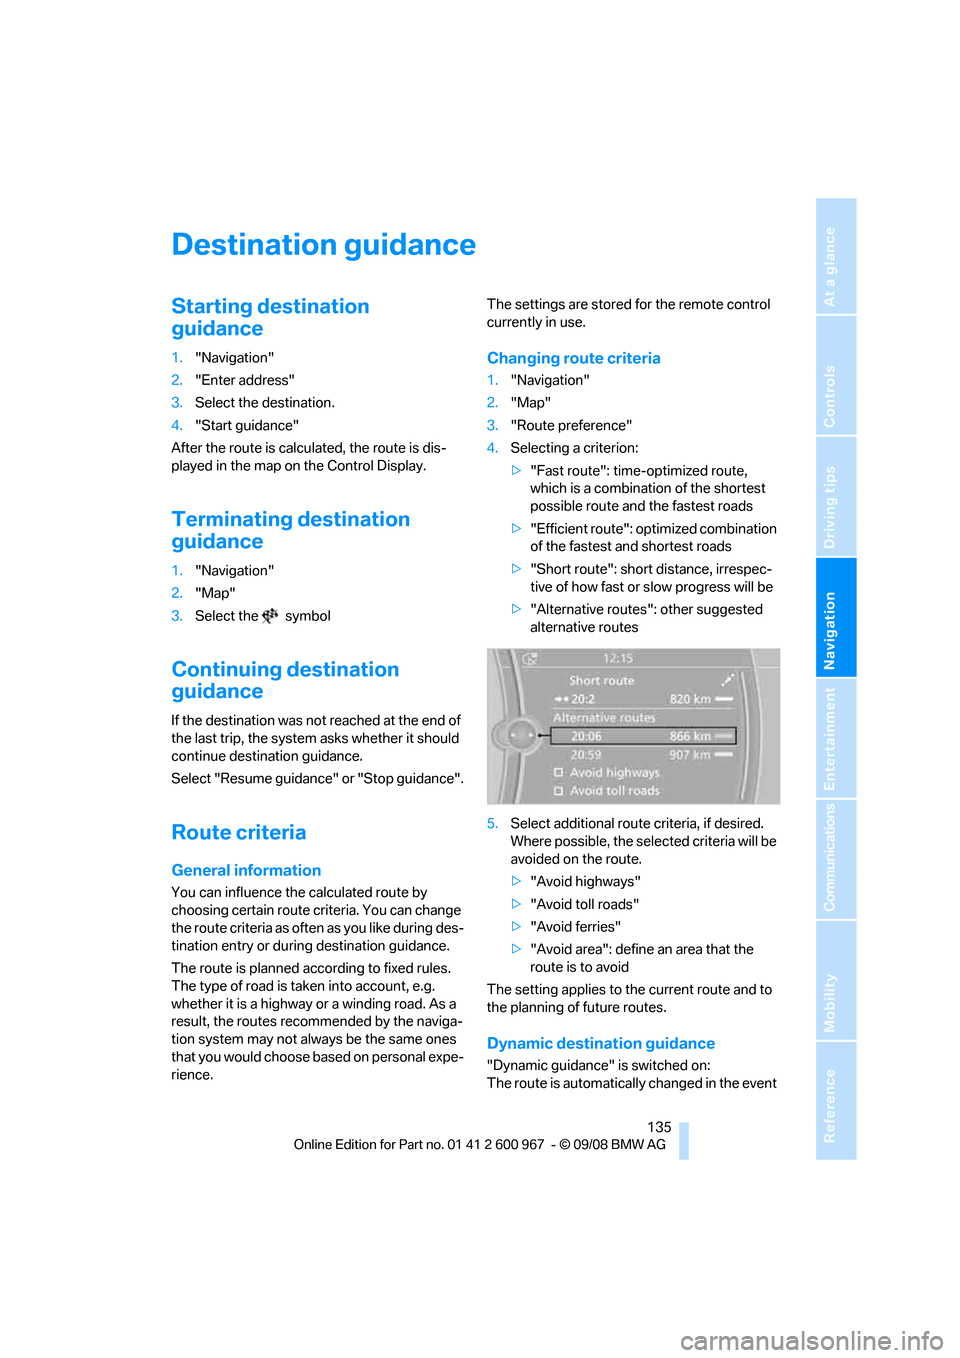
4.Selecting a criterion:
>"Fast route": time-optimized route,
which is a combination of the shortest
possible route and the fastest roads
>"Efficient route": optimized combination
of the fastest and shortest roads
>"Short route": short distance, irrespec-
tive of how fast or slow progress will be
>"Alternative routes": other suggested
alternative routes
5.Select additional route criteria, if desired.
Where possible, the selected criteria will be
avoided on the route.
>"Avoid highways"
>"Avoid toll roads"
>"Avoid ferries"
>"Avoid area": define an area that the
route is to avoid
The setting applies to the current route and to
the planning of future routes.
Dynamic destination guidance
"Dynamic guidance" is switched on:
The route is automatically changed in the event