Symbol BMW 335I CONVERTIBLE 2009 E93 Owner's Manual
[x] Cancel search | Manufacturer: BMW, Model Year: 2009, Model line: 335I CONVERTIBLE, Model: BMW 335I CONVERTIBLE 2009 E93Pages: 260, PDF Size: 7.95 MB
Page 6 of 260
Notes
4
Notes
Using this Owner's Manual
We have tried to make all the information in this
Owner's Manual easy to find. The fastest way to
find specific topics is to refer to the detailed
index at the back of the manual. If you wish to
gain an initial overview of your vehicle, you will
find this in the first chapter.
Should you sell your BMW some day, please
remember to hand over the Owner's Manual as
well; it is an important component of your vehi-
cle.
Additional sources of information
Should you have any other questions, your
BMW center will be glad to advise you at any
time.
Information on BMW, e.g. on technical aspects,
can also be found on the Internet at
www.bmwusa.com.
Symbols used
Indicates precautions that must be fol-
lowed precisely in order to avoid the pos-
sibility of personal injury and serious damage to
the vehicle.<
Indicates information that will assist you
in gaining the optimum benefit from your
vehicle and enable you to care more effectively
for your vehicle.<
Refers to measures that can be taken to
help protect the environment.<
*Indicates special equipment, country-spe-
cific equipment and optional accessories, as
well as equipment and functions not yet avail-
able at the time of printing.
"..." Identifies Control Display texts used to
select individual functions.
{...} Verbal instructions to use with the voice
activation system.
{{...}} Identifies the answers generated by the
voice activation system.
Symbols on vehicle components
Indicates that you should consult the rel-
evant section of this Owner's Manual for
information on a particular part or assembly.
Page 22 of 260
iDrive
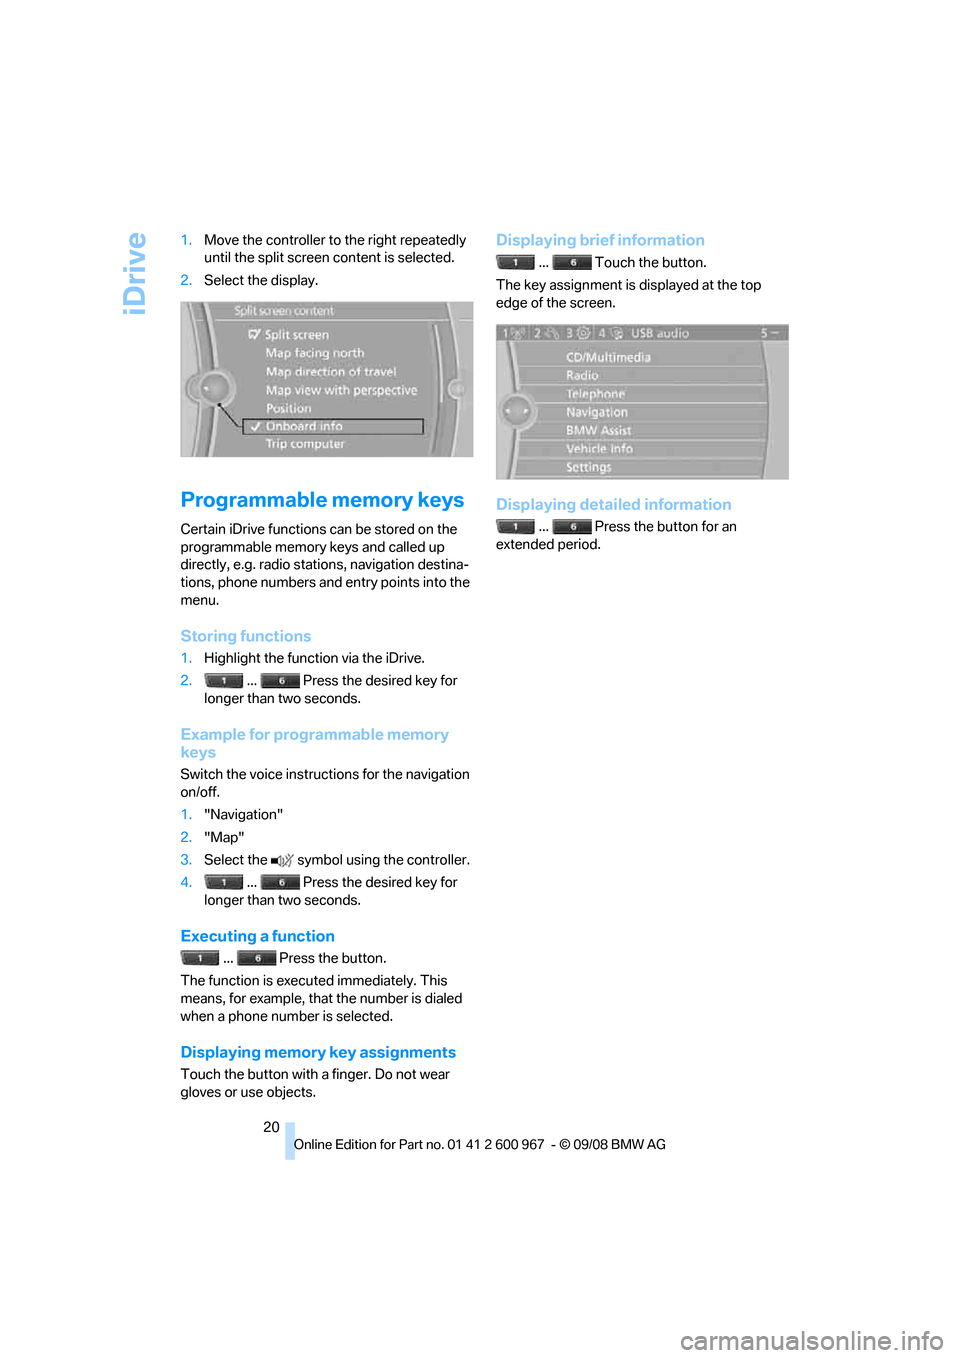
20 1.Move the controller to the right repeatedly
until the split screen content is selected.
2.Select the display.
Programmable memory keys
Certain iDrive functions can be stored on the
programmable memory keys and called up
directly, e.g. radio stations, navigation destina-
tions, phone numbers and entry points into the
menu.
Storing functions
1.Highlight the function via the iDrive.
2. ... Press the desired key for
longer than two seconds.
Example for programmable memory
keys
Switch the voice instructions for the navigation
on/off.
1."Navigation"
2."Map"
3.Select the symbol using the controller.
4. ... Press the desired key for
longer than two seconds.
Executing a function
... Press the button.
The function is executed immediately. This
means, for example, that the number is dialed
when a phone number is selected.
Displaying memory key assignments
Touch the button with a finger. Do not wear
gloves or use objects.
Displaying brief information
... Touch the button.
The key assignment is displayed at the top
edge of the screen.
Displaying detailed information
... Press the button for an
extended period.
Page 23 of 260
At a glance
21Reference
Controls
Driving tips
Communications
Navigation
Entertainment
Mobility
Letters and numbers
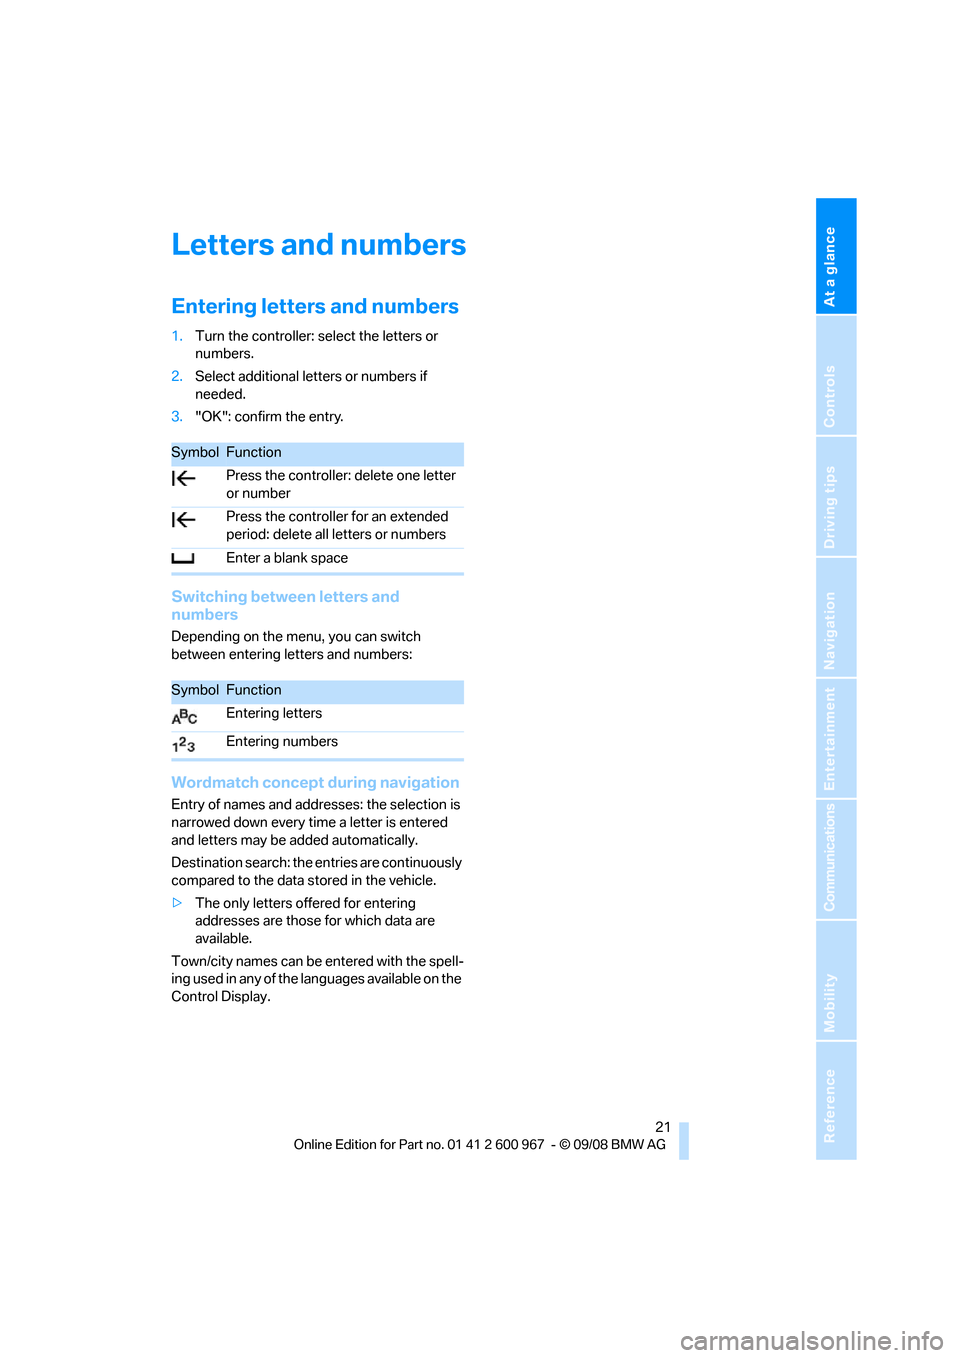
Entering letters and numbers
1.Turn the controller: select the letters or
numbers.
2.Select additional letters or numbers if
needed.
3."OK": confirm the entry.
Switching between letters and
numbers
Depending on the menu, you can switch
between entering letters and numbers:
Wordmatch concept during navigation
Entry of names and addresses: the selection is
narrowed down every time a letter is entered
and letters may be added automatically.
Destination search: the entries are continuously
compared to the data stored in the vehicle.
>The only letters offered for entering
addresses are those for which data are
available.
Town/city names can be entered with the spell-
ing used in any of the languages available on the
Control Display.
SymbolFunction
Press the controller: delete one letter
or number
Press the controller for an extended
period: delete all letters or numbers
Enter a blank space
SymbolFunction
Entering letters
Entering numbers
Page 24 of 260
Voice activation system
22
Voice activation system
The concept
The voice activation system allows you to con-
trol operation of various vehicle systems with-
out removing your hands from the steering
wheel.
Individual menu items on the Control Display
can be spoken as commands. It is not neces-
sary to use the controller.
The voice activation system transforms your
oral commands into control signals for the
selected systems and provides support in the
form of instructions or questions.
Coupe: the voice activation system uses a spe-
cial microphone located in the area of the inte-
rior rearview mirror, refer to page14.
Convertible: the voice activation system uses a
special microphone located in the area of the
steering column.
Precondition
Via iDrive, select the language in which the
voice activation system is operating, so that the
spoken commands can be identified. Selecting
the language for iDrive, refer to page80.
Symbols in the Owner's Manual
Saying commands
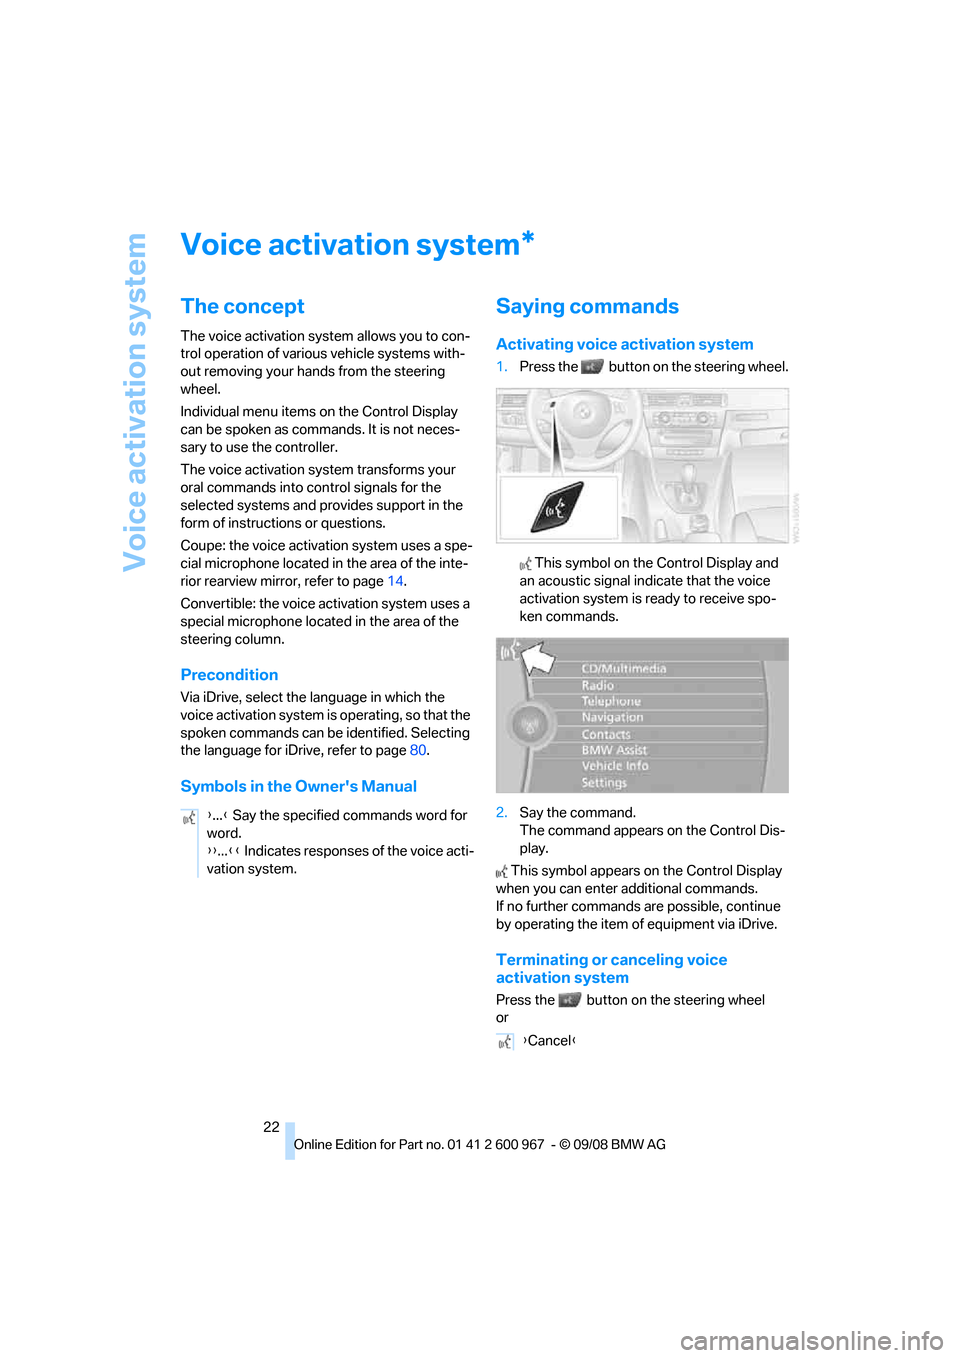
Activating voice activation system
1.Press the button on the steering wheel.
This symbol on the Control Display and
an acoustic signal indicate that the voice
activation system is ready to receive spo-
ken commands.
2.Say the command.
The command appears on the Control Dis-
play.
This symbol appears on the Control Display
when you can enter additional commands.
If no further commands are possible, continue
by operating the item of equipment via iDrive.
Terminating or canceling voice
activation system
Press the button on the steering wheel
or
*
{...} Say the specified commands word for
word.
{{...}} Indicates responses of the voice acti-
vation system.
{Cancel}
Page 42 of 260
Opening and closing
40
Interruption
The automatic sequence of movements is
interrupted if the switch for hardtop operation is
released. The sequence can be continued in
the desired direction by pushing or pulling the
switch.
A hardtop that is not fully opened or
closed is a safety hazard.
Do not interrupt and resume the closing proce-
dure several times in close succession as this
could damage the mechanism.<
If the hardtop is not fully opened or
closed, the luggage compartment lid can-
not be opened and the windows cannot be
moved.<
Convenient operation with remote
control or via door lock
Refer to pages28 and30.
Wind deflector*
The wind deflector keeps air movements in the
passenger compartment to a minimum when
the hardtop is open and provides an even more
comfortable ride, particularly at high speeds.
Installation
The wind deflector is stored in a protective
cover in the cargo bay. Brief instructions for
operation can be found on the protective cover.
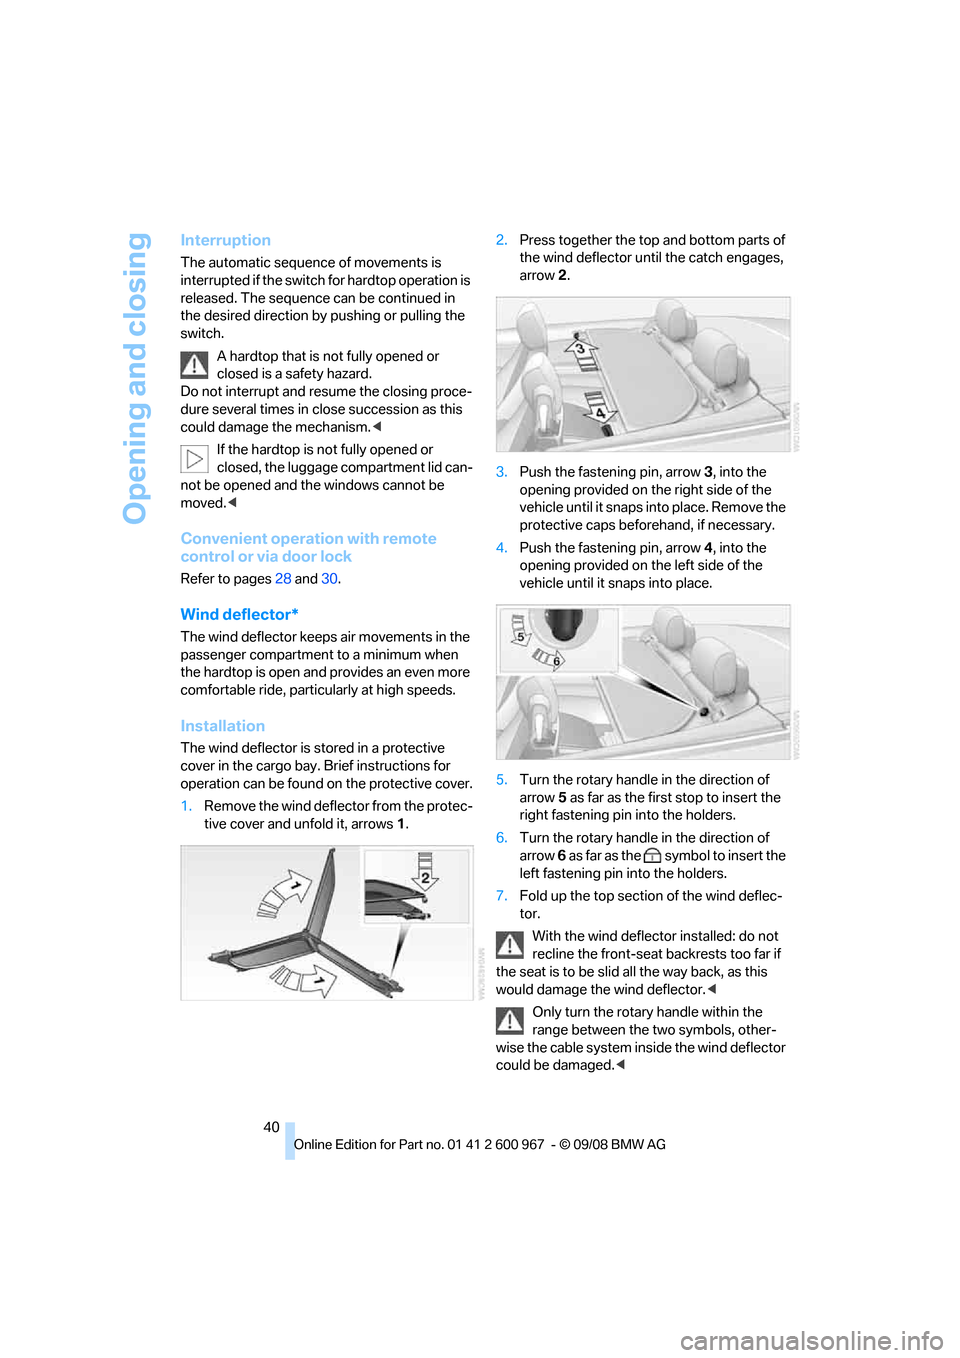
1.Remove the wind deflector from the protec-
tive cover and unfold it, arrows 1.2.Press together the top and bottom parts of
the wind deflector until the catch engages,
arrow 2.
3.Push the fastening pin, arrow 3, into the
opening provided on the right side of the
vehicle until it snaps into place. Remove the
protective caps beforehand, if necessary.
4.Push the fastening pin, arrow 4, into the
opening provided on the left side of the
vehicle until it snaps into place.
5.Turn the rotary handle in the direction of
arrow 5 as far as the first stop to insert the
right fastening pin into the holders.
6.Turn the rotary handle in the direction of
arrow 6 as far as the symbol to insert the
left fastening pin into the holders.
7.Fold up the top section of the wind deflec-
tor.
With the wind deflector installed: do not
recline the front-seat backrests too far if
the seat is to be slid all the way back, as this
would damage the wind deflector.<
Only turn the rotary handle within the
range between the two symbols, other-
wise the cable system inside the wind deflector
could be damaged.<
Page 71 of 260
Controls
69Reference
At a glance
Driving tips
Communications
Navigation
Entertainment
Mobility
Everything under control
Odometer, outside
temperature display, clock
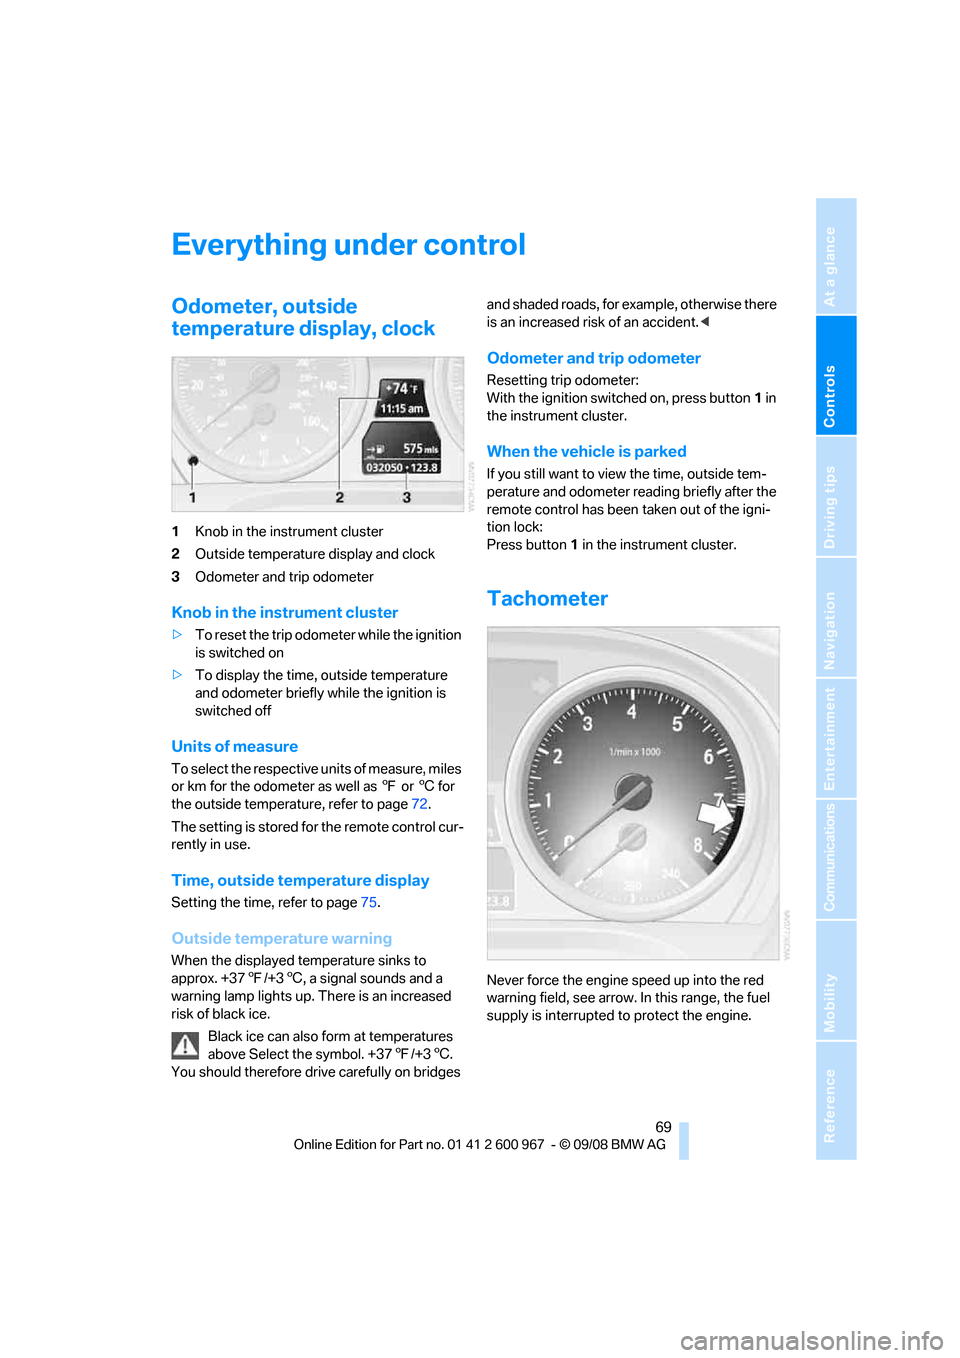
1Knob in the instrument cluster
2Outside temperature display and clock
3Odometer and trip odometer
Knob in the instrument cluster
>To reset the trip odometer while the ignition
is switched on
>To display the time, outside temperature
and odometer briefly while the ignition is
switched off
Units of measure
To select the respective units of measure, miles
or km for the odometer as well as 7 or 6 for
the outside temperature, refer to page72.
The setting is stored for the remote control cur-
rently in use.
Time, outside temperature display
Setting the time, refer to page75.
Outside temperature warning
When the displayed temperature sinks to
approx. +377/+36, a signal sounds and a
warning lamp lights up. There is an increased
risk of black ice.
Black ice can also form at temperatures
above Select the symbol. +377/+36.
You should therefore drive carefully on bridges and shaded roads, for example, otherwise there
is an increased risk of an accident.<
Odometer and trip odometer
Resetting trip odometer:
With the ignition switched on, press button1 in
the instrument cluster.
When the vehicle is parked
If you still want to view the time, outside tem-
perature and odometer reading briefly after the
remote control has been taken out of the igni-
tion lock:
Press button 1 in the instrument cluster.
Tachometer
Never force the engine speed up into the red
warning field, see arrow. In this range, the fuel
supply is interrupted to protect the engine.
Page 75 of 260
Controls
73Reference
At a glance
Driving tips
Communications
Navigation
Entertainment
Mobility
1."Settings"
2."Language/Units"
3.Select the desired menu item.
4.Select the desired unit.
The settings are stored for the remote control
currently in use.
Service requirements
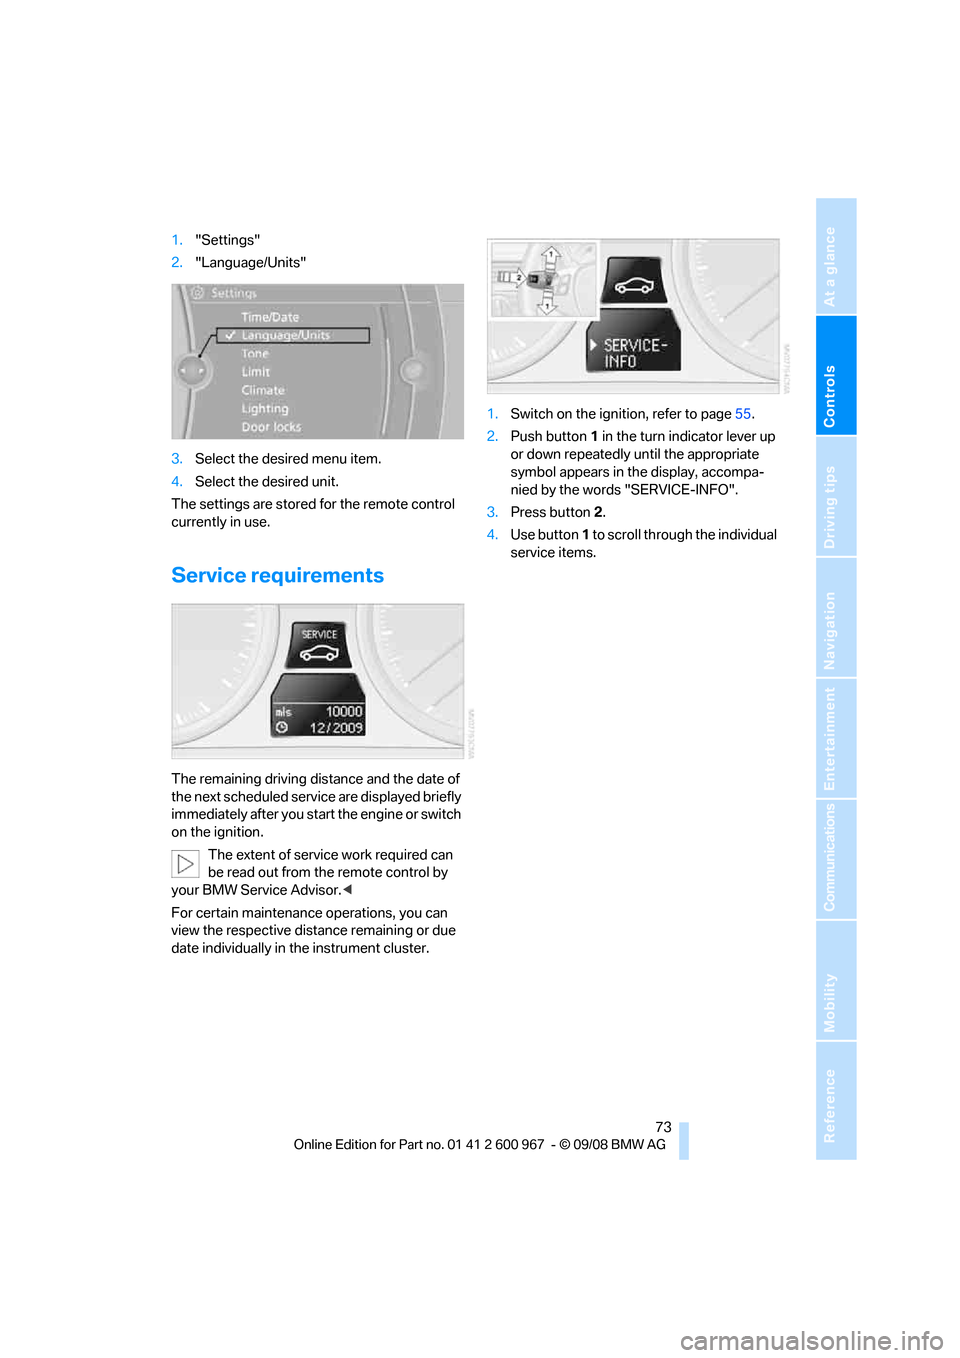
The remaining driving distance and the date of
the next scheduled service are displayed briefly
immediately after you start the engine or switch
on the ignition.
The extent of service work required can
be read out from the remote control by
your BMW Service Advisor.<
For certain maintenance operations, you can
view the respective distance remaining or due
date individually in the instrument cluster.1.Switch on the ignition, refer to page55.
2.Push button 1 in the turn indicator lever up
or down repeatedly until the appropriate
symbol appears in the display, accompa-
nied by the words "SERVICE-INFO".
3.Press button 2.
4.Use button 1 to scroll through the individual
service items.
Page 76 of 260
Everything under control
74
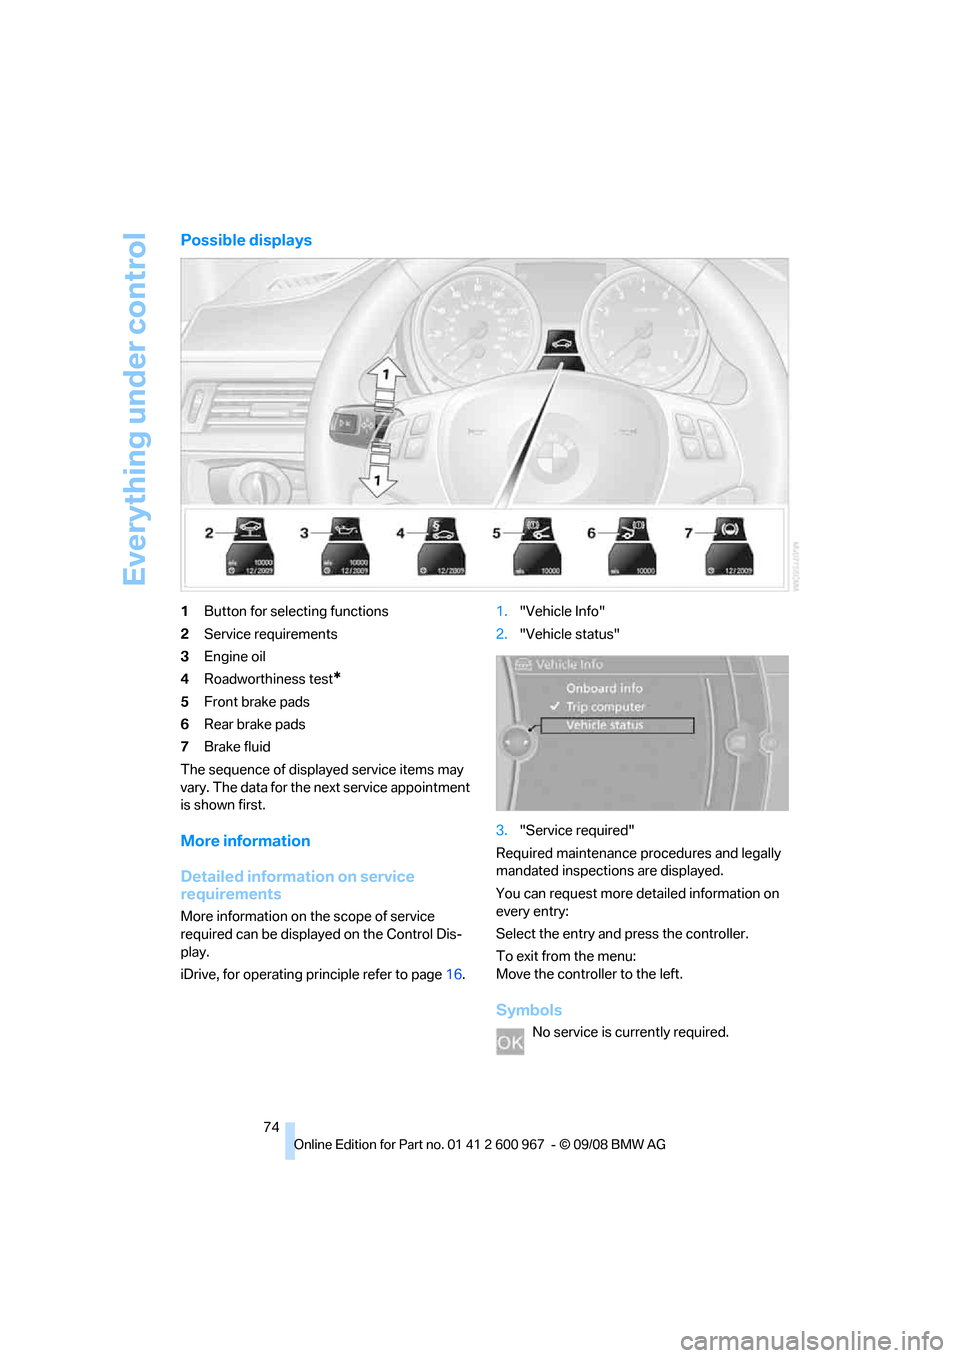
Possible displays
1Button for selecting functions
2Service requirements
3Engine oil
4Roadworthiness test
*
5Front brake pads
6Rear brake pads
7Brake fluid
The sequence of displayed service items may
vary. The data for the next service appointment
is shown first.
More information
Detailed information on service
requirements
More information on the scope of service
required can be displayed on the Control Dis-
play.
iDrive, for operating principle refer to page16.1."Vehicle Info"
2."Vehicle status"
3."Service required"
Required maintenance procedures and legally
mandated inspections are displayed.
You can request more detailed information on
every entry:
Select the entry and press the controller.
To exit from the menu:
Move the controller to the left.
Symbols
No service is currently required.
Page 78 of 260
Everything under control
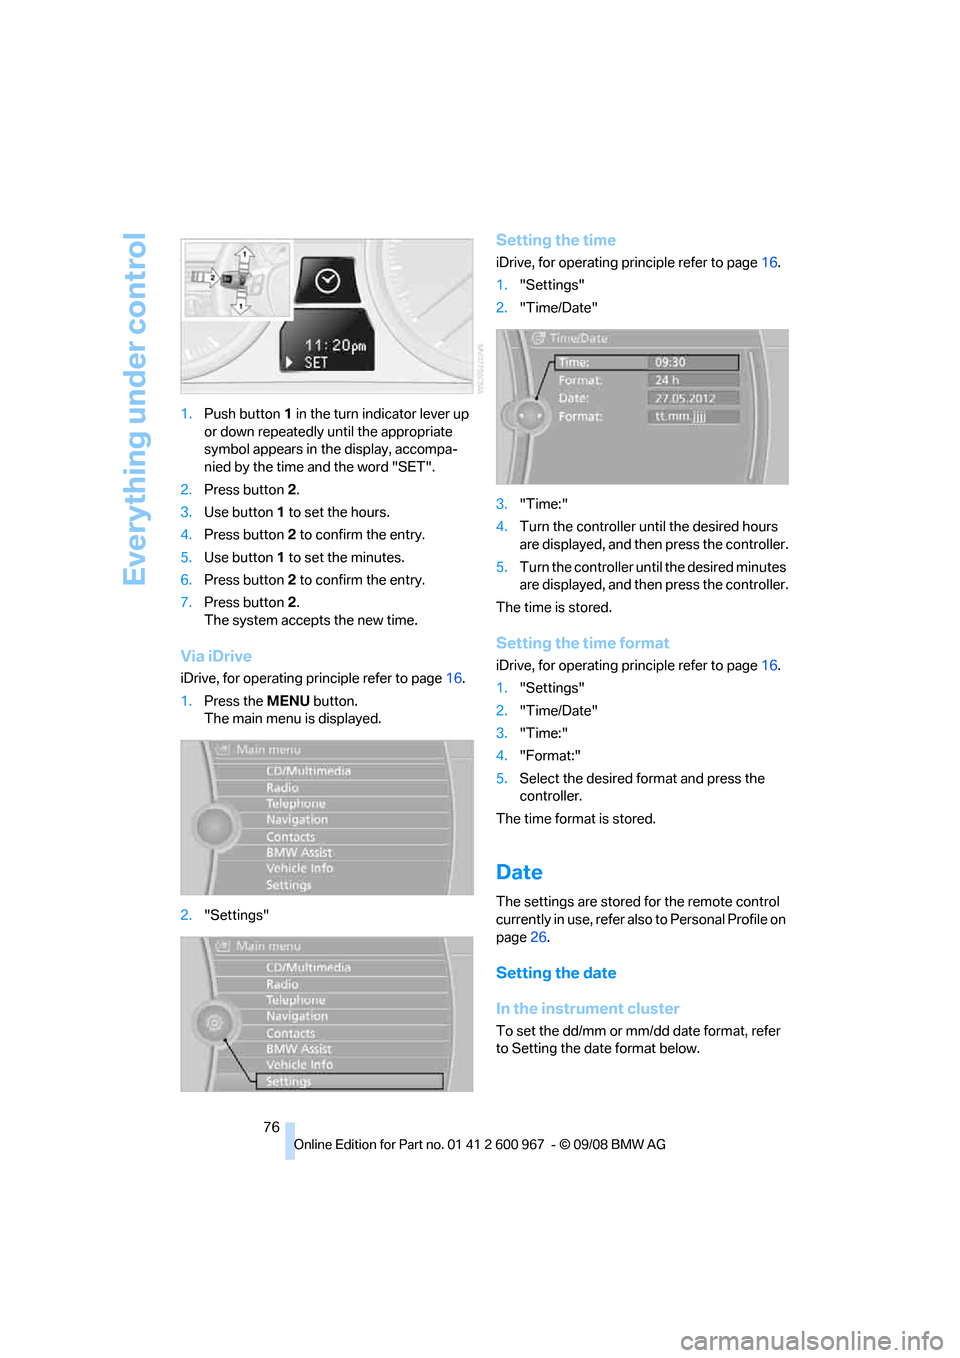
76 1.Push button 1 in the turn indicator lever up
or down repeatedly until the appropriate
symbol appears in the display, accompa-
nied by the time and the word "SET".
2.Press button 2.
3.Use button 1 to set the hours.
4.Press button 2 to confirm the entry.
5.Use button 1 to set the minutes.
6.Press button 2 to confirm the entry.
7.Press button 2.
The system accepts the new time.
Via iDrive
iDrive, for operating principle refer to page16.
1.Press the MENU button.
The main menu is displayed.
2."Settings"
Setting the time
iDrive, for operating principle refer to page16.
1."Settings"
2."Time/Date"
3."Time:"
4.Turn the controller until the desired hours
are displayed, and then press the controller.
5.Turn the controller until the desired minutes
are displayed, and then press the controller.
The time is stored.
Setting the time format
iDrive, for operating principle refer to page16.
1."Settings"
2."Time/Date"
3."Time:"
4."Format:"
5.Select the desired format and press the
controller.
The time format is stored.
Date
The settings are stored for the remote control
currently in use, refer also to Personal Profile on
page26.
Setting the date
In the instrument cluster
To set the dd/mm or mm/dd date format, refer
to Setting the date format below.
Page 79 of 260
Controls
77Reference
At a glance
Driving tips
Communications
Navigation
Entertainment
Mobility
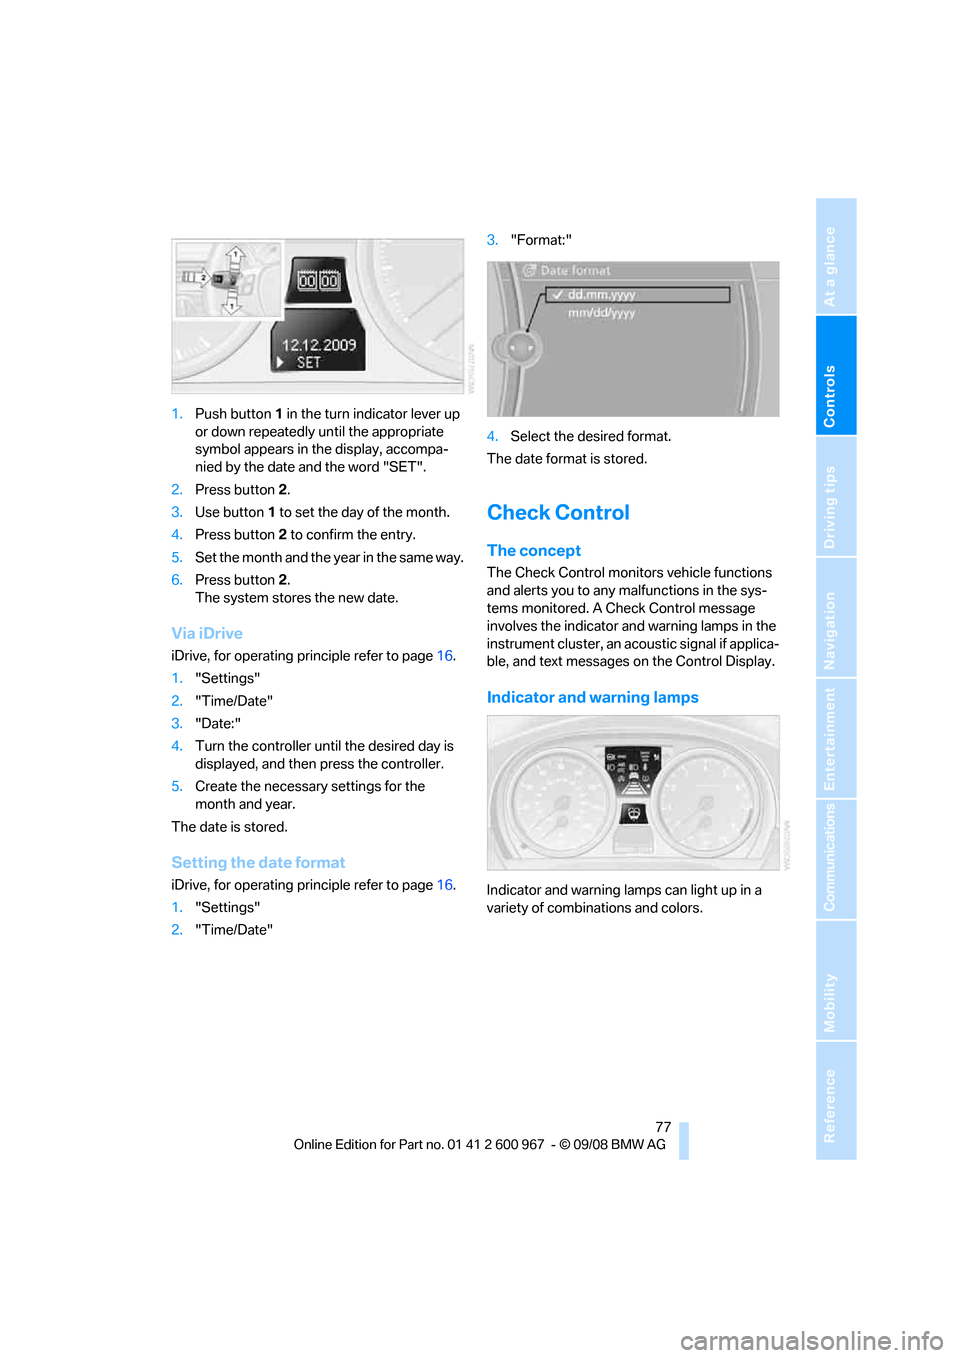
1.Push button 1 in the turn indicator lever up
or down repeatedly until the appropriate
symbol appears in the display, accompa-
nied by the date and the word "SET".
2.Press button 2.
3.Use button 1 to set the day of the month.
4.Press button 2 to confirm the entry.
5.Set the month and the yea r i n t h e s a m e w a y .
6.Press button 2.
The system stores the new date.
Via iDrive
iDrive, for operating principle refer to page16.
1."Settings"
2."Time/Date"
3."Date:"
4.Turn the controller until the desired day is
displayed, and then press the controller.
5.Create the necessary settings for the
month and year.
The date is stored.
Setting the date format
iDrive, for operating principle refer to page16.
1."Settings"
2."Time/Date"3."Format:"
4.Select the desired format.
The date format is stored.
Check Control
The concept
The Check Control monitors vehicle functions
and alerts you to any malfunctions in the sys-
tems monitored. A Check Control message
involves the indicator and warning lamps in the
instrument cluster, an acoustic signal if applica-
ble, and text messages on the Control Display.
Indicator and warning lamps
Indicator and warning lamps can light up in a
variety of combinations and colors.