ESP BMW 5 SERIES 2011 Owners Manual
[x] Cancel search | Manufacturer: BMW, Model Year: 2011, Model line: 5 SERIES, Model: BMW 5 SERIES 2011Pages: 304, PDF Size: 10.54 MB
Page 22 of 304
Voice activation system*
The concept
▷
The voice activation system can be used to
operate
functions by means of spoken com‐
mands.
▷ Most menu items on the Control Display can
be voiced as commands. The system
prompts you to make your entries.
▷ Functions that can only be used when the
vehicle
is stationary cannot be operated us‐
ing the voice activation system.
▷ The system uses a special microphone on
the driver's side.
▷ ›...‹ Verbal instructions in the Owner's
Manual
to use with the voice activation sys‐
tem.
Requirements
Via the Control Display, set a language that is
also supported by the voice activation system
so
that the spoken commands can be identified.
Set the language, refer to page 79.
Using voice activation
Activating the voice activation system
1. Press the button on the steering
wheel.
2. Wait for the signal.
3. Say the command.
The
command is displayed in the instrument
cluster. This symbol in the instrument cluster indi‐
cates that the voice activation system is active.
If no other commands are available, continue
operating the function via iDrive. Terminating the voice activation
system
Briefly press the button on the steering wheel
or ›Cancel‹.
Possible commands
Having possible commands read aloud
The commands available in each case depend
on the menu item selected on the Control Dis‐
play.
To have the available commands read out
loud: ›Voice commands‹
For
example, if the "Settings" menu is displayed,
the commands for the settings are read out loud.
Help dialog for the voice activation
system
Calling up help dialog: ›Help‹
Additional commands for the help dialog:
▷ ›Help with examples‹: information about the
current operating options and the most im‐
portant
commands for them are announced.
▷ ›Help with voice activation‹: information
about
the principle of operation for the voice
activation system is announced.
Executing functions using short
commands
Functions on the main menu can be performed
directly
by means of short commands, irrespec‐
tive of which menu item is currently selected,
e.g., ›Vehicle status‹.
List of short commands of the voice activation
system, refer to page 285.
Seite 22
22 Online Edition for Part no. 01 40 2 606 469 - 03 11 490
Voice activation system
ProCarManuals.com
Page 29 of 304
New remote controls
You can obtain new remote controls from your
service center.
Loss of the remote controls
Lost remote controls can be blocked by your
service center.
Emergency
detection of remote control
It is possible to switch on the ignition or start the
engine in situations such as the following:
▷ Interference of radio transmission to remote
control by external sources.
▷ Discharged battery in the remote control.
A Check Control message is displayed if an at‐
tempt is made to switch on the ignition or start
the engine.
Starting the engine in case of
emergency
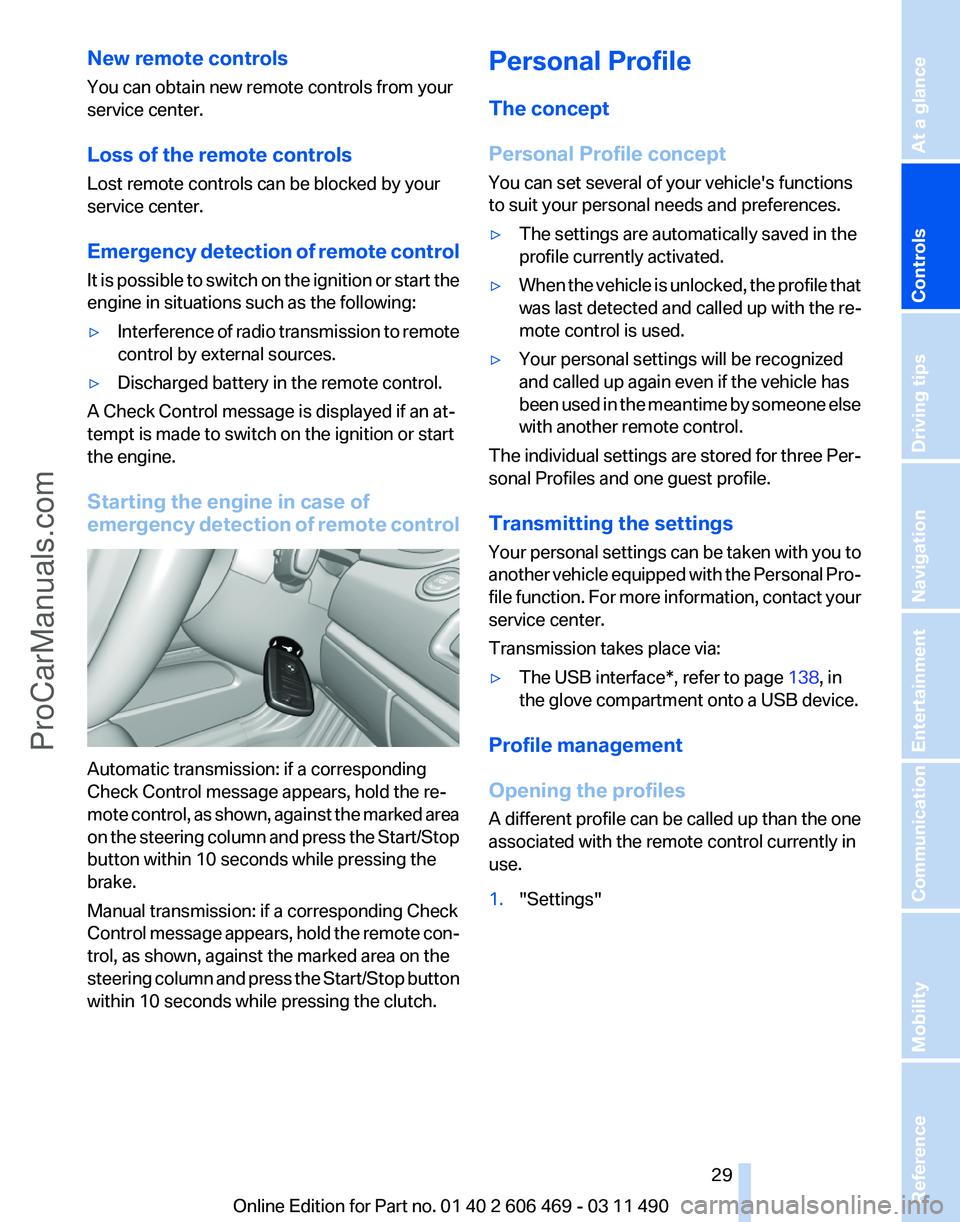
detection of remote controlAutomatic transmission: if a corresponding
Check Control message appears, hold the re‐
mote
control, as shown, against the marked area
on the steering column and press the Start/Stop
button within 10 seconds while pressing the
brake.
Manual transmission: if a corresponding Check
Control message appears, hold the remote con‐
trol, as shown, against the marked area on the
steering column and press the Start/Stop button
within 10 seconds while pressing the clutch. Personal Profile
The concept
Personal Profile concept
You can set several of your vehicle's functions
to suit your personal needs and preferences.
▷
The settings are automatically saved in the
profile currently activated.
▷ When the vehicle is unlocked, the profile that
was last detected and called up with the re‐
mote control is used.
▷ Your personal settings will be recognized
and called up again even if the vehicle has
been
used in the meantime by someone else
with another remote control.
The individual settings are stored for three Per‐
sonal Profiles and one guest profile.
Transmitting the settings
Your
personal settings can be taken with you to
another vehicle equipped with the Personal Pro‐
file function. For more information, contact your
service center.
Transmission takes place via:
▷ The USB interface*, refer to page 138, in
the glove compartment onto a USB device.
Profile management
Opening the profiles
A
different profile can be called up than the one
associated with the remote control currently in
use.
1. "Settings"
Seite 29
29Online Edition for Part no. 01 40 2 606 469 - 03 11 490
Reference Mobility Communication Entertainment Navigation Driving tips
Controls At a glance
ProCarManuals.com
Page 38 of 304
The vehicle automatically detects the remote
control when it is nearby or in the passenger
compartment.
Comfort Access supports the following func‐
tions:
▷
Unlocking/locking of the vehicle.
▷ Convenient closing.
▷ Unlocking of the trunk lid separately.
▷ Starting the engine.
Functional requirements
▷ There are no external sources of interfer‐
ence nearby.
▷ To lock the vehicle, the remote control must
be located outside of the vehicle.
▷ The next unlocking and locking cycle is not
possible until after approx. 2 seconds.
▷ The engine can only be started if the remote
control is inside the vehicle.
Comparison with ordinary remote
control
The
functions can be controlled by pressing the
buttons or via Comfort Access.
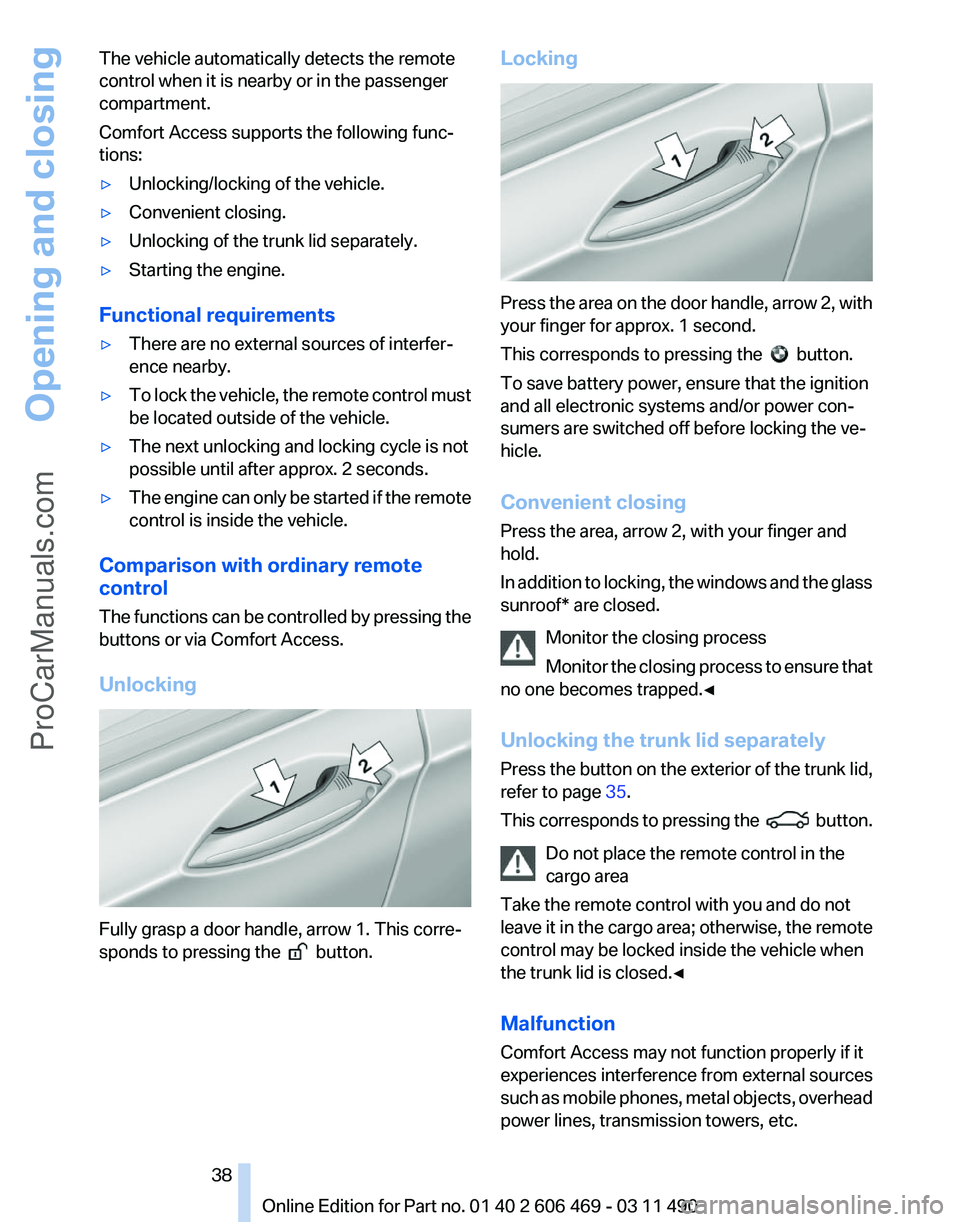
Unlocking Fully grasp a door handle, arrow 1. This corre‐
sponds to pressing the
button.Locking Press the area on the door handle, arrow 2, with
your finger for approx. 1 second.
This corresponds to pressing the
button.
To save battery power, ensure that the ignition
and all electronic systems and/or power con‐
sumers are switched off before locking the ve‐
hicle.
Convenient closing
Press the area, arrow 2, with your finger and
hold.
In
addition to locking, the windows and the glass
sunroof* are closed.
Monitor the closing process
Monitor the closing process to ensure that
no one becomes trapped.◀
Unlocking the trunk lid separately
Press the button on the exterior of the trunk lid,
refer to page 35.
This corresponds to pressing the button.
Do not place the remote control in the
cargo area
Take the remote control with you and do not
leave
it in the cargo area; otherwise, the remote
control may be locked inside the vehicle when
the trunk lid is closed.◀
Malfunction
Comfort Access may not function properly if it
experiences interference from external sources
such as mobile phones, metal objects, overhead
power lines, transmission towers, etc. Seite 38
38 Online Edition for Part no. 01 40 2 606 469 - 03 11 490
Opening and closing
ProCarManuals.com
Page 39 of 304
If this occurs, open or close the vehicle using the
buttons
on the remote control or use a key in the
door lock.
To subsequently start the engine, hold the re‐
mote control against the marked area on the
steering column, refer to page 29.
Alarm system*
The concept
The vehicle alarm system responds to:
▷ Opening of a door, the hood or the trunk lid.
▷ Movements in the vehicle: interior motion
sensor, refer to page 40.
▷ Changes in the vehicle tilt, e.g., during at‐
tempts to steal a wheel or when towing the
car.
▷ Interruptions in battery voltage.
The alarm system briefly indicates tampering:
▷ By sounding an acoustic alarm.
▷ By switching on the hazard warning system.
▷ By flashing the high beams.
Arming and disarming the alarm
system
General information
When
you lock or unlock the vehicle, either with
the remote control or at the door lock*, the alarm
system is armed or disarmed at the same time.
Door lock and armed alarm system
Unlocking via the door lock will trigger the alarm
on some country-specific versions.
Trunk lid and armed alarm system
The trunk lid can be opened using the remote
control, even if the alarm system is armed.
Press the button on the remote control
for approx. 1 second and release.
After the trunk lid is closed, it is locked and
monitored again by the alarm system. The haz‐
ard warning system flashes once. In some vehicle equipment variants, the trunk lid
can only be opened using the remote control if
the vehicle was unlocked first.
Panic mode*
Press
the button on the remote control
for at least 3 seconds.
Switching off the alarm
▷ Unlock the vehicle using the remote control.
▷ With Comfort Access: If you are carrying the
remote control with you, pull on the door
handle.
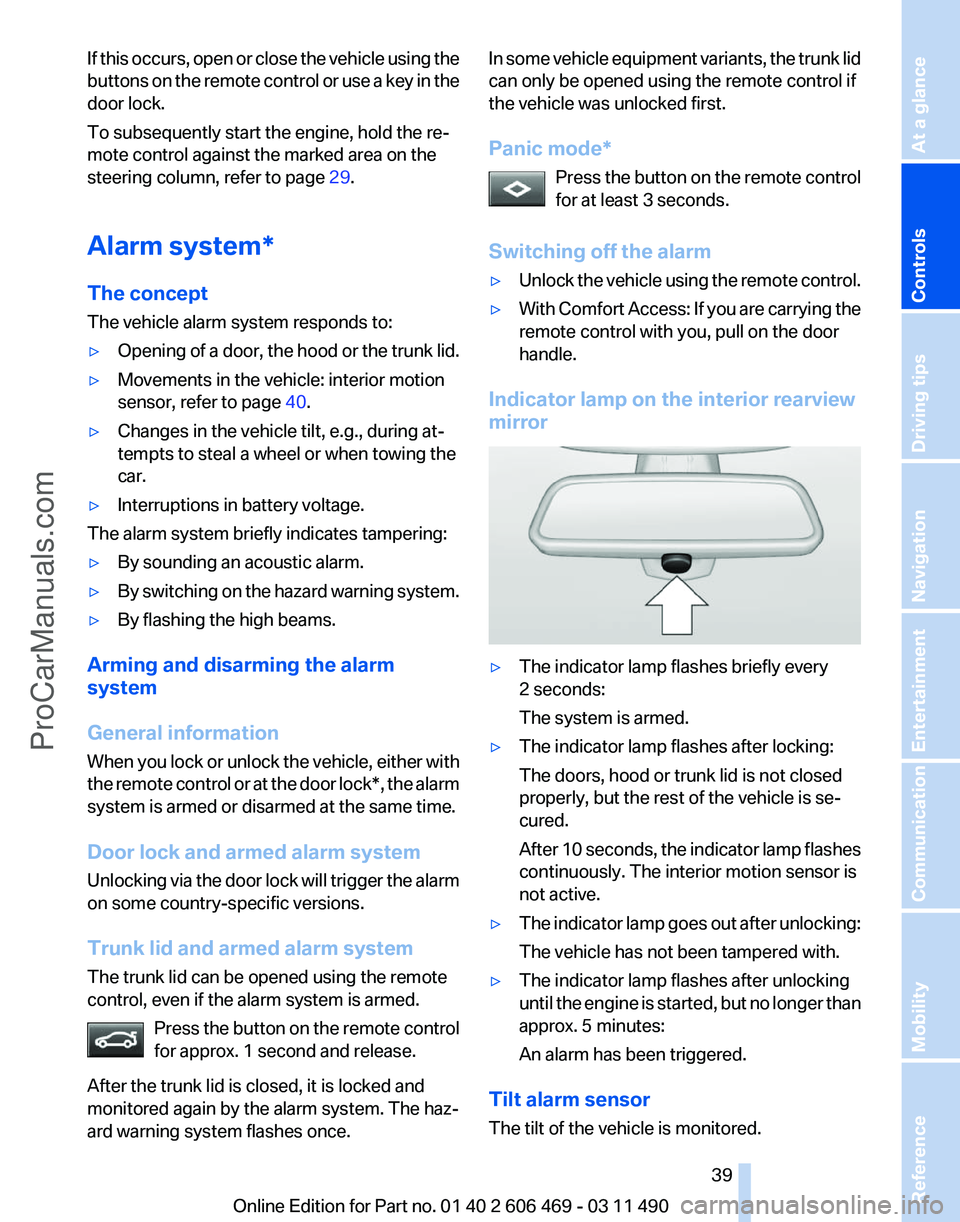
Indicator lamp on the interior rearview
mirror ▷
The indicator lamp flashes briefly every
2 seconds:
The system is armed.
▷ The indicator lamp flashes after locking:
The doors, hood or trunk lid is not closed
properly, but the rest of the vehicle is se‐
cured.
After
10 seconds, the indicator lamp flashes
continuously. The interior motion sensor is
not active.
▷ The indicator lamp goes out after unlocking:
The vehicle has not been tampered with.
▷ The indicator lamp flashes after unlocking
until
the engine is started, but no longer than
approx. 5 minutes:
An alarm has been triggered.
Tilt alarm sensor
The tilt of the vehicle is monitored. Seite 39
39Online Edition for Part no. 01 40 2 606 469 - 03 11 490
Reference Mobility Communication Entertainment Navigation Driving tips
Controls At a glance
ProCarManuals.com
Page 40 of 304
The alarm system responds in situations such
as attempts to steal a wheel or tow the car.
Interior motion sensor
The
windows and glass sunroof* must be closed
for the system to function properly.
Avoiding unintentional alarms
The tilt alarm sensor and interior motion sensor
can be switched off together, such as in the fol‐
lowing situations:
▷ In automatic car washes
▷ In duplex garages.
▷ During transport on car-carrying trains, at
sea or on a trailer.
▷ When animals are to remain in the vehicle.
Switching off the tilt alarm sensor and
interior motion sensor Press the button on the remote control
twice in succession.
The indicator lamp lights up for approx. 2 sec‐
onds and then flashes continuously.
The
tilt alarm sensor and interior motion sensor
are switched off until the vehicle is locked again.
Power windows
General information
Take the remote control with you
Take the remote control with you when
leaving the vehicle so that children, for example,
cannot operate the power windows and injure
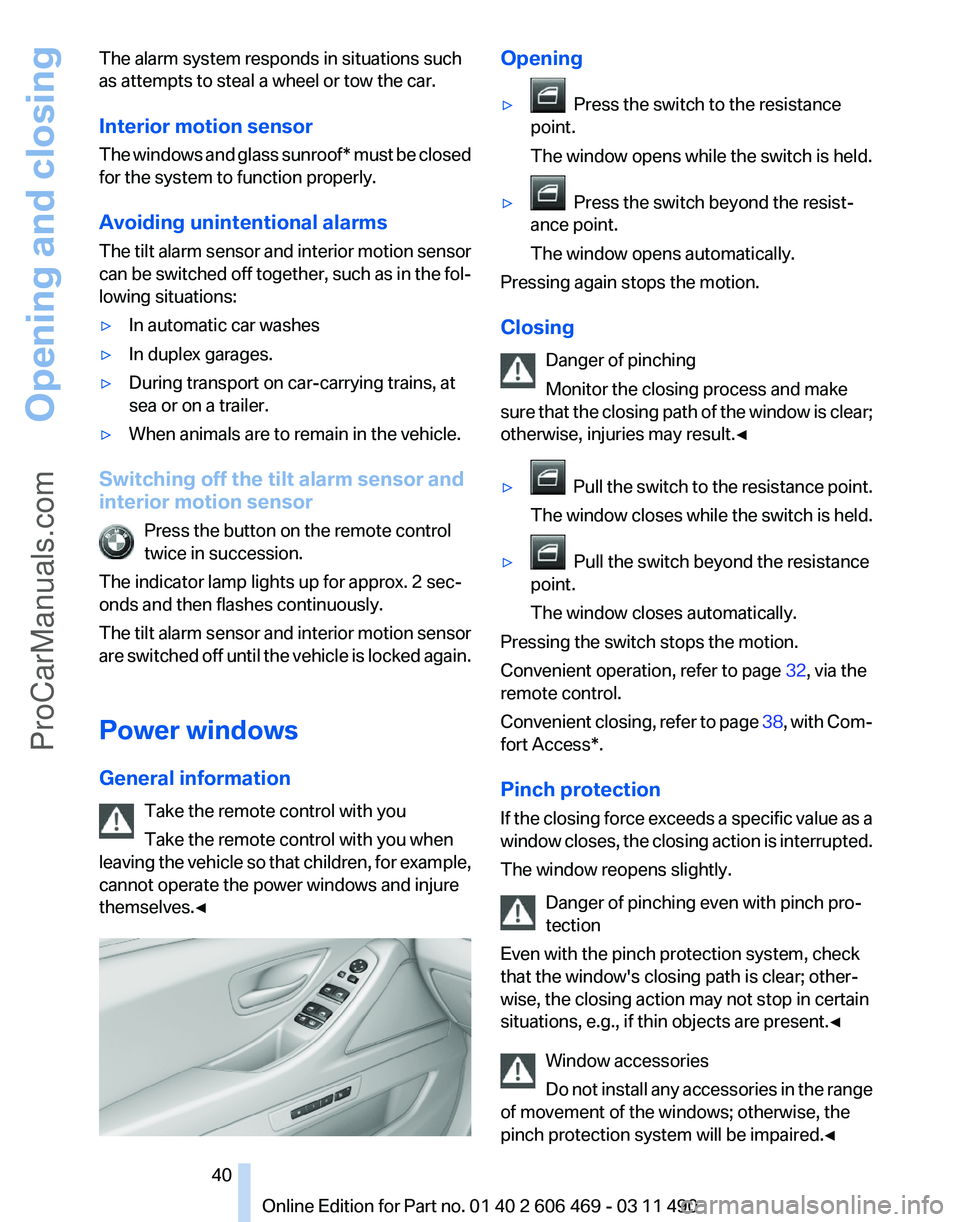
themselves.◀ Opening
▷
Press the switch to the resistance
point.
The window opens while the switch is held.
▷ Press the switch beyond the resist‐
ance point.
The window opens automatically.
Pressing again stops the motion.
Closing
Danger of pinching
Monitor the closing process and make
sure
that the closing path of the window is clear;
otherwise, injuries may result.◀
▷ Pull
the switch to the resistance point.
The window closes while the switch is held.
▷ Pull the switch beyond the resistance
point.
The window closes automatically.
Pressing the switch stops the motion.
Convenient operation, refer to page 32, via the
remote control.
Convenient
closing, refer to page 38, with Com‐
fort Access*.
Pinch protection
If the closing force exceeds a specific value as a
window closes, the closing action is interrupted.
The window reopens slightly.
Danger of pinching even with pinch pro‐
tection
Even with the pinch protection system, check
that the window's closing path is clear; other‐
wise, the closing action may not stop in certain
situations, e.g., if thin objects are present.◀
Window accessories
Do not install any accessories in the range
of movement of the windows; otherwise, the
pinch protection system will be impaired.◀ Seite 40
40 Online Edition for Part no. 01 40 2 606 469 - 03 11 490
Opening and closing
ProCarManuals.com
Page 42 of 304
Take the remote control with you
Take the remote control with you when
leaving
the vehicle so that children, for example,
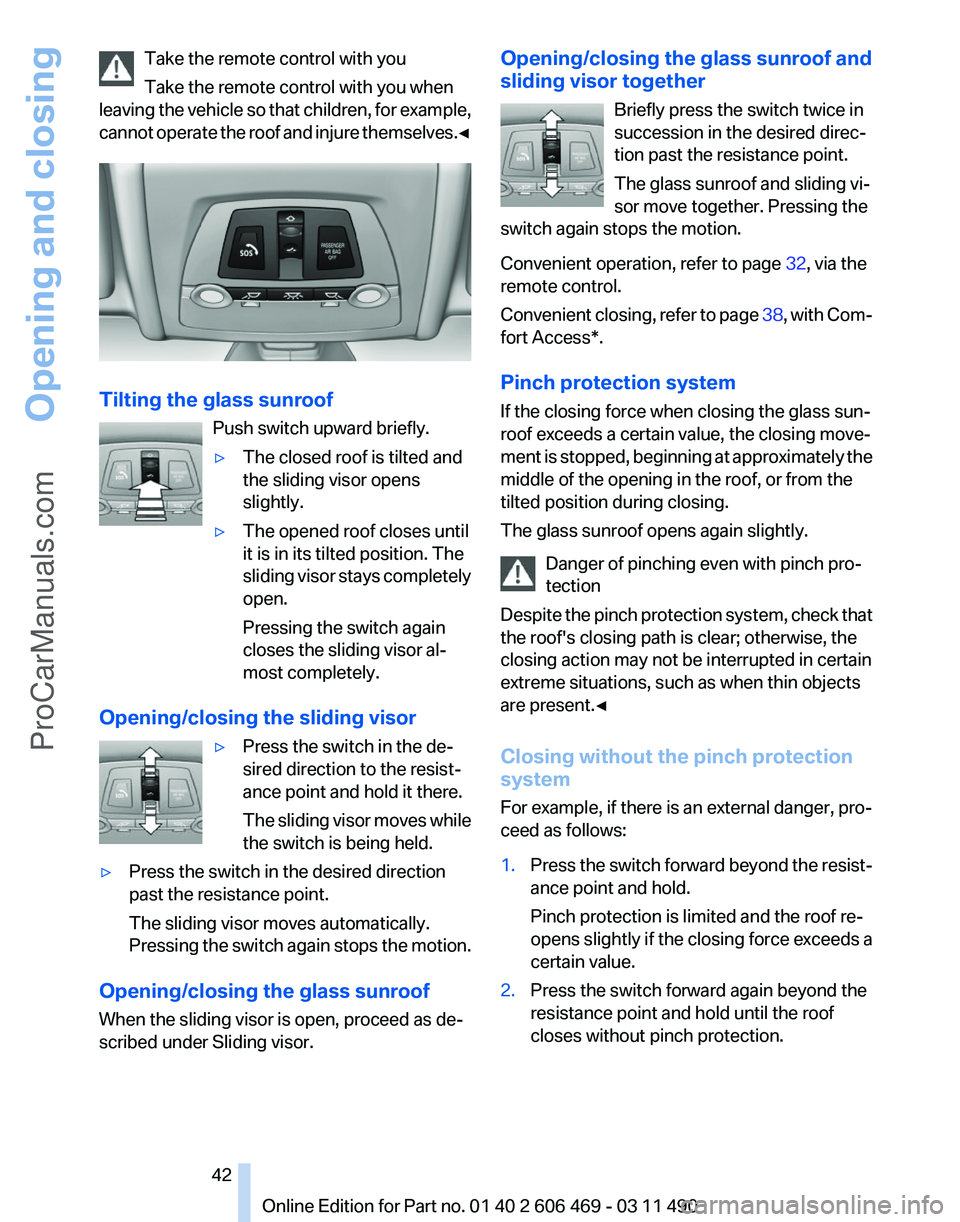
cannot operate the roof and injure themselves.◀ Tilting the glass sunroof
Push switch upward briefly.
▷The closed roof is tilted and
the sliding visor opens
slightly.
▷ The opened roof closes until
it is in its tilted position. The
sliding
visor stays completely
open.
Pressing the switch again
closes the sliding visor al‐
most completely.
Opening/closing the sliding visor ▷Press the switch in the de‐
sired direction to the resist‐
ance point and hold it there.
The
sliding visor moves while
the switch is being held.
▷ Press the switch in the desired direction
past the resistance point.
The sliding visor moves automatically.
Pressing
the switch again stops the motion.
Opening/closing the glass sunroof
When the sliding visor is open, proceed as de‐
scribed under Sliding visor. Opening/closing the glass sunroof and
sliding visor together
Briefly press the switch twice in
succession in the desired direc‐
tion past the resistance point.
The glass sunroof and sliding vi‐
sor move together. Pressing the
switch again stops the motion.
Convenient operation, refer to page 32, via the
remote control.
Convenient
closing, refer to page 38, with Com‐
fort Access*.
Pinch protection system
If the closing force when closing the glass sun‐
roof exceeds a certain value, the closing move‐
ment is stopped, beginning at approximately the
middle of the opening in the roof, or from the
tilted position during closing.
The glass sunroof opens again slightly.
Danger of pinching even with pinch pro‐
tection
Despite the pinch protection system, check that
the roof's closing path is clear; otherwise, the
closing action may not be interrupted in certain
extreme situations, such as when thin objects
are present.◀
Closing without the pinch protection
system
For example, if there is an external danger, pro‐
ceed as follows:
1. Press the switch forward beyond the resist‐
ance point and hold.
Pinch protection is limited and the roof re‐
opens
slightly if the closing force exceeds a
certain value.
2. Press the switch forward again beyond the
resistance point and hold until the roof
closes without pinch protection. Seite 42
42 Online Edition for Part no. 01 40 2 606 469 - 03 11 490
Opening and closing
ProCarManuals.com
Page 44 of 304
Adjusting
Sitting safely
The
ideal seating position can make a vital con‐
tribution to relaxed, fatigue-free driving.
The seating position plays an important role in
an accident in combination with:
▷ Safety belts, refer to page 48.
▷ Head restraints, refer to page 49.
▷ Airbags, refer to page 85.
Seats
Adjusting
General information Do not adjust the seat while driving
Never attempt to adjust the driver's seat
while driving.
The
seat could respond with unexpected move‐
ment and the ensuing loss of vehicle control
could lead to an accident.◀
Do not incline the backrest too far to the
rear
Do not incline the backrest on the front passen‐
ger side too far to the rear during driving. Oth‐
erwise, there is the danger of sliding under the
safety belt in an accident. This would eliminate
the protection normally provided by the belt.◀
The seat setting is stored for the remote control
currently in use. When the vehicle is unlocked
via the remote control, the position is automati‐
cally retrieved if this function, refer to page 33,
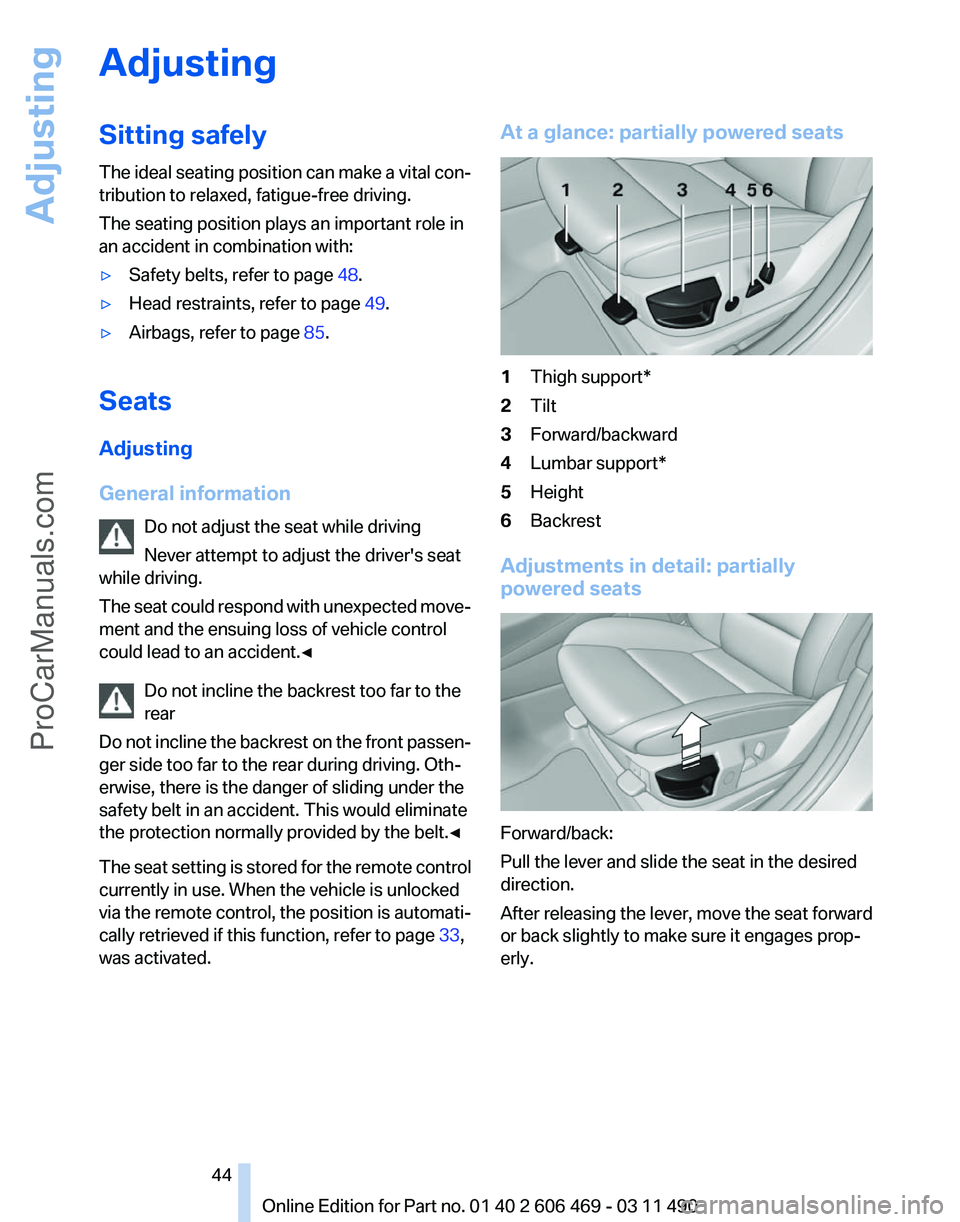
was activated. At a glance: partially powered seats
1
Thigh support*
2 Tilt
3 Forward/backward
4 Lumbar support*
5 Height
6 Backrest
Adjustments in detail: partially
powered seats Forward/back:
Pull the lever and slide the seat in the desired
direction.
After
releasing the lever, move the seat forward
or back slightly to make sure it engages prop‐
erly.
Seite 44
44 Online Edition for Part no. 01 40 2 606 469 - 03 11 490
Adjusting
ProCarManuals.com
Page 51 of 304
Before transporting passengers
Reinstall the head restraint before trans‐
porting anyone in the seat; otherwise, the pro‐
tective function of the head restraint is unavail‐
able.◀
Seat, mirror, and steering
wheel memory*
General information
Front Two different driver's seat, exterior mirror, and
steering wheel positions can be stored and re‐
trieved
for each remote control. The adjustment
of the lumbar support is not stored.
Storing
1. Switch on the ignition.
2. Set the desired position.
3. Press the button. The LED in the
button lights up.
4. Press the desired button 1 or 2. The LED
goes out.
If the M button is pressed accidentally: Press the button again.
The LED goes out.
Calling up settings Do not retrieve the memory while driving
Do not retrieve the memory setting while
driving,
as an unexpected movement of the seat
or steering wheel could result in an accident.◀ Comfort function
1.
Open the driver's door.
2. Switch off the ignition.
3. Briefly press the desired button 1 or 2.
The corresponding seat position is performed
automatically.
The procedure stops when a switch for adjust‐
ing the seat or one of the buttons is pressed.
Safety mode
1. Close the driver's door or switch on the ig‐
nition.
2. Press and hold the desired button 1 or 2 until
the adjustment procedure is completed.
Calling up of a seat position
deactivated
After
a brief period, the calling up of stored seat
positions is deactivated to save battery power.
To reactivate calling up of a seat position:
▷ Open or close the door or trunk lid.
▷ Press a button on the remote control.
▷ Press the Start/Stop button.
Mirrors
Exterior mirrors
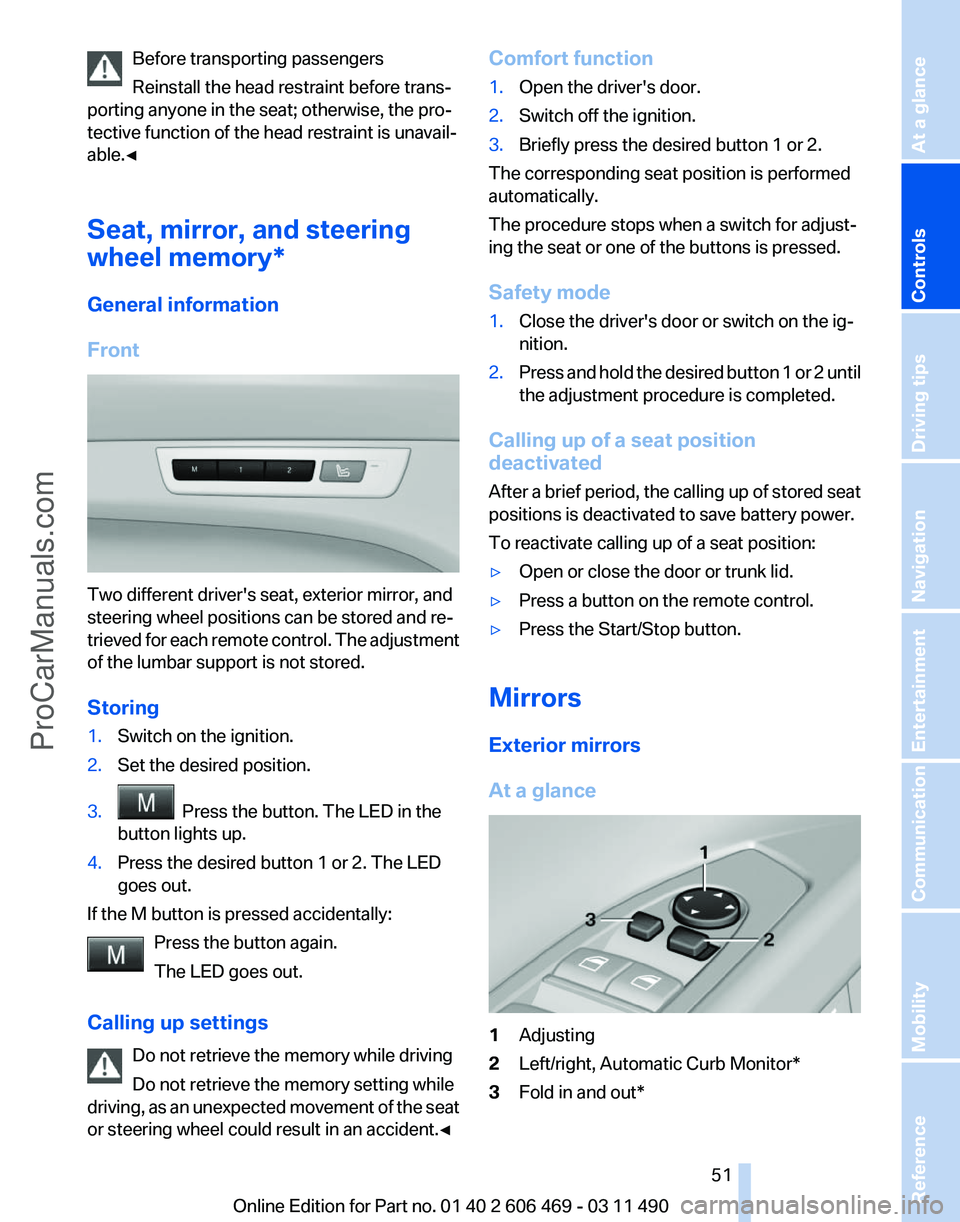
At a glance 1
Adjusting
2 Left/right, Automatic Curb Monitor*
3 Fold in and out*
Seite 51
51Online Edition for Part no. 01 40 2 606 469 - 03 11 490
Reference Mobility Communication Entertainment Navigation Driving tips
Controls At a glance
ProCarManuals.com
Page 52 of 304
General information
The
mirror on the passenger side is more curved
than the driver's side mirror.
Estimating distances correctly
Objects reflected in the mirror are closer
than they appear. Do not estimate the distance
to the traffic behind you based on what you see
in the mirror, as this will increase your risk of an
accident.◀
The mirror setting is stored for the remote con‐
trol currently in use. When the vehicle is un‐
locked via the remote control, the position is au‐
tomatically retrieved if the setting for this
function is active.
Selecting a mirror
To change over to the other mirror:
Slide the mirror changeover switch.
Adjusting electrically The setting corresponds to the direction
in which the button is pressed.
Storing positions*
Seat, mirror, and steering wheel memory, refer
to page 51.
Adjusting manually
If an electrical malfunction occurs, for example,
press the edges of the mirror glass.
Automatic Curb Monitor*
When the reverse gear is engaged, the mirror
glass tilts downward slightly on the front pas‐
senger side. This improves your view of the curb
and other low-lying obstacles when parking, for
example.
Activating
1. Slide the mirror changeover switch
to the driver's side mirror position.
2. Engage transmission position R. Deactivating
Slide the mirror changeover switch to the pas‐
senger's side mirror position.
Fold in and out*
Press the button.
Possible up to approx. 15 mph/20 km/h.
For example, this is advantageous
▷ In car washes.
▷ In narrow streets.
▷ For folding back mirrors that were folded
away manually.
Mirrors that were folded in are folded out auto‐
matically
at a speed of approx. 25 mph/40 km/h.
Fold in the mirror in a car wash
Before entering an automatic car wash,
fold in the exterior mirrors by hand or with the
button; otherwise, they could be damaged, de‐
pending on the width of the vehicle.◀
Automatic heating
Both exterior mirrors are automatically heated
whenever the engine is running.
Automatic dimming feature
Both exterior mirrors are automatically dimmed.
Photocells are used for control in the Interior rear
view mirror, refer to page 53.
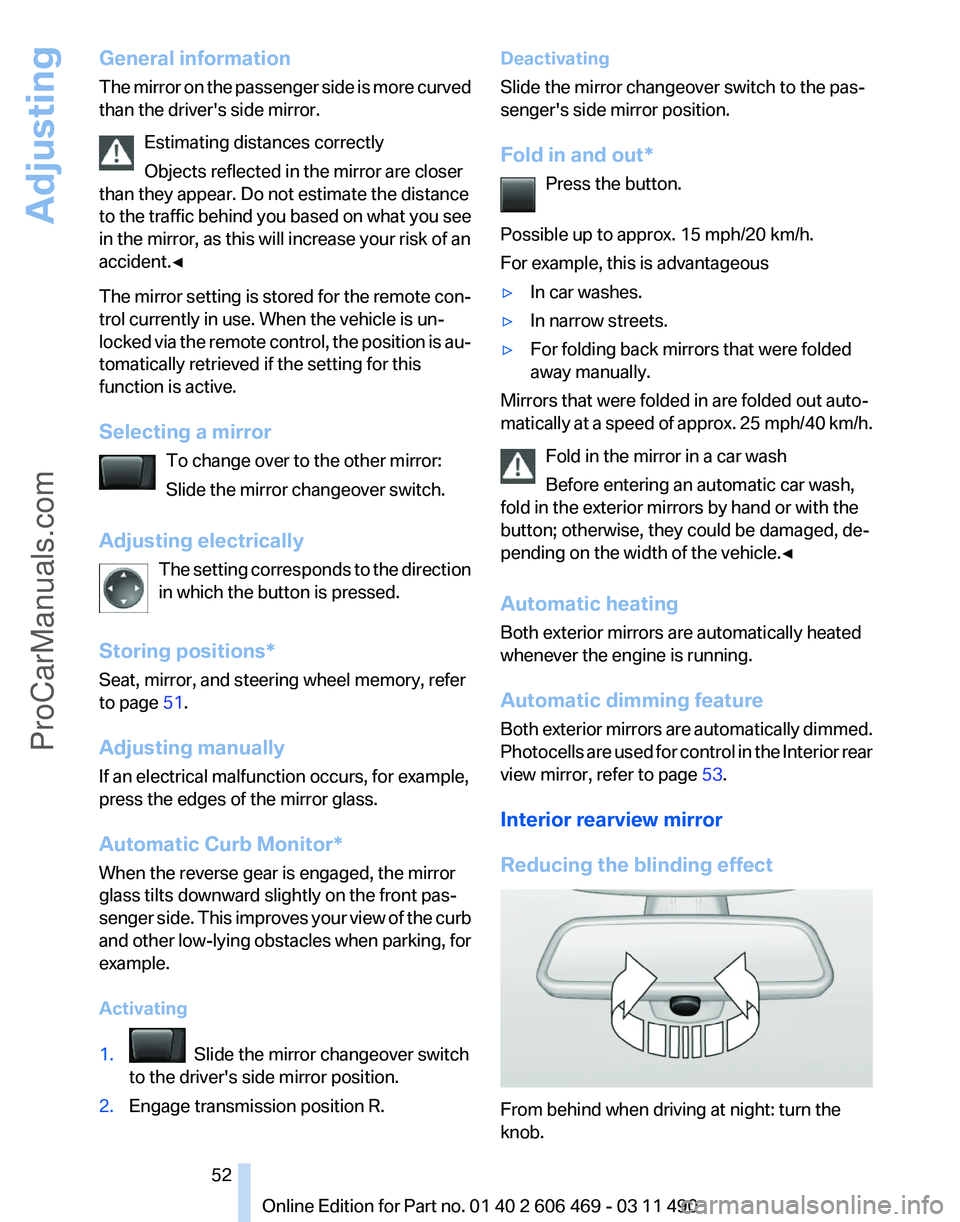
Interior rearview mirror
Reducing the blinding effect From behind when driving at night: turn the
knob. Seite 52
52 Online Edition for Part no. 01 40 2 606 469 - 03 11 490
Adjusting
ProCarManuals.com
Page 81 of 304
The setting is stored for the remote control cur‐
rently in use.
Automatic headlamp control
Switch
position : the low beams are switched
on and off automatically, e.g., in tunnels, in twi‐
light or if there is precipitation. The indicator
lamp in the instrument cluster lights up.
A blue sky with the sun low on the horizon can
cause the lights to be switched on.
The low beams always stay on when the fog
lamps are switched on.
Personal responsibility
The automatic headlamp control cannot
serve
as a substitute for your personal judgment
in determining when the lamps should be
switched on in response to ambient lighting
conditions.
For example, the sensors are unable to detect
fog or hazy weather. To avoid safety risks, you
should always switch on the lamps manually un‐
der these conditions.◀
Daytime running lights*
With the ignition switched on, the daytime run‐
ning lights light up in position 0, or .
After the ignition is switched off, the parking
lamps light up in position
.
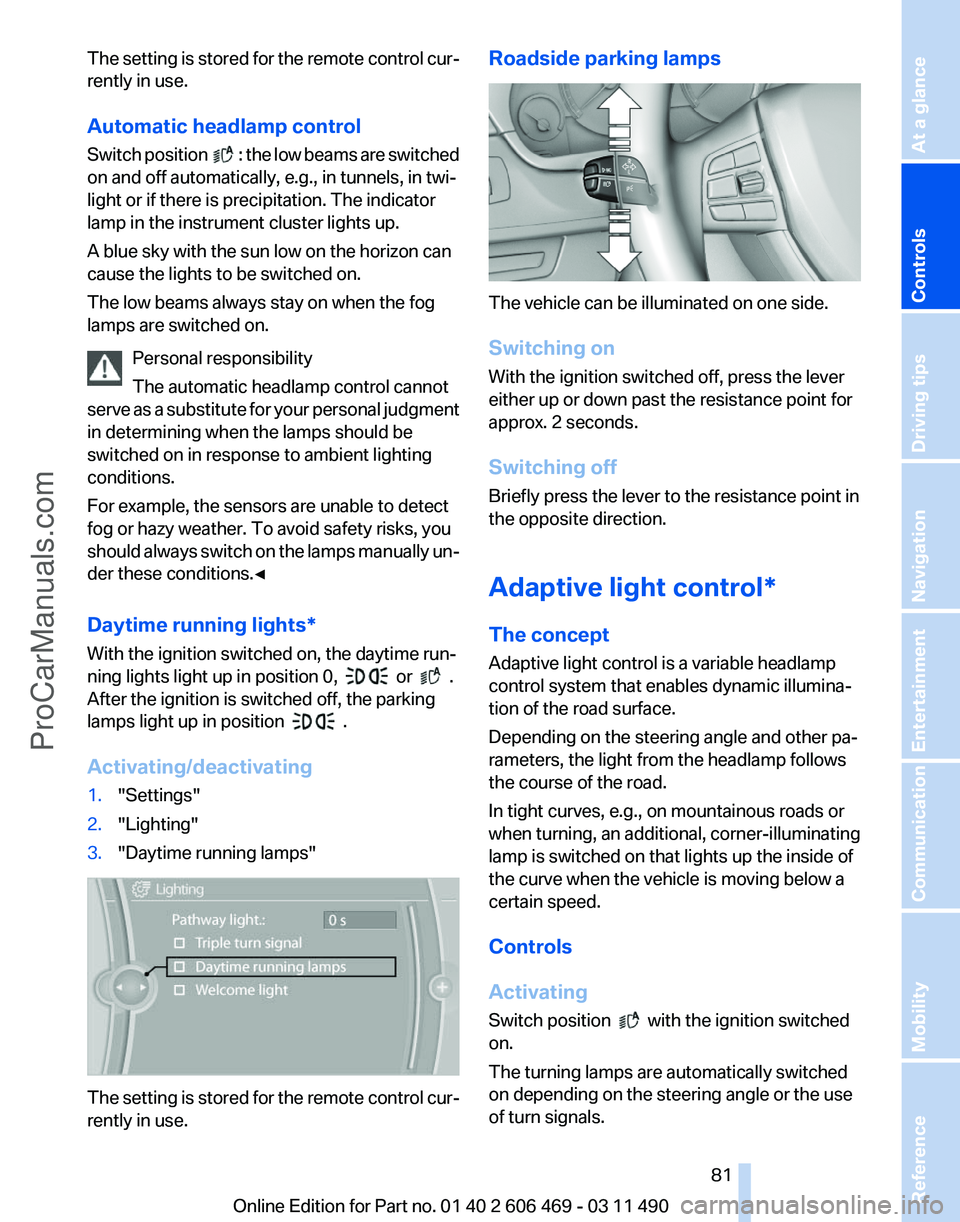
Activating/deactivating
1. "Settings"
2. "Lighting"
3. "Daytime running lamps" The setting is stored for the remote control cur‐
rently in use. Roadside parking lamps
The vehicle can be illuminated on one side.
Switching on
With the ignition switched off, press the lever
either up or down past the resistance point for
approx. 2 seconds.
Switching off
Briefly press the lever to the resistance point in
the opposite direction.
Adaptive light control*
The concept
Adaptive light control is a variable headlamp
control system that enables dynamic illumina‐
tion of the road surface.
Depending on the steering angle and other pa‐
rameters, the light from the headlamp follows
the course of the road.
In tight curves, e.g., on mountainous roads or
when turning, an additional, corner-illuminating
lamp is switched on that lights up the inside of
the curve when the vehicle is moving below a
certain speed.
Controls
Activating
Switch position
with the ignition switched
on.
The turning lamps are automatically switched
on depending on the steering angle or the use
of turn signals.
Seite 81
81Online Edition for Part no. 01 40 2 606 469 - 03 11 490
Reference Mobility Communication Entertainment Navigation Driving tips
Controls At a glance
ProCarManuals.com