seat BMW 5 SERIES GRAN TURISMO 2013 F07 Owner's Guide
[x] Cancel search | Manufacturer: BMW, Model Year: 2013, Model line: 5 SERIES GRAN TURISMO, Model: BMW 5 SERIES GRAN TURISMO 2013 F07Pages: 255, PDF Size: 7.25 MB
Page 170 of 255
Adjust the vent to direct the air in your di‐
rection, e.g., if the vehicle interior is hot
from the sun.▷Draft-free ventilation:
Adjust the vent to let the air flow past you.
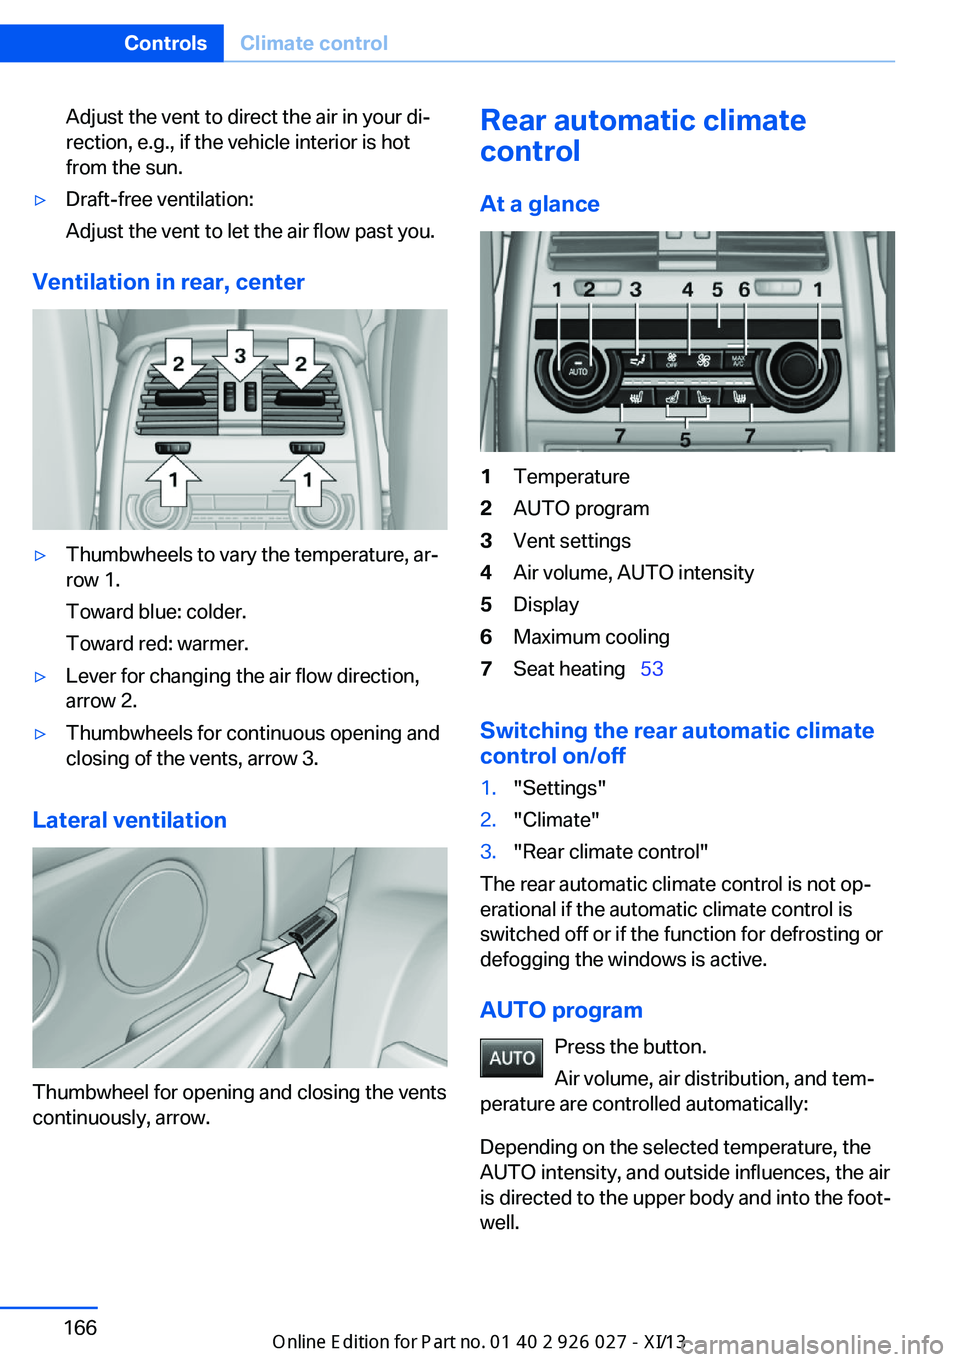
Ventilation in rear, center
▷Thumbwheels to vary the temperature, ar‐
row 1.
Toward blue: colder.
Toward red: warmer.▷Lever for changing the air flow direction,
arrow 2.▷Thumbwheels for continuous opening and
closing of the vents, arrow 3.
Lateral ventilation
Thumbwheel for opening and closing the vents
continuously, arrow.
Rear automatic climate
control
At a glance1Temperature2AUTO program3Vent settings4Air volume, AUTO intensity5Display6Maximum cooling7Seat heating 53
Switching the rear automatic climate
control on/off
1."Settings"2."Climate"3."Rear climate control"
The rear automatic climate control is not op‐
erational if the automatic climate control is
switched off or if the function for defrosting or
defogging the windows is active.
AUTO program Press the button.
Air volume, air distribution, and tem‐
perature are controlled automatically:
Depending on the selected temperature, the
AUTO intensity, and outside influences, the air
is directed to the upper body and into the foot‐
well.
Seite 166ControlsClimate control166
Online Edition for Part no. 01 40 2 909 928 - VI/13
Page 171 of 255
The cooling function is switched on automati‐
cally with the AUTO program.
Intensity of the AUTO program
With the AUTO program switched on, auto‐
matic control of the air volume and air distribu‐
tion can be adjusted.
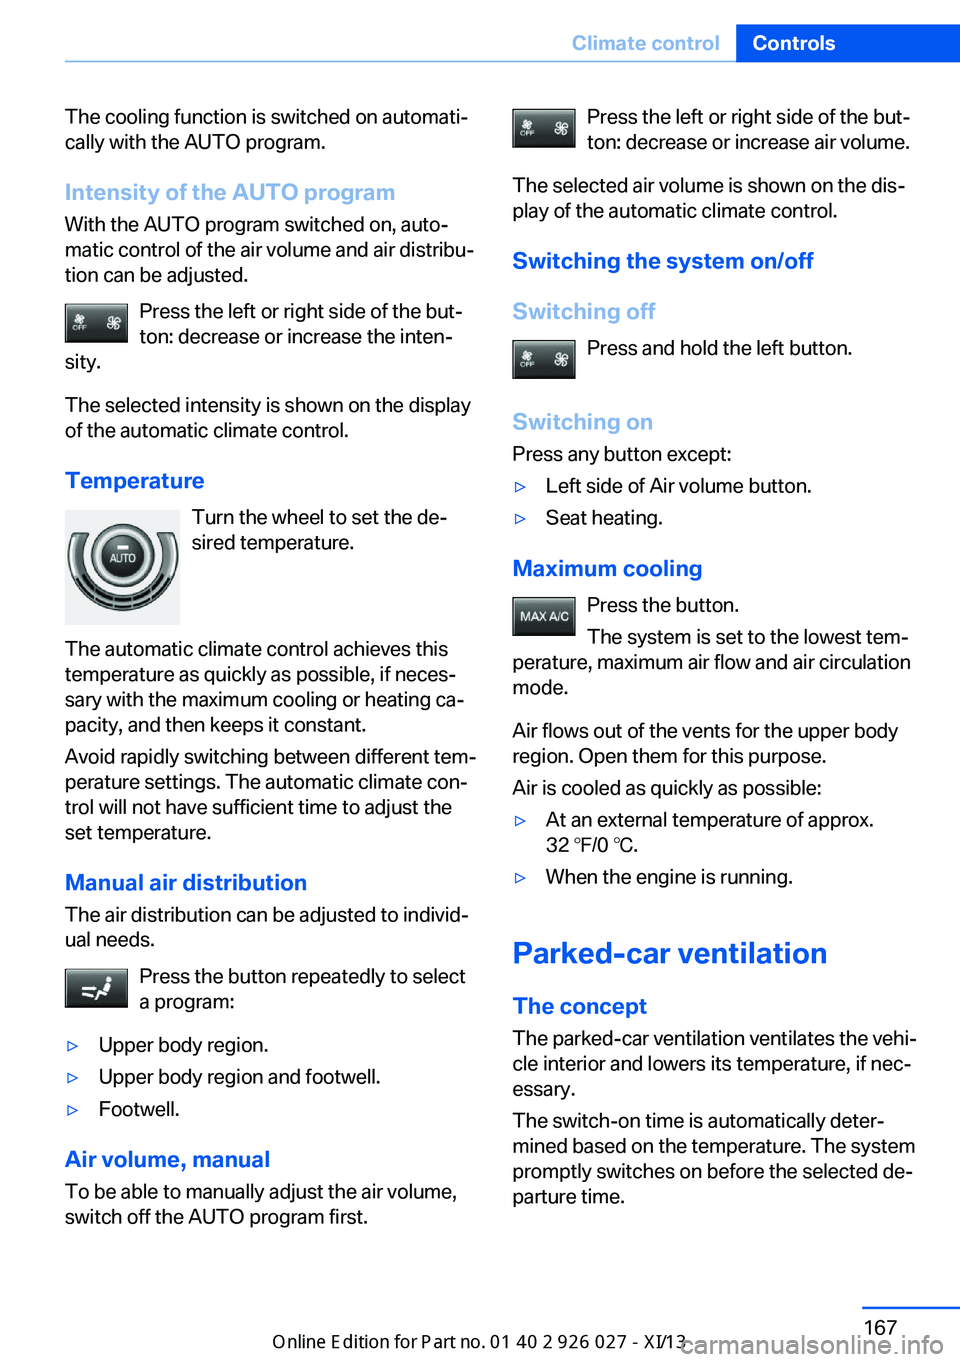
Press the left or right side of the but‐
ton: decrease or increase the inten‐
sity.
The selected intensity is shown on the display
of the automatic climate control.
Temperature Turn the wheel to set the de‐
sired temperature.
The automatic climate control achieves this
temperature as quickly as possible, if neces‐
sary with the maximum cooling or heating ca‐
pacity, and then keeps it constant.
Avoid rapidly switching between different tem‐
perature settings. The automatic climate con‐
trol will not have sufficient time to adjust the
set temperature.
Manual air distribution
The air distribution can be adjusted to individ‐
ual needs.
Press the button repeatedly to select
a program:▷Upper body region.▷Upper body region and footwell.▷Footwell.
Air volume, manual
To be able to manually adjust the air volume,
switch off the AUTO program first.
Press the left or right side of the but‐
ton: decrease or increase air volume.
The selected air volume is shown on the dis‐
play of the automatic climate control.
Switching the system on/off
Switching off Press and hold the left button.
Switching on
Press any button except:▷Left side of Air volume button.▷Seat heating.
Maximum cooling
Press the button.
The system is set to the lowest tem‐
perature, maximum air flow and air circulation
mode.
Air flows out of the vents for the upper body
region. Open them for this purpose.
Air is cooled as quickly as possible:
▷At an external temperature of approx.
32 ℉/0 ℃.▷When the engine is running.
Parked-car ventilation
The concept The parked-car ventilation ventilates the vehi‐
cle interior and lowers its temperature, if nec‐
essary.
The switch-on time is automatically deter‐
mined based on the temperature. The system
promptly switches on before the selected de‐
parture time.
Seite 167Climate controlControls167
Online Edition for Part no. 01 40 2 909 928 - VI/13
Page 178 of 255
Cargo area
Cargo cover
Note Do not deposit heavy objects
Do not deposit heavy or hard objects on
the trunk cover. Otherwise, they could endan‐
ger occupants during braking and evasive ma‐
neuvers, for example.◀
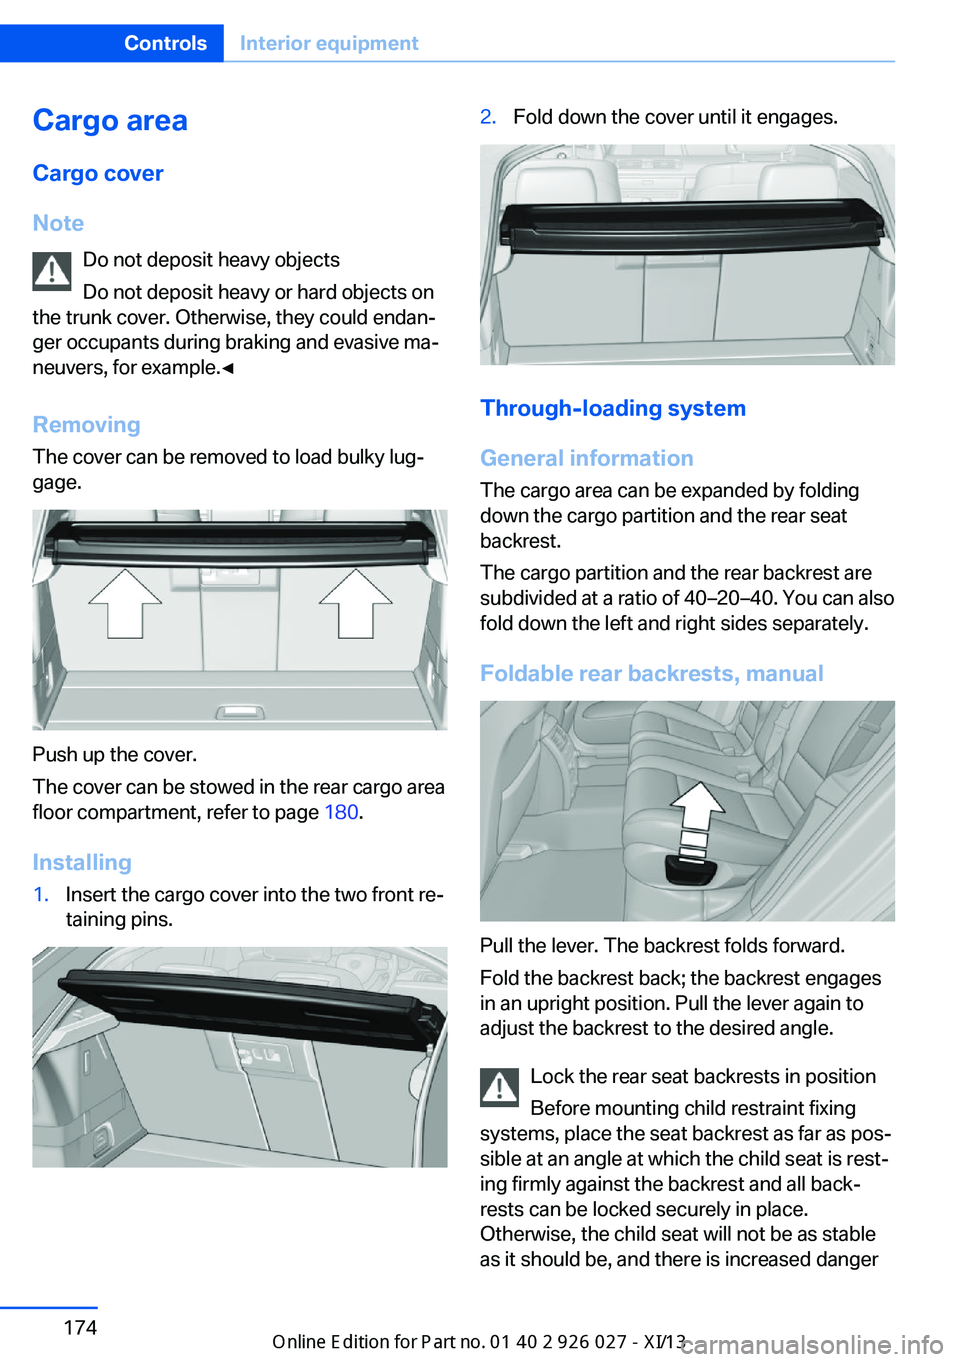
Removing The cover can be removed to load bulky lug‐
gage.
Push up the cover.
The cover can be stowed in the rear cargo area
floor compartment, refer to page 180.
Installing
1.Insert the cargo cover into the two front re‐
taining pins.2.Fold down the cover until it engages.
Through-loading system
General information
The cargo area can be expanded by folding
down the cargo partition and the rear seat
backrest.
The cargo partition and the rear backrest are
subdivided at a ratio of 40–20–40. You can also
fold down the left and right sides separately.
Foldable rear backrests, manual
Pull the lever. The backrest folds forward.
Fold the backrest back; the backrest engages
in an upright position. Pull the lever again to
adjust the backrest to the desired angle.
Lock the rear seat backrests in positionBefore mounting child restraint fixing
systems, place the seat backrest as far as pos‐
sible at an angle at which the child seat is rest‐
ing firmly against the backrest and all back‐
rests can be locked securely in place.
Otherwise, the child seat will not be as stable
as it should be, and there is increased danger
Seite 174ControlsInterior equipment174
Online Edition for Part no. 01 40 2 909 928 - VI/13
Page 179 of 255
of injury due to unexpected movement of the
seat backrest.◀
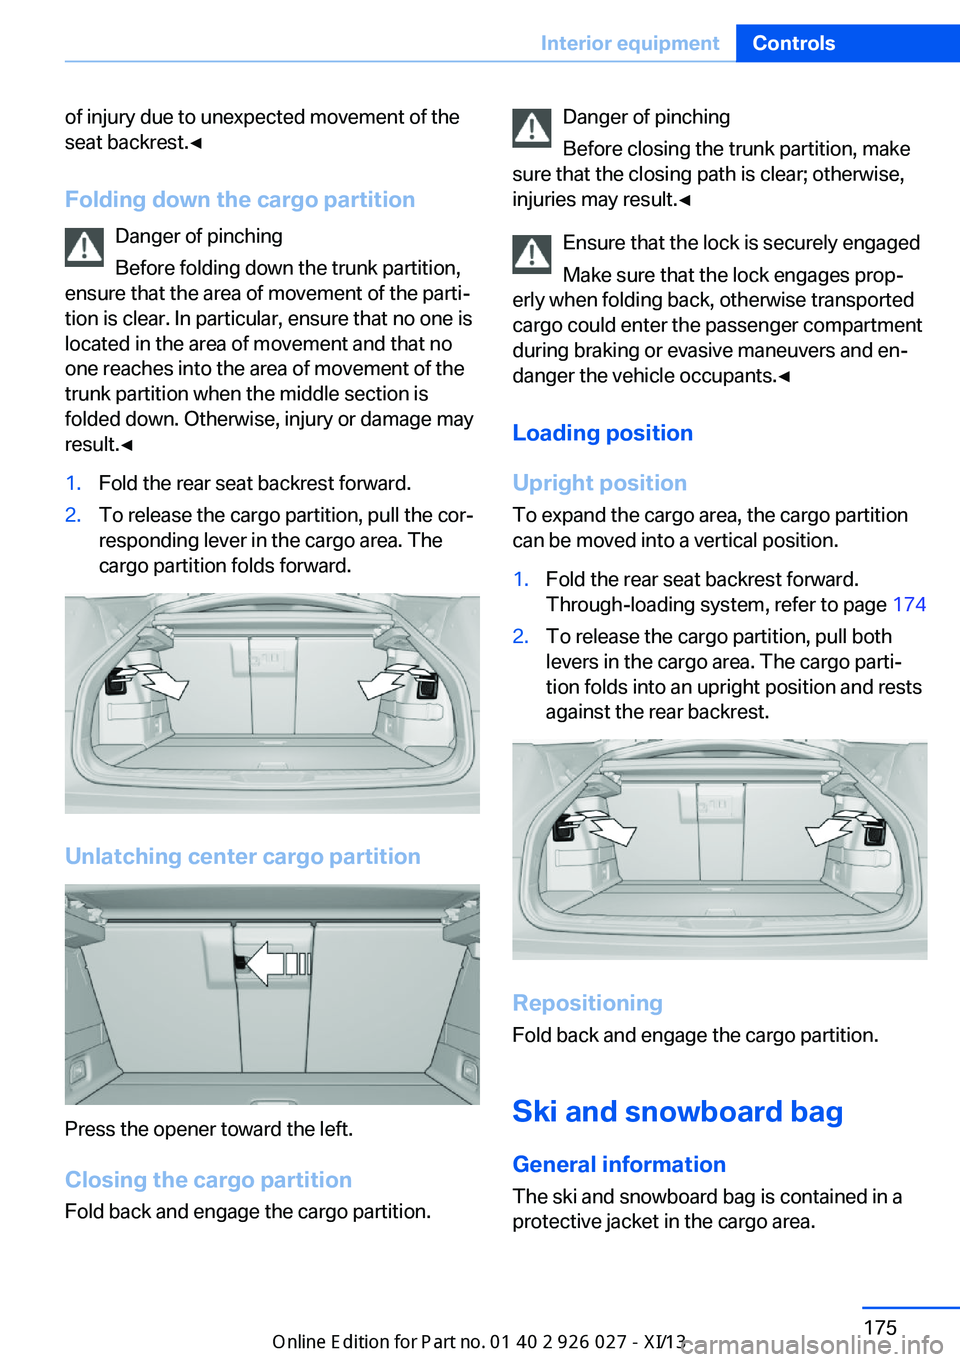
Folding down the cargo partition Danger of pinching
Before folding down the trunk partition,
ensure that the area of movement of the parti‐
tion is clear. In particular, ensure that no one is
located in the area of movement and that no
one reaches into the area of movement of the
trunk partition when the middle section is
folded down. Otherwise, injury or damage may
result.◀1.Fold the rear seat backrest forward.2.To release the cargo partition, pull the cor‐
responding lever in the cargo area. The
cargo partition folds forward.
Unlatching center cargo partition
Press the opener toward the left.
Closing the cargo partition Fold back and engage the cargo partition.
Danger of pinching
Before closing the trunk partition, make
sure that the closing path is clear; otherwise,
injuries may result.◀
Ensure that the lock is securely engaged
Make sure that the lock engages prop‐
erly when folding back, otherwise transported
cargo could enter the passenger compartment
during braking or evasive maneuvers and en‐
danger the vehicle occupants.◀
Loading position
Upright position
To expand the cargo area, the cargo partition
can be moved into a vertical position.1.Fold the rear seat backrest forward.
Through-loading system, refer to page 1742.To release the cargo partition, pull both
levers in the cargo area. The cargo parti‐
tion folds into an upright position and rests
against the rear backrest.
Repositioning
Fold back and engage the cargo partition.
Ski and snowboard bagGeneral information
The ski and snowboard bag is contained in a
protective jacket in the cargo area.
Seite 175Interior equipmentControls175
Online Edition for Part no. 01 40 2 909 928 - VI/13
Page 181 of 255
Storage compartmentsVehicle equipmentAll standard, country-specific and optional
equipment that is offered in the model series is
described in this chapter. Therefore, equip‐
ment is also described that is not available in a
vehicle, e. g., because of the selected optional
equipment or country variant. This also applies
for safety-related functions and systems.
Notes No loose objects in the passenger com‐
partment
Do not stow any objects in the passenger
compartment without securing them; other‐
wise, they may present a danger to occupants
for instance during braking and avoidance ma‐
neuvers.◀
Do not place anti-slip mats on the dash‐
board
Do not place anti-slip mats on the dashboard.
The mat materials could damage the dash‐
board.◀
Storage compartments
The following storage compartments are avail‐
able in the vehicle interior:▷Glove compartment on the driver's and
front passenger side, refer to page 177.▷Storage compartment in the center con‐
sole, refer to page 179.▷Storage compartment in the center arm‐
rest, refer to page 178, in the front and
rear.▷Compartments in the doors.▷Pockets on the backrests of the front
seats.▷Net in the front passenger footwell.
Glove compartment
Front passenger side
Note Close the glove compartment again im‐
mediately
Close the glove compartment immediately af‐
ter use while driving; otherwise, injury may oc‐
cur during accidents.◀
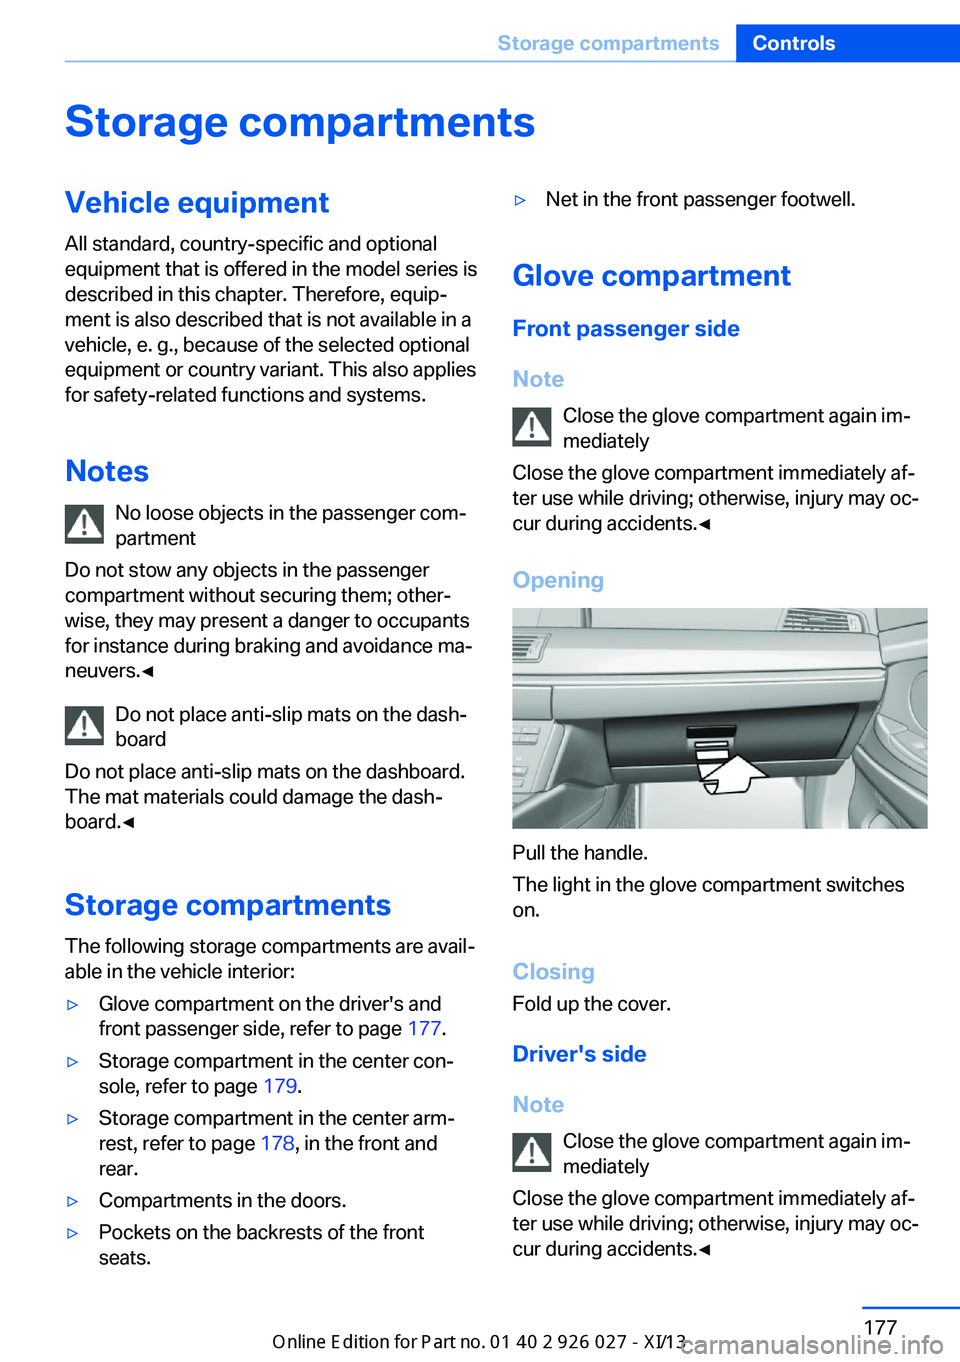
Opening
Pull the handle.
The light in the glove compartment switches
on.
ClosingFold up the cover.
Driver's side
Note Close the glove compartment again im‐
mediately
Close the glove compartment immediately af‐ ter use while driving; otherwise, injury may oc‐ cur during accidents.◀
Seite 177Storage compartmentsControls177
Online Edition for Part no. 01 40 2 909 928 - VI/13
Page 182 of 255
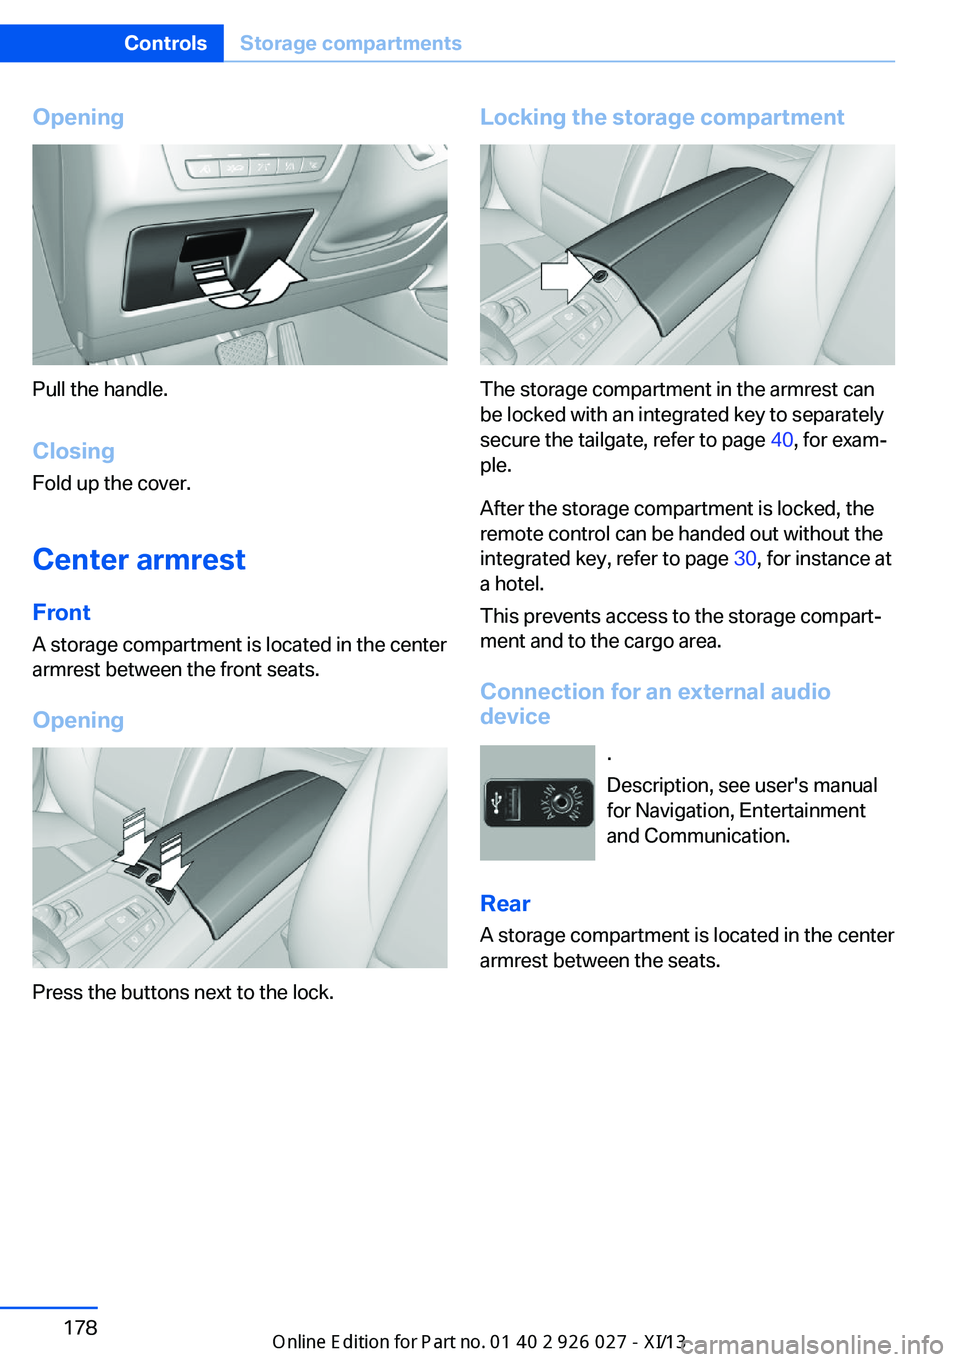
Opening
Pull the handle.ClosingFold up the cover.
Center armrest
Front A storage compartment is located in the center
armrest between the front seats.
Opening
Press the buttons next to the lock.
Locking the storage compartment
The storage compartment in the armrest can
be locked with an integrated key to separately
secure the tailgate, refer to page 40, for exam‐
ple.
After the storage compartment is locked, the
remote control can be handed out without the
integrated key, refer to page 30, for instance at
a hotel.
This prevents access to the storage compart‐
ment and to the cargo area.
Connection for an external audio
device
.
Description, see user's manual
for Navigation, Entertainment
and Communication.
Rear A storage compartment is located in the center
armrest between the seats.
Seite 178ControlsStorage compartments178
Online Edition for Part no. 01 40 2 909 928 - VI/13
Page 192 of 255
Stowing cargo▷Cover sharp edges and corners on the
cargo.▷Heavy cargo: stow as far forward and as
low as possible, ideally directly behind the
cargo partition.▷Very heavy cargo: when the rear seat is not
occupied, secure each of the outer safety
belts in the opposite buckle.▷If necessary, fold down the rear backrests,
including the cargo partition, to stow cargo.▷Do not stack cargo above the top edge of
the backrests.
Securing cargo
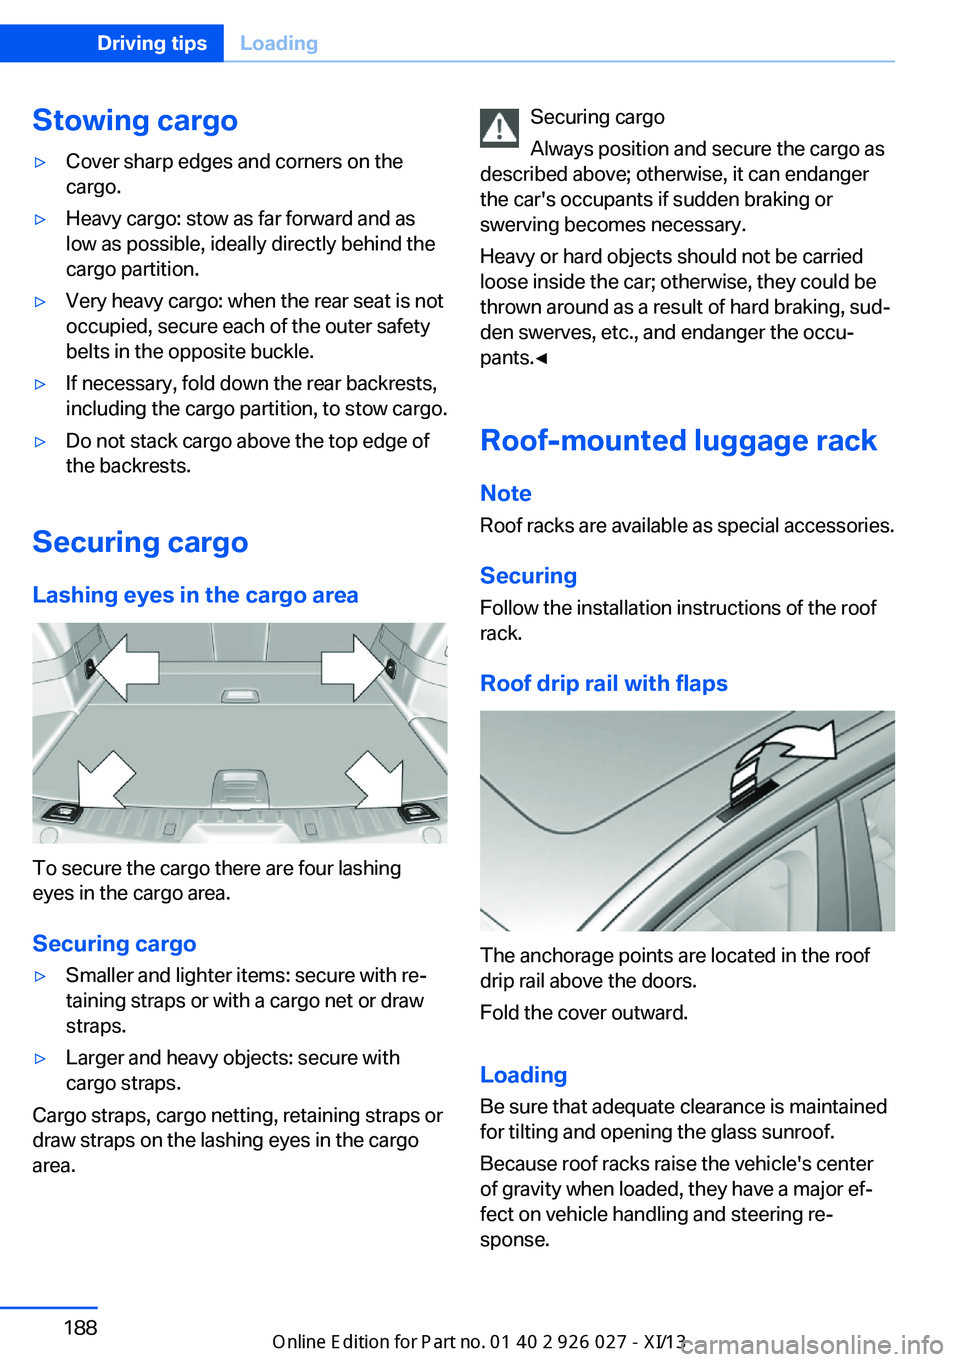
Lashing eyes in the cargo area
To secure the cargo there are four lashing
eyes in the cargo area.
Securing cargo
▷Smaller and lighter items: secure with re‐
taining straps or with a cargo net or draw
straps.▷Larger and heavy objects: secure with
cargo straps.
Cargo straps, cargo netting, retaining straps or
draw straps on the lashing eyes in the cargo
area.
Securing cargo
Always position and secure the cargo as
described above; otherwise, it can endanger
the car's occupants if sudden braking or
swerving becomes necessary.
Heavy or hard objects should not be carried
loose inside the car; otherwise, they could be
thrown around as a result of hard braking, sud‐
den swerves, etc., and endanger the occu‐
pants.◀
Roof-mounted luggage rack
Note Roof racks are available as special accessories.
Securing
Follow the installation instructions of the roof
rack.
Roof drip rail with flaps
The anchorage points are located in the roof
drip rail above the doors.
Fold the cover outward.
Loading Be sure that adequate clearance is maintained
for tilting and opening the glass sunroof.
Because roof racks raise the vehicle's center
of gravity when loaded, they have a major ef‐
fect on vehicle handling and steering re‐
sponse.
Seite 188Driving tipsLoading188
Online Edition for Part no. 01 40 2 909 928 - VI/13
Page 195 of 255
Use coasting conditions
When approaching a red light, take your foot
off the accelerator and let the vehicle coast to
a halt.
On a downhill gradient, take your foot off the
accelerator and let the vehicle roll.
The flow of fuel is interrupted while coasting.
Switch off the engine during longer stops
Switch off the engine during longer stops, e.g.,
at traffic lights, railroad crossings or in traffic
congestion.
Automatic Engine Start/Stop Function The Auto Start/Stop function of your vehicle
automatically switches off the engine during a
stop.
If the engine is switched off and then restarted
rather than leaving the engine running con‐
stantly, fuel consumption and emissions are
reduced. Savings can begin within a few sec‐
onds of switching off the engine.
Using this system can cause certain compo‐
nents of the vehicle to become worn prema‐
turely.
In addition, fuel consumption is also deter‐
mined by other factors, such as driving style,
road conditions, maintenance or environmental
factors.
Switch off any functions that
are not currently needed
Functions such as seat heating and the rear
window defroster require a lot of energy and
consume additional fuel, especially in city and
stop-and-go traffic.
Therefore, switch off these functions if they
are not actually needed.Have maintenance carried
out
Have vehicles maintained regularly to achieve
optimal vehicle economy and operating life.
Have the maintenance carried out by your
service center.
Please also note the BMW Maintenance Sys‐
tem, refer to page 216.
ECO PRO
The concept ECO PRO supports a driving style that saves
on fuel consumption. For this purpose, the en‐
gine control and comfort functions, e. g. the
climate control output, are adjusted.
The extension of the range that is achieved as
a result can be displayed in the instrument
cluster.
At a glance
The system includes the following
EfficientDynamics functions and displays:▷ECO PRO bonus range, refer to page 192.▷ECO PRO tips driving instruction, refer to
page 193▷ECO PRO climate control, refer to
page 192.
Activating ECO PRO
Press button repeatedly until ECO
PRO is displayed in the instrument
cluster.
Configuring ECO PRO
Via the Driving Dynamics Control
1.Activate ECO PRO.2."Configure ECO PRO"3.Configure the program.Seite 191Saving fuelDriving tips191
Online Edition for Part no. 01 40 2 909 928 - VI/13
Page 196 of 255
Via the iDrive1."Settings"2."ECO PRO mode"
Or
1."Settings"2."Driving mode"3."Configure ECO PRO"
Configure the program.
ECO PRO Tip
▷"Tip at:":
Set ECO Pro speed at which an ECO PRO
Tip is to be displayed.▷"ECO PRO speed warning":
A reminder is displayed if the set ECO PRO
speed is exceeded.
ECO PRO climate control
"ECO PRO climate control"
The climate control is adjusted to be fuel-effi‐
cient.
By making a slight change to the set tempera‐
ture, or slowly adjusting the rate of heating or
cooling of the passenger compartment, fuel
consumption can be economized.
The outputs of the seat heater and the exterior
mirror heating are also reduced.
The exterior mirror heating is made available
when outside temperatures are very cold.
ECO PRO potentialThe percentage of potential savings that can
be achieved with the current configuration is
displayed.
Display in the instrument cluster
Display in the instrument display
When ECO PRO mode is activated, the display
switches to a special configuration.
Some of the displays may differ from the dis‐
play in the instrument cluster.
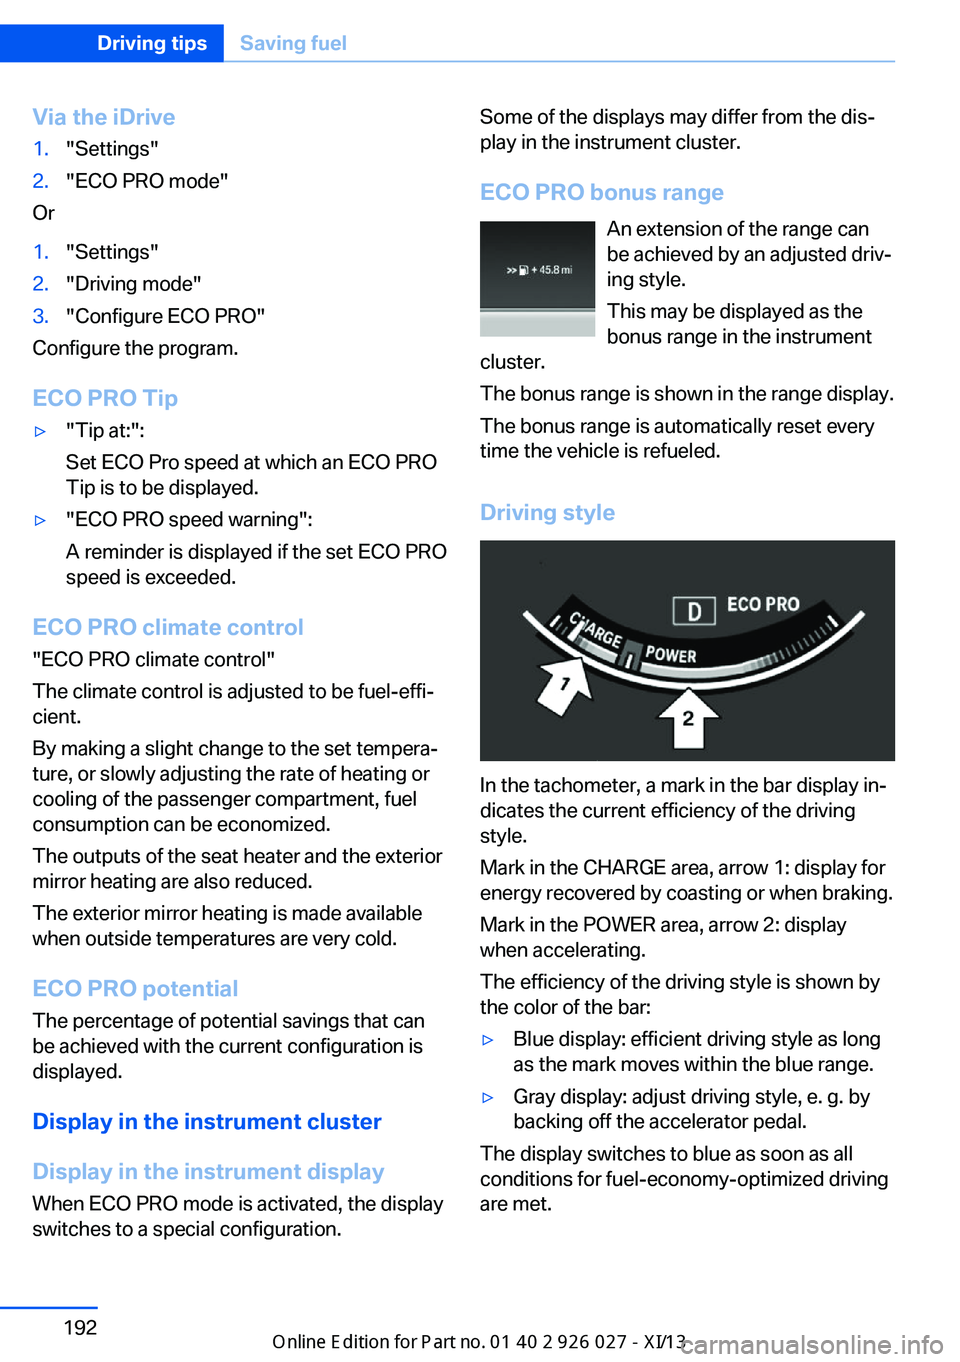
ECO PRO bonus range An extension of the range can
be achieved by an adjusted driv‐
ing style.
This may be displayed as the
bonus range in the instrument
cluster.
The bonus range is shown in the range display.
The bonus range is automatically reset every
time the vehicle is refueled.
Driving style
In the tachometer, a mark in the bar display in‐
dicates the current efficiency of the driving
style.
Mark in the CHARGE area, arrow 1: display for
energy recovered by coasting or when braking.
Mark in the POWER area, arrow 2: display
when accelerating.
The efficiency of the driving style is shown by
the color of the bar:
▷Blue display: efficient driving style as long
as the mark moves within the blue range.▷Gray display: adjust driving style, e. g. by
backing off the accelerator pedal.
The display switches to blue as soon as all
conditions for fuel-economy-optimized driving
are met.
Seite 192Driving tipsSaving fuel192
Online Edition for Part no. 01 40 2 909 928 - VI/13
Page 227 of 255
Your service center will be glad to advise you
on questions regarding the battery.
Battery replacement Use approved vehicle batteries only
Only use vehicle batteries that have been
approved for your vehicle by the manufacturer;
otherwise, the vehicle could be damaged and
systems or functions may not be fully availa‐
ble.◀
After a battery replacement, have the battery
registered on the vehicle by your service cen‐
ter to ensure that all comfort functions are fully
available and that any Check Control mes‐
sages of these comfort functions are no longer
displayed.
Charging the battery
Note Do not plug chargers into the socket
Do not connect battery chargers to the
factory-installed sockets in the vehicle as this
may damage the battery.◀
General information
Make sure that the battery is always suffi‐
ciently charged to guarantee that the battery
remains usable for its full service life.
The battery may need to be charged in the fol‐
lowing cases:▷When making frequent short-distance
drives.▷If the vehicle is not used for prolonged pe‐
riods, longer than a month.
Starting aid terminals
In the vehicle, only charge the battery via the
starting aid terminals, refer to page 227, in the
engine compartment with the engine off.
Power failure
After a temporary power loss, some equipment
needs to be reinitialized.
Individual settings need to be reprogrammed:▷Seat, mirror, and steering wheel memory:
store the positions again.▷Time: update.▷Date: update.▷Radio station: saving new, see user's
manual for Navigation, Entertainment and
Communication.▷Navigation system: wait for the operability
of the navigation.
Disposing of old batteries
Have old batteries disposed of by your
service center or bring them to a recy‐
cling center.
Maintain the battery in an upright position for
transport and storage. Secure the battery so
that it does not tip over during transport.
Fuses Notes Replacing fuses
Never attempt to repair a blown fuse and
do not replace a defective fuse with a substi‐
tute of another color or amperage rating; this could lead to a circuit overload, ultimately re‐
sulting in a fire in the vehicle.◀
Plastic tweezers and information on the fuse
types and locations are stored in the fuse box
in the cargo area.
Seite 223Replacing componentsMobility223
Online Edition for Part no. 01 40 2 909 928 - VI/13