heating BMW 525I SPORT WAGON 2001 Owners Manual
[x] Cancel search | Manufacturer: BMW, Model Year: 2001, Model line: 525I SPORT WAGON, Model: BMW 525I SPORT WAGON 2001Pages: 238, PDF Size: 2.44 MB
Page 11 of 238
11n
Controls and features
Operation, care and maintenance
Technology for safety and
driving convenience:
Park Distance Control
(PDC)100
Automatic Stability Control plus
Traction (ASC+T)/Dynamic
Stability Control (DSC)102
Tire Pressure Control (RDC)103
Lamps:
Parking lamps/Low beams105
Instrument lighting105
High beams/Parking lamps106
Fog lamps106
Interior lamps106
Reading lamps107
Controlling the climate for
pleasant driving:
Air conditioner108
Automatic climate control114
Seat heating119
Steering wheel heating120
Roller sun blind120
Independent ventilation
system120
Cabin convenience:
BMW Universal Transmitter121
Glove compartment124
Storage facilities124
Cellular phone125
Beverage holder 125
Ashtray, front126
Cigarette lighter126
Ashtray, rear127
Loading and transporting
cargo:
Through-loading system128
Ski bag129
sport wagon:
Luggage compartment132
Roll-up cover132
Partition net132
Storage areas in the luggage
compartment133
Cargo loading136
Roof-mounted luggage rack137
Special operating instructions:
Break-in procedure140
Driving notes141
Catalytic converter142
Antilock Brake System
(ABS)143
Disc brakes144
Brake system146
Winter operation146
Power steering148
Level control system148
Cellular phone149
Radio reception149
Wheels and tires:
Tire inflation pressure150
Tire condition150
Tire replacement151
Tire rotation152
Wheel and tire
combinations153
Winter tires154
Snow chains155
Approved wheel and tire
specifications156
Page 22 of 238
22n
Indicator and warning lampsTechnology that monitors itselfMany of the systems of your BMW
monitor themselves automatically, both
during engine starts and while you are
driving. Indicator and warning lamps
that are identified by "l" are tested for
proper functioning whenever the igni-
tion key is turned. They each light up
once for different periods of time.
If a fault should occur in one of these
systems, the corresponding lamp does
not go out after the engine is started or
it lights up while the vehicle is moving.
You will see how to react to this below.
Red: stop immediately
Battery charge current l
The battery is no longer being
charged. There is a malfunction
of the alternator V-belt or in the charg-
ing circuit of the alternator. Please con-
tact the nearest BMW center.
If the ribbed V-belt is defective, do
not continue driving. The engine
could be damaged due to overheating.
If the ribbed V-belt is defective, in-
creased steering effort is also re-
quired.<
Engine oil pressure l
Comes on while the engine is
running and the "STOP!ENGINE
OILPRESS" message appears in the
Check Control: stop vehicle immedi-
ately and switch off engine. Check level
of oil in engine, top up as required. If oil
level is correct: please contact the
nearest BMW center.
Do not continue driving. The en-
gine could be damaged because
of inadequate lubrication.<
Tire Pressure Control (RDC)
* l
In addition, there is an acousti-
cal warning signal: a tire failure
has occurred. Reduce vehicle speed
immediately and stop the vehicle. Avoid
hard brake applications. Do not over-
steer. For additional information: refer
to page 103.
Parking brake
*,
brake hydraulic system l
Comes on when you engage the
parking brake. For additional informa-
tion: refer to page 70.
Comes on although the parking brake is
released: have the brake fluid level
checked. Before driving further, be
sure to read the notes on pages 146
and 168.
Also comes on with the message
"CHECK BRAKE PADS" in the Check
Control.
Parking brake* warning lamp/
Brake hydraulic system for
Canadian models.
Page 35 of 238
IndexDataTechnologyRepairsCar careControlsOverview
Overview
Controls and features
Operation, care
and maintenance
Owner service procedures
Technical data
Index Advanced technology
35n
Technology for safety and
driving convenience:
Park Distance Control
(PDC)100
Automatic Stability Control plus
Traction (ASC+T)/Dynamic
Stability Control (DSC)102
Tire Pressure Control (RDC)103
Lamps:
Parking lamps/Low beams105
Instrument lighting105
High beams/Parking lamps106
Fog lamps106
Interior lamps106
Reading lamps107
Controlling the climate for
pleasant driving:
Air conditioner108
Automatic climate control114
Seat heating119
Steering wheel heating120
Roller sun blind120
Independent ventilation
system120Cabin convenience:
BMW Universal Transmitter121
Glove compartment124
Storage facilities124
Cellular phone125
Beverage holder 125
Ashtray, front126
Cigarette lighter126
Ashtray, rear127
Loading and transporting
cargo:
Through-loading system128
Ski bag129
sport wagon:
Luggage compartment132
Roll-up cover132
Partition net132
Storage areas in the luggage
compartment133
Cargo loading136
Roof-mounted luggage rack137
Page 44 of 238
44n
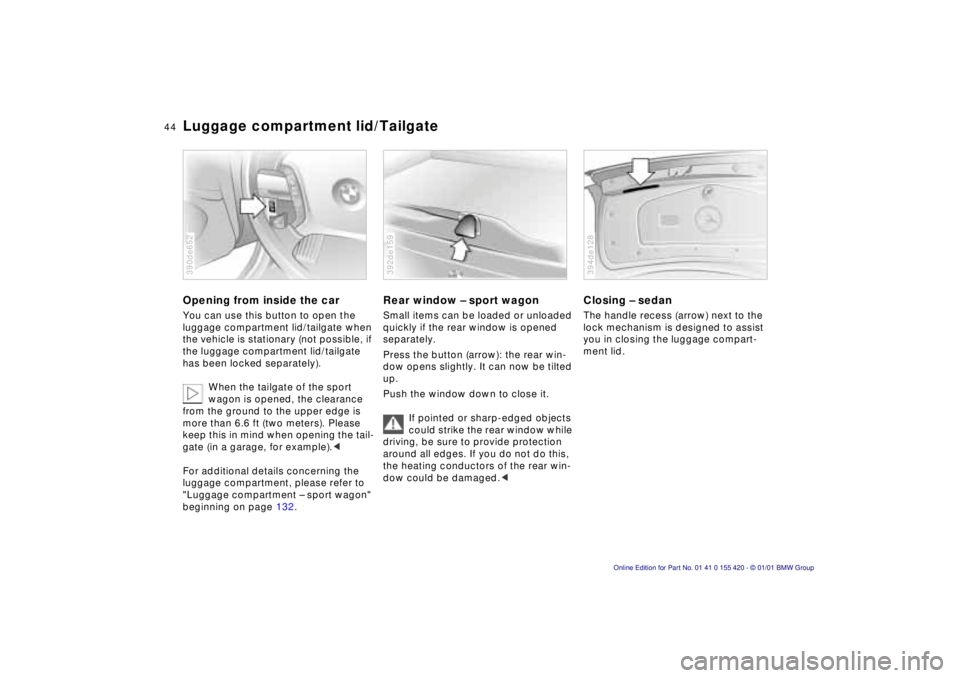
Luggage compartment lid/TailgateOpening from inside the carYou can use this button to open the
luggage compartment lid/tailgate when
the vehicle is stationary (not possible, if
the luggage compartment lid/tailgate
has been locked separately).
When the tailgate of the sport
wagon is opened, the clearance
from the ground to the upper edge is
more than 6.6 ft (two meters). Please
keep this in mind when opening the tail-
gate (in a garage, for example).<
For additional details concerning the
luggage compartment, please refer to
"Luggage compartment – sport wagon"
beginning on page 132.390de652
Rear window – sport wagonSmall items can be loaded or unloaded
quickly if the rear window is opened
separately.
Press the button (arrow): the rear win-
dow opens slightly. It can now be tilted
up.
Push the window down to close it.
If pointed or sharp-edged objects
could strike the rear window while
driving, be sure to provide protection
around all edges. If you do not do this,
the heating conductors of the rear win-
dow could be damaged.< 392de159
Closing – sedanThe handle recess (arrow) next to the
lock mechanism is designed to assist
you in closing the luggage compart-
ment lid.394de128
Page 91 of 238
IndexDataTechnologyRepairsCar careControlsOverview
91n
Multi-Information Display (MID)
*
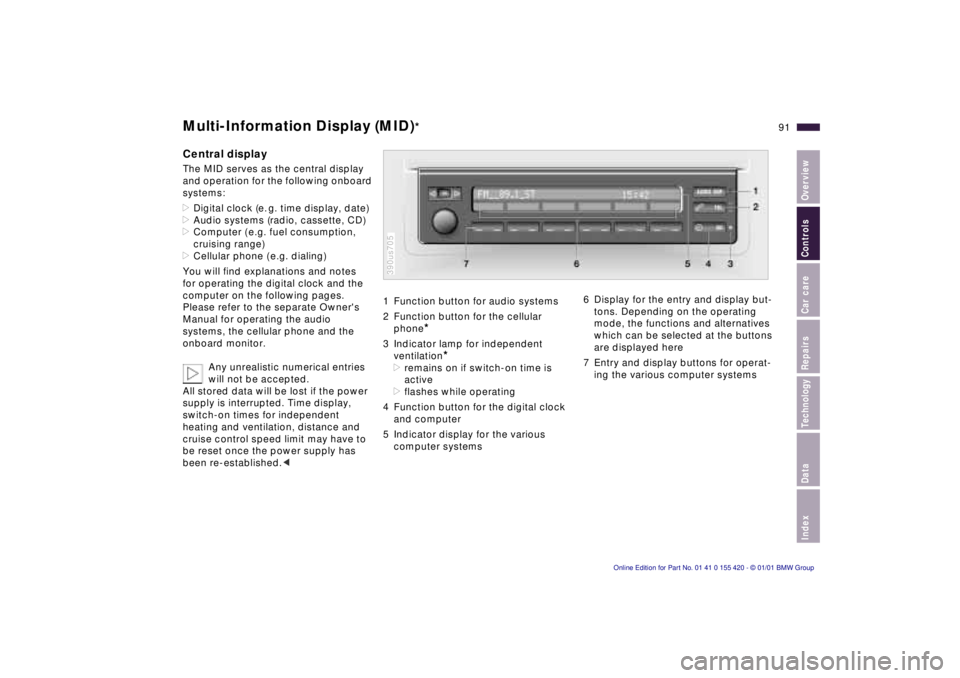
Central displayThe MID serves as the central display
and operation for the following onboard
systems:
>Digital clock (e. g. time display, date)
>Audio systems (radio, cassette, CD)
>Computer ( e.g. fuel consumption,
cruising range)
>Cellular phone ( e.g. dialing)
You will find explanations and notes
for operating the digital clock and the
computer on the following pages.
Please refer to the separate Owner's
Manual for operating the audio
systems, the cellular phone and the
onboard monitor.
Any unrealistic numerical entries
will not be accepted.
All stored data will be lost if the power
supply is interrupted. Time display,
switch-on times for independent
heating and ventilation, distance and
cruise control speed limit may have to
be reset once the power supply has
been re-established.<
1 Function button for audio systems
2 Function button for the cellular
phone
*
3 Indicator lamp for independent
ventilation
*
>remains on if switch-on time is
active
>flashes while operating
4 Function button for the digital clock
and computer
5 Indicator display for the various
computer systems390us705
6 Display for the entry and display but-
tons. Depending on the operating
mode, the functions and alternatives
which can be selected at the buttons
are displayed here
7 Entry and display buttons for operat-
ing the various computer systems
Page 110 of 238
110n
Air conditionerTips for a pleasant driving
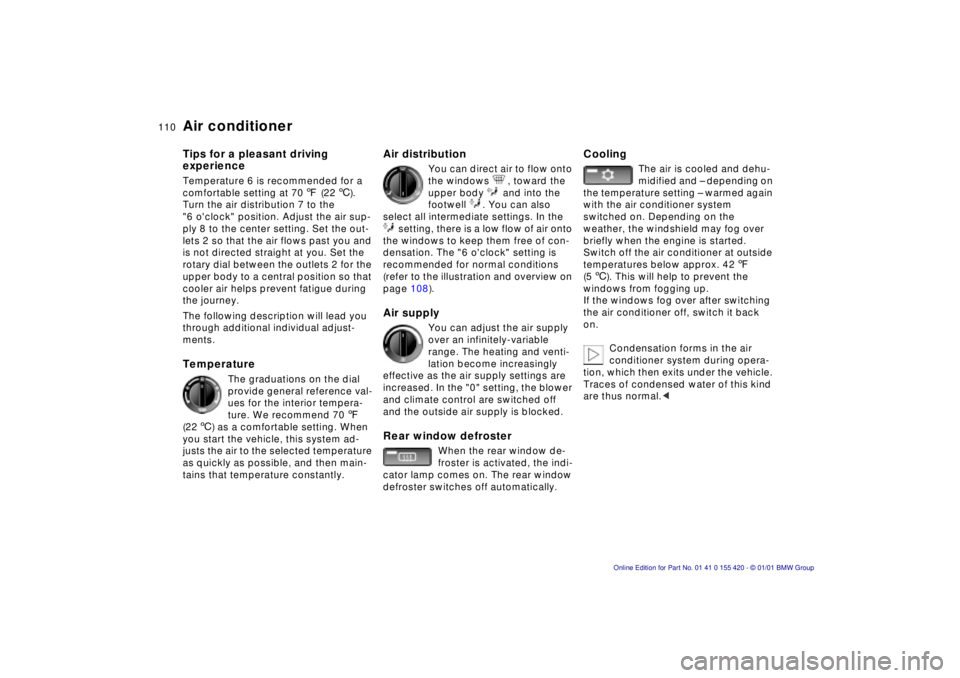
experienceTemperature 6 is recommended for a
comfortable setting at 707 (226).
Turn the air distribution 7 to the
"6 o'clock" position. Adjust the air sup-
ply 8 to the center setting. Set the out-
lets 2 so that the air flows past you and
is not directed straight at you. Set the
rotary dial between the outlets 2 for the
upper body to a central position so that
cooler air helps prevent fatigue during
the journey.
The following description will lead you
through additional individual adjust-
ments.Temperature
The graduations on the dial
provide general reference val-
ues for the interior tempera-
ture. We recommend 707
(226) as a comfortable setting. When
you start the vehicle, this system ad-
justs the air to the selected temperature
as quickly as possible, and then main-
tains that temperature constantly.
Air distribution
You can direct air to flow onto
the windows , toward the
upper body and into the
footwell . You can also
select all intermediate settings. In the
setting, there is a low flow of air onto
the windows to keep them free of con-
densation. The "6 o'clock" setting is
recommended for normal conditions
(refer to the illustration and overview on
page 108).
Air supply
You can adjust the air supply
over an infinitely-variable
range. The heating and venti-
lation become increasingly
effective as the air supply settings are
increased. In the "0" setting, the blower
and climate control are switched off
and the outside air supply is blocked.
Rear window defroster
When the rear window de-
froster is activated, the indi-
cator lamp comes on. The rear window
defroster switches off automatically.
Cooling
The air is cooled and dehu-
midified and – depending on
the temperature setting – warmed again
with the air conditioner system
switched on. Depending on the
weather, the windshield may fog over
briefly when the engine is started.
Switch off the air conditioner at outside
temperatures below approx. 427
(56). This will help to prevent the
windows from fogging up.
If the windows fog over after switching
the air conditioner off, switch it back
on.
Condensation forms in the air
conditioner system during opera-
tion, which then exits under the vehicle.
Traces of condensed water of this kind
are thus normal.<
Page 113 of 238
IndexDataTechnologyRepairsCar careControlsOverview
113n
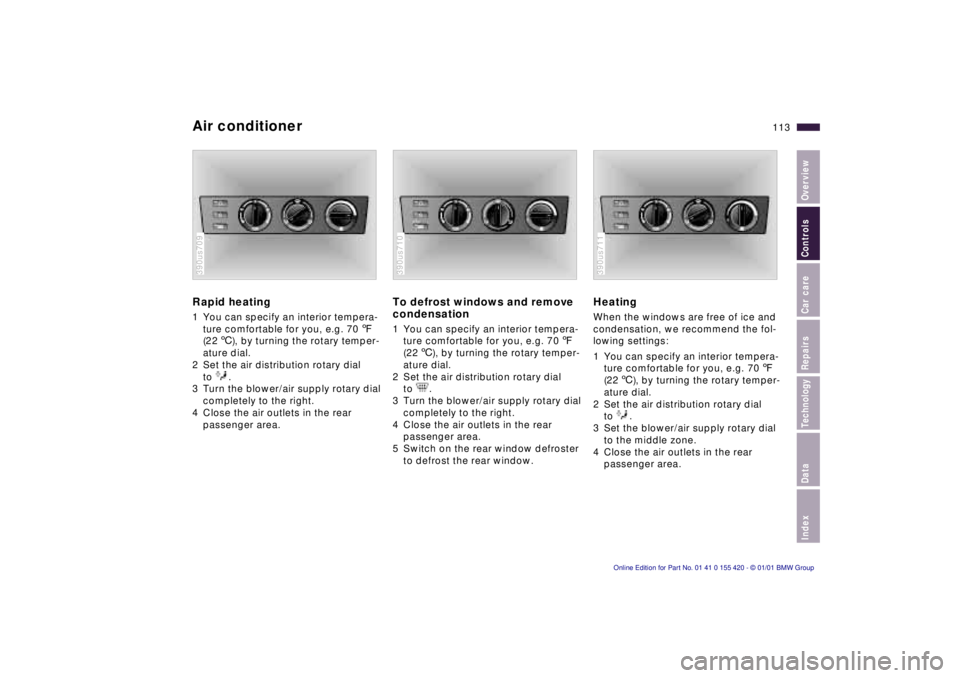
Air conditionerRapid heating 1 You can specify an interior tempera-
ture comfortable for you, e.g. 707
(226), by turning the rotary temper-
ature dial.
2 Set the air distribution rotary dial
to .
3 Turn the blower/air supply rotary dial
completely to the right.
4 Close the air outlets in the rear
passenger area.390us709
To defrost windows and remove
condensation 1 You can specify an interior tempera-
ture comfortable for you, e.g. 707
(226), by turning the rotary temper-
ature dial.
2 Set the air distribution rotary dial
to .
3 Turn the blower/air supply rotary dial
completely to the right.
4 Close the air outlets in the rear
passenger area.
5 Switch on the rear window defroster
to defrost the rear window.390us710
HeatingWhen the windows are free of ice and
condensation, we recommend the fol-
lowing settings:
1 You can specify an interior tempera-
ture comfortable for you, e.g. 707
(226), by turning the rotary temper-
ature dial.
2 Set the air distribution rotary dial
to .
3 Set the blower/air supply rotary dial
to the middle zone.
4 Close the air outlets in the rear
passenger area.390de127390us711
Page 115 of 238
IndexDataTechnologyRepairsCar careControlsOverview
115n
Automatic climate control
*
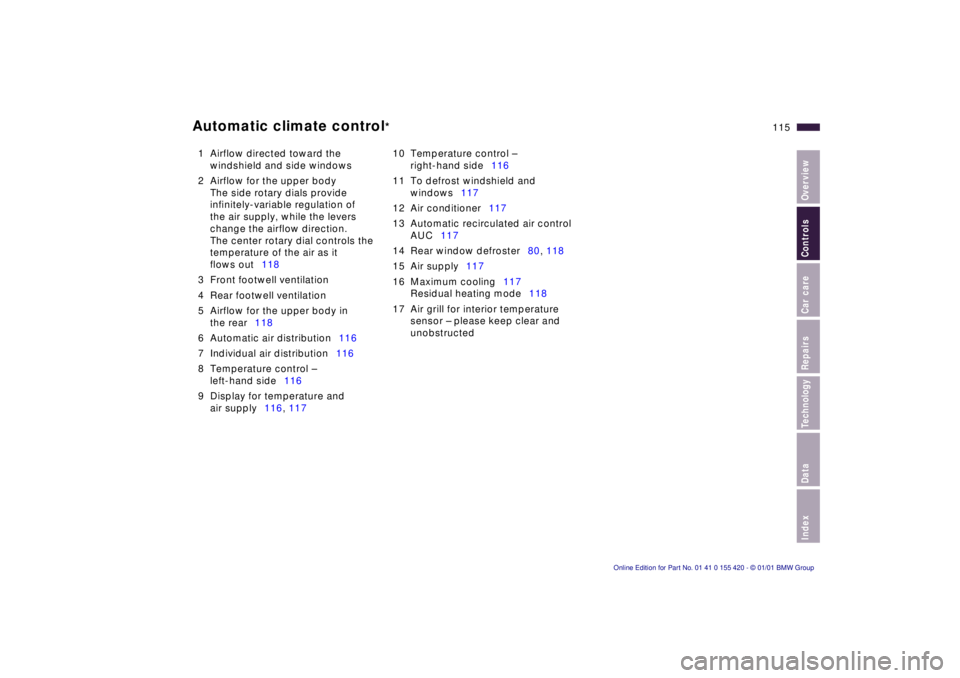
1 Airflow directed toward the
windshield and side windows
2 Airflow for the upper body
The side rotary dials provide
infinitely-variable regulation of
the air supply, while the levers
change the airflow direction.
The center rotary dial controls the
temperature of the air as it
flows out118
3 Front footwell ventilation
4 Rear footwell ventilation
5 Airflow for the upper body in
the rear118
6 Automatic air distribution116
7 Individual air distribution116
8 Temperature control –
left-hand side116
9 Display for temperature and
air supply116, 11710 Temperature control –
right-hand side116
11 To defrost windshield and
windows117
12 Air conditioner117
13 Automatic recirculated air control
AUC117
14 Rear window defroster80, 118
15 Air supply117
16 Maximum cooling117
Residual heating mode118
17 Air grill for interior temperature
sensor – please keep clear and
unobstructed
Page 117 of 238
IndexDataTechnologyRepairsCar careControlsOverview
117n
Automatic climate control
*
Air supply
In the "AUTO" program, the
airflow is controlled automati-
cally. AUTO will appear in the display 9
(refer to the overview on page 114).
Use "+" and "– " to vary the airflow.
When your setting is displayed by bars,
the automatic airflow is switched off.
Automatic air distribution maintains its
setting. You can reactivate the auto-
matic airflow by pressing the "AUTO"
button.
When you press "– " during operation at
minimum blower speed all displays are
canceled: the blower, heating and air
conditioner are switched off. The out-
side air supply is closed. By pressing
any button of the automatic climate
control (except the "MAX" button 16),
you can switch the system back on.
To defrost windshield and
windows
This program quickly re-
moves ice and condensation
from the windshield and the side win-
dows.
Air conditioner
The air is cooled and dehu-
midified and – depending on
the temperature setting – warmed again
when the air conditioner system is
switched on. Depending on the
weather, the windshield may fog over
briefly when the engine is started.
Use the button to switch off the air con-
ditioner at outside temperatures below
approx. +417 (+56). This will help to
prevent the windows from fogging up.
If the windows fog over after switching
the air conditioner off, switch it back
on.
Condensation forms in the air
conditioner system during opera-
tion, which then exits under the vehicle.
Traces of condensed water of this kind
are thus normal.<
Maximum cooling
You will get maximum
cooling capacity using this
program if the engine is running and
the outside temperature is above
+41 7(+5 6).
The temperature display 9 jumps to
+61 7 (+16 6), the system switches
over to the recirculated-air mode, and
the air will only stream out of the venti-
lation grill with the maximum amount of
air flow. That is why you need to keep
these open if you select this program.
Automatic recirculated-air
control (AUC)
You can respond to unpleas-
ant external odors by tempo-
rarily stopping the flow of outside air.
The system then recirculates the air
currently within the vehicle. Press the
button repeatedly to run through the
following control sequence:
>Indicator lamps off: outside airflow
operational.
Page 118 of 238
118n
Automatic climate control
*
>Left-hand indicator lamp on – AUC
mode: the system recognizes pollut-
ants in the outside air and blocks the
flow of air when necessary. The sys-
tem then recirculates the air currently
within the vehicle.
Depending on the air quality, the au-
tomatic system then switches back
and forth between outside air supply
and recirculation of the air within the
vehicle.
>Right-hand indicator lamp on: the
flow of external air into the vehicle is
permanently blocked. The system
then recirculates the air currently
within the vehicle.
If you have a multifunction steering
wheel with the recirculated-air button
(refer to page 25), you can also use it to
switch between "Off" and the recircu-
lated-air mode or AUC and the recircu-
lated-air mode.
If the windows should fog over in
the recirculated air mode, switch
the recirculated air mode off and in-
crease the air supply as required.<
Rear window defroster
When the rear window de-
froster is activated, the indica-
tor lamp comes on. The rear window
defroster switches off automatically.
Residual heating mode
The heat which is stored in
the engine is utilized for
heating the interior when the engine
has been switched off (while waiting at
a railroad crossing, for instance).
In ignition key position 1, you can alter
the settings of the automatic climate
control. In ignition key position 0, the
system automatically directs heated air
to the windshield, side windows and
footwells.
This function may be activated
when the outside temperature is
below approx. 597 (156), the engine
is at operating temperature, and the
battery is adequately charged. The LED
on the button will light up when all con-
ditions have been met.<
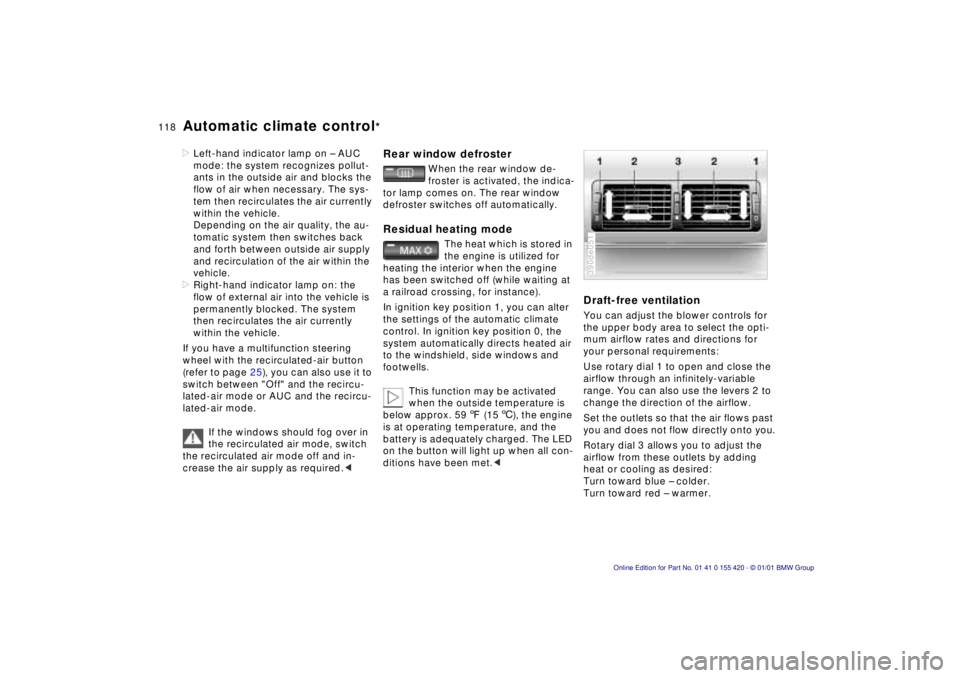
Draft-free ventilationYou can adjust the blower controls for
the upper body area to select the opti-
mum airflow rates and directions for
your personal requirements:
Use rotary dial 1 to open and close the
airflow through an infinitely-variable
range. You can also use the levers 2 to
change the direction of the airflow.
Set the outlets so that the air flows past
you and does not flow directly onto you.
Rotary dial 3 allows you to adjust the
airflow from these outlets by adding
heat or cooling as desired:
Turn toward blue – colder.
Turn toward red – warmer.390de051