turn signal BMW 525I SPORT WAGON 2002 User Guide
[x] Cancel search | Manufacturer: BMW, Model Year: 2002, Model line: 525I SPORT WAGON, Model: BMW 525I SPORT WAGON 2002Pages: 186, PDF Size: 2.77 MB
Page 84 of 186

84n
Check Control>"RELEASE PARKINGBRAKE"
>"COOLANT TEMPERATURE"
The coolant is overheated. Stop the
vehicle immediately and switch off
the engine. Refer to pages 82
and 142
>"STOP! ENGINE OILPRESS"
The oil pressure is too low. Stop the
vehicle immediately and switch off
the engine. Refer to pages 19, 140
>"CHECK BRAKE FLUID"
Indicates that brake fluid is down to
roughly minimum level. Have the
reservoir topped up at the earliest
opportunity, refer to page 143. Have
the source of the brake fluid loss
repaired at your BMW center
>"TIRE DEFECT"
*
Reduce vehicle speed immediately
and stop the vehicle. Avoid hard
brake applications. Do not oversteer.
Refer to page 100
>"SELFLEVEL SUSP.INACT"
Please consult the nearest BMW
center. Refer to page 99
>"SPEED LIMIT"
*
Display if the programmed speed
limit has been exceeded, refer to
page 91Priority 2
These displays appear for 20 seconds
when the ignition key is turned to posi-
tion 2. The warning symbols remain
after the message disappears. You can
display the messages again by pressing
the CHECK button 3:
>"TRUNKLID OPEN"
Message appears only when the
vehicle is initially set in motion
>"DOOR OPEN"
This message appears after a defined
road speed has been exceeded
>"FASTEN SEAT BELTS"
*
In addition to this message, a
warning lamp with the safety belt icon
appears and an acoustic signal
sounds
>"WASHER FLUID LOW"
Too low; top up fluid at the next
opportunity. Refer to page 139
>"CHECK ENGINE OIL LEV"
The engine oil level is at the absolute
minimum. You should respond by
topping up the oil as soon as
possible, refer to page 140. Do not
continue for more than approximately
30 miles (50 km) before adding oil>"CHECK FILLER CAP"
Inspect the cap to make sure that it is
closed properly, refer to page 24. If
the cap is not closed securely it will
trigger the "Service Engine Soon"
lamp
>"OUTSIDE TEMP. +20 7 (Ð5 6)"
This display is only an example. The
current temperature is displayed at
outside temperatures of +37.5 7
(+3 6) and below. Refer also to
page 80
>"SET TIRE PRESSURE"
*
The RDC has imported the current
inflation pressure in the tires as the
target values which the system will
monitor.
Refer to page 99
>"CHECK TIRE PRESSURE"
*
Check and correct the tire inflation
pressure to specifications at the
earliest opportunity (next stop for
fuel).
Refer to page 99
>"TIRECONTROL INACTIVE"
*
A temporary interference of the RDC
or a system fault. Refer to page 100
>"CHECK BRAKE LIGHTS"
A lamp has failed or the electrical
circuit has a fault. Refer to pages 154
and 160 or consult a BMW center
Page 86 of 186
86n
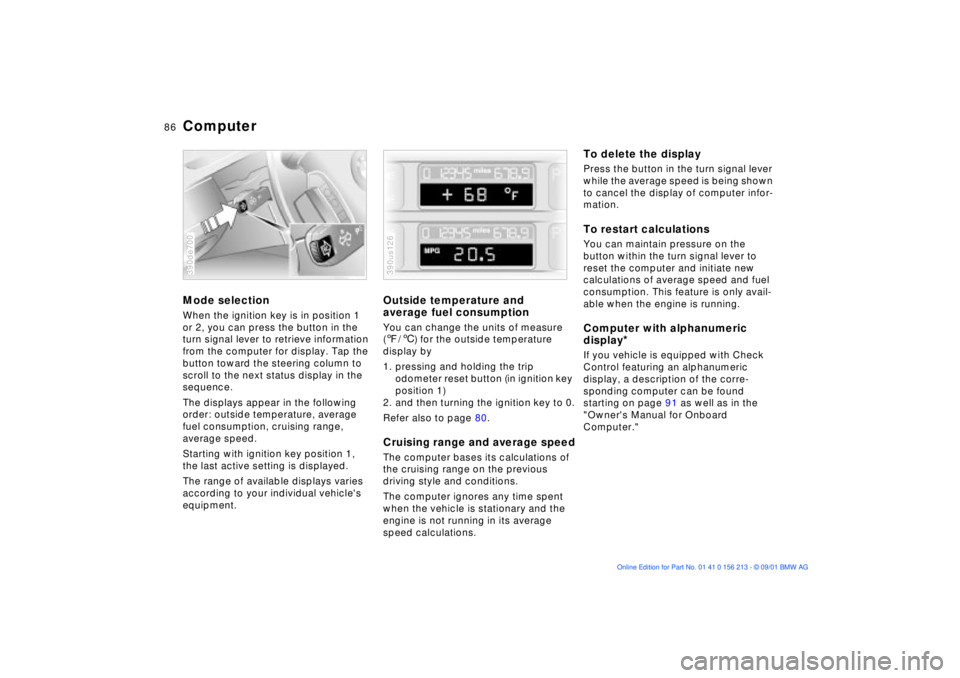
ComputerMode selectionWhen the ignition key is in position 1
or 2, you can press the button in the
turn signal lever to retrieve information
from the computer for display. Tap the
button toward the steering column to
scroll to the next status display in the
sequence.
The displays appear in the following
order: outside temperature, average
fuel consumption, cruising range,
average speed.
Starting with ignition key position 1,
the last active setting is displayed.
The range of available displays varies
according to your individual vehicle's
equipment.390de700
Outside temperature and
average fuel consumptionYou can change the units of measure
(7/6) for the outside temperature
display by
1. pressing and holding the trip
odometer reset button (in ignition key
position 1)
2. and then turning the ignition key to 0.
Refer also to page 80.Cruising range and average speedThe computer bases its calculations of
the cruising range on the previous
driving style and conditions.
The computer ignores any time spent
when the vehicle is stationary and the
engine is not running in its average
speed calculations.390us126
To delete the displayPress the button in the turn signal lever
while the average speed is being shown
to cancel the display of computer infor-
mation.To restart calculationsYou can maintain pressure on the
button within the turn signal lever to
reset the computer and initiate new
calculations of average speed and fuel
consumption. This feature is only avail-
able when the engine is running.Computer with alphanumeric
display
*
If you vehicle is equipped with Check
Control featuring an alphanumeric
display, a description of the corre-
sponding computer can be found
starting on page 91 as well as in the
"Owner's Manual for Onboard
Computer."
Page 89 of 186
89n
OverviewControlsMaintenanceRepairsDataIndex
Digital clock in the MID
*
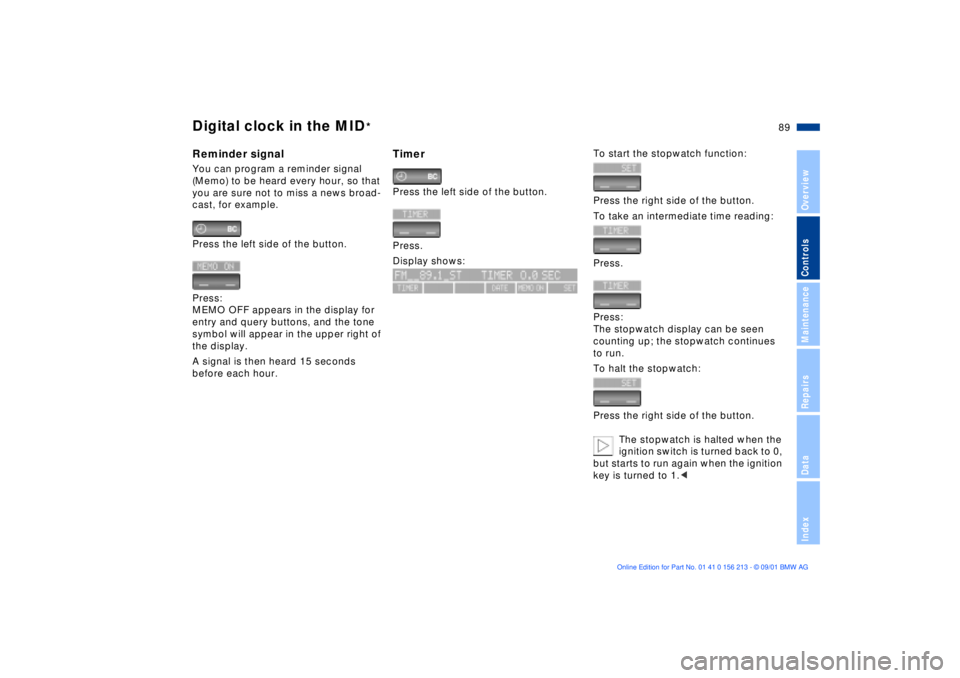
Reminder signalYou can program a reminder signal
(Memo) to be heard every hour, so that
you are sure not to miss a news broad-
cast, for example.
Press the left side of the button.
Press:
MEMO OFF appears in the display for
entry and query buttons, and the tone
symbol will appear in the upper right of
the display.
A signal is then heard 15 seconds
before each hour.
TimerPress the left side of the button.
Press.
Display shows:
To start the stopwatch function:
Press the right side of the button.
To take an intermediate time reading:
Press.
Press:
The stopwatch display can be seen
counting up; the stopwatch continues
to run.
To halt the stopwatch:
Press the right side of the button.
The stopwatch is halted when the
ignition switch is turned back to 0,
but starts to run again when the ignition
key is turned to 1.<
Page 95 of 186
95n
OverviewControlsMaintenanceRepairsDataIndex
Computer in the MID
*
After three incorrect code entries, or
three attempts to start the engine
without a code entry, the alarm will
sound for 30 seconds on vehicles
equipped with an alarm.
Deactivating the alarm in an emer-
gency:
If you have forgotten the code, proceed
as follows:
1. Disconnect the battery, wait approx.
2 minutes, then reconnect it. Note
that on vehicles with an alarm, this
will sound
2. Set the ignition key to position 1:
The time display will count down for
the next ten minutes
3. After ten minutes, start the engine.
If the code becomes available
again in the meantime, it can be
entered during the waiting period after
pressing the CODE button.<
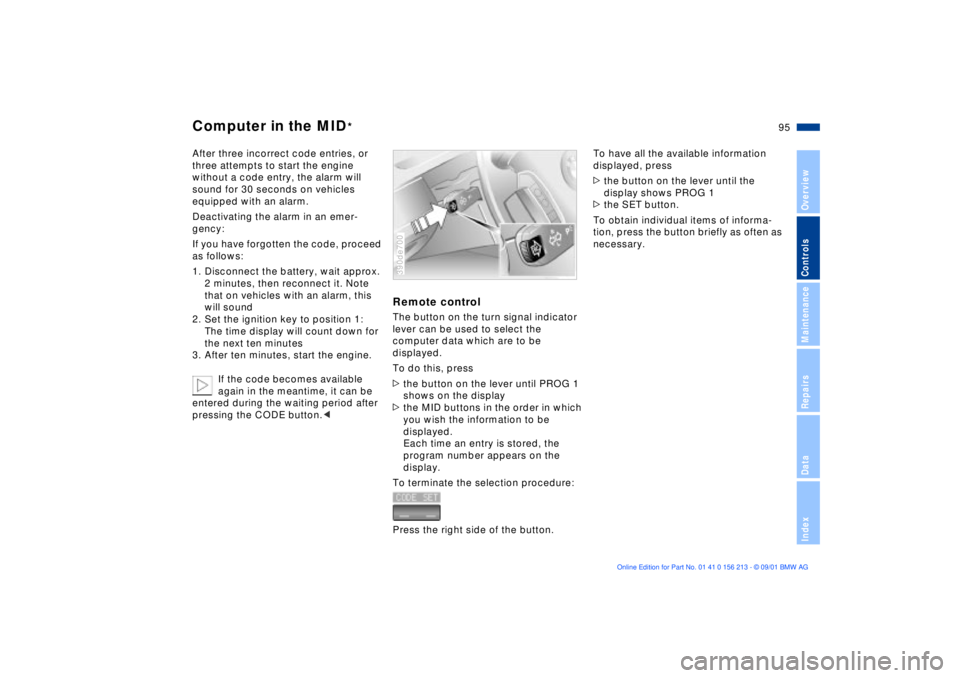
Remote controlThe button on the turn signal indicator
lever can be used to select the
computer data which are to be
displayed.
To do this, press
>the button on the lever until PROG 1
shows on the display
>the MID buttons in the order in which
you wish the information to be
displayed.
Each time an entry is stored, the
program number appears on the
display.
To terminate the selection procedure:
Press the right side of the button.390de700
To have all the available information
displayed, press
>the button on the lever until the
display shows PROG 1
>the SET button.
To obtain individual items of informa-
tion, press the button briefly as often as
necessary.
Page 102 of 186
102n
Instrument lighting
High beams/Standing lamps
Fog lamps
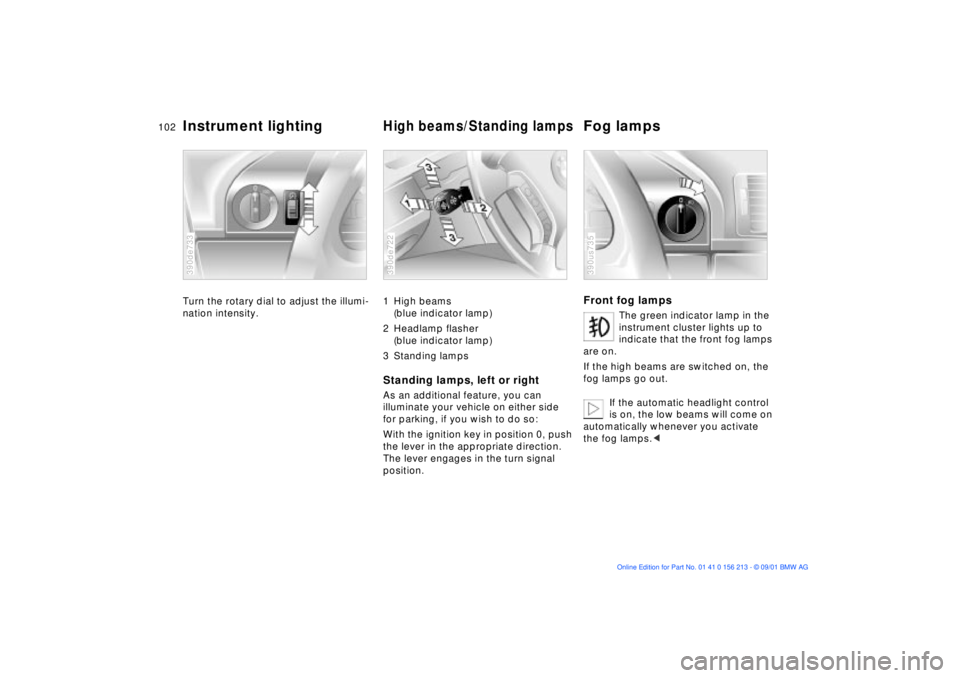
Turn the rotary dial to adjust the illumi-
nation intensity.390de733
1 High beams
(blue indicator lamp)
2 Headlamp flasher
(blue indicator lamp)
3 Standing lampsStanding lamps, left or rightAs an additional feature, you can
illuminate your vehicle on either side
for parking, if you wish to do so:
With the ignition key in position 0, push
the lever in the appropriate direction.
The lever engages in the turn signal
position.390de722
Front fog lamps
The green indicator lamp in the
instrument cluster lights up to
indicate that the front fog lamps
are on.
If the high beams are switched on, the
fog lamps go out.
If the automatic headlight control
is on, the low beams will come on
automatically whenever you activate
the fog lamps.<
390us735
Page 152 of 186
152n
Lamps and bulbsXenon lamps
*
The operating life of these lamp units is
extremely long and the likelihood of
failure very low, provided that they are
not switched on and off an excessive
number of times. If one of these bulbs
should nevertheless fail, it is possible to
continue driving with great caution
using the fog lamps, provided traffic
laws in your area do not prohibit this.
Because of the extremely high
voltages involved, any work on the
lighting system should be carried out by
technically-qualified personnel only.
Otherwise, there is a risk of fatal
injury.<
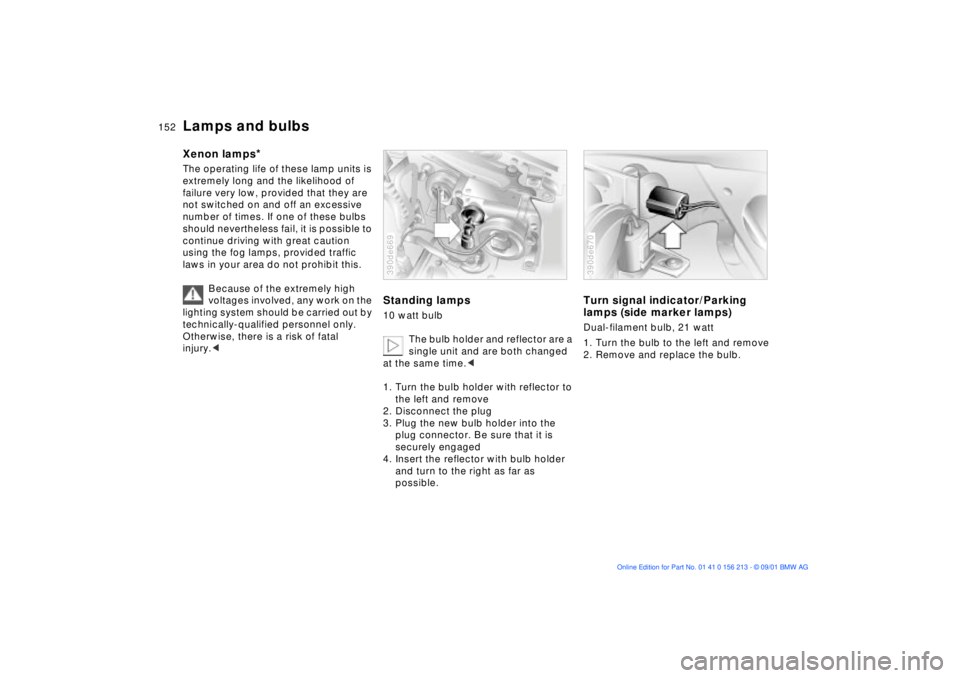
Standing lamps10 watt bulb
The bulb holder and reflector are a
single unit and are both changed
at the same time.<
1. Turn the bulb holder with reflector to
the left and remove
2. Disconnect the plug
3. Plug the new bulb holder into the
plug connector. Be sure that it is
securely engaged
4. Insert the reflector with bulb holder
and turn to the right as far as
possible.390de669
Turn signal indicator/Parking
lamps (side marker lamps)Dual-filament bulb, 21 watt
1. Turn the bulb to the left and remove
2. Remove and replace the bulb.390de670
Page 153 of 186
153n
OverviewControlsMaintenanceRepairsDataIndex
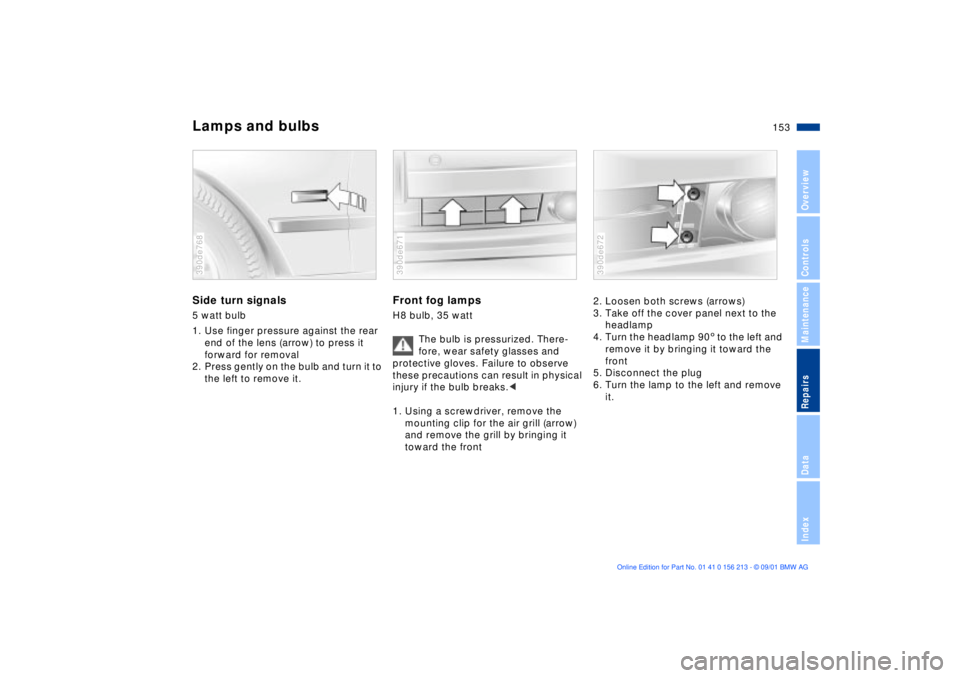
Lamps and bulbsSide turn signals5 watt bulb
1. Use finger pressure against the rear
end of the lens (arrow) to press it
forward for removal
2. Press gently on the bulb and turn it to
the left to remove it.390de768
Front fog lampsH8 bulb, 35 watt
The bulb is pressurized. There-
fore, wear safety glasses and
protective gloves. Failure to observe
these precautions can result in physical
injury if the bulb breaks.<
1. Using a screwdriver, remove the
mounting clip for the air grill (arrow)
and remove the grill by bringing it
toward the front390de671
2. Loosen both screws (arrows)
3. Take off the cover panel next to the
headlamp
4. Turn the headlamp 903 to the left and
remove it by bringing it toward the
front
5. Disconnect the plug
6. Turn the lamp to the left and remove
it.390de672
Page 154 of 186
154n
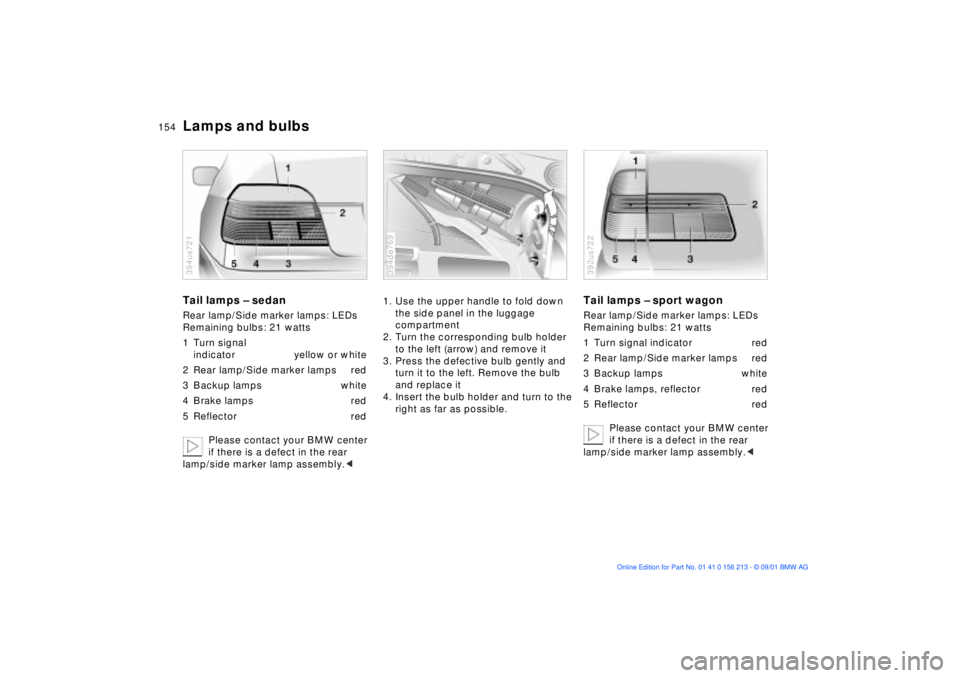
Lamps and bulbsTail lamps Ð sedanRear lamp/Side marker lamps: LEDs
Remaining bulbs: 21 watts
1 Turn signal
indicator yellow or white
2 Rear lamp/Side marker lamps red
3 Backup lamps white
4 Brake lamps red
5 Reflector red
Please contact your BMW center
if there is a defect in the rear
lamp/side marker lamp assembly.< 394us721
1. Use the upper handle to fold down
the side panel in the luggage
compartment
2. Turn the corresponding bulb holder
to the left (arrow) and remove it
3. Press the defective bulb gently and
turn it to the left. Remove the bulb
and replace it
4. Insert the bulb holder and turn to the
right as far as possible.394de769
Tail lamps Ð sport wagonRear lamp/Side marker lamps: LEDs
Remaining bulbs: 21 watts
1 Turn signal indicator red
2 Rear lamp/Side marker lamps red
3 Backup lamps white
4 Brake lamps, reflector red
5 Reflector red
Please contact your BMW center
if there is a defect in the rear
lamp/side marker lamp assembly.< 392us722
Page 164 of 186
164n
Towing the vehicle
The towed vehicle should always
be the lighter of the two vehicles.
If this is not the case, it is no longer
possible to control vehicle response.<
Tow-startingIt is not possible to start the engine of
vehicles equipped with an automatic
transmission by towing or pushing.
For instructions on jump-starting: refer
to page 162.
Never attempt to use your vehicle to
push another vehicle, since damage to
the energy-absorbing bumpers could
result.
Towing a vehicle with automatic
transmission1. Place the selector lever in position N
2. Towing speed:
Max. 45 mph (70 km/h)
3. Towing distance:
Max. 95 miles (150 km)
4. Leave the ignition key in position 1 to
ensure that the brake lamps, turn
signals, horn and windshield wipers
remain operative, and to prevent the
steering lock detent from engaging
5. Switch on the hazard warning
flashers (observe official regulations).
Find some means of identifying the
vehicle in tow, for instance, place a sign
or warning triangle in the rear window.
Make sure that the ignition key
remains in position 1 even when
the electrical system has failed to
prevent the steering lock from
engaging. The steering and brakes are
without power-assist when the engine
is off. This means that increased effort
is required for steering and braking.<
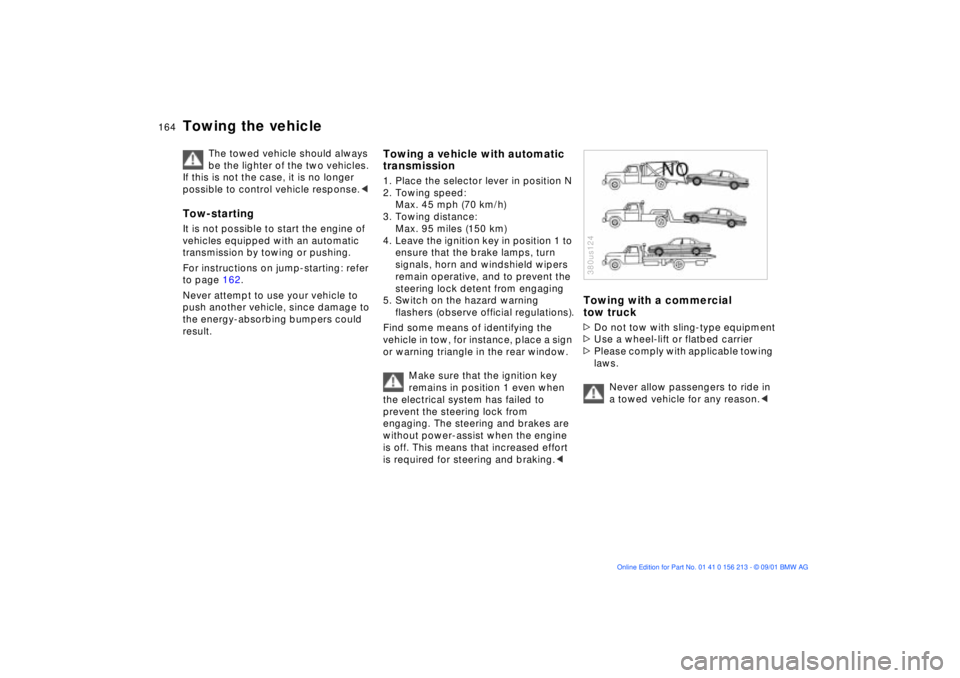
Towing with a commercial
tow truck>Do not tow with sling-type equipment
>Use a wheel-lift or flatbed carrier
>Please comply with applicable towing
laws.
Never allow passengers to ride in
a towed vehicle for any reason.< 380us124
Page 181 of 186
Everything from A to Z
181n
OverviewControlsMaintenanceRepairsDataIndex
Reminder signal (Memo)89
Remote control34
computer95
Removable rear-seat
backrest119
Remove condensation from
windows106, 109
Replacing
fuses160t
lamps and bulbs151t
wiper blades150t
Reporting safety defects11
Reservoir, washer
system139t
Residual heat111
Rims135
Roller sun blind112
Roll-up cover123
Roof load capacity171
Roof-mounted luggage
rack127 S
Safety belts53
Safety defects, reporting11
Safety lock buttons37
Seat belts53
Seats electric power50
manually-adjusted50
memory setting54
Secure the load126
Securing cargo42, 126
Selector lever, automatic
transmission70, 73
Service and Warranty
Information Booklet (US
models)144
Service Interval
Display82, 144
Shiftlock70, 73
Shoulder support51
Side airbags58
Side Impact Head Protection
System58
Side lamps
bulb replacement152t
Side turn signal
bulb replacement153t
Ski bag120
Ski bag in the sport
wagon122
Sliding/tilt sunroof46
manual operation47
with glass moonroof47
Snow chains136 Socket for attaching
electrical appliances118
Spare tire157t
Speaker117
Special characteristics of
winter tires136
Special oil141t
Speed94
Speed limit91
Speed, average86, 94
Speedometer15, 16, 17
sport wagon
anchorages126
compartments in the
luggage
compartment124
cover in the luggage
compartment124
folding down the rear
backrest123
LATCH child-restraint
system64
load-securing
devices126
luggage
compartment123
opening the rear
window40
partition net123 rear window wiper, blade
replacement150t
releasing the tailgate after
an electrical
malfunction39
roll-up cover123
securing a load126
ski bag122
tail lamp assembly, bulb
replacement154t
transporting children
safely64
Standing lamps102
Starting assistance162t
Starting problems67t
Starting the engine67
Steering wheel
heating56
lock66
memory setting54
Steering wheel with
multifunction buttons22
Steptronic73
Stopwatch89
for additional information
refer to the "Owner's
Manual for Onboard
Computer"
Storage compartments116
in the cargo area124