lock BMW 525XI 2006 Owner's Manual
[x] Cancel search | Manufacturer: BMW, Model Year: 2006, Model line: 525XI, Model: BMW 525XI 2006Pages: 248, PDF Size: 8.58 MB
Page 47 of 248
Adjustments
46
Safety feature
1.Close the driver's door and switch the igni-
tion on or off.
2.Press the desired memory button1 or2
and maintain pressure until the adjustment
process has been completed.
If the button was pressed inadvertently:
press the button again; the LED goes out.
Activating with remote control
The last positions of the driver's seat, the exter-
nal rearview mirrors, and steering wheel are
stored for the remote key currently in use.
You can choose when the position is requested:
>Request when unlocking vehicle
>Request when opening driver's door
iDrive, for principle details, refer to page16.
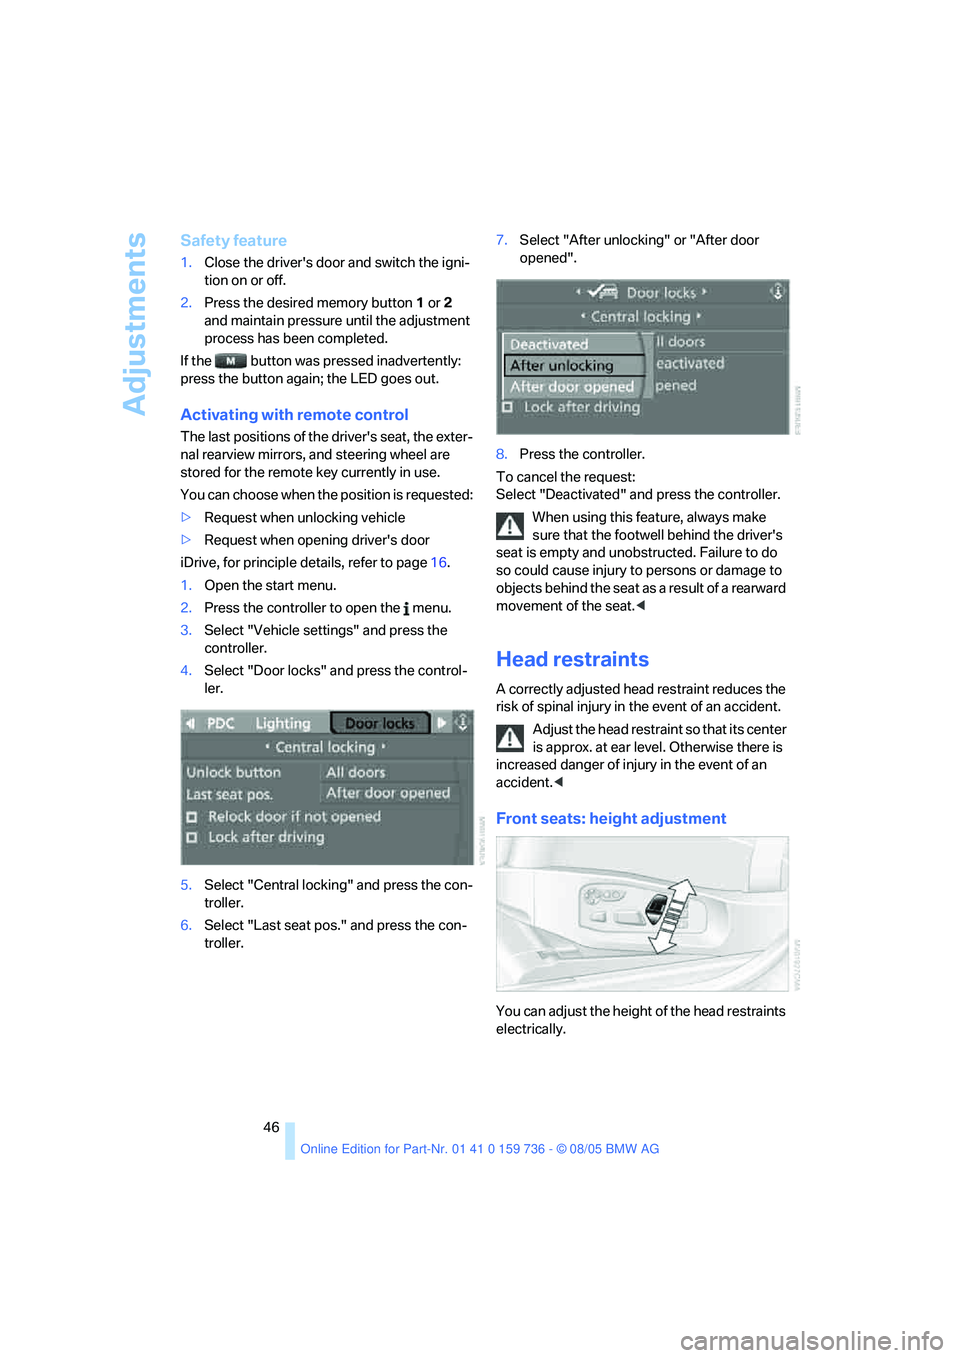
1.Open the start menu.
2.Press the controller to open the menu.
3.Select "Vehicle settings" and press the
controller.
4.Select "Door locks" and press the control-
ler.
5.Select "Central locking" and press the con-
troller.
6.Select "Last seat pos." and press the con-
troller.7.Select "After unlocking" or "After door
opened".
8.Press the controller.
To cancel the request:
Select "Deactivated" and press the controller.
When using this feature, always make
sure that the footwell behind the driver's
seat is empty and unobstructed. Failure to do
so could cause injury to persons or damage to
objects behind the seat as a result of a rearward
movement of the seat.<
Head restraints
A correctly adjusted head restraint reduces the
risk of spinal injury in the event of an accident.
Adjust the head restraint so that its center
is approx. at ear level. Otherwise there is
increased danger of injury in the event of an
accident.<
Front seats: height adjustment
You can adjust the height of the head restraints
electrically.
Page 51 of 248
Adjustments
50
Tilting down passenger-side exterior
mirror – automatic parking function*
Activating
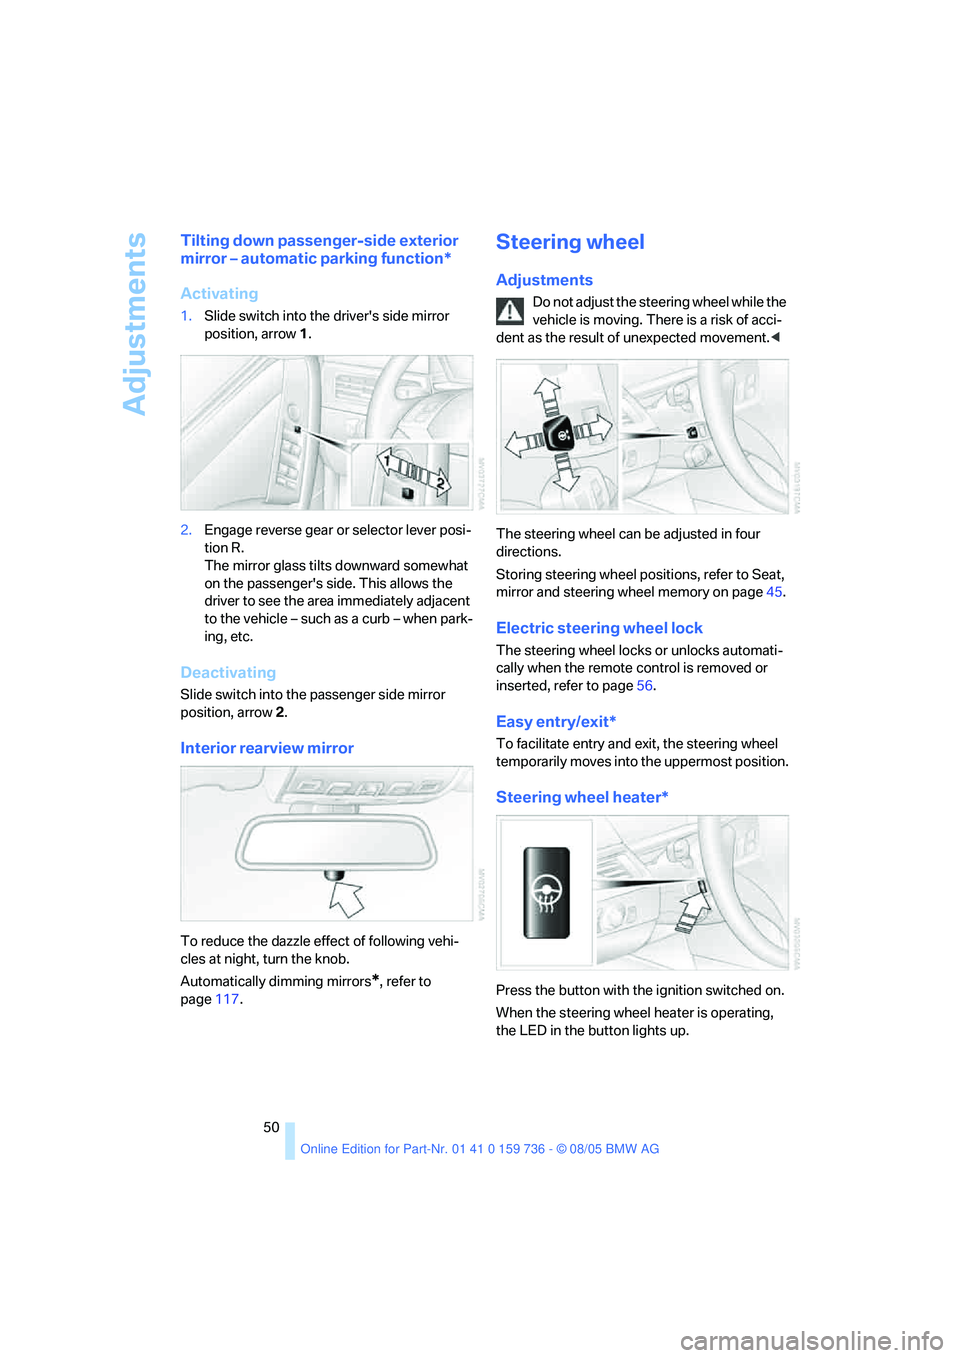
1.Slide switch into the driver's side mirror
position, arrow 1.
2.Engage reverse gear or selector lever posi-
tion R.
The mirror glass tilts downward somewhat
on the passenger's side. This allows the
driver to see the area immediately adjacent
to the vehicle – such as a curb – when park-
ing, etc.
Deactivating
Slide switch into the passenger side mirror
position, arrow 2.
Interior rearview mirror
To reduce the dazzle effect of following vehi-
cles at night, turn the knob.
Automatically dimming mirrors
*, refer to
page117.
Steering wheel
Adjustments
Do not adjust the steering wheel while the
vehicle is moving. There is a risk of acci-
dent as the result of unexpected movement.<
The steering wheel can be adjusted in four
directions.
Storing steering wheel positions, refer to Seat,
mirror and steering wheel memory on page45.
Electric steering wheel lock
The steering wheel locks or unlocks automati-
cally when the remote control is removed or
inserted, refer to page56.
Easy entry/exit*
To facilitate entry and exit, the steering wheel
temporarily moves into the uppermost position.
Steering wheel heater*
Press the button with the ignition switched on.
When the steering wheel heater is operating,
the LED in the button lights up.
Page 54 of 248
Controls
53Reference
At a glance
Driving tips
Communications
Navigation
Entertainment
Mobility
Backrest width*
The backrest width adjustment of the
passenger seat must be opened com-
pletely. After mounting the child's seat, no
memory position may be called up and the
active backrest width adjustment must be
deactivated, otherwise the stability of the
child's seat on the front passenger seat is lim-
ited.<
1.After unlocking the vehicle, place on the
front passenger seat and close the door to
call up the memory position.
2.Completely open the backrest width adjust-
ment, refer to page44.
3.Deactivate active backrest width adjust-
ment, refer to page45.
4.Install child's seat.
Child seat security
All rear safety belts and the safety belt for the
front passenger can be locked against pulling
out to secure child restraint systems.
Locking safety belt
1.Secure the child restraint system with the
belt.
2.Pull out the belt webbing completely.
3.Allow the belt webbing to be pulled in and
pull taut against the child restraint system.
The safety belt is locked.
Unlocking safety belt
1.Open the belt buckle.
2.Remove the child restraint system.
3.Allow the belt webbing to be pulled in com-
pletely.
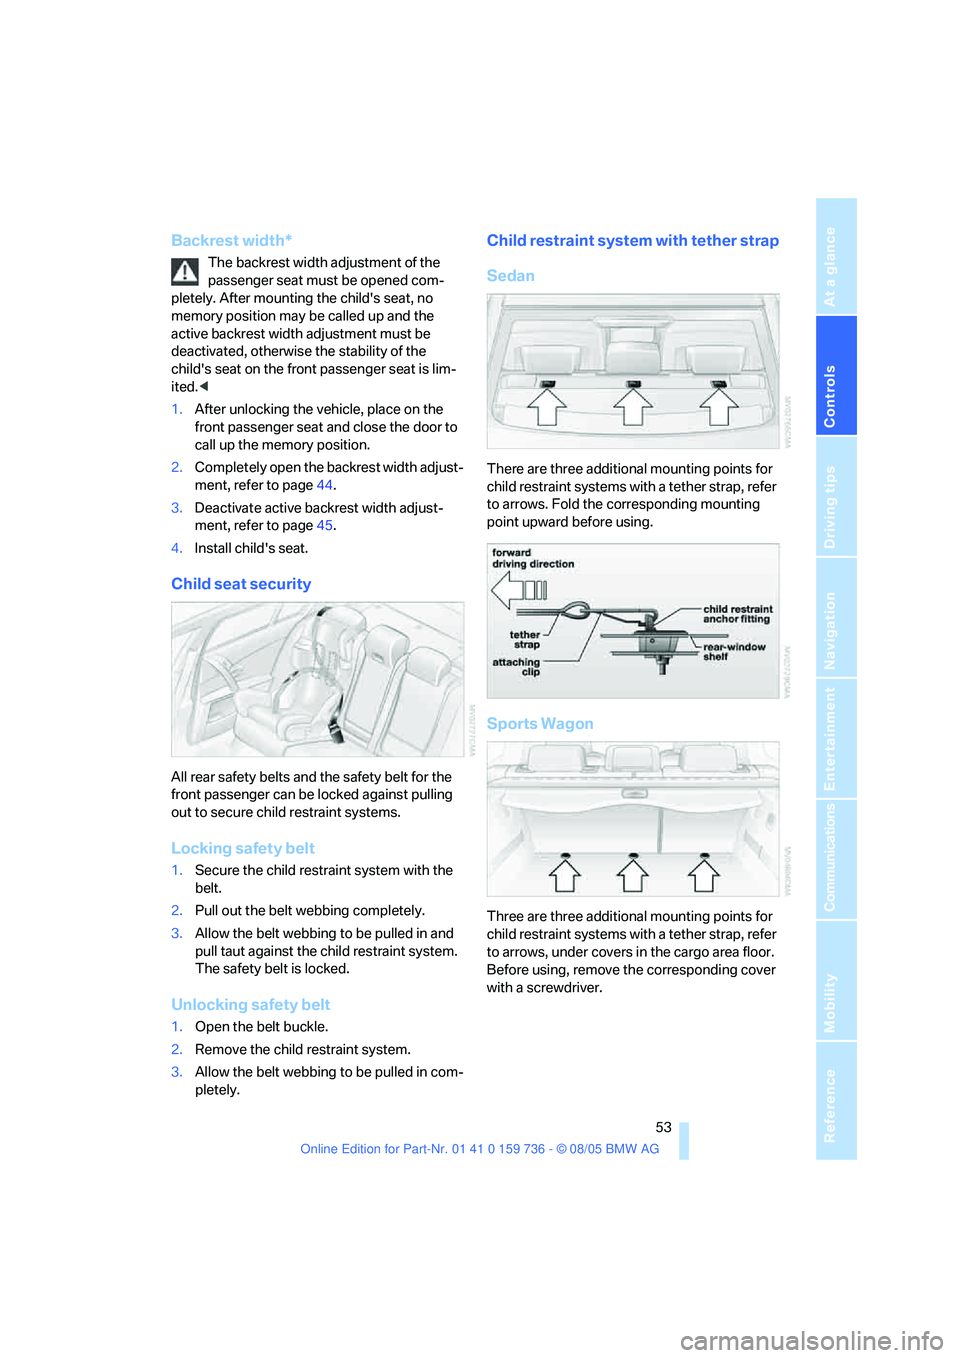
Child restraint system with tether strap
Sedan
There are three additional mounting points for
child restraint systems with a tether strap, refer
to arrows. Fold the corresponding mounting
point upward before using.
Sports Wagon
Three are three additional mounting points for
child restraint systems with a tether strap, refer
to arrows, under covers in the cargo area floor.
Before using, remove the corresponding cover
with a screwdriver.
Page 56 of 248
Controls
55Reference
At a glance
Driving tips
Communications
Navigation
Entertainment
Mobility
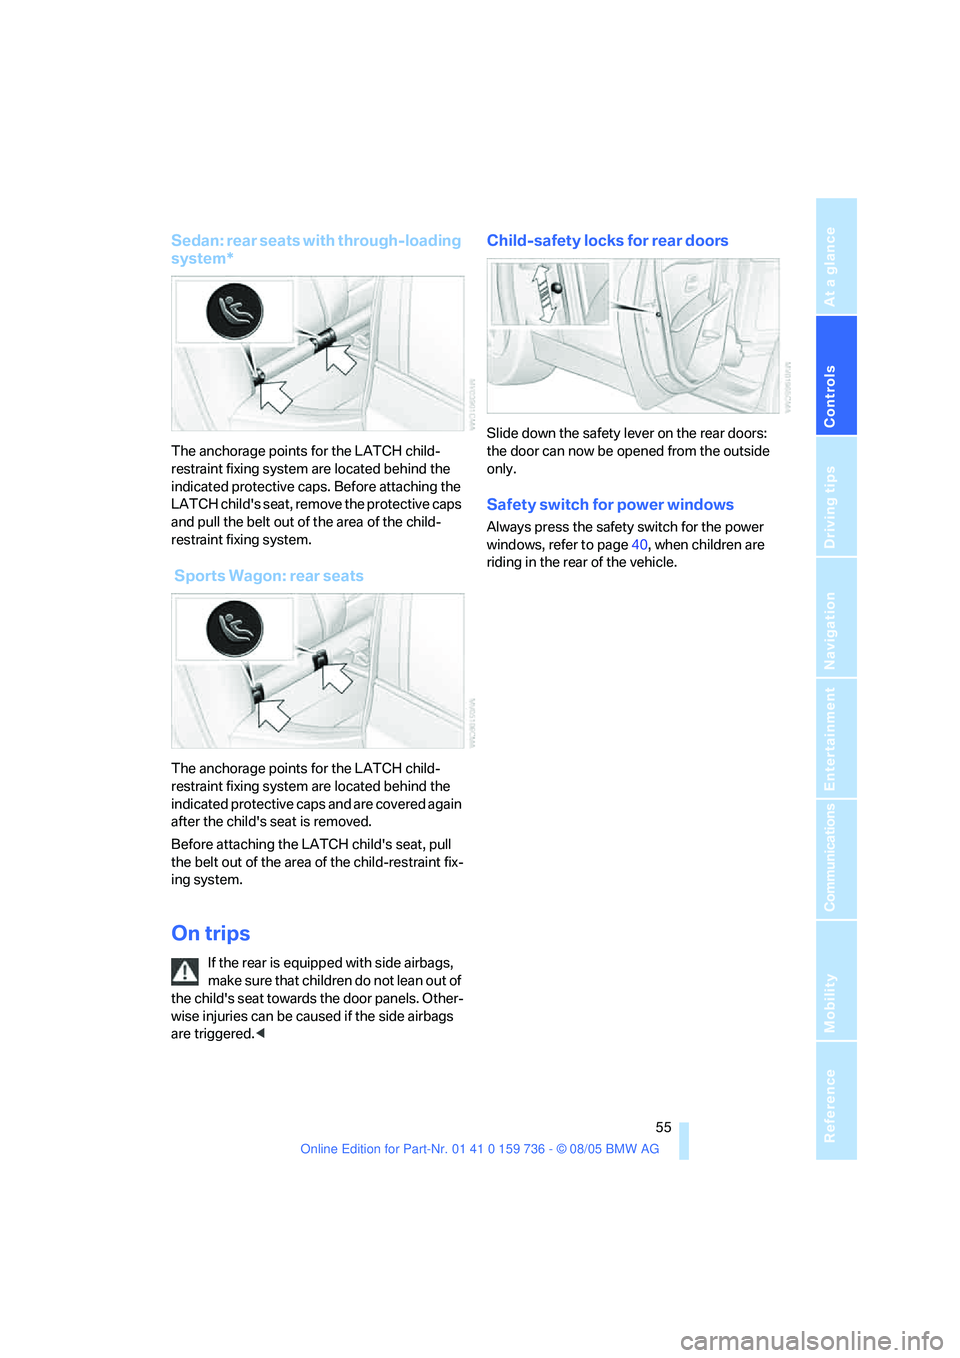
Sedan: rear seats with through-loading
system*
The anchorage points for the LATCH child-
restraint fixing system are located behind the
indicated protective caps. Before attaching the
LATCH child's seat, remove the protective caps
and pull the belt out of the area of the child-
restraint fixing system.
Sports Wagon: rear seats
The anchorage points for the LATCH child-
restraint fixing system are located behind the
indicated protective caps and are covered again
after the child's seat is removed.
Before attaching the LATCH child's seat, pull
the belt out of the area of the child-restraint fix-
ing system.
On trips
If the rear is equipped with side airbags,
make s ure that children do not lean o ut of
the child's seat towards the door panels. Other-
wise injuries can be caused if the side airbags
are triggered.<
Child-safety locks for rear doors
Slide down the safety lever on the rear doors:
the door can now be opened from the outside
only.
Safety switch for power windows
Always press the safety switch for the power
windows, refer to page40, when children are
riding in the rear of the vehicle.
Page 57 of 248
Driving
56
Driving
Ignition lock
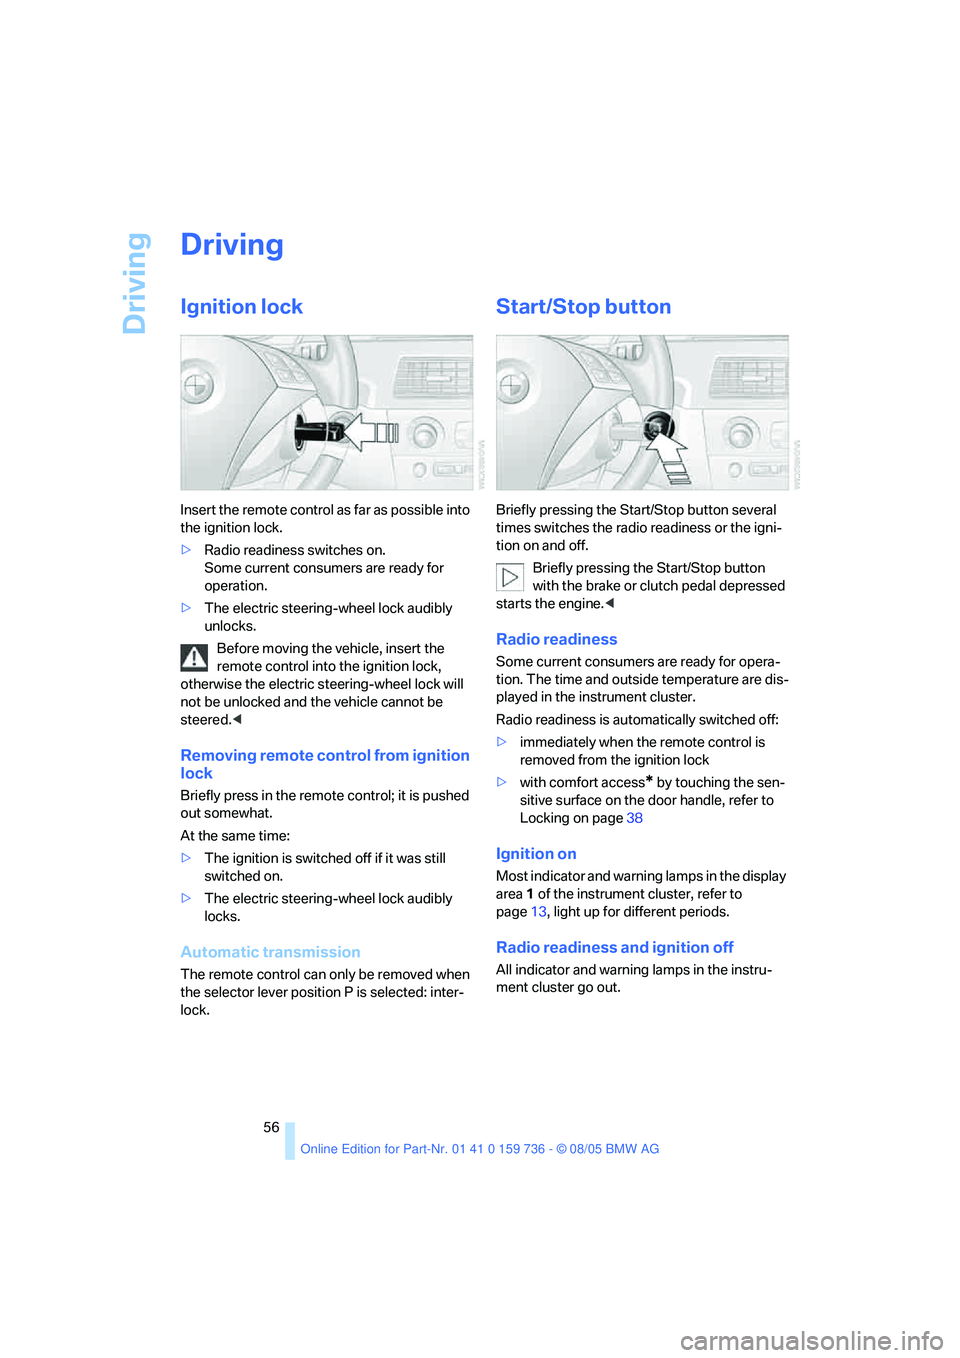
Insert the remote control as far as possible into
the ignition lock.
>Radio readiness switches on.
Some current consumers are ready for
operation.
>The electric steering-wheel lock audibly
unlocks.
Before moving the vehicle, insert the
remote control into the ignition lock,
otherwise the electric steering-wheel lock will
not be unlocked and the vehicle cannot be
steered.<
Removing remote control from ignition
lock
Briefly press in the remote control; it is pushed
out somewhat.
At the same time:
>The ignition is switched off if it was still
switched on.
>The electric steering-wheel lock audibly
locks.
Automatic transmission
The remote control can only be removed when
the selector lever position P is selected: inter-
lock.
Start/Stop button
Briefly pressing the Start/Stop button several
times switches the radio readiness or the igni-
tion on and off.
Briefly pressing the Start/Stop button
with the brake or clutch pedal depressed
starts the engine.<
Radio readiness
Some current consumers are ready for opera-
tion. The time and outside temperature are dis-
played in the instrument cluster.
Radio readiness is automatically switched off:
>immediately when the remote control is
removed from the ignition lock
>with comfort access
* by touching the sen-
sitive surface on the door handle, refer to
Locking on page38
Ignition on
Most indicator and warning lamps in the display
area1 of the instrument cluster, refer to
page13, light up for different periods.
Radio readiness and ignition off
All indicator and warning lamps in the instru-
ment cluster go out.
Page 58 of 248
Controls
57Reference
At a glance
Driving tips
Communications
Navigation
Entertainment
Mobility
Starting engine
Do not run the engine in closed rooms,
otherwise the inhaling of toxic exhaust
gases can cause unconsciousness and death.
The exhaust gases contain carbon monoxide,
an odorless and colorless, but highly toxic gas.
Never leave an unattended vehicle with the
engine running, as such a vehicle represents a
potential safety hazard.
Before leaving the vehicle with the engine run-
ning, set the selector lever to the idling or the
P position and set the handbrake, otherwise the
vehicle can begin to roll.<
When starting the engine, do not press the
accelerator pedal.
Do not allow the engine to warm up by leaving it
running while the vehicle remains stationary.
Instead, begin to drive immediately at a moder-
ate engine speed.
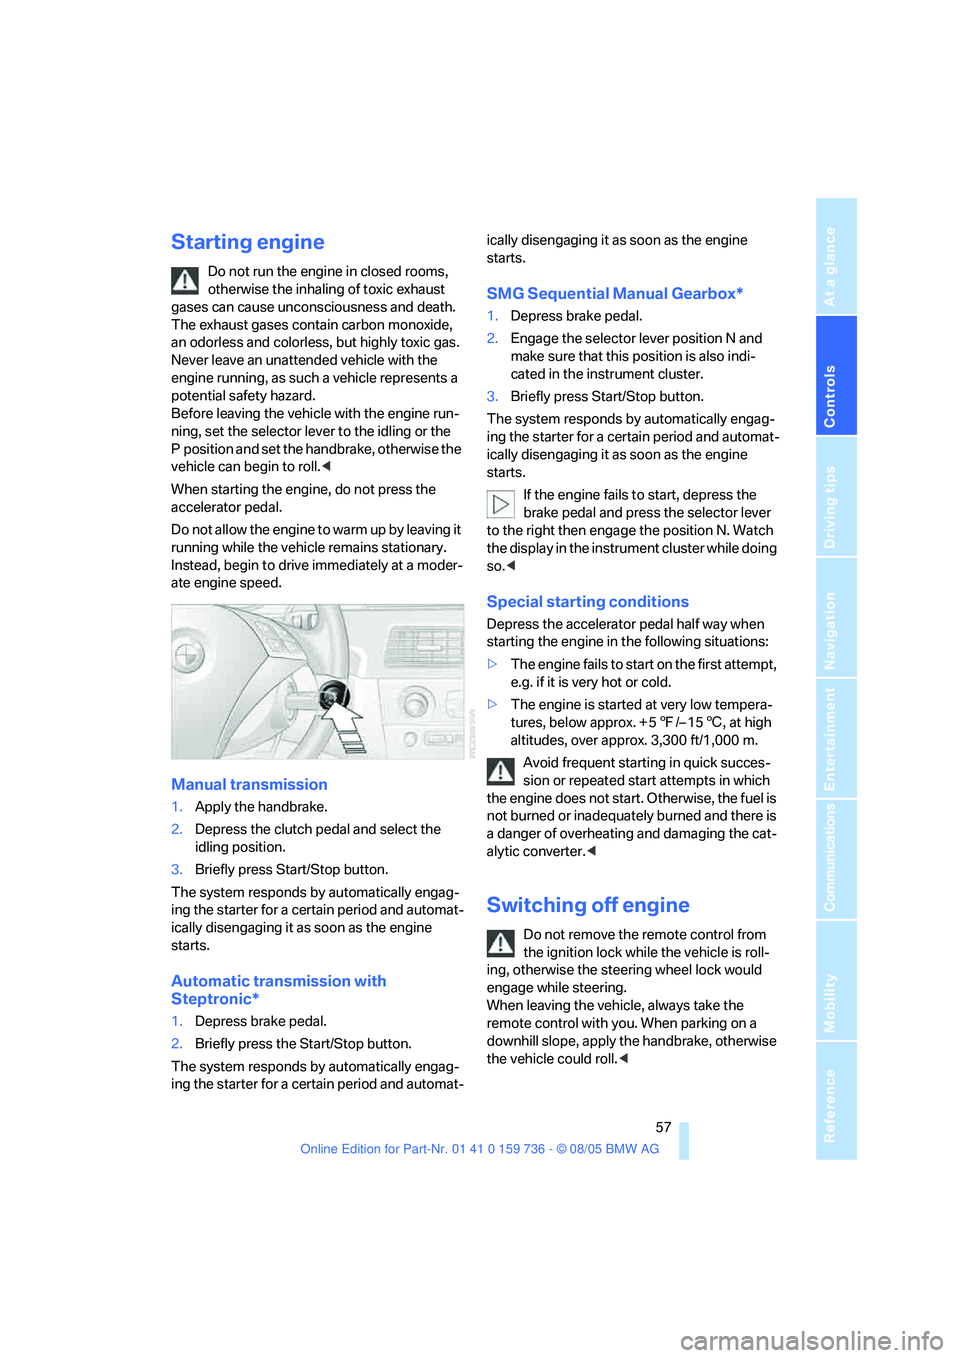
Manual transmission
1.Apply the handbrake.
2.Depress the clutch pedal and select the
idling position.
3.Briefly press Start/Stop button.
The system responds by automatically engag-
ing the starter for a certain period and automat-
ically disengaging it as soon as the engine
starts.
Automatic transmission with
Steptronic*
1.Depress brake pedal.
2.Briefly press the Start/Stop button.
The system responds by automatically engag-
ing the starter for a certain period and automat-ically disengaging it as soon as the engine
starts.
SMG Sequential Manual Gearbox*
1.Depress brake pedal.
2.Engage the selector lever position N and
make sure that this position is also indi-
cated in the instrument cluster.
3.Briefly press Start/Stop button.
The system responds by automatically engag-
ing the starter for a certain period and automat-
ically disengaging it as soon as the engine
starts.
If the engine fails to start, depress the
brake pedal and press the selector lever
to the right then engage the position N. Watch
the display in the instrument cluster while doing
so.<
Special starting conditions
Depress the accelerator pedal half way when
starting the engine in the following situations:
>The engine fails to start on the first attempt,
e.g. if it is very hot or cold.
>The engine is started at very low tempera-
tures, below approx. + 57/– 156, at high
altitudes, over approx. 3,300 ft/1,000 m.
Avoid frequent starting in quick succes-
sion or repeated start attempts in which
the engine does not start. Otherwise, the fuel is
not burned or inadequately burned and there is
a danger of overheating and damaging the cat-
alytic converter.<
Switching off engine
Do not remove the remote control from
the ignition lock while the vehicle is roll-
ing, otherwise the steering wheel lock would
engage while steering.
When leaving the vehicle, always take the
remote control with you. When parking on a
downhill slope, apply the handbrake, otherwise
the vehicle could roll.<
Page 59 of 248
Driving
58
Manual transmission
1.Briefly press the Start/Stop button with the
vehicle stopped.
2.Shift into first gear or reverse.
3.Apply the handbrake.
SMG Sequential Manual Gearbox*
1.Apply the handbrake.
2.Engage a driving position.
3.Briefly press Start/Stop button.
If the position N is engaged when the
engine is switched off, this is pointed out
visually and acoustically.
Automatic transmission*
1.Select the selector lever position P with the
vehicle stopped.
2.Briefly press Start/Stop button.
Handbrake
The handbrake is primarily intended to prevent
the vehicle from rolling while parked; it brakes
the rear wheels.
Indicator lamp
The indicator lamp lights up, and a sig-
nal also sounds when starting off. The
handbrake is applied.
Indicator lamp for Canadian models.
Applying
The lever locks in position automatically.
Releasing
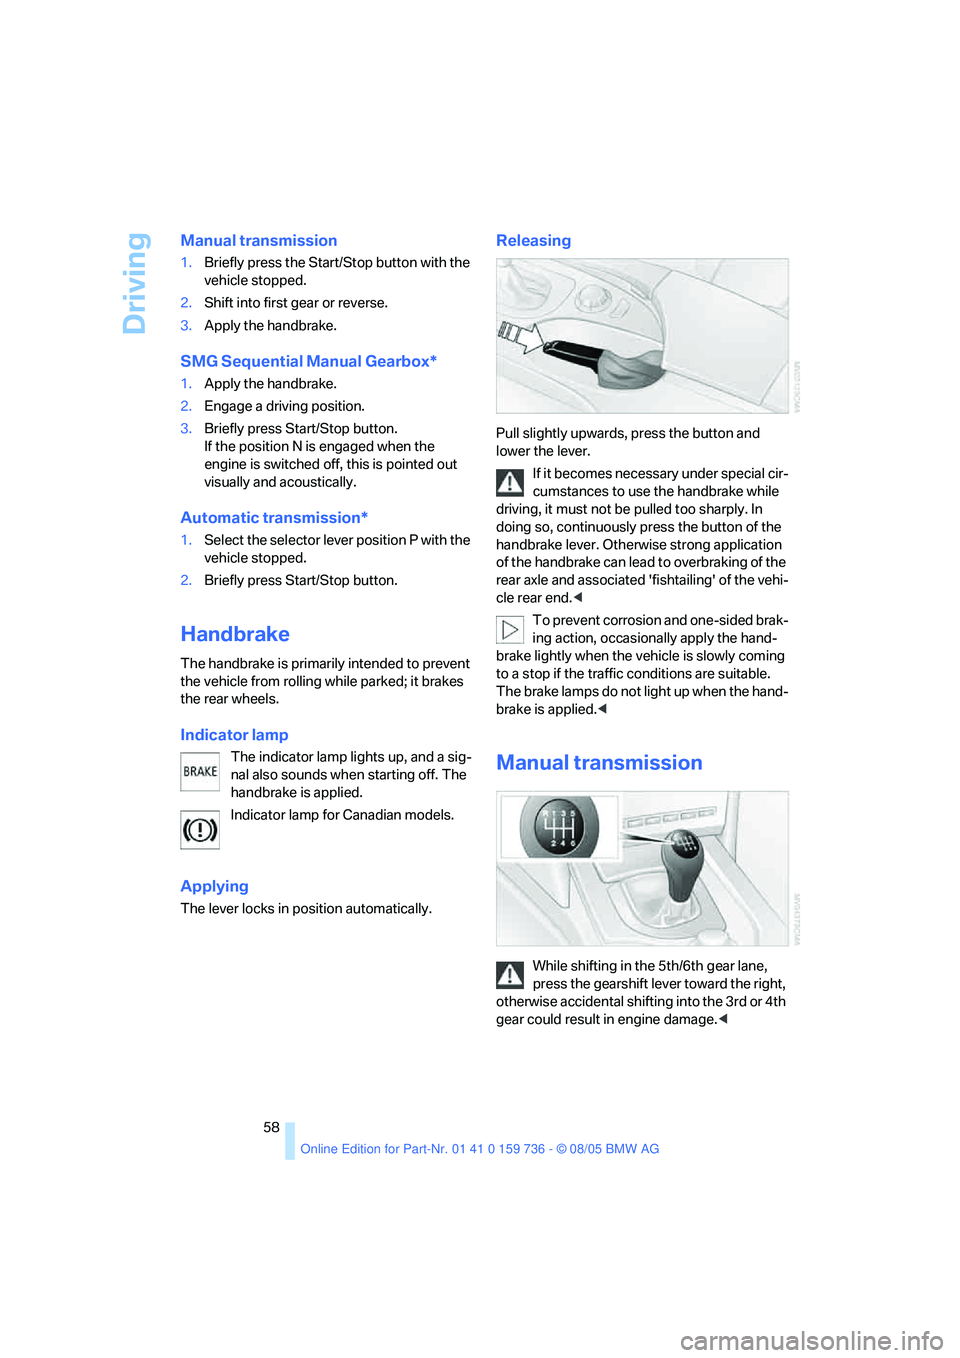
Pull slightly upwards, press the button and
lower the lever.
If it becomes necessary under special cir-
cumstances to use the handbrake while
driving, it must not be pulled too sharply. In
doing so, continuously press the button of the
handbrake lever. Otherwise strong application
of the handbrake can lead to overbraking of the
rear axle and associated 'fishtailing' of the vehi-
cle rear end.<
To prevent corrosion and one-sided brak-
ing action, occasionally apply the hand-
brake lightly when the vehicle is slowly coming
to a stop if the traffic conditions are suitable.
The brake lamps do not light up when the hand-
brake is applied.<
Manual transmission
While shifting in the 5th/6th gear lane,
press the gearshift lever toward the right,
otherwise accidental shifting into the 3rd or 4th
gear could result in engine damage.<
Page 60 of 248
Controls
59Reference
At a glance
Driving tips
Communications
Navigation
Entertainment
Mobility
Reverse gear
Select only when the vehicle is stationary.
When pressing the gearshift lever to the left,
overcome some resistance.
The backup lamps switch on automatically with
the ignition switched on.
SMG Sequential Manual
Gearbox*
The concept
The SMG Sequential Manual Gearbox is an
automated manual transmission in which an
electrohydraulic system handles the clutching
and gear changes.
You operate SMG with the selector lever in the
center console and two shift paddles on the
steering wheel.
It offers you the following functions:
>Optional manual or automatic operation:
Sequential mode or Drive mode
>You have a choice of two driving programs:
Normal or Sport, refer to Dynamic Driving
Control page60
>Automatic downshifting and prevention of
incorrect shifting even in sequential opera-
tion
>Acceleration assistant, refer to page61.
Selector lever positions
The current selector lever position is displayed
on the center console.
>R: Reverse gear
>N: Neutral>One-touch functions for Sequential mode:
+: manual upshifting
–: manual downshifting
>D: activate/deactivate the Drive mode
The transmission automatically shifts
into N if the driver's door is opened with
the engine running and neither the pedals, the
shift paddles nor the selector lever are oper-
ated.
This is indicated by an acoustic signal and the
flashing display N in the instrument cluster.<
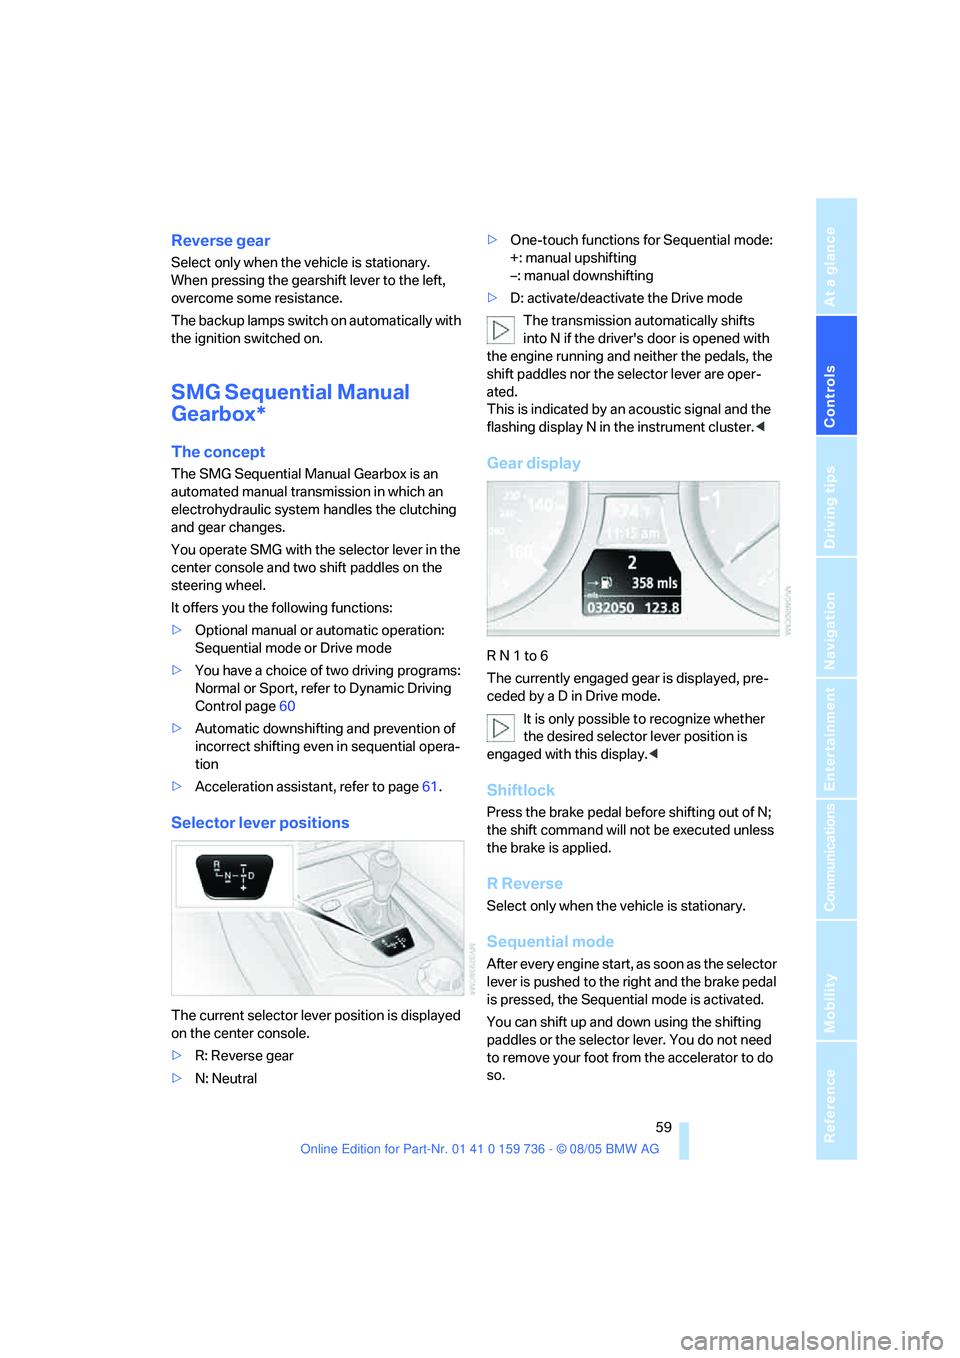
Gear display
R N 1 to 6
The currently engaged gear is displayed, pre-
ceded by a D in Drive mode.
It is only possible to recognize whether
the desired selector lever position is
engaged with this display.<
Shiftlock
Press the brake pedal before shifting out of N;
the shift command will not be executed unless
the brake is applied.
R Reverse
Select only when the vehicle is stationary.
Sequential mode
After every engine start, as soon as the selector
lever is pushed to the right and the brake pedal
is pressed, the Sequential mode is activated.
You can shift up and down using the shifting
paddles or the selector lever. You do not need
to remove your foot from the accelerator to do
so.
Page 62 of 248
Controls
61Reference
At a glance
Driving tips
Communications
Navigation
Entertainment
Mobility
Acceleration assistant
The acceleration assistant enables optimized
vehicle acceleration at racing car level on road
surfaces with good adhesion when starting off.
Do not use the acceleration assistant too
often, otherwise components will wear
prematurely.<
1.Activate the Dynamic Traction Control.
2.Deactivate DSC, refer to page85.
3.Quickly press accelerator pedal all the way
down: kick-down. The ideal starting-off
engine speed is set.
To maintain the vehicle stability, reacti-
vate DSC afterward.<
Automatic transmission with
Steptronic*
In addition to fully automatic operation, you can
also manually shift with the Steptronic, refer to
page62.
Selector lever positions
P R N D M/S + –
Displays in instrument cluster
P R N D DS M1 to M6
The selector lever position is indicated, and in
the manual mode the gear currently engaged.
Changing selector lever positions
>Only move the selector lever from posi-
tion P when the engine is running: interlock.>With the vehicle stopped, press the brake
before shifting out of P or N, otherwise the
selector lever is blocked: shiftlock.
To prevent the vehicle from creeping
after you select a driving position,
maintain pressure on the brake pedal until
you are ready to start.
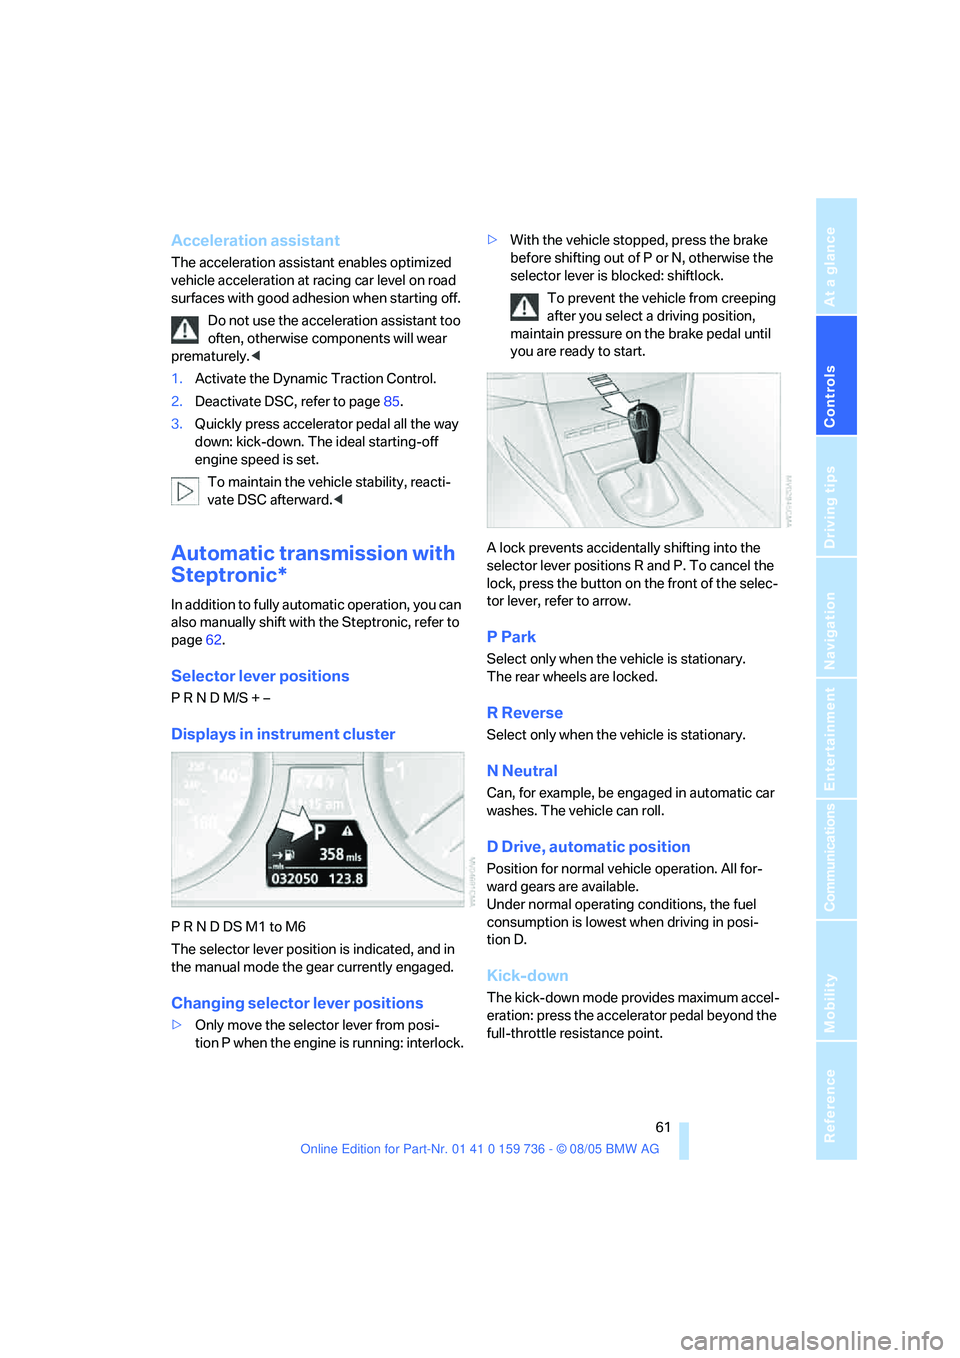
A lock prevents accidentally shifting into the
selector lever positions R and P. To cancel the
lock, press the button on the front of the selec-
tor lever, refer to arrow.
P Park
Select only when the vehicle is stationary.
The rear wheels are locked.
R Reverse
Select only when the vehicle is stationary.
N Neutral
Can, for example, be engaged in automatic car
washes. The vehicle can roll.
D Drive, automatic position
Position for normal vehicle operation. All for-
ward gears are available.
Under normal operating conditions, the fuel
consumption is lowest when driving in posi-
tion D.
Kick-down
The kick-down mode provides maximum accel-
eration: press the accelerator pedal beyond the
full-throttle resistance point.
Page 63 of 248
Driving
62
Sport program and
manual operation M/S
Move selector lever from position D toward the
left into the M/S shifting slot:
The sport program is activated and DS appears
in the instrument cluster. This position is rec-
ommended for a performance-oriented driving
style.
When the selector lever is pressed forward or
back, the manual mode is activated and the
Steptronic shifts the gear. The instrument clus-
ter shows M1 through M6.
Upshifts and downshifts are executed only
when they will result in a plausible combination
of engine and vehicle speed; thus, for example,
a downshift that would cause the engine to
overrev will not be executed by the system. The
selected gear appears briefly in the instrument
cluster, followed by the current gear.
To use the automatic function again, move the
selector lever to the right into position D.
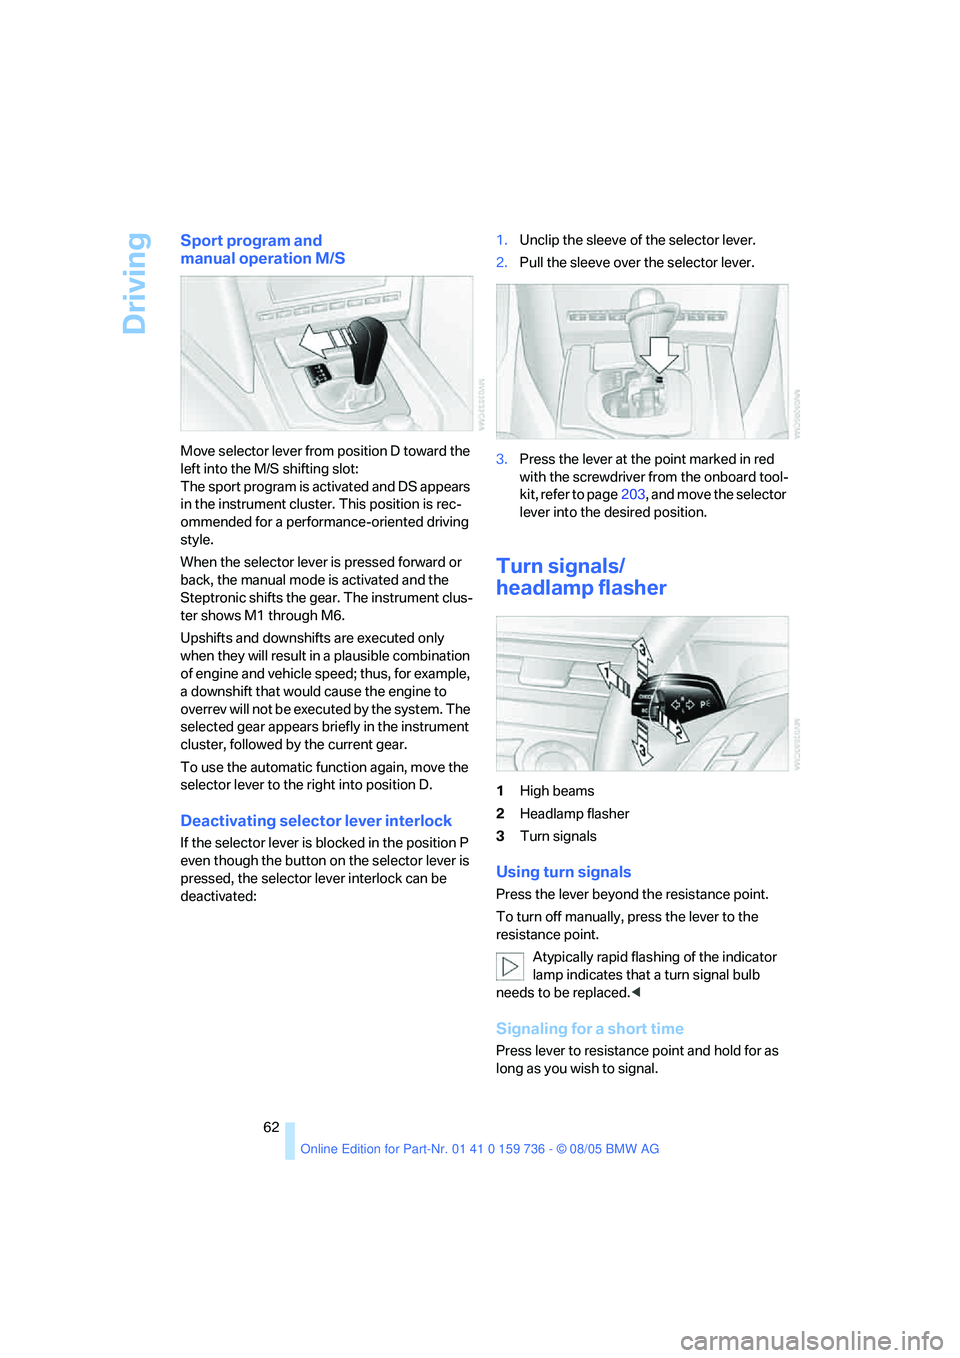
Deactivating selector lever interlock
If the selector lever is blocked in the position P
even though the button on the selector lever is
pressed, the selector lever interlock can be
deactivated:1.Unclip the sleeve of the selector lever.
2.Pull the sleeve over the selector lever.
3.Press the lever at the point marked in red
with the screwdriver from the onboard tool-
kit, refer to page203, and move the selector
lever into the desired position.
Turn signals/
headlamp flasher
1High beams
2Headlamp flasher
3Turn signals
Using turn signals
Press the lever beyond the resistance point.
To turn off manually, press the lever to the
resistance point.
Atypically rapid flashing of the indicator
lamp indicates that a turn signal bulb
needs to be replaced.<
Signaling for a short time
Press lever to resistance point and hold for as
long as you wish to signal.