Section 6 BMW 528i 1998 E39 Owner's Guide
[x] Cancel search | Manufacturer: BMW, Model Year: 1998, Model line: 528i, Model: BMW 528i 1998 E39Pages: 1002
Page 833 of 1002
Downloaded from www.Manualslib.com manuals search engine
Trunk Lid, ~ail~atel
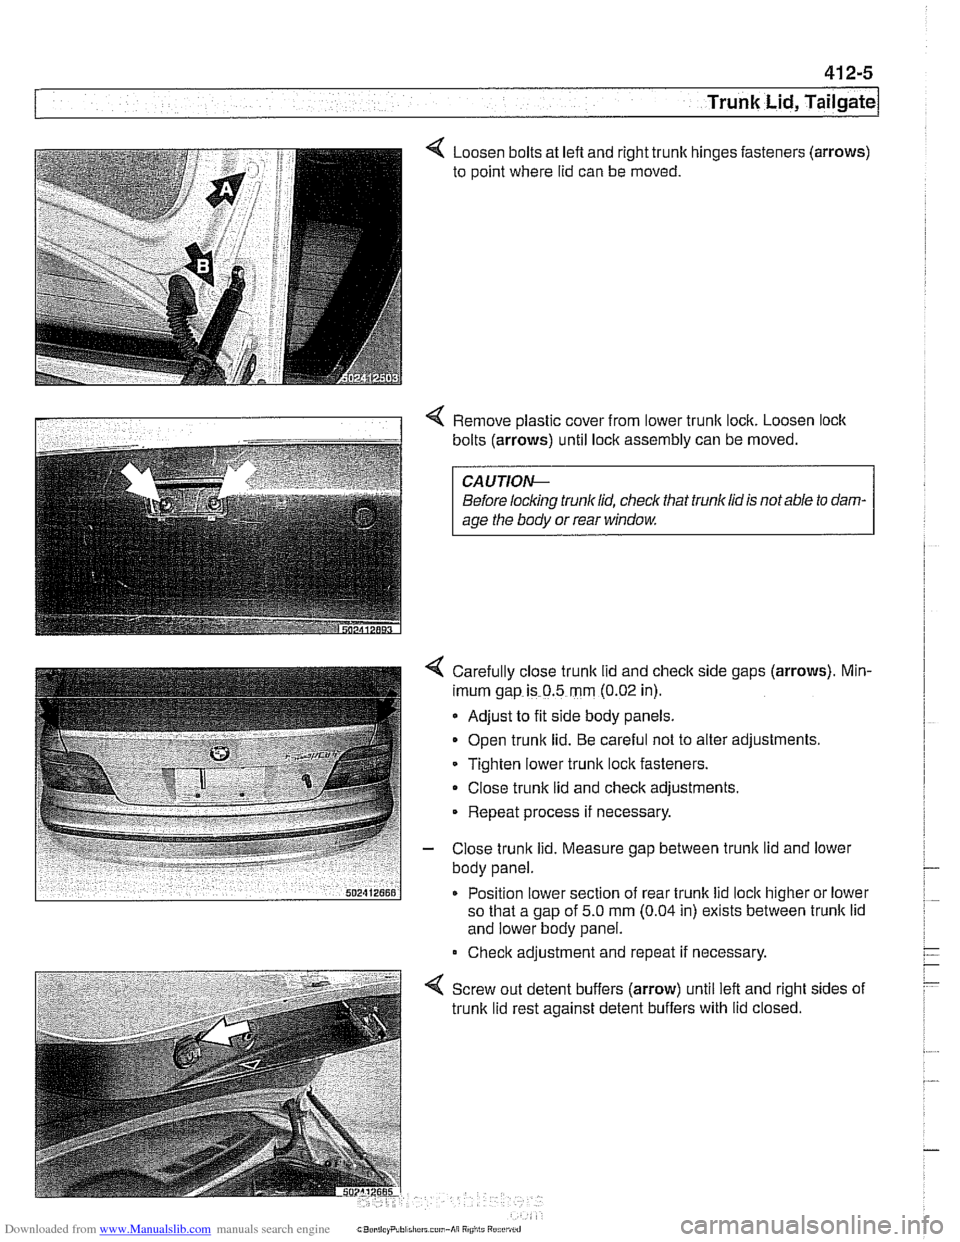
Loosen bolts at lefl and right trunk
to point where lid can be moved. hinges
fasteners (arrows)
4 Remove plastic cover from lower trunlc lock. Loosen lock
bolts (arrows) until lock assembly can be moved.
CAUTION-
Before locking trunklid, check that trunk lid is not able to dam-
age the body or rear window.
4 Carefully close trunk lid and check side gaps (arrows). Min-
imum gap is 0.5 mm (0.02 in).
Adjust to fit side body panels.
Open trunlc lid.
Be careful not to alter adjustments.
Tighten lower trunlc lock fasteners.
Close trunk lid and check adjustments.
Repeat process if necessary.
- Close trunk lid. Measure gap between trunlc lid and lower
body panel.
Position lower section of rear trunlc lid
lock higher or lower
so that a
ciao of 5.0 mm (0.04 in) exists between trunlc lid
and
lowe;body panel. '
Check adjustment and repeat if necessary,
4 Screw out detent buffers (arrow) until left and right sides of
trunk lid rest against detent buffers with lid closed.
Page 842 of 1002
Downloaded from www.Manualslib.com manuals search engine
41 2-1 4
l~runk Lid, Tailgate
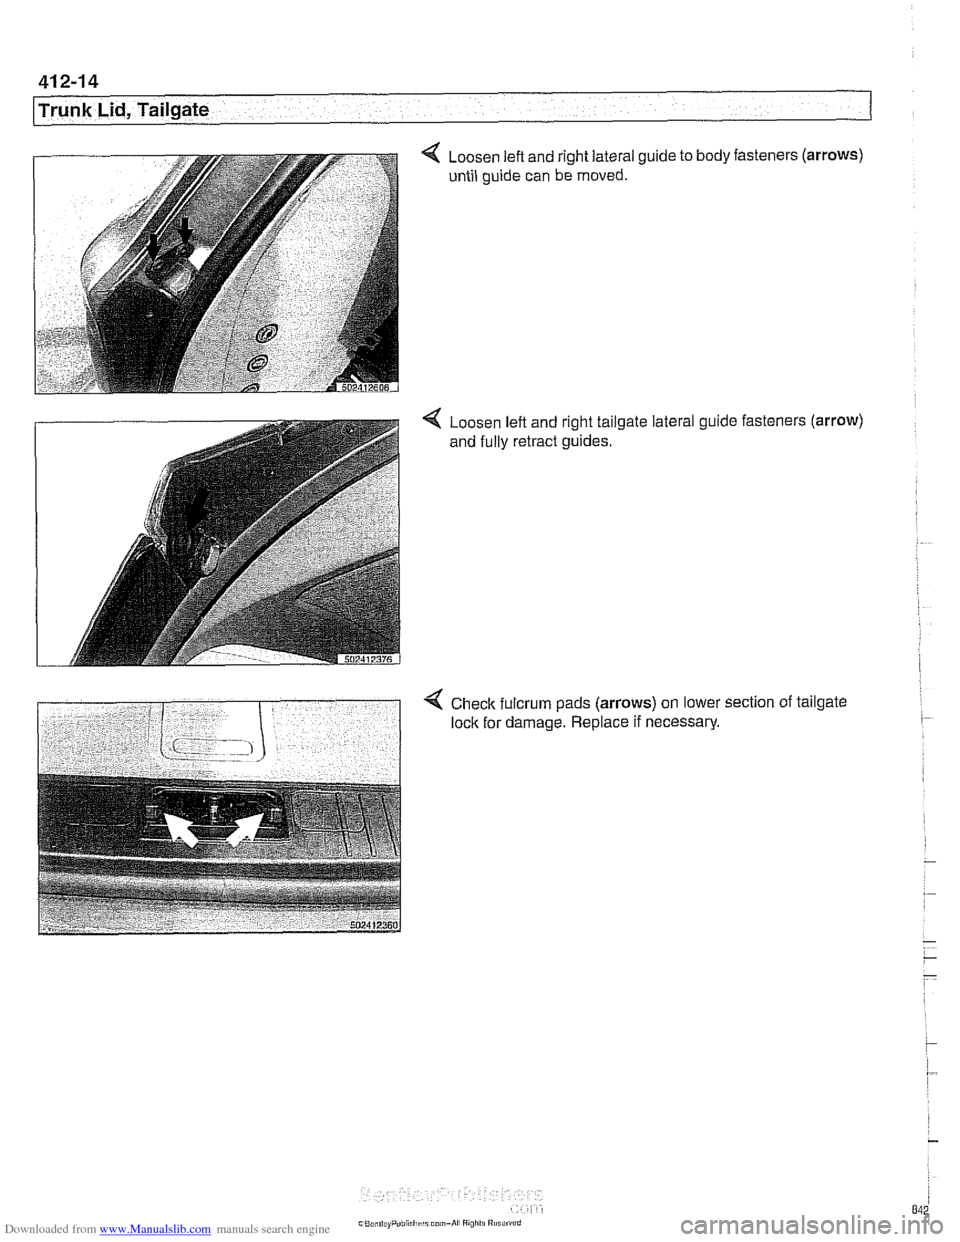
< Loosen left and right lateral guide to body fasteners (arrows)
until guide can be moved.
4 Loosen left and right tailgate lateral guide fasteners (arrow)
and fully retract guides.
Check fulcrum pads (arrows) on lower section of tailgate
lock for damage. Replace if necessary.
Page 843 of 1002
Downloaded from www.Manualslib.com manuals search engine
Trunk Lid, ~ail~atel
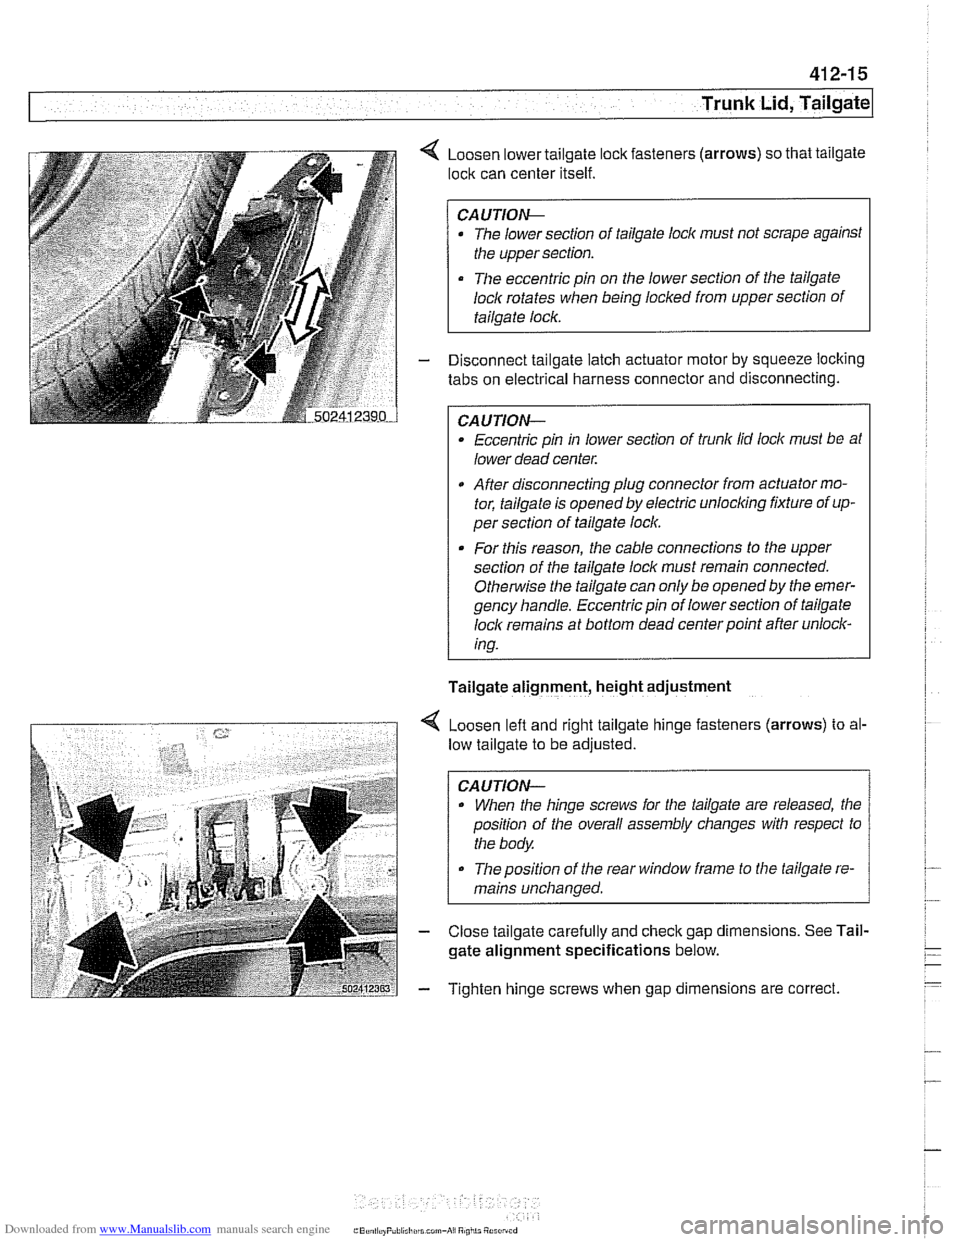
4 Loosen lower tailgate lock fasteners (arrows) so that tailgate
lock can center itself.
CAUTION-
The lower section of tailgate lock must not scrape against
the upper section.
The eccentric pin on the lower section of the tailgate
loclc rotates
when being locked from upper section of
tailgate lock.
- Disconnect tailgate latch actuator motor by squeeze locking
tabs on electrical harness connector and disconnecting.
CAUTION-
Eccentric pin in lower section of trunk lid lock must be at
lower dead center.
After disconnecting plug connector from actuator mo-
tor, tailgate is opened by electric
unloclcing fixture of up-
per section of tailgate loclc.
. For this reason, the cable connections to the upper
section of the tailgate loclc must remain connected.
Othe~tise the tailgate can only be opened by the emer-
gency handle. Eccentric pin of lower section of tailgate
loclc remains at bottom dead center point after unlock-
ing.
Tailgate alignment, height adjustment
4 Loosen left and right tailgate hinge fasteners (arrows) to al-
low tailgate to be adjusted.
CAUTION-
. When the hinge screws for the tailgate are released, the
position of the overall assembly changes with respect to
the body.
The position of the rear window frame to the tailgate re-
mains unchanged.
- Close tailgate carefully and check gap dimensions. See Tail-
gate alignment specifications below.
- Tighten hinge screws when gap dimensions are correct.
Page 847 of 1002
Downloaded from www.Manualslib.com manuals search engine
Trunk Lid, Tailgate
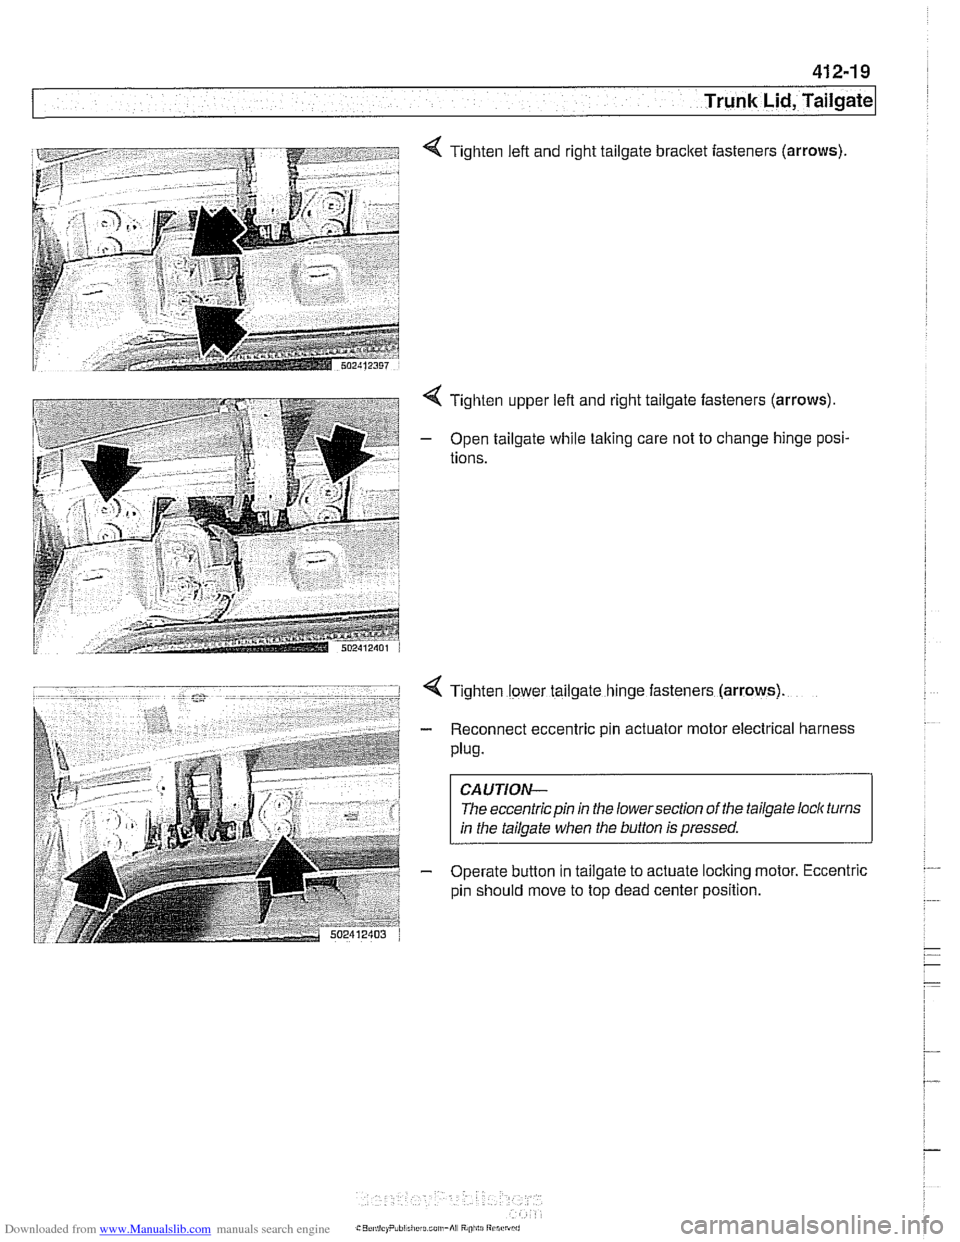
4 Tighten left and right tailgate bracket iasteners (arrows)
4 Tighten upper left and right tailgate fasteners (arrows).
- Open tailgate while taking care not to change hinge posi-
tions.
4 Tighten lower tailgate hinge fasteners (arrows)
- Reconnect eccentric pin actuator motor electrical harness
Plug.
CAUTION-
The eccentric pin in the lowersection of the tailgate loclc turns
in the tailgate when the button is pressed.
- Operate button in tailgate to actuate loclting motor. Eccentric
pin should move to top dead center position.
Page 848 of 1002
Downloaded from www.Manualslib.com manuals search engine
Trunk Lid, Tailgate
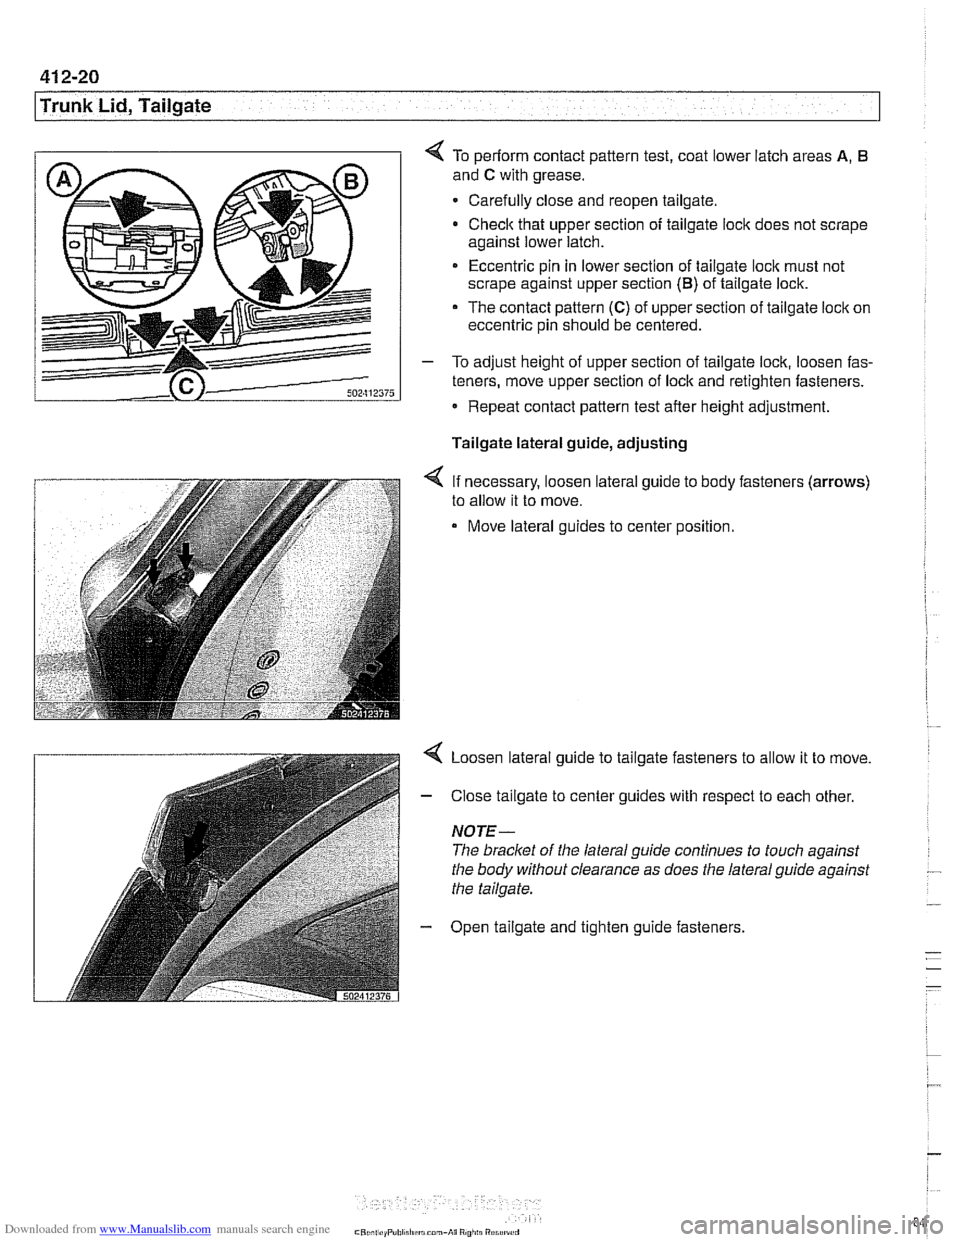
4 To periorm contact pattern test, coat lower latch areas A, 6
and C with grease.
Carefully close and reopen tailgate.
Check that upper section of tailgate lock does not scrape
against lower latch.
* Eccentric pin in lower section of tailgate loclc must not
scrape against upper section
(B) of tailgate lock.
The contact pattern (C) of upper section of tailgate lock on
eccentric pin should be centered.
- To adjust height of upper section of tailgate lock, loosen fas-
teners, move upper section of lock and retighten fasteners.
Repeat contact pattern test after height adjustment.
Tailgate lateral guide, adjusting
< If necessary, loosen lateral guide to body fasteners (arrows)
to allow it to move.
Move lateral guides to center position.
< Loosen lateral guide to tailgate fasteners to allow it to move.
- Close tailgate to center guides with respect to each other.
NOTE-
The bracket of the lateral guide continues to touch against
the body without clearance as does the lateral guide against
the tailgate.
- Open tailgate and tighten guide fasteners.
Page 849 of 1002
Downloaded from www.Manualslib.com manuals search engine
41 2-21
Trunk Lid, ~ailaatel
Rear window, adjusting
NOTE- Three versions of rear window are used on
Sport Wagon
models.
Tailgate must be correctly adjusted before rear window ad-
justments are made.
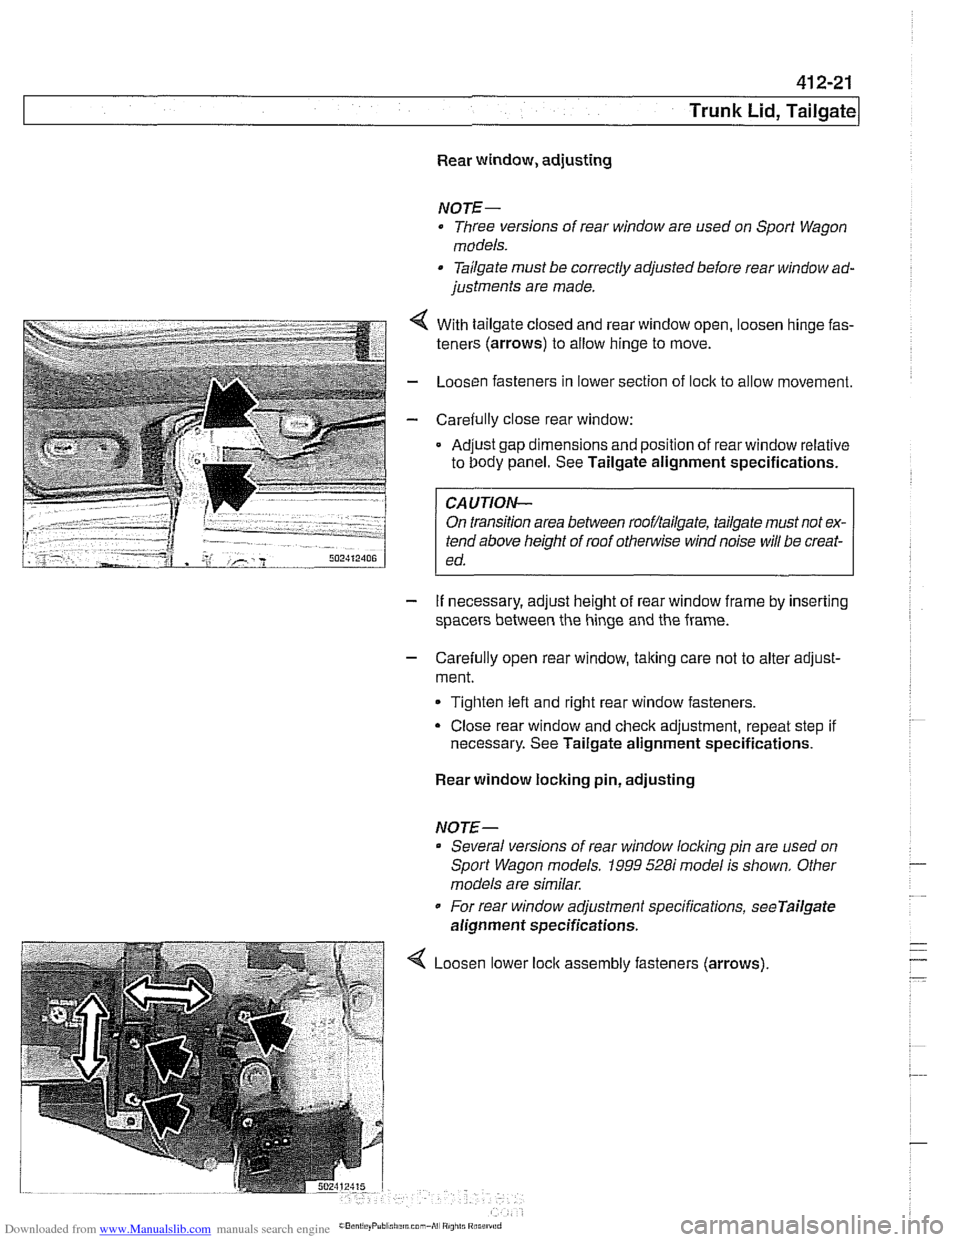
- . . . . . .. .. 4 With tailgate closeo ano rear window open, oosen ninge fas-
teners (arrows) to allow ninge to move.
- LoosL'n fasteners n lower section of ock to al ow movement.
- Care& ly c ose rear window:
Ad.~st gap dmensions and poston of rear window relative
to Oody panel. See Tailgate alignment specifications. .
FA-UTION- I
On transition area between rooflailgate, tailgate must not ex-
tend above height of roof
othe~lise wind noise will be creat-
ed.
- If necessary, adjust height of rear window frame by inserting
spacers between the hinge and the frame.
- Carefully open rear window, taking care not to alter adjust-
ment.
Tighten left and right rear window fasteners.
Close rear window and check adjustment, repeat step if
necessary. See Tailgate alignment specifications.
Rear window locking pin, adjusting
NOTE-- Several versions of rear window
locldng pin are used on
Sport Wagon models.
1999 528i model is shown. Other
models are similar.
For rear window adjustment specifications,
seeTailgate
alignment specifications.
Loosen lower assembly fasteners (arrows)
Page 850 of 1002
Downloaded from www.Manualslib.com manuals search engine
41 2-22
1 Trunk Lid, Tailgate
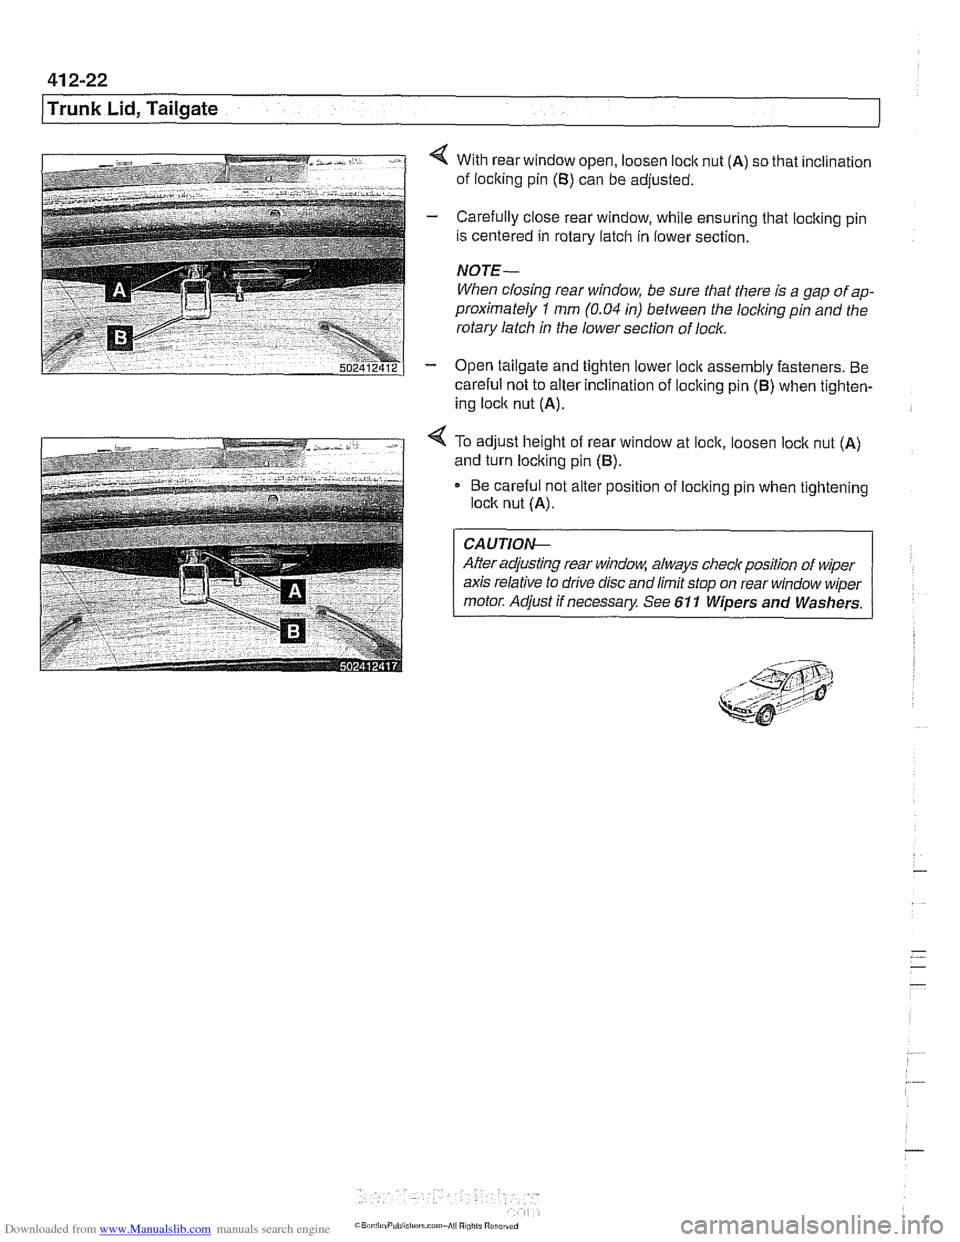
4 With rear window open, loosen loclc nut (A) so that inclination
of loclting pin
(B) can be adjusted.
- Carefully close rear window, while ensuring that locking pin
is centered in rotary latch in lower section.
NOTE-
When closing rear window, be sure that there is a gap of ap-
proximately
1 mm (0.04 in) between the locliing pin and the
rotary latch in the lower section of lock.
- Open tailgate and tighten lower loclc assembly fasteners. Be
careful not to alter inclination of loclting pin
(B) when tighten-
ing loclc nut
(A).
4 To adjust height of rear window at lock, loosen loclc nut (A)
and turn locking pin (B).
Be careful not alter position of loclting pin when tightening
lock nut
(A).
CA UTIOG
After adjusting rear window, always checlr position of wiper
axis relative to drive disc and limit stop on rear window wiper
motor. Adjust if necessary See 611 Wipers and Washers.
Page 885 of 1002
Downloaded from www.Manualslib.com manuals search engine
Interior Trim
The E39 dashboard assembly includes the instrument clus-
ter, passenger side
airbag, glove compartment, fuse and re-
lay panel, radio. IHKA control panel oron-board monitor (if
equipped with GPS). The dash is made up of an upper and
lower sections. The lower section must be remove before the
upper section can be removed.
Dashboard removal is a complex operation. Read the proce-
dures through before starting work.
Lower dash panel assembly, removing and
installing
- Disconnect negative (-) cable from battery and cover termi-
nal with
insulating material.
--7
CAUTION-
Prior to disconnecting the battery, read the battery discon-
nectioncautionsgiven atthe irontin001 General Warnings
and Cautions.
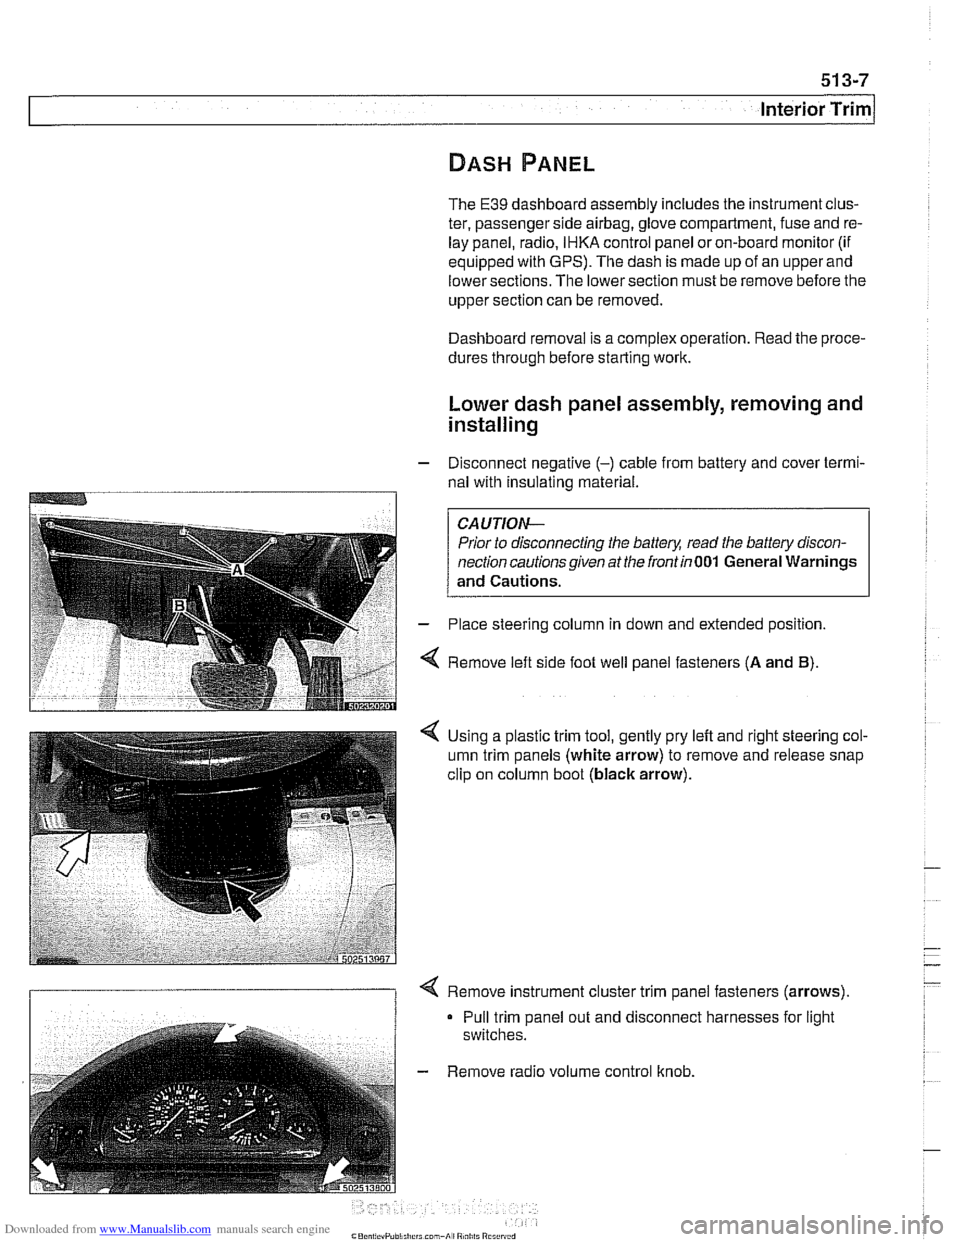
- Place steering column in down and extended position.
4 Remove left side foot well panel fasteners (A and B).
< Using a plastic trim tool, gently pry left and right steering col-
umn trim panels (white arrow) to remove and release snap
clip on column boot
(black arrow).
I 1 < Remove instrument cluster trim panel fasteners (arrows).
Pull trim panel out and disconnect harnesses for light
switches.
- Remove radio volume control knob.
Page 896 of 1002
Downloaded from www.Manualslib.com manuals search engine
51 5-2
/Central Locking and Anti-Theft
This section covers repair information for door, trunk and car-
go compartment locks, central locking, electronic
immob~liza-
tion (EWS) and anti-theft alarm (DWA).
€39 cars are equipped with sophisticated self-diagnostic elec-
trical systems. When experiencing malfunctions relating to
central locking. EWS or anti-theft systems, start the diagnosis
process using the
BMW service tester DIS, GT 1, MoDiC or
equivalent scan tool. An advanced diagnostic scan tool can
usually pinpoint electrical faults quickly and safely.
Additional electrical information can be found in:
610 Electrical Component Locations
ELE Electrical Wiring Diagrams
Central locking in E39 vehicles controls the door
locks, trunk
or tailgate lock and fuel filler flap lock. The control module for
the Central Body Electronics system (ZKE
Ill), lknown as the
General Module (GM
Ill), controls central locking.
ZKE
Ill manages the following central locking related func-
tions:
Central locking
* Keyless entry
Key memory
Power trunk release
Electric opening of tailgate
DWA alarm system
Diagnosis
General Module
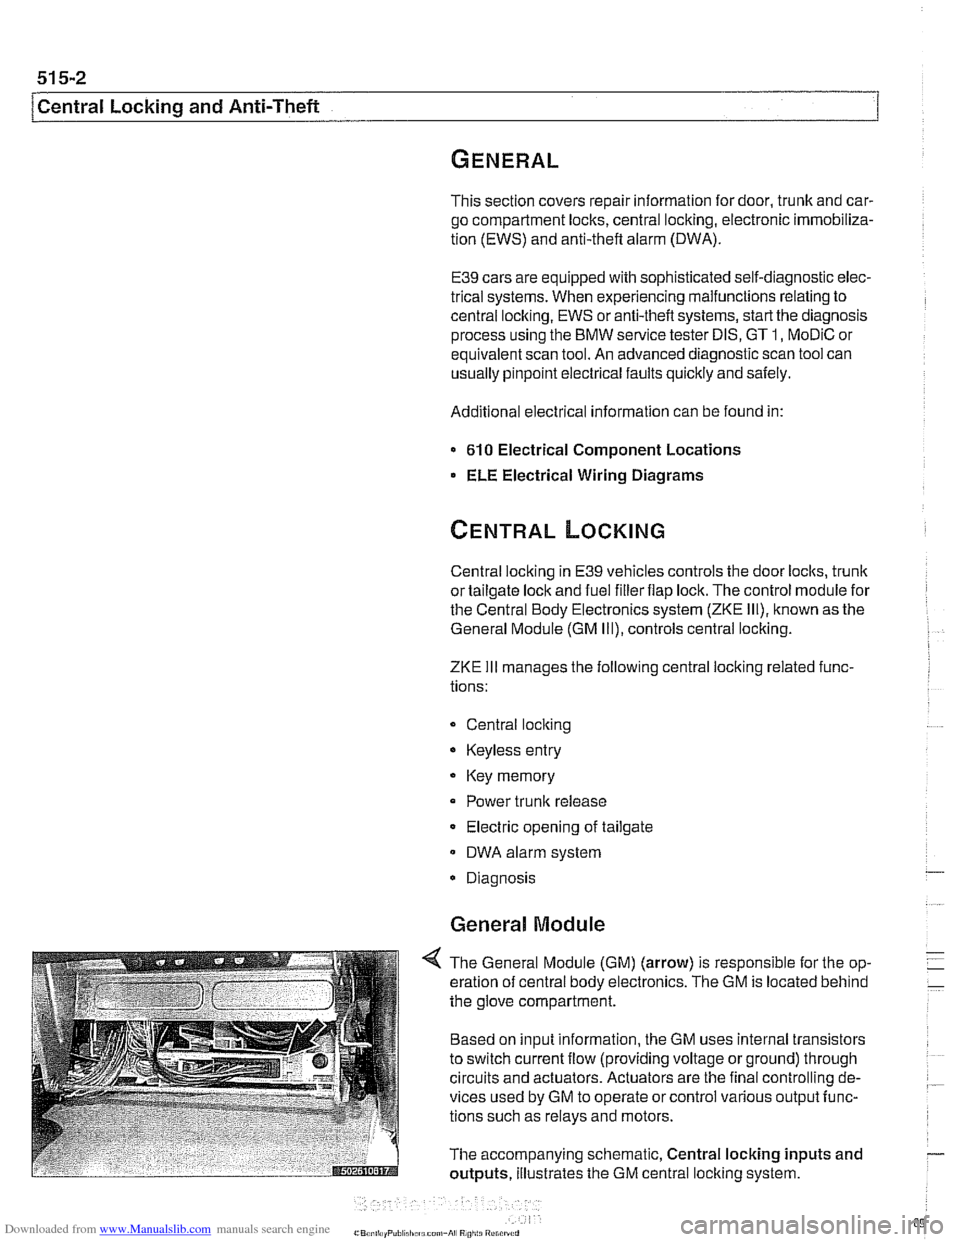
4 The General Module (GM) (arrow) is responsible for the op-
eration of central body electronics. The GM is located behind
the glove compartment.
Based on input information, the GM uses internal transistors
to switch current flow (providing voltage or ground) through
circuits and actuators. Actuators are the final controlling de-
vices used by GM to operate or control various output func-
tions such as relays and motors.
The accompanying schematic, Central locking inputs and
outputs, illustrates the GM central locking system.
Page 899 of 1002
Downloaded from www.Manualslib.com manuals search engine
Central Locking and Anti-Theft
DWA alarm
The DWA alarm system is
armedldisarmed when thevehicle
is locked / unlocked from either the door or trunk.
Convenience closing
I opening
The windows and sun roof can be closed or opened by hold-
ing the key in the
loclc I unlock position.
Crash sensor
The crash sensor is located in the left front
kick panel. It func-
tions by unlocking all doors in the event of an accident.
NOTE-
Continuous and repeated locliing / unlocking may cause
timedarrest of
the locliing system. When activated, the timed
arrest lasts for two minutes. The timed arrest does not affect
the crash sensor
unlocliing the doors in case of an accident.
Door locks
The driver's door lock location is the only point outside of the
vehicle where the ltey can mechanically control all of the cen-
tral locking system functions.
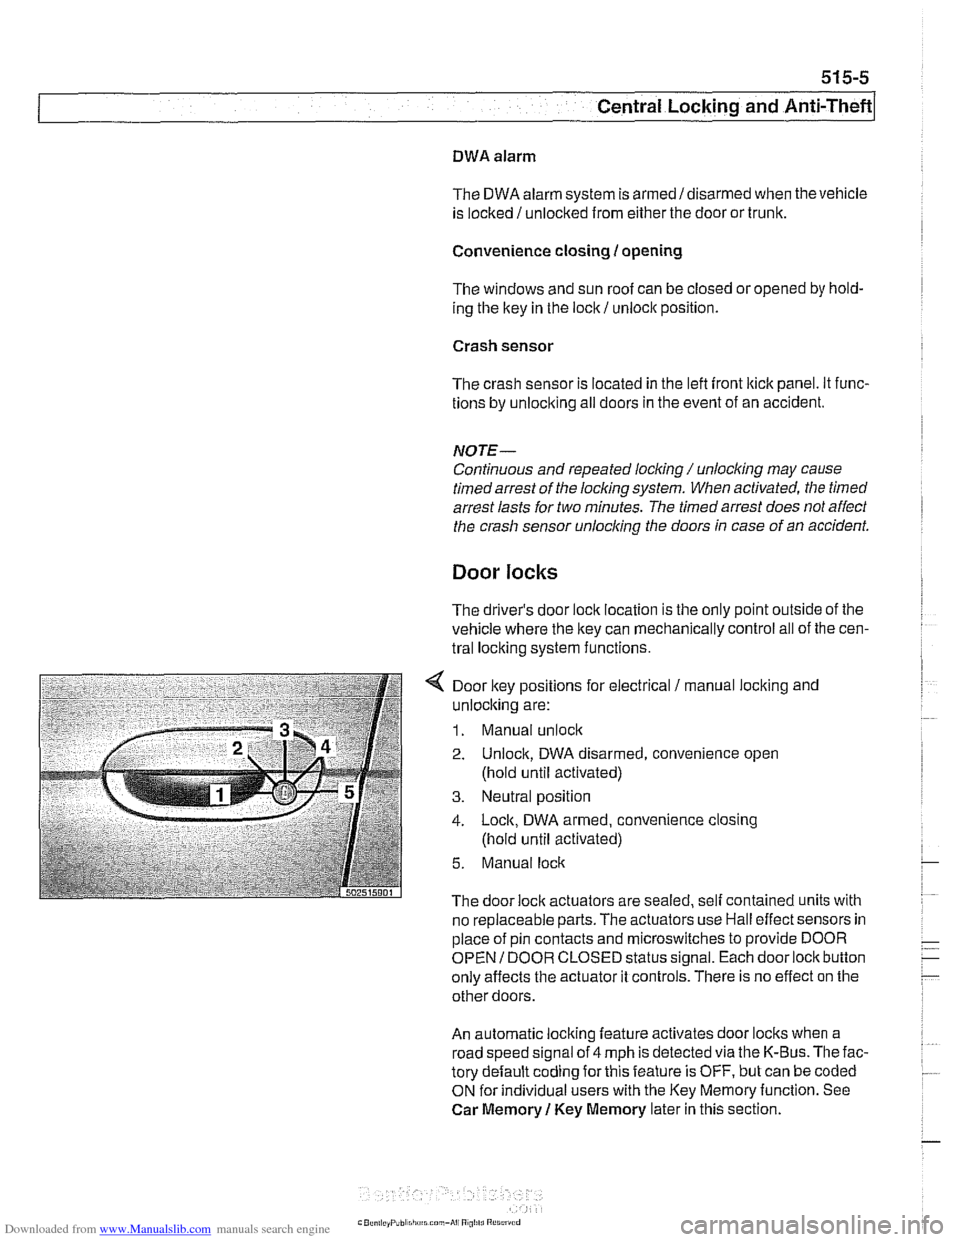
4 Door key positions for electrical / manual loclting and
unlocking are:
1. Manual unlock
2. Unlock, DWA disarmed, convenience open
(hold until activated)
3. Neutral position
4. Lock, DWA armed, convenience closing
(hold until activated)
5. Manual lock
The door lock actuators are sealed. self contained units with
no replaceable parts. The
actuators use Hall effect sensors in
place of pin contacts and microswitches to provide DOOR
OPEN
I DOOR CLOSED status signal. Each door lock button
only affects the actuator it controls. There is no effect on the
other doors.
An automatic locking feature activates door locks when a
road speed signal of 4 mph is detected via the K-Bus. The fac-
tory default coding for this feature is OFF, but can be coded
ON for individual users with the Key Memoryfunction. See
Car Memory
1 Key Memory later in this section.