Engine compartment BMW 528i 1998 E39 Manual Online
[x] Cancel search | Manufacturer: BMW, Model Year: 1998, Model line: 528i, Model: BMW 528i 1998 E39Pages: 1002
Page 800 of 1002
Downloaded from www.Manualslib.com manuals search engine
.
I Body-General 1
Rear wiper system
The rear wiper assembly on the E39 Sport Wagon is a self-
contained unit. The control electronics are integrated into the
gear drive that is part of the motor assembly. The control elec-
tronics contain two hall sensors, one
forthe park position and
one
forthe end stop or to signal reverse direction of the wiper
motor.
-
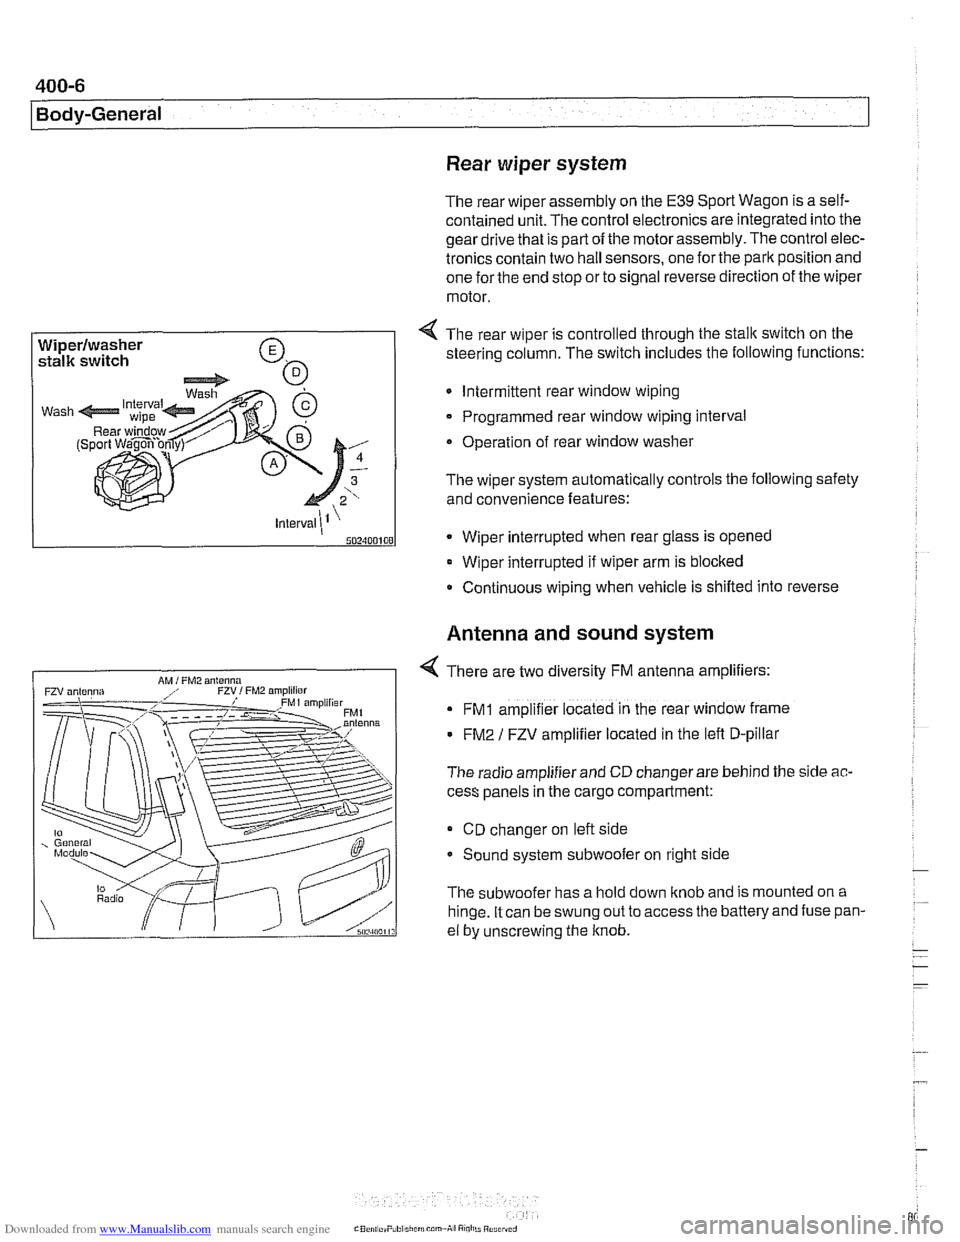
Wiperlwasher
stalk switch
/ 4 - 3
502400100
4 The rear wiper is controlled through the stalk switch on the
steering column. The switch includes the following functions:
Intermittent rear window wiping
Programmed rear window wiping interval
Operation of rear window washer
The wiper system automatically controls the following safety
and convenience features:
* Wiper interrupted when rear glass is opened
Wiper interrupted if wiper arm is blocked
Continuous wiping when vehicle is shifled into reverse
Antenna and sound system
4 There are two diversity FM antenna amplifiers:
FMI amplifier located in the rear window frame
FM2 / FZV amplifier located in the lefl D-pillar
The radio amplifier and CD changer are behind the side
ac-
cess panels in the cargo compartment:
CD changer on lefl side
Sound system subwoofer on right side
The subwoofer has a hold down knob and is mounted on a
hinge. It can be swung out to access
the batteryand fuse pan-
el by unscrewing the knob.
Page 804 of 1002
Downloaded from www.Manualslib.com manuals search engine
400-1 0
Body-General
Seats
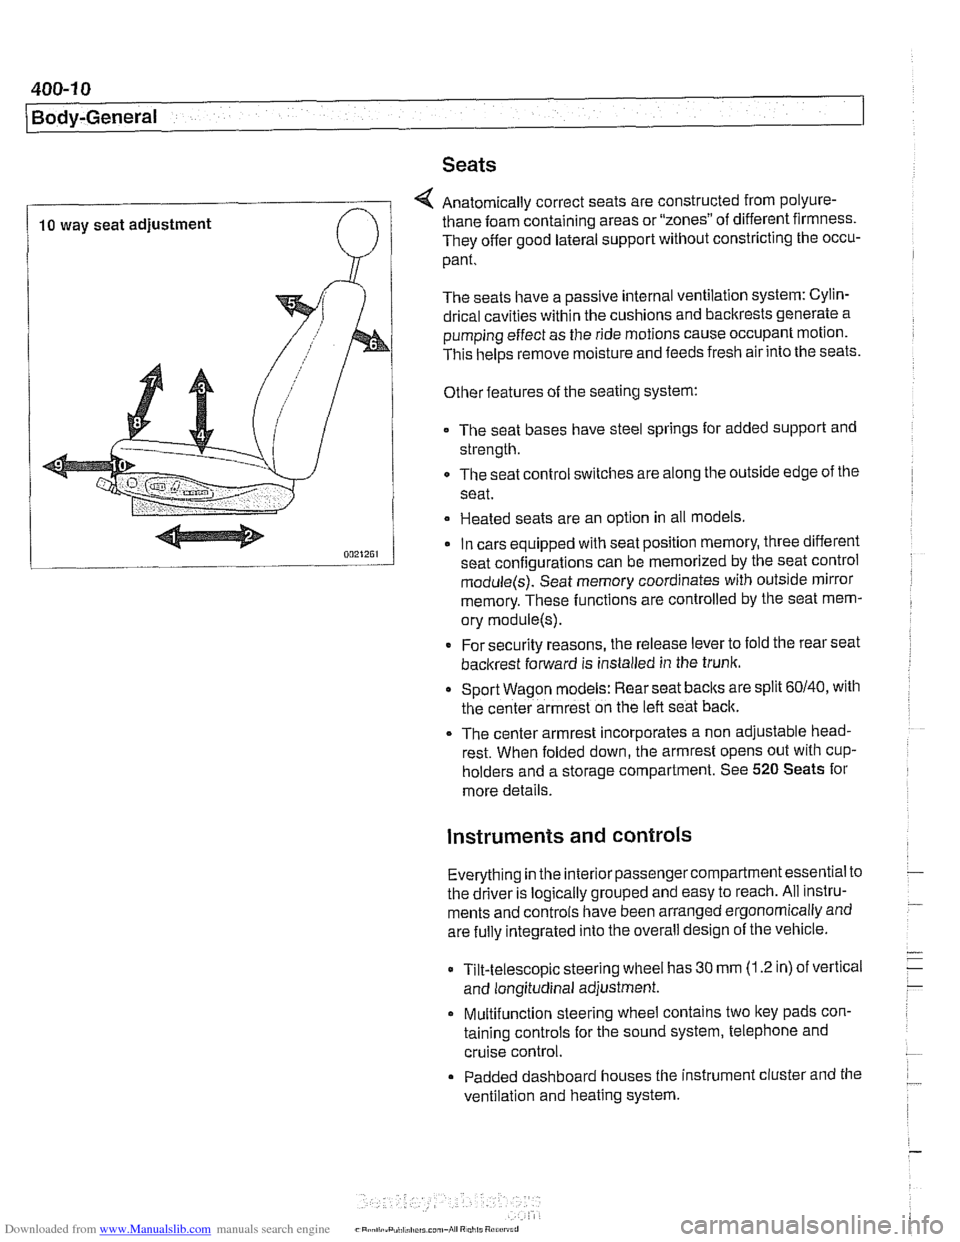
4 Anatomically correct seats are constructed from polyure-
10 way seat adjustment thane foam
containing areas or "zones" of different firmness.
They offer good lateral support without constricting the occu-
pant.
The seats have a passive internal ventilation system: Cylin-
drical cavities within the cushions and backrests generate a
pumping effect as the ride motions cause occupant motion.
This
helps remove moisture and feeds fresh air into the seats.
Other features of the seating system:
The seat bases have steel springs for added support and
strength.
The seat control switches are along the outside edge of
the
seat.
Heated seats are an option in all models
In cars equipped with seat position memory, three different
seat confiaurations can be memorized by the seat control
module(s): Seat memory coordinates with outside mirror
memory. These functions are controlled by the seat mem-
ory
module(s).
* For security reasons, the release lever to fold the rear seat
backrest forward is installed in the trunk.
Sport Wagon models: Rear seat
baclts are split 60140, with
the center armrest on the left seat back.
The center armrest incorporates a non adjustable head-
rest. When folded down, the armrest opens out with
cup-
holders and a storage compartment. See 520 Seats for
more details.
instruments and controls
Everything in the interior passengercompartment essential to
the driver is logically grouped and easy to reach. All instru-
ments and controls have been arranged ergonomically and
are fully integrated into the overall design of the vehicle.
Tilt-telescopic steering wheel has
30 mm (1.2 in) of vertical
and longitudinal adjustment.
Multifunction steering wheel contains two
ltey pads con-
taining controls for the sound system, telephone and
cruise control.
Padded dashboard houses the instrument cluster and the
ventilation and heating system.
Page 806 of 1002
Downloaded from www.Manualslib.com manuals search engine
400-12
I Body-General
HEATING AND AIR ~ONDITIONING
(I H KA)
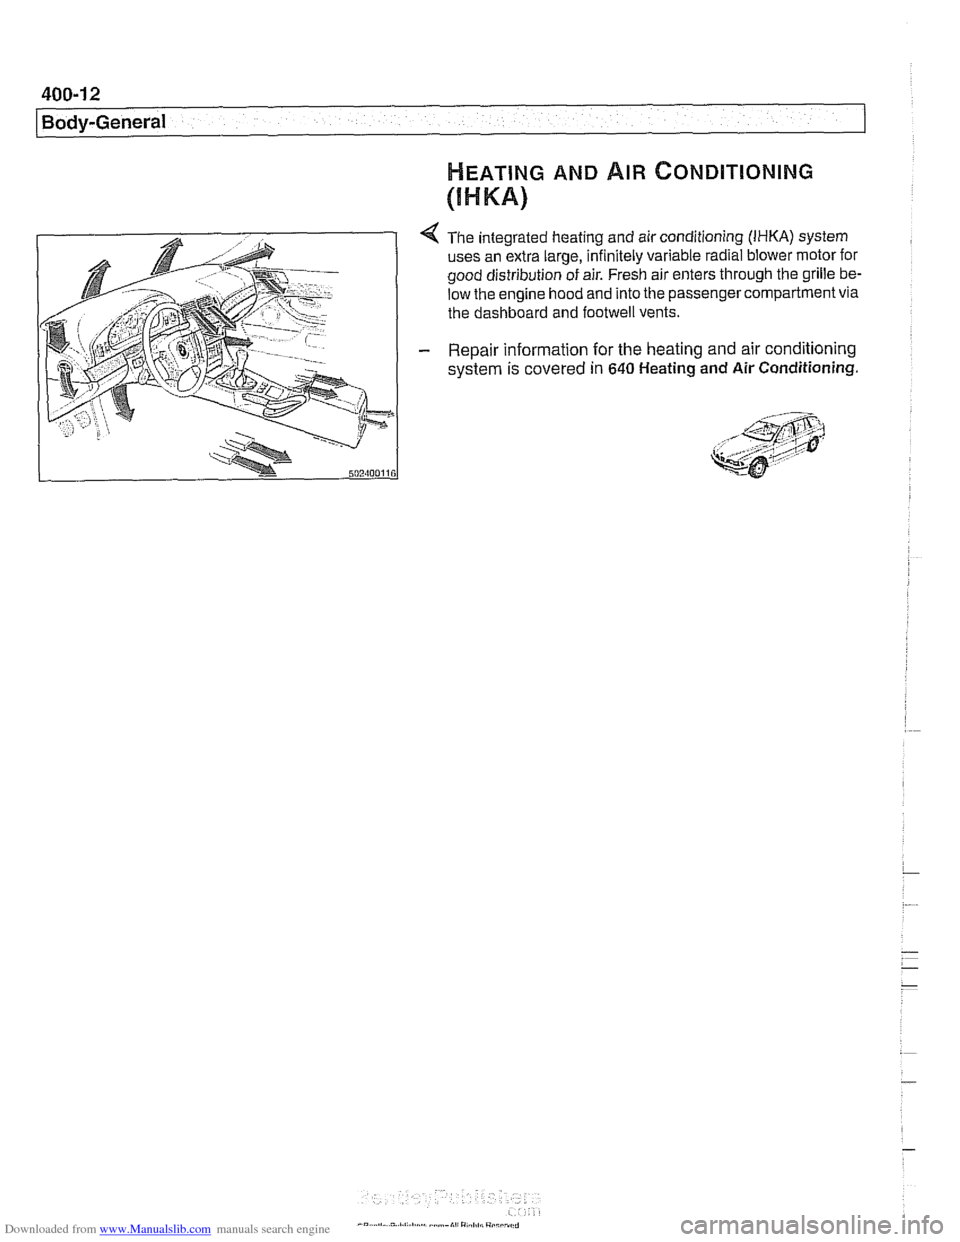
4 The integrated heating and air conditioning (IHKA) system
uses an extra large, infinitely variable radial blower motor for
good distribution of air. Fresh air enters through the grille
be.
low the engine hood and into the passenger compartment via
the dashboard and
footwell vents.
- Repair information for the heating and air conditioning
system is covered
in 640 Heating and Air Conditioning.
Page 834 of 1002
Downloaded from www.Manualslib.com manuals search engine
. .- -
l~runk Lid, Tailgate
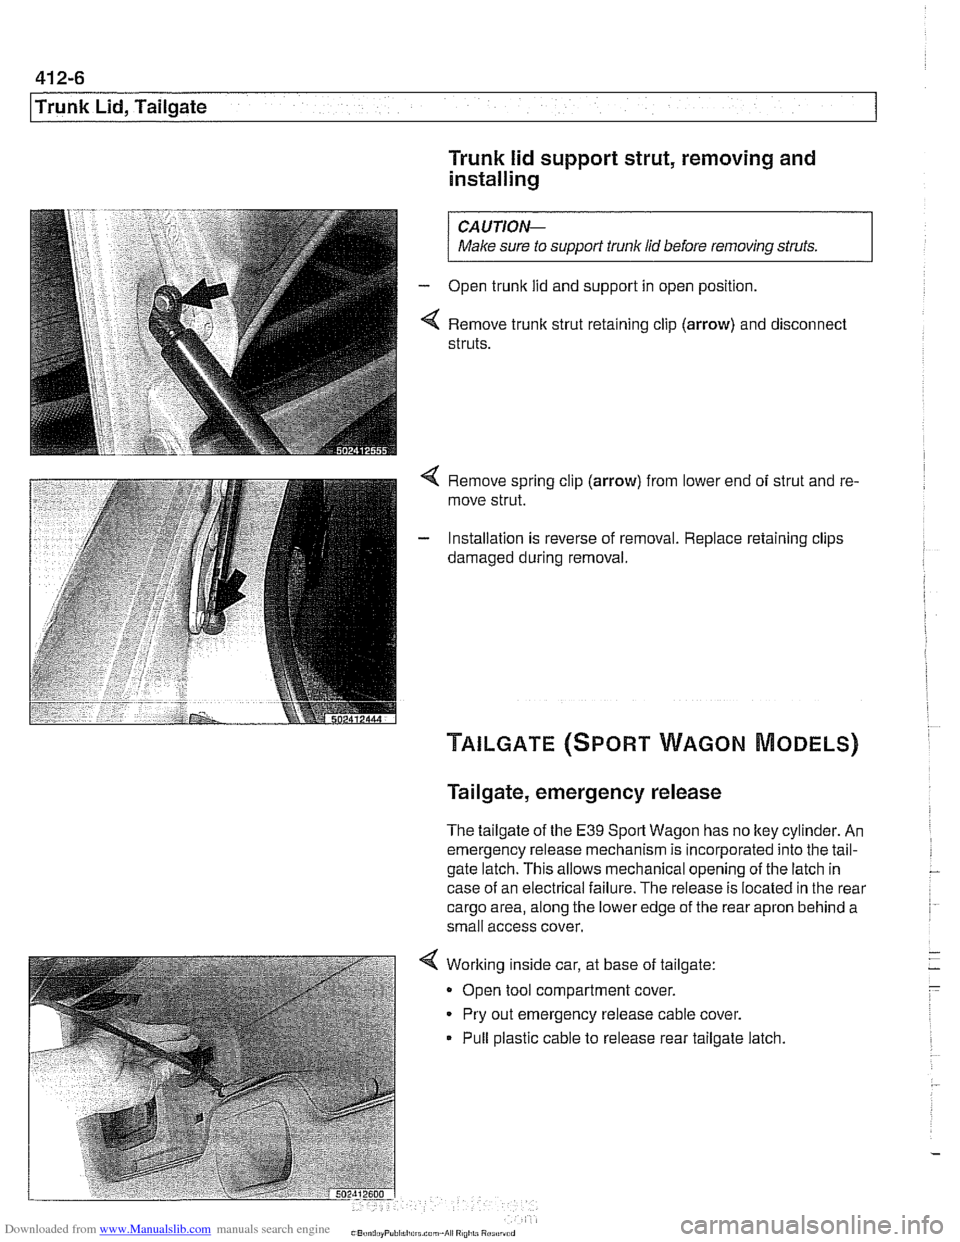
Trunk lid support strut, removing and
installing
/ Make sure to supporf trunk lid before removing struts. I
Open trunk lid and support in open position.
Remove trunk strut retaining clip
(arrow) and disconnect
struts.
4 Remove spring clip (arrow) from lower end of strut and re-
move strut.
- Installation is reverse of removal. Replace retaining clips
damaged during removal.
Tailgate, emergency release
The tailgate of the E39 Sport Wagon has no ltey cylinder. An
emergency release mechanism is incorporated into the tail-
gate latch. This allows mechanical opening of the latch in
case of an electrical failure. The release is located in the rear
cargo area, along the lower edge of the rear apron behind a
small access cover.
Working inside car, at base of tailgate:
Open tool compartment cover.
Pry out emergency release cable cover.
Pull plastic cable to release rear tailgate latch
Page 860 of 1002
Downloaded from www.Manualslib.com manuals search engine
51 0-1 0
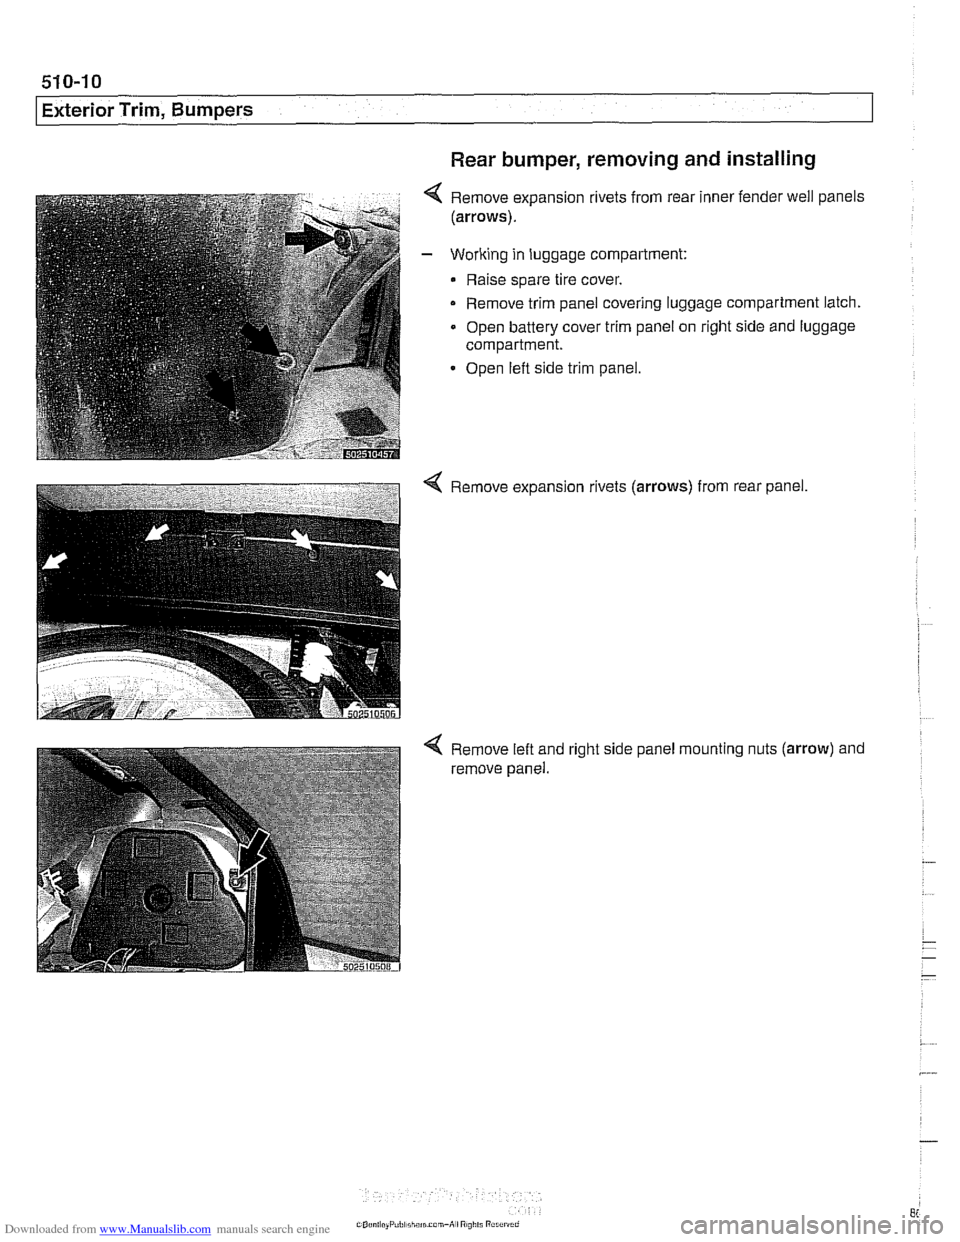
Exterior Trim, Bumpers Rear bumper, removing
and installing
Remove expansion rivets from rear inner fender well panels
(arrows).
Working in luggage compartment:
Raise spare tire cover.
- Remove trim panel covering luggage compartment latch.
Open battery cover trim panel on right side and luggage
compartment.
Open left side trim panel.
4 Remove expansion rivets (arrows) from rear panel.
Remove left and
remove panel. right
side panel mounting
nuts (arrow) and
Page 866 of 1002
Downloaded from www.Manualslib.com manuals search engine
51 2-2
I Door Windows 1
This repair group covers door glass, window regulator and
power window motor repair information.
CA U JIO&
All E39 models are equipped with side-impact airbags in the
front doors. Some models are also equipped with
airbags in
the rear doors. Be sure to read the
airbag warnings and cau-
tions in 721
Airbag System (SRS).
Electric window switch replacement is covered in 612
Switches.
The windshield, rear window, fixed rear doorglass, and cargo
compartment glass (Sport Wagon only) are bonded using
special adhesives and tools. It is recommended that bonded
glass replacement be done by an authorized
BMW service fa-
cility or an automotive glass installer.
Special tools
Some window repair operations require special tools.
Power windows
- Power window features in E39 models include:
Control of the front and rear door window motors is carried
out directly by the General Module (GM
Ill).
One-touch operation in both directions on all four windows.
Cable type window regulator used for all door windows.
. Anti-trap protection provided by pressure sensitive finger
guard.
Right front and each rear door has a single window switch
located in door handle trim.
Rear door window switches can be deactivated by press-
ing child lock-out switch in the driver's window switch block.
Convenience closinglopening of the windows from driver's
loci( cylinder or convenience opening only from remote un-
lociting feature (FZV) remote key.
Window (FZV) operation can be owner customized with
Car Memory function. See 515 Central Locking and Anti-
Theft.
After ignition is switched off, electric windows can be oper-
ated until a door is opened or until
I6 minutes has elapsed.
The GM
IiI bases window motor end position on current
draw (load). There is a maximum window motor run time of
6 seconds. The motor is then switched off even if the end
position load sensor fails.
Page 879 of 1002
Downloaded from www.Manualslib.com manuals search engine
513-1
51 3 lnterior Trim
General . . . . . . . . . . . . . . . . . . . . . . . . . . . ,513-2
Interior trim repairs . . . . . . . . . . . . . . . . . . . ,513-2
Center Console . . . . . . . . . . . . . . . . . . . . .513-3
Center console, removing and installing . . . 213-3
Dash Panel . . . . . . . . . . . . . . . . . . . . . . . . ,513-7
Lower dash panel assembly,
removing and installing
. . . . . . . . . . . . . . . . ,513-7
Upper dash assembly,
removing and installing
. . . . . . . . . . . . . . . ,513-1 1
Window and door post trim panels,
removing and installing
. . . . . . . . . . . . . . . 513-12
Dash panel support,
removing and installing
. . . . . . . . . . . . . . . 513-15
Rear parcel shelf panel,
removing and installing
. . . . . . . . . . . . . . . 513-15
Glove compartment,
removing and installing
. . . . . . . . . . . . . . . 513-16
Page 885 of 1002
Downloaded from www.Manualslib.com manuals search engine
Interior Trim
The E39 dashboard assembly includes the instrument clus-
ter, passenger side
airbag, glove compartment, fuse and re-
lay panel, radio. IHKA control panel oron-board monitor (if
equipped with GPS). The dash is made up of an upper and
lower sections. The lower section must be remove before the
upper section can be removed.
Dashboard removal is a complex operation. Read the proce-
dures through before starting work.
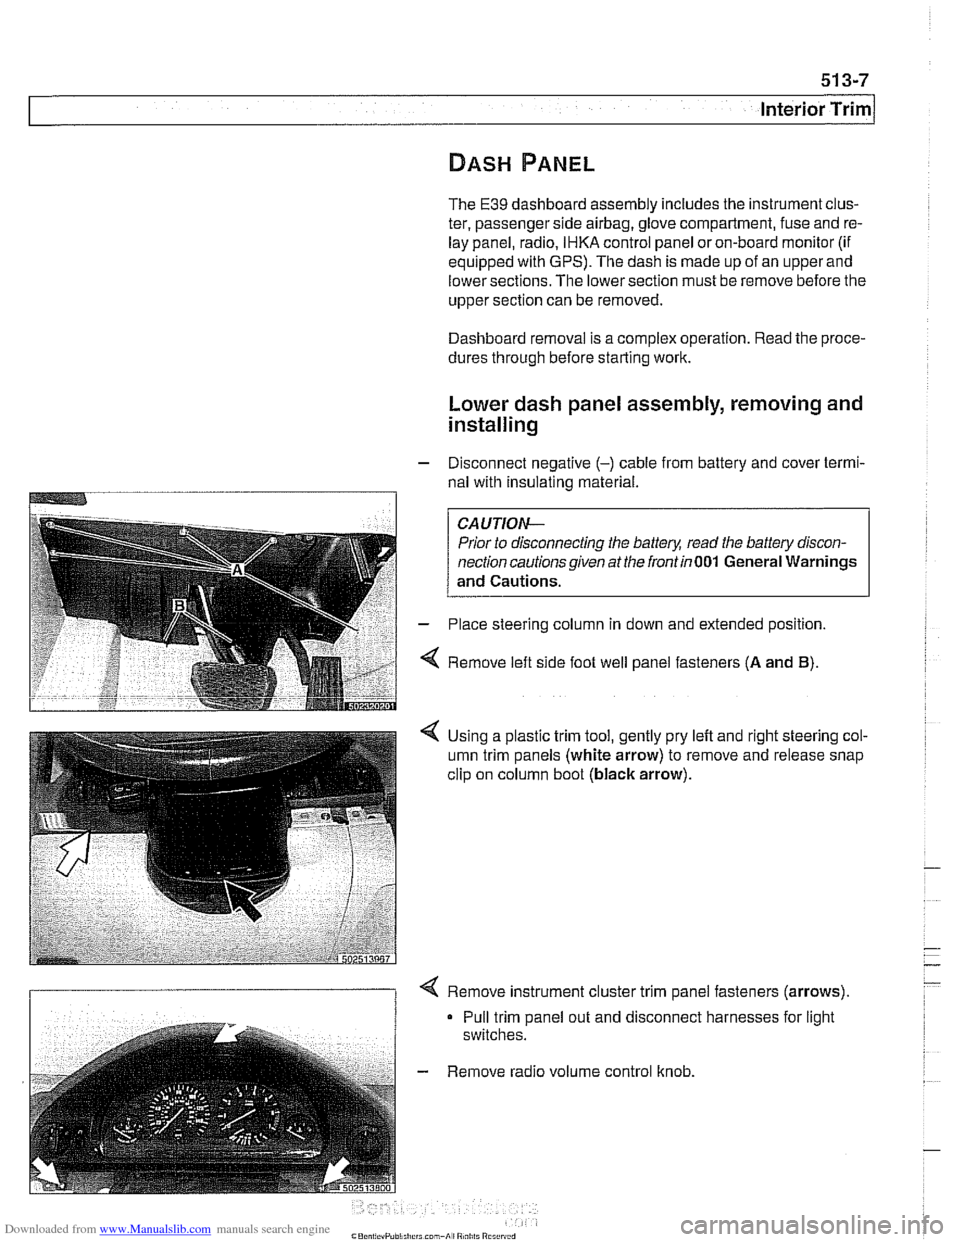
Lower dash panel assembly, removing and
installing
- Disconnect negative (-) cable from battery and cover termi-
nal with
insulating material.
--7
CAUTION-
Prior to disconnecting the battery, read the battery discon-
nectioncautionsgiven atthe irontin001 General Warnings
and Cautions.
- Place steering column in down and extended position.
4 Remove left side foot well panel fasteners (A and B).
< Using a plastic trim tool, gently pry left and right steering col-
umn trim panels (white arrow) to remove and release snap
clip on column boot
(black arrow).
I 1 < Remove instrument cluster trim panel fasteners (arrows).
Pull trim panel out and disconnect harnesses for light
switches.
- Remove radio volume control knob.
Page 887 of 1002
Downloaded from www.Manualslib.com manuals search engine
Interior Trim
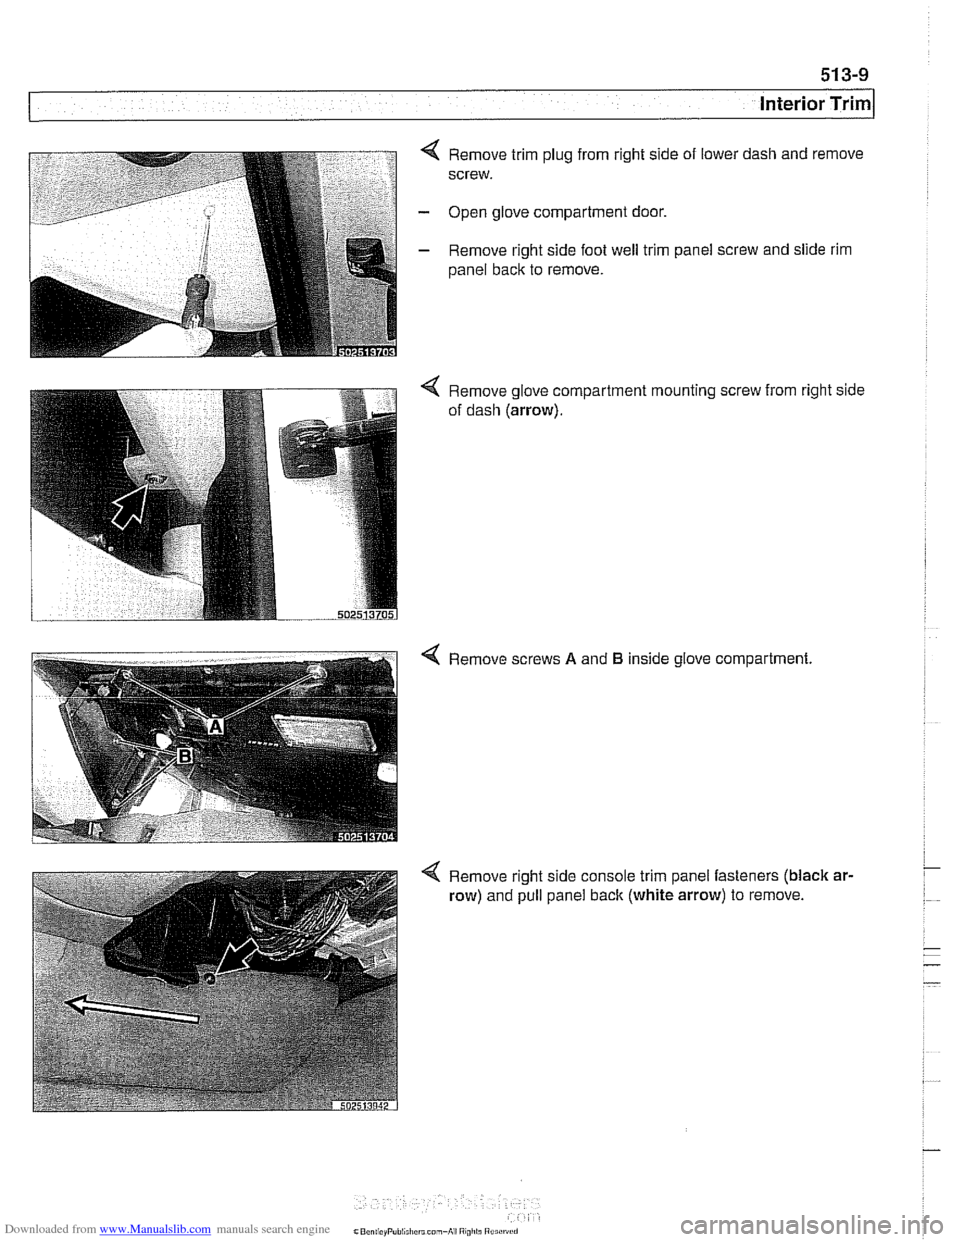
4 Remove trim plug from right side of lower dash and remove
screw.
- Open glove compartment door.
- Remove right side foot well trim panel screw and slide rim
panel back to remove.
4 Remove glove compartment mounting screw from right side
of dash (arrow).
Remove right side console trim panel fasteners (black ar-
row) and pull panel back
(white arrow) to remove.
Page 894 of 1002
Downloaded from www.Manualslib.com manuals search engine
51 3-1 6
Interior Trim
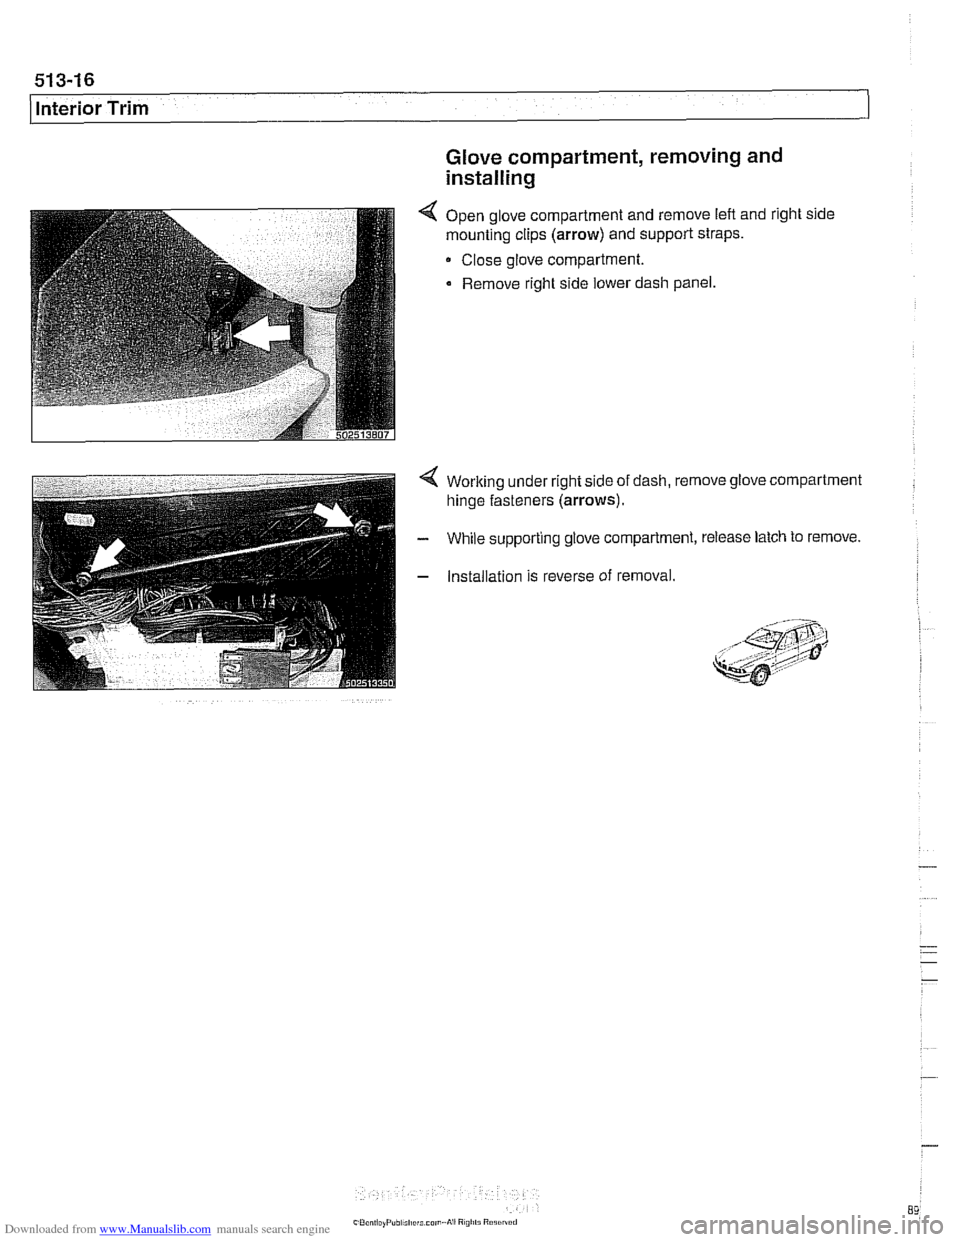
Glove compartment, removing and
installing
4 Open glove compartment and remove lefl and right side
mounting clips
(arrow) and support straps.
Close glove compartment.
Remove right side lower dash panel.
4 Working under right side of dash, remove glove compartment
hinge fasteners
(arrows).
- While supporting glove compartment, release latch to remove.
- Installation is reverse of removal.
, &j?i 8 .: ,,,, < I;; ,..9;:*?:4 *-,;: ,,