heating BMW 535D 2014 Owners Manual
[x] Cancel search | Manufacturer: BMW, Model Year: 2014, Model line: 535D, Model: BMW 535D 2014Pages: 267, PDF Size: 5.88 MB
Page 14 of 267
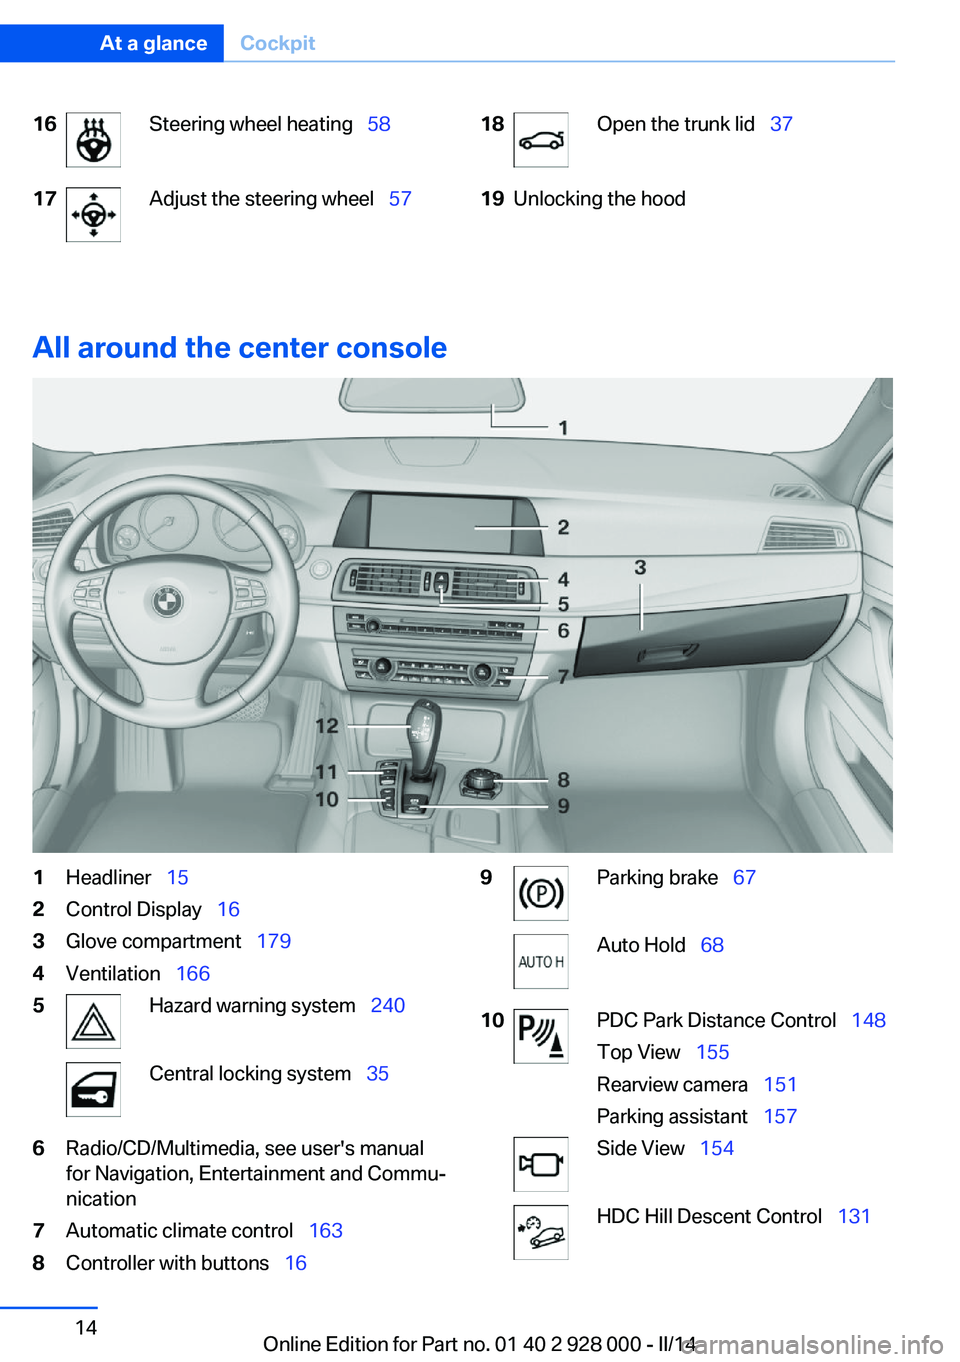
16Steering wheel heating 5817Adjust the steering wheel 5718Open the trunk lid 3719Unlocking the hood
All around the center console
1Headliner 152Control Display 163Glove compartment 1794Ventilation 1665Hazard warning system 240Central locking system 356Radio/CD/Multimedia, see user's manual
for Navigation, Entertainment and Commu‐
nication7Automatic climate control 1638Controller with buttons 169Parking brake 67Auto Hold 6810PDC Park Distance Control 148
Top View 155
Rearview camera 151
Parking assistant 157Side View 154HDC Hill Descent Control 131Seite 14At a glanceCockpit14
Online Edition for Part no. 01 40 2 928 000 - II/14
Page 37 of 267
When the driver's door is closed, the vehicle is
completely locked.
Automatic tailgate operation
Opening
During opening, the trunk lid pivots back and
up. Ensure that adequate clearance is available
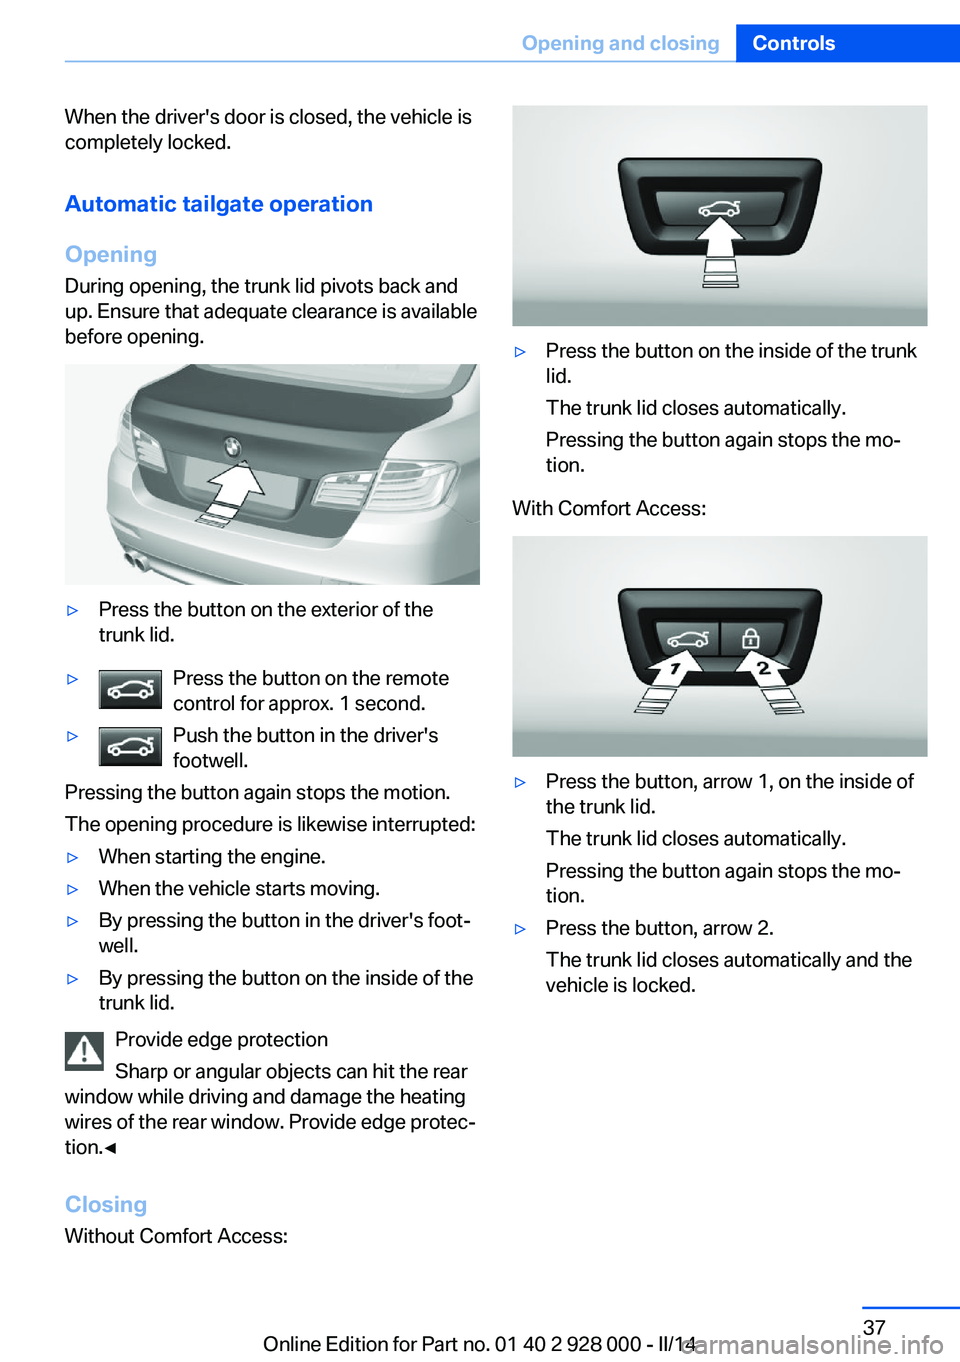
before opening.▷Press the button on the exterior of the
trunk lid.▷Press the button on the remote
control for approx. 1 second.▷Push the button in the driver's
footwell.
Pressing the button again stops the motion.
The opening procedure is likewise interrupted:
▷When starting the engine.▷When the vehicle starts moving.▷By pressing the button in the driver's foot‐
well.▷By pressing the button on the inside of the
trunk lid.
Provide edge protection
Sharp or angular objects can hit the rear
window while driving and damage the heating
wires of the rear window. Provide edge protec‐
tion.◀
ClosingWithout Comfort Access:
▷Press the button on the inside of the trunk
lid.
The trunk lid closes automatically.
Pressing the button again stops the mo‐
tion.
With Comfort Access:
▷Press the button, arrow 1, on the inside of
the trunk lid.
The trunk lid closes automatically.
Pressing the button again stops the mo‐
tion.▷Press the button, arrow 2.
The trunk lid closes automatically and the
vehicle is locked.Seite 37Opening and closingControls37
Online Edition for Part no. 01 40 2 928 000 - II/14
Page 50 of 267
Shoulder support
Also supports the back in the shoulder area:
▷Results in a relaxed seating position.▷Reduces strain on the shoulder muscles.
Active seatActive adjustment of the seat cushion's con‐
tours reduces muscular tension and fatigue to
help prevent lower back pain.
Press the button. The LED lights up.
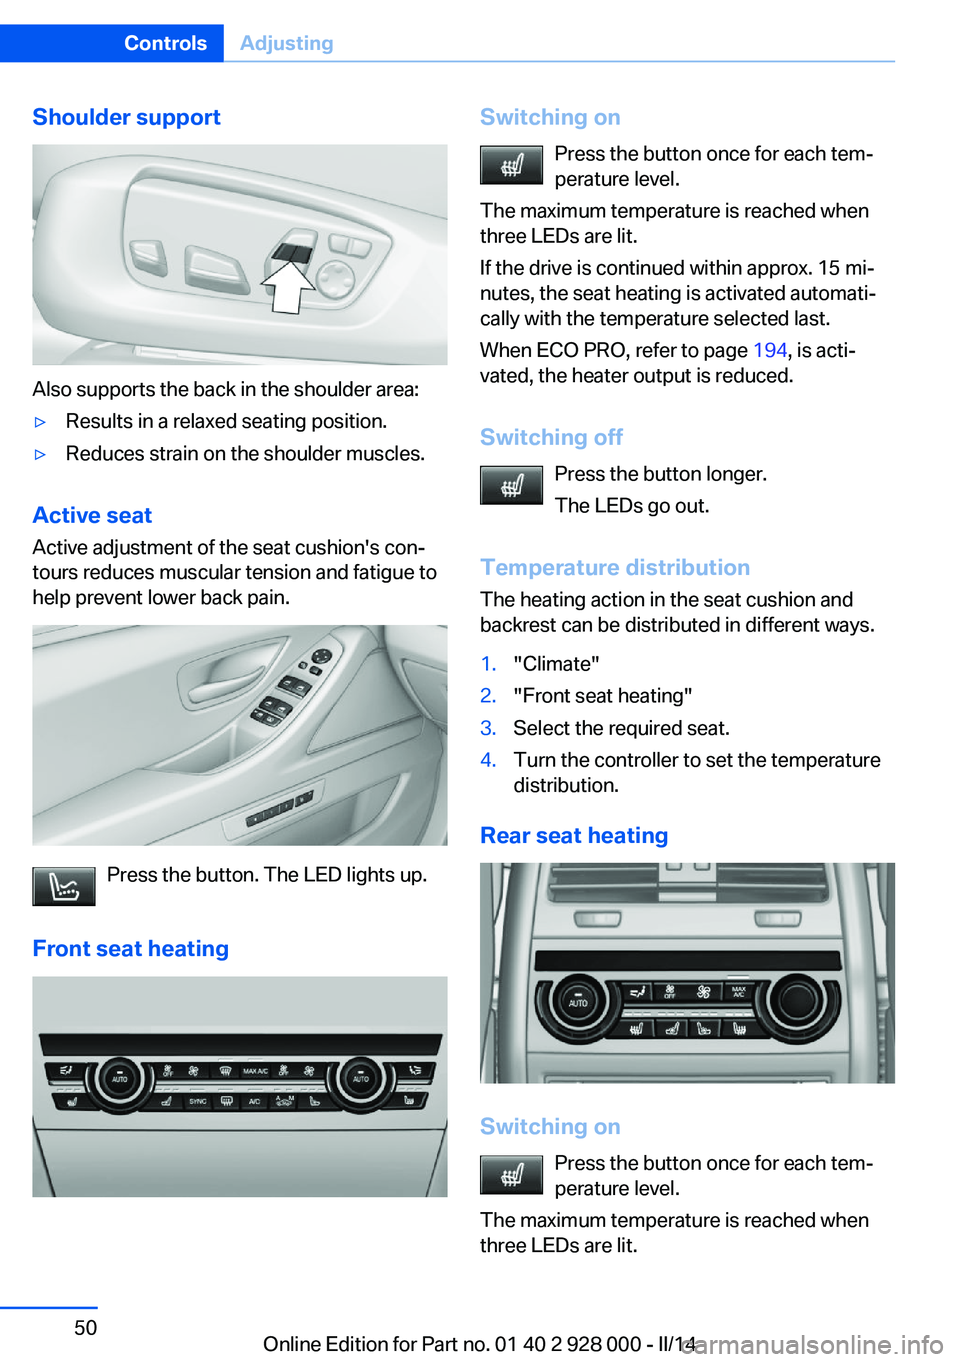
Front seat heating
Switching on Press the button once for each tem‐
perature level.
The maximum temperature is reached when
three LEDs are lit.
If the drive is continued within approx. 15 mi‐
nutes, the seat heating is activated automati‐
cally with the temperature selected last.
When ECO PRO, refer to page 194, is acti‐
vated, the heater output is reduced.
Switching off Press the button longer.
The LEDs go out.
Temperature distribution
The heating action in the seat cushion and
backrest can be distributed in different ways.1."Climate"2."Front seat heating"3.Select the required seat.4.Turn the controller to set the temperature
distribution.
Rear seat heating
Switching on
Press the button once for each tem‐
perature level.
The maximum temperature is reached when
three LEDs are lit.
Seite 50ControlsAdjusting50
Online Edition for Part no. 01 40 2 928 000 - II/14
Page 51 of 267
If the drive is continued within approx. 15 mi‐
nutes, the seat heating is activated automati‐
cally with the temperature selected last.
When ECO PRO, refer to page 194, is acti‐
vated, the heater output is reduced.
Switching off Press the button longer.
The LEDs go out.
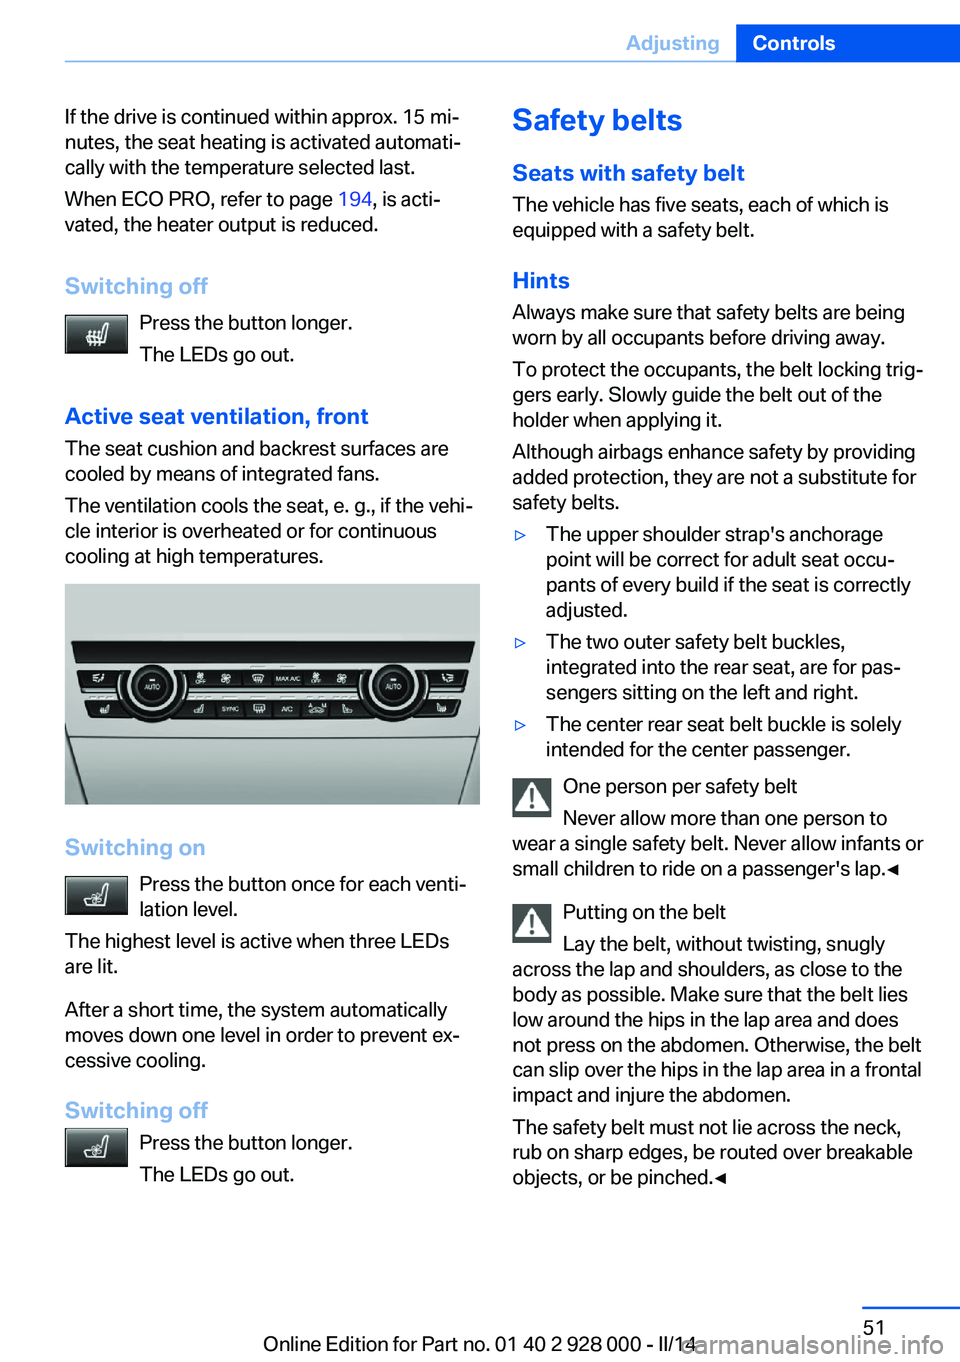
Active seat ventilation, front The seat cushion and backrest surfaces are
cooled by means of integrated fans.
The ventilation cools the seat, e. g., if the vehi‐
cle interior is overheated or for continuous
cooling at high temperatures.
Switching on
Press the button once for each venti‐
lation level.
The highest level is active when three LEDs
are lit.
After a short time, the system automatically
moves down one level in order to prevent ex‐
cessive cooling.
Switching off Press the button longer.
The LEDs go out.
Safety belts
Seats with safety belt
The vehicle has five seats, each of which is
equipped with a safety belt.
Hints
Always make sure that safety belts are being
worn by all occupants before driving away.
To protect the occupants, the belt locking trig‐
gers early. Slowly guide the belt out of the
holder when applying it.
Although airbags enhance safety by providing
added protection, they are not a substitute for
safety belts.▷The upper shoulder strap's anchorage
point will be correct for adult seat occu‐
pants of every build if the seat is correctly
adjusted.▷The two outer safety belt buckles,
integrated into the rear seat, are for pas‐
sengers sitting on the left and right.▷The center rear seat belt buckle is solely
intended for the center passenger.
One person per safety belt
Never allow more than one person to
wear a single safety belt. Never allow infants or
small children to ride on a passenger's lap.◀
Putting on the belt
Lay the belt, without twisting, snugly
across the lap and shoulders, as close to the
body as possible. Make sure that the belt lies
low around the hips in the lap area and does
not press on the abdomen. Otherwise, the belt
can slip over the hips in the lap area in a frontal
impact and injure the abdomen.
The safety belt must not lie across the neck,
rub on sharp edges, be routed over breakable
objects, or be pinched.◀
Seite 51AdjustingControls51
Online Edition for Part no. 01 40 2 928 000 - II/14
Page 56 of 267
Estimating distances correctly
Objects reflected in the mirror are closer
than they appear. Do not estimate the distance
to the traffic behind you based on what you
see in the mirror, as this will increase your risk
of an accident.◀
Depending on how the vehicle is equipped, the
mirror setting is stored for the remote control
in use. When the vehicle is unlocked via the re‐
mote control, the position is automatically re‐
trieved if the setting for this function is active.
Selecting a mirror To change over to the other mirror:Slide the mirror changeover switch.
Adjusting electrically The setting corresponds to the direc‐
tion in which the button is pressed.
Saving positions Seat, mirror, and steering wheel memory, refer
to page 54.
Adjusting manually
If an electrical malfunction occurs, for example,
press the edges of the mirror glass.
Automatic Curb Monitor
The concept
When the reverse gear is engaged, the mirror glass tilts downward slightly on the front pas‐
senger side. This improves your view of the
curb and other low-lying obstacles when park‐
ing, for example.
Activating1. Slide the mirror changeover switch
to the driver's side mirror position.2.Engage selector lever position R.Deactivating
Slide the mirror changeover switch to the pas‐
senger side mirror position.
Fold in and out Press the button.
Possible up to approx. 15 mph/20 km/h.
For example, this is advantageous▷In car washes.▷In narrow streets.▷For folding back mirrors that were folded
away manually.
Mirrors that were folded in are folded out auto‐
matically at a speed of approx.
25 mph/40 km/h.
Fold in the mirror in a car wash
Before washing the car in an automatic
car wash, fold in the exterior mirrors by hand or
with the button; otherwise, the mirrors could
be damaged, depending on the width of the
vehicle.◀
Automatic heating
Both exterior mirrors are automatically heated
whenever the engine is running.
Automatic dimming feature Both exterior mirrors are automatically dim‐
med. Photocells are used for control in the In‐
terior rear view mirror, refer to page 57.
Seite 56ControlsAdjusting56
Online Edition for Part no. 01 40 2 928 000 - II/14
Page 58 of 267
Steering wheel heating
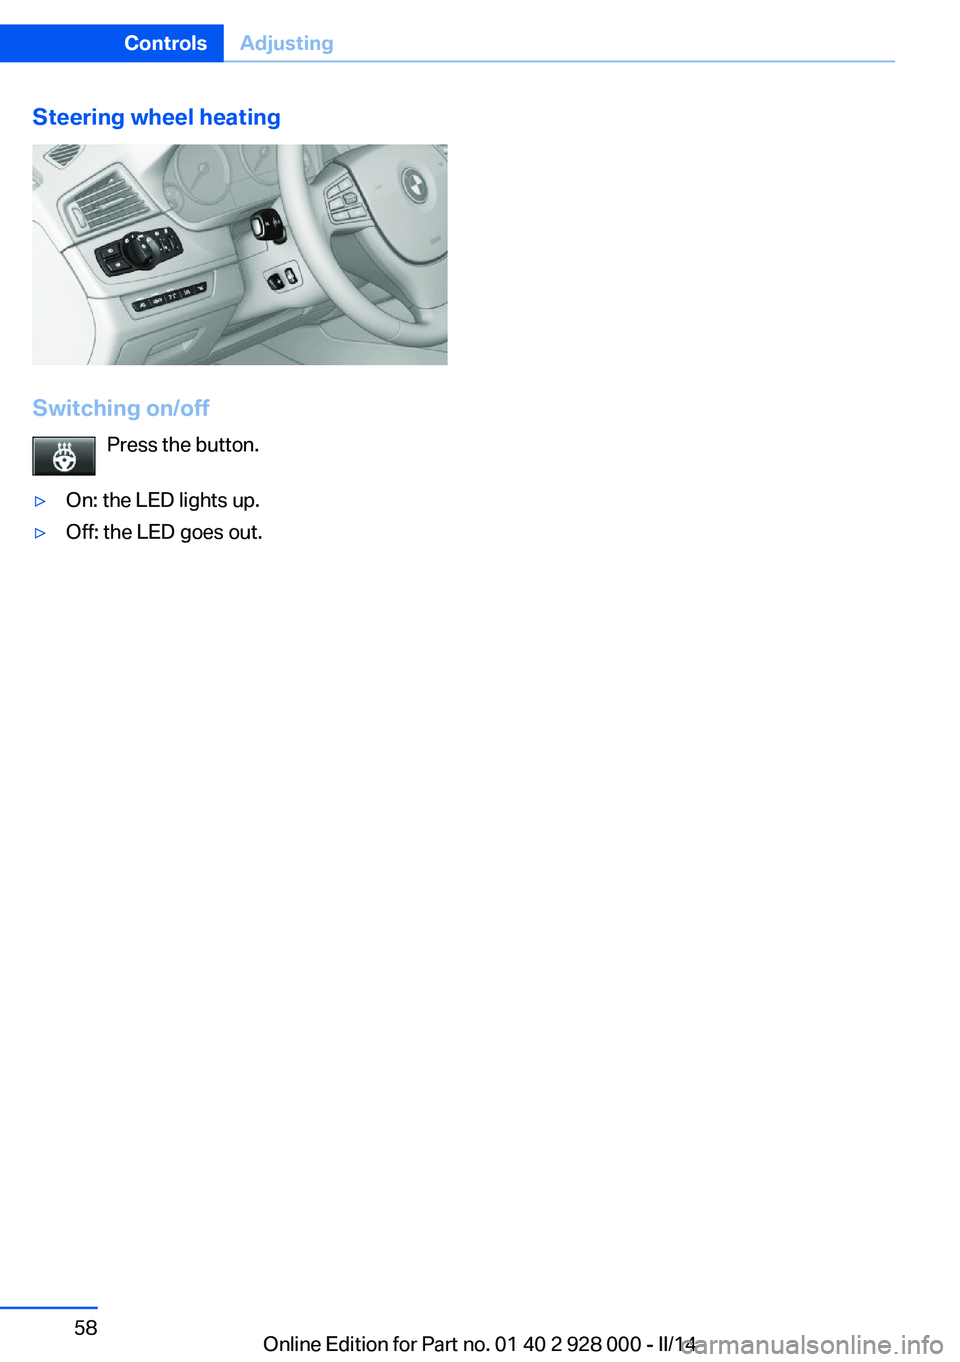
Switching on/offPress the button.
▷On: the LED lights up.▷Off: the LED goes out.Seite 58ControlsAdjusting58
Online Edition for Part no. 01 40 2 928 000 - II/14
Page 64 of 267
When the ignition is switched off automatically
by opening or closing the driver's door, un‐
buckling the driver's seat belt or by the auto‐
matic switching of the low beams to parking
lamps, the radio ready state remains active.
Radio ready state Activate radio ready state:▷When the engine is running: press the
Start/Stop button.
Some electronic systems/power consumers
remain ready for operation.
The radio ready state switches off automati‐
cally:
▷After approx. 8 minutes.▷When the vehicle is locked using the cen‐
tral locking system.▷Shortly before the battery is discharged
completely, so that the engine can still be
started.
Starting the engine
Hints Enclosed areas
Do not let the engine run in enclosed
areas, since breathing in exhaust fumes may
lead to loss of consciousness and death. The
exhaust gases contain carbon monoxide, an
odorless and colorless, but highly toxic gas.◀
Unattended vehicle
Do not leave the vehicle unattended with
the engine running; doing so poses a risk of
danger.
Before leaving the vehicle with the engine run‐
ning, set the parking brake and place the trans‐
mission in selector lever position P or neutral
to prevent the vehicle from moving.◀
Repeated starting in quick succession
Avoid repeated unsuccessful attempts to
start the vehicle or starting the vehicle several
times in quick succession. Otherwise, the fuel
is not burned or is inadequately burned, posing
a risk of overheating and damage to the cata‐
lytic converter.◀
Do not wait for the engine to warm-up while
the vehicle remains stationary. Start driving at
moderate engine speeds.
Diesel engine
If the engine is cold and temperatures are be‐
low approx. 32 ℉/0 ℃, the start process may
be delayed somewhat due to automatic pre‐
heating.
A Check Control message is displayed.
Automatic transmission
Starting the engine1.Depress the brake pedal.2.Press the Start/Stop button.
The ignition is activated automatically for a
certain time and is stopped as soon as the en‐
gine starts.
Manual transmission
Starting the engine
1.Depress the brake pedal.2.Press on the clutch pedal and shift to neu‐
tral.3.Press the Start/Stop button.
The ignition is activated automatically for a
certain time and is stopped as soon as the en‐
gine starts.
Seite 64ControlsDriving64
Online Edition for Part no. 01 40 2 928 000 - II/14
Page 66 of 267

Displays in the instrument clusterThe display indicates that the
Auto Start/Stop function is
ready for an Automatic engine
start.
The display indicates that the
conditions for an automatic en‐
gine stop have not been satis‐
fied.
Note The engine is not switched off automatically in
the following situations:▷External temperature too low.▷The external temperature is high and auto‐
matic climate control is running.▷The passenger compartment has not yet
been heated or cooled to the required
level.▷The engine is not yet at operating temper‐
ature.▷The wheels are at a sharp angle or the
steering wheel is being turned.▷After driving in reverse.▷Fogging of the windows when the auto‐
matic climate control is switched on.▷Vehicle battery is heavily discharged.▷The engine compartment lid is unlocked.▷HDC Hill Descent Control is activated.▷The parking assistant is activated.▷Stop-and-go traffic.▷The selector lever is in position N or M/S.▷Use of fuel with high ethanol content.
Starting the engine
The engine starts automatically under the fol‐
lowing conditions:
▷Automatic transmission:
By releasing the brake pedal.When Automatic Hold is activated: press
the accelerator pedal.▷Manual transmission:
The clutch pedal is pressed.
After the engine starts, accelerate as usual.
Safety mode
After the engine switches off automatically, it
will not start again automatically if any one of
the following conditions are met.
▷The driver's safety belt is unbuckled and
the driver's door is open.▷The hood was unlocked.
Some indicator lamps light up for varying
lengths of time.
The engine can only be started via the Start/
Stop button.
Note Even if driving away was not intended, the de‐
activated engine starts up automatically in the
following situations:
▷Excessive warming of the passenger com‐
partment when the cooling function is
switched on.▷The steering wheel is turned.▷Automatic transmission: change from se‐
lector lever position D to N, R or M/S.▷Automatic transmission: change from se‐
lector lever position P to N, D, R or M/S.▷The vehicle begins rolling.▷Fogging of the windows when the auto‐
matic climate control is switched on.▷Vehicle battery is heavily discharged.▷Excessive cooling of the passenger com‐
partment when the heating is switched on.▷Low brake vacuum pressure; this can oc‐
cur, for example, if the brake pedal is de‐
pressed a number of times in succession.Seite 66ControlsDriving66
Online Edition for Part no. 01 40 2 928 000 - II/14
Page 163 of 267
Climate controlVehicle equipment
All standard, country-specific and optional
equipment that is offered in the model series is
described in this chapter. Therefore, equip‐ment is also described that is not available in a
vehicle, e. g., because of the selected optional
equipment or country variant. This also applies
for safety-related functions and systems.
Automatic climate control
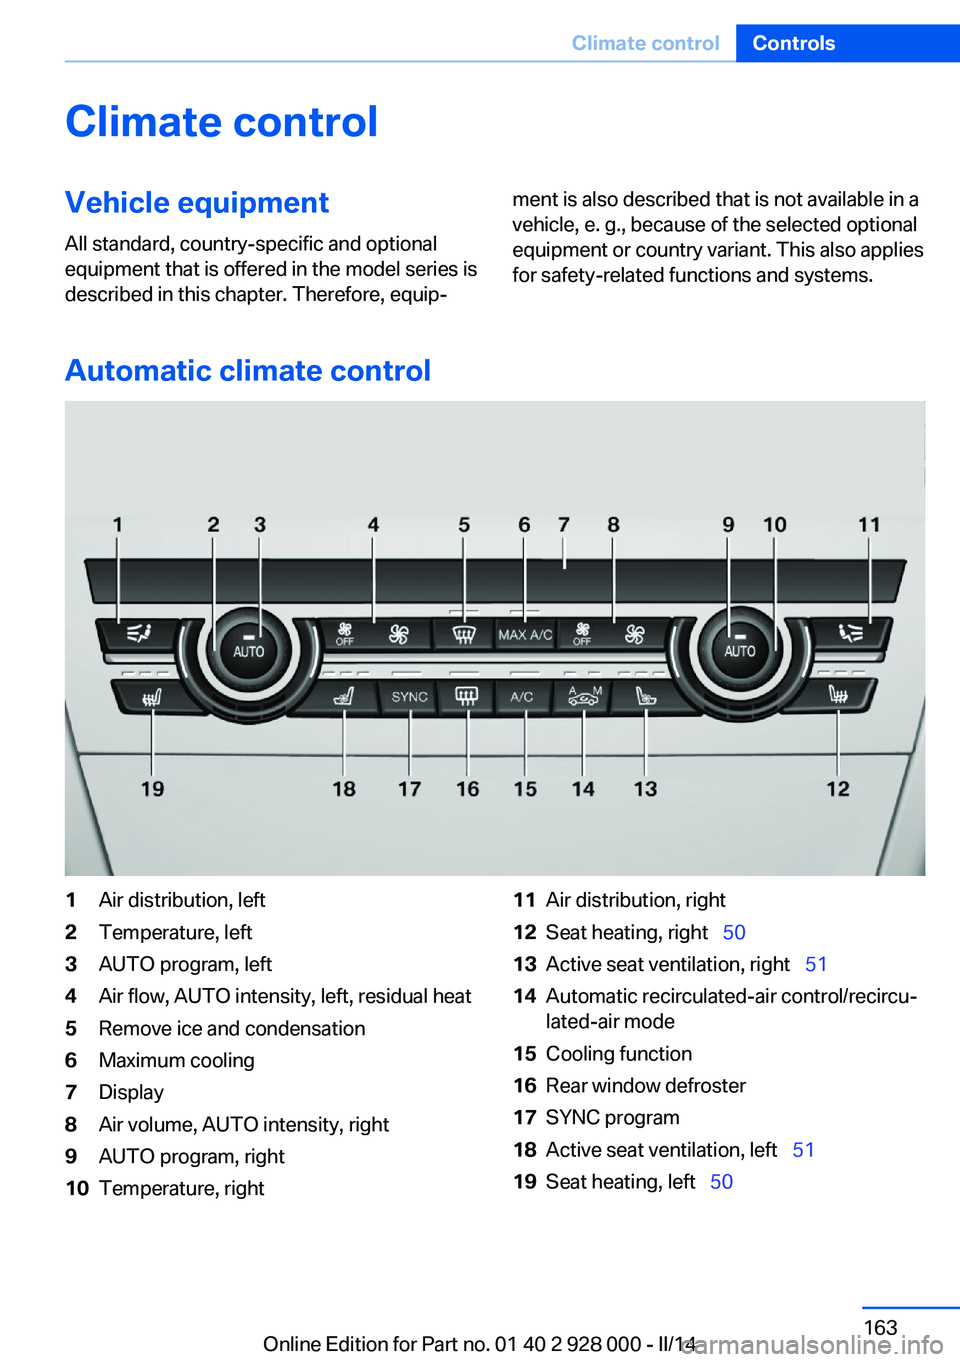
1Air distribution, left2Temperature, left3AUTO program, left4Air flow, AUTO intensity, left, residual heat5Remove ice and condensation6Maximum cooling7Display8Air volume, AUTO intensity, right9AUTO program, right10Temperature, right11Air distribution, right12Seat heating, right 5013Active seat ventilation, right 5114Automatic recirculated-air control/recircu‐
lated-air mode15Cooling function16Rear window defroster17SYNC program18Active seat ventilation, left 5119Seat heating, left 50Seite 163Climate controlControls163
Online Edition for Part no. 01 40 2 928 000 - II/14
Page 164 of 267
Climate control functions in detail
Manual air distribution Press the button repeatedly to select
a program:▷Upper body region.▷Upper body region and footwell.▷Footwell.▷Windows and footwell.▷Windows, upper body region, and footwell.▷Windows: driver's side only.▷Windows and upper body region.
If the windows are fogged over, press the
AUTO button on the driver's side to utilize the
condensation sensor.
Temperature Turn the wheel to set the de‐sired temperature.
The automatic climate control achieves this
temperature as quickly as possible, if neces‐
sary with the maximum cooling or heating ca‐
pacity, and then keeps it constant.
Avoid rapidly switching between different tem‐
perature settings. Otherwise, the automatic cli‐
mate control will not have sufficient time to ad‐
just the set temperature.
AUTO program Press the button.
Air flow, air distribution, and tempera‐
ture are controlled automatically.
Depending on the selected temperature,
AUTO intensity program and outside influen‐ ces, the air is directed to the windshield, side
windows, upper body, and into the footwell.
The cooling function, refer to page 165, is
switched on automatically with the AUTO pro‐
gram.
At the same time, a condensation sensor con‐
trols the program so as to prevent window
condensation as much as possible.
Intensity of the AUTO program
With the AUTO program switched on, auto‐
matic control of the air flow and air distribution
can be adjusted.
Press the left or right side of the but‐
ton: decrease or increase the inten‐
sity.
The selected intensity is shown on the display
of the automatic climate control.
Air flow, manual To be able to manually adjust the air flow,
switch off the AUTO program first.
Press the left or right side of the but‐
ton: decrease or increase air flow.
The selected air flow is shown on the display of
the automatic climate control.
The air flow of the automatic climate control
may be reduced automatically to save battery
power.
Defrosting windows and removing condensation
Press the button.
Ice and condensation are quickly re‐
moved from the windshield and the front side
windows.
The air volume can be adjusted when the pro‐
gram is active.
If the windows are fogged over, you can also
switch on the cooling function or press the
AUTO button to utilize the condensation sen‐
sor.Seite 164ControlsClimate control164
Online Edition for Part no. 01 40 2 928 000 - II/14