steering wheel BMW 535I GRAN TURISMO 2012 Owners Manual
[x] Cancel search | Manufacturer: BMW, Model Year: 2012, Model line: 535I GRAN TURISMO, Model: BMW 535I GRAN TURISMO 2012Pages: 321, PDF Size: 12.7 MB
Page 12 of 321
CockpitVehicle equipment
All standard, country-specific and optional
equipment that is offered in the model series is
described in this chapter. Therefore, equipmentis also described that is not available in a vehicle,
e. g., because of the selected optional equip‐
ment or country variant. This also applies for
safety-related functions and systems.
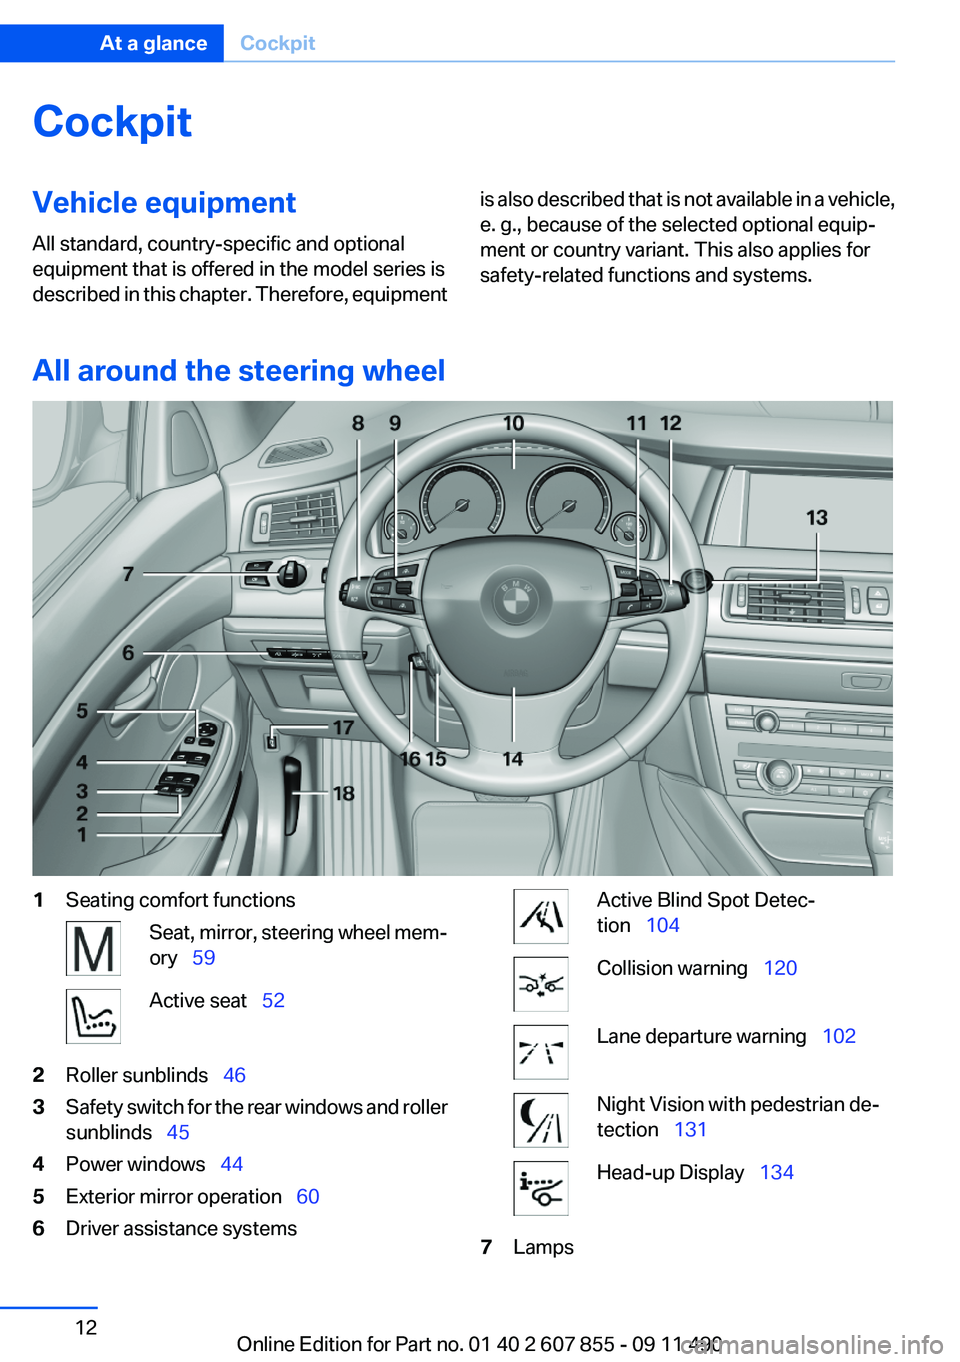
All around the steering wheel
1Seating comfort functionsSeat, mirror, steering wheel mem‐
ory 59Active seat 522Roller sunblinds 463Safety switch for the rear windows and roller
sunblinds 454Power windows 445Exterior mirror operation 606Driver assistance systemsActive Blind Spot Detec‐
tion 104Collision warning 120Lane departure warning 102Night Vision with pedestrian de‐
tection 131Head-up Display 1347LampsSeite 12At a glanceCockpit12
Online Edition for Part no. 01 40 2 607 855 - 09 11 490
Page 13 of 321
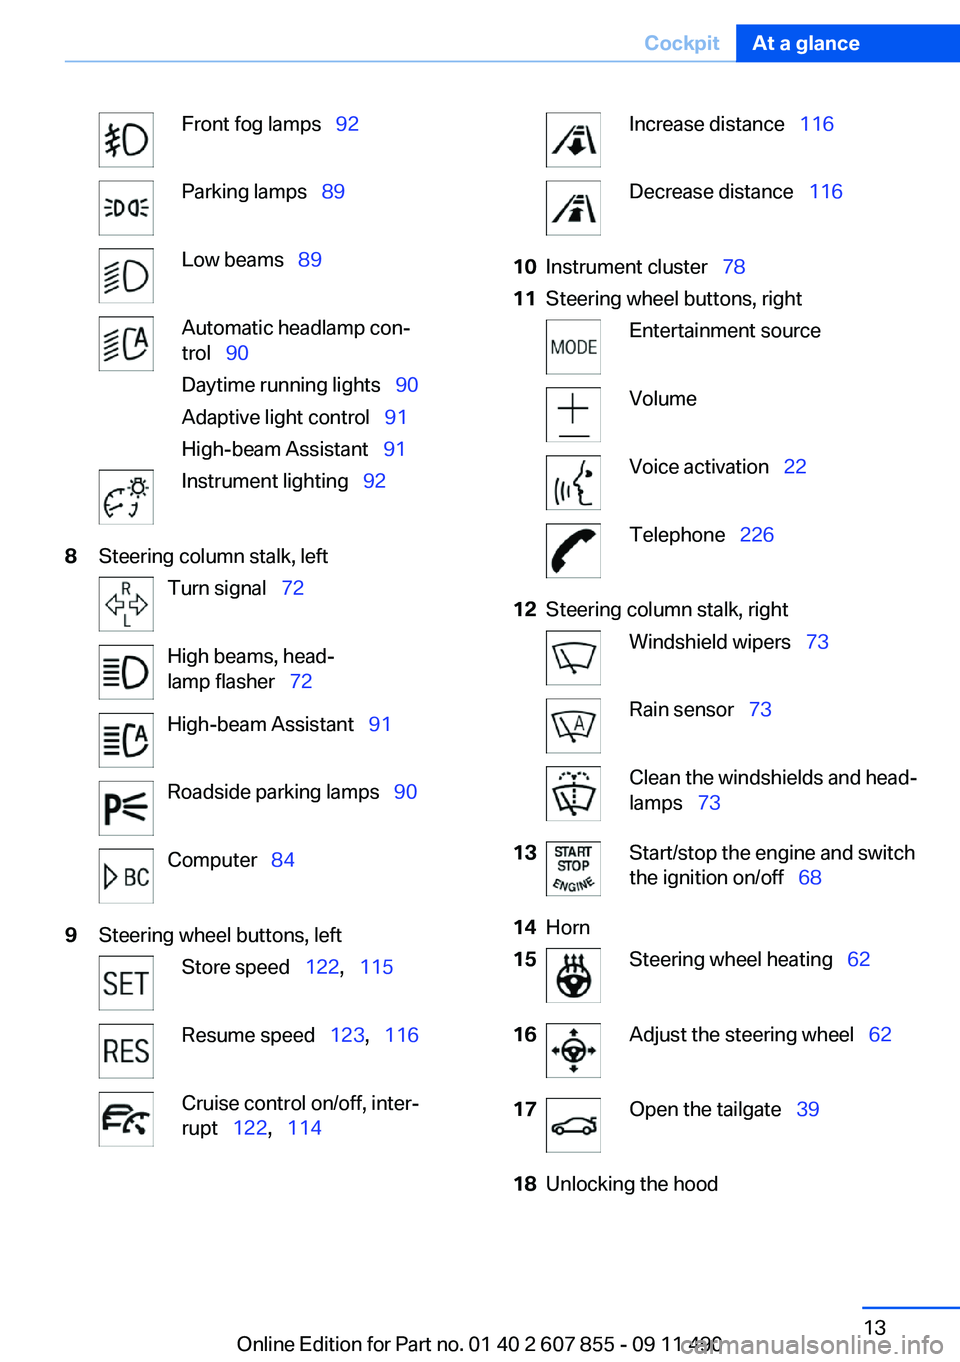
Front fog lamps 92Parking lamps 89Low beams 89Automatic headlamp con‐
trol 90
Daytime running lights 90
Adaptive light control 91
High-beam Assistant 91Instrument lighting 928Steering column stalk, leftTurn signal 72High beams, head‐
lamp flasher 72High-beam Assistant 91Roadside parking lamps 90Computer 849Steering wheel buttons, leftStore speed 122, 115Resume speed 123, 116Cruise control on/off, inter‐
rupt 122, 114Increase distance 116Decrease distance 11610Instrument cluster 7811Steering wheel buttons, rightEntertainment sourceVolumeVoice activation 22Telephone 22612Steering column stalk, rightWindshield wipers 73Rain sensor 73Clean the windshields and head‐
lamps 7313Start/stop the engine and switch
the ignition on/off 6814Horn15Steering wheel heating 6216Adjust the steering wheel 6217Open the tailgate 3918Unlocking the hoodSeite 13CockpitAt a glance13
Online Edition for Part no. 01 40 2 607 855 - 09 11 490
Page 22 of 321
Voice activation systemVehicle equipment
All standard, country-specific and optional
equipment that is offered in the model series is
described in this chapter. Therefore, equipment
is also described that is not available in a vehicle,
e. g., because of the selected optional equip‐
ment or country variant. This also applies for
safety-related functions and systems.
The concept▷Most functions that are displayed on the
Control Display can be operated by spoken
commands via the voice activation system.
The system prompts you to make your en‐
tries.▷Functions that can only be used when the
vehicle is stationary cannot be operated us‐
ing the voice activation system.▷The system uses a special microphone on
the driver's side.▷›...‹ Verbal instructions in the Owner's
Manual to use with the voice activation sys‐
tem.
Requirements
Via the Control Display, set a language that is
also supported by the voice activation system
so that the spoken commands can be identified.
Set the language, refer to page 87.
Using voice activation
Activating the voice activation system
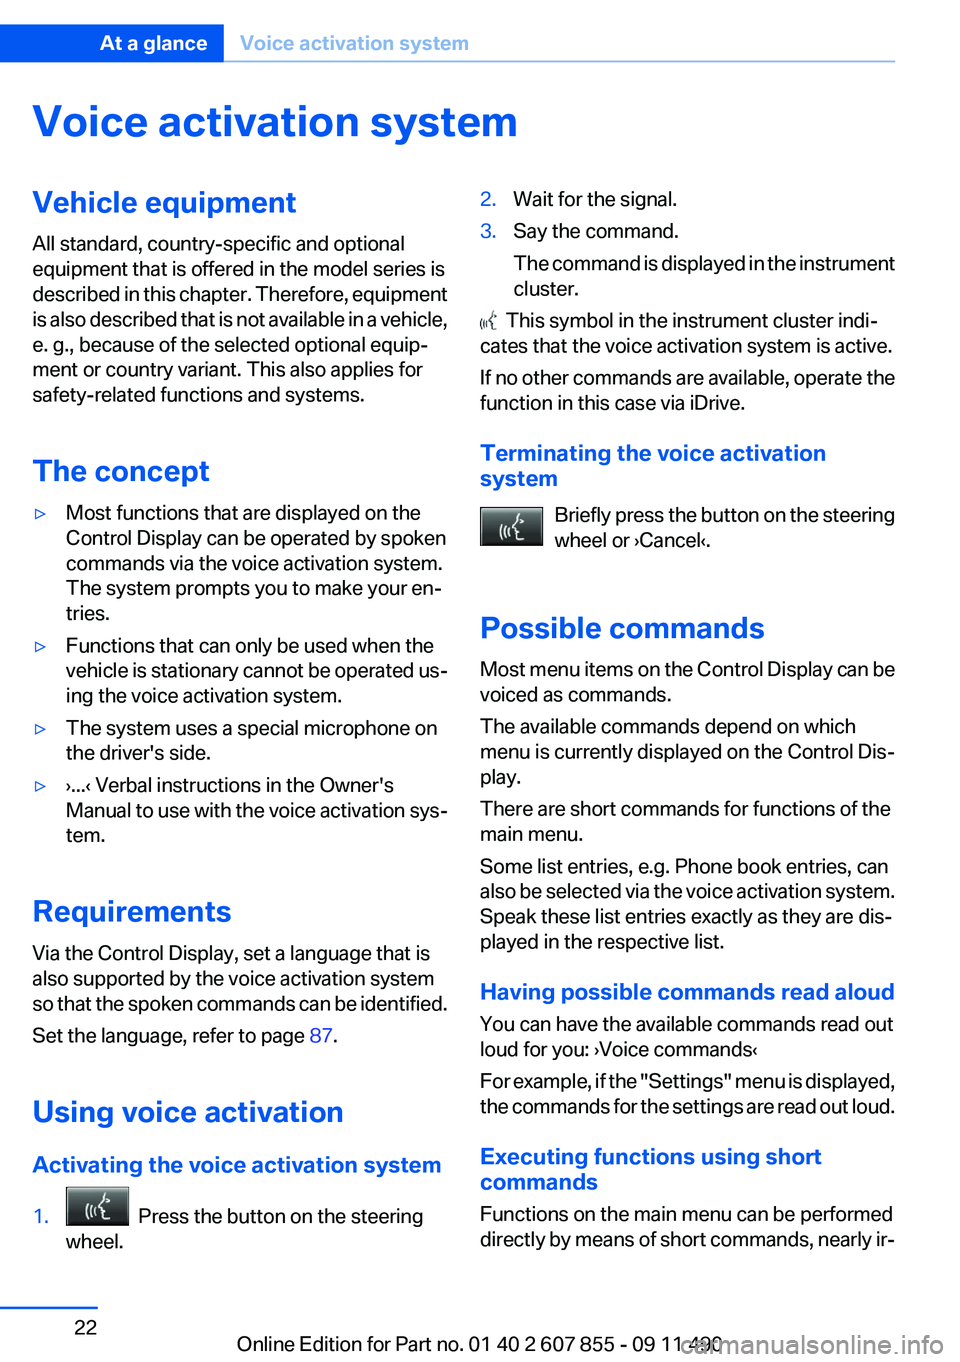
1. Press the button on the steering
wheel.2.Wait for the signal.3.Say the command.
The command is displayed in the instrument
cluster.
This symbol in the instrument cluster indi‐
cates that the voice activation system is active.
If no other commands are available, operate the
function in this case via iDrive.
Terminating the voice activation
system
Briefly press the button on the steering
wheel or ›Cancel‹.
Possible commands
Most menu items on the Control Display can be
voiced as commands.
The available commands depend on which
menu is currently displayed on the Control Dis‐
play.
There are short commands for functions of the
main menu.
Some list entries, e.g. Phone book entries, can
also be selected via the voice activation system.
Speak these list entries exactly as they are dis‐
played in the respective list.
Having possible commands read aloud
You can have the available commands read out
loud for you: ›Voice commands‹
For example, if the "Settings" menu is displayed,
the commands for the settings are read out loud.
Executing functions using short
commands
Functions on the main menu can be performed
directly by means of short commands, nearly ir‐
Seite 22At a glanceVoice activation system22
Online Edition for Part no. 01 40 2 607 855 - 09 11 490
Page 23 of 321
respective of which menu item is currently se‐
lected, e.g., ›Vehicle status‹.
List of short commands of the voice activation
system, refer to page 300.
Help dialog for the voice activation
system
Calling up help dialog: ›Help‹
Additional commands for the help dialog:▷›Help with examples‹: information about the
current operating options and the most im‐
portant commands for them are announced.▷›Help with voice activation‹: information
about the principle of operation for the voice
activation system is announced.
Example: playing back a CD
1.Switch on the Entertainment sound output
if necessary.2. Press the button on the steering
wheel.3.›C D and multimedia‹
The medium last played is played back.4. Press the button on the steering
wheel.5.›C D track ...‹ e.g., CD track 4.
Setting the voice dialog
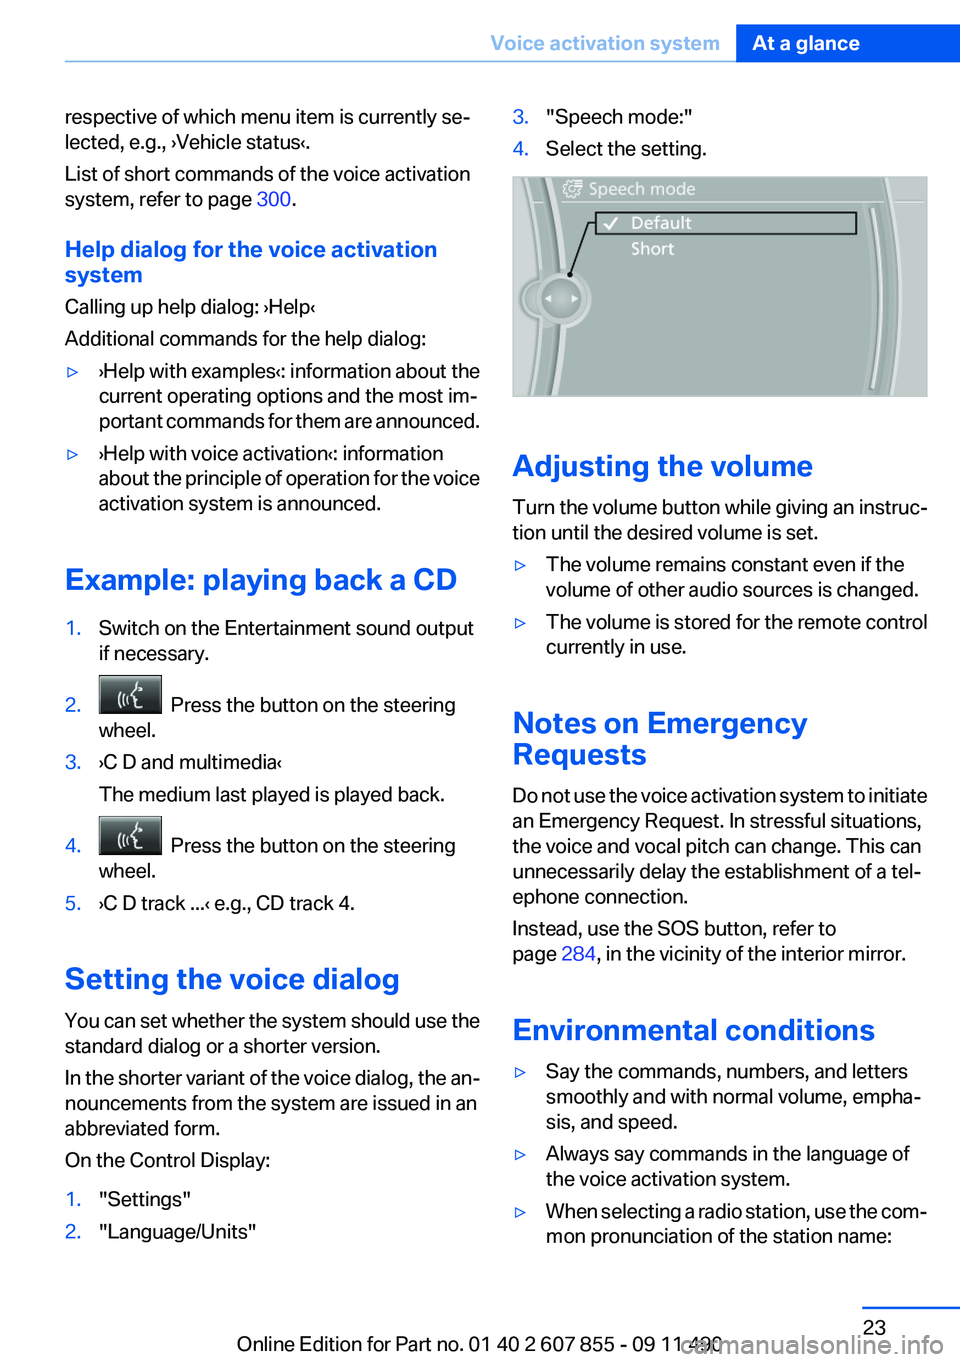
You can set whether the system should use the
standard dialog or a shorter version.
In the shorter variant of the voice dialog, the an‐
nouncements from the system are issued in an
abbreviated form.
On the Control Display:
1."Settings"2."Language/Units"3."Speech mode:"4.Select the setting.
Adjusting the volume
Turn the volume button while giving an instruc‐
tion until the desired volume is set.
▷The volume remains constant even if the
volume of other audio sources is changed.▷The volume is stored for the remote control
currently in use.
Notes on Emergency
Requests
Do not use the voice activation system to initiate
an Emergency Request. In stressful situations,
the voice and vocal pitch can change. This can
unnecessarily delay the establishment of a tel‐
ephone connection.
Instead, use the SOS button, refer to
page 284, in the vicinity of the interior mirror.
Environmental conditions
▷Say the commands, numbers, and letters
smoothly and with normal volume, empha‐
sis, and speed.▷Always say commands in the language of
the voice activation system.▷When selecting a radio station, use the com‐
mon pronunciation of the station name:Seite 23Voice activation systemAt a glance23
Online Edition for Part no. 01 40 2 607 855 - 09 11 490
Page 33 of 321
4.Open "Guest".5.Create the settings.
Note: the guest profile cannot be renamed.
Display profile list during start
The profile list can be displayed during each
start for selecting the desired profile.
1."Settings"2."Profiles"3."Options" Open.4."Display user list at startup"
Personal Profile settings
The following functions and settings can be
stored in a profile.
More information on the settings can be found
under:
▷Active Cruise Control: collision warning, re‐
fer to page 120.▷Exterior mirror position, refer to page 60.▷CD/Multimedia, refer to page 196: audio
source listened to last.▷Dynamic Driving Control: sport program, re‐
fer to page 112.▷Driver's seat position, refer to page 35: au‐
tomatic retrieval after unlocking.▷Programmable memory buttons, refer to
page 20: assignment.▷Head-up Display, refer to page 134: selec‐
tion, brightness and position of the display.▷Headlamp courtesy delay feature, refer to
page 90: time setting.▷Tone, refer to page 186: tone settings.▷Automatic climate control, refer to
page 136: settings.▷Steering wheel position, refer to page 62.▷Navigation, refer to page 168: map views,
route criteria, voice output on/off.▷Night Vision with pedestrian detection, refer
to page 131: selection of functions and type
of display.▷Daytime running lights, refer to page 90:
current setting.▷Park Distance Control PDC, refer to
page 187: adjusting the signal tone volume.▷Radio, refer to page 188: stored stations,
station listened to last, special settings.▷Backup camera, refer to page 127: selec‐
tion of functions and type of display.▷Side View, refer to page 130: selection of
the display type.▷Language on the Control Display, refer to
page 87.▷Lane departure warning, refer to page 102:
last setting, on/off.▷Active Blind Spot Detection, refer to
page 104: last setting, on/off.▷Triple turn signal activation, refer to
page 72.▷Locking the vehicle, refer to page 37: after
a brief period or after starting to drive.
Central locking system
The concept
The central locking system becomes active
when the driver's door is closed.
The system simultaneously engages and re‐
leases the locks on the following:
▷Doors.▷Tailgate.▷Fuel filler flap.
Operating from the outside
▷Via the remote control.▷Via the driver's door lock.▷Via the door handles.▷Via the button on the tailgate.Seite 33Opening and closingControls33
Online Edition for Part no. 01 40 2 607 855 - 09 11 490
Page 35 of 321
LockingPress the button on the remote control.
Locking from the outside
Do not lock the vehicle from the outside if
there are people in it, as the vehicle cannot be
unlocked from inside without special knowl‐
edge.◀
Switching on interior lamps and
courtesy lamps
Press the button on the remote control
with the vehicle locked.
Panic mode
You can trigger the alarm system if you find
yourself in a dangerous situation.
Press the button on the remote control
for at least 3 seconds.
To switch off the alarm: press any button.
Switching on the headlamp courtesy
delay feature
Briefly press the button on the remote
control.
The duration can be set in the Control Display.
Opening the tailgate Press the button on the remote control
for approx. 1 second.
The large tailgate opens slightly.
Note the opening height of the large tail‐
gate
The tailgate pivots back and up when it opens.
Ensure that there is sufficient clearance when
the large tailgate opens; otherwise, damage may
result.◀
Press the button on the remote control
for approx. 1 second and release.The small tailgate opens slightly.
The tailgate pivots back and up when it opens.
Ensure that adequate clearance is available be‐
fore opening.
The tailgate opens, regardless of whether it was
previously locked or unlocked.
In some vehicle equipment variants, the tailgate
can only be opened using the remote control if
the vehicle was unlocked first.
To avoid locking yourself out of the vehicle, do
not place the remote control into the cargo area.
The tailgate is locked again as soon as it is
pushed closed.
Provide edge protection
Sharp or angular objects can hit the rear
window while driving and damage the heating
wires of the rear window. Provide edge protec‐
tion.◀
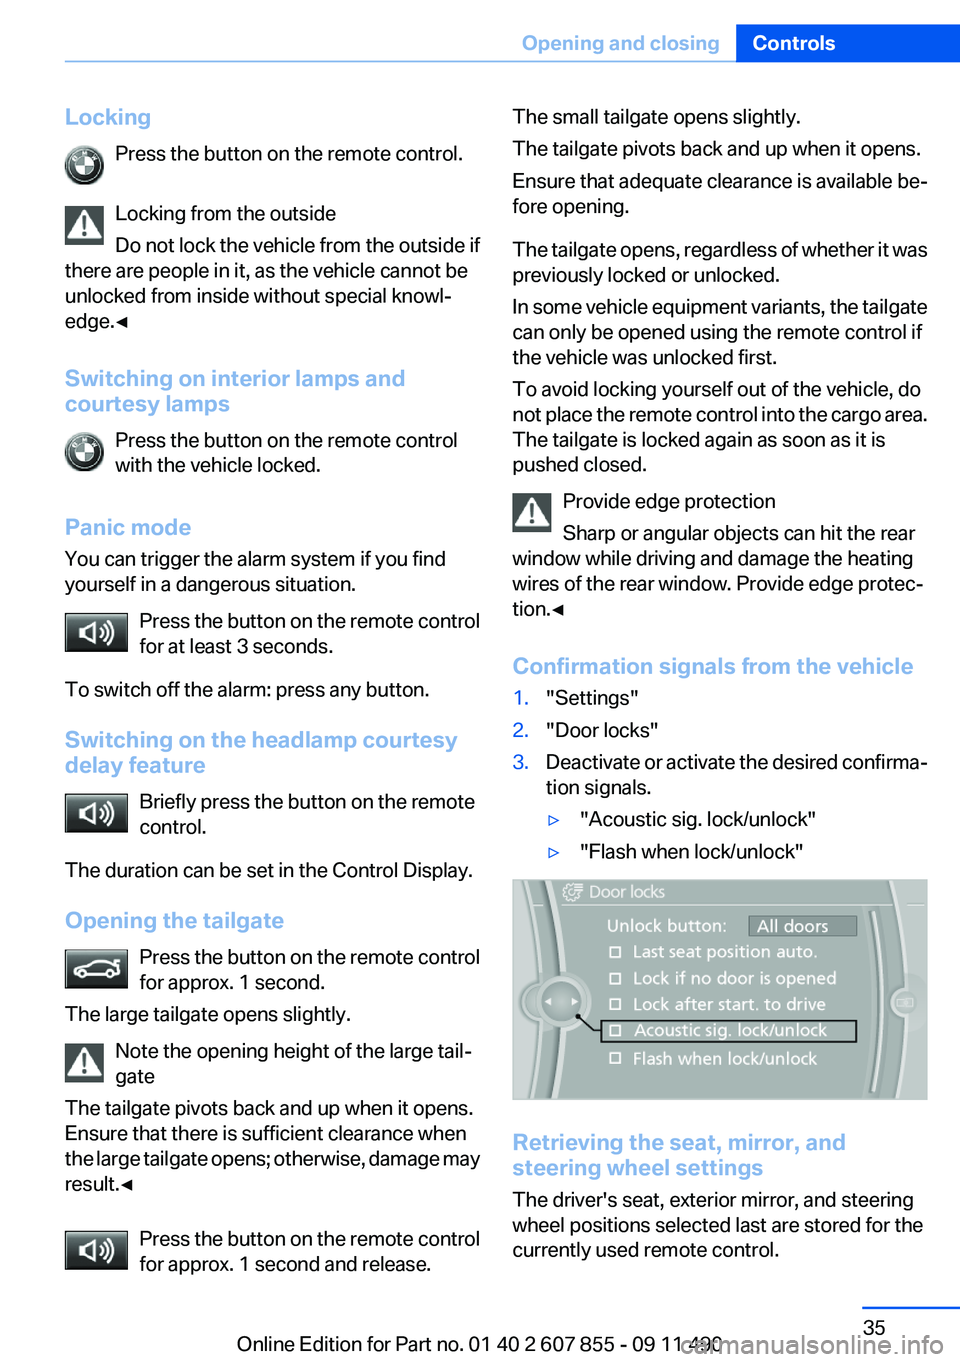
Confirmation signals from the vehicle1."Settings"2."Door locks"3.Deactivate or activate the desired confirma‐
tion signals.▷"Acoustic sig. lock/unlock"▷"Flash when lock/unlock"
Retrieving the seat, mirror, and
steering wheel settings
The driver's seat, exterior mirror, and steering
wheel positions selected last are stored for the
currently used remote control.
Seite 35Opening and closingControls35
Online Edition for Part no. 01 40 2 607 855 - 09 11 490
Page 43 of 321
Malfunction
Comfort Access may not function properly if it
experiences interference from external sources
such as mobile phones, metal objects, overhead
power lines, transmission towers, etc.
In this case, open or close the vehicle using the
buttons on the remote control or use the
integrated key in the door lock.
To subsequently start the engine, hold the re‐
mote control against the marked area on the
steering column, refer to page 31.
Alarm system
The concept
The vehicle alarm system responds to:▷Opening of a door, the hood or the tailgate.▷Movements in the vehicle.▷Changes in the vehicle tilt, e.g., during at‐
tempts to steal a wheel or when towing the
car.▷Interruptions in battery voltage.
The alarm system briefly indicates tampering:
▷By sounding an acoustic alarm.▷By switching on the hazard warning system.▷By flashing the high beams.
Arming and disarming the alarm
system
General information
When you lock or unlock the vehicle, either with
the remote control, Comfort Access or at the
door lock the alarm system is armed or disarmed
at the same time.
Door lock and armed alarm system
Unlocking via the door lock will trigger the alarm
on some country-specific versions.
In order to terminate this alarm, unlock vehicle
with the remote control or switch on the ignition,
if necessary, by emergency detection of the re‐
mote control.
Tailgate and armed alarm system
The tailgate can be opened using the remote
control, even if the alarm system is armed.▷Press the button on the remote
control for approx. 1 second.
The large tailgate opens slightly.▷Press the button on the remote
control for approx. 1 second and re‐
lease.
The small tailgate opens slightly.
Note the opening height of the large tail‐
gate
The tailgate pivots back and up when it opens.
Ensure that there is sufficient clearance when
the large tailgate opens; otherwise, damage may
result.◀
After the tailgate is closed, it is locked and moni‐
tored again by the alarm system. The hazard
warning system flashes once.
In some vehicle equipment variants, the tailgate
can only be opened using the remote control if
the vehicle was unlocked first.
Panic mode Press the button on the remote control
for at least 3 seconds.
Switching off the alarm
▷Unlock the vehicle using the remote control.▷With Comfort Access: if you are carrying the
remote control with you, pull on the door
handle.Seite 43Opening and closingControls43
Online Edition for Part no. 01 40 2 607 855 - 09 11 490
Page 59 of 321
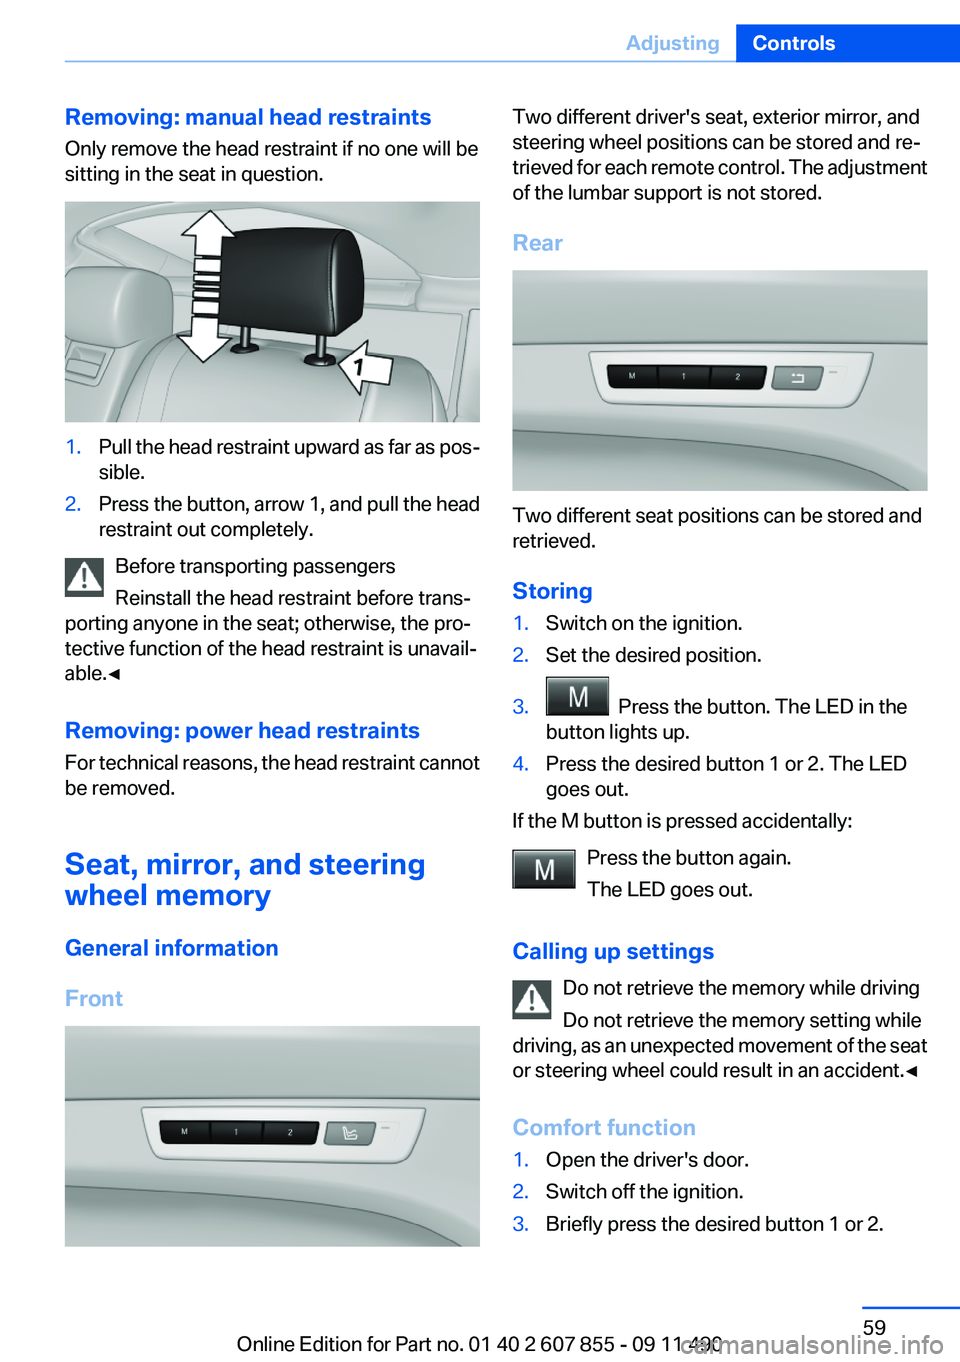
Removing: manual head restraints
Only remove the head restraint if no one will be
sitting in the seat in question.1.Pull the head restraint upward as far as pos‐
sible.2.Press the button, arrow 1, and pull the head
restraint out completely.
Before transporting passengers
Reinstall the head restraint before trans‐
porting anyone in the seat; otherwise, the pro‐
tective function of the head restraint is unavail‐
able.◀
Removing: power head restraints
For technical reasons, the head restraint cannot
be removed.
Seat, mirror, and steering
wheel memory
General information
Front
Two different driver's seat, exterior mirror, and
steering wheel positions can be stored and re‐
trieved for each remote control. The adjustment
of the lumbar support is not stored.
Rear
Two different seat positions can be stored and
retrieved.
Storing
1.Switch on the ignition.2.Set the desired position.3. Press the button. The LED in the
button lights up.4.Press the desired button 1 or 2. The LED
goes out.
If the M button is pressed accidentally:
Press the button again.
The LED goes out.
Calling up settings Do not retrieve the memory while driving
Do not retrieve the memory setting while
driving, as an unexpected movement of the seat
or steering wheel could result in an accident.◀
Comfort function
1.Open the driver's door.2.Switch off the ignition.3.Briefly press the desired button 1 or 2.Seite 59AdjustingControls59
Online Edition for Part no. 01 40 2 607 855 - 09 11 490
Page 60 of 321
The corresponding seat position is performed
automatically.
The procedure stops when a switch for adjust‐
ing the seat or one of the buttons is pressed.
Safety mode1.Close the driver's door or switch on the ig‐
nition.2.Press and hold the desired button 1 or 2 until
the adjustment procedure is completed.
Calling up of a seat position
deactivated
After a brief period, the calling up of stored seat
positions is deactivated to save battery power.
To reactivate calling up of a seat position:
▷Open or close the door or tailgate.▷Press a button on the remote control.▷Press the Start/Stop button.
Mirrors
Exterior mirrors
At a glance
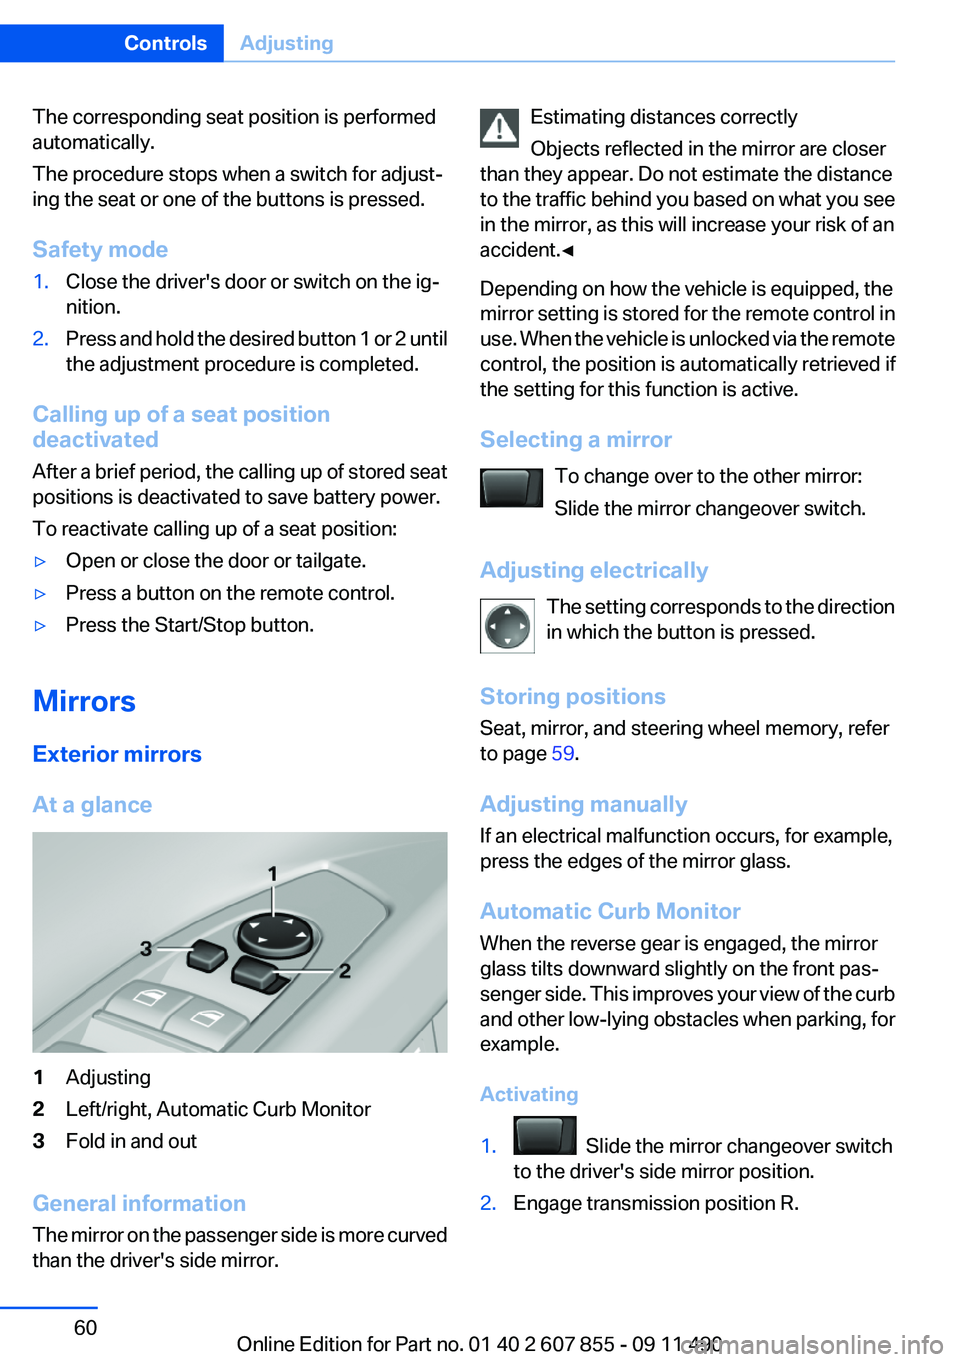
1Adjusting2Left/right, Automatic Curb Monitor3Fold in and out
General information
The mirror on the passenger side is more curved
than the driver's side mirror.
Estimating distances correctly
Objects reflected in the mirror are closer
than they appear. Do not estimate the distance
to the traffic behind you based on what you see
in the mirror, as this will increase your risk of an
accident.◀
Depending on how the vehicle is equipped, the
mirror setting is stored for the remote control in
use. When the vehicle is unlocked via the remote
control, the position is automatically retrieved if
the setting for this function is active.
Selecting a mirror To change over to the other mirror:
Slide the mirror changeover switch.
Adjusting electrically The setting corresponds to the direction
in which the button is pressed.
Storing positions
Seat, mirror, and steering wheel memory, refer
to page 59.
Adjusting manually
If an electrical malfunction occurs, for example,
press the edges of the mirror glass.
Automatic Curb Monitor
When the reverse gear is engaged, the mirror
glass tilts downward slightly on the front pas‐
senger side. This improves your view of the curb
and other low-lying obstacles when parking, for
example.
Activating1. Slide the mirror changeover switch
to the driver's side mirror position.2.Engage transmission position R.Seite 60ControlsAdjusting60
Online Edition for Part no. 01 40 2 607 855 - 09 11 490
Page 62 of 321
Steering wheel
General information Do not adjust while driving
Do not adjust the steering wheel while
driving; otherwise, an unexpected movement
could result in an accident.◀
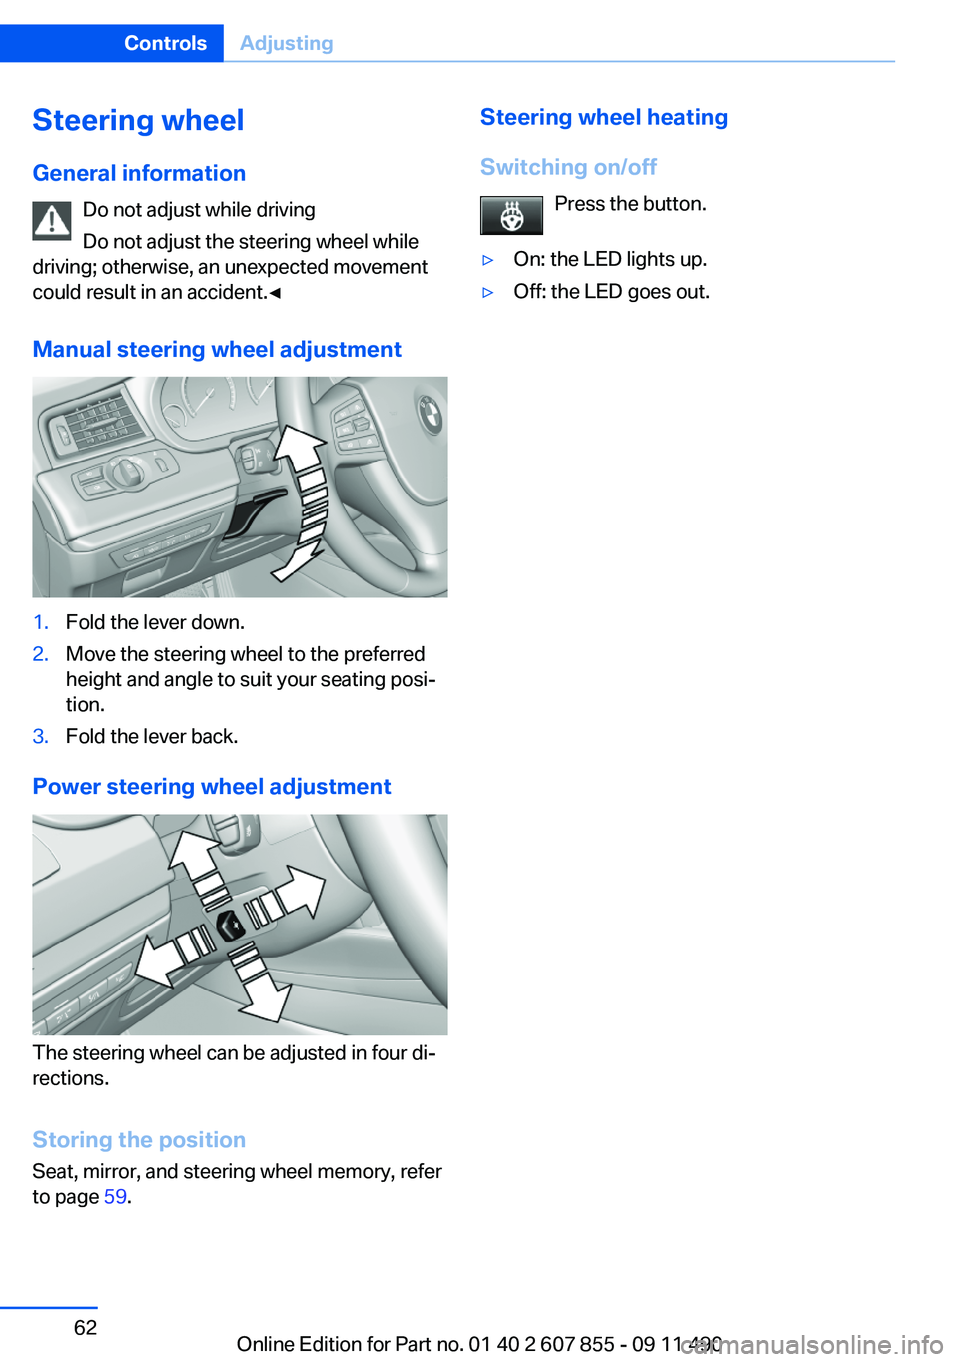
Manual steering wheel adjustment1.Fold the lever down.2.Move the steering wheel to the preferred
height and angle to suit your seating posi‐
tion.3.Fold the lever back.
Power steering wheel adjustment
The steering wheel can be adjusted in four di‐
rections.
Storing the position
Seat, mirror, and steering wheel memory, refer
to page 59.
Steering wheel heating
Switching on/off Press the button.▷On: the LED lights up.▷Off: the LED goes out.Seite 62ControlsAdjusting62
Online Edition for Part no. 01 40 2 607 855 - 09 11 490