light BMW 535I XDRIVE GT 2011 F07 Owners Manual
[x] Cancel search | Manufacturer: BMW, Model Year: 2011, Model line: 535I XDRIVE GT, Model: BMW 535I XDRIVE GT 2011 F07Pages: 297, PDF Size: 8.59 MB
Page 202 of 297
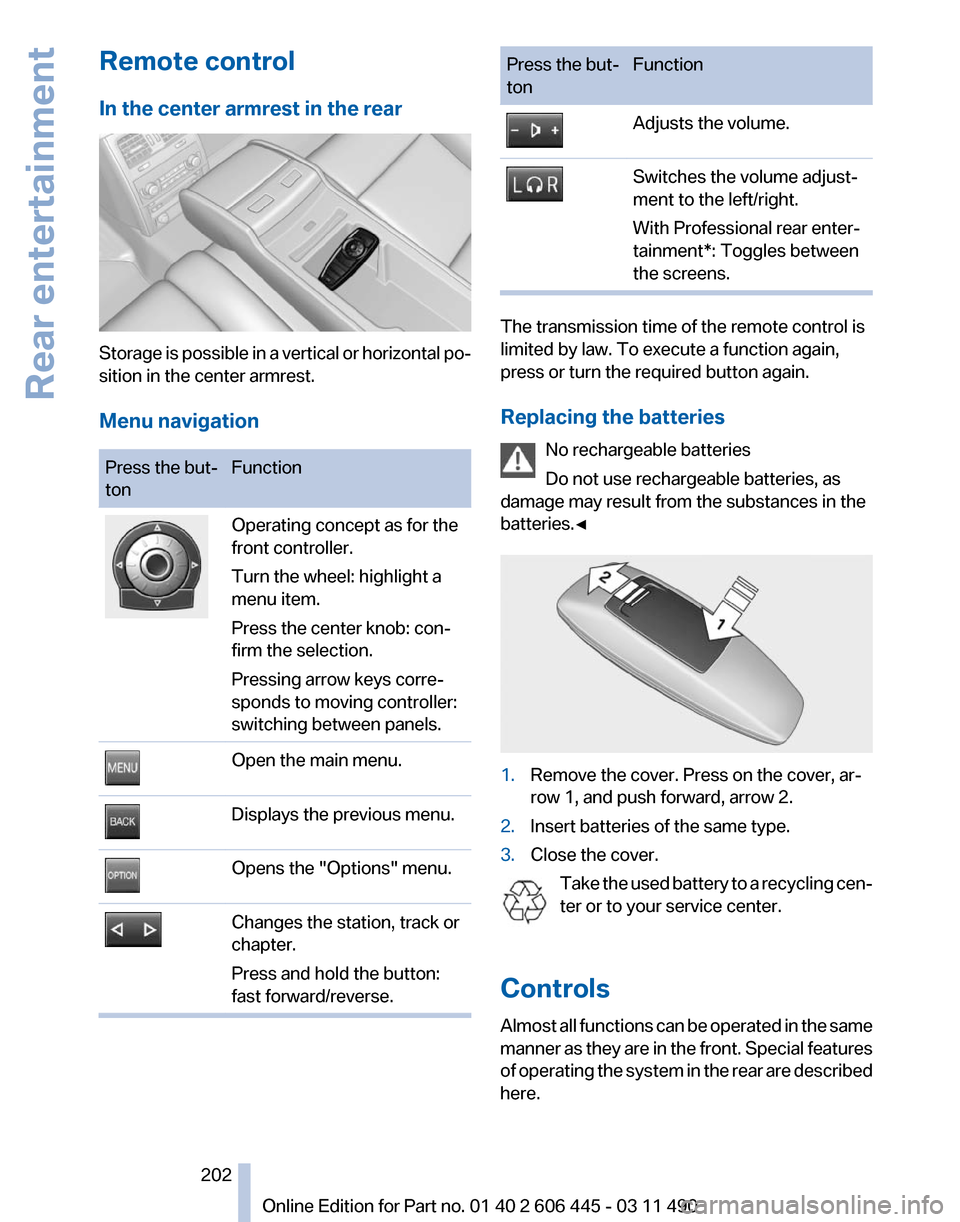
Remote control
In the center armrest in the rear
Storage is possible in a vertical or horizontal po‐
sition in the center armrest.
Menu navigation
Press the but‐
ton
Function Operating concept as for the
front controller.
Turn the wheel: highlight a
menu item.
Press the center knob: con‐
firm the selection.
Pressing arrow keys corre‐
sponds to moving controller:
switching between panels.
Open the main menu.
Displays the previous menu.
Opens the "Options" menu.
Changes the station, track or
chapter.
Press and hold the button:
fast forward/reverse. Press the but‐
ton
Function Adjusts the volume.
Switches the volume adjust‐
ment to the left/right.
With Professional rear enter‐
tainment*: Toggles between
the screens.
The transmission time of the remote control is
limited by law. To execute a function again,
press or turn the required button again.
Replacing the batteries
No rechargeable batteries
Do not use rechargeable batteries, as
damage may result from the substances in the
batteries.◀ 1.
Remove the cover. Press on the cover, ar‐
row 1, and push forward, arrow 2.
2. Insert batteries of the same type.
3. Close the cover.
Take the used battery to a recycling cen‐
ter or to your service center.
Controls
Almost
all functions can be operated in the same
manner as they are in the front. Special features
of operating the system in the rear are described
here. Seite 202
202 Online Edition for Part no. 01 40 2 606 445 - 03 11 490
Rear entertainment
Page 205 of 297
Headphones, vehicle
loudspeakers
Connecting the headphones
Normal headphones
Connect via the jack 1/8"/3.5 mm, refer to
page
201, on the rear CD/DVD player.
Infrared headphones
Connection via the infrared interface on the
lower edge of the screen.
Fitting infrared headphones and information on
which headphones are supported can be ob‐
tained from your service center.
When using infrared headphones, ensure that
the connection between the headphones and
the infrared interface is not disrupted:
▷ Do not place an obstacle between the inter‐
face and headphones.
▷ Do not cover the interface.
▷ Do not scratch the interface.
Fold up display screens for interference-free re‐
ception.
Unfavorable light conditions such as bright am‐
bient light can impair reception.
Sound output on the headphones or
vehicle loudspeakers
Operation is only possible in the rear.
1. Open "Options".
2. "Headphones" or "Loudspeakers"
With the following setting, sound output in the
rear is not possible via the vehicle speakers:
"Driver control".
External devices
General information
External audio and video devices and digital
cameras
can be connected to cinch sockets, re‐
fer to page 201, on the CD/DVD player. Opera‐
tion takes place on the external device. Due to the large number of different audio and
video devices available on the market, it cannot
be ensured that every audio and video device
will be displayed correctly on the screen.
Connecting an external device
1.
Fold down the cover in front of the cinch
sockets on the CD/DVD player.
2. Connect the external device to the RCA
sockets.
▷Video: yellow socket.
▷ Audio: white and red socket.
Starting playback
1. "CD/Multimedia"
2. "External devices"
3. Select the or symbol.
Volume
The volume of the sound output is dependent
on the audio device. If this volume differs mark‐
edly
from the volume of the other audio sources,
it is advisable to adjust the volumes.
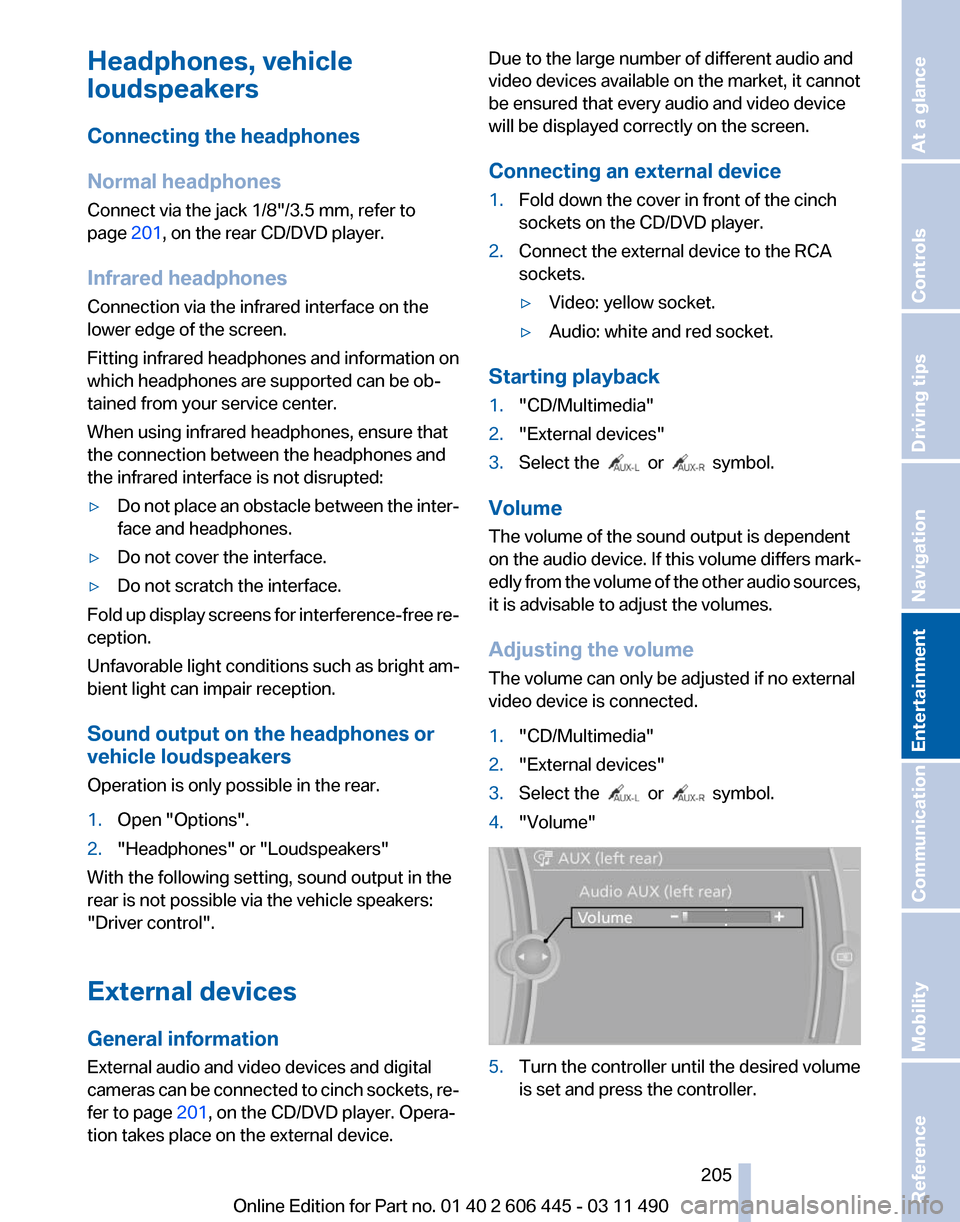
Adjusting the volume
The volume can only be adjusted if no external
video device is connected.
1. "CD/Multimedia"
2. "External devices"
3. Select the or symbol.
4. "Volume" 5.
Turn the controller until the desired volume
is set and press the controller.
Seite 205
205Online Edition for Part no. 01 40 2 606 445 - 03 11 490
Reference Mobility Communication
Entertainment Navigation Driving tips Controls At a glance
Page 212 of 297
If the pairing was successful, the mobile phone
appears at the top of the list of mobile phones.
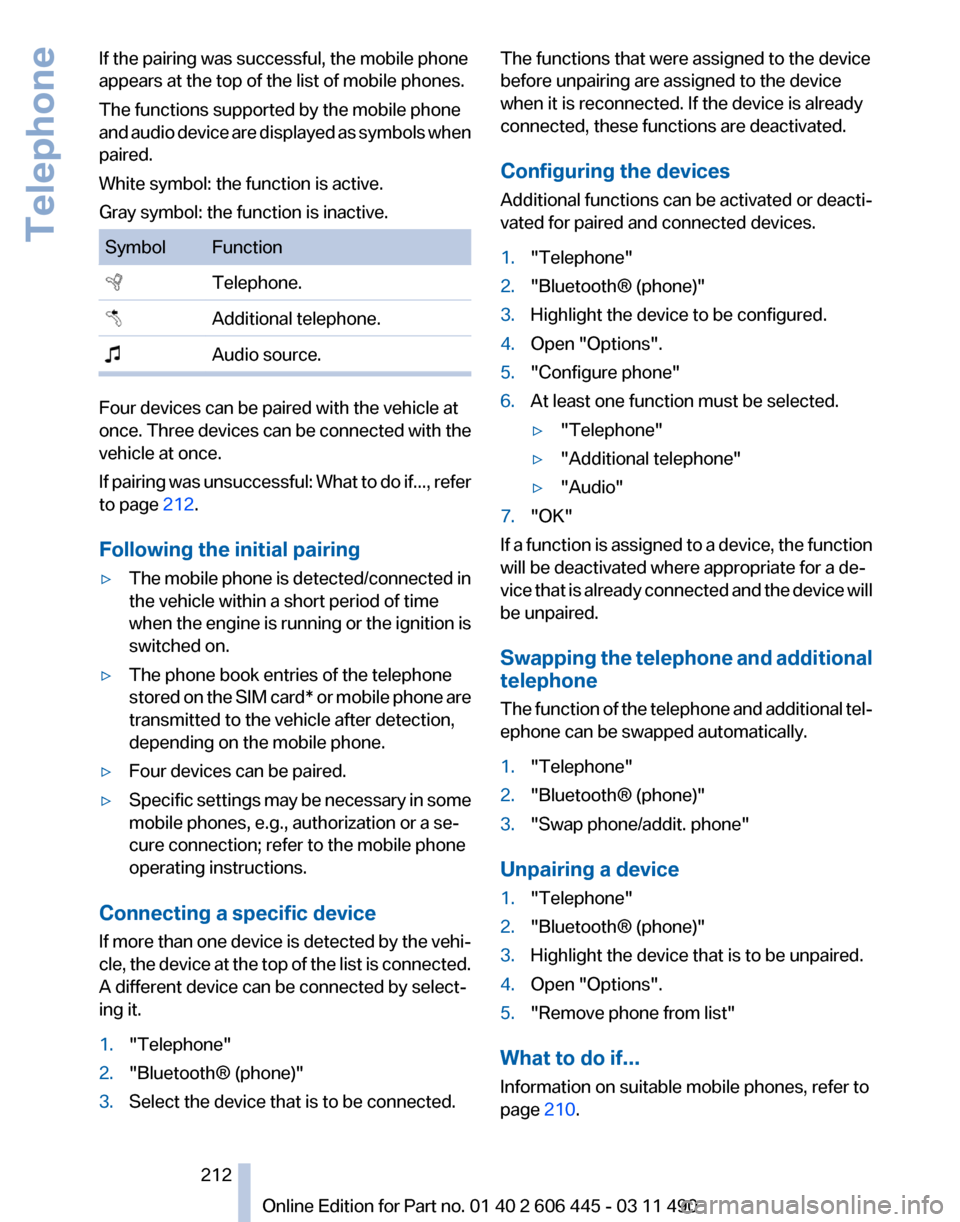
The functions supported by the mobile phone
and
audio device are displayed as symbols when
paired.
White symbol: the function is active.
Gray symbol: the function is inactive. Symbol Function
Telephone.
Additional telephone.
Audio source. Four devices can be paired with the vehicle at
once.
Three devices can be connected with the
vehicle at once.
If pairing was unsuccessful: What to do if..., refer
to page 212.
Following the initial pairing
▷ The mobile phone is detected/connected in
the vehicle within a short period of time
when
the engine is running or the ignition is
switched on.
▷ The phone book entries of the telephone
stored
on the SIM card* or mobile phone are
transmitted to the vehicle after detection,
depending on the mobile phone.
▷ Four devices can be paired.
▷ Specific settings may be necessary in some
mobile phones, e.g., authorization or a se‐
cure connection; refer to the mobile phone
operating instructions.
Connecting a specific device
If
more than one device is detected by the vehi‐
cle, the device at the top of the list is connected.
A different device can be connected by select‐
ing it.
1. "Telephone"
2. "Bluetooth® (phone)"
3. Select the device that is to be connected. The functions that were assigned to the device
before unpairing are assigned to the device
when it is reconnected. If the device is already
connected, these functions are deactivated.
Configuring the devices
Additional functions can be activated or deacti‐
vated for paired and connected devices.
1.
"Telephone"
2. "Bluetooth® (phone)"
3. Highlight the device to be configured.
4. Open "Options".
5. "Configure phone"
6. At least one function must be selected.
▷"Telephone"
▷ "Additional telephone"
▷ "Audio"
7. "OK"
If a function is assigned to a device, the function
will be deactivated where appropriate for a de‐
vice
that is already connected and the device will
be unpaired.
Swapping the telephone and additional
telephone
The function of the telephone and additional tel‐
ephone can be swapped automatically.
1. "Telephone"
2. "Bluetooth® (phone)"
3. "Swap phone/addit. phone"
Unpairing a device
1. "Telephone"
2. "Bluetooth® (phone)"
3. Highlight the device that is to be unpaired.
4. Open "Options".
5. "Remove phone from list"
What to do if...
Information on suitable mobile phones, refer to
page 210.
Seite 212
212 Online Edition for Part no. 01 40 2 606 445 - 03 11 490
Telephone
Page 216 of 297
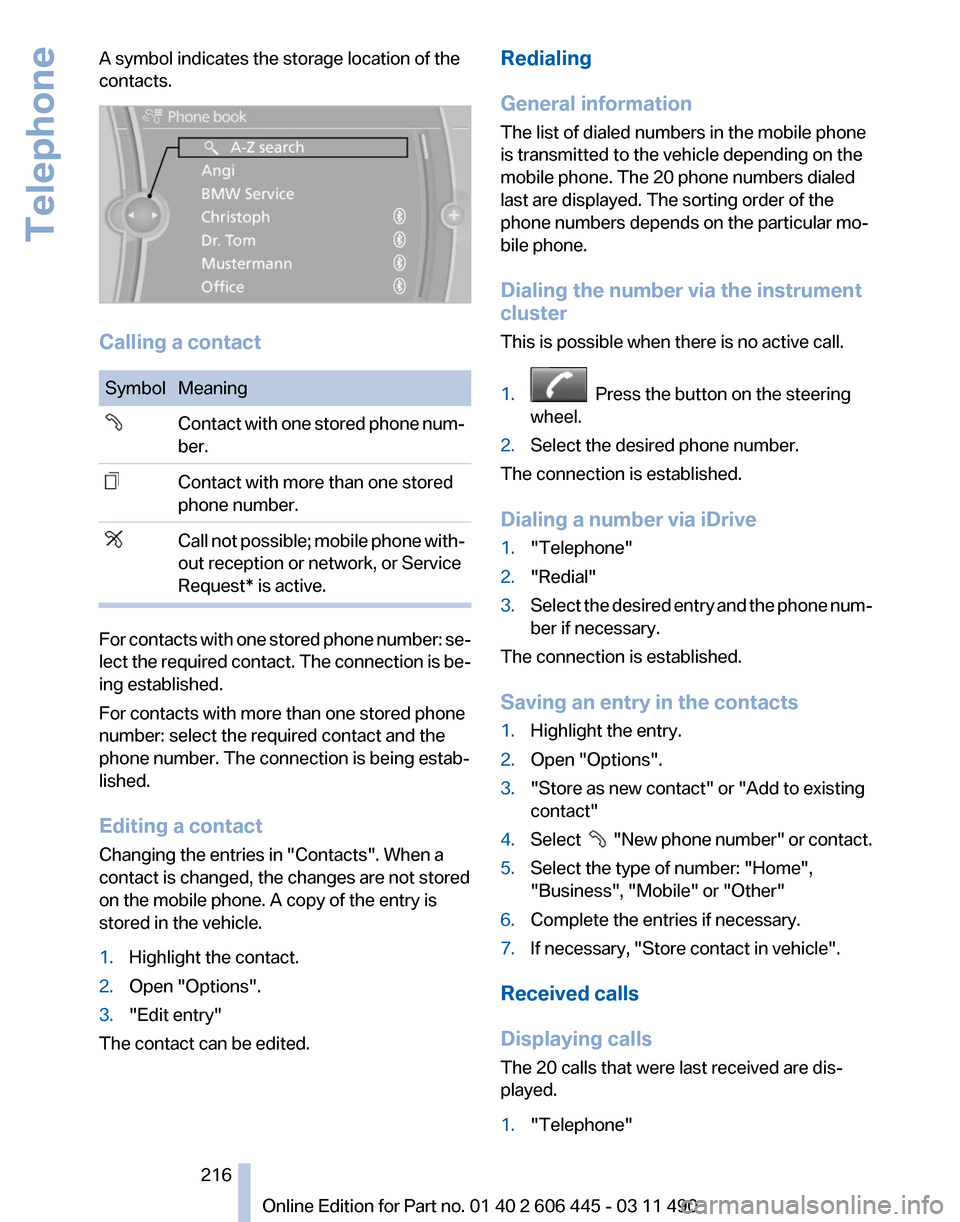
A symbol indicates the storage location of the
contacts.
Calling a contact
Symbol Meaning
Contact with one stored phone num‐
ber.
Contact with more than one stored
phone number.
Call not possible; mobile phone with‐
out reception or network, or Service
Request* is active.
For contacts with one stored phone number: se‐
lect
the required contact. The connection is be‐
ing established.
For contacts with more than one stored phone
number: select the required contact and the
phone number. The connection is being estab‐
lished.
Editing a contact
Changing the entries in "Contacts". When a
contact is changed, the changes are not stored
on the mobile phone. A copy of the entry is
stored in the vehicle.
1. Highlight the contact.
2. Open "Options".
3. "Edit entry"
The contact can be edited. Redialing
General information
The list of dialed numbers in the mobile phone
is transmitted to the vehicle depending on the
mobile phone. The 20 phone numbers dialed
last are displayed. The sorting order of the
phone numbers depends on the particular mo‐
bile phone.
Dialing the number via the instrument
cluster
This is possible when there is no active call.
1.
Press the button on the steering
wheel.
2. Select the desired phone number.
The connection is established.
Dialing a number via iDrive
1. "Telephone"
2. "Redial"
3. Select the desired entry and the phone num‐
ber if necessary.
The connection is established.
Saving an entry in the contacts
1. Highlight the entry.
2. Open "Options".
3. "Store as new contact" or "Add to existing
contact"
4. Select
"New phone number" or contact.
5. Select the type of number: "Home",
"Business", "Mobile" or "Other"
6. Complete the entries if necessary.
7. If necessary, "Store contact in vehicle".
Received calls
Displaying calls
The 20 calls that were last received are dis‐
played.
1. "Telephone"
Seite 216
216 Online Edition for Part no. 01 40 2 606 445 - 03 11 490
Telephone
Page 217 of 297
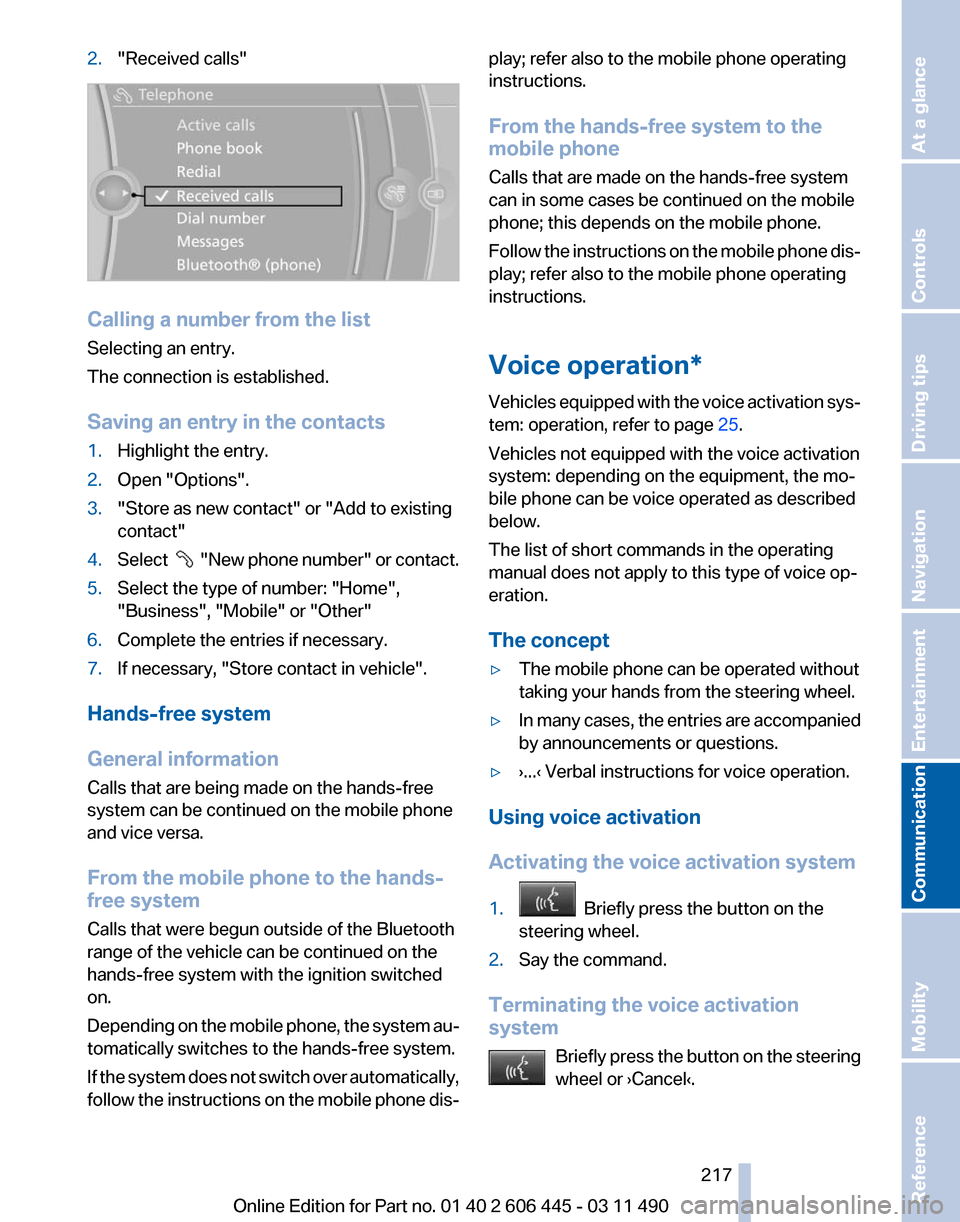
2.
"Received calls" Calling a number from the list
Selecting an entry.
The connection is established.
Saving an entry in the contacts
1.
Highlight the entry.
2. Open "Options".
3. "Store as new contact" or "Add to existing
contact"
4. Select "New phone number" or contact.
5. Select the type of number: "Home",
"Business", "Mobile" or "Other"
6. Complete the entries if necessary.
7. If necessary, "Store contact in vehicle".
Hands-free system
General information
Calls that are being made on the hands-free
system can be continued on the mobile phone
and vice versa.
From the mobile phone to the hands-
free system
Calls that were begun outside of the Bluetooth
range of the vehicle can be continued on the
hands-free system with the ignition switched
on.
Depending
on the mobile phone, the system au‐
tomatically switches to the hands-free system.
If the system does not switch over automatically,
follow the instructions on the mobile phone dis‐ play; refer also to the mobile phone operating
instructions.
From the hands-free system to the
mobile phone
Calls that are made on the hands-free system
can in some cases be continued on the mobile
phone; this depends on the mobile phone.
Follow
the instructions on the mobile phone dis‐
play; refer also to the mobile phone operating
instructions.
Voice operation*
Vehicles equipped with the voice activation sys‐
tem: operation, refer to page 25.
Vehicles not equipped with the voice activation
system: depending on the equipment, the mo‐
bile phone can be voice operated as described
below.
The list of short commands in the operating
manual does not apply to this type of voice op‐
eration.
The concept
▷ The mobile phone can be operated without
taking your hands from the steering wheel.
▷ In many cases, the entries are accompanied
by announcements or questions.
▷ ›...‹ Verbal instructions for voice operation.
Using voice activation
Activating the voice activation system
1. Briefly press the button on the
steering wheel.
2. Say the command.
Terminating the voice activation
system Briefly
press the button on the steering
wheel or ›Cancel‹. Seite 217
217Online Edition for Part no. 01 40 2 606 445 - 03 11 490
Reference Mobility
Communication Entertainment Navigation Driving tips Controls At a glance
Page 222 of 297
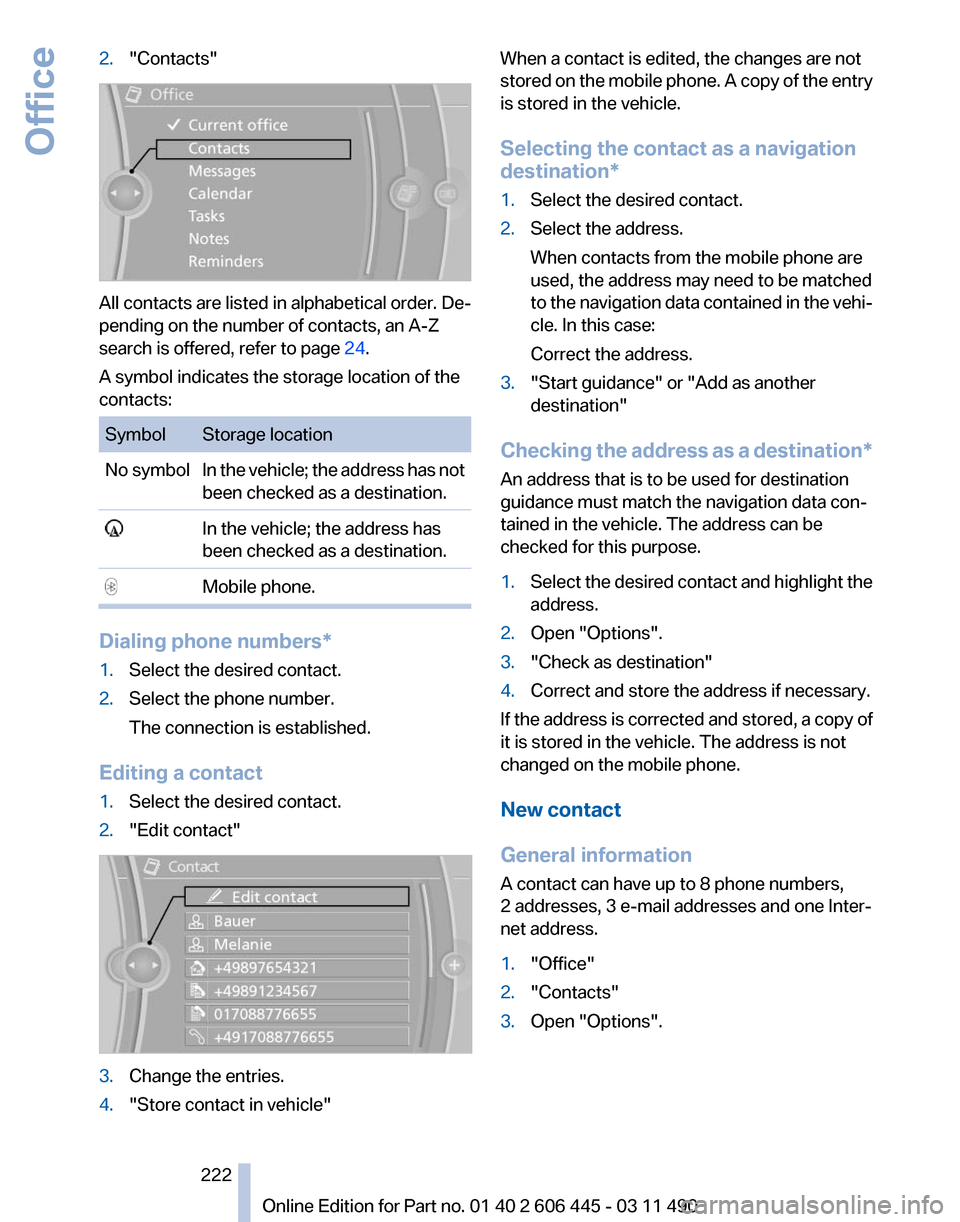
2.
"Contacts" All contacts are listed in alphabetical order. De‐
pending on the number of contacts, an A-Z
search is offered, refer to page
24.
A symbol indicates the storage location of the
contacts: Symbol Storage location
No symbol In the vehicle; the address has not
been checked as a destination. In the vehicle; the address has
been checked as a destination. Mobile phone.
Dialing phone numbers*
1.
Select the desired contact.
2. Select the phone number.
The connection is established.
Editing a contact
1. Select the desired contact.
2. "Edit contact" 3.
Change the entries.
4. "Store contact in vehicle" When a contact is edited, the changes are not
stored
on the mobile phone. A copy of the entry
is stored in the vehicle.
Selecting the contact as a navigation
destination*
1. Select the desired contact.
2. Select the address.
When contacts from the mobile phone are
used, the address may need to be matched
to
the navigation data contained in the vehi‐
cle. In this case:
Correct the address.
3. "Start guidance" or "Add as another
destination"
Checking the address as a destination*
An address that is to be used for destination
guidance must match the navigation data con‐
tained in the vehicle. The address can be
checked for this purpose.
1. Select the desired contact and highlight the
address.
2. Open "Options".
3. "Check as destination"
4. Correct and store the address if necessary.
If the address is corrected and stored, a copy of
it is stored in the vehicle. The address is not
changed on the mobile phone.
New contact
General information
A contact can have up to 8 phone numbers,
2 addresses, 3 e-mail addresses and one Inter‐
net address.
1. "Office"
2. "Contacts"
3. Open "Options".
Seite 222
222 Online Edition for Part no. 01 40 2 606 445 - 03 11 490
Office
Page 223 of 297
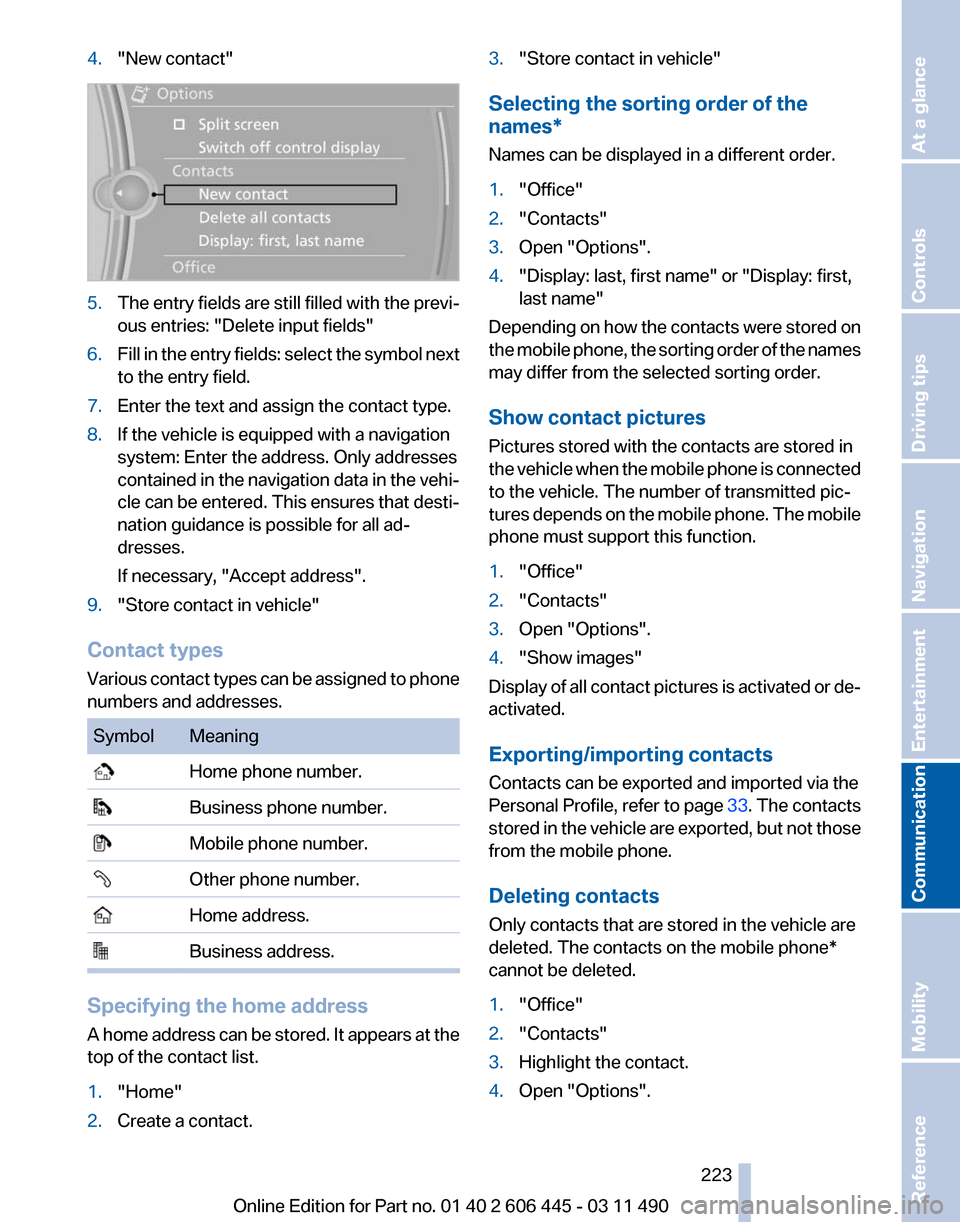
4.
"New contact" 5.
The entry fields are still filled with the previ‐
ous entries: "Delete input fields"
6. Fill in the entry fields: select the symbol next
to the entry field.
7. Enter the text and assign the contact type.
8. If the vehicle is equipped with a navigation
system: Enter the address. Only addresses
contained
in the navigation data in the vehi‐
cle can be entered. This ensures that desti‐
nation guidance is possible for all ad‐
dresses.
If necessary, "Accept address".
9. "Store contact in vehicle"
Contact types
Various
contact types can be assigned to phone
numbers and addresses. Symbol Meaning
Home phone number.
Business phone number.
Mobile phone number.
Other phone number.
Home address.
Business address.
Specifying the home address
A
home address can be stored. It appears at the
top of the contact list.
1. "Home"
2. Create a contact. 3.
"Store contact in vehicle"
Selecting the sorting order of the
names*
Names can be displayed in a different order.
1. "Office"
2. "Contacts"
3. Open "Options".
4. "Display: last, first name" or "Display: first,
last name"
Depending on how the contacts were stored on
the
mobile phone, the sorting order of the names
may differ from the selected sorting order.
Show contact pictures
Pictures stored with the contacts are stored in
the vehicle when the mobile phone is connected
to the vehicle. The number of transmitted pic‐
tures depends on the mobile phone. The mobile
phone must support this function.
1. "Office"
2. "Contacts"
3. Open "Options".
4. "Show images"
Display of all contact pictures is activated or de‐
activated.
Exporting/importing contacts
Contacts can be exported and imported via the
Personal Profile, refer to page 33. The contacts
stored
in the vehicle are exported, but not those
from the mobile phone.
Deleting contacts
Only contacts that are stored in the vehicle are
deleted. The contacts on the mobile phone*
cannot be deleted.
1. "Office"
2. "Contacts"
3. Highlight the contact.
4. Open "Options".
Seite 223
223Online Edition for Part no. 01 40 2 606 445 - 03 11 490
Reference Mobility
Communication Entertainment Navigation Driving tips Controls At a glance
Page 225 of 297
3.
Open "Options".
4. "Delete all messages" or "Delete service
messages"
Text messages
Calling the sender of a text message
1. Select the desired message.
2. Select the symbol.
Saving the sender in the contacts
1. Highlight the desired message.
2. Open "Options".
3. "Store as new contact" or "Add to existing
contact"
Reading the text message out loud*
Read the text messages out loud, refer to
page 228.
My Info
Starting destination guidance
1. Select the message.
2. "Start guidance" or "Add as another
destination"
Dialing the number in the message
Up to 4 phone numbers can be transmitted with
a message.
1. Select the desired message.
2. "Call":
If the message contains a number, the con‐
nection is established. "Select phone number":
If
the message contains more than one num‐
ber, select the desired number from the list.
The connection is established.
Message from the Concierge service
Starting destination guidance
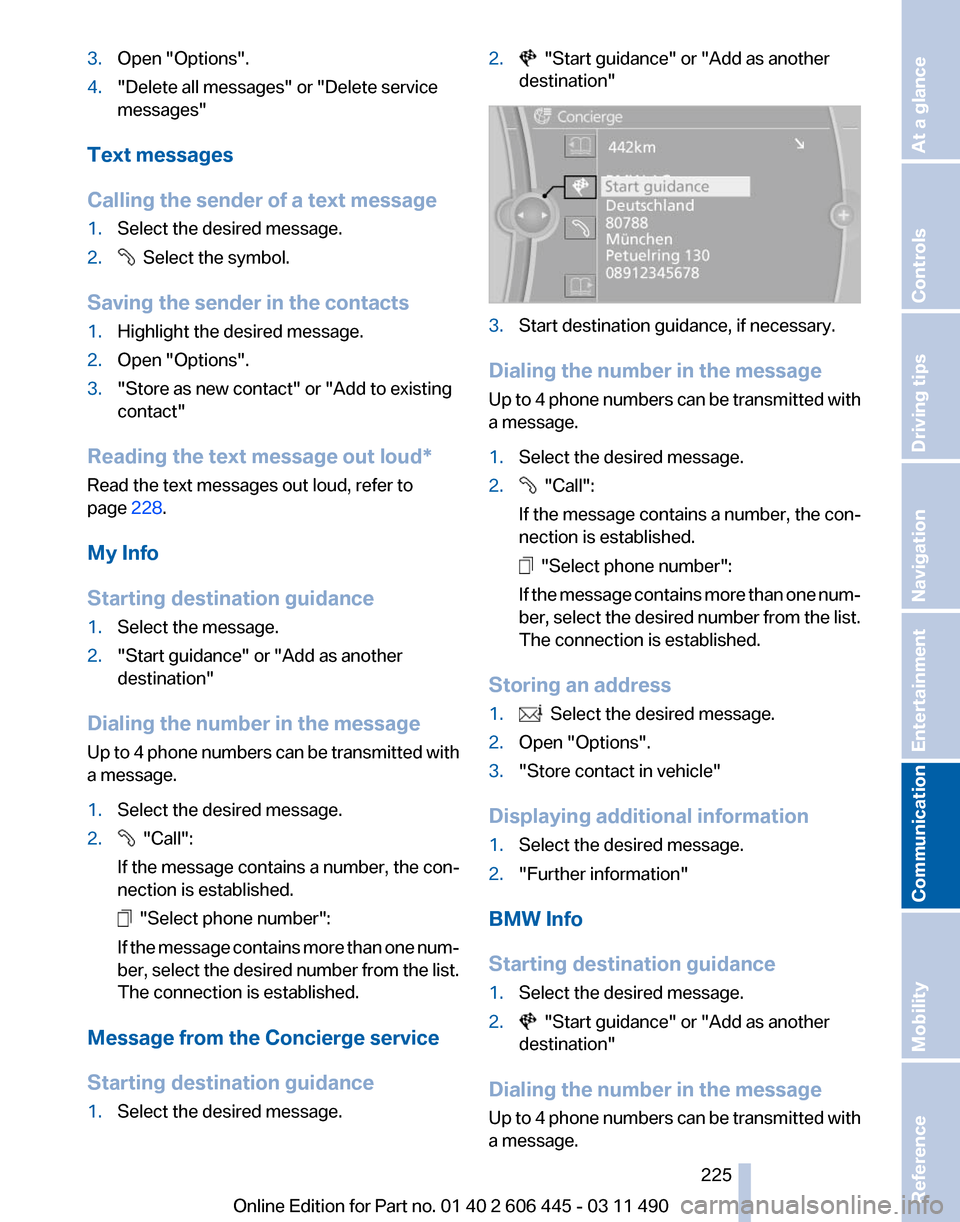
1. Select the desired message. 2. "Start guidance" or "Add as another
destination" 3.
Start destination guidance, if necessary.
Dialing the number in the message
Up
to 4 phone numbers can be transmitted with
a message.
1. Select the desired message.
2. "Call":
If the message contains a number, the con‐
nection is established. "Select phone number":
If
the message contains more than one num‐
ber, select the desired number from the list.
The connection is established.
Storing an address
1. Select the desired message.
2. Open "Options".
3. "Store contact in vehicle"
Displaying additional information
1. Select the desired message.
2. "Further information"
BMW Info
Starting destination guidance
1. Select the desired message.
2. "Start guidance" or "Add as another
destination"
Dialing the number in the message
Up
to 4 phone numbers can be transmitted with
a message.
Seite 225
225Online Edition for Part no. 01 40 2 606 445 - 03 11 490
Reference Mobility
Communication Entertainment Navigation Driving tips Controls At a glance
Page 228 of 297
Using contact data
At a glance
Contact data from calendar entries, appoint‐
ments,
tasks, emails and notes can be stored or
selected*.
Displaying contact or selecting phone
number
1. "Use contact data"
2. Display the contact or select the phone
number:
▷Select the contact to display contact de‐
tails.
▷ Select the phone number to establish a
connection directly.
Storing contact data
1. "Use contact data"
2. Highlight the phone number or e-mail ad‐
dress.
3. Open "Options".
4. "Add to existing contact" or "Store as new
contact"
Reading out loud*
Text messages, e-mails, appointment entries,
tasks, and notes can be read out loud.
1. Select the desired message, appointment,
task, or note.
2. Select the symbol.
The following options are available during read‐
ing:
▷ "Pause"
Interrupt reading. Select again to restart
reading.
▷ "Back to beginning"
Start reading message again from the be‐
ginning.
▷ Select the symbol.
Skip a paragraph. ▷ Select the symbol.
Go back one paragraph.
▷ To end reading, tilt the controller to the left.
What to do if...
Information on suitable mobile phones, refer to
page 210.
Appointments, tasks, notes, text messages, or
e-mails from the mobile phone are not dis‐
played.
▷ The mobile phone is not capable of the
missing function or is not connected cor‐
rectly.
▷ The Office function is deactivated.
▷ The mobile phone is connected as an addi‐
tional phone.
▷ Appointments are older than 20 days or are
more than 50 days in the future.
▷ The tasks have been marked as completed
or have a due date that lies more than
90 days in the future.
▷ Depending on the number of stored ap‐
pointments, task notes, and messages in
the
mobile phone, not all are displayed in the
vehicle.
Not all appointments and tasks from the mobile
phone are displayed at the right time?
▷ The time zone, time or date is incorrectly set
on the Control Display and mobile phone.
The e-mail attachment is not displayed.
▷ E-mails are transmitted without an attach‐
ment.
Entries are not displayed in full length.
▷ Text were already transmitted from the mo‐
bile phone in a shortened form.
▷ Synchronization between the mobile phone
and vehicle may take several minutes.
The contact pictures are not being displayed?
▷ A max. of 200 contact pictures can be stored
in the vehicle.
The E-mail is displayed with a delay?
Seite 228
228 Online Edition for Part no. 01 40 2 606 445 - 03 11 490
Office
Page 231 of 297
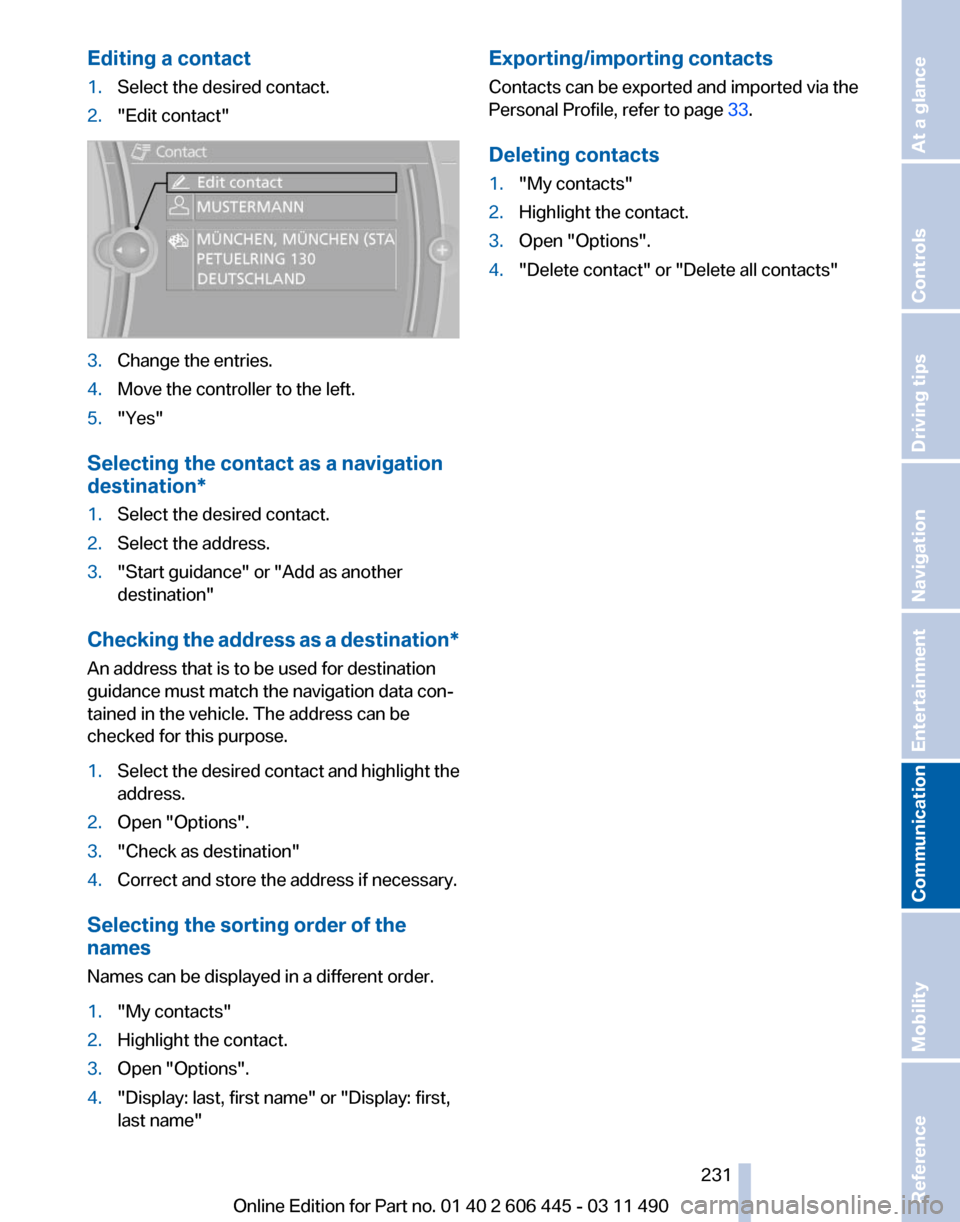
Editing a contact
1.
Select the desired contact.
2. "Edit contact" 3.
Change the entries.
4. Move the controller to the left.
5. "Yes"
Selecting the contact as a navigation
destination*
1. Select the desired contact.
2. Select the address.
3. "Start guidance" or "Add as another
destination"
Checking the address as a destination*
An address that is to be used for destination
guidance must match the navigation data con‐
tained in the vehicle. The address can be
checked for this purpose.
1. Select the desired contact and highlight the
address.
2. Open "Options".
3. "Check as destination"
4. Correct and store the address if necessary.
Selecting the sorting order of the
names
Names can be displayed in a different order.
1. "My contacts"
2. Highlight the contact.
3. Open "Options".
4. "Display: last, first name" or "Display: first,
last name" Exporting/importing contacts
Contacts can be exported and imported via the
Personal Profile, refer to page
33.
Deleting contacts
1. "My contacts"
2. Highlight the contact.
3. Open "Options".
4. "Delete contact" or "Delete all contacts"
Seite 231
231Online Edition for Part no. 01 40 2 606 445 - 03 11 490
Reference Mobility
Communication Entertainment Navigation Driving tips Controls At a glance