light BMW 535I XDRIVE GT 2011 F07 Owner's Manual
[x] Cancel search | Manufacturer: BMW, Model Year: 2011, Model line: 535I XDRIVE GT, Model: BMW 535I XDRIVE GT 2011 F07Pages: 297, PDF Size: 8.59 MB
Page 234 of 297
Vehicles equipped with BMW Assist or
BMW TeleService
1.
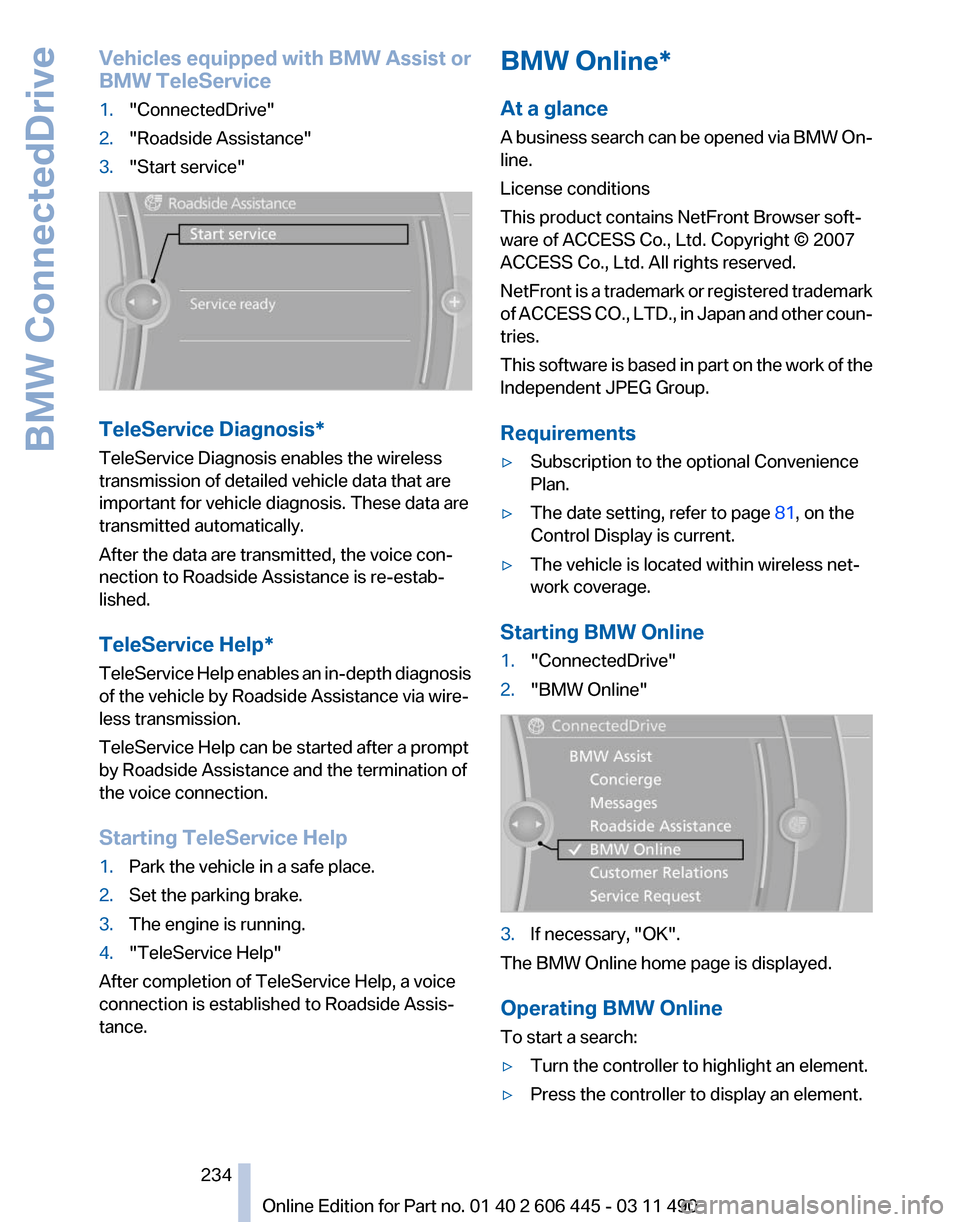
"ConnectedDrive"
2. "Roadside Assistance"
3. "Start service" TeleService Diagnosis*
TeleService Diagnosis enables the wireless
transmission of detailed vehicle data that are
important for vehicle diagnosis. These data are
transmitted automatically.
After the data are transmitted, the voice con‐
nection to Roadside Assistance is re-estab‐
lished.
TeleService Help
*
TeleService Help enables an in-depth diagnosis
of the vehicle by Roadside Assistance via wire‐
less transmission.
TeleService Help can be started after a prompt
by Roadside Assistance and the termination of
the voice connection.
Starting TeleService Help
1. Park the vehicle in a safe place.
2. Set the parking brake.
3. The engine is running.
4. "TeleService Help"
After completion of TeleService Help, a voice
connection is established to Roadside Assis‐
tance. BMW Online*
At a glance
A
business search can be opened via BMW On‐
line.
License conditions
This product contains NetFront Browser soft‐
ware of ACCESS Co., Ltd. Copyright © 2007
ACCESS Co., Ltd. All rights reserved.
NetFront is a trademark or registered trademark
of ACCESS CO., LTD., in Japan and other coun‐
tries.
This software is based in part on the work of the
Independent JPEG Group.
Requirements
▷ Subscription to the optional Convenience
Plan.
▷ The date setting, refer to page 81, on the
Control Display is current.
▷ The vehicle is located within wireless net‐
work coverage.
Starting BMW Online
1. "ConnectedDrive"
2. "BMW Online" 3.
If necessary, "OK".
The BMW Online home page is displayed.
Operating BMW Online
To start a search:
▷ Turn the controller to highlight an element.
▷ Press the controller to display an element.
Seite 234
234 Online Edition for Part no. 01 40 2 606 445 - 03 11 490
BMW ConnectedDrive
Page 249 of 297
Retreaded tires
Possibly substantial variations in the de‐
sign and age of the tire casing structures can
limit service life and have a negative impact on
road safety.◀
Winter tires
The manufacturer of your vehicle recommends
winter tires for winter roads or at temperatures
below +45 ℉/+7 ℃.
Although
so-called all-season M+S tires do pro‐
vide better winter traction than summer tires,
they do not provide the same level of perform‐
ance as winter tires.
Maximum speed of winter tires
If the maximum speed of the vehicle is higher
than the permissible speed for the winter tires,
then display a corresponding sign in the field of
vision. You can obtain this sign from the tire spe‐
cialist or from your service center.
Maximum speed for winter tires
Do not exceed the maximum speed for the
winter tires; otherwise, tire damage and acci‐
dents can occur.◀
Run-flat tires
For your own safety, only use run-flat tires. No
spare tire is available in the case of a flat tire. Your
service center will be glad to advise you.
Rotating wheels between axles
The manufacturer of your vehicle advises
against swapping wheels between the front and
rear axles.
This can impair the handling characteristics.
Storage
Store wheels and tires in a cool, dry place with
as little exposure to light as possible.
Always protect tires against all contact with oil,
grease and fuels.
Do not exceed the maximum tire inflation pres‐
sure indicated on the side wall of the tire. Run-flat tires*
Label
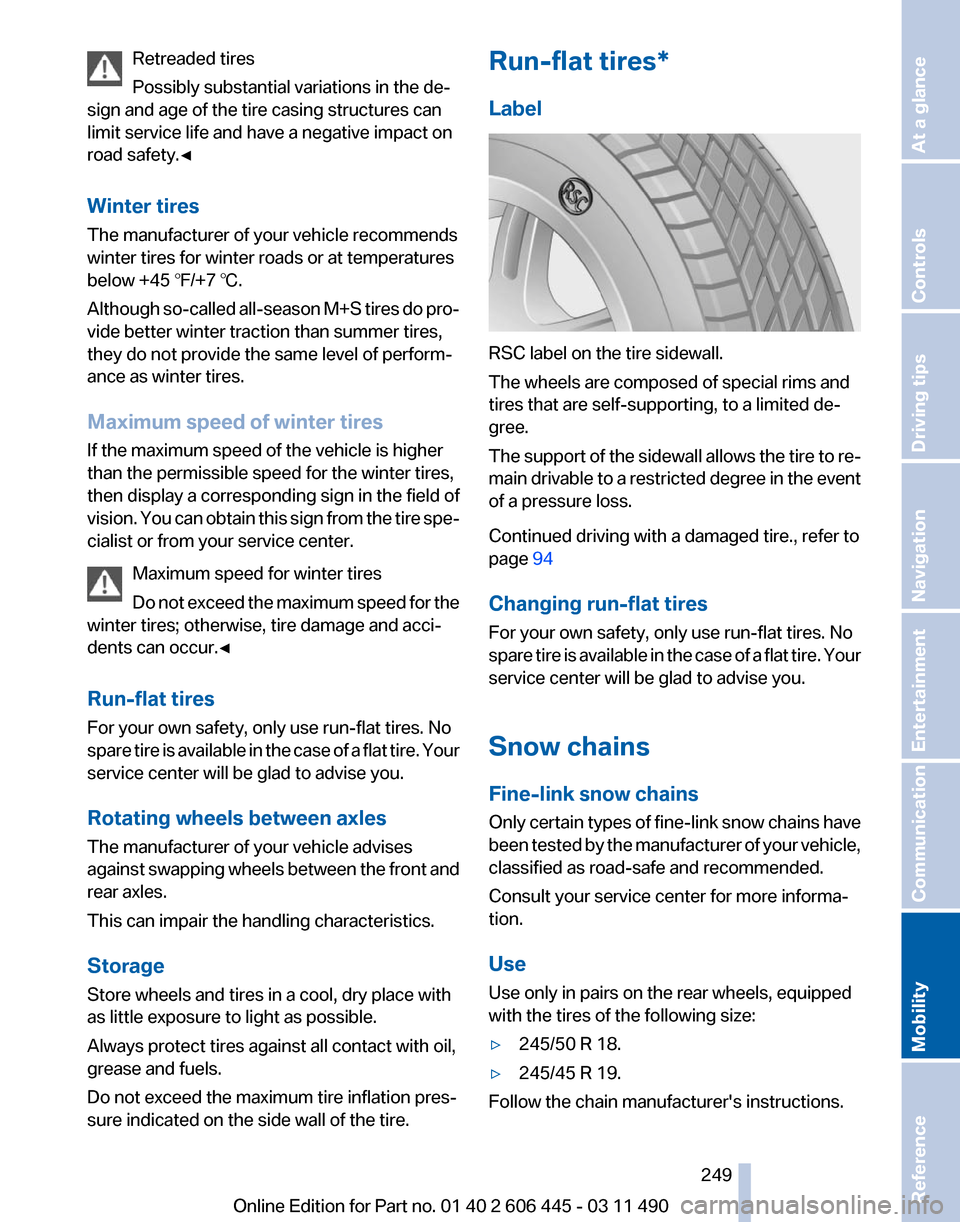
RSC label on the tire sidewall.
The wheels are composed of special rims and
tires that are self-supporting, to a limited de‐
gree.
The
support of the sidewall allows the tire to re‐
main drivable to a restricted degree in the event
of a pressure loss.
Continued driving with a damaged tire., refer to
page 94
Changing run-flat tires
For your own safety, only use run-flat tires. No
spare tire is available in the case of a flat tire. Your
service center will be glad to advise you.
Snow chains
Fine-link snow chains
Only certain types of fine-link snow chains have
been tested by the manufacturer of your vehicle,
classified as road-safe and recommended.
Consult your service center for more informa‐
tion.
Use
Use only in pairs on the rear wheels, equipped
with the tires of the following size:
▷ 245/50 R 18.
▷ 245/45 R 19.
Follow the chain manufacturer's instructions.
Seite 249
249Online Edition for Part no. 01 40 2 606 445 - 03 11 490
Reference
Mobility Communication Entertainment Navigation Driving tips Controls At a glance
Page 253 of 297
Engine oil
General information
The
engine oil consumption is dependent on the
driving style and driving conditions.
Therefore, check the engine oil level after every
refueling using the electronic engine oil level
check.
Checking the oil level
The concept
The oil level is monitored electronically and dis‐
played on the Control Display.
Requirements
▷ The engine must be running and warm after
the vehicle has been driven for at least
6 miles/10 km.
▷ The vehicle is stopped or being driven on a
level roadway.
Displaying the oil level
1. "Vehicle Info"
2. "Vehicle status"
3. "Engine oil level" Possible messages
▷
"Engine oil level OK"
▷ "Measurement not possible at this time."
▷ "Measuring engine oil level..."
Duration with the engine running: ap‐
prox. 3 minutes. Duration while driving: approx. 5 minutes.
▷ "Engine oil level below minimum. Add 1
quart!"
Add oil within the next 125 miles/200 km.
▷ "Engine oil level too high! Have this
checked."
Have the vehicle checked immediately.
Too much engine oil
Have the vehicle checked immedi‐
ately; otherwise, surplus oil can lead to en‐
gine damage.
◀ ▷
"Measurement inactive. Have this
checked."
Note the newly calculated remaining mile‐
age until the next oil service. Have the sys‐
tem checked as soon as possible.
Adding engine oil
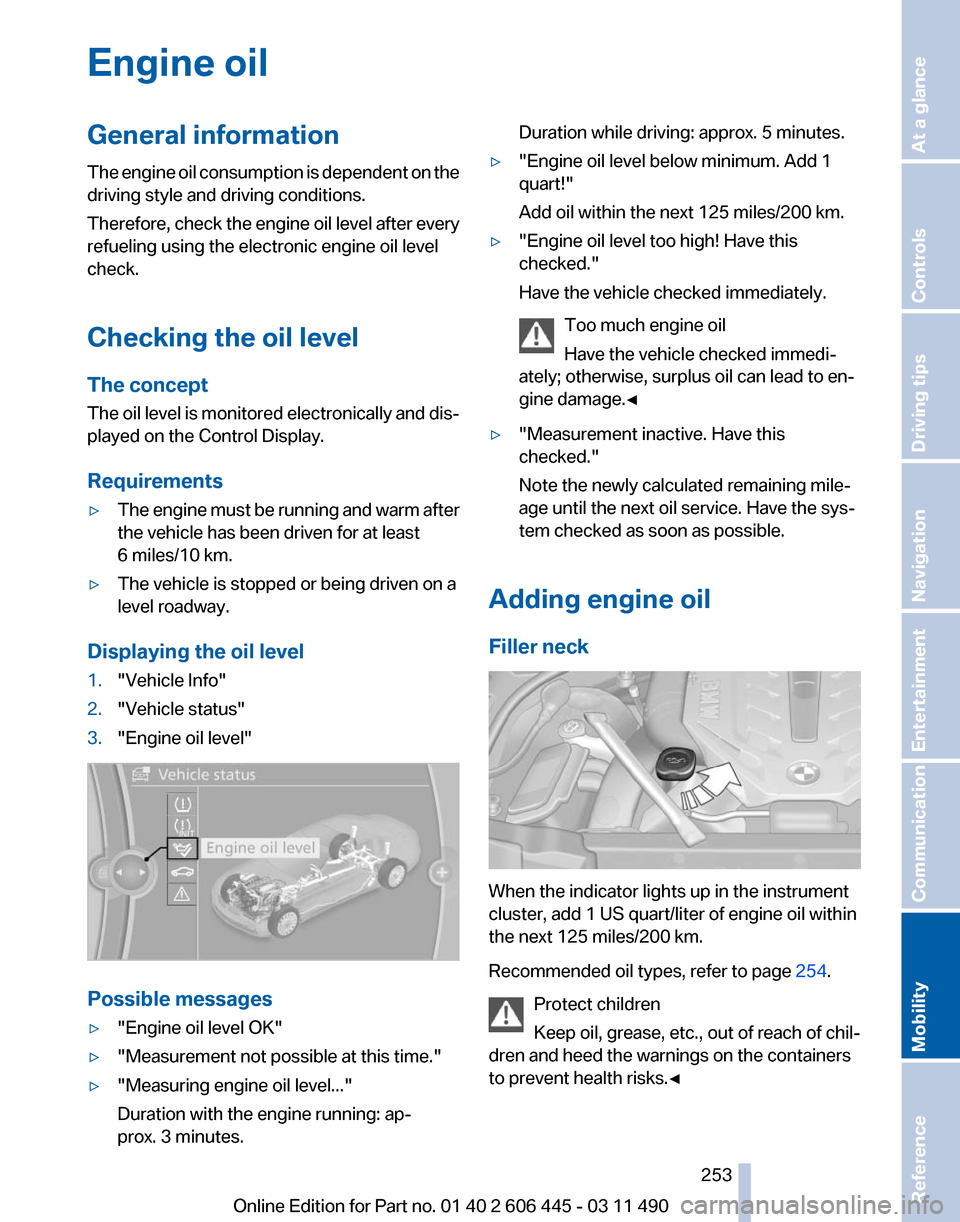
Filler neck When the indicator lights up in the instrument
cluster, add 1 US quart/liter of engine oil within
the next 125 miles/200 km.
Recommended oil types, refer to page
254.
Protect children
Keep oil, grease, etc., out of reach of chil‐
dren and heed the warnings on the containers
to prevent health risks.◀ Seite 253
253Online Edition for Part no. 01 40 2 606 445 - 03 11 490
Reference
Mobility Communication Entertainment Navigation Driving tips Controls At a glance
Page 254 of 297
Oil types
Note
No oil additives
Oil
additives may lead to engine damage.◀
Approved oil types
Your service center can advise you on which en‐
gine oils have been approved by the manufac‐
turer of your vehicle.
The engine oil quality is critical for the life of the
engine.
Only use approved BMW High Performance oil.
Approved oils belong to the viscosity grades
SAE 0W-40, SAE 0W-30, SAE 5W-40 and SAE
5W-30.
Alternative oil types
If the approved engine oils are not available, up
to 1 US quart/liter of another oil with the follow‐
ing specification may be used.
API SM quality standards or higher. Coolant
General information
Danger of burns from hot engine
Do not open the cooling system while the
engine is hot; otherwise, escaping coolant may
cause burns.◀ Suitable additives
Only
use suitable additives; otherwise, en‐
gine damage may occur. The additives are
harmful to your health.◀
Coolant consists of water and additives.
Not all commercially available additives are suit‐
able for your vehicle. Ask your service center for
suitable additives.
Coolant level
If there is no Min– and Max– mark in the filler
neck of the coolant reservoir, have the coolant
level checked if necessary by your service cen‐
ter and add coolant as needed.
Checking
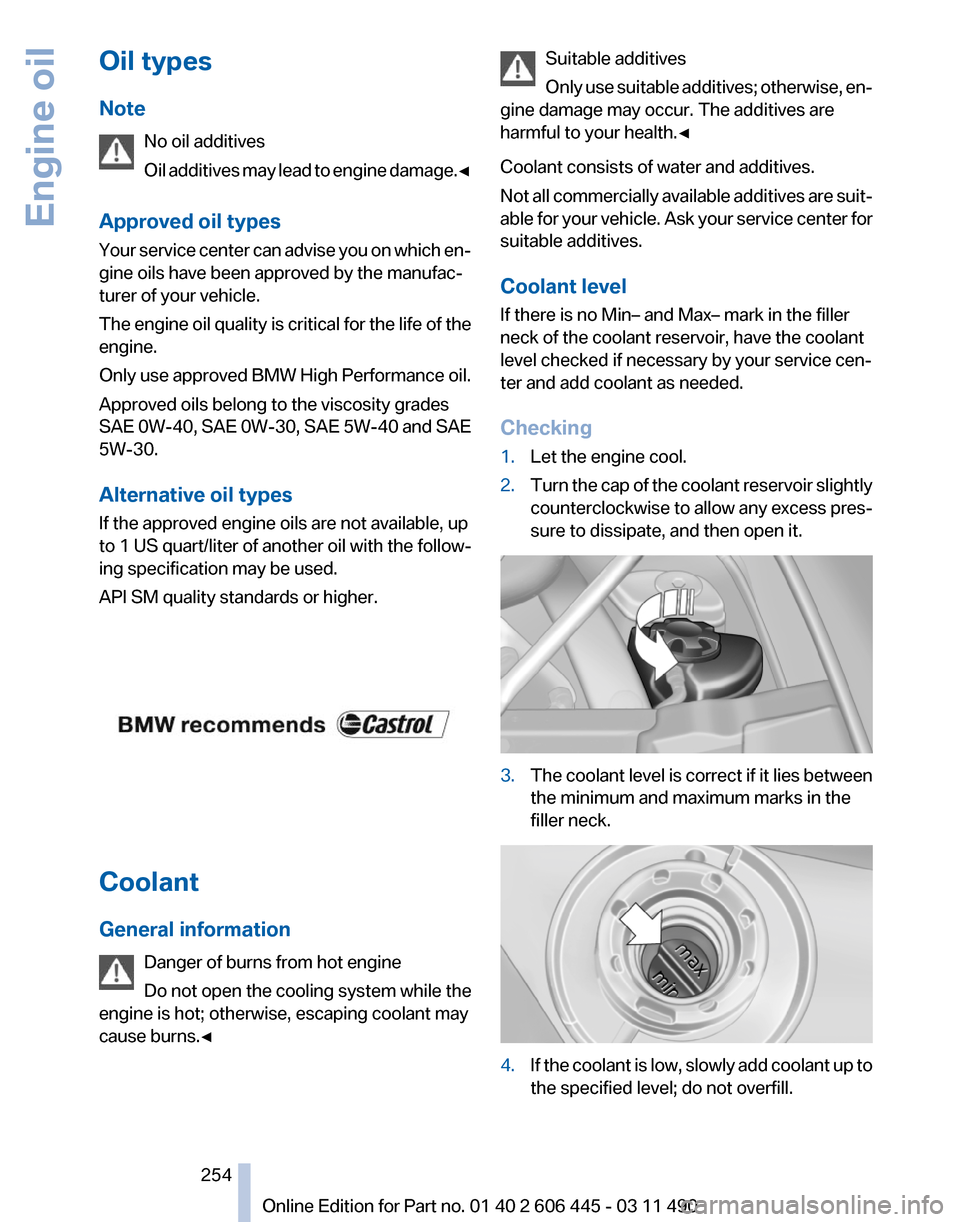
1. Let the engine cool.
2. Turn the cap of the coolant reservoir slightly
counterclockwise
to allow any excess pres‐
sure to dissipate, and then open it. 3.
The coolant level is correct if it lies between
the minimum and maximum marks in the
filler neck. 4.
If the coolant is low, slowly add coolant up to
the specified level; do not overfill. Seite 254
254 Online Edition for Part no. 01 40 2 606 445 - 03 11 490
Engine oil
Page 256 of 297
Maintenance
BMW Maintenance System
The maintenance system directs you to re‐
quired
maintenance measures and thereby sup‐
ports you in maintaining road safety and the op‐
erational reliability of the vehicle.
Condition Based Service CBS
Sensors and special algorithms take into ac‐
count the driving conditions of your vehicle.
Based on this, Condition Based Service deter‐
mines the maintenance requirements.
The system makes it possible to adapt the
amount of maintenance you need to your user
profile.
Details on the service requirements, refer to
page 82, can be displayed on the Control Dis‐
play.
Service data in the remote control
Information on the required maintenance is con‐
tinuously stored in the remote control. Your
service center will read out this data and suggest
the right array of service procedures for your ve‐
hicle.
Therefore, hand your service specialist the re‐
mote control that you used most recently.
Storage periods
Storage periods during which the vehicle bat‐
tery was disconnected are not taken into ac‐
count.
If this occurs, have a service center update the
time-dependent maintenance procedures,
such as checking brake fluid and, if necessary,
changing the engine oil and the microfilter/acti‐
vated-charcoal filter. Service and Warranty
Information Booklet for US
models and Warranty and
Service Guide Booklet for
Canadian models
Please
consult your Service and Warranty Infor‐
mation Booklet for US models and Warranty and
Service Guide Booklet for Canadian models for
additional information on service requirements.
Maintenance and repair should be performed by
your service center. Make sure to have regular
maintenance procedures recorded in the vehi‐
cle's Service and Warranty Information Booklet
for US models, and in the Warranty and Service
Guide Booklet for Canadian models. These en‐
tries are proof of regular maintenance.
Socket for OBD Onboard
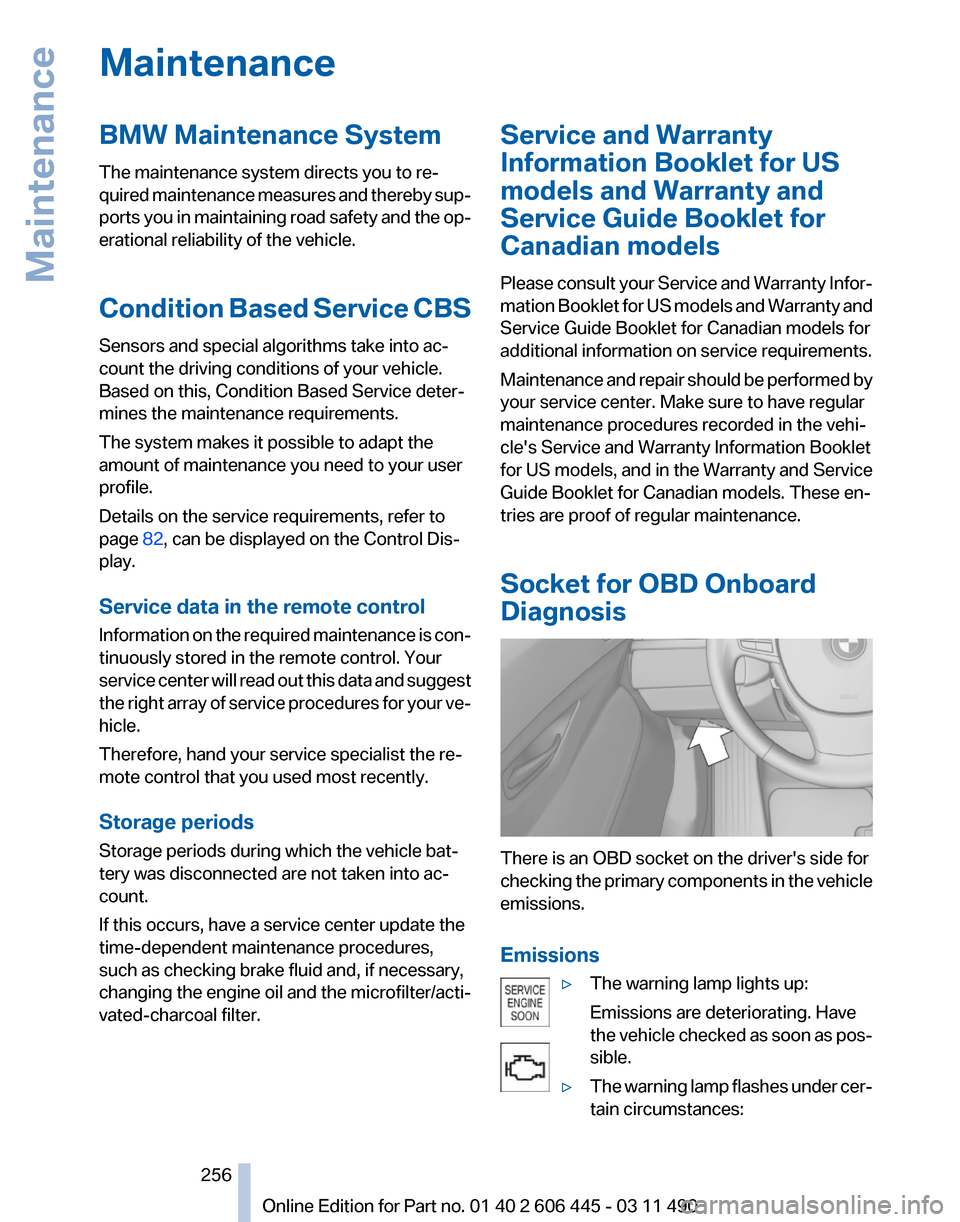
Diagnosis There is an OBD socket on the driver's side for
checking
the primary components in the vehicle
emissions.
Emissions
▷The warning lamp lights up:
Emissions are deteriorating. Have
the
vehicle checked as soon as pos‐
sible.
▷ The warning lamp flashes under cer‐
tain circumstances: Seite 256
256 Online Edition for Part no. 01 40 2 606 445 - 03 11 490
Maintenance
Page 257 of 297
This indicates that there is excessive
misfiring in the engine.
Reduce the vehicle speed and have
the system checked immediately;
otherwise, serious engine misfiring
within a brief period can seriously
damage emission control compo‐
nents,
in particular the catalytic con‐
verter.
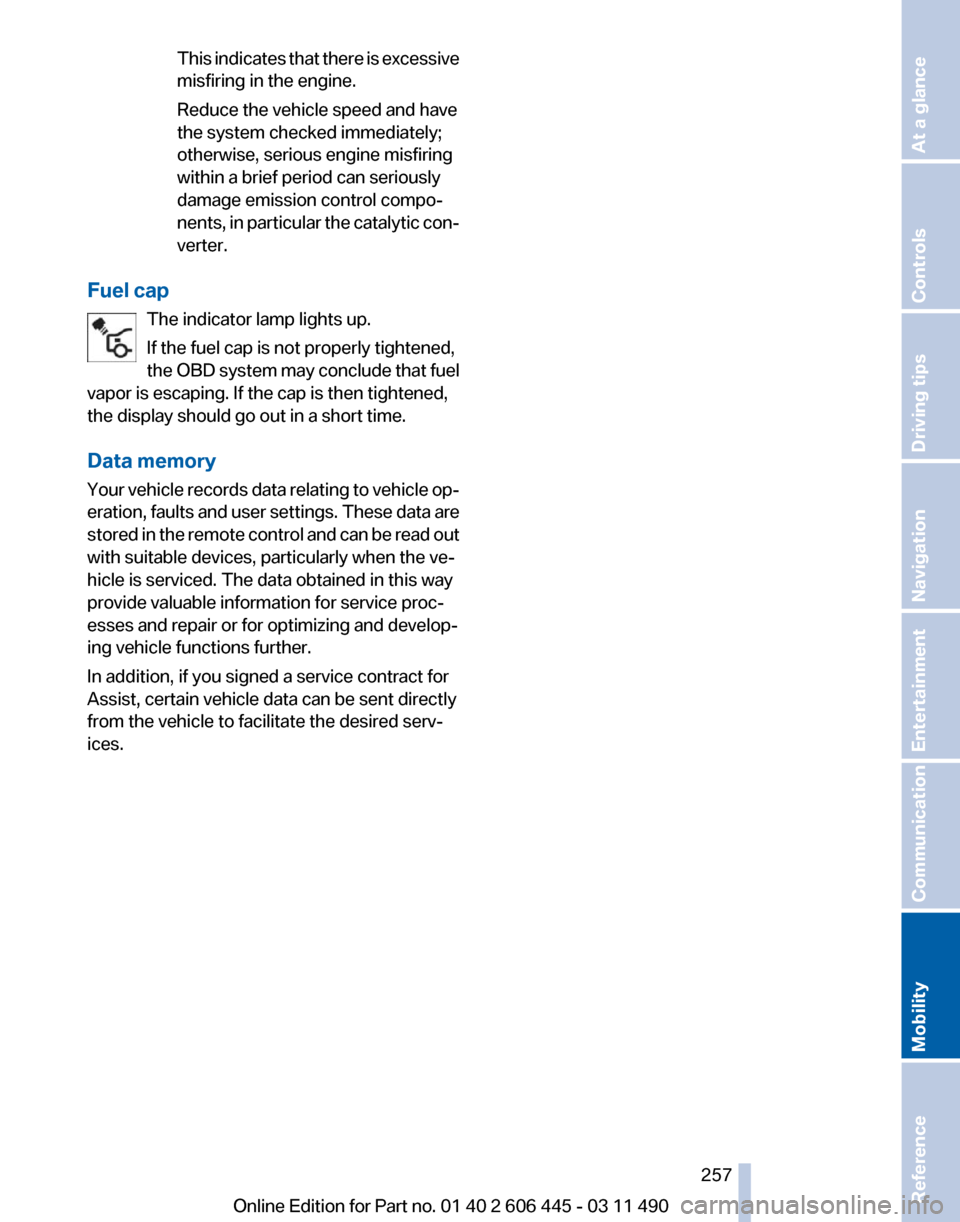
Fuel cap The indicator lamp lights up.
If the fuel cap is not properly tightened,
the
OBD system may conclude that fuel
vapor is escaping. If the cap is then tightened,
the display should go out in a short time.
Data memory
Your vehicle records data relating to vehicle op‐
eration, faults and user settings. These data are
stored in the remote control and can be read out
with suitable devices, particularly when the ve‐
hicle is serviced. The data obtained in this way
provide valuable information for service proc‐
esses and repair or for optimizing and develop‐
ing vehicle functions further.
In addition, if you signed a service contract for
Assist, certain vehicle data can be sent directly
from the vehicle to facilitate the desired serv‐
ices. Seite 257
257Online Edition for Part no. 01 40 2 606 445 - 03 11 490
Reference
Mobility Communication Entertainment Navigation Driving tips Controls At a glance
Page 258 of 297
Replacing components
Tool kit
The tool kit is located in the rear compartment
in the cargo area, refer to page
142.
Wiper blade replacement Do
not fold down the wipers without wiper
blades
Do not fold down the wipers if wiper blades have
not been installed; this may damage the wind‐
shield.◀
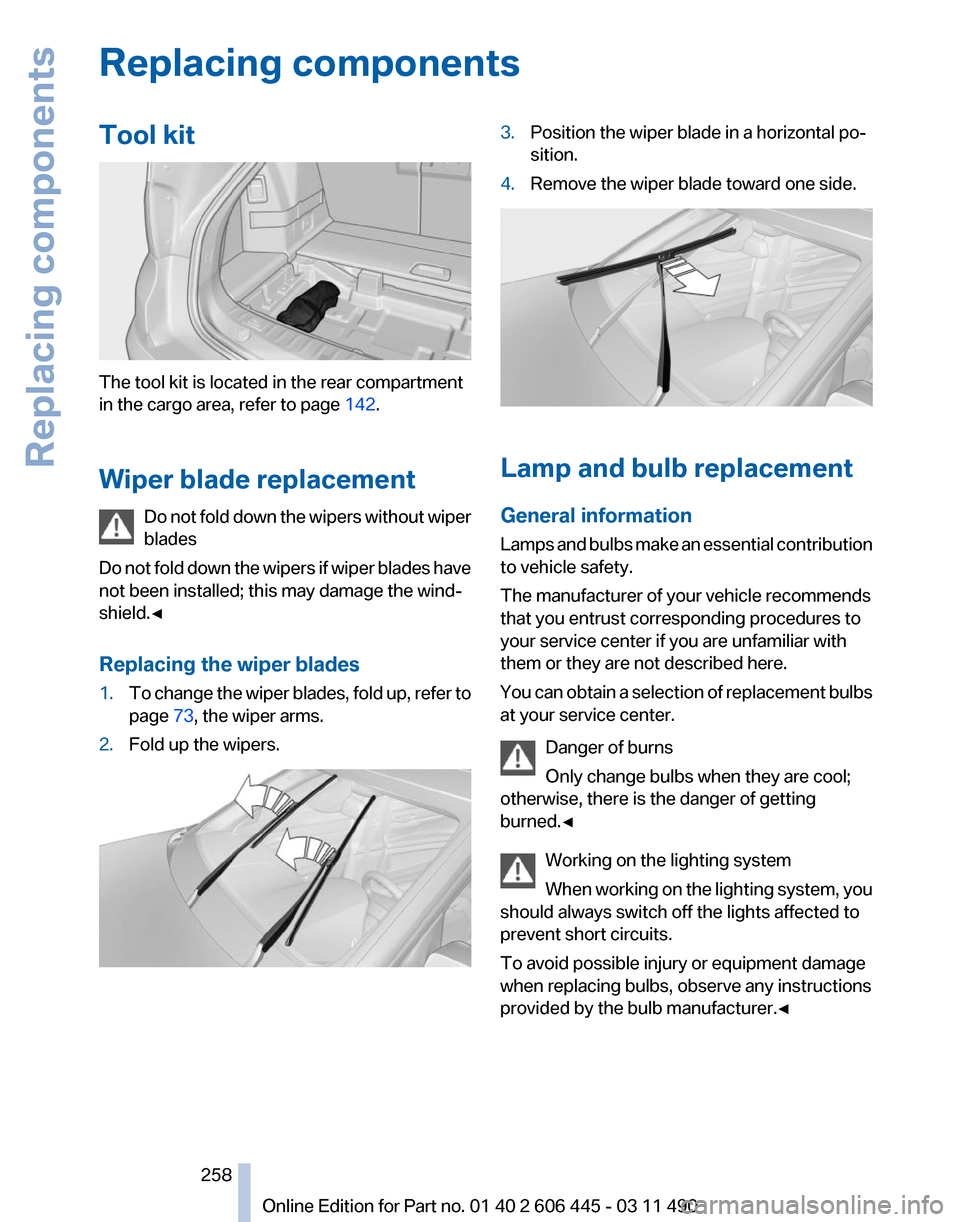
Replacing the wiper blades
1. To change the wiper blades, fold up, refer to
page 73, the wiper arms.
2. Fold up the wipers. 3.
Position the wiper blade in a horizontal po‐
sition.
4. Remove the wiper blade toward one side. Lamp and bulb replacement
General information
Lamps
and bulbs make an essential contribution
to vehicle safety.
The manufacturer of your vehicle recommends
that you entrust corresponding procedures to
your service center if you are unfamiliar with
them or they are not described here.
You can obtain a selection of replacement bulbs
at your service center.
Danger of burns
Only change bulbs when they are cool;
otherwise, there is the danger of getting
burned.◀
Working on the lighting system
When working on the lighting system, you
should always switch off the lights affected to
prevent short circuits.
To avoid possible injury or equipment damage
when replacing bulbs, observe any instructions
provided by the bulb manufacturer.◀ Seite 258
258 Online Edition for Part no. 01 40 2 606 445 - 03 11 490Replacing components
Page 259 of 297
Do not touch the bulbs
Do not touch the glass of new bulbs with
your bare hands, as even minute amounts of
contamination will burn into the bulb's surface
and reduce its service life.
Use
a clean tissue, cloth or something similar, or
hold the bulb by its base.◀
Light-emitting diodes (LEDs)
Light-emitting diodes installed behind a cover
serve as the light source for controls, display el‐
ements and other equipment.
These light-emitting diodes, which are related
to conventional lasers, are officially designated
as Class 1 light-emitting diodes.
Do not remove the covers
Do not remove the covers, and never stare
into the unfiltered light for several hours; other‐
wise, irritation of the retina could result.◀
Headlamp glass
Condensation can form on the inside of the ex‐
ternal lamps in cool or humid weather. When the
light is switched on, the condensation evapo‐
rates after a short time. The headlamp glasses
do not need to be changed.
If there is a large amount of moisture, e.g., water
droplets form in the lamp, have it checked by
your service center.
Front lamps, bulb replacement
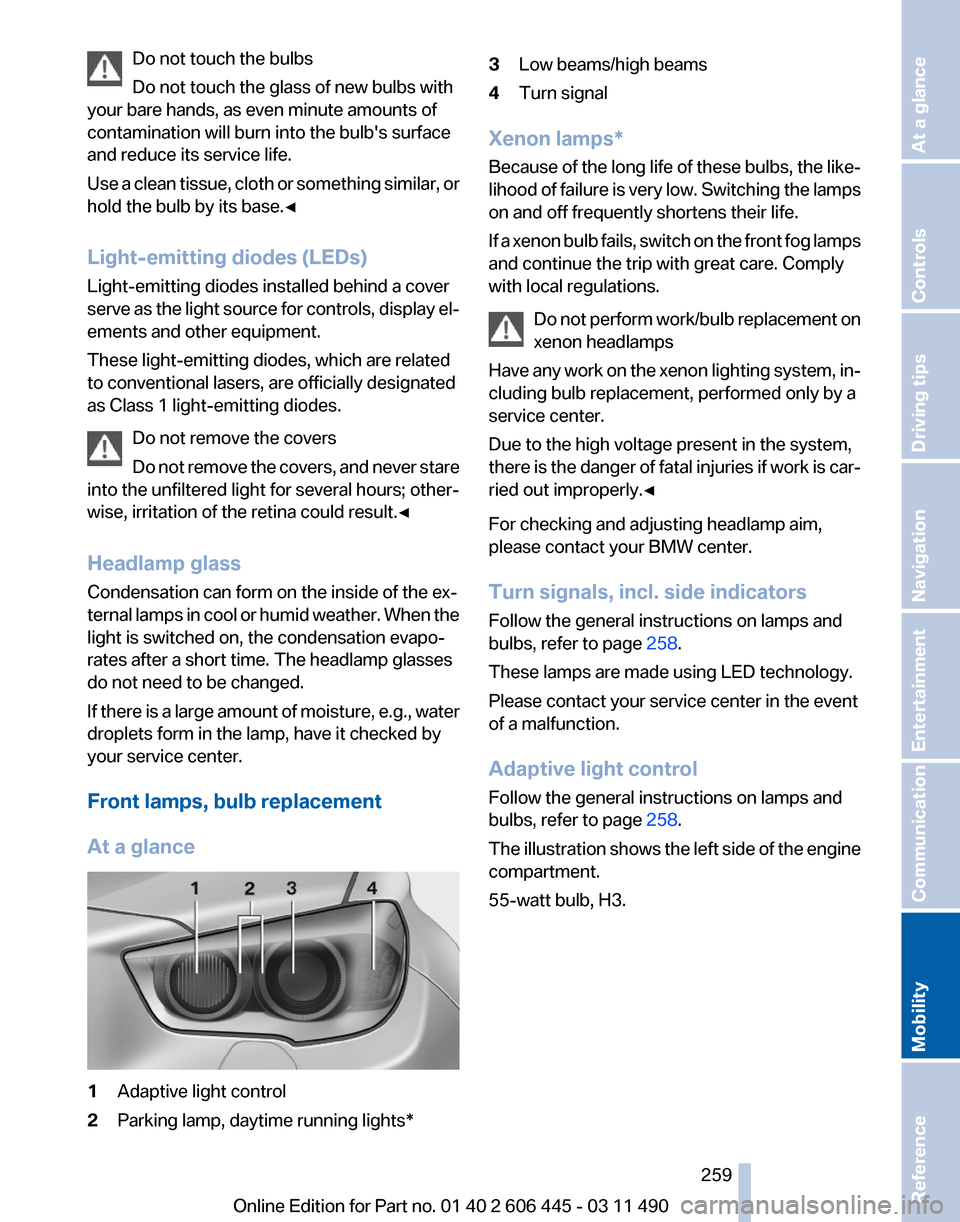
At a glance 1
Adaptive light control
2 Parking lamp, daytime running lights* 3
Low beams/high beams
4 Turn signal
Xenon lamps*
Because
of the long life of these bulbs, the like‐
lihood of failure is very low. Switching the lamps
on and off frequently shortens their life.
If a xenon bulb fails, switch on the front fog lamps
and continue the trip with great care. Comply
with local regulations.
Do not perform work/bulb replacement on
xenon headlamps
Have any work on the xenon lighting system, in‐
cluding bulb replacement, performed only by a
service center.
Due to the high voltage present in the system,
there is the danger of fatal injuries if work is car‐
ried out improperly.◀
For checking and adjusting headlamp aim,
please contact your BMW center.
Turn signals, incl. side indicators
Follow the general instructions on lamps and
bulbs, refer to page 258.
These lamps are made using LED technology.
Please contact your service center in the event
of a malfunction.
Adaptive light control
Follow the general instructions on lamps and
bulbs, refer to page 258.
The illustration shows the left side of the engine
compartment.
55-watt bulb, H3. Seite 259
259Online Edition for Part no. 01 40 2 606 445 - 03 11 490
Reference
Mobility Communication Entertainment Navigation Driving tips Controls At a glance
Page 261 of 297
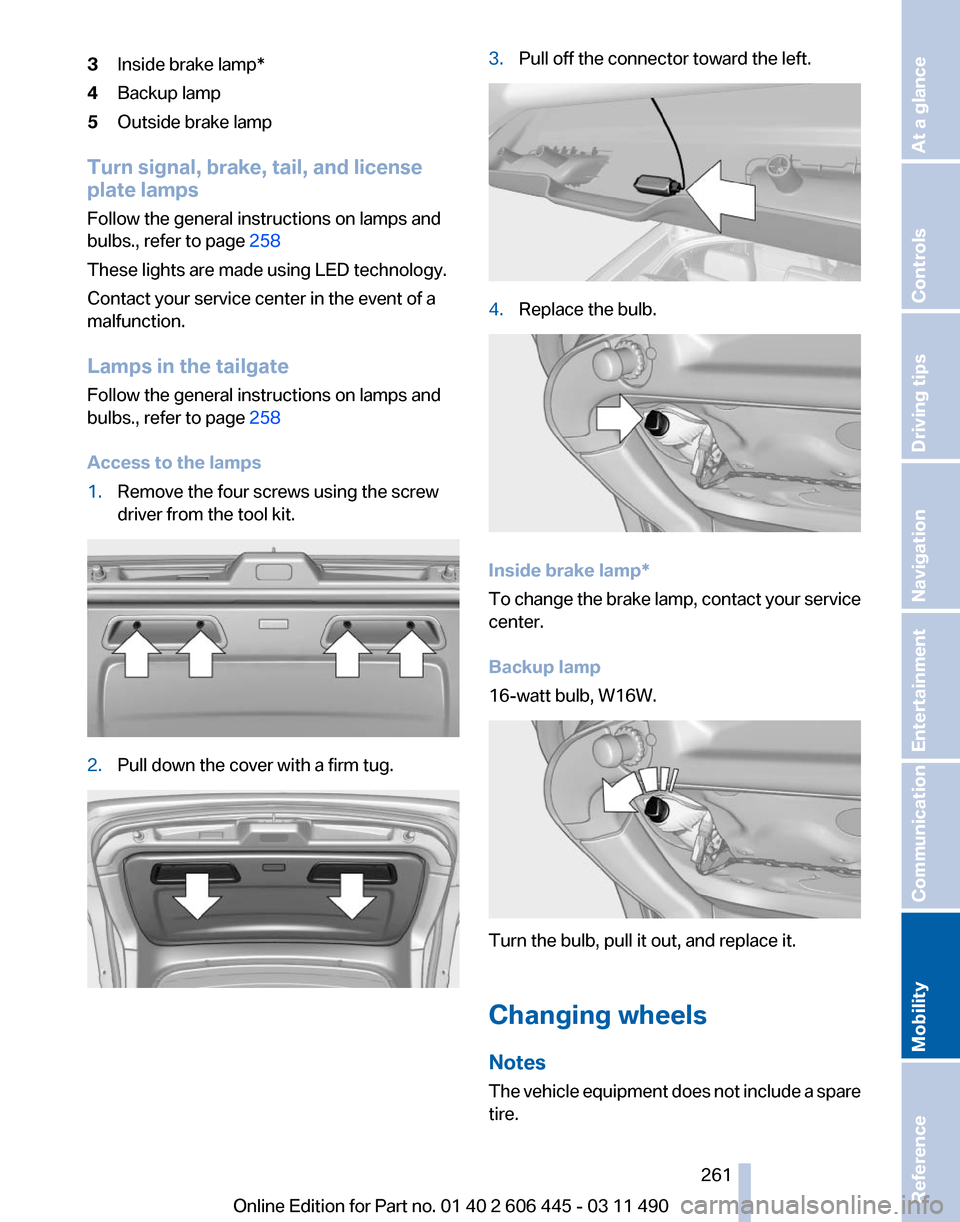
3
Inside brake lamp*
4 Backup lamp
5 Outside brake lamp
Turn signal, brake, tail, and license
plate lamps
Follow the general instructions on lamps and
bulbs., refer to page 258
These lights are made using LED technology.
Contact your service center in the event of a
malfunction.
Lamps in the tailgate
Follow the general instructions on lamps and
bulbs., refer to page 258
Access to the lamps
1. Remove the four screws using the screw
driver from the tool kit. 2.
Pull down the cover with a firm tug. 3.
Pull off the connector toward the left. 4.
Replace the bulb. Inside brake lamp*
To
change the brake lamp, contact your service
center.
Backup lamp
16-watt bulb, W16W. Turn the bulb, pull it out, and replace it.
Changing wheels
Notes
The
vehicle equipment does not include a spare
tire.
Seite 261
261Online Edition for Part no. 01 40 2 606 445 - 03 11 490
Reference
Mobility Communication Entertainment Navigation Driving tips Controls At a glance
Page 264 of 297
Breakdown assistance
Hazard warning flashers
The button is located in the center console.
Emergency Request
*
Requirements
▷ Equipment version with full preparation
package mobile phone.
An Emergency Request can be made, even
if no mobile phones are paired with the ve‐
hicle.
▷ BMW Assist is activated.
▷ The radio ready state is switched on.
▷ The BMW Assist system is logged in to a
wireless communications network sup‐
ported by BMW Assist.
▷ The Assist system is functional.
Only press the SOS button in an emergency.
Emergency Request not guaranteed
For
technical reasons, the Emergency Re‐
quest cannot be guaranteed under unfavorable
conditions.◀
Service contract
▷ After your contract with BMW Assist has ex‐
pired,
the BMW Assist system can be deac‐
tivated by the service center without you
having to visit a workshop.
After deactivation, an Emergency Request
is no longer possible. ▷
Under certain circumstances, the system
can be reactivated by a service center after
you sign a new contract.
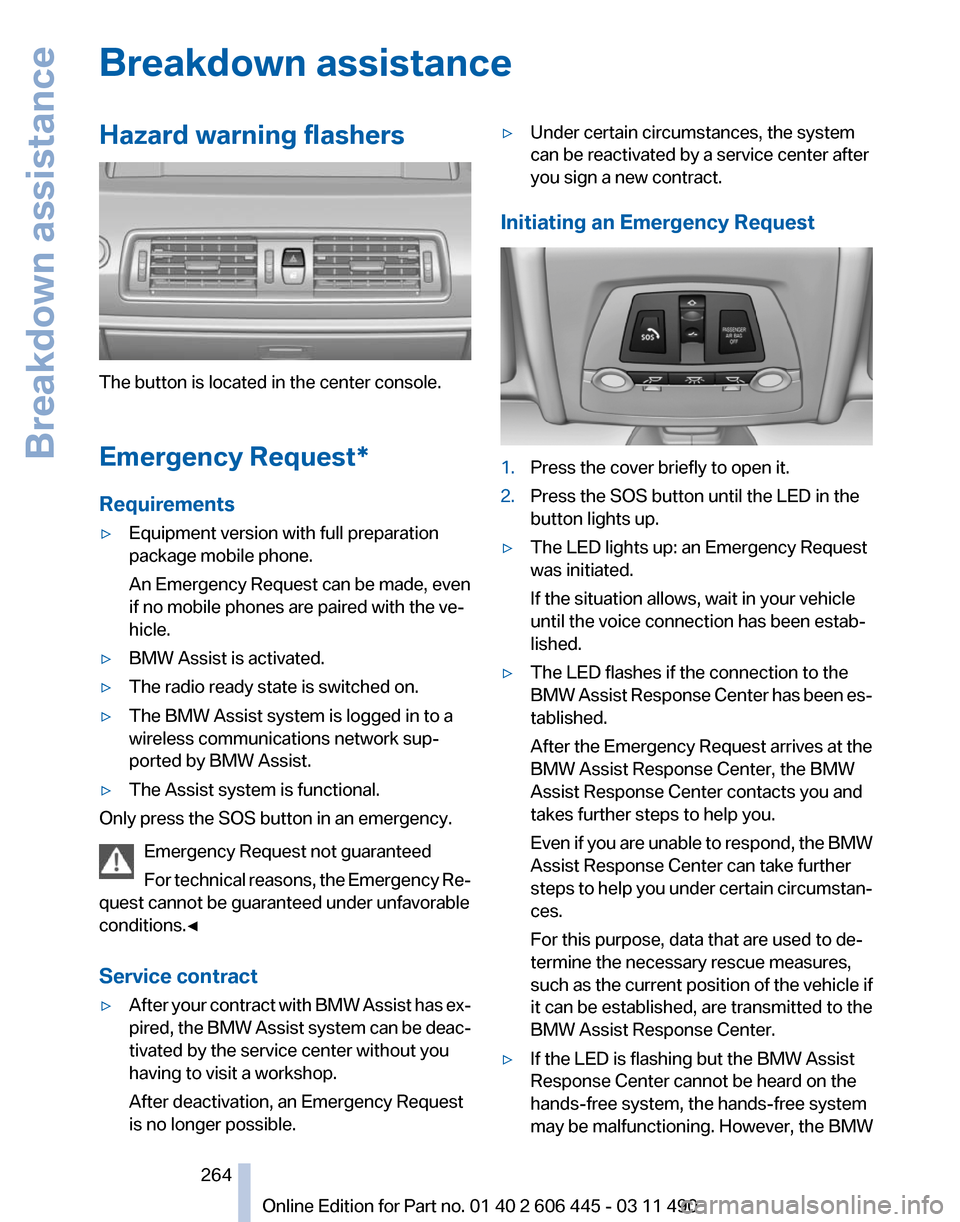
Initiating an Emergency Request 1.
Press the cover briefly to open it.
2. Press the SOS button until the LED in the
button lights up.
▷ The LED lights up: an Emergency Request
was initiated.
If the situation allows, wait in your vehicle
until the voice connection has been estab‐
lished.
▷ The LED flashes if the connection to the
BMW
Assist Response Center has been es‐
tablished.
After the Emergency Request arrives at the
BMW Assist Response Center, the BMW
Assist Response Center contacts you and
takes further steps to help you.
Even if you are unable to respond, the BMW
Assist Response Center can take further
steps to help you under certain circumstan‐
ces.
For this purpose, data that are used to de‐
termine the necessary rescue measures,
such as the current position of the vehicle if
it can be established, are transmitted to the
BMW Assist Response Center.
▷ If the LED is flashing but the BMW Assist
Response Center cannot be heard on the
hands-free system, the hands-free system
may be malfunctioning. However, the BMW
Seite 264
264 Online Edition for Part no. 01 40 2 606 445 - 03 11 490
Breakdown assistance