Timing chain BMW 540i 2000 E39 Owner's Guide
[x] Cancel search | Manufacturer: BMW, Model Year: 2000, Model line: 540i, Model: BMW 540i 2000 E39Pages: 1002
Page 164 of 1002
Downloaded from www.Manualslib.com manuals search engine
11 3-70
Cylinder Head Removal and Installation
- Remove adjustable timing chain tensioner tool from timing
case cover and install primary timing chain tensioner with
new sealing washer.
Tightening torque Chain tensioner cylinder to timing cover
65 Nm (48 ft-lb)
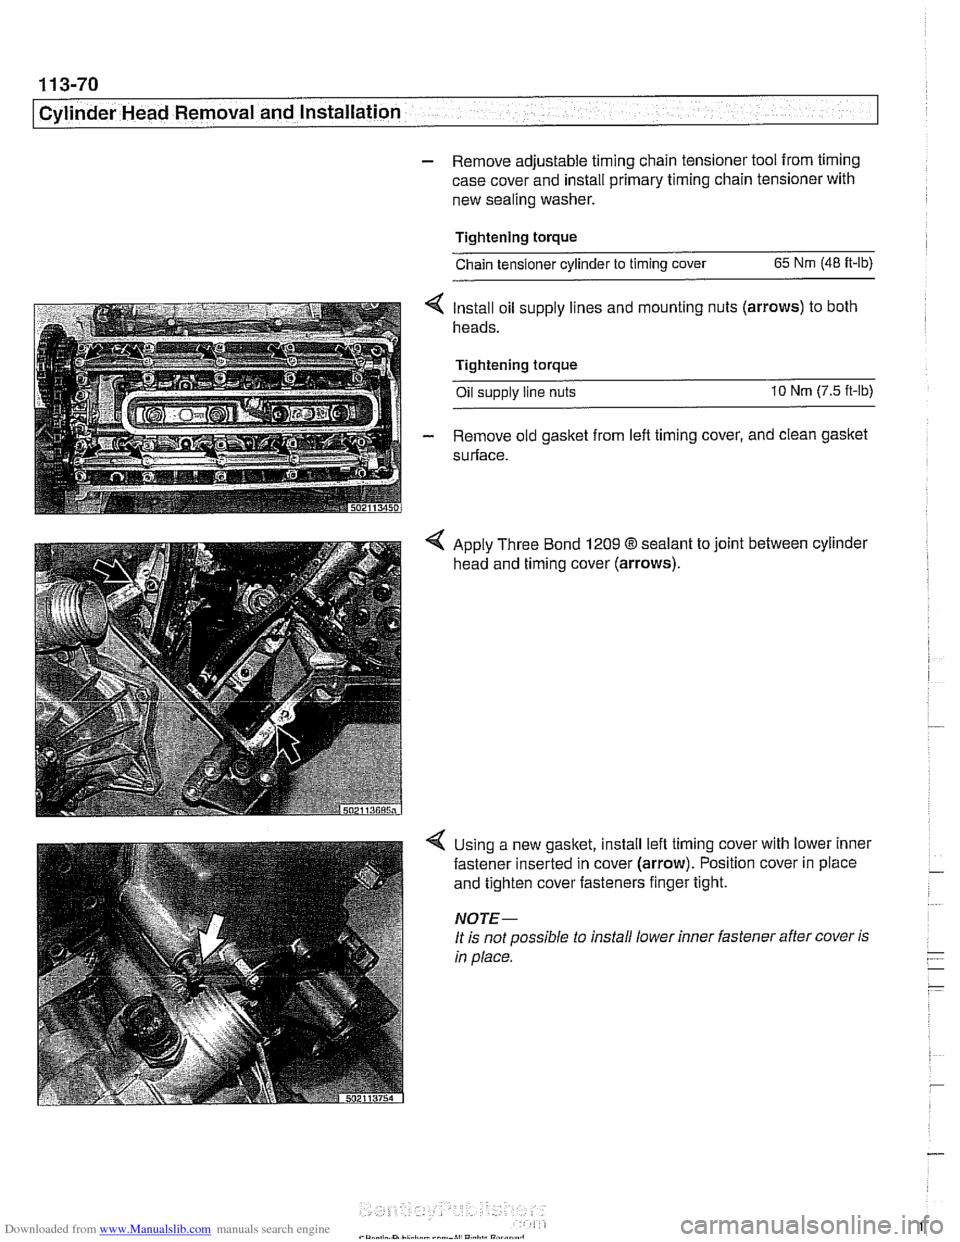
4 Install oil supply lines and mounting nuts (arrows) to both
heads.
Tightening torque
Oil supply line nuts 10 Nm (7.5 ft-lb)
- Remove old gasket from lefl timing cover, and clean gasket
surface.
4 Apply Three Bond 1209 8 sealant to joint between cylinder
head and timing cover (arrows).
Using a new gasket, install lefl timing cover with lower inner
fastener inserted in cover (arrow). Position cover in place
and tighten cover fasteners finger tight.
NOTE-
It is not possible to install lower inner fastener after cover is
in place.
Page 165 of 1002
Downloaded from www.Manualslib.com manuals search engine
. ." . .
I - Cylinder Head Removal - and instard --
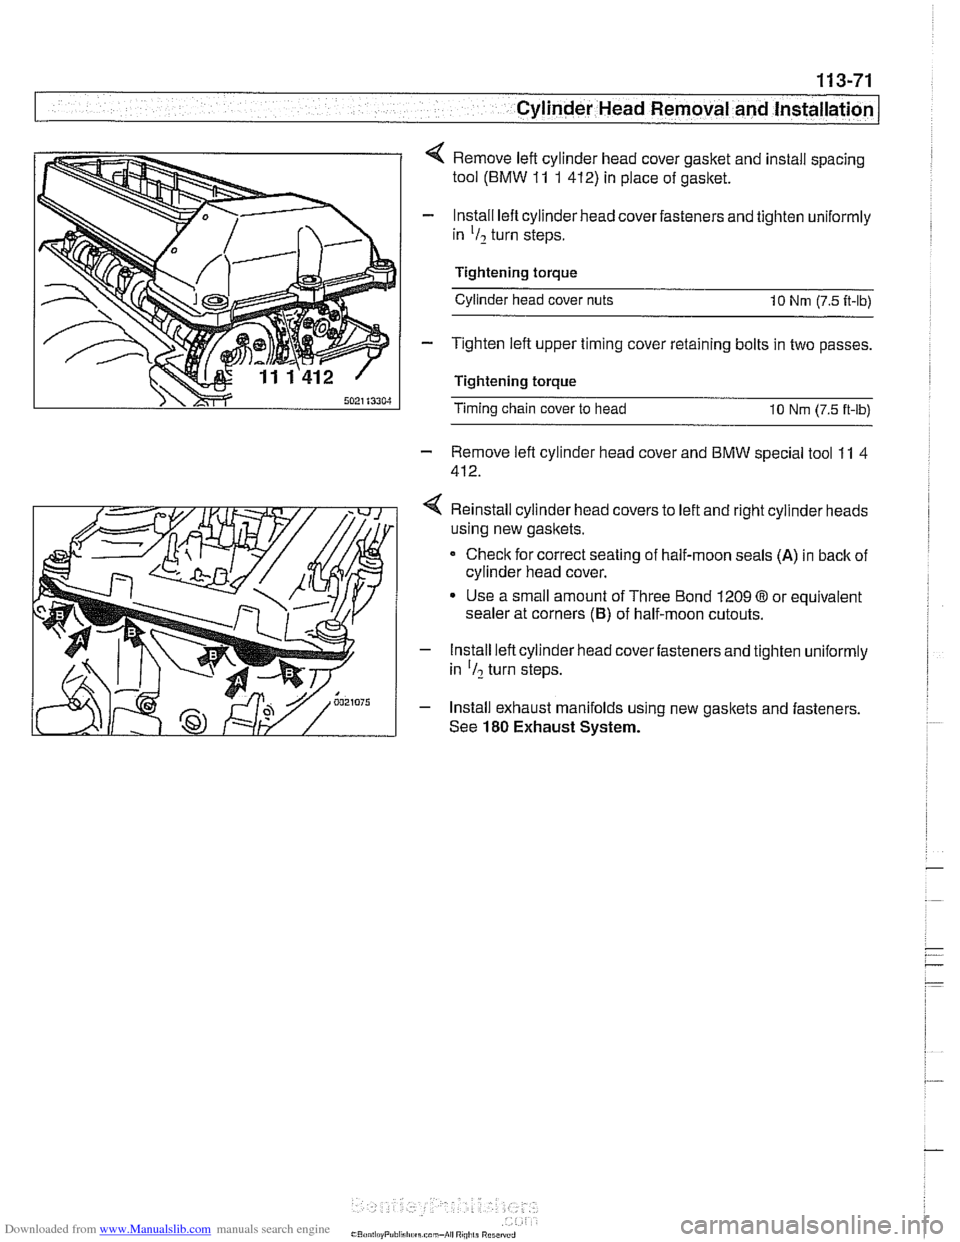
4 Remove left cylinder head cover gasket and install spacing
tool (BMW
11 1 412) in place of gasket.
- lnstall lefl cylinder head cover fasteners and tighten uniformly
in
'I2 turn steps.
Tightening torque Cylinder head cover nuts
10 Nrn (7.5 it-lb)
- Tighten left upper timing cover retaining bolts in two passes.
Tightening torque
Timing chain cover to head 10 Nrn (7.5 ft-lb)
- Remove lefl cylinder head cover and BMW special tool 11 4
412.
4 Reinstall cylinder head covers to left and right cylinder heads
using new gaskets.
Check for correct seating of half-moon seals
(A) in back of
cylinder head cover.
Use a small amount of Three Bond 1209
03 or equivalent
sealer at corners
(6) of half-moon cutouts.
- Install left cylinder head cover fasteners and tighten uniformly
in
'I? turn steps.
- Install exhaust manifolds using new gaskets and fasteners.
See
180 Exhaust System.
Page 169 of 1002
Downloaded from www.Manualslib.com manuals search engine
1 13-75
Cylinder Head Removal and Installation I
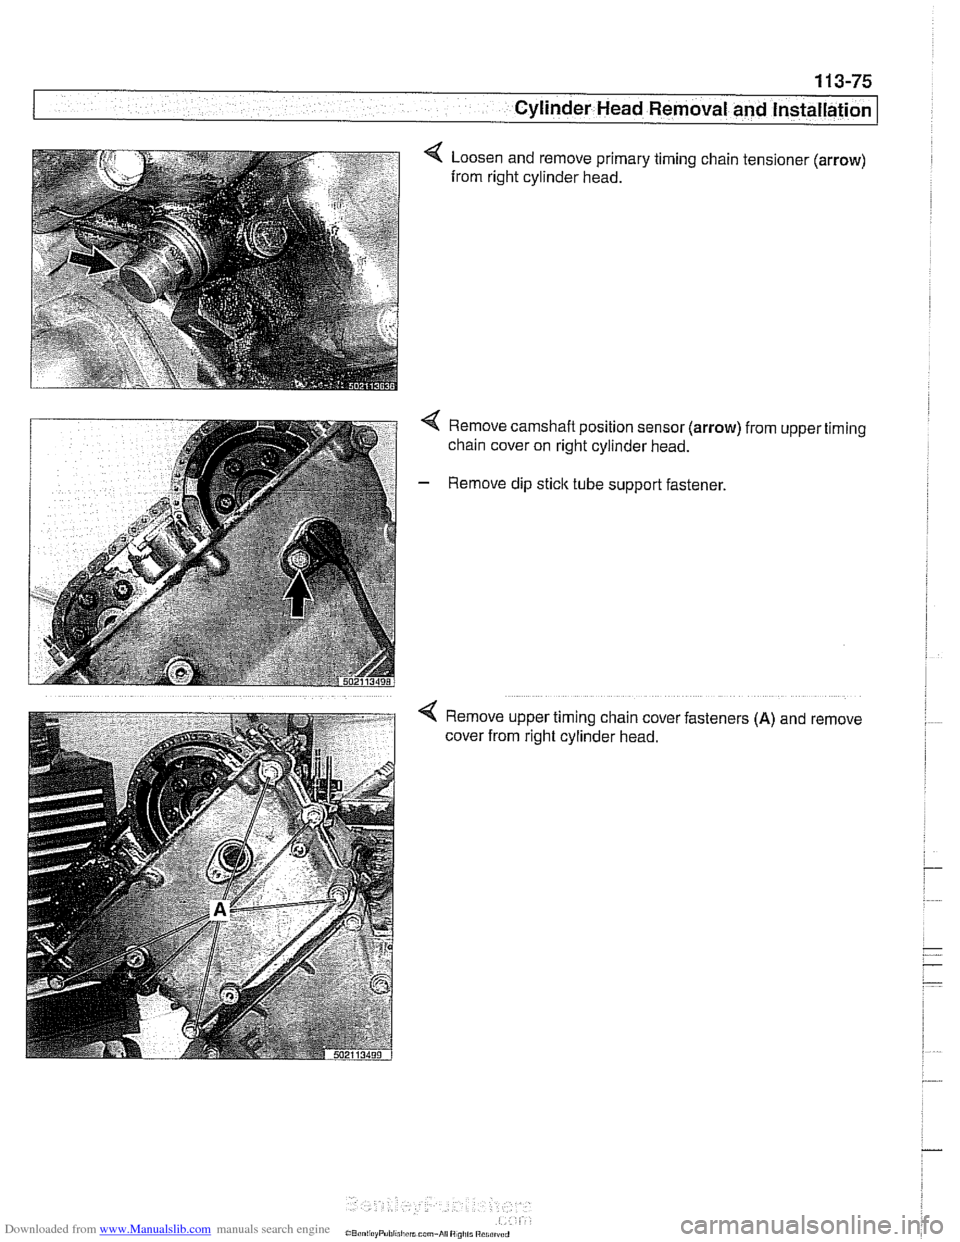
4 Loosen and remove primary timing chain tensioner (arrow)
from right cylinder head.
Remove camshaft position sensor (arrow)
chain cover on right cylinder head.
Remove dip
stick tube support fastener. from
upper
Remove upper timing chain cover fasteners
(A) and
cover from right cylinder head. timing
remove
Page 170 of 1002
Downloaded from www.Manualslib.com manuals search engine
1 13-76
Cylinder Head Removal and Installation
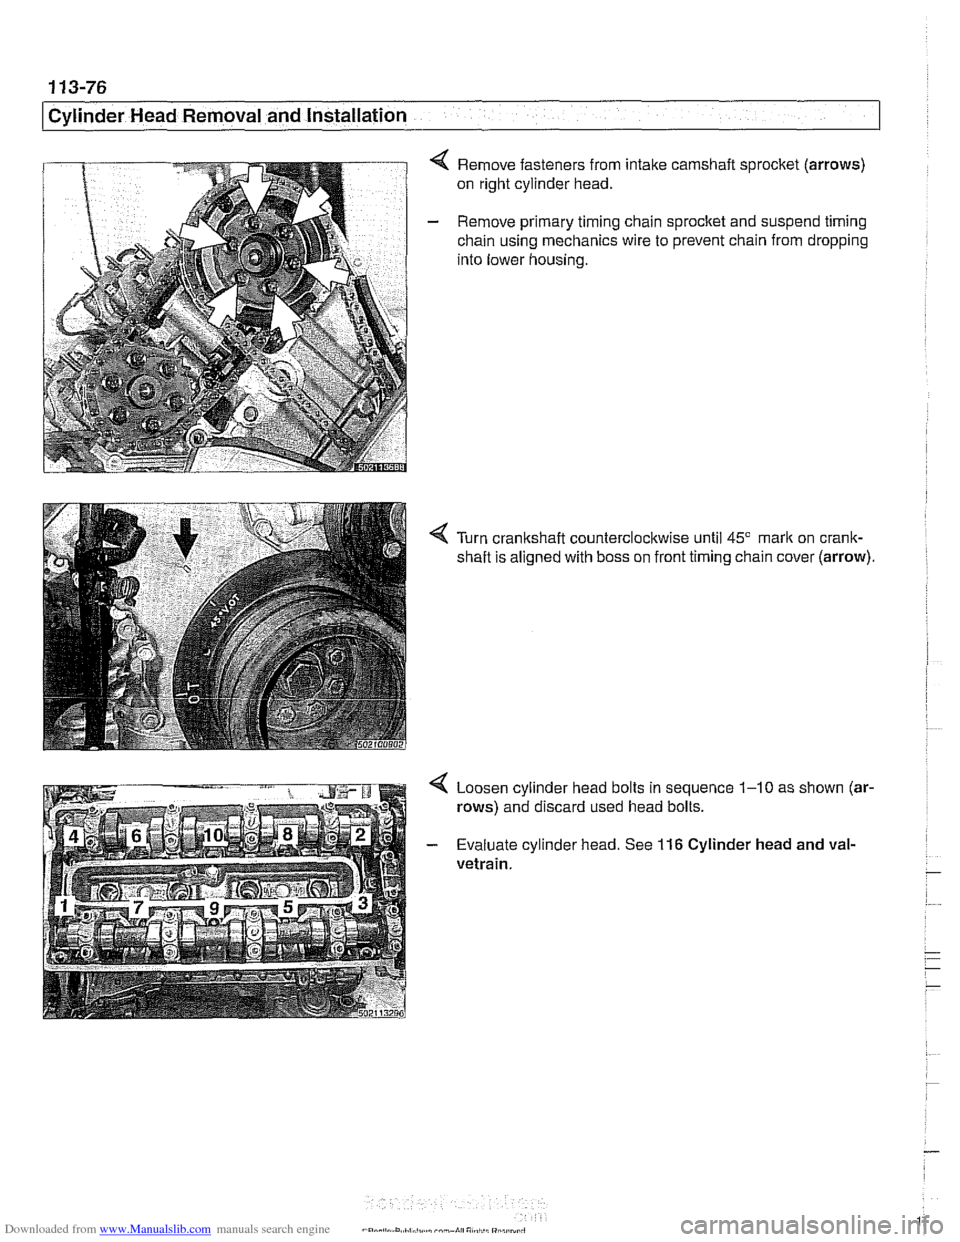
Remove fasteners from intake camshaft sprocket (arrows)
on right cylinder head.
- Remove primary timing chain sprocket and suspend timing
chain using mechanics wire to prevent chain from dropping
into lower housing.
Turn crankshaft counterclockwise until
45" mark on crank-
shaft is aligned with boss on front timing chain cover (arrow)
4 Loosen cylinder head bolts in sequence 1-10 as shown (ar-
rows) and discard used head bolts.
- Evaluate cylinder head. See 116 Cylinder head and val-
vetrain.
Page 173 of 1002
Downloaded from www.Manualslib.com manuals search engine
-8" ."
Cylinder Head Removal and Installation --
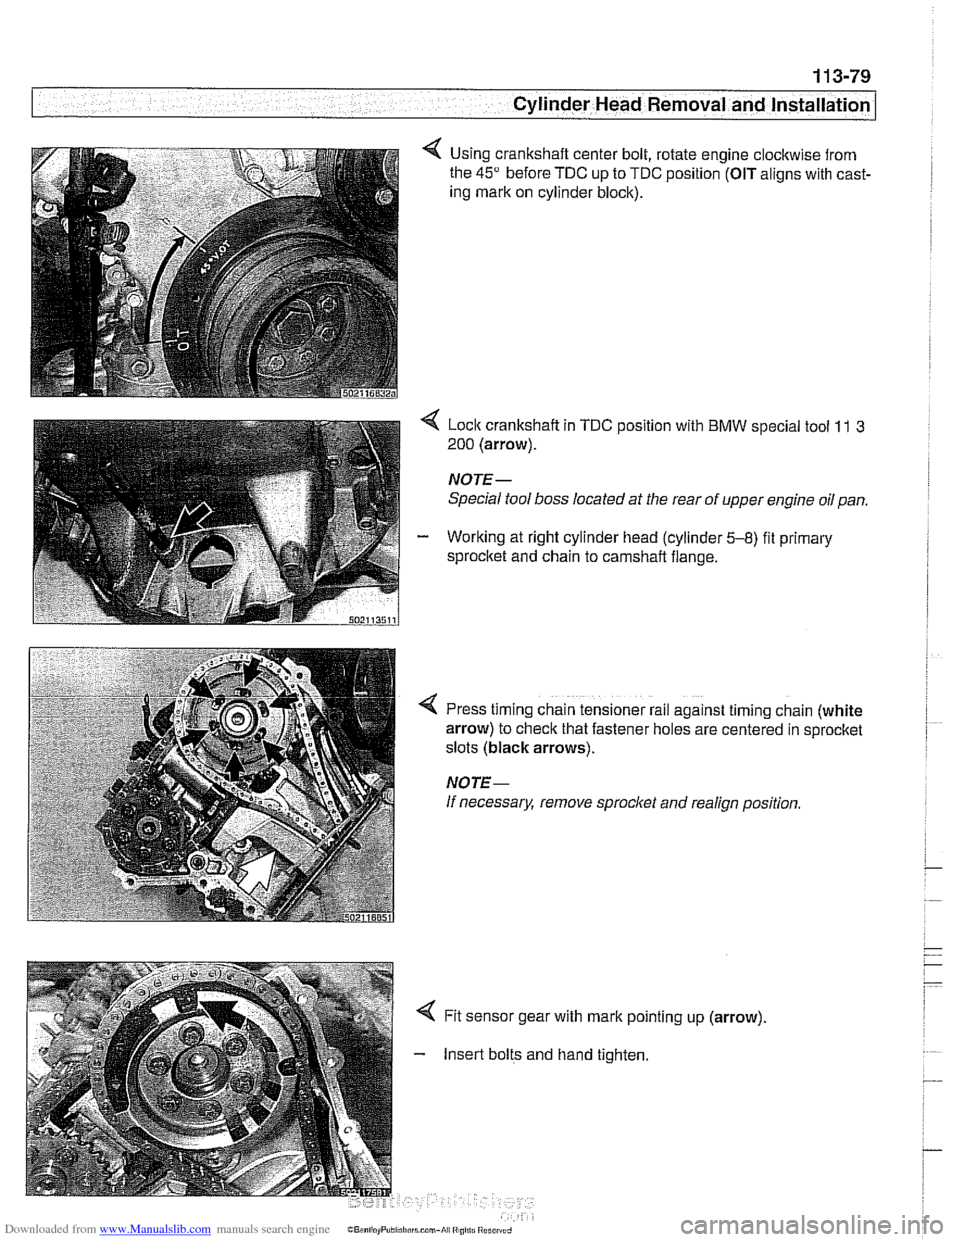
Using crankshaft center bolt, rotate engine clockwise from
the
45" before TDC up to TDC position (OIT aligns with cast-
ing mark on cylinder block).
< Lock crankshaft in TDC position with BMW special tool 11 3
200 (arrow).
NOTE-
Special tool boss located at the rear of upper engine oil pan.
- Working at right cylinder head (cylinder 5-8) fit primary
sprocltet and chain to camshaft flange.
!
I
4 Press timing chain tensioner rail against timing chain (white
arrow) to check that fastener holes are centered in sprocket
slots (black arrows).
NOTE-
If necessary, remove sprocl
Insert bolts and hand tighten.
Page 174 of 1002
Downloaded from www.Manualslib.com manuals search engine
11 3-80
Cylinder Head Removal and lnstallation
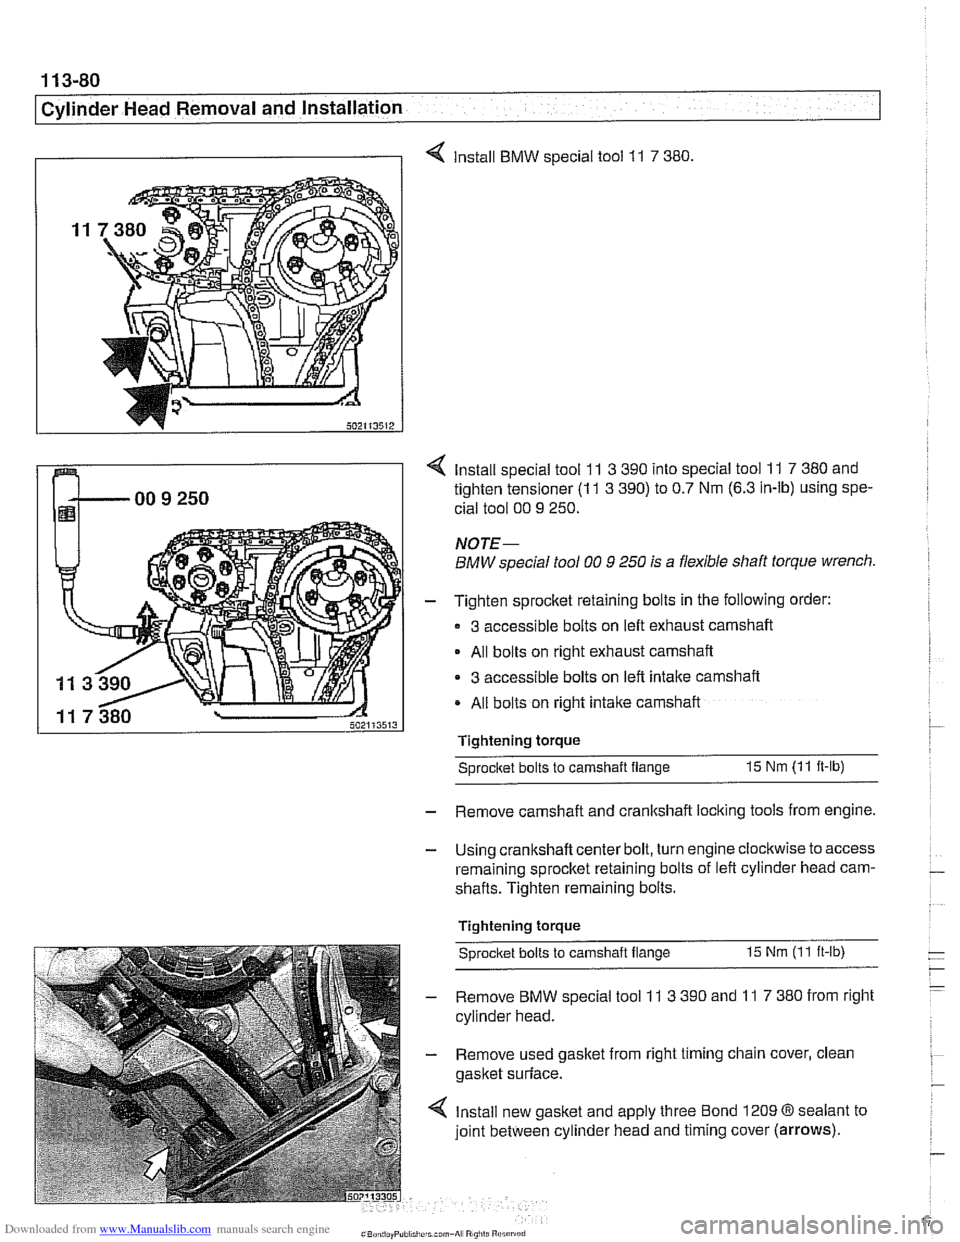
I I 4 Install BMW special tool 11 7 380
4 Install special tool 11 3 390 into special tool 11 7 380 and
tighten tensioner
(1 1 3 390) to 0.7 Nm (6.3 in-lb) using spe-
cial tool 00
9 250.
NOTE-
BMW special tool 00 9 250 is a flexible shaft torque wrench.
- Tighten sprocket retaining bolts in the following order:
3 accessible bolts on left exhaust camshaft
- All bolts on right exhaust camshaft
3 accessible bolts on left intake camshaft
All bolts on right intake camshaft
Tightening torque
Sprocitet bolts to camshaft flange 15 Nm (11 ft-lb)
- Remove camshaft and crankshaft locking tools from engine.
- Using crankshaft center bolt, turn engine clockwise to access
remaining sprocket retaining bolts of left cylinder head cam-
shafts. Tighten remaining bolts.
Tightening torque
Sprocket bolts
to camshaft flange 15 Nm (11 ft-ib)
- Remove BMW special tool 11 3 390 and 11 7 380 from right
cylinder head.
- Remove used gasket from right timing chain cover, clean
gasket surface.
4 Install new gasket and apply three Bond 1209 @sealant to
joint between cylinder head and timing cover
(arrows).
Page 175 of 1002
Downloaded from www.Manualslib.com manuals search engine
Cylinder Head Removal and Installation 1
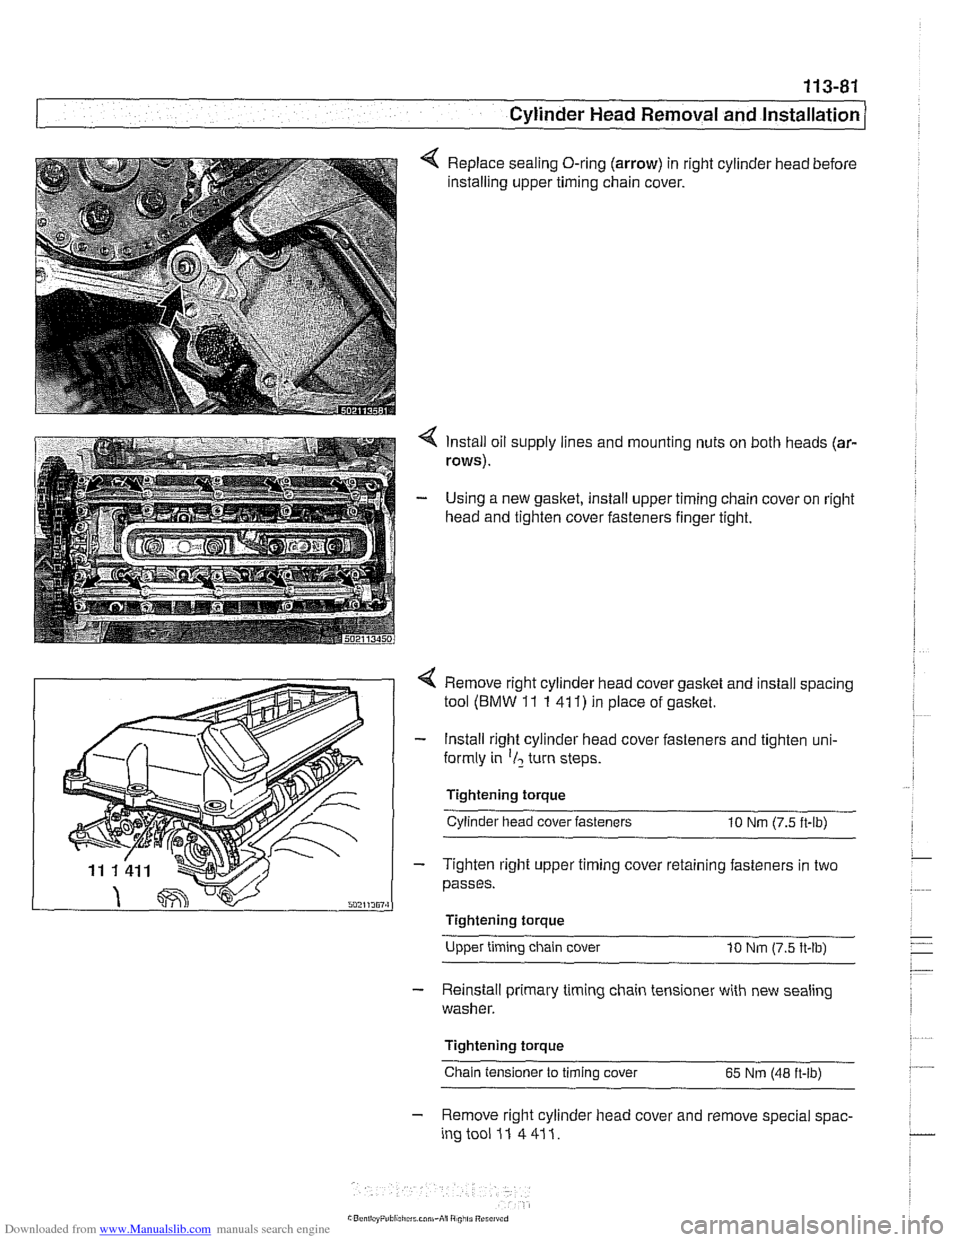
Replace sealing O-ring (arrow) in right cylinder head before
installing upper timing chain cover.
4 Install oil supply lines and mounting nuts on both heads (ar-
rows).
- Using a new gasket, install upper timing chain cover on right
head and tighten cover fasteners finger tight.
4 Remove right cylinder head cover gasket and install spacing
tool
(BMW 11 1 41 1) in place of gasket.
- Install right cylinder head cover fasteners and tighten uni-
formly in
'1, turn steps.
Tightening torque Cylinder head cover fasteners
10 Nm (7.5 ft-lb)
- Tighten right upper timing cover retaining fasteners in two
passes.
I Tightening torque
Upper timing chain cover
10 Nm (7.5 ft-lb)
- Reinstall primary timing chain tensioner with new sealing
washer.
Tightening torque
Chain tensioner to timing cover
65 Nm (48 ft-lb)
- Remove right cylinder head cover and remove special spac-
ingtooi 11 4411.
Page 177 of 1002
Downloaded from www.Manualslib.com manuals search engine
11 6 Cylinder Head and Valvetrain
........................... General ............................ 1 16-2 Valves 116-56
.................... Special Tools ........................ 11 6-2 Valves. leak test 11 6-56
......... Valves. removing and installing 11 6-56 Cylinder Head ..................... .I1 6.5 ....................... Valve guides 11 6-57
Valves. leak test ...................... 11 6-6
Valve stem oil seals .................. 11 6-58 ...... ..""""."""ll 6.6 Valveseats ........................ 116-59 Hydraulic lifters, checking and replacing .. .I1 6-7 Valve ....................... 6-60 . .
Camshaft andLifter Removal
and Installation
.................... 11 6-1 1
Camshaft and lifter removal and
installation
(M52 engine) ............. .I1 6.12
Camshaft and lifter. removal and
installation (M52
TU and M54 engine) .... 11 6-1 9
Double VANOS timing chain components
. 11 6-28
Camshaft removal and installation
(M62 engine)
....................... 11 6-39
Page 178 of 1002
Downloaded from www.Manualslib.com manuals search engine
This group covers cylinder head and valvetrain service and
repair. Some of the repair procedures described here require
that the cylinder head first be removed as described in
113
Cylinder Head Removal and Installation.
NOTE- For timing chain and
VANOS repair information, see 117
Camshaft Timing Chain.
If it is
determined that the cylinder head will require signif-
icant reconditioning work, a remanufactured cylinder head
may be a good alternative. Remanufactured cylinder
heads are available from an authorized
BMW dealer.
The information given in this repair group is organized ac-
cording to engine code. For engine application information,
see
I00 Engine-General.
For specific repair procedures, refer to the appropriate repair
group:
* 020 Maintenance
100 Engine-General
113 Cylinder Head Removal and Installation
117 Camshafi Timing Chain
= 170 Radiator and Coo!ing System
Special Tools
Special BMW tools are required for most cylinder head ser-
vice described in this repair group. Many of these tools are ex-
pensive and only available through an authorized
BMW
dealer. If the special tools are not available, have the cylinder
head removed and disassembled by an authorized BMW
dealer. Be sure to read each procedure thoroughly before
starting a job to determine which special tools and equipment
will be necessary.
Most of the repairs to a cylinder head require precision
rna-
chine work to specific tolerances. This type of work should be
performed by an authorized BMW repairfacility or an ASE
certified machinist.
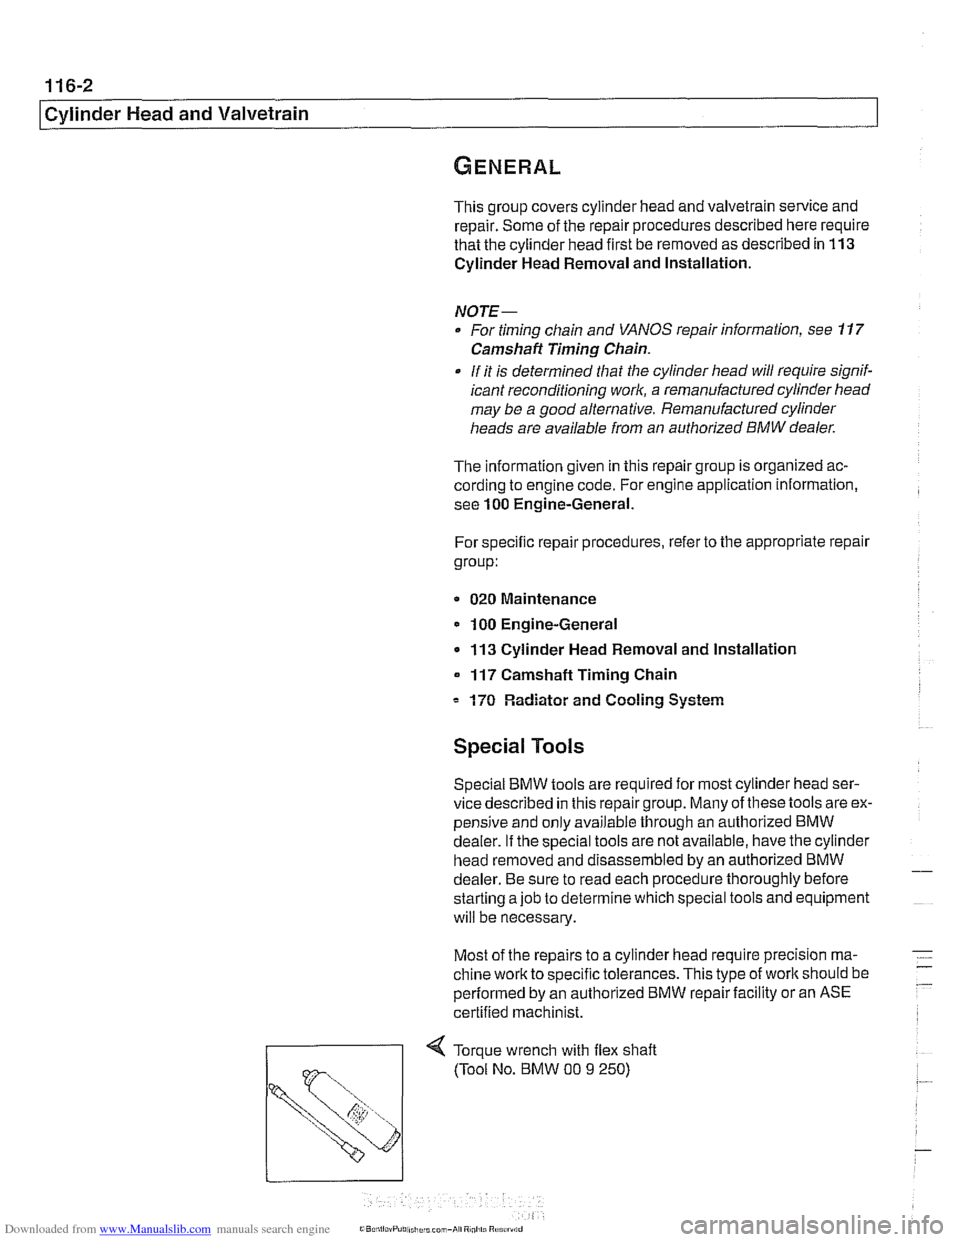
71 Torque wrench with flex shaft
Page 180 of 1002
Downloaded from www.Manualslib.com manuals search engine
/cylinder Head and Valvetrain
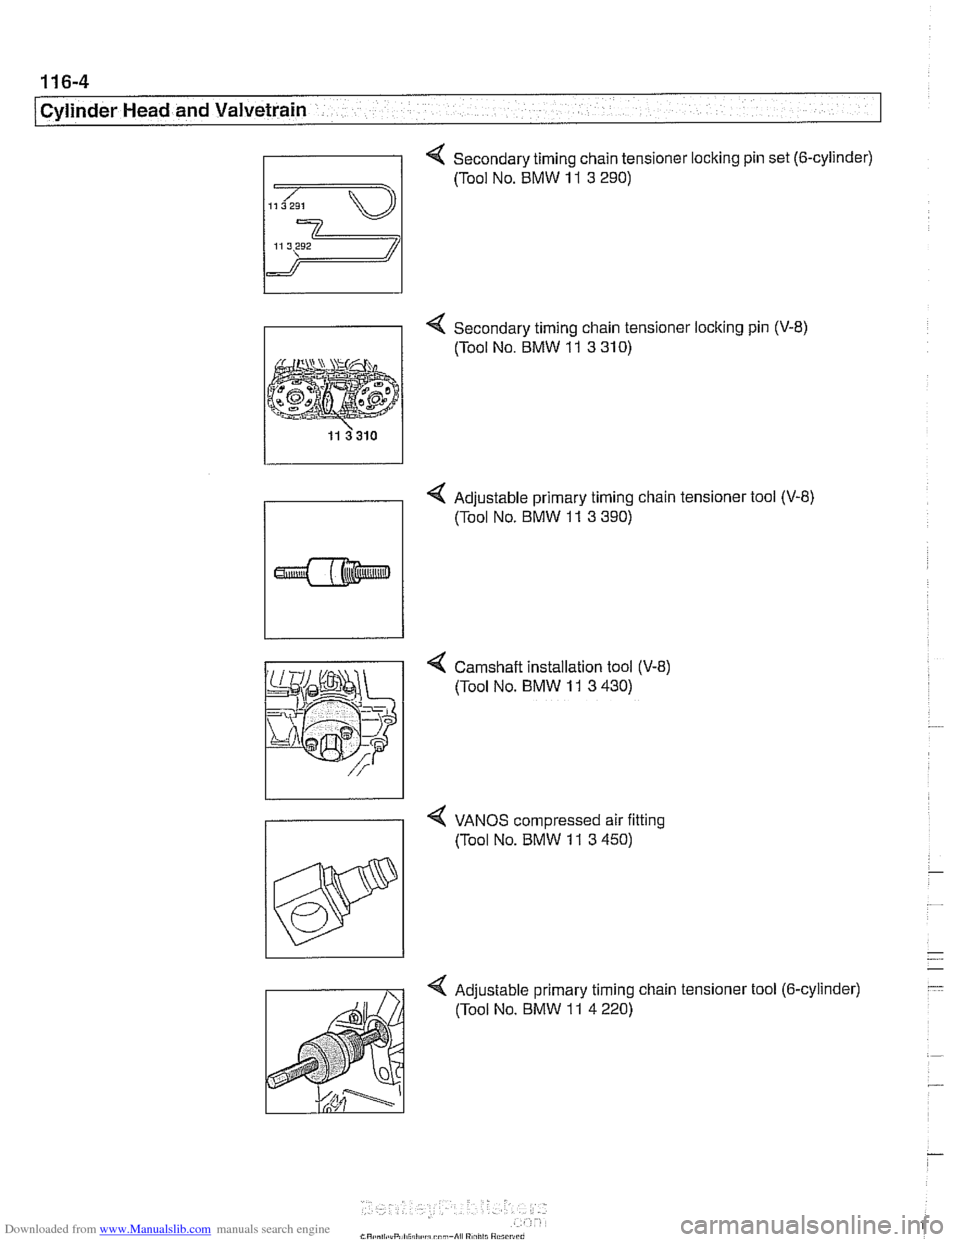
Secondary timing chain tensioner locking pin set (6-cylinder)
- 4 Secondary timing chain tensioner locking pin (V-8)
(Tool No. BMW
11 3 310)
4 Adjustable primary timing chain tensioner tool (V-8)
(Tool No. BMW
11 3 390)
4 Camshaft installation tool (V-8)
(Tool No.
BMW 11 3 430)
4 VANOS compressed air fitting
7 (Tool No. BMW 11 3 450)
Adjustable primary timing chain tensioner tool (6-cylinder) (Tool No. BMW
11 4 220)