driveshaft BMW 540i 2000 E39 Workshop Manual
[x] Cancel search | Manufacturer: BMW, Model Year: 2000, Model line: 540i, Model: BMW 540i 2000 E39Pages: 1002
Page 3 of 1002
Downloaded from www.Manualslib.com manuals search engine
YOU are now in Volume I
I
Foreword ................... .. ........................................................................\
.......... v
Index
........................ .. ................................................................ rear of manual
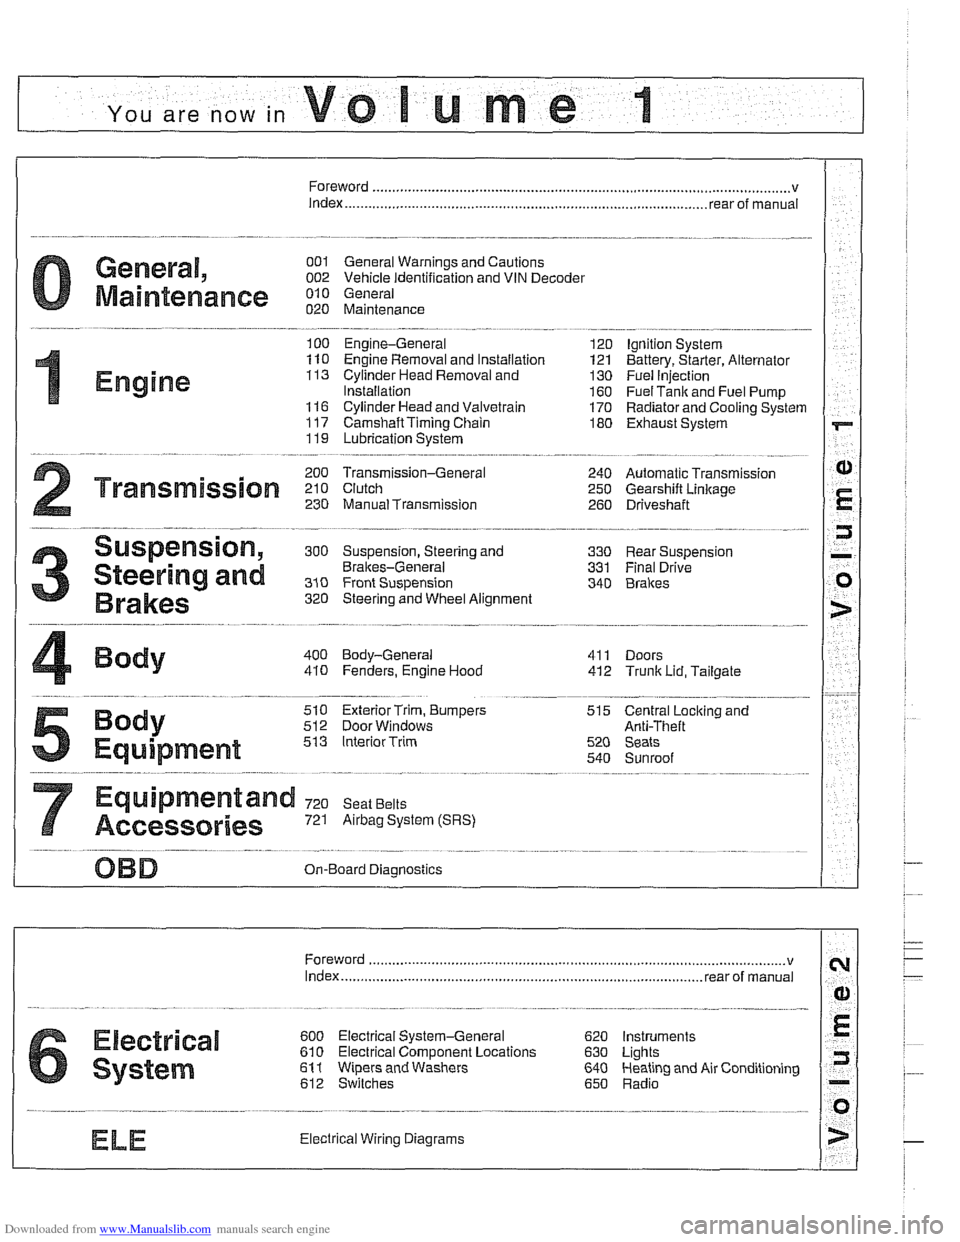
General, 001 General Warnings and Cautions 002 Vehicle Identification and VIN Decoder
Maintenance OiO 020 Maintenance
Engine
100 Engine-General 110 Engine Removal and Installation
113 Cylinder Head Removal and
Installation
116 Cyiinder Head and Valvetrain 117 Camshaft Timing Chain
119 Lubrication System
200 Transmission-General
2 Transmission 210 clutch 230 ManualTransmission
I20 Ignition System
121 Battery, Starter, Alternator
130 Fuel Injection
160 Fuel Tank and Fuel Pump 170 Radiator and Cooling System
180 Exhaust System
240 Automatic Transmission
250 Gearshift Linkage 260 Driveshaft
Suspension, 300 Suspension, Steering and 330 Rear Suspension
Brakes-General 331 Final Drive
Steering and No Front Suspension 340 Brakes
320 Steering and Wheel Alignment
400 Body-General
410 Fenders, Engine Hood 411 Doors
412 Trunk Lid, Tailgate
510 Exterior Trim, Bumpers 512 Door Windows
Equipment 513 Interior Trim
7
Equipment and 720 seat Belts
Accessories 721 Airbag System (SRS)
OBD On-Board Diagnostics
. ............ ..
515 Central Lociting and
Anti-Theft
520 Seats 540 Sunroof
.................................................................... Foreword .............................. .. v
Index ................... .. ................................................................ rear of manual
Electrical
6 system
600 Electrical System-General 620 Instruments
610 Electrical Comoonent Locations 630 Liohts
611 wipers and washers 612 Switches eati in^ and Air Conditioning
Radio
. ........... ........ .........................
Electrical Wiring Diagrams
Page 62 of 1002
Downloaded from www.Manualslib.com manuals search engine
020-30
Maintenance
fluid use and the most-up-to-date information regarding
transmission operating fluids.
The automatic transmission is not equipped with a dipstick.
Therefore, checking the ATF level is an involved procedure
which includes measuring and maintaining a specified ATF
temperature during the checking procedure.
For more complete
ATF service information, including
checking
ATF level and ATF filter replacement procedures,
see
240 Automatic Transmission.
Transmission service, manual
Manual transmission service consists of inspecting for leaks
and checking the fluid. Evidence of transmission leaks is
like-
ly to be seen around the driveshaft mounting flange and at the
bottom of the bellhousing.
NOTE-
For more information on identifying oil
leaks and their
causes, see 230 Manual Transmission and210 Clutch.
Transmission fluid, checking and filling
(manual transmission)
Tne manual transmss'on inslalleo 'n rne E39 models s f;lled
with a special liierime iluid (ivlTF-LT-I). oi. ordinarily
does
not need to be changed.
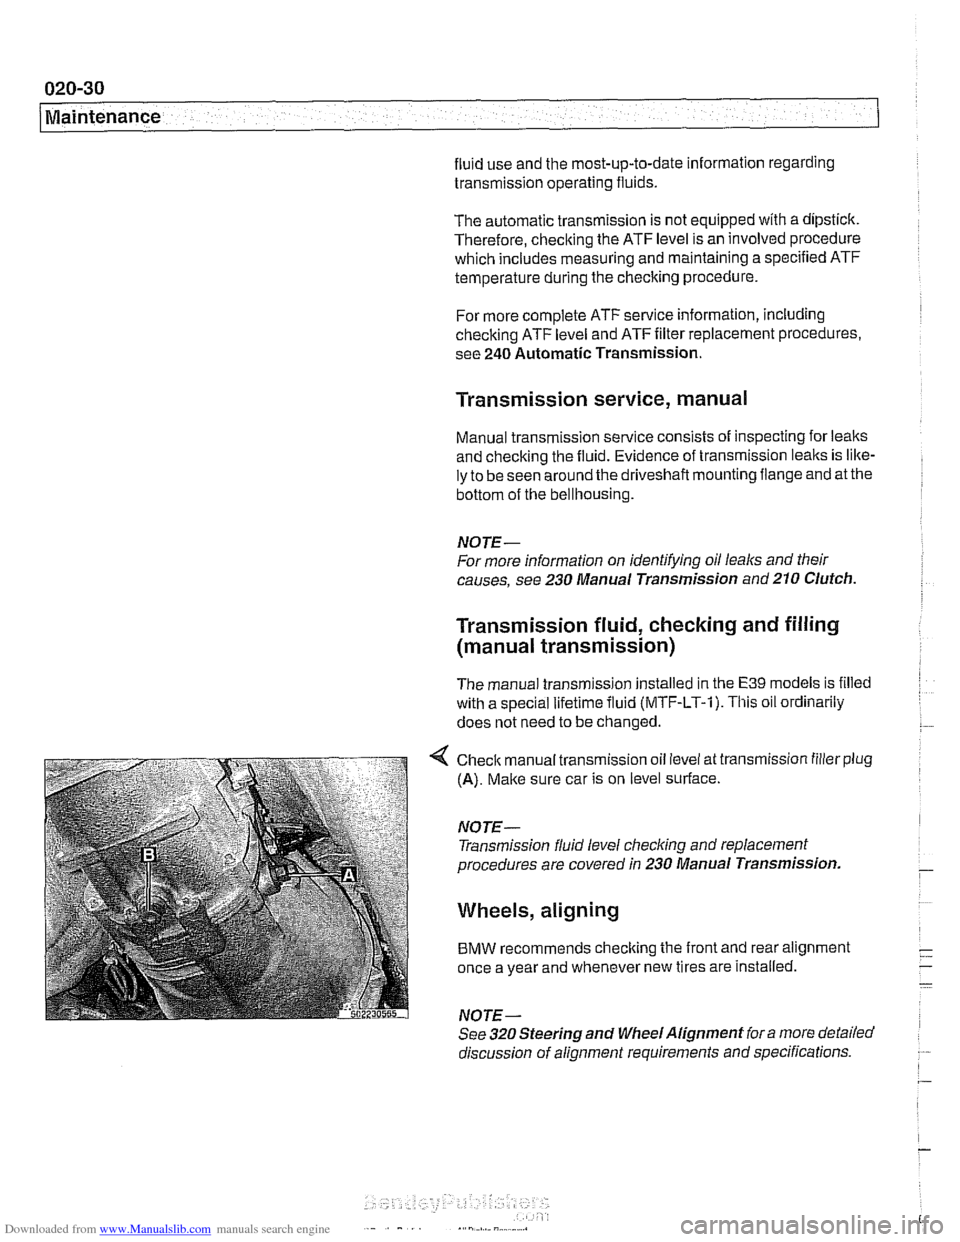
< Check manual transmission oil level at transmission filler plug
(A). Make sure car is on level surface.
NOTE- Transmission fluid level
checking and replacement
procedures are covered in 230 Manual Transmission.
Wheels, aligning
BMW recommends checking the front and rear alignment
once a year and whenever new tires are installed.
NOTE-
See 320 Steering and Wheel Alignment for a more detailed
discussion of alignment requirements and specifications.
Page 491 of 1002
Downloaded from www.Manualslib.com manuals search engine
Fuel Tank and Fuel pump/
- Remove suction hose from tank filler neck carefully to avoid
damaging filler neck baffle plate.
CAUTION-
After finishing repairs but before starling engine, be sure
there is at least
5 liters (1.5 gallons) of fuel in tanlc. The fuel
pump will be damaged if run without fuel.
Fuel tank, removing and installing
- Remove fuel tank filler cap and drain tank as described
earlier.
- Disconnect negative cable from battery.
CAUTION-
Prior to disconnecting the battea read the battery discon-
nection cautions given in
001 General Cautions and
Warnings.
- Remove rear seat bottom cushion. Peel forward lip of carpet
from beneath seat cushion and carefully peel back insulation
to expose fuel tank access cover on left and right sides. Re-
move covers.
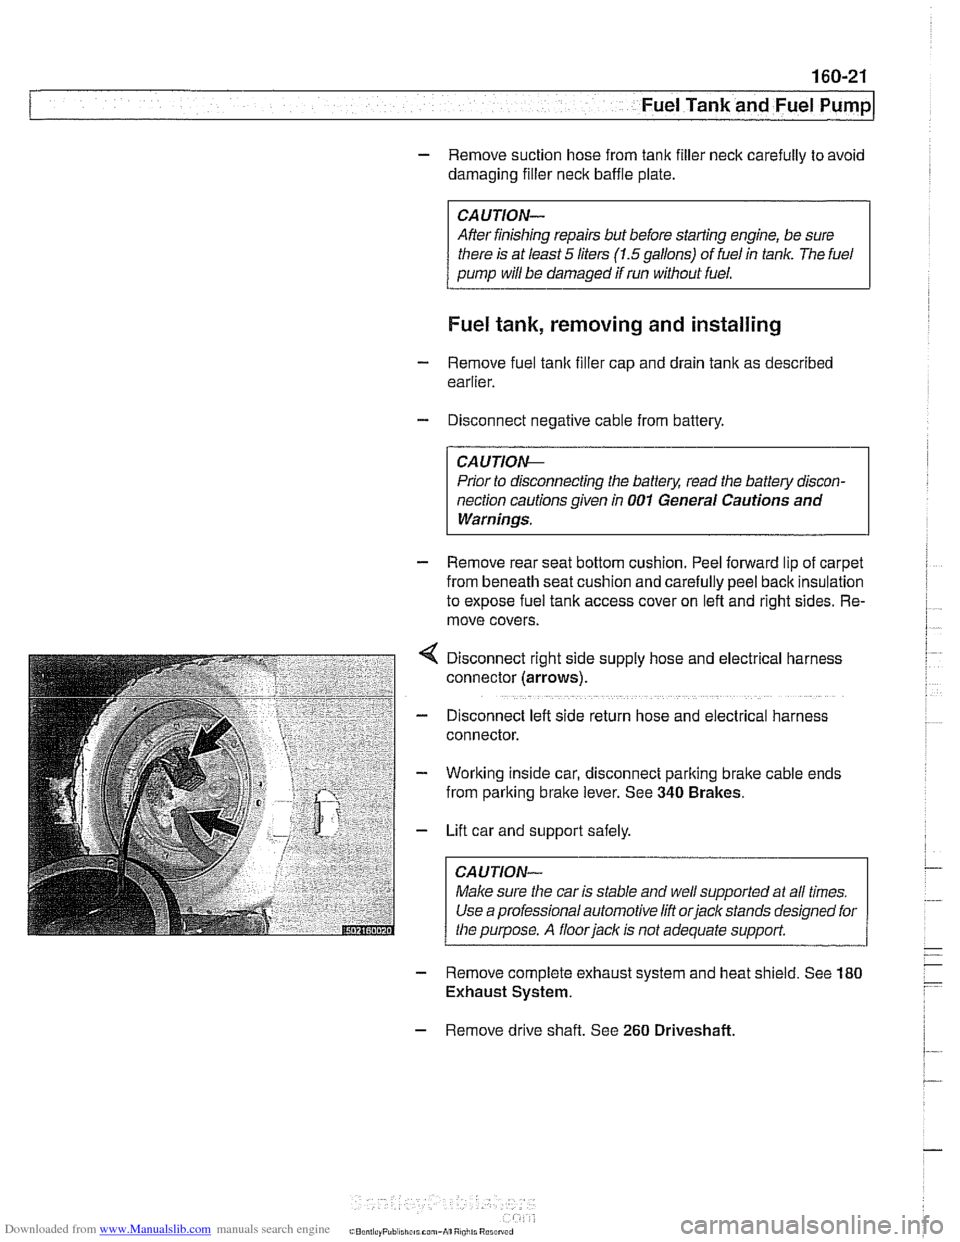
Disconnect right side supply hose and
electr~cal harness
connector (arrows).
D~sconnect left side return hose and electrical harness
connector.
Working inside car, disconnect parking
bralte cable ends
from parking brake lever. See
340 Brakes.
Lift car and support safely.
Make sure the car is stable and
we/ supported at all times.
Use a professional automotive lift
orjack stands designed for
the purpose. A floorjaclc is not adequate support.
- Remove complete exhaust system and heat shield. See 180
Exhaust System.
- Remove drive shaft. See 260 Driveshaft
Page 540 of 1002
Downloaded from www.Manualslib.com manuals search engine
This repair group covers general application information for
the clutch, manual and automatic transmissions, shift linkag-
es and driveshaft.
Drivetrain
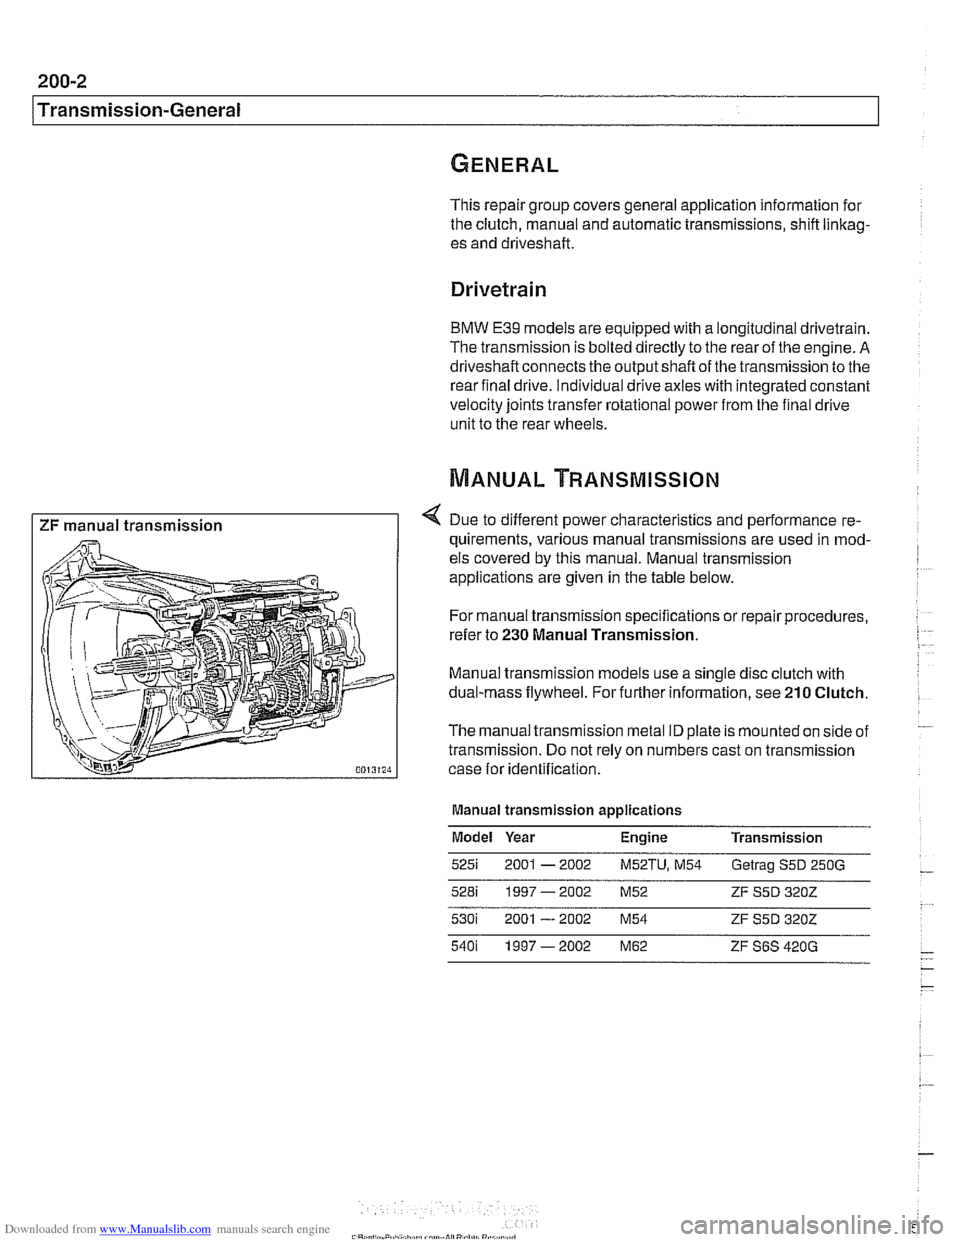
I ZF manual transmission I
BMW E39 models are equipped with a longitudinal drivetrain.
The transmission is bolted directly to the rear of the engine.
A
driveshaft connects the output shaft of the transmission to the
rear final drive. Individual drive axles with integrated constant
velocity joints transfer rotational power from the final drive
unit to the rear wheels.
4 Due to different power characteristics and performance re-
quirements, various manual transmissions are used in mod-
els covered by this manual. Manual transmission
applications are given in the table below.
For manual transmission specifications or repair procedures,
refer to
230 Manual Transmission.
Manual transmission models use a single disc clutch with
dual-mass flywheel. For further information, see
210 Clutch.
The manual transmission metal ID plate is mounted on side of
transmission. Do not rely on numbers cast on transmission
case for identification.
Manual transmission applications
Model Year Engine Transmission
5251 2001 - 2002 M52TU, M54 Getrag S5D 250G
528i 1997-2002 M52 ZF S5D 3202
Page 572 of 1002
Downloaded from www.Manualslib.com manuals search engine
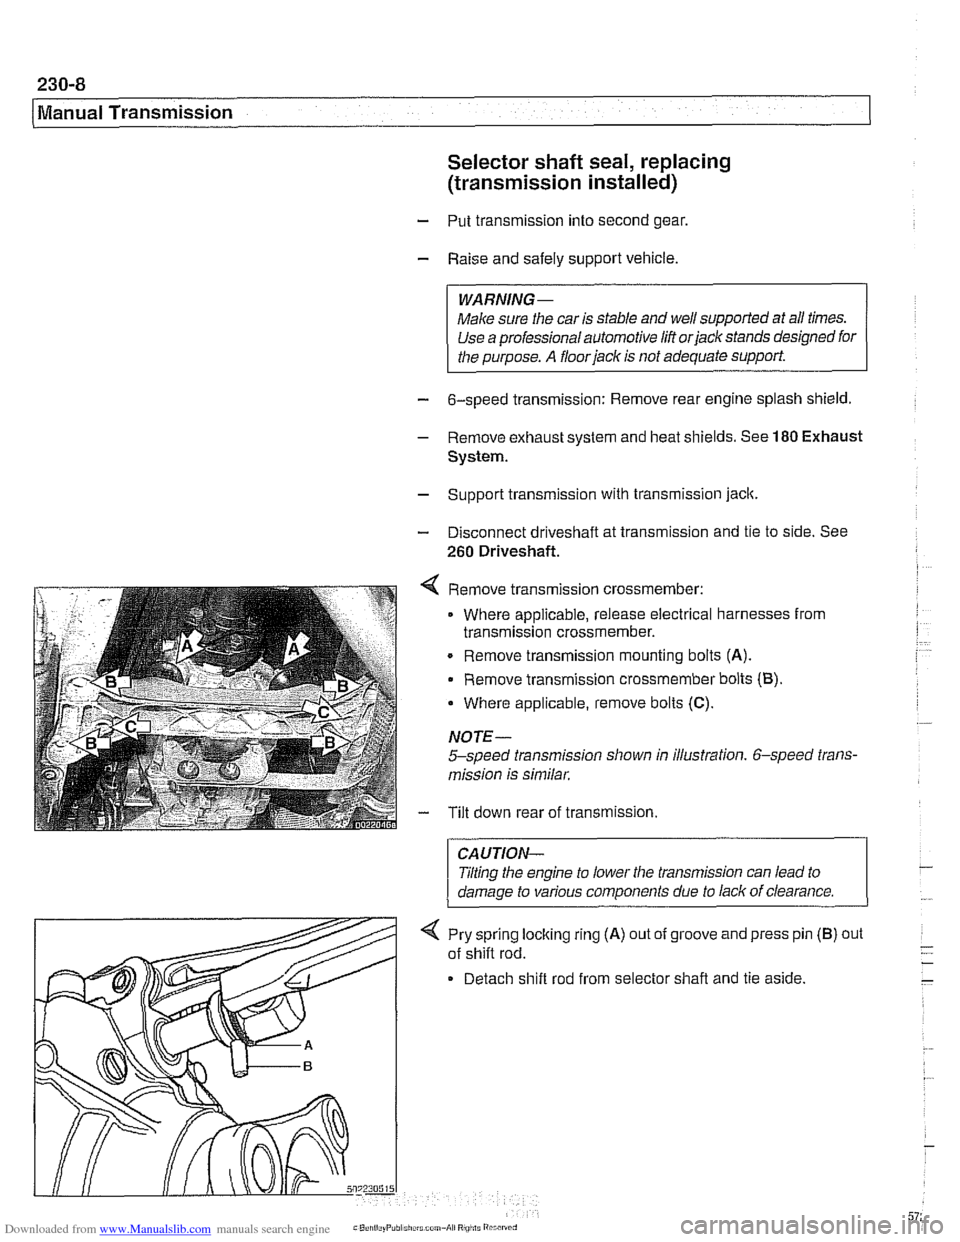
Manual Transmission Selector shaft seal, replacing
(transmission installed)
- Put transmission into second gear.
- Raise and safely support vehicle.
WARNING-
Make sure the car is stable and well supported at all times.
Use a professional automotive lift
orjack stands designed for
the purpose.
A floorjack is not adequate support
- 6-speed transmission: Remove rear engine splash shield
- Remove exhaust system and heat shields. See 180 Exhaust
System.
- Support transmission with transmission jack.
- Disconnect driveshaft at transmission and tie to side. See
260 Driveshaft.
4 Remove transmission crossmember:
Where applicable, release electrical harnesses from
transmission crossmember.
. Remove transmission mounting bolts (A).
Remove transmission crossmember bolts (B).
Where applicable, remove bolts
(C).
NOTE-
5-speed transmission shown in illustration. 6-speed trans-
mission is similar.
- Tilt down rear of transmission.
CAUTION-
Jilting the engine to lower the transmission can lead to
damaae to various components due to lack of clearance.
-
4 Pry sprlng locking rlng (A) out of groove and press pin
of
sh~fl rod.
Detach
sh~ft rod from selector shafl and tie as~de.
(B) out
Page 573 of 1002
Downloaded from www.Manualslib.com manuals search engine
230-9
Manual ~ransmissionl
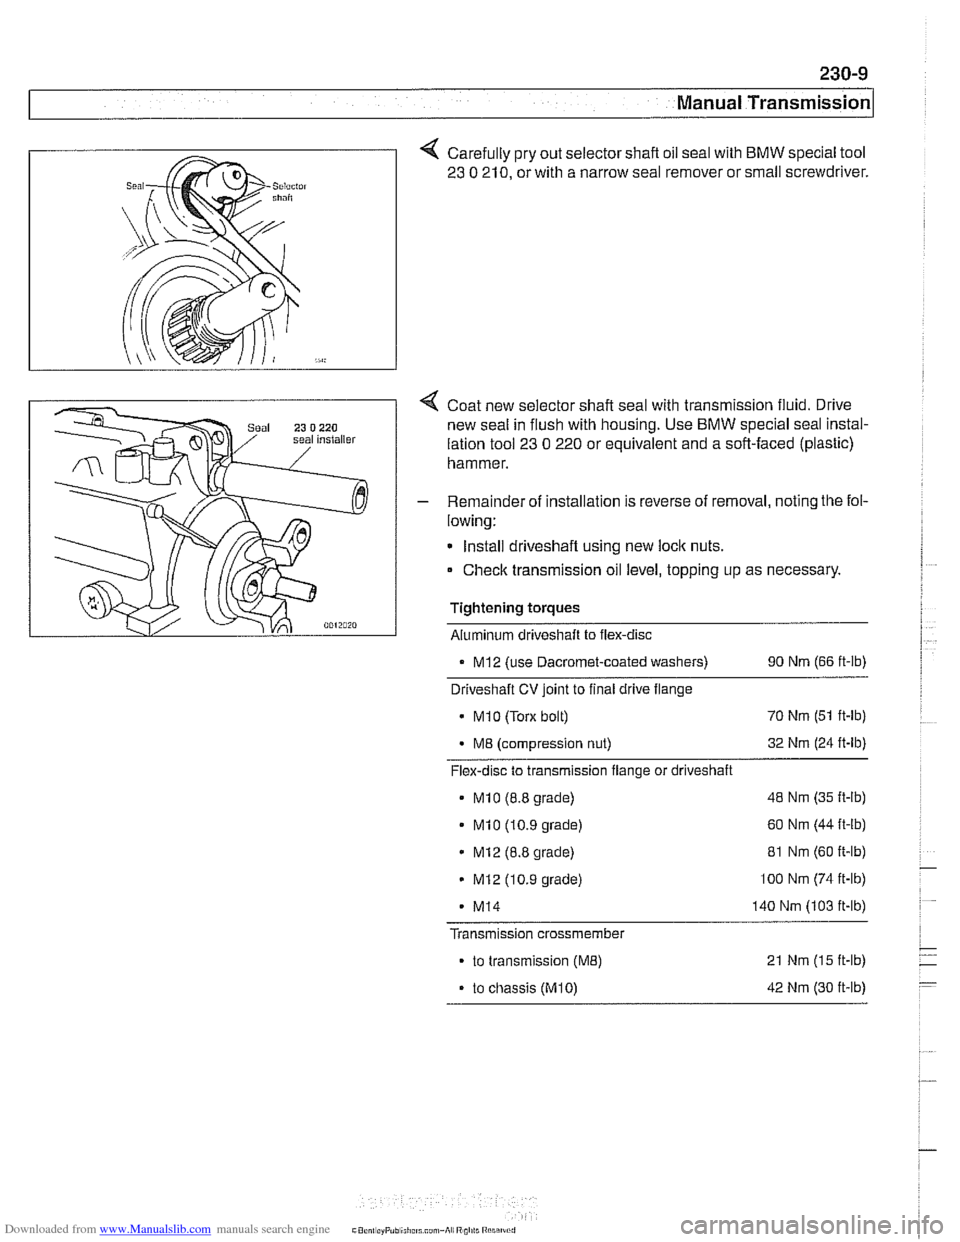
Carefully pry out selector shaft oil seal with BMW special tool
23
0 210, or with a narrow seal remover or small screwdriver.
Coat new selector shaft seal with transmission fluid. Drive
new seal in flush with housing. Use
BMW special seal instal-
lation tool
23 0 220 or equivalent and a soft-faced (plastic)
hammer.
- Remainder of installation is reverse of removal, noting the fol-
lowing:
Install driveshaft using new
loclc nuts.
Check transmission oil level, topping up as necessary.
Tightening torques Aluminum driveshaft to flex-disc
. MI2 (use Dacromet-coated washers) 90 Nm (66 ft-lb)
Driveshaft CV joint to final drive flange
MI 0 (Torx bolt) 70
Nm (51 ft-lb)
M8 (compression nut) 32
Nm (24 ft-lb)
Flex-disc to transmission flange or driveshaft
MI0 (8.8 grade) 48 Nm (35 ft-lb)
MI0 (10.9 grade) 60
Nm (44 it-lb)
MI2 (8.8 grade) 81
Nm (60 ft-lb)
MI2 (10.9 grade) lo0 Nm (74 ft-lb)
- MI4 140 Nm (103 ft-lb)
Transmission crossmember
to transmission (ME) 21 Nm (15 ft-lb)
. to chassis (M10) 42 Nm (30 ft-lb)
Page 574 of 1002
Downloaded from www.Manualslib.com manuals search engine
230-1 0
I Manual Transmission
Output shaft seal, replacing (5-speed
transmission) (transmission installed)
- Raise and safely support vehicle.
WARNING -
Make sure the car is stable and well supported at all times.
Use a professional automotive
lilt orjack stands designed
for the purpose.
A floorjack is not adequate support.
- Remove exhaust system and heat shields. See 180 Exhaust
System
Support transmission with transmission jack.
Disconnect driveshafi at transmission output flange, and
hang driveshaft to side. See
260 Driveshaft.
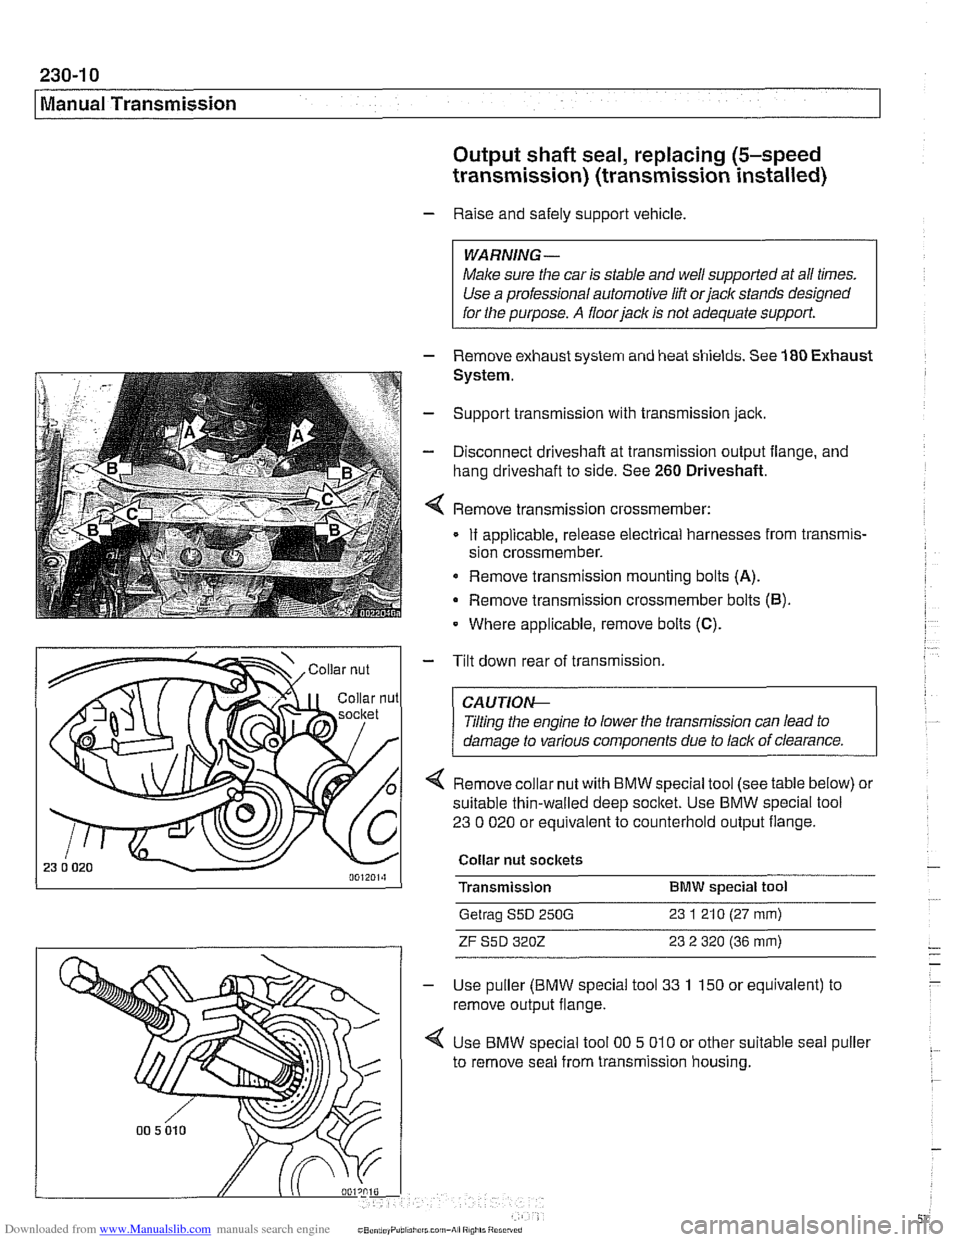
Remove transmission crossmember:
If applicable, release electrical harnesses from transmis-
sion crossmember.
Remove transmission mounting bolts
(A).
Remove transmission crossmember bolts (6).
Where applicable, remove bolts (C).
- Tilt down rear of transmission.
CAUTIOI\C
Tilting the engine to lower the transmission can lead to
damage to various components due to lack of clearance.
4 Remove collar nut with BMW special tool (see table below) or
suitable thin-walled deep
socltet. Use BMW special tool
23 0 020 or equivalent to counterhold output flange.
Collar nut sockets
Transmission
BMW special tool
Getrag S5D 250G 23 1 21 0 (27 mm)
ZF S5D 3202 23 2 320 (36 mm)
Use puller (BMW special tool 33 1 150 or equivalent) to
remove output flange.
Use BMW special tool
00 5 010 or other suitable seal puller
to remove seal from transmission housing.
Page 575 of 1002
Downloaded from www.Manualslib.com manuals search engine
230-1 1
Manual ~ransmissionl
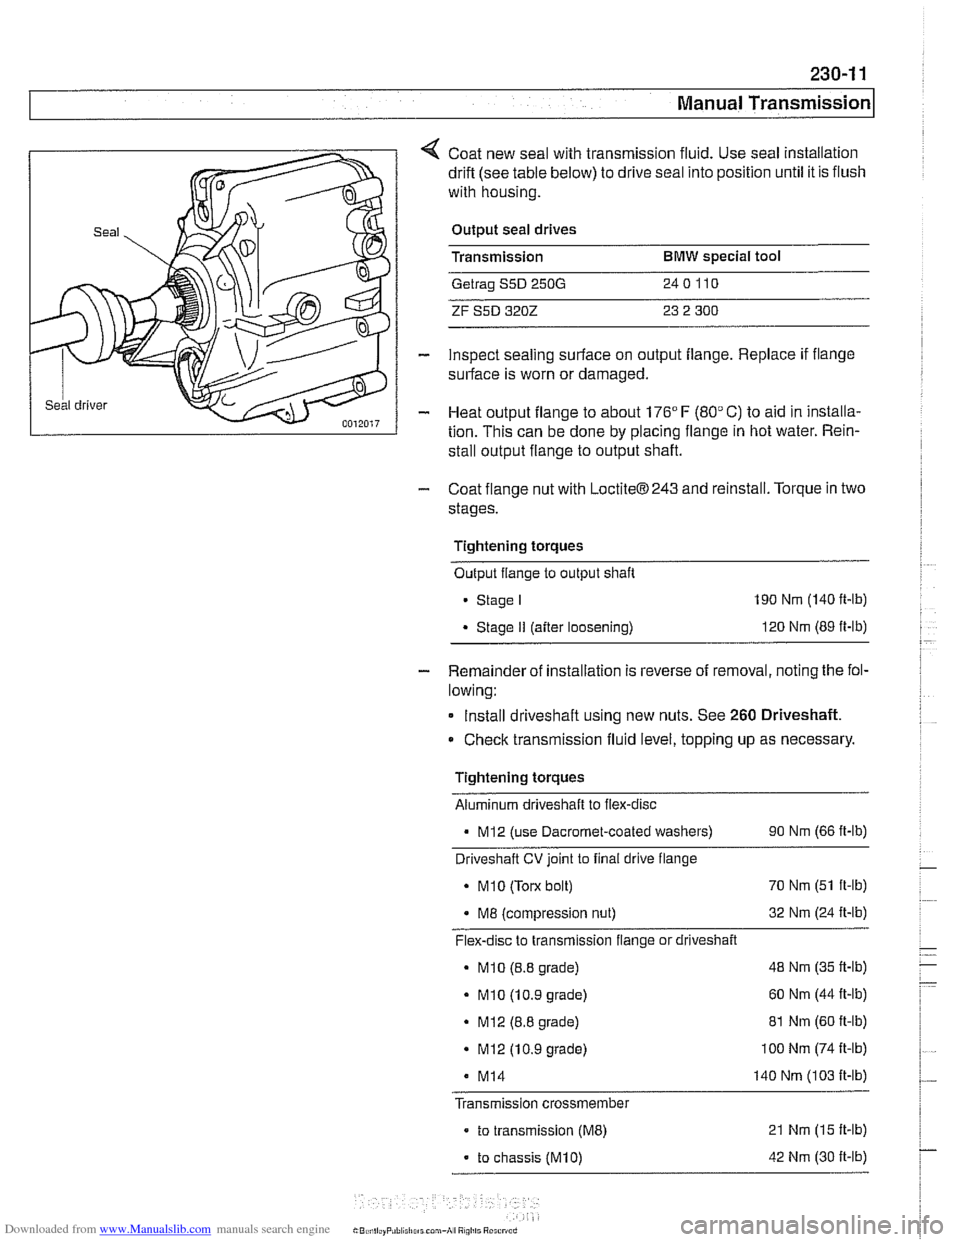
Coat new seal with transmission fluid. Use seal installation
drift (see table below) to drive seal into position until it is flush
with housing.
Output seal drives
Transmission
BMW special tool
Getrag S5D 250G 240110
ZF S5D 3202 23 2 300
inspect sealing surface on output flange. Replace if flange
surface is worn or damaged.
Heat output flange to about 176"
F (80" C) to aid in installa-
tion. This can be done by placing flange in hot water. Rein-
stall output flange to output shaft.
- Coat flange nut with LoctiteB243 and reinstall. Torque in two
stages.
Tightening torques Output flange to output shaft
Stage I 190 Nm (140 ft-lb)
Stage II (after loosening) 120
Nm (89 ft-lb)
- Remainder of installation is reverse of removal, noting the fol-
lowing:
Install driveshaft using new nuts. See
260 Driveshaft.
Check transmission fluid level, topping up as necessary
Tightening torques Aluminum driveshaft to flex-disc
- MI2 (use Dacromet-coated washers) 90 Nm (66 ft-lb)
Driveshaft
CV joint to final drive flange
. MI0 (Torx bolt) 70
Nm (51 ft-lb)
. M8 (compression nut) 32
Nm (24 ft-lb)
Flex-disc to transmission flange or driveshaft
- MI0 (8.8 grade) 48
Nm (35 ft-lb)
- MI0 (10.9 grade) 60
Nm (44 It-lb)
. MI2 (8.8 grade) 81 Nm (60 ft-lb)
. MI2 (10.9 grade) I00 Nm (74 It-lb)
M14 140 Nm (103 It-lb)
Transmission crossmember
- to transmission (ME) 21 Nm (15 It-lb)
- to chassis (M10) 42 Nm (30 It-lb)
Page 576 of 1002
Downloaded from www.Manualslib.com manuals search engine
230-12
/ Manual Transmission
Output shaft seal, replacing (6-speed
transmission) (transmission installed)
- Raise and safely support vehicle.
WARNING-
Make sure the car is stable and well supported at all times.
Use a professional automotive lift
orjack stands designed for
the purpose.
A floorjack is not adequate support.
- Remove exhaust system and heat shields. See 180 Exhaust
System.
- Support transmission with transmission jack
- Disconnect driveshaft at transmission output flange, and
hang driveshaft to side. See
260 Driveshaft.
Remove transmission crassmember:
If applicable, release electrical harnesses from transmis-
sion crossmember.
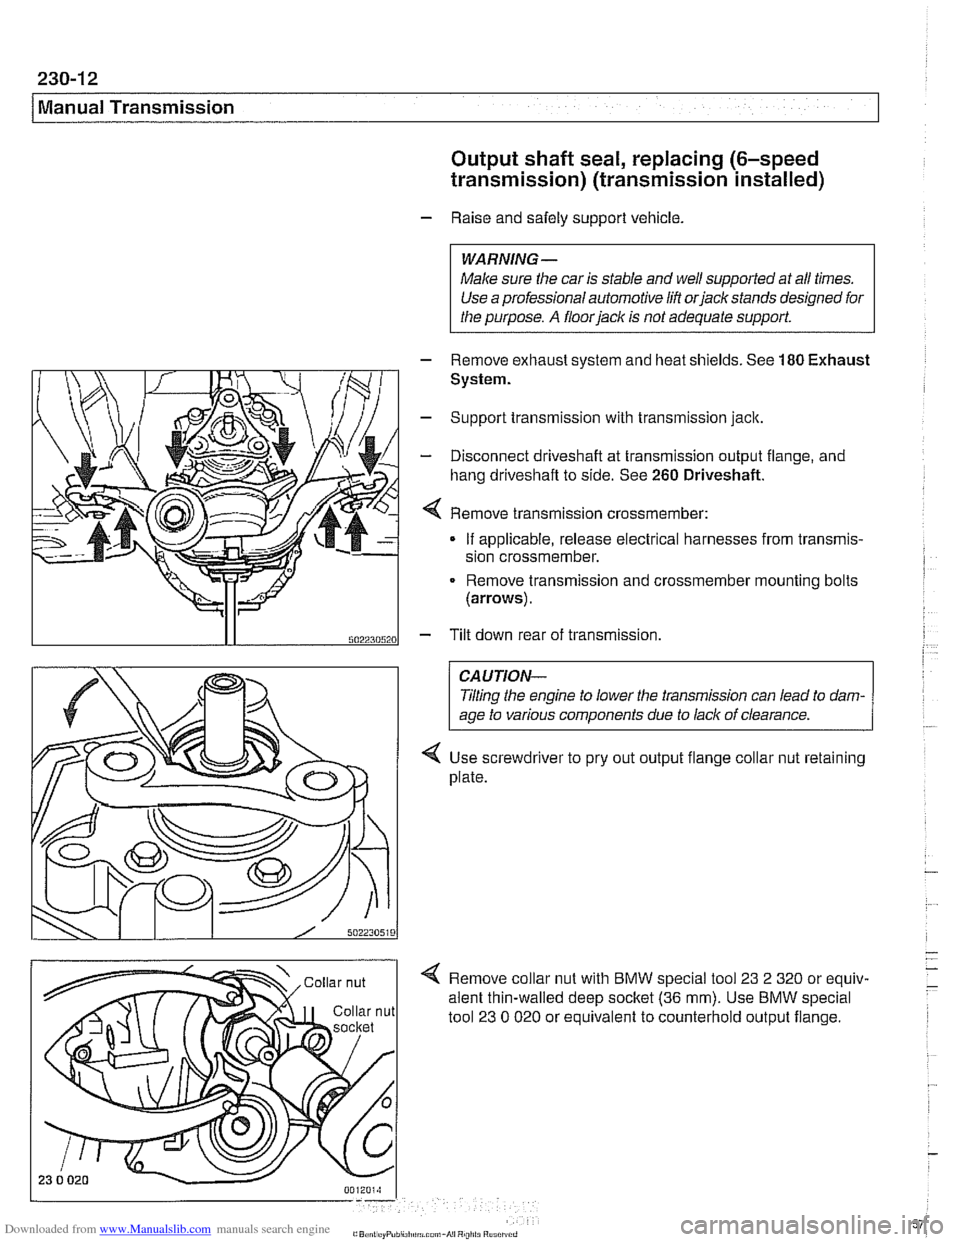
Remove transmission and crossmember mounting bolts
(arrows).
5022305201 - Tilt down rear of transmission
CAUTION-
Tlting the engine to lower the transmission can lead to dam-
age to various components due to lack of clearance.
Use screwdriver to pry out output flange collar nut retaining
plate.
Remove collar nut with BMW special tool
23 2 320 or equiv-
alent thin-walled deep socltet
(36 mm). Use BMW special
tool
23 0 020 or equivalent to counterhold output flange.
Page 578 of 1002
Downloaded from www.Manualslib.com manuals search engine
230-14
I Manual Transmission
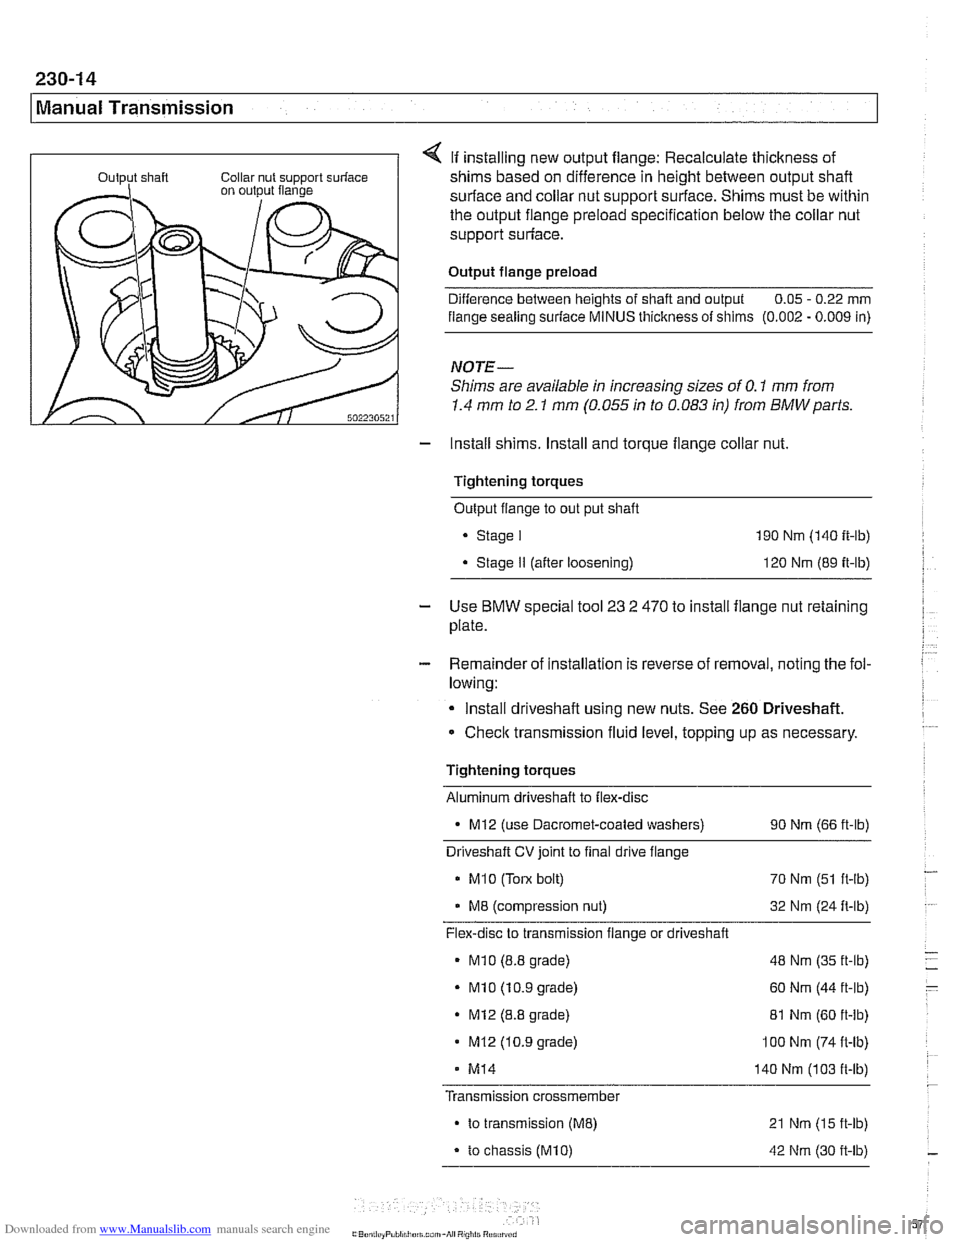
If installing new output flange: Recalculate thickness of
shims based on difference in height between output shaft
surface and collar nut support surface. Shims must be within
the output flange preload specification below the collar nut
support surface.
Output flange preload Difference between heights of shaft and output 0.05
- 0.22 mm
flange sealing
suriace MINUS thickness of shims (0.002 - 0.009 in)
NOTE-
Shims are available in increasing sizes of 0.1 mm from
1.4 mm to 2.1 mm (0.055 in to 0.083 in) from BMWparts.
- Install shims. Install and torque flange collar nut.
Tightening torques Output flange to out put shaft
. Stage I 190 Nm (140 ft-lb)
. Stage II (after loosening) 120 Nm (89 it-lb)
- Use BMW special tool 23 2 470 to install flange nut retaining
plate.
- Remainder of installation is reverse of removal, noting the fol-
lowing:
Install driveshaft using new nuts. See
260 Driveshaft.
Checlc transmission fluid level, topping up as necessary.
Tightening torques
Aluminum driveshaft to flex-disc
- MI2 (use Dacromet-coated washers) 90 Nm (66 ft-lb)
Driveshaft
CV joint to final drive flange
MI0 (Tom bolt)
70 Nm (51 ft-lb)
M8 (compression nut) 32 Nm (24 ft-lb)
Flex-disc to transmission flange or driveshaft
* MI0 (8.8 grade) 48 Nm (35 ft-lb)
- MI0 (10.9 grade) 60 Nm (44 ft-lb)
. MI2 (8.8 grade)
81 Nm (60 ft-lb)
MI2 (10.9 grade) 100 Nm (74 ft-lb)
- MI4 140 Nm (1 03 ft-lb)
Transmission
crossmembe~
to transmission (ME)
to chassis (M10)
21 Nm (15 ft-lb)
42 Nm (30 it-lb)