Track BMW 550I 2011 F10 User Guide
[x] Cancel search | Manufacturer: BMW, Model Year: 2011, Model line: 550I, Model: BMW 550I 2011 F10Pages: 304, PDF Size: 10.18 MB
Page 185 of 304
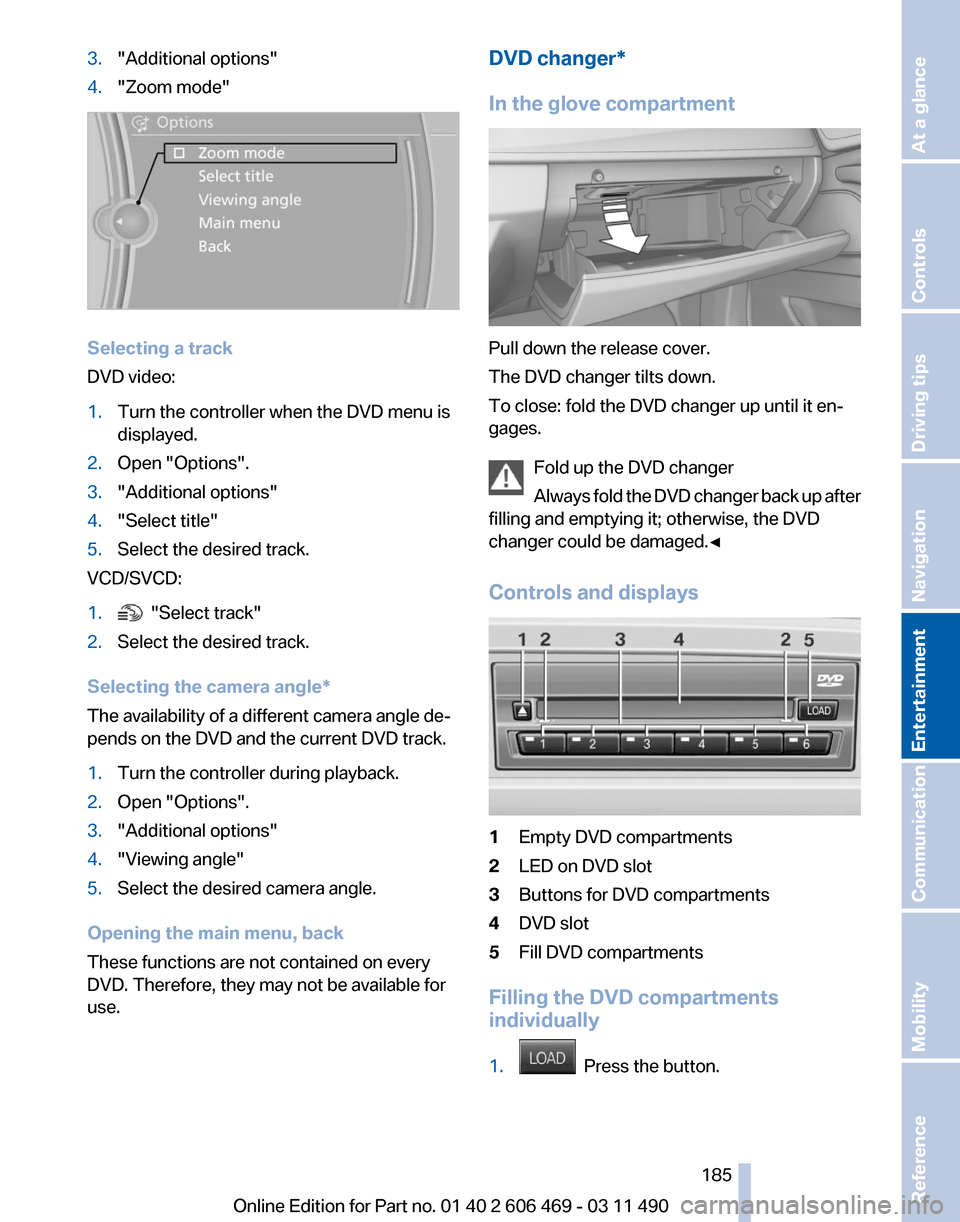
3.
"Additional options"
4. "Zoom mode" Selecting a track
DVD video:
1.
Turn the controller when the DVD menu is
displayed.
2. Open "Options".
3. "Additional options"
4. "Select title"
5. Select the desired track.
VCD/SVCD:
1. "Select track"
2. Select the desired track.
Selecting the camera angle*
The availability of a different camera angle de‐
pends on the DVD and the current DVD track.
1. Turn the controller during playback.
2. Open "Options".
3. "Additional options"
4. "Viewing angle"
5. Select the desired camera angle.
Opening the main menu, back
These functions are not contained on every
DVD. Therefore, they may not be available for
use. DVD changer*
In the glove compartment
Pull down the release cover.
The DVD changer tilts down.
To close: fold the DVD changer up until it en‐
gages.
Fold up the DVD changer
Always
fold the DVD changer back up after
filling and emptying it; otherwise, the DVD
changer could be damaged.◀
Controls and displays 1
Empty DVD compartments
2 LED on DVD slot
3 Buttons for DVD compartments
4 DVD slot
5 Fill DVD compartments
Filling the DVD compartments
individually
1. Press the button. Seite 185
185Online Edition for Part no. 01 40 2 606 469 - 03 11 490
Reference Mobility Communication
Entertainment Navigation Driving tips Controls At a glance
Page 186 of 304
The LED on the first empty compartment
flashes.
2. Select another compartment if necessary.
3. Wait for the LEDs on the DVD slot to flash.
4. Insert a single CD or DVD in the middle.
The CD/DVD is drawn in automatically and
placed into the selected compartment.
Sliding in CDs/DVDs
Do not insert the CD/DVD until the LEDs
on
the DVD slot are flashing; otherwise, the CD/
DVD or the DVD changer could be damaged.
Do not continue to push on the CD/DVD; this
may cause it to jam and prevent it from being
able to eject again.◀
Filling all empty DVD compartments
1. Hold the button down.
The LEDs on the empty CD compartments
flash.
2. Wait for the LEDs on the DVD slot to begin
flashing
and then insert each CD or DVD into
the center of the slot.
The CDs/DVDs are drawn in automatically
and placed into the vacant compartments.
Sliding in CDs/DVDs
Do not insert the CD/DVD until the LEDs
on
the DVD slot are flashing; otherwise, the CD/
DVD or the DVD changer could be damaged.
Do not continue to push on the CD/DVD; this
may cause it to jam and prevent it from being
able to eject again.◀
After they are inserted, it may take several mi‐
nutes for the CDs/DVDs to be read in.
Removing a single CD/DVD
1. Press the button.
2. Select the DVD compartment.
The CD/DVD is partially ejected.
3. Remove the CD/DVD. Removing all CDs/DVDs
1.
Hold the button down.
2. Remove the CDs/DVDs.
Malfunctions
If
all LEDs on the DVD changer are flashing rap‐
idly, a malfunction has occurred.
To eliminate the malfunction:
1. Press one of the buttons:
▷ ▷
The CD/DVD last inserted is ejected.
2. Remove the CD/DVD.
The DVD changer is functional again after the
LEDs stop flashing rapidly.
Audio playback*
The audio track of a DVD can be played back
even if video playback is not possible in the ve‐
hicle.
Only
the main film without the previews or extras
can be played back.
Starting playback
A DVD is located in the DVD changer.
1. "CD/Multimedia"
2. "CD/DVD"
3. Select the desired DVD.
Selecting a chapter using the button Press the button repeatedly until the
desired chapter is played.
Selecting a chapter using iDrive
1. "CD/Multimedia"
2. "CD/DVD"
3. Select the desired DVD.
4. Select the desired chapter. Seite 186
186 Online Edition for Part no. 01 40 2 606 469 - 03 11 490
CD/multimedia
Page 188 of 304
only be used for private purposes. Copying of
this technology is prohibited.
DTS Digital Surround™
Manufactured
under license under U.S.
Patent Numbers: 5,451,942;
5,956,674; 5,974,380; 5,978,762; 6,487,535 &
and other patents granted and registered in the
USA and worldwide. DTS and the logo are reg‐
istered trademarks & DTS Digital Surround and
the DTS logos are trademarks of DTS Inc. ©
DTS, Inc. All rights reserved.
Music collection*
Storing music
General information
Music tracks from CDs/DVDs and USB devices
can be stored in the music collection on a hard
disc in the vehicle and played from there.
▷ Audio CD: tracks are converted into a com‐
pressed audio format. If available, informa‐
tion on the album, such as the artist, is
stored as well.
▷ CD/DVD or USB device with compressed
audio
files: the entire content of the CD/DVD
or the USB device is stored in the vehicle as
an album. The WMA, MP3, M4A*, and
AAC* formats are stored. Individual tracks
and directories can be deleted later, Delet‐
ing a track and directory, refer to page 191.
Tracks with DRM copy protection can be
stored but cannot be played back.
Backing up music data
Regularly back up the music data; other‐
wise,
it could be lost if there is a fault on the hard
disk.◀
Music recognition technology and re‐
lated data are provided by Gracenote®.
Gracenote is the industry standard in music rec‐
ognition technology and related content deliv‐
ery. For more information, please visit
www.gracenote.com. CD and music-related data from Gracenote, Inc.,
copyright © 2000-2009 Gracenote. Gracenote
Software, copyright © 2000-2009 Gracenote.
This product and service may practice one or
more
of the following U.S. Patents: #5,987,525;
#6,061,680; #6,154,773, #6,161,132,
#6,230,192, #6,230,207, #6,240,459,
#6,330,593, and other patents issued or pend‐
ing. Some services supplied under license from
Open Globe, Inc. for U.S. Patent: #6,304,523.
Storing from a CD/DVD
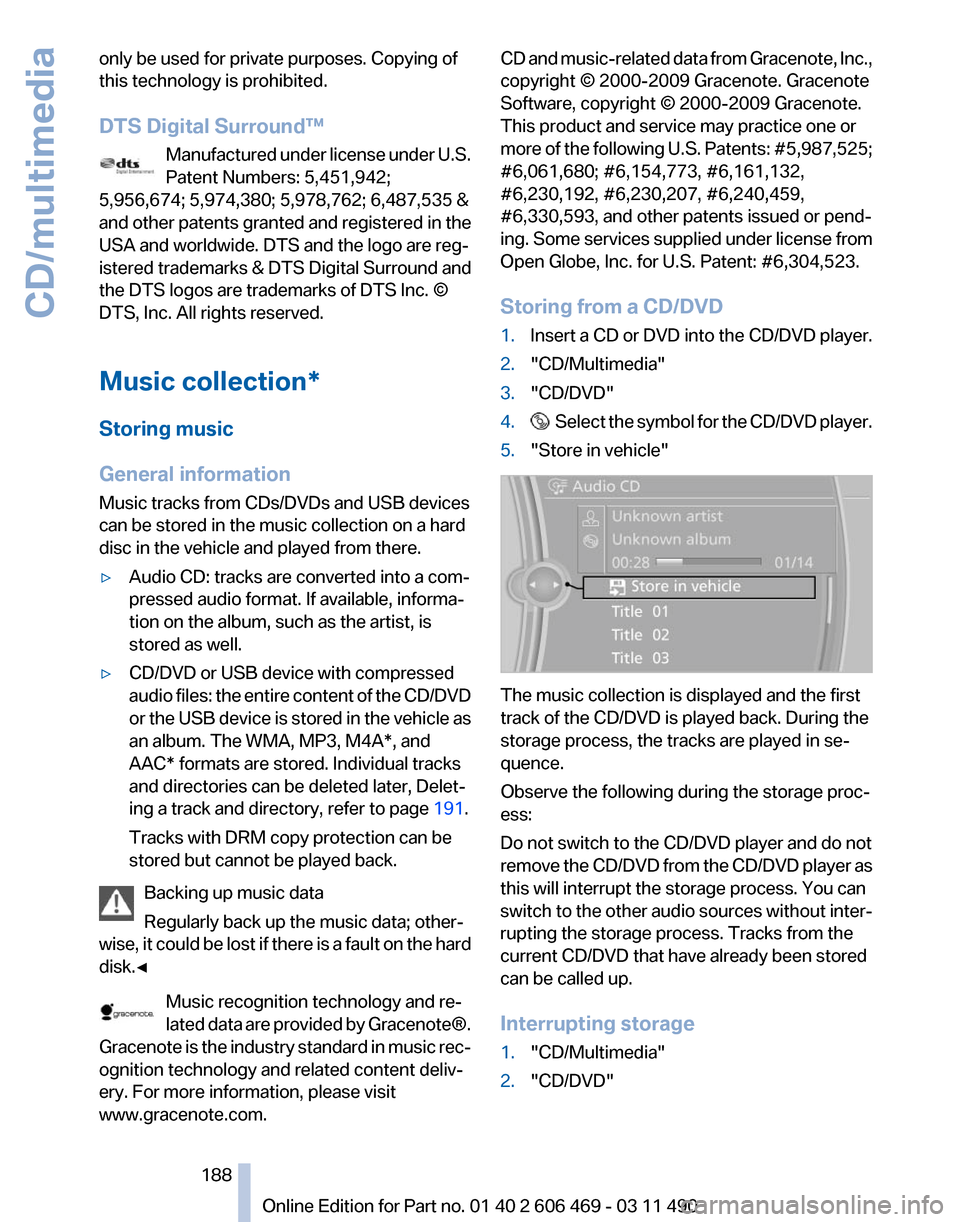
1. Insert a CD or DVD into the CD/DVD player.
2. "CD/Multimedia"
3. "CD/DVD"
4. Select the symbol for the CD/DVD player.
5. "Store in vehicle" The music collection is displayed and the first
track of the CD/DVD is played back. During the
storage process, the tracks are played in se‐
quence.
Observe the following during the storage proc‐
ess:
Do not switch to the CD/DVD player and do not
remove
the CD/DVD from the CD/DVD player as
this will interrupt the storage process. You can
switch to the other audio sources without inter‐
rupting the storage process. Tracks from the
current CD/DVD that have already been stored
can be called up.
Interrupting storage
1. "CD/Multimedia"
2. "CD/DVD"
Seite 188
188 Online Edition for Part no. 01 40 2 606 469 - 03 11 490
CD/multimedia
Page 189 of 304
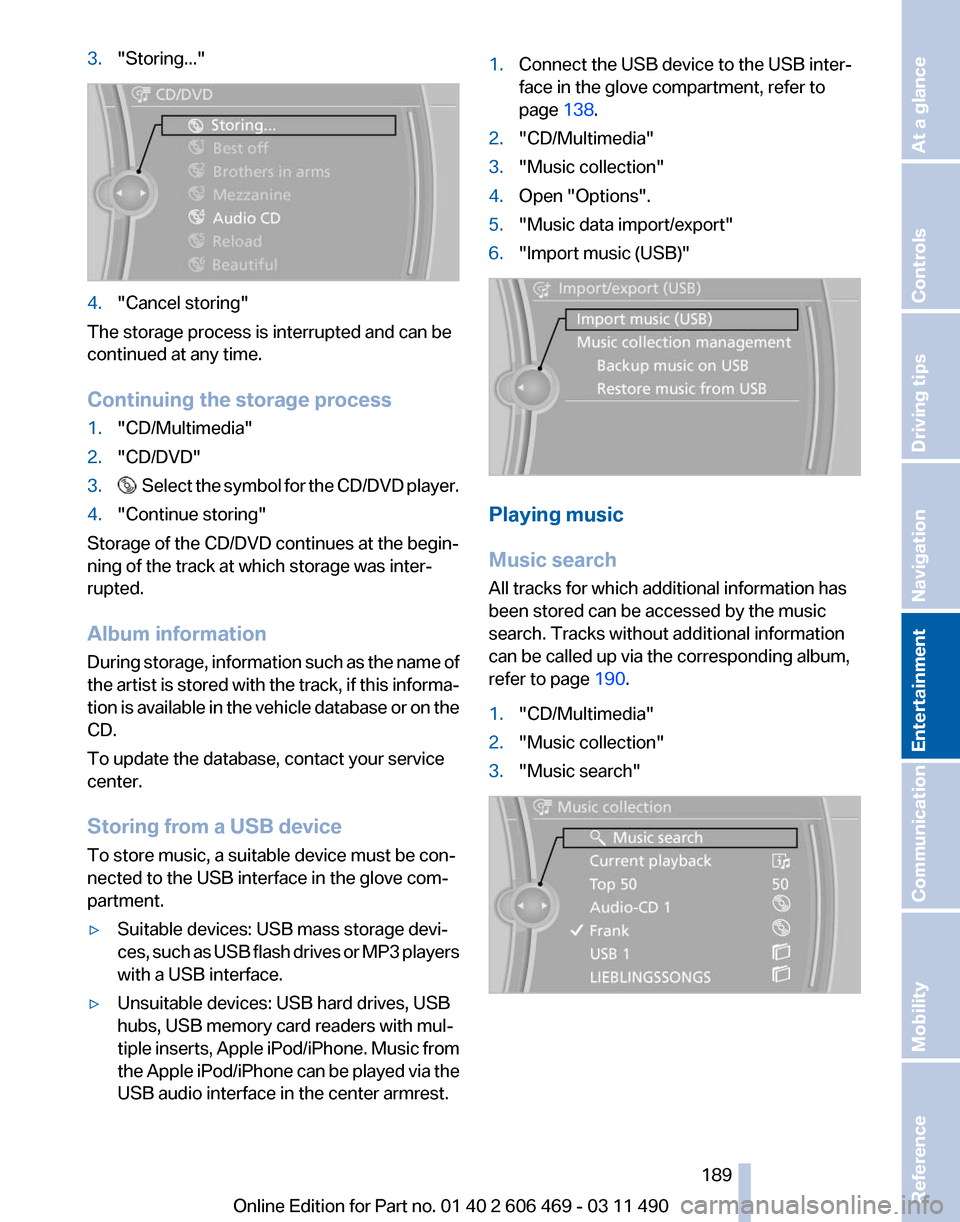
3.
"Storing..." 4.
"Cancel storing"
The storage process is interrupted and can be
continued at any time.
Continuing the storage process
1. "CD/Multimedia"
2. "CD/DVD"
3. Select the symbol for the CD/DVD player.
4. "Continue storing"
Storage of the CD/DVD continues at the begin‐
ning of the track at which storage was inter‐
rupted.
Album information
During
storage, information such as the name of
the artist is stored with the track, if this informa‐
tion is available in the vehicle database or on the
CD.
To update the database, contact your service
center.
Storing from a USB device
To store music, a suitable device must be con‐
nected to the USB interface in the glove com‐
partment.
▷ Suitable devices: USB mass storage devi‐
ces,
such as USB flash drives or MP3 players
with a USB interface.
▷ Unsuitable devices: USB hard drives, USB
hubs, USB memory card readers with mul‐
tiple
inserts, Apple iPod/iPhone. Music from
the Apple iPod/iPhone can be played via the
USB audio interface in the center armrest. 1.
Connect the USB device to the USB inter‐
face in the glove compartment, refer to
page 138.
2. "CD/Multimedia"
3. "Music collection"
4. Open "Options".
5. "Music data import/export"
6. "Import music (USB)" Playing music
Music search
All tracks for which additional information has
been stored can be accessed by the music
search. Tracks without additional information
can be called up via the corresponding album,
refer to page
190.
1. "CD/Multimedia"
2. "Music collection"
3. "Music search" Seite 189
189Online Edition for Part no. 01 40 2 606 469 - 03 11 490
Reference Mobility Communication
Entertainment Navigation Driving tips Controls At a glance
Page 190 of 304
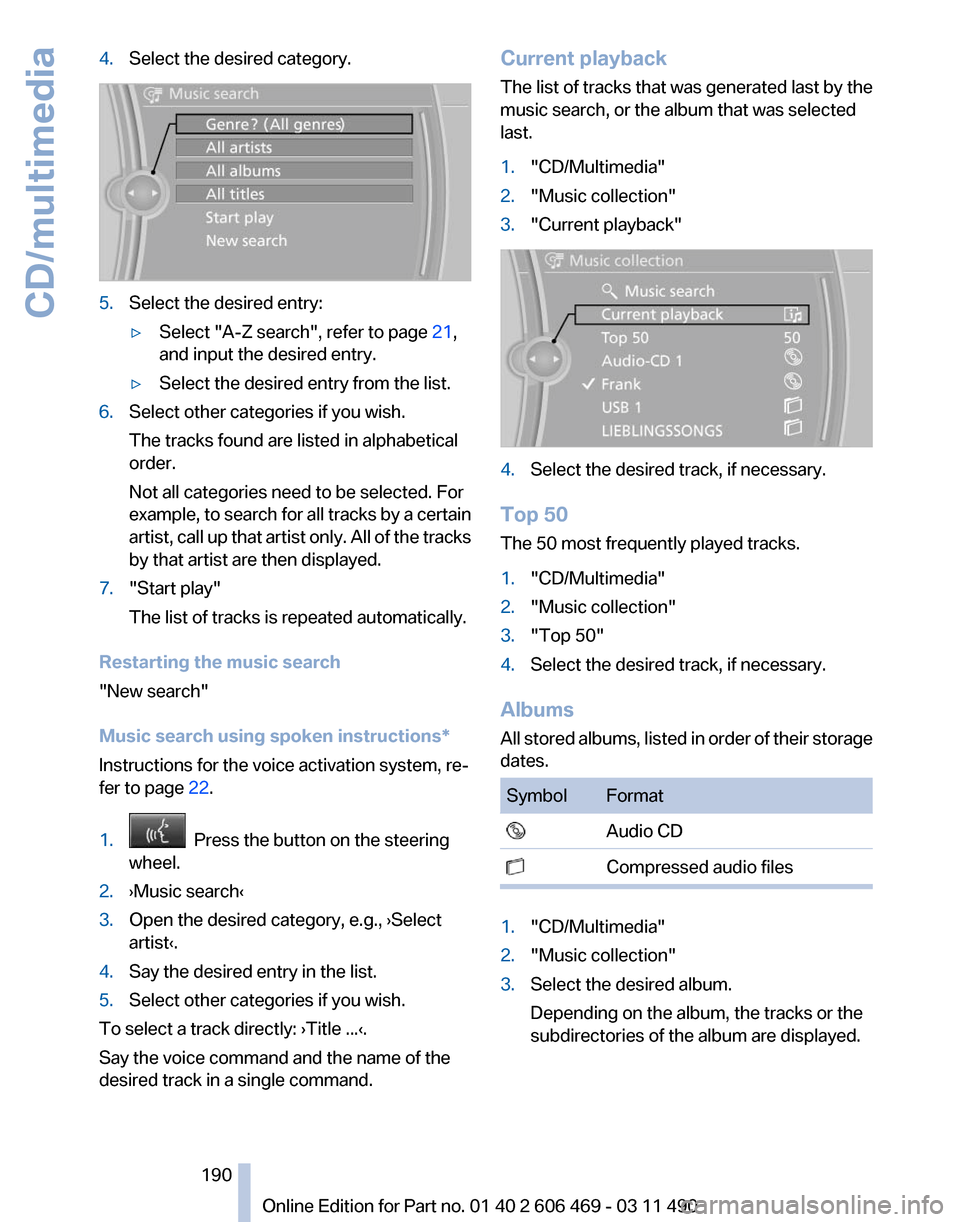
4.
Select the desired category. 5.
Select the desired entry:
▷Select "A-Z search", refer to page 21,
and input the desired entry.
▷ Select the desired entry from the list.
6. Select other categories if you wish.
The tracks found are listed in alphabetical
order.
Not all categories need to be selected. For
example,
to search for all tracks by a certain
artist, call up that artist only. All of the tracks
by that artist are then displayed.
7. "Start play"
The list of tracks is repeated automatically.
Restarting the music search
"New search"
Music search using spoken instructions
*
Instructions for the voice activation system, re‐
fer to page 22.
1. Press the button on the steering
wheel.
2. ›Music search‹
3. Open the desired category, e.g., ›Select
artist‹.
4. Say the desired entry in the list.
5. Select other categories if you wish.
To select a track directly: ›Title ...‹.
Say the voice command and the name of the
desired track in a single command. Current playback
The
list of tracks that was generated last by the
music search, or the album that was selected
last.
1. "CD/Multimedia"
2. "Music collection"
3. "Current playback" 4.
Select the desired track, if necessary.
Top 50
The 50 most frequently played tracks.
1. "CD/Multimedia"
2. "Music collection"
3. "Top 50"
4. Select the desired track, if necessary.
Albums
All
stored albums, listed in order of their storage
dates. Symbol Format
Audio CD
Compressed audio files
1.
"CD/Multimedia"
2. "Music collection"
3. Select the desired album.
Depending on the album, the tracks or the
subdirectories of the album are displayed.
Seite 190
190 Online Edition for Part no. 01 40 2 606 469 - 03 11 490
CD/multimedia
Page 191 of 304
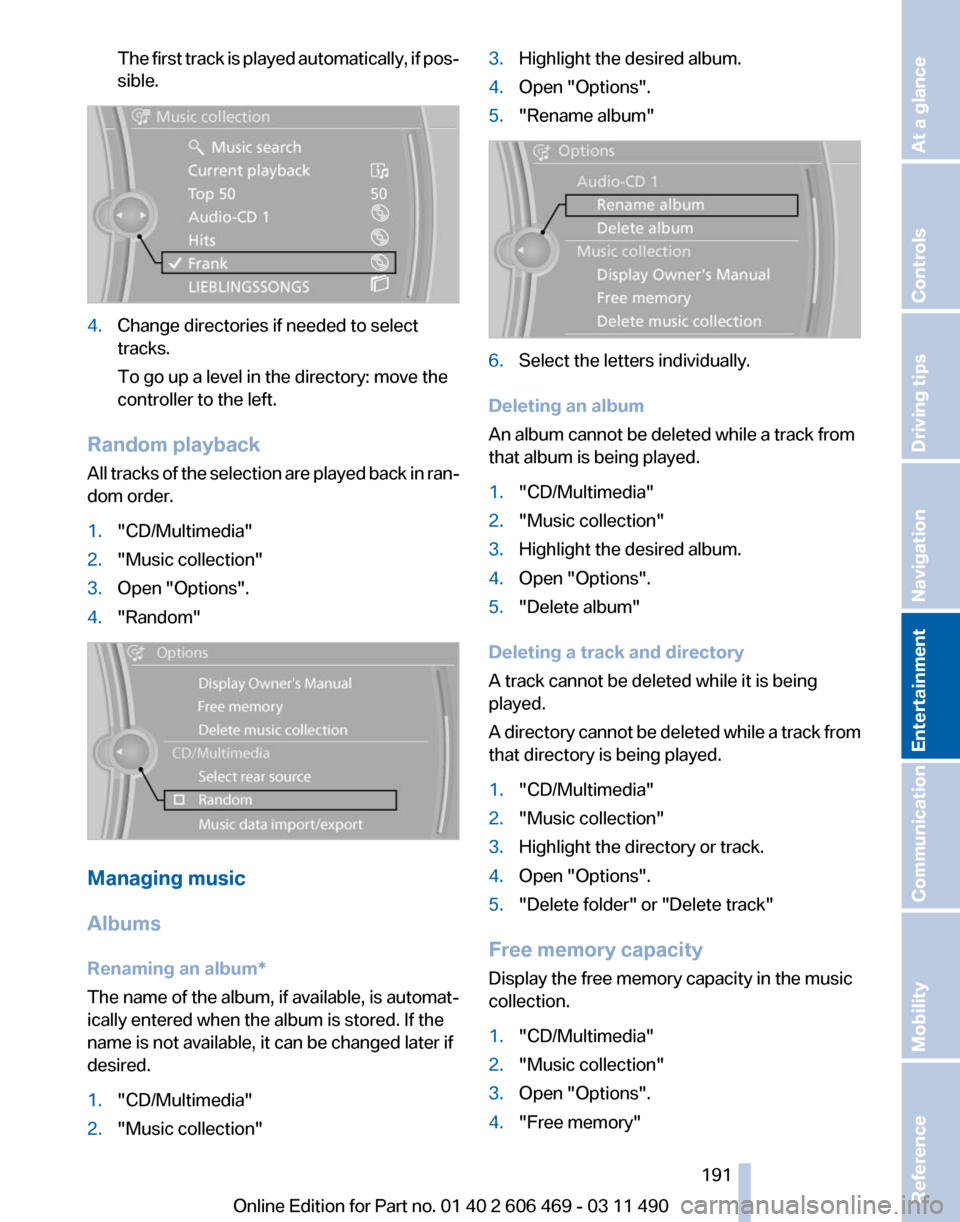
The first track is played automatically, if pos‐
sible.
4.
Change directories if needed to select
tracks.
To go up a level in the directory: move the
controller to the left.
Random playback
All tracks of the selection are played back in ran‐
dom order.
1. "CD/Multimedia"
2. "Music collection"
3. Open "Options".
4. "Random" Managing music
Albums
Renaming an album
*
The name of the album, if available, is automat‐
ically entered when the album is stored. If the
name is not available, it can be changed later if
desired.
1. "CD/Multimedia"
2. "Music collection" 3.
Highlight the desired album.
4. Open "Options".
5. "Rename album" 6.
Select the letters individually.
Deleting an album
An album cannot be deleted while a track from
that album is being played.
1. "CD/Multimedia"
2. "Music collection"
3. Highlight the desired album.
4. Open "Options".
5. "Delete album"
Deleting a track and directory
A track cannot be deleted while it is being
played.
A
directory cannot be deleted while a track from
that directory is being played.
1. "CD/Multimedia"
2. "Music collection"
3. Highlight the directory or track.
4. Open "Options".
5. "Delete folder" or "Delete track"
Free memory capacity
Display the free memory capacity in the music
collection.
1. "CD/Multimedia"
2. "Music collection"
3. Open "Options".
4. "Free memory"
Seite 191
191Online Edition for Part no. 01 40 2 606 469 - 03 11 490
Reference Mobility Communication
Entertainment Navigation Driving tips Controls At a glance
Page 192 of 304
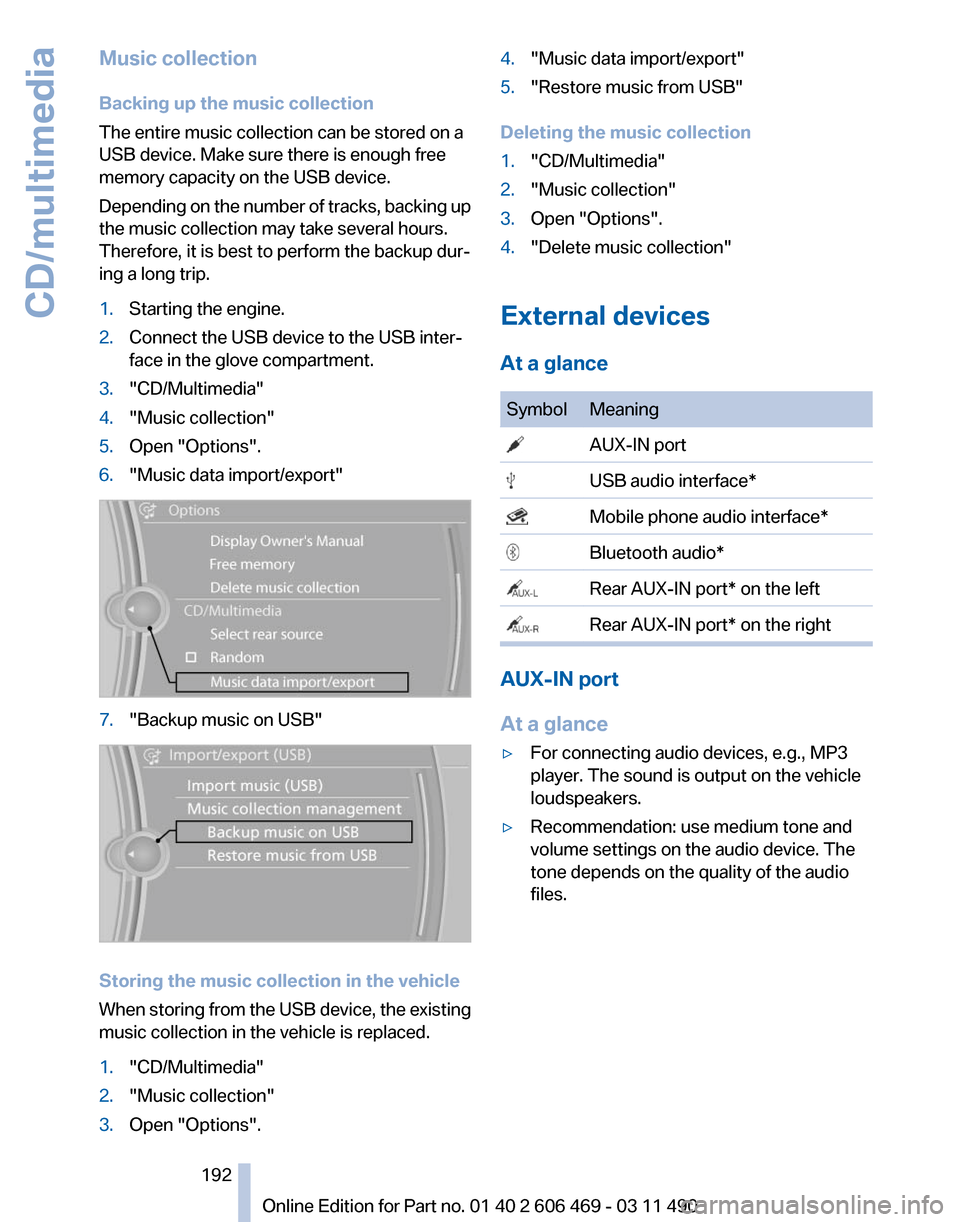
Music collection
Backing up the music collection
The entire music collection can be stored on a
USB device. Make sure there is enough free
memory capacity on the USB device.
Depending
on the number of tracks, backing up
the music collection may take several hours.
Therefore, it is best to perform the backup dur‐
ing a long trip.
1. Starting the engine.
2. Connect the USB device to the USB inter‐
face in the glove compartment.
3. "CD/Multimedia"
4. "Music collection"
5. Open "Options".
6. "Music data import/export" 7.
"Backup music on USB" Storing the music collection in the vehicle
When
storing from the USB device, the existing
music collection in the vehicle is replaced.
1. "CD/Multimedia"
2. "Music collection"
3. Open "Options". 4.
"Music data import/export"
5. "Restore music from USB"
Deleting the music collection
1. "CD/Multimedia"
2. "Music collection"
3. Open "Options".
4. "Delete music collection"
External devices
At a glance Symbol Meaning
AUX-IN port
USB audio interface*
Mobile phone audio interface*
Bluetooth audio*
Rear AUX-IN port* on the left
Rear AUX-IN port* on the right
AUX-IN port
At a glance
▷
For connecting audio devices, e.g., MP3
player. The sound is output on the vehicle
loudspeakers.
▷ Recommendation: use medium tone and
volume settings on the audio device. The
tone depends on the quality of the audio
files.
Seite 192
192 Online Edition for Part no. 01 40 2 606 469 - 03 11 490
CD/multimedia
Page 193 of 304
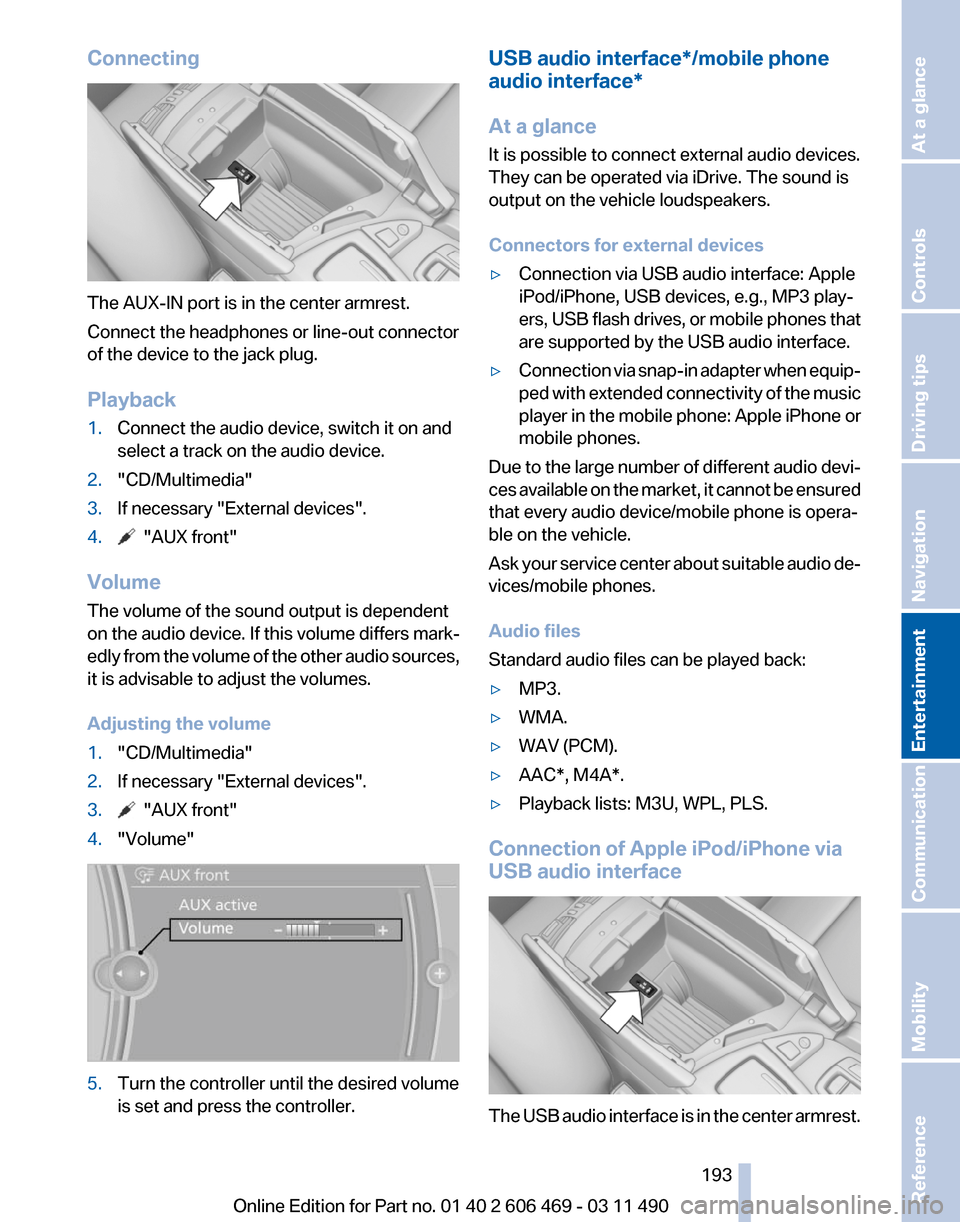
Connecting
The AUX-IN port is in the center armrest.
Connect the headphones or line-out connector
of the device to the jack plug.
Playback
1.
Connect the audio device, switch it on and
select a track on the audio device.
2. "CD/Multimedia"
3. If necessary "External devices".
4. "AUX front"
Volume
The volume of the sound output is dependent
on the audio device. If this volume differs mark‐
edly
from the volume of the other audio sources,
it is advisable to adjust the volumes.
Adjusting the volume
1. "CD/Multimedia"
2. If necessary "External devices".
3. "AUX front"
4. "Volume" 5.
Turn the controller until the desired volume
is set and press the controller. USB audio interface*/mobile phone
audio interface
*
At a glance
It is possible to connect external audio devices.
They can be operated via iDrive. The sound is
output on the vehicle loudspeakers.
Connectors for external devices
▷ Connection via USB audio interface: Apple
iPod/iPhone, USB devices, e.g., MP3 play‐
ers,
USB flash drives, or mobile phones that
are supported by the USB audio interface.
▷ Connection via snap-in adapter when equip‐
ped
with extended connectivity of the music
player in the mobile phone: Apple iPhone or
mobile phones.
Due to the large number of different audio devi‐
ces
available on the market, it cannot be ensured
that every audio device/mobile phone is opera‐
ble on the vehicle.
Ask your service center about suitable audio de‐
vices/mobile phones.
Audio files
Standard audio files can be played back:
▷ MP3.
▷ WMA.
▷ WAV (PCM).
▷ AAC*, M4A*.
▷ Playback lists: M3U, WPL, PLS.
Connection of Apple iPod/iPhone via
USB audio interface The USB audio interface is in the center armrest.
Seite 193
193Online Edition for Part no. 01 40 2 606 469 - 03 11 490
Reference Mobility Communication
Entertainment Navigation Driving tips Controls At a glance
Page 194 of 304
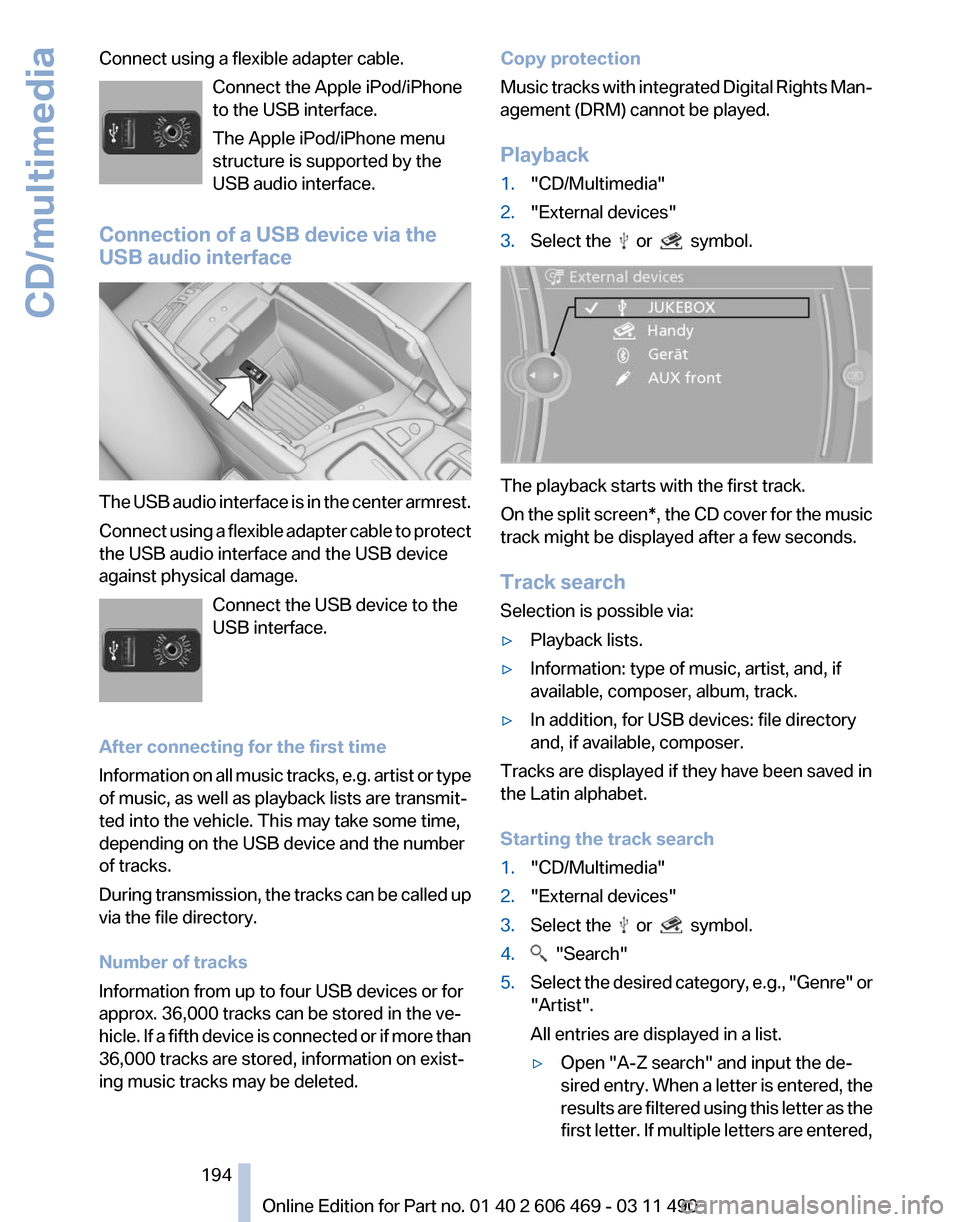
Connect using a flexible adapter cable.
Connect the Apple iPod/iPhone
to the USB interface.
The Apple iPod/iPhone menu
structure is supported by the
USB audio interface.
Connection of a USB device via the
USB audio interface The USB audio interface is in the center armrest.
Connect
using a flexible adapter cable to protect
the USB audio interface and the USB device
against physical damage.
Connect the USB device to the
USB interface.
After connecting for the first time
Information on all music tracks, e.g. artist or type
of music, as well as playback lists are transmit‐
ted into the vehicle. This may take some time,
depending on the USB device and the number
of tracks.
During transmission, the tracks can be called up
via the file directory.
Number of tracks
Information from up to four USB devices or for
approx. 36,000 tracks can be stored in the ve‐
hicle. If a fifth device is connected or if more than
36,000 tracks are stored, information on exist‐
ing music tracks may be deleted. Copy protection
Music
tracks with integrated Digital Rights Man‐
agement (DRM) cannot be played.
Playback
1. "CD/Multimedia"
2. "External devices"
3. Select the or symbol.
The playback starts with the first track.
On
the split screen*, the CD cover for the music
track might be displayed after a few seconds.
Track search
Selection is possible via:
▷ Playback lists.
▷ Information: type of music, artist, and, if
available, composer, album, track.
▷ In addition, for USB devices: file directory
and, if available, composer.
Tracks are displayed if they have been saved in
the Latin alphabet.
Starting the track search
1. "CD/Multimedia"
2. "External devices"
3. Select the or symbol.
4. "Search"
5. Select the desired category, e.g., "Genre"
or
"Artist".
All entries are displayed in a list.
▷ Open "A-Z search" and input the de‐
sired
entry. When a letter is entered, the
results are filtered using this letter as the
first letter. If multiple letters are entered,
Seite 194
194 Online Edition for Part no. 01 40 2 606 469 - 03 11 490
CD/multimedia
Page 195 of 304
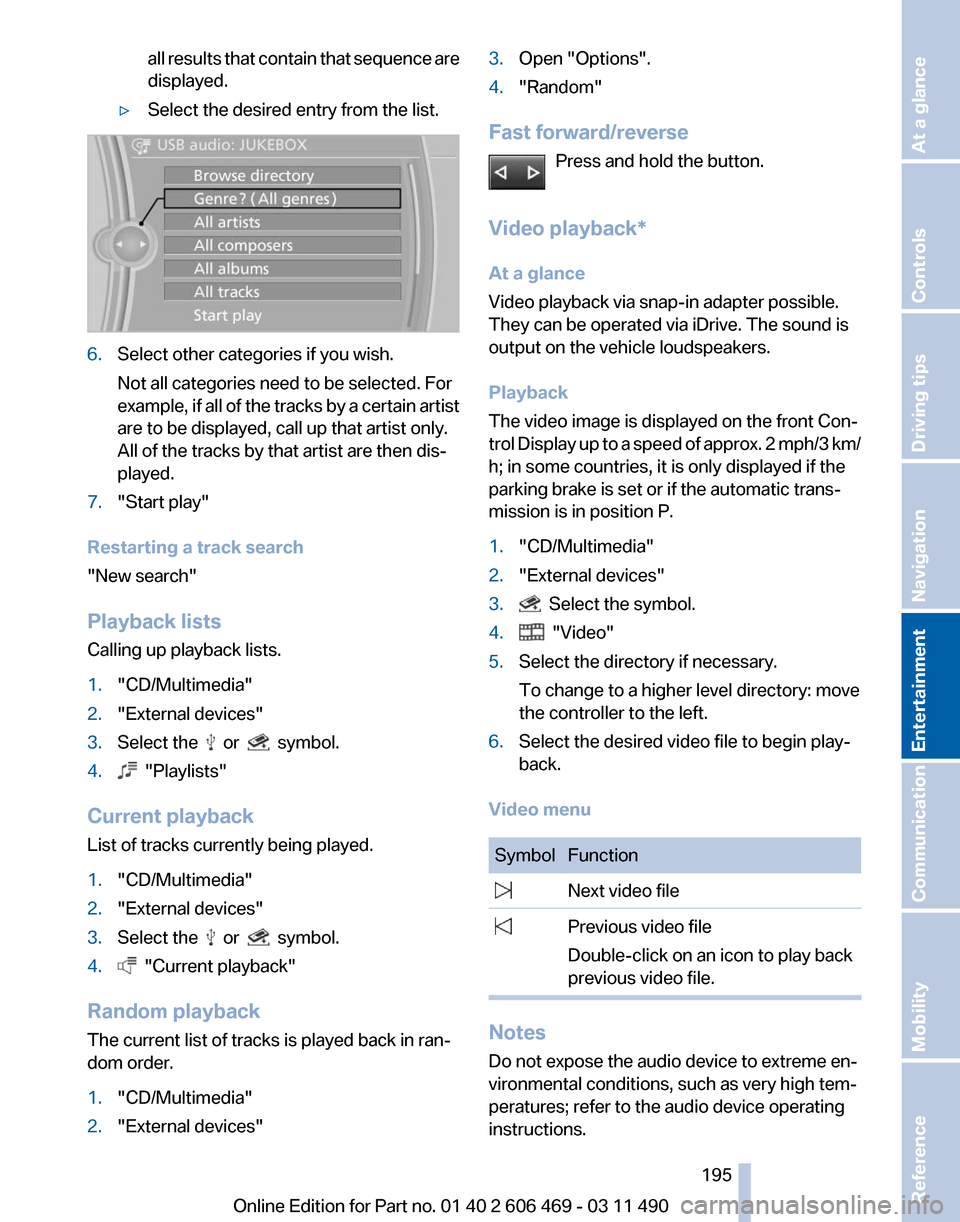
all results that contain that sequence are
displayed.
▷ Select the desired entry from the list. 6.
Select other categories if you wish.
Not all categories need to be selected. For
example,
if all of the tracks by a certain artist
are to be displayed, call up that artist only.
All of the tracks by that artist are then dis‐
played.
7. "Start play"
Restarting a track search
"New search"
Playback lists
Calling up playback lists.
1. "CD/Multimedia"
2. "External devices"
3. Select the or symbol.
4. "Playlists"
Current playback
List of tracks currently being played.
1. "CD/Multimedia"
2. "External devices"
3. Select the or symbol.
4. "Current playback"
Random playback
The current list of tracks is played back in ran‐
dom order.
1. "CD/Multimedia"
2. "External devices" 3.
Open "Options".
4. "Random"
Fast forward/reverse Press and hold the button.
Video playback*
At a glance
Video playback via snap-in adapter possible.
They can be operated via iDrive. The sound is
output on the vehicle loudspeakers.
Playback
The video image is displayed on the front Con‐
trol
Display up to a speed of approx. 2 mph/3 km/
h; in some countries, it is only displayed if the
parking brake is set or if the automatic trans‐
mission is in position P.
1. "CD/Multimedia"
2. "External devices"
3. Select the symbol.
4. "Video"
5. Select the directory if necessary.
To change to a higher level directory: move
the controller to the left.
6. Select the desired video file to begin play‐
back.
Video menu Symbol Function
Next video file
Previous video file
Double-click on an icon to play back
previous video file. Notes
Do not expose the audio device to extreme en‐
vironmental conditions, such as very high tem‐
peratures; refer to the audio device operating
instructions. Seite 195
195Online Edition for Part no. 01 40 2 606 469 - 03 11 490
Reference Mobility Communication
Entertainment Navigation Driving tips Controls At a glance