window BMW 6 SERIES 2009 User Guide
[x] Cancel search | Manufacturer: BMW, Model Year: 2009, Model line: 6 SERIES, Model: BMW 6 SERIES 2009Pages: 272, PDF Size: 9.16 MB
Page 42 of 272
Opening and closing
40 restart the engine within approx. 10 seconds
after it is switched off.
Switching off engine when equipped
with sport automatic transmission
The engine can only be switched off in trans-
mission position P, refer to page61.
To switch off the engine in transmission posi-
tion N, the remote control must be inserted in
the ignition lock.
Before driving into a car wash in
vehicles equipped with automatic
transmission
1.Insert remote control into ignition lock.
2.Depress brake pedal.
3.Engage transmission position N.
4.Switch off the engine.
The vehicle can roll.
Malfunction
The comfort access function may malfunction
due to local radio waves. If this occurs, then
open or close the vehicle with the buttons on
the remote control or with a key. To start the
engine following this, insert the remote control
in the ignition lock.
When unlocking or locking/comfort closing do
not simultaneously grasp the door handle and
touch the surfaces, arrow2 or 3. Otherwise, you
may limit the function.
Replacing battery
If the battery of the remote control is dead, a
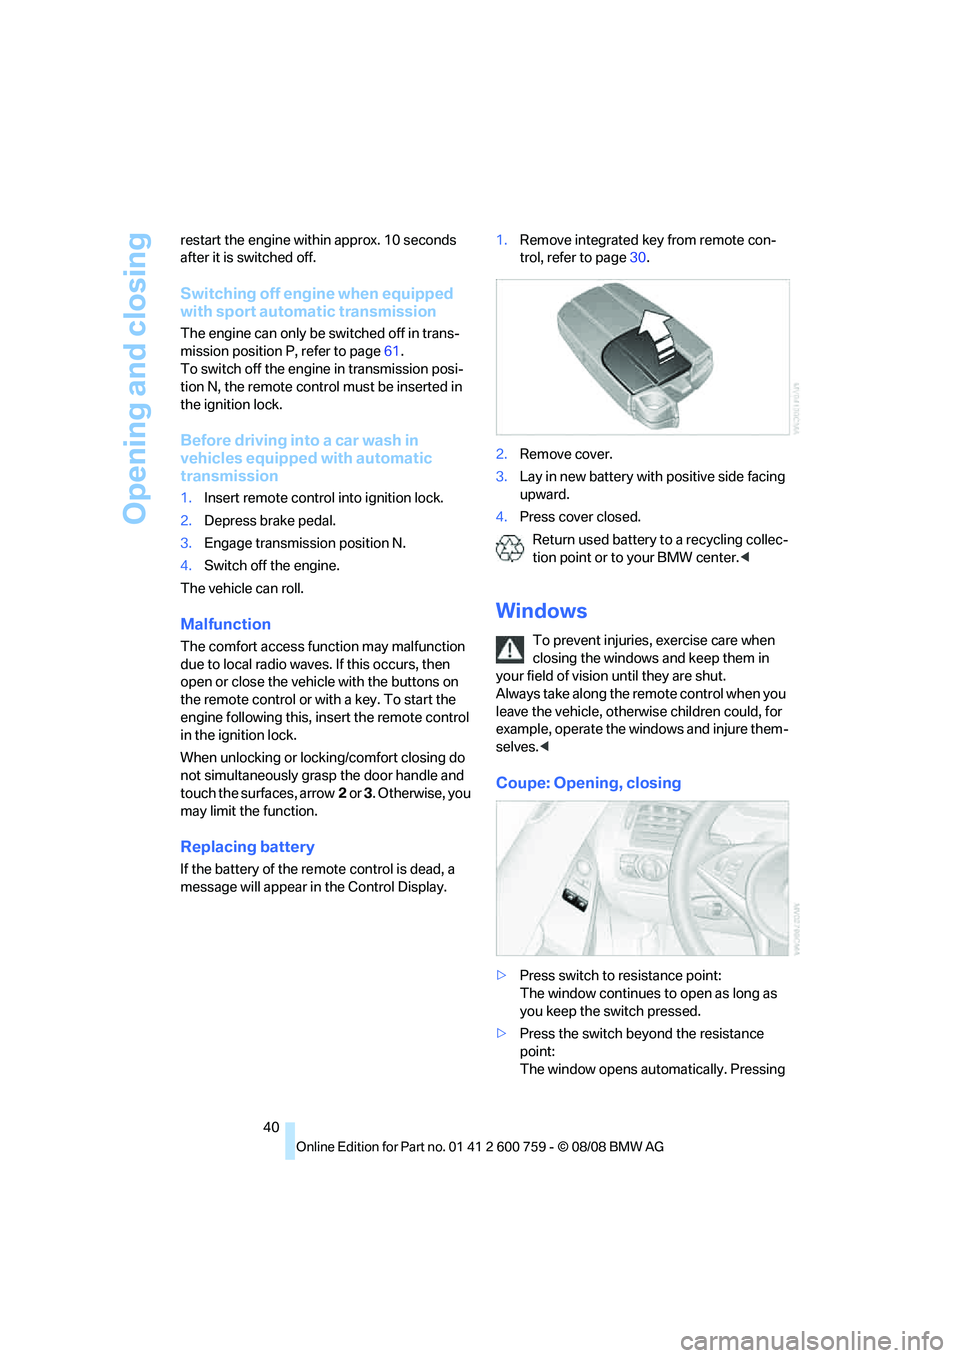
message will appear in the Control Display.1.Remove integrated key from remote con-
trol, refer to page30.
2.Remove cover.
3.Lay in new battery with positive side facing
upward.
4.Press cover closed.
Return used battery to a recycling collec-
tion point or to your BMW center.<
Windows
To prevent injuries, exercise care when
closing the windows and keep them in
your field of vision until they are shut.
Always take along the remote control when you
leave the vehicle, otherwise children could, for
example, operate the windows and injure them-
selves.<
Coupe: Opening, closing
>Press switch to resistance point:
The window continues to open as long as
you keep the switch pressed.
>Press the switch beyond the resistance
point:
The window opens automatically. Pressing
Page 43 of 272
Controls
41Reference
At a glance
Driving tips
Communications
Navigation
Entertainment
Mobility
the switch again stops the opening move-
ment.
You can close the windows in the same manner
by pulling the switch.
Convertible: Opening, closing
To close the side windows while the vehi-
cle is being driven, always close the rear
windows first or all four windows simulta-
neously; otherwise, the windows cannot close
tightly at higher speeds.<
Individually
>Press switch to resistance point:
The window continues to open as long as
you keep the switch pressed.
>Press the switch beyond the resistance
point:
The window opens automatically. Pressing
the switch again stops the opening move-
ment.
You can close the windows in the same manner
by pulling the switch. The rear windows cannot
be closed automatically.
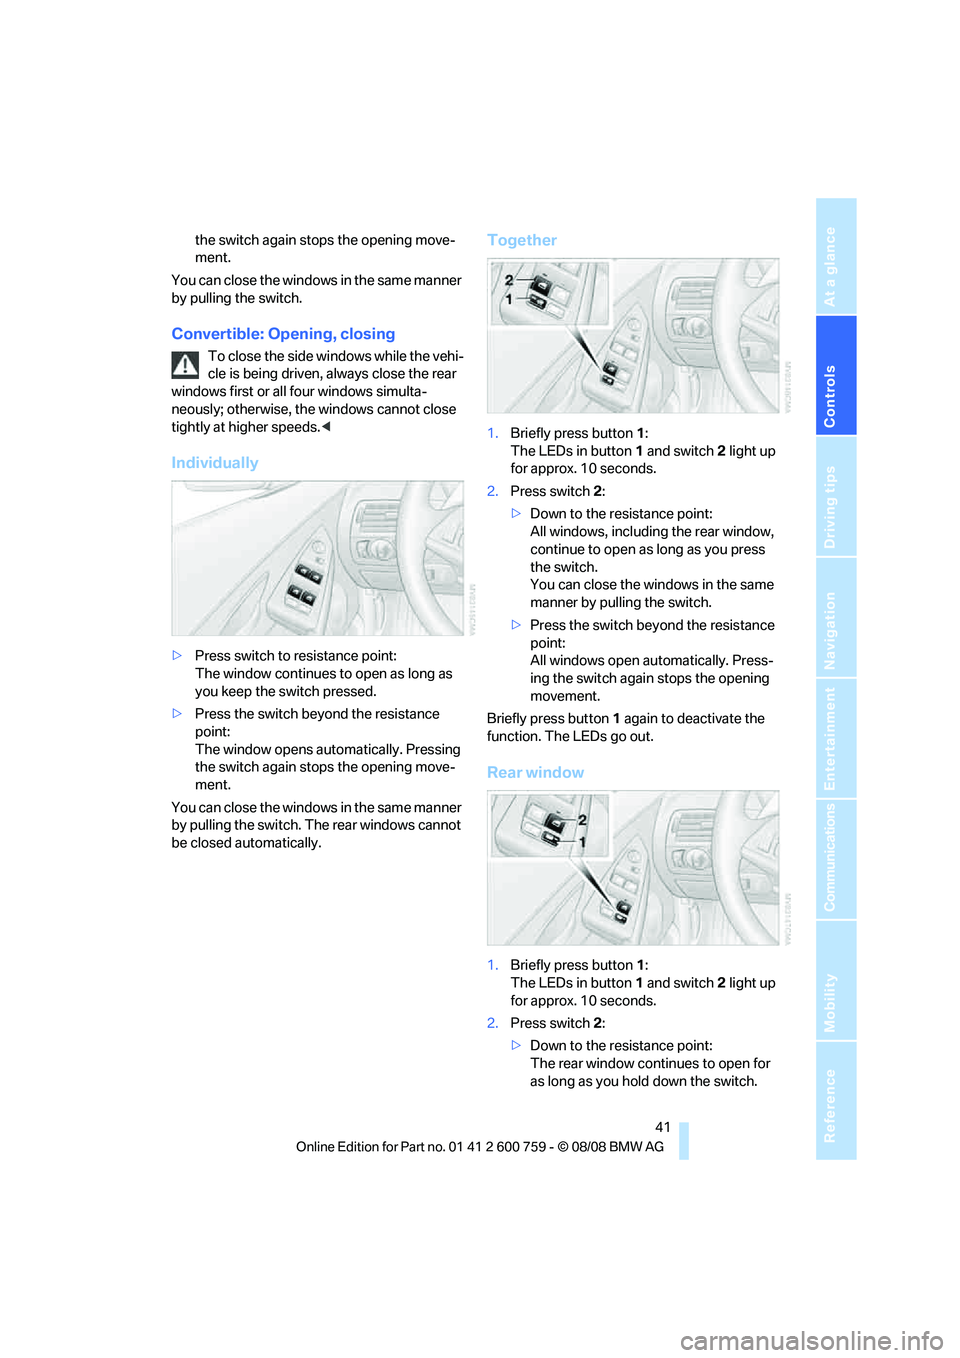
Together
1.Briefly press button1:
The LEDs in button1 and switch2 light up
for approx. 10 seconds.
2.Press switch 2:
>Down to the resistance point:
All windows, including the rear window,
continue to open as long as you press
the switch.
You can close the windows in the same
manner by pulling the switch.
>Press the switch beyond the resistance
point:
All windows open automatically. Press-
ing the switch again stops the opening
movement.
Briefly press button 1 again to deactivate the
function. The LEDs go out.
Rear window
1.Briefly press button1:
The LEDs in button1 and switch2 light up
for approx. 10 seconds.
2.Press switch 2:
>Down to the resistance point:
The rear window continues to open for
as long as you hold down the switch.
Page 44 of 272
Opening and closing
42 You can close the rear window in the
same manner by pulling the switch.
>Press the switch beyond the resistance
point:
The rear window opens automatically.
Pressing the switch again stops the
opening movement.
Briefly press button 1 again to deactivate the
function. The LEDs go out.
The rear window opens and closes auto-
matically when you open or close the con-
vertible top.<
For information on using the convenient opera-
tion mode at the door lock or with the remote
control, refer to page32 or34.
Coupe: For information on comfort closing with
comfort access, refer to page39.
After switching off ignition
You can still operate the windows with the
remote control removed or the ignition
switched off for approx. 1 minute, as long as
neither of the doors has been opened.
Pinch protection system
If the closing force exceeds a specific value as a
window closes, the closing action is interrupted
and the window reopens slightly.
Despite the pinch protection system,
inspect the window's travel path prior to
closing it, as the safety system might fail to
detect certain kinds of obstructions, such as
thin objects, and the window would continue
closing.
Do not install any accessories in the range of
movement of the windows, otherwise the pinch
protection system will be impaired.
Convertible: the rear side windows and rear
window are not equipped with a pinch protec-
tion system. Therefore, watch the rear side win-
dows and the rear window during closing, oth-
erwise injuries can occur.<
Closing without pinch protection
system
In case of danger from outside or if, for example,
ice on the window prevents normal closing, pro-
ceed as follows:
1.Pull the switch beyond the resistance point
and hold. The pinch protection system is
limited and the window opens slightly if the
closing force exceeds a certain value.
2.Pull the switch beyond the resistance point
and hold again within approx. 4 seconds.
The window closes without the pinch pro-
tection system.
Coupe:
Glass sunroof, electric with
raise function*
The glass sunroof and sliding visor are opera-
tional whenever the ignition is switched on.
To prevent injuries, exercise care when
closing the glass sunroof and keep it in
your field of vision until it is shut.
Always take along the remote control when you
leave the vehicle, otherwise children could, for
example, operate the roof and injure them-
selves.<
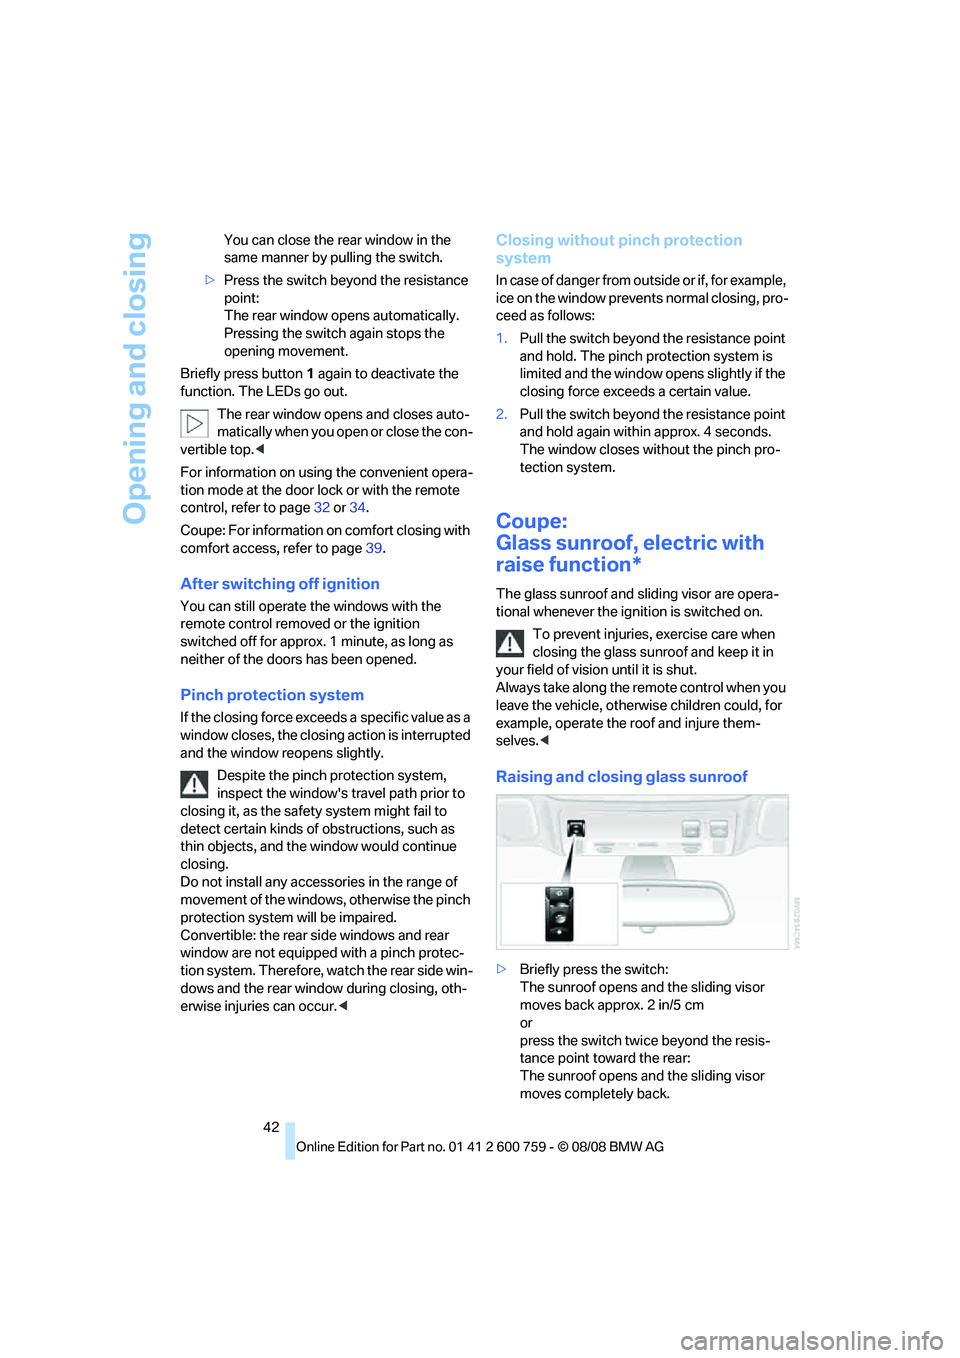
Raising and closing glass sunroof
>Briefly press the switch:
The sunroof opens and the sliding visor
moves back approx. 2 in/5 cm
or
press the switch twice beyond the resis-
tance point toward the rear:
The sunroof opens and the sliding visor
moves completely back.
Page 45 of 272
Controls
43Reference
At a glance
Driving tips
Communications
Navigation
Entertainment
Mobility
>To close, briefly press the switch or push it
twice beyond the resistance point toward
the front:
The sunroof and sliding visor close.
Opening and closing sliding visor
>Push the switch up to the resistance point in
the desired direction:
The sliding visor continues to move for as
long as you hold the switch.
>Push the switch beyond the resistance
point in the desired direction:
The sliding visor moves automatically.
Briefly press the switch again in any direc-
tion to stop the movement.
For information on using the convenient opera-
tion mode at the door lock or with the remote
control, refer to page32 or34.
For information on comfort closing with comfort
access, refer to page39.
Pinch protection system
If the glass sunroof encounters resistance when
closing, the closing action is interrupted and the
glass sunroof opens.
If the sliding visor encounters resistance when
closing within the last approx. 8 in/20 cm, the
closing action is interrupted and the sliding
visor opens again slightly.
Despite the pinch protection system,
inspect the sunroof's travel path prior to
closing it, as the safety system might fail to
detect certain kinds of obstructions, such as
very thin objects, and the sunroof would con-
tinue closing.<
Closing without pinch protection
system
In case of danger from outside, slide the switch
forward beyond the resistance point and hold.
The roof closes without the pinch protection
system.
Following interruptions in electrical
power supply
After an interruption in the power supply the
glass sunroof may not move. Then have the system initialized. Should this occur, please
have the sunroof initialized at your BMW center.
Moving manually*
In the event of an electrical malfunction, you can
move the glass sunroof and the sliding visor
manually.
Glass sunroof
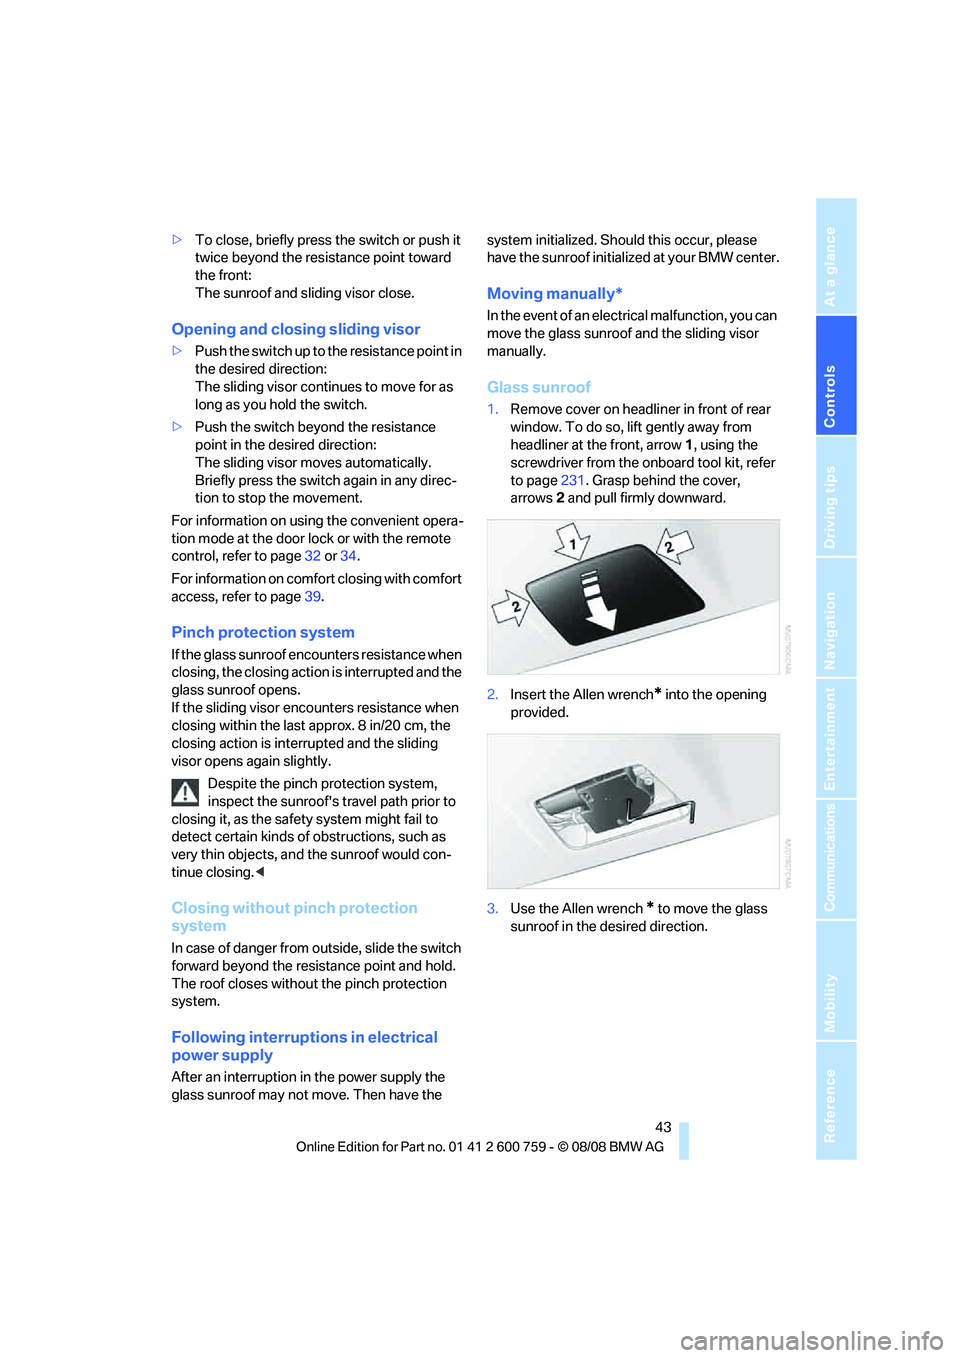
1.Remove cover on headliner in front of rear
window. To do so, lift gently away from
headliner at the front, arrow1, using the
screwdriver from the onboard tool kit, refer
to page231. Grasp behind the cover,
arrows2 and pull firmly downward.
2.Insert the Allen wrench
* into the opening
provided.
3.Use the Allen wrench
* to move the glass
sunroof in the desired direction.
Page 47 of 272
Controls
45Reference
At a glance
Driving tips
Communications
Navigation
Entertainment
Mobility
To avoid putting excessive strain on the
battery, only move the convertible top
when the engine is running if possible.
Before closing the convertible top, remove for-
eign objects from the windshield frame, as
these might inhibit closing of the convertible
top.<
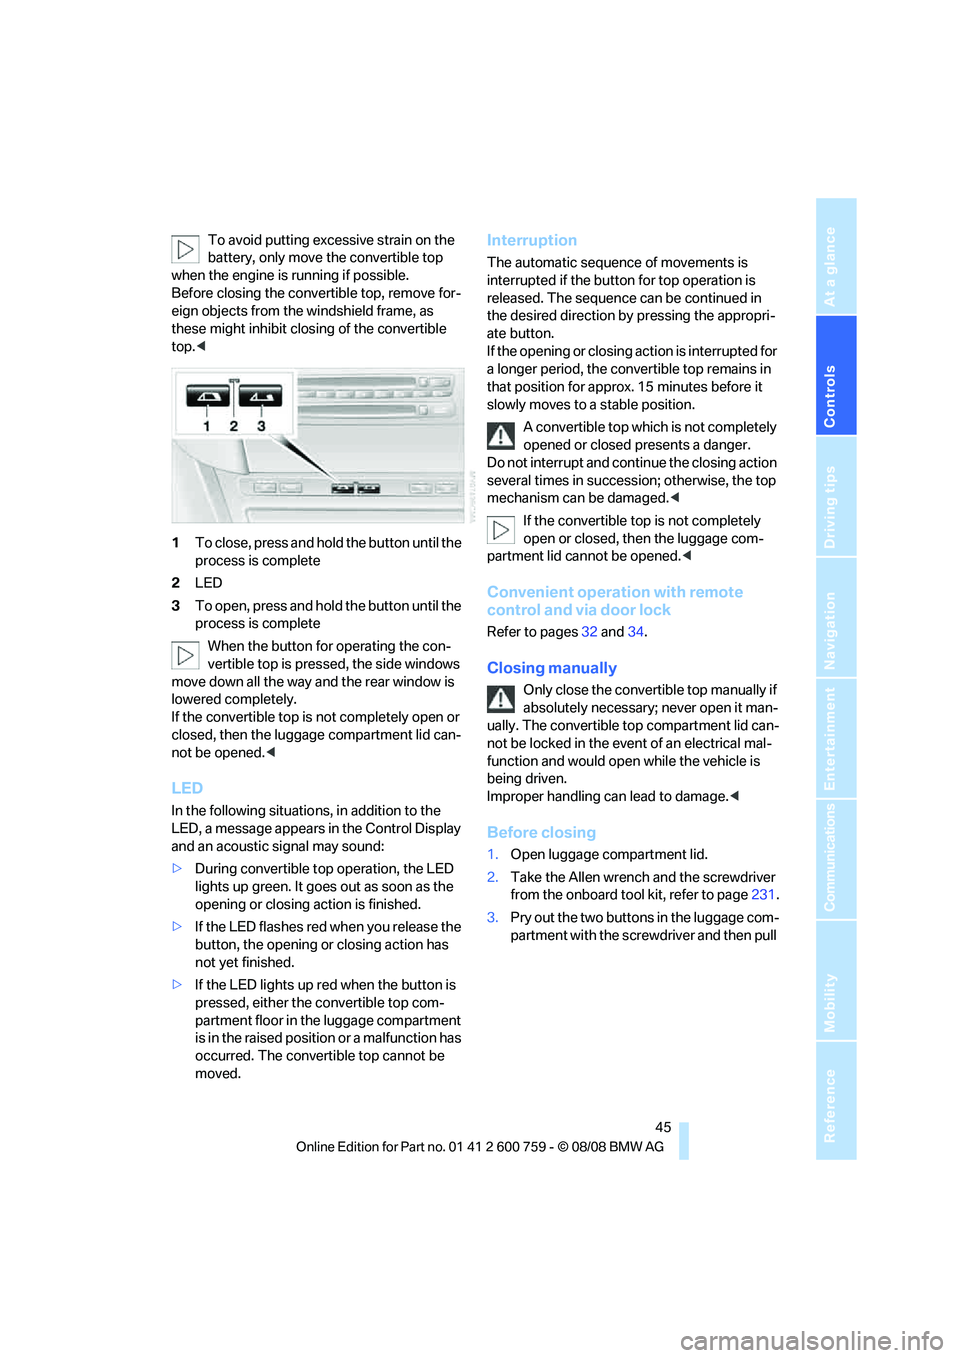
1To close, press and hold the button until the
process is complete
2LED
3To open, press and hold the button until the
process is complete
When the button for operating the con-
vertible top is pressed, the side windows
move down all the way and the rear window is
lowered completely.
If the convertible top is not completely open or
closed, then the luggage compartment lid can-
not be opened.<
LED
In the following situations, in addition to the
LED, a message appears in the Control Display
and an acoustic signal may sound:
>During convertible top operation, the LED
lights up green. It goes out as soon as the
opening or closing action is finished.
>If the LED flashes red when you release the
button, the opening or closing action has
not yet finished.
>If the LED lights up red when the button is
pressed, either the convertible top com-
partment floor in the luggage compartment
is in the raised position or a malfunction has
occurred. The convertible top cannot be
moved.
Interruption
The automatic sequence of movements is
interrupted if the button for top operation is
released. The sequence can be continued in
the desired direction by pressing the appropri-
ate button.
If the opening or closing action is interrupted for
a longer period, the convertible top remains in
that position for approx. 15 minutes before it
slowly moves to a stable position.
A convertible top which is not completely
opened or closed presents a danger.
Do not interrupt and continue the closing action
several times in succession; otherwise, the top
mechanism can be damaged.<
If the convertible top is not completely
open or closed, then the luggage com-
partment lid cannot be opened.<
Convenient operation with remote
control and via door lock
Refer to pages32 and34.
Closing manually
Only close the convertible top manually if
absolutely necessary; never open it man-
ually. The convertible top compartment lid can-
not be locked in the event of an electrical mal-
function and would open while the vehicle is
being driven.
Improper handling can lead to damage.<
Before closing
1.Open luggage compartment lid.
2.Take the Allen wrench and the screwdriver
from the onboard tool kit, refer to page231.
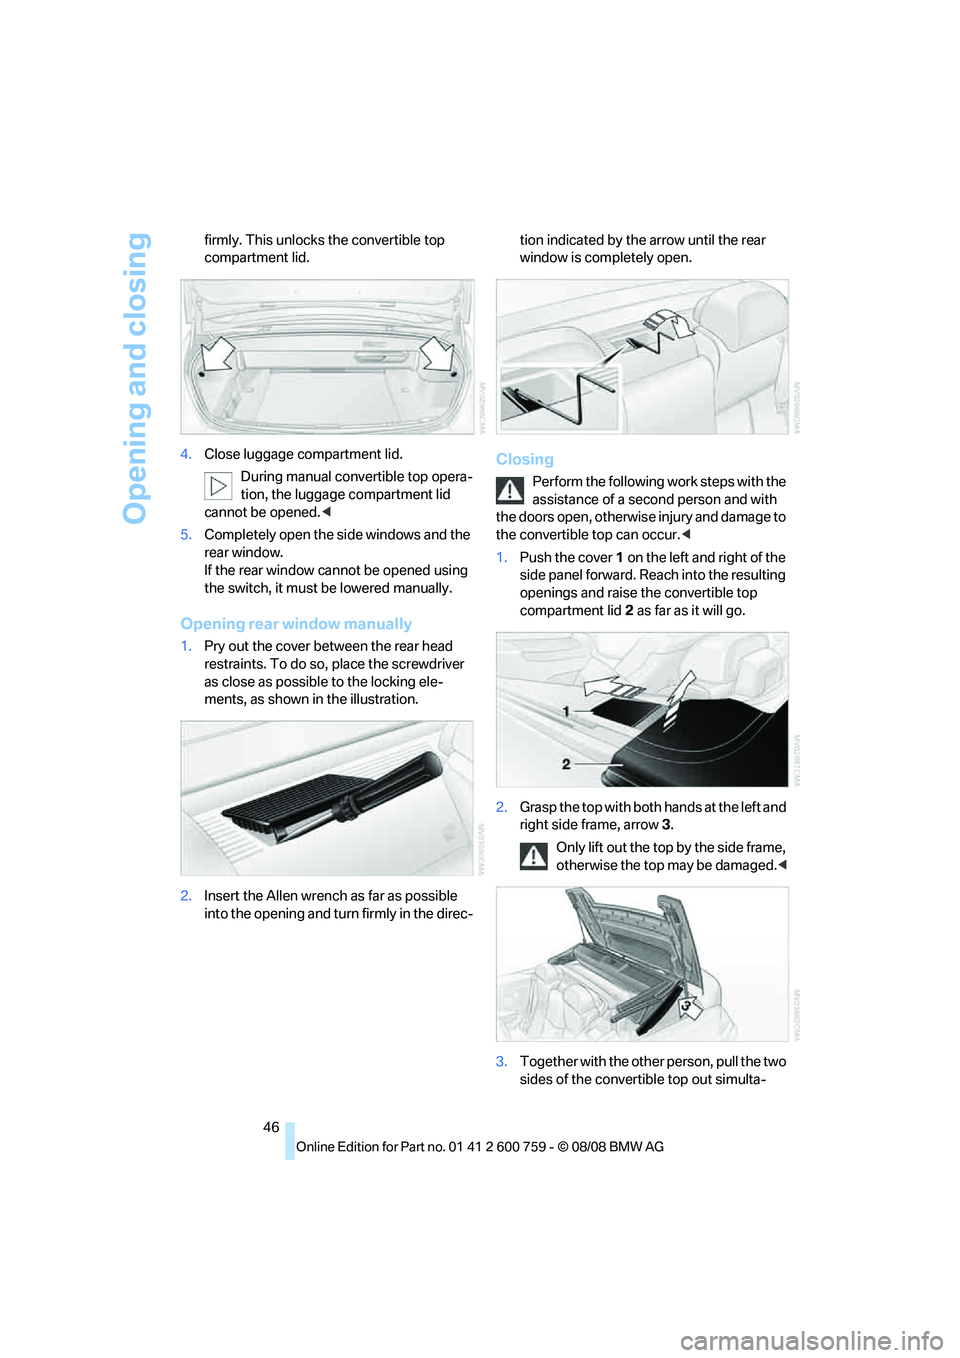
3.Pry out the two buttons in the luggage com-
partment with the screwdriver and then pull
Page 48 of 272
Opening and closing
46 firmly. This unlocks the convertible top
compartment lid.
4.Close luggage compartment lid.
During manual convertible top opera-
tion, the luggage compartment lid
cannot be opened.<
5.Completely open the side windows and the
rear window.
If the rear window cannot be opened using
the switch, it must be lowered manually.
Opening rear window manually
1.Pry out the cover between the rear head
restraints. To do so, place the screwdriver
as close as possible to the locking ele-
ments, as shown in the illustration.
2.Insert the Allen wrench as far as possible
into the opening and turn firmly in the direc-tion indicated by the arrow until the rear
window is completely open.
Closing
Perform the following work steps with the
assistance of a second person and with
the doors open, otherwise injury and damage to
the convertible top can occur.<
1.Push the cover 1 on the left and right of the
side panel forward. Reach into the resulting
openings and raise the convertible top
compartment lid2 as far as it will go.
2.Grasp the top with both hands at the left and
right side frame, arrow3.
Only lift out the top by the side frame,
otherwise the top may be damaged.<
3.Together with the other person, pull the two
sides of the convertible top out simulta-
Page 49 of 272
Controls
47Reference
At a glance
Driving tips
Communications
Navigation
Entertainment
Mobility
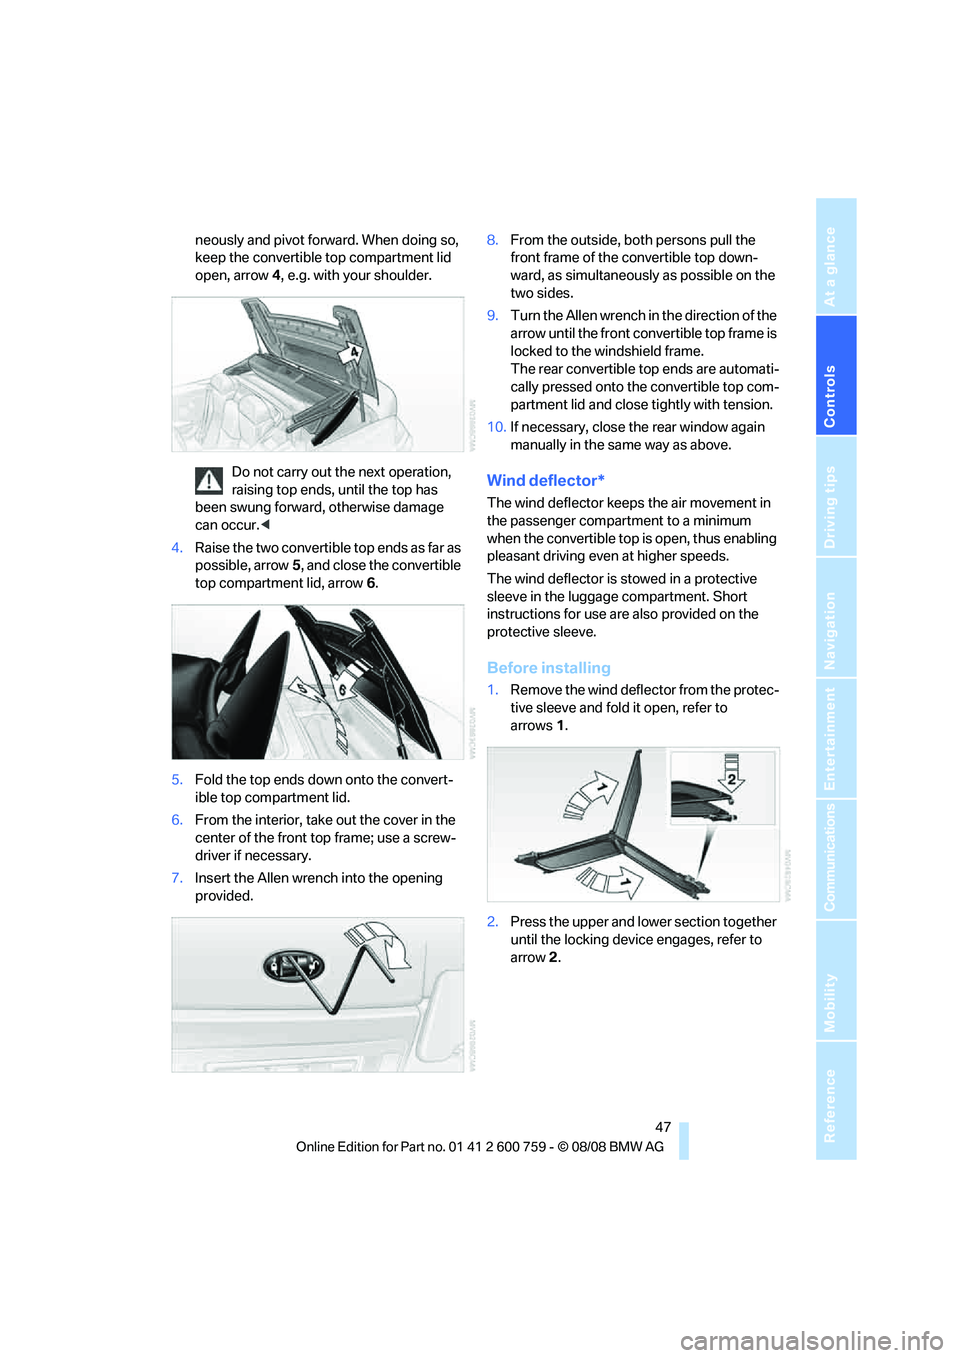
neously and pivot forward. When doing so,
keep the convertible top compartment lid
open, arrow4, e.g. with your shoulder.
Do not carry out the next operation,
raising top ends, until the top has
been swung forward, otherwise damage
can occur.<
4.Raise the two convertible top ends as far as
possible, arrow5, and close the convertible
top compartment lid, arrow6.
5.Fold the top ends down onto the convert-
ible top compartment lid.
6.From the interior, take out the cover in the
center of the front top frame; use a screw-
driver if necessary.
7.Insert the Allen wrench into the opening
provided.8.From the outside, both persons pull the
front frame of the convertible top down-
ward, as simultaneously as possible on the
two sides.
9.Turn the Allen wrench in the direction of the
arrow until the front convertible top frame is
locked to the windshield frame.
The rear convertible top ends are automati-
cally pressed onto the convertible top com-
partment lid and close tightly with tension.
10.If necessary, close the rear window again
manually in the same way as above.
Wind deflector*
The wind deflector keeps the air movement in
the passenger compartment to a minimum
when the convertible top is open, thus enabling
pleasant driving even at higher speeds.
The wind deflector is stowed in a protective
sleeve in the luggage compartment. Short
instructions for use are also provided on the
protective sleeve.
Before installing
1.Remove the wind deflector from the protec-
tive sleeve and fold it open, refer to
arrows1.
2.Press the upper and lower section together
until the locking device engages, refer to
arrow2.
Page 61 of 272
Controls
59Reference
At a glance
Driving tips
Communications
Navigation
Entertainment
Mobility
Follow the system manufacturer's
instructions on installation and use of
LATCH child restraint systems in order not to
impair their protective function.<
Anchor points for LATCH mounts
Before attaching the LATCH child's seat, pull
the belt away from the region of the child
restraint fixing system.
Make sure that both of the lower LATCH
mounts have properly clicked into place
and that the child restraint system is resting
snugly against the backrest. Otherwise, the
protective action may be impeded.<
Rear seats
The mounting points for the LATCH anchors
are located at the positions indicated by arrows
in the gap between the seat and the backrest.
Coupe: child restraint system with
tether strap
Only use the top tether-strap mounting
points to secure child restraint systems,
otherwise the mounting points could be dam-
aged.
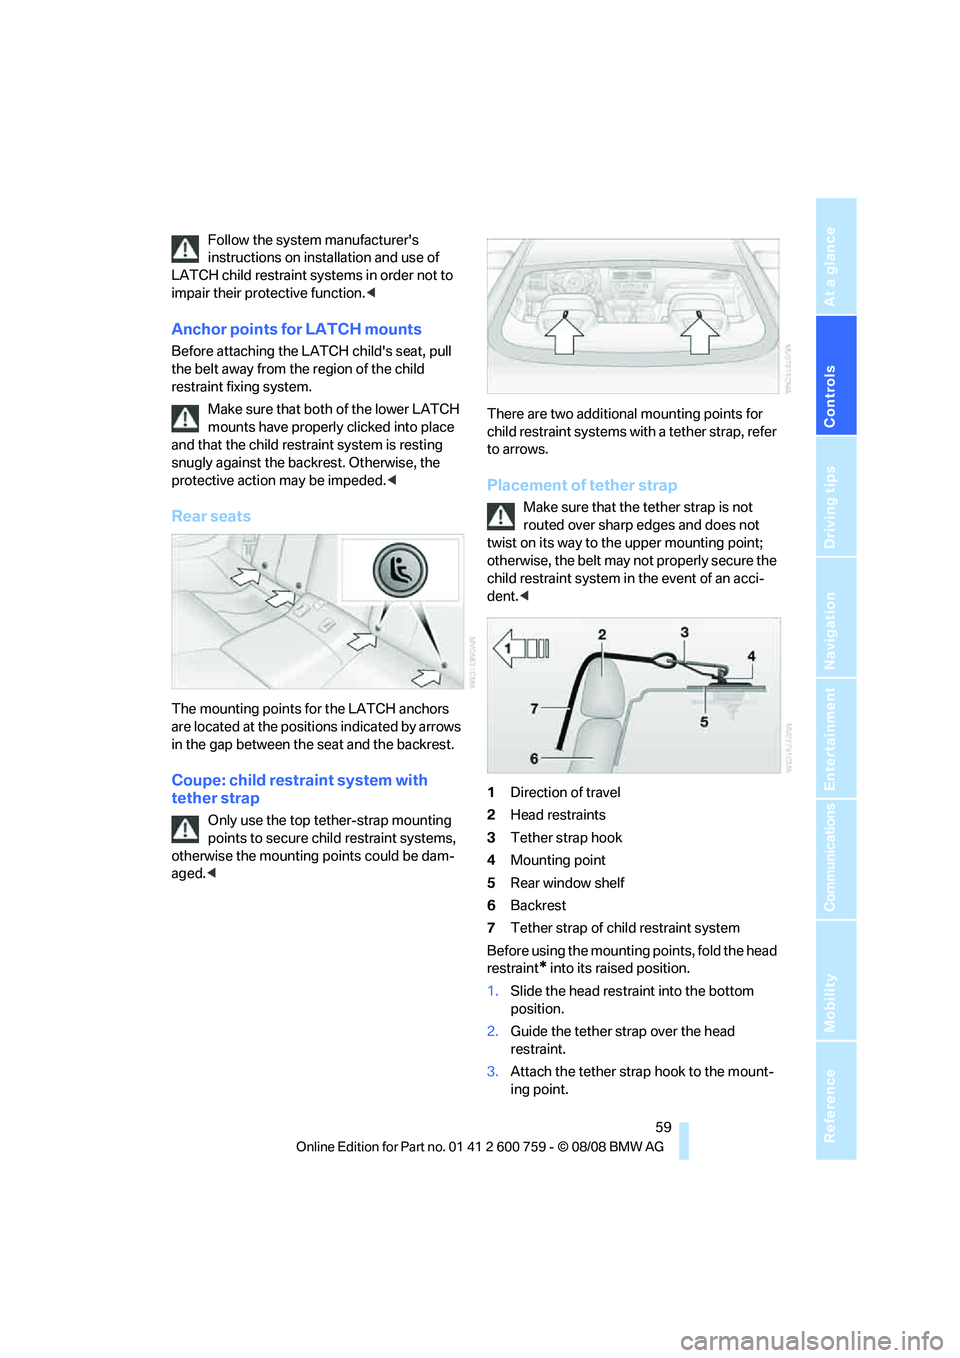
to arrows.
Placement of tether strap
Make sure that the tether strap is not
routed over sharp edges and does not
twist on its way to the upper mounting point;
otherwise, the belt may not properly secure the
child restraint system in the event of an acci-
dent.<
1Direction of travel
2Head restraints
3Tether strap hook
4Mounting point
5Rear window shelf
6Backrest
7Tether strap of child restraint system
Before using the mounting points, fold the head
restraint
* into its raised position.
1.Slide the head restraint into the bottom
position.
2.Guide the tether strap over the head
restraint.
3.Attach the tether strap hook to the mount-
ing point.
Page 81 of 272
Controls
79Reference
At a glance
Driving tips
Communications
Navigation
Entertainment
Mobility
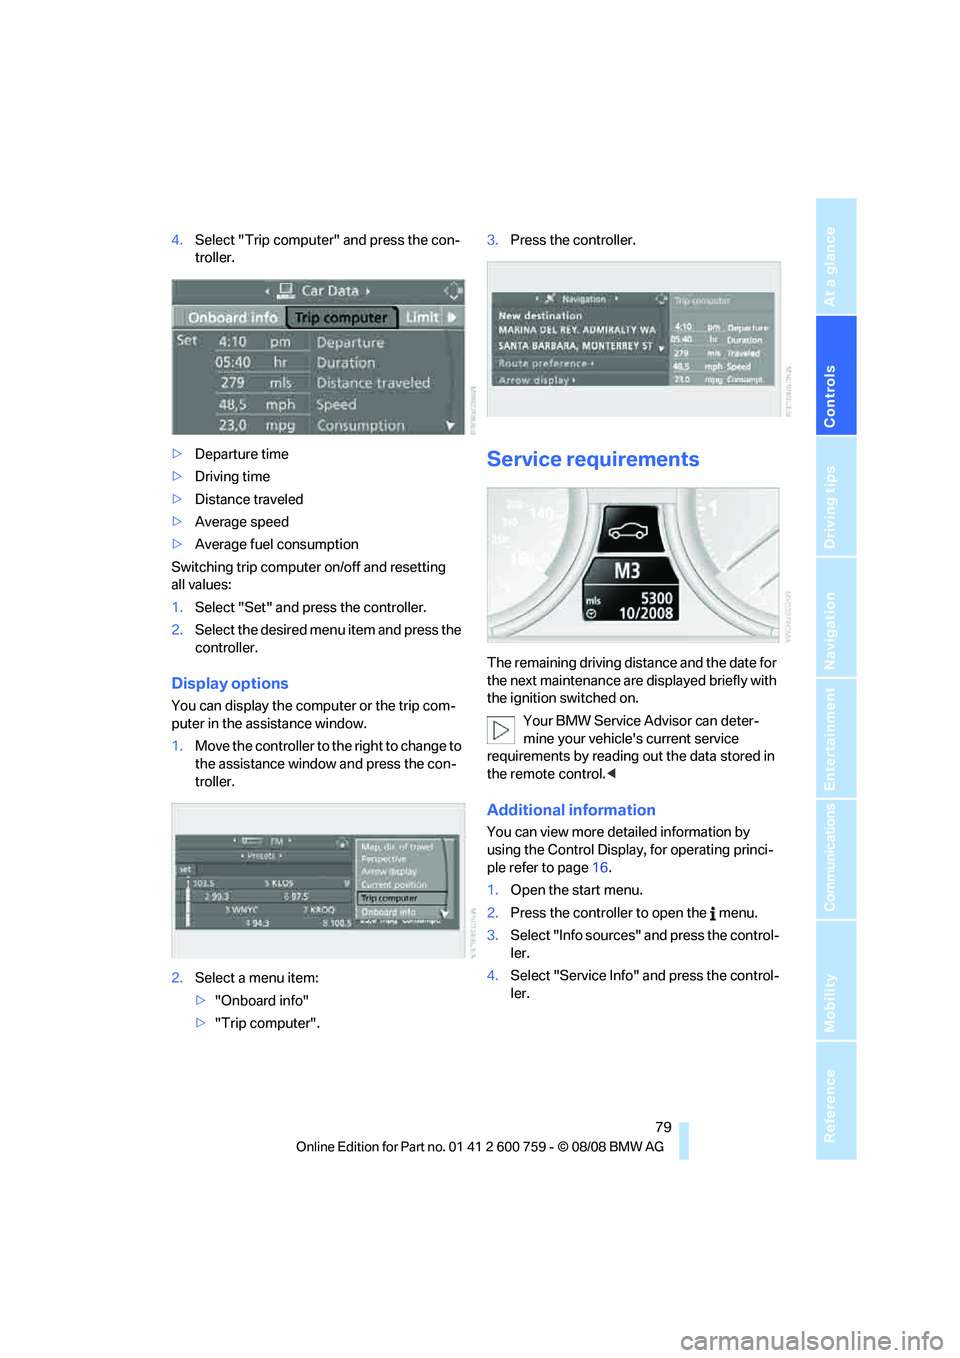
4.Select "Trip computer" and press the con-
troller.
>Departure time
>Driving time
>Distance traveled
>Average speed
>Average fuel consumption
Switching trip computer on/off and resetting
all values:
1.Select "Set" and press the controller.
2.Select the desired menu item and press the
controller.
Display options
You can display the computer or the trip com-
puter in the assistance window.
1.Move the controller to the right to change to
the assistance window and press the con-
troller.
2.Select a menu item:
>"Onboard info"
>"Trip computer".3.Press the controller.
Service requirements
The remaining driving distance and the date for
the next maintenance are displayed briefly with
the ignition switched on.
Your BMW Service Advisor can deter-
mine your vehicle's current service
requirements by reading out the data stored in
the remote control.<
Additional information
You can view more detailed information by
using the Control Display, for operating princi-
ple refer to page16.
1.Open the start menu.
2.Press the controller to open the menu.
3.Select "Info sources" and press the control-
ler.
4.Select "Service Info" and press the control-
ler.
Page 103 of 272
Controls
101Reference
At a glance
Driving tips
Communications
Navigation
Entertainment
Mobility
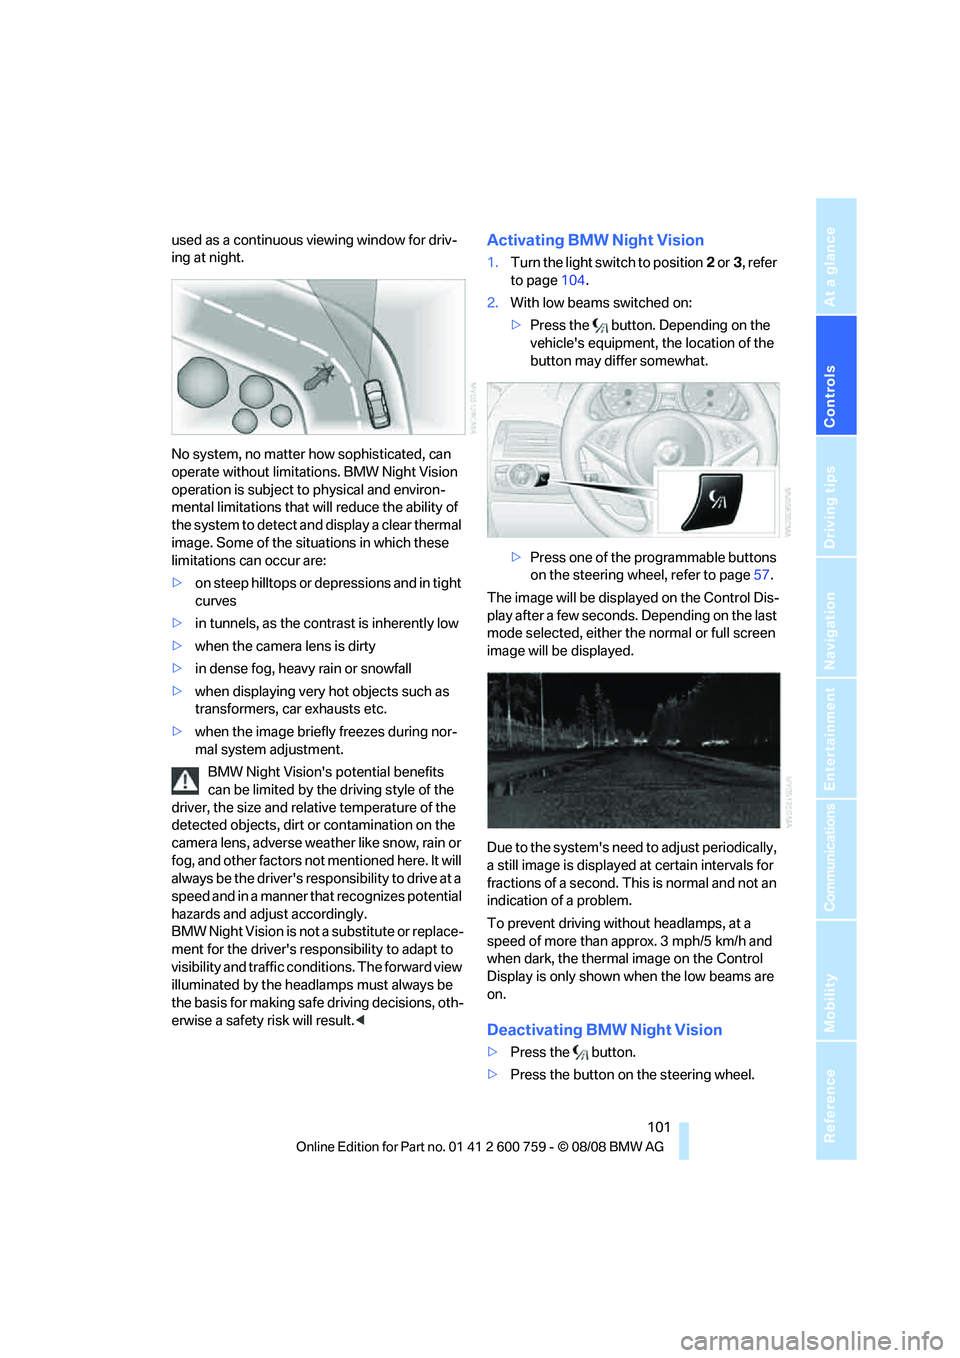
used as a continuous viewing window for driv-
ing at night.
No system, no matter how sophisticated, can
operate without limitations. BMW Night Vision
operation is subject to physical and environ-
mental limitations that will reduce the ability of
the system to detect and display a clear thermal
image. Some of the situations in which these
limitations can occur are:
>on steep hilltops or depressions and in tight
curves
>in tunnels, as the contrast is inherently low
>when the camera lens is dirty
>in dense fog, heavy rain or snowfall
>when displaying very hot objects such as
transformers, car exhausts etc.
>when the image briefly freezes during nor-
mal system adjustment.
BMW Night Vision's potential benefits
can be limited by the driving style of the
driver, the size and relative temperature of the
detected objects, dirt or contamination on the
camera lens, adverse weather like snow, rain or
fog, and other factors not mentioned here. It will
always be the driver's responsibility to drive at a
speed and in a manner that recognizes potential
hazards and adjust accordingly.
BMW Night Vision is not a substitute or replace-
ment for the driver's responsibility to adapt to
visibility and traffic conditions. The forward view
illuminated by the headlamps must always be
the basis for making safe driving decisions, oth-
erwise a safety risk will result.
to page104.
2.With low beams switched on:
>Press the button. Depending on the
vehicle's equipment, the location of the
button may differ somewhat.
>Press one of the programmable buttons
on the steering wheel, refer to page57.
The image will be displayed on the Control Dis-
play after a few seconds. Depending on the last
mode selected, either the normal or full screen
image will be displayed.
Due to the system's need to adjust periodically,
a still image is displayed at certain intervals for
fractions of a second. This is normal and not an
indication of a problem.
To prevent driving without headlamps, at a
speed of more than approx. 3 mph/5 km/h and
when dark, the thermal image on the Control
Display is only shown when the low beams are
on.
Deactivating BMW Night Vision
>Press the button.
>Press the button on the steering wheel.