fuel BMW 6 SERIES COUPE 2014 F13 Owner's Manual
[x] Cancel search | Manufacturer: BMW, Model Year: 2014, Model line: 6 SERIES COUPE, Model: BMW 6 SERIES COUPE 2014 F13Pages: 247, PDF Size: 5.08 MB
Page 9 of 247
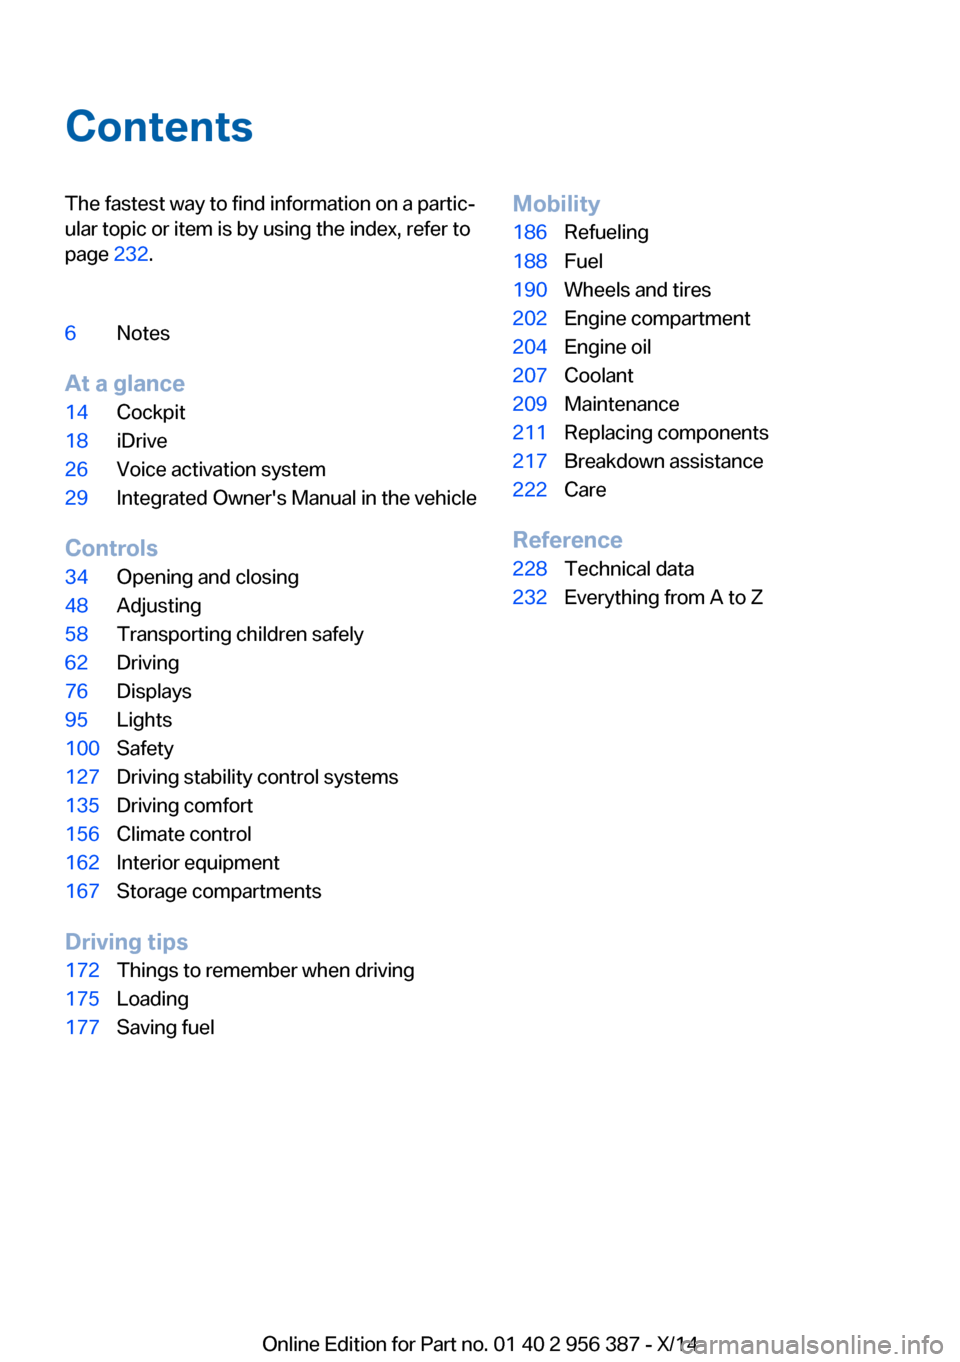
ContentsThe fastest way to find information on a partic‐
ular topic or item is by using the index, refer to
page 232.6Notes
At a glance
14Cockpit18iDrive26Voice activation system29Integrated Owner's Manual in the vehicle
Controls
34Opening and closing48Adjusting58Transporting children safely62Driving76Displays95Lights100Safety127Driving stability control systems135Driving comfort156Climate control162Interior equipment167Storage compartments
Driving tips
172Things to remember when driving175Loading177Saving fuelMobility186Refueling188Fuel190Wheels and tires202Engine compartment204Engine oil207Coolant209Maintenance211Replacing components217Breakdown assistance222Care
Reference
228Technical data232Everything from A to Z
Online Edition for Part no. 01 40 2 956 387 - X/14
Page 43 of 247
Without remote control
From the outside Locking from the outside
Do not lock the vehicle from the outside
with people inside the car, as the vehicle can‐
not be unlocked from inside without special knowledge.◀
Remove the key before pulling the door
handle
Before pulling the outside door handle, remove
the key to avoid damaging the paintwork and
the key.◀
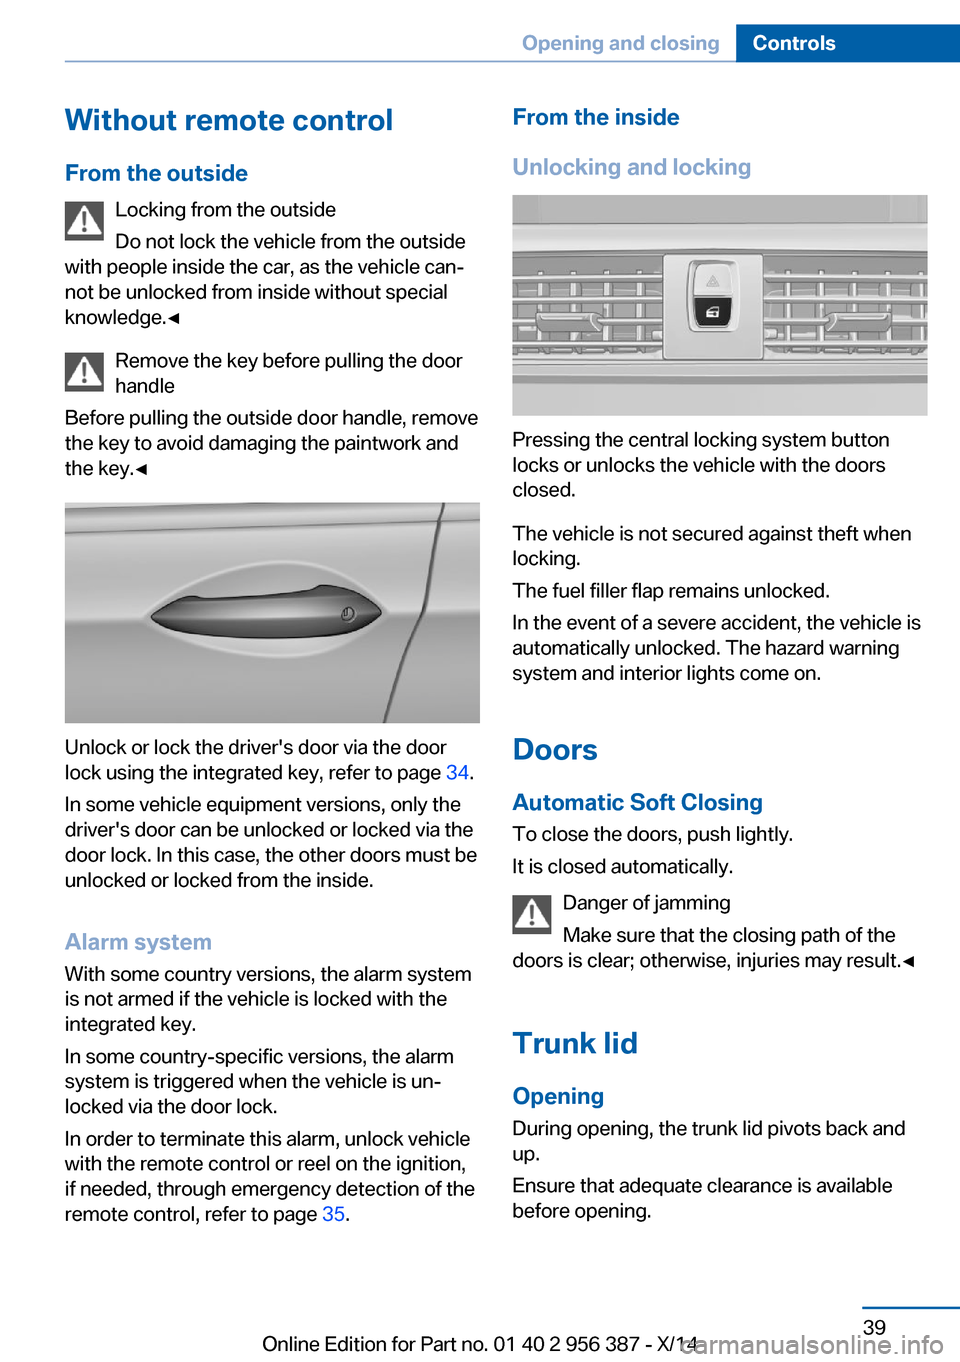
Unlock or lock the driver's door via the door
lock using the integrated key, refer to page 34.
In some vehicle equipment versions, only the
driver's door can be unlocked or locked via the
door lock. In this case, the other doors must be
unlocked or locked from the inside.
Alarm system
With some country versions, the alarm system
is not armed if the vehicle is locked with the
integrated key.
In some country-specific versions, the alarm system is triggered when the vehicle is un‐
locked via the door lock.
In order to terminate this alarm, unlock vehicle
with the remote control or reel on the ignition,
if needed, through emergency detection of the
remote control, refer to page 35.
From the inside
Unlocking and locking
Pressing the central locking system button
locks or unlocks the vehicle with the doors
closed.
The vehicle is not secured against theft when
locking.
The fuel filler flap remains unlocked.
In the event of a severe accident, the vehicle is
automatically unlocked. The hazard warning
system and interior lights come on.
Doors Automatic Soft Closing
To close the doors, push lightly.
It is closed automatically.
Danger of jamming
Make sure that the closing path of the
doors is clear; otherwise, injuries may result.◀
Trunk lidOpening
During opening, the trunk lid pivots back and
up.
Ensure that adequate clearance is available
before opening.
Seite 39Opening and closingControls39
Online Edition for Part no. 01 40 2 956 387 - X/14
Page 46 of 247
Separately unlocking the trunk lidPress button on the exterior of the trunk lid.
This corresponds to pressing
the re‐
mote control button.
The situation of the doors does not change.
Do not place the remote control in the
cargo area
Take the remote control with you and do not
leave it in the cargo area; otherwise, the re‐
mote control is locked inside the vehicle when
the trunk lid is closed.◀
Malfunction
Remote control detection by the vehicle can
among others be malfunctioning under the fol‐
lowing circumstances:
▷Interference of the radio connection from
transmission towers or other equipment
with high transmit power.▷Shielding of the remote control due to
metal objects.▷Interference of the radio connection from
mobile phones or other electronic devices
in direct proximity.
Do not transport the remote control together
with metal objects or electronic devices.
In the case of a malfunction, unlock and lock
the vehicle using the buttons of the remote
control or using the integrated key, refer to
page 39.
Adjusting
Unlocking The settings are saved in the active profile, re‐
fer to page 35.
Doors
1."Settings"2."Doors/key"3. Select the symbol.4.Select the desired function:▷"Driver's door only"
Only the driver's door and the fuel filler
flap are unlocked. Pressing again un‐
locks the entire vehicle.▷"All doors"
The entire vehicle is unlocked.
Trunk lid
Depending on optional features and country
version, this setting is not offered in some
cases.
1."Settings"2."Doors/key"3. Select the symbol.4.Select the desired function:▷"Tailgate"
The trunk lid is opened.▷"Tailgate + door(s)"
The trunk lid is opened and the doors
are unlocked.
Confirmation signals from the vehicle
The settings are saved in the active profile, re‐
fer to page 35.
1."Settings"2."Doors/key"3.Deactivate or activate the desired confir‐
mation signals.▷"Acoustic sig. lock/unlock"▷"Flash when lock/unlock"
Automatic locking
The settings are saved in the active profile, re‐fer to page 35.
1."Settings"2."Doors/key"3.Select the desired function:Seite 42ControlsOpening and closing42
Online Edition for Part no. 01 40 2 956 387 - X/14
Page 67 of 247
▷When the vehicle is locked using the cen‐
tral locking system.▷Shortly before the battery is discharged
completely, so that the engine can still be
started.
The radio-ready state remains active if, e.g.,
the ignition is automatically switched off for the
following reasons:
▷Opening or closing the driver's door.▷Unfastening of the driver's safety belt.▷When automatically switching from low
beams to parking lights.
Starting the engine
Hints Enclosed areas
Do not let the engine run in enclosed
areas, since breathing in exhaust fumes may
lead to loss of consciousness and death. The
exhaust gases contain carbon monoxide, an
odorless and colorless but highly toxic gas.◀
Unattended vehicle
Do not leave the vehicle unattended with
the engine running; doing so poses a risk of
danger.
Before leaving the vehicle with the engine run‐
ning, set the parking brake and place the trans‐
mission in selector lever position P or N to pre‐
vent the vehicle from moving.◀
Repeated starting in quick succession
Avoid trying to start the vehicle repeat‐
edly and in quick succession. Otherwise, the fuel is not burned or is inadequately burned,
posing a risk of overheating and damage to the
catalytic converter.◀
Do not wait for the engine to warm-up while
the vehicle remains stationary. Start driving at
moderate engine speeds.
Steptronic transmission
Starting the engine1.Depress the brake pedal.2.Press the Start/Stop button.
The ignition is activated automatically for a
certain time and is stopped as soon as the en‐
gine starts.
Engine stop
Hints Take the remote control with you
Take the remote control with you when
leaving the vehicle so that children, e.g., can‐
not start the engine.◀
Apply parking brake and further secure
the vehicle if needed.
Set the parking brake firmly when parking; oth‐
erwise, the vehicle could roll. On steep upward
and downward inclines, further secure the ve‐
hicle, e.g., by turning the steering wheel in the
direction of the curb.◀
Before driving into a car wash
So that the vehicle can roll into a car wash ob‐
serve instructions for going into an automatic
car wash, refer to page 222.
Steptronic transmission
Switching off the engine
1.Engage selector lever position P with the
vehicle stopped.2.Press the Start/Stop button.
The engine is switched off.
The radio-ready state is switched on.3.Set the parking brake.Seite 63DrivingControls63
Online Edition for Part no. 01 40 2 956 387 - X/14
Page 68 of 247
Auto Start/Stop function
The concept The Auto Start/Stop function helps save fuel.
The system switches off the engine during a
stop, e.g., in traffic congestion or at traffic lights. The ignition remains switched on. The
engine starts again automatically for driving
off.
Automatic mode After every start of the engine using the Start/
Stop button, the Auto Start/Stop function is in
the last selected state, refer to page 65.
When the Auto Start Stop function is active, it
is available when the vehicle is traveling faster
than about 3 mph, approx. 5 km/h.
Engine stop
The engine is switched off automatically dur‐
ing a stop under the following conditions:
Steptronic transmission:▷The selector lever is in selector lever posi‐
tion D.▷The brake pedal remains pressed while the
vehicle is stationary or the vehicle is held
by Automatic Hold.▷The driver's safety belt is buckled or the
driver's door is closed.
The air flow from the air conditioner is reduced
when the engine is switched off.
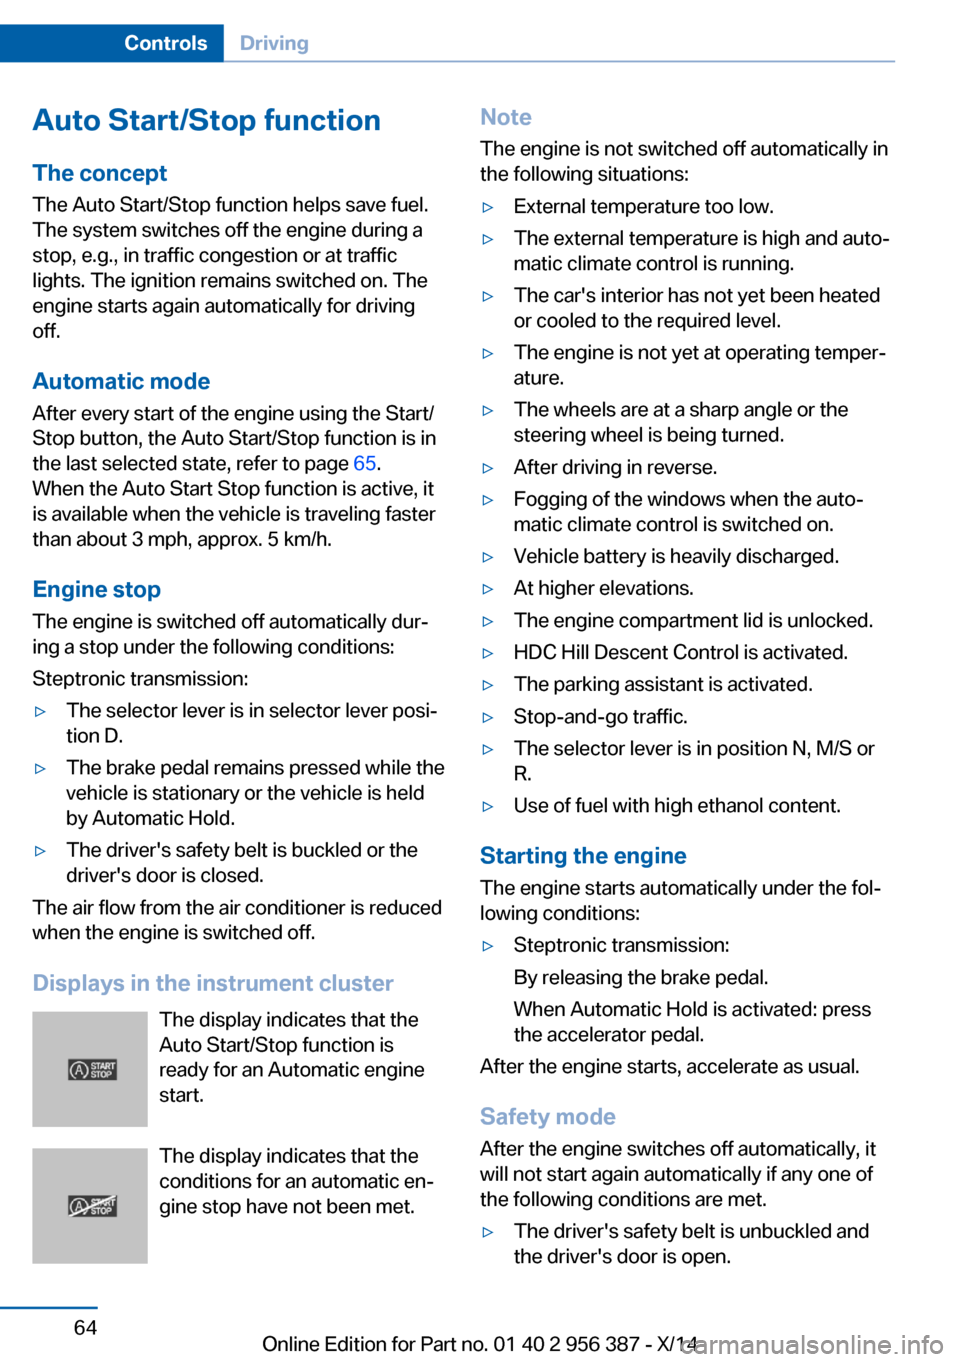
Displays in the instrument cluster The display indicates that the
Auto Start/Stop function is
ready for an Automatic engine
start.
The display indicates that the conditions for an automatic en‐
gine stop have not been met.
Note
The engine is not switched off automatically in
the following situations:▷External temperature too low.▷The external temperature is high and auto‐
matic climate control is running.▷The car's interior has not yet been heated
or cooled to the required level.▷The engine is not yet at operating temper‐
ature.▷The wheels are at a sharp angle or the
steering wheel is being turned.▷After driving in reverse.▷Fogging of the windows when the auto‐
matic climate control is switched on.▷Vehicle battery is heavily discharged.▷At higher elevations.▷The engine compartment lid is unlocked.▷HDC Hill Descent Control is activated.▷The parking assistant is activated.▷Stop-and-go traffic.▷The selector lever is in position N, M/S or
R.▷Use of fuel with high ethanol content.
Starting the engine
The engine starts automatically under the fol‐
lowing conditions:
▷Steptronic transmission:
By releasing the brake pedal.
When Automatic Hold is activated: press
the accelerator pedal.
After the engine starts, accelerate as usual.
Safety mode
After the engine switches off automatically, it
will not start again automatically if any one of
the following conditions are met.
▷The driver's safety belt is unbuckled and
the driver's door is open.Seite 64ControlsDriving64
Online Edition for Part no. 01 40 2 956 387 - X/14
Page 80 of 247
DisplaysVehicle features and optionsThis chapter describes all standard, country-
specific and optional features offered with the
series. It also describes features that are notnecessarily available in your car, e. g., due to
the selected options or country versions. This
also applies to safety-related functions and
systems.
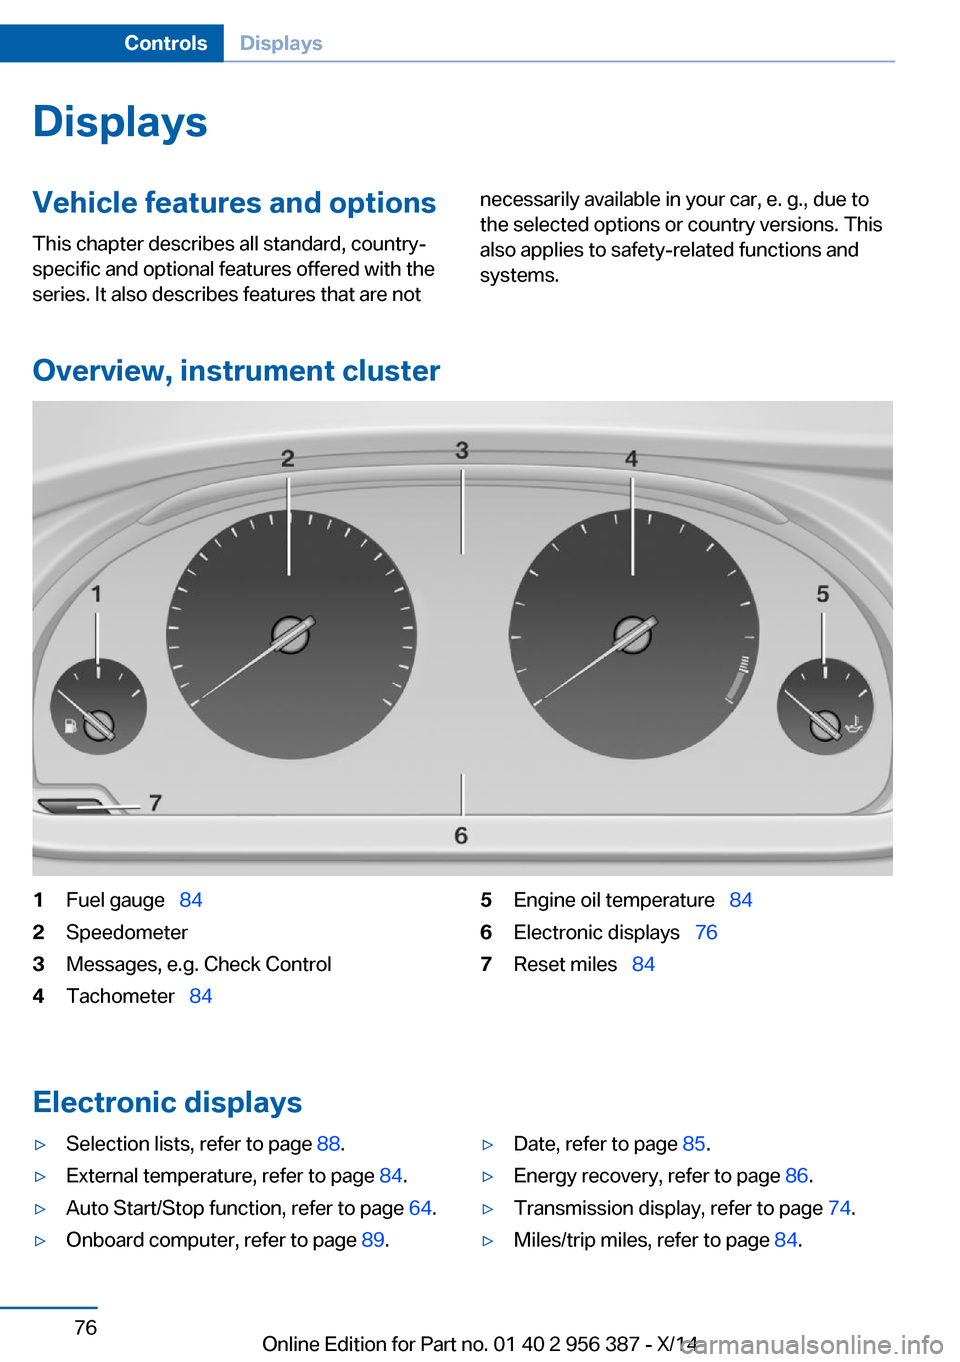
Overview, instrument cluster
1Fuel gauge 842Speedometer3Messages, e.g. Check Control4Tachometer 845Engine oil temperature 846Electronic displays 767Reset miles 84
Electronic displays
▷Selection lists, refer to page 88.▷External temperature, refer to page 84.▷Auto Start/Stop function, refer to page 64.▷Onboard computer, refer to page 89.▷Date, refer to page 85.▷Energy recovery, refer to page 86.▷Transmission display, refer to page 74.▷Miles/trip miles, refer to page 84.Seite 76ControlsDisplays76
Online Edition for Part no. 01 40 2 956 387 - X/14
Page 81 of 247
▷Messages, e.g. Check Control, refer to
page 80.▷Current fuel consumption, refer to
page 85.▷Navigation display, see User's manual for
Navigation, Entertainment and Communi‐
cation.▷Range, refer to page 85.▷Status, Driving Dynamics Control, refer to
page 131.▷Service requirements, refer to page 86.▷Speed limit detection, refer to page 87.▷Time, refer to page 85.
Multifunctional instrument display
The concept
The instrument display is a variable display. In
the event of a program change, the display
rendition adapts to the respective program
through the Driving Dynamics Control. The
change of appearance can be deactivated on
the Control Display.Some of the displays in the instrument display
may differ from the way they are shown in this
Owner's Manual.
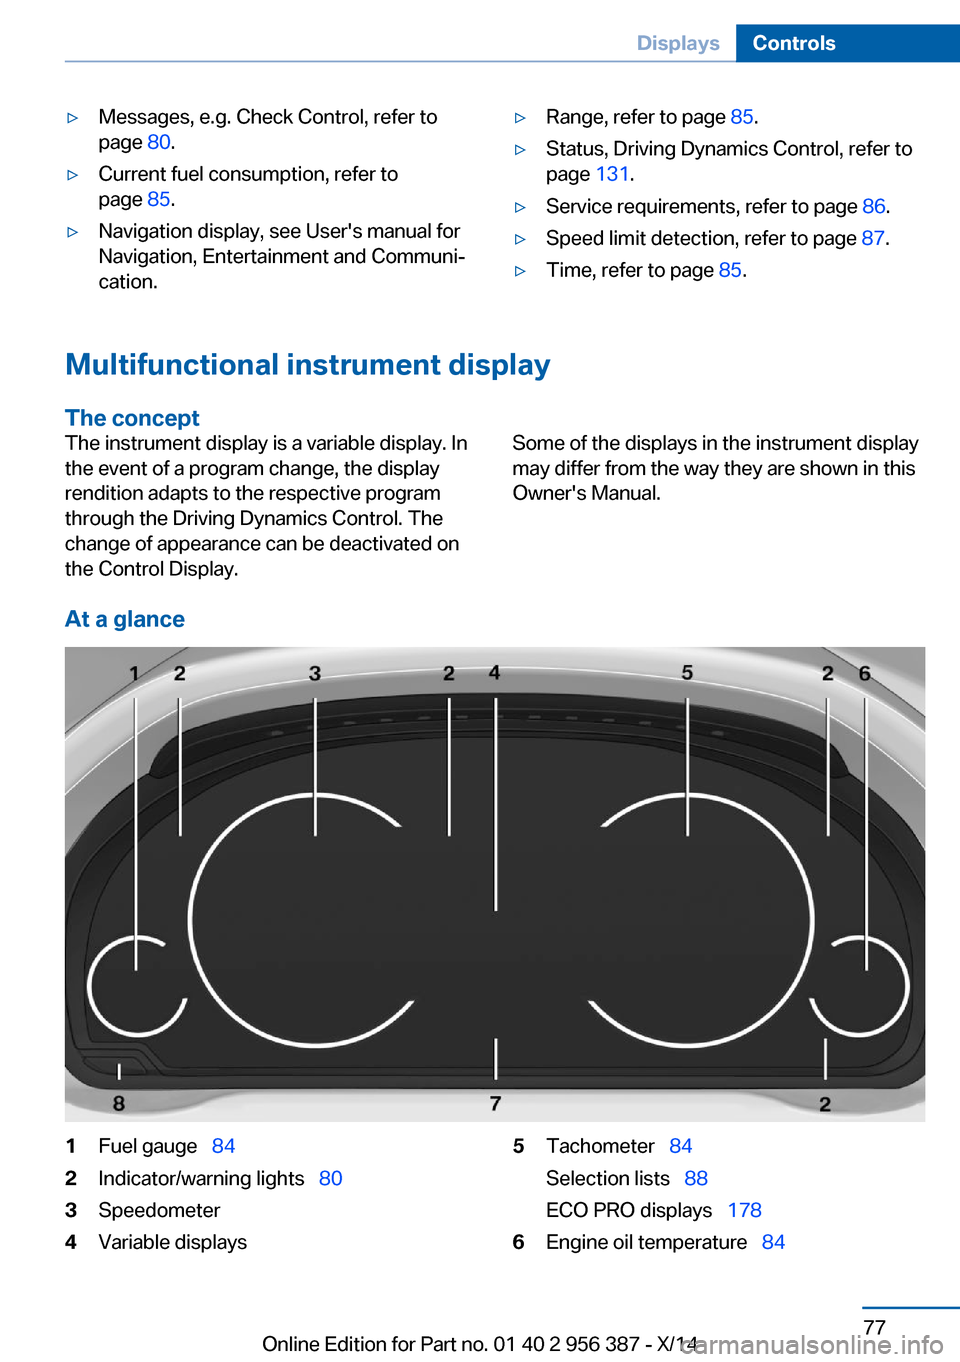
At a glance
1Fuel gauge 842Indicator/warning lights 803Speedometer4Variable displays5Tachometer 84
Selection lists 88
ECO PRO displays 1786Engine oil temperature 84Seite 77DisplaysControls77
Online Edition for Part no. 01 40 2 956 387 - X/14
Page 83 of 247
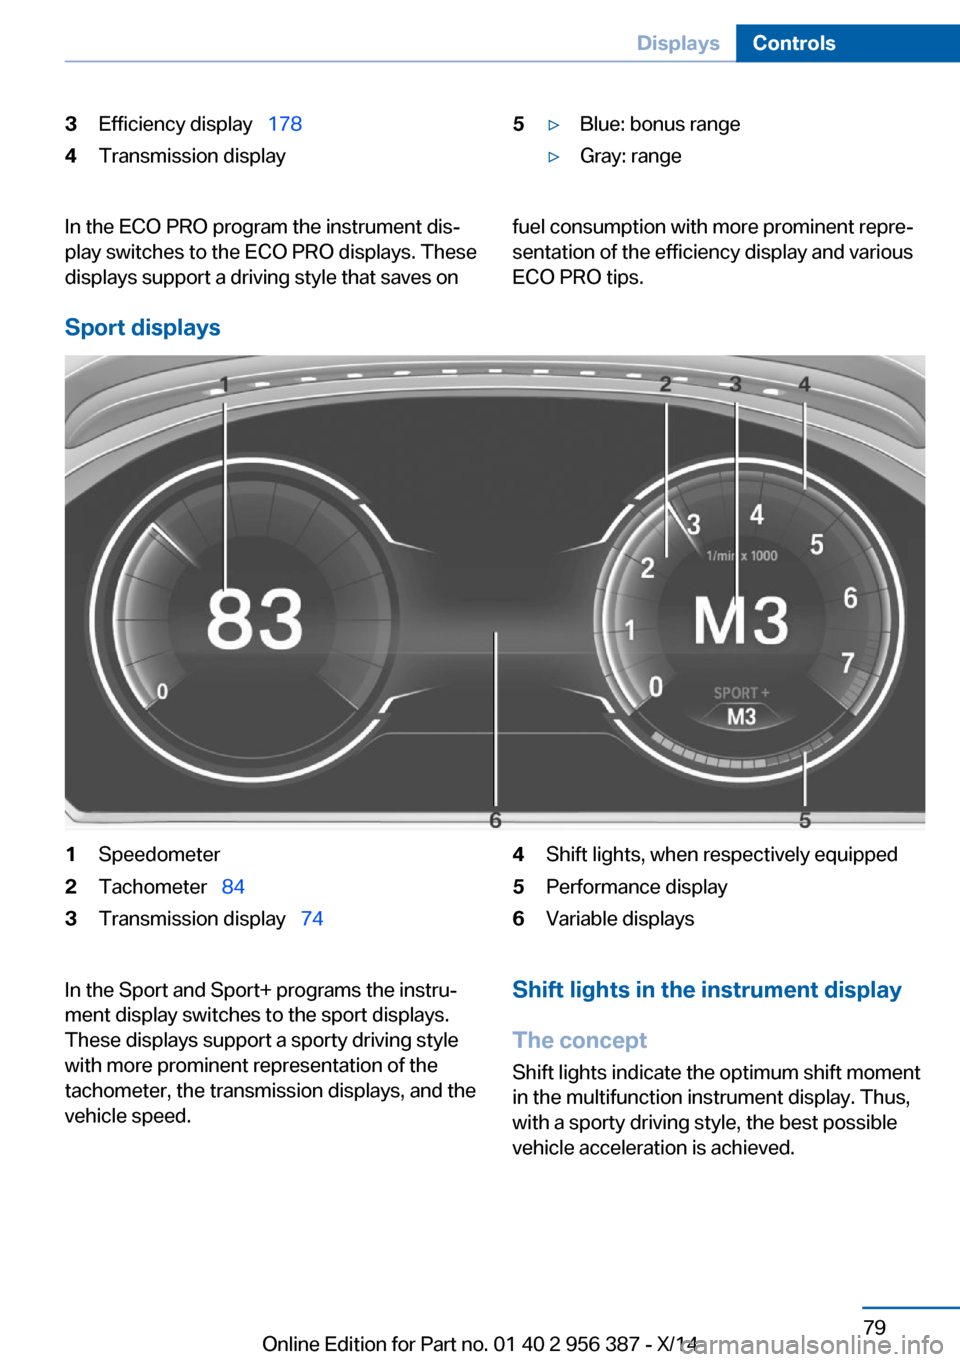
3Efficiency display 1784Transmission display5▷Blue: bonus range▷Gray: rangeIn the ECO PRO program the instrument dis‐
play switches to the ECO PRO displays. These
displays support a driving style that saves onfuel consumption with more prominent repre‐
sentation of the efficiency display and various
ECO PRO tips.
Sport displays
1Speedometer2Tachometer 843Transmission display 744Shift lights, when respectively equipped5Performance display6Variable displaysIn the Sport and Sport+ programs the instru‐
ment display switches to the sport displays.
These displays support a sporty driving style
with more prominent representation of the
tachometer, the transmission displays, and the
vehicle speed.Shift lights in the instrument display
The concept Shift lights indicate the optimum shift momentin the multifunction instrument display. Thus, with a sporty driving style, the best possible
vehicle acceleration is achieved.Seite 79DisplaysControls79
Online Edition for Part no. 01 40 2 956 387 - X/14
Page 84 of 247
General information
Steptronic Sport transmission: shift lights are
shown, when the SPORT+ driving program is
activated.
Switching on shift lights Steptronic Sport transmission:1.Select Sport+ using the Driving Dynamics
Control.2.Activate the M/S manual mode of the
transmission.
Display in the instrument display
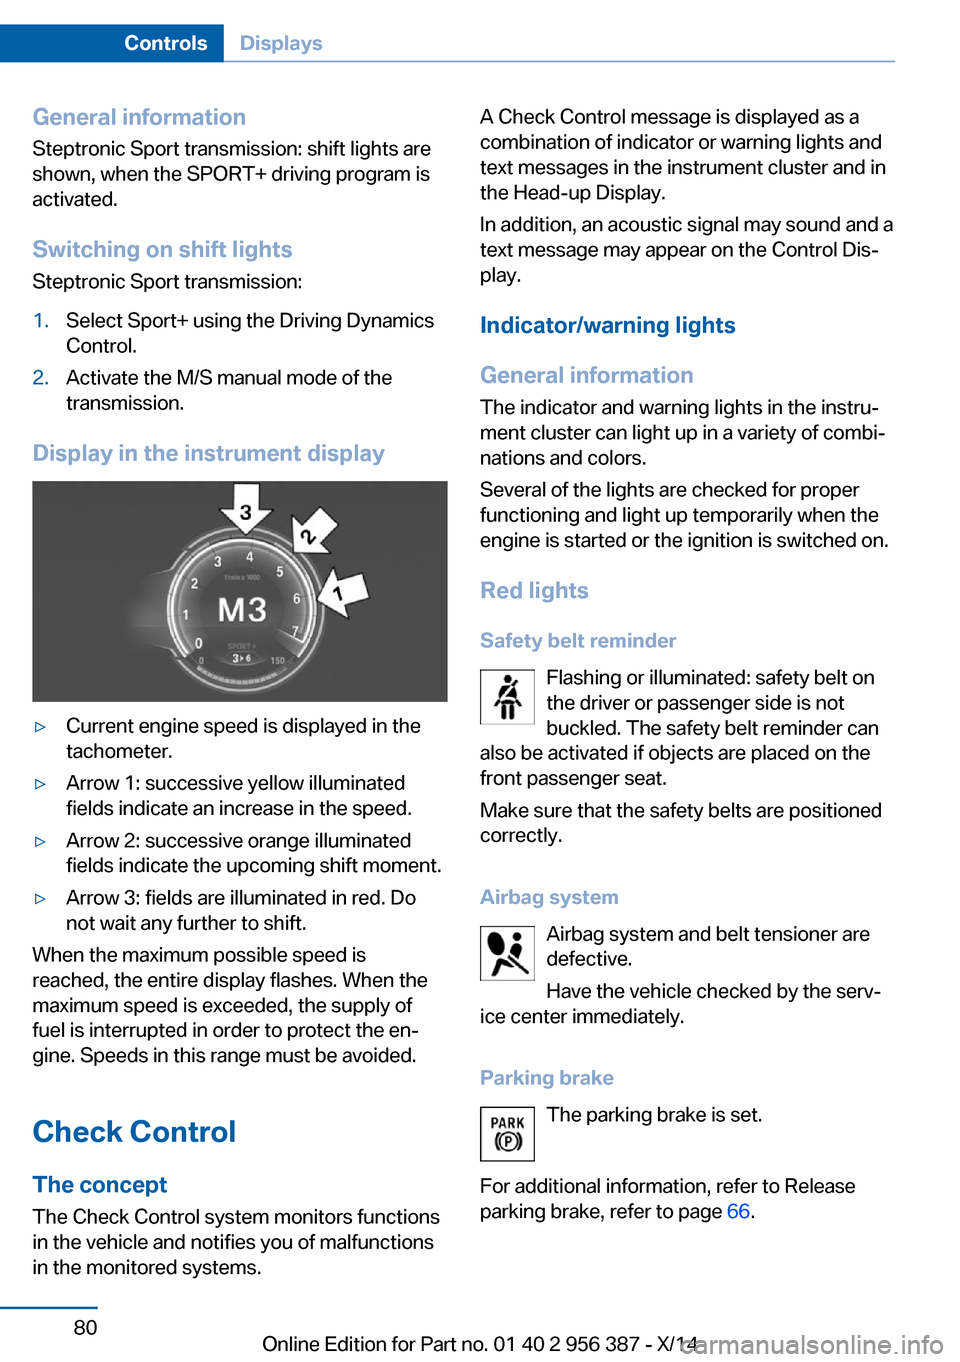
▷Current engine speed is displayed in the
tachometer.▷Arrow 1: successive yellow illuminated
fields indicate an increase in the speed.▷Arrow 2: successive orange illuminated
fields indicate the upcoming shift moment.▷Arrow 3: fields are illuminated in red. Do
not wait any further to shift.
When the maximum possible speed is
reached, the entire display flashes. When the
maximum speed is exceeded, the supply of
fuel is interrupted in order to protect the en‐
gine. Speeds in this range must be avoided.
Check Control
The concept The Check Control system monitors functions
in the vehicle and notifies you of malfunctions
in the monitored systems.
A Check Control message is displayed as a
combination of indicator or warning lights and
text messages in the instrument cluster and in
the Head-up Display.
In addition, an acoustic signal may sound and a text message may appear on the Control Dis‐
play.
Indicator/warning lights
General information
The indicator and warning lights in the instru‐
ment cluster can light up in a variety of combi‐
nations and colors.
Several of the lights are checked for proper
functioning and light up temporarily when the
engine is started or the ignition is switched on.
Red lights Safety belt reminder Flashing or illuminated: safety belt on
the driver or passenger side is not
buckled. The safety belt reminder can
also be activated if objects are placed on the
front passenger seat.
Make sure that the safety belts are positioned
correctly.
Airbag system Airbag system and belt tensioner aredefective.
Have the vehicle checked by the serv‐
ice center immediately.
Parking brake The parking brake is set.
For additional information, refer to Release
parking brake, refer to page 66.Seite 80ControlsDisplays80
Online Edition for Part no. 01 40 2 956 387 - X/14
Page 88 of 247
Displaying stored Check Control
messages
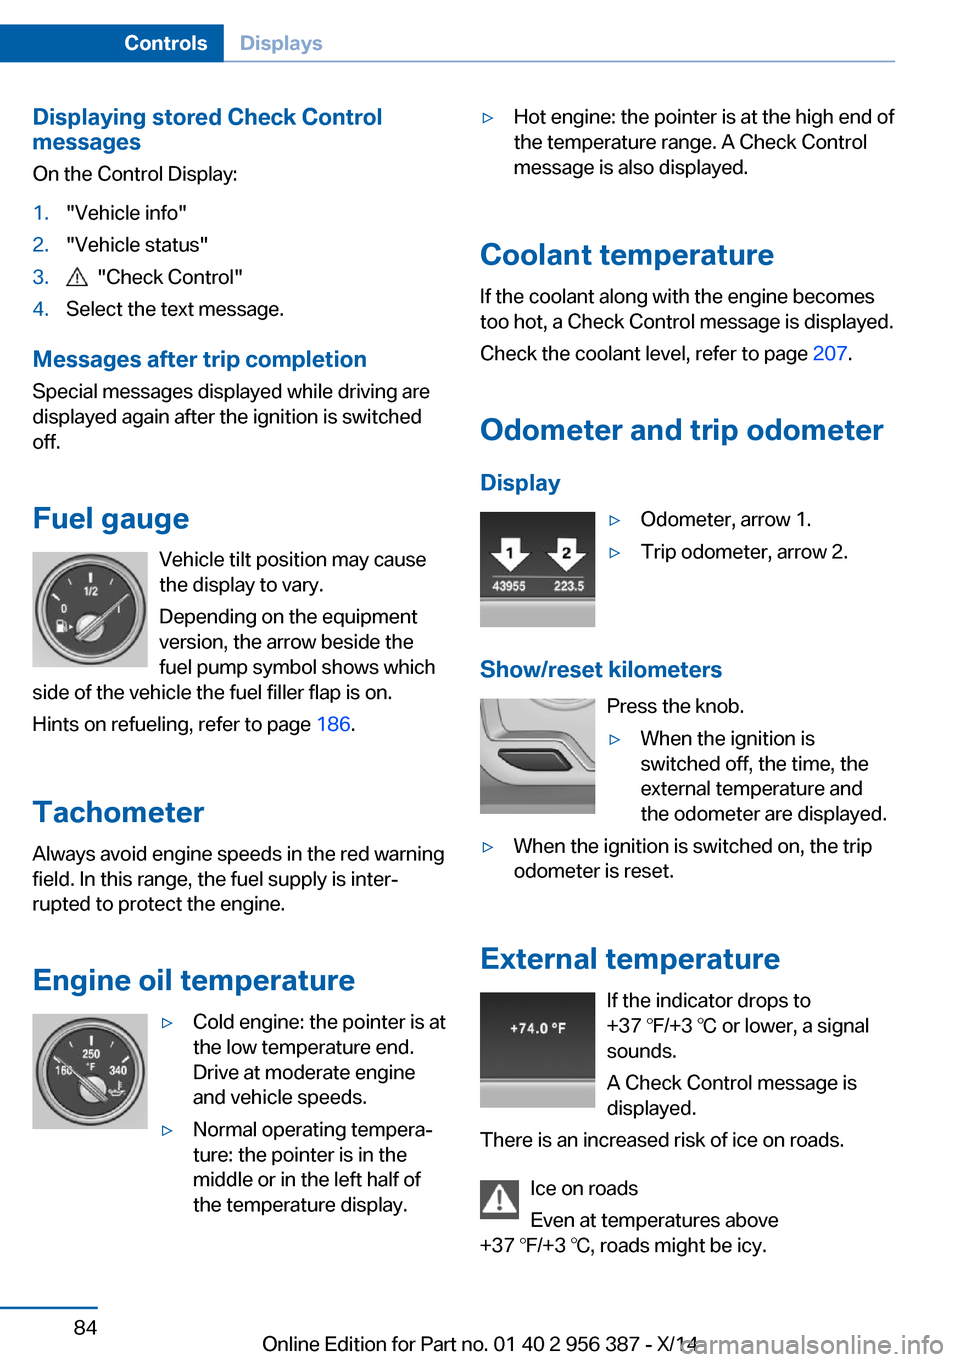
On the Control Display:1."Vehicle info"2."Vehicle status"3. "Check Control"4.Select the text message.
Messages after trip completion Special messages displayed while driving are
displayed again after the ignition is switched
off.
Fuel gauge Vehicle tilt position may cause
the display to vary.
Depending on the equipment
version, the arrow beside the
fuel pump symbol shows which
side of the vehicle the fuel filler flap is on.
Hints on refueling, refer to page 186.
Tachometer Always avoid engine speeds in the red warning
field. In this range, the fuel supply is inter‐
rupted to protect the engine.
Engine oil temperature
▷Cold engine: the pointer is at
the low temperature end.
Drive at moderate engine
and vehicle speeds.▷Normal operating tempera‐
ture: the pointer is in the
middle or in the left half of
the temperature display.▷Hot engine: the pointer is at the high end of
the temperature range. A Check Control
message is also displayed.
Coolant temperature
If the coolant along with the engine becomes
too hot, a Check Control message is displayed.
Check the coolant level, refer to page 207.
Odometer and trip odometer Display
▷Odometer, arrow 1.▷Trip odometer, arrow 2.
Show/reset kilometers Press the knob.
▷When the ignition is
switched off, the time, the
external temperature and
the odometer are displayed.▷When the ignition is switched on, the trip
odometer is reset.
External temperature
If the indicator drops to
+37 ℉/+3 ℃ or lower, a signal
sounds.
A Check Control message is displayed.
There is an increased risk of ice on roads.
Ice on roads
Even at temperatures above
+37 ℉/+3 ℃, roads might be icy.
Seite 84ControlsDisplays84
Online Edition for Part no. 01 40 2 956 387 - X/14