change time BMW 650I COUPE 2010 E63 Owner's Manual
[x] Cancel search | Manufacturer: BMW, Model Year: 2010, Model line: 650I COUPE, Model: BMW 650I COUPE 2010 E63Pages: 252, PDF Size: 8.4 MB
Page 20 of 252
iDrive
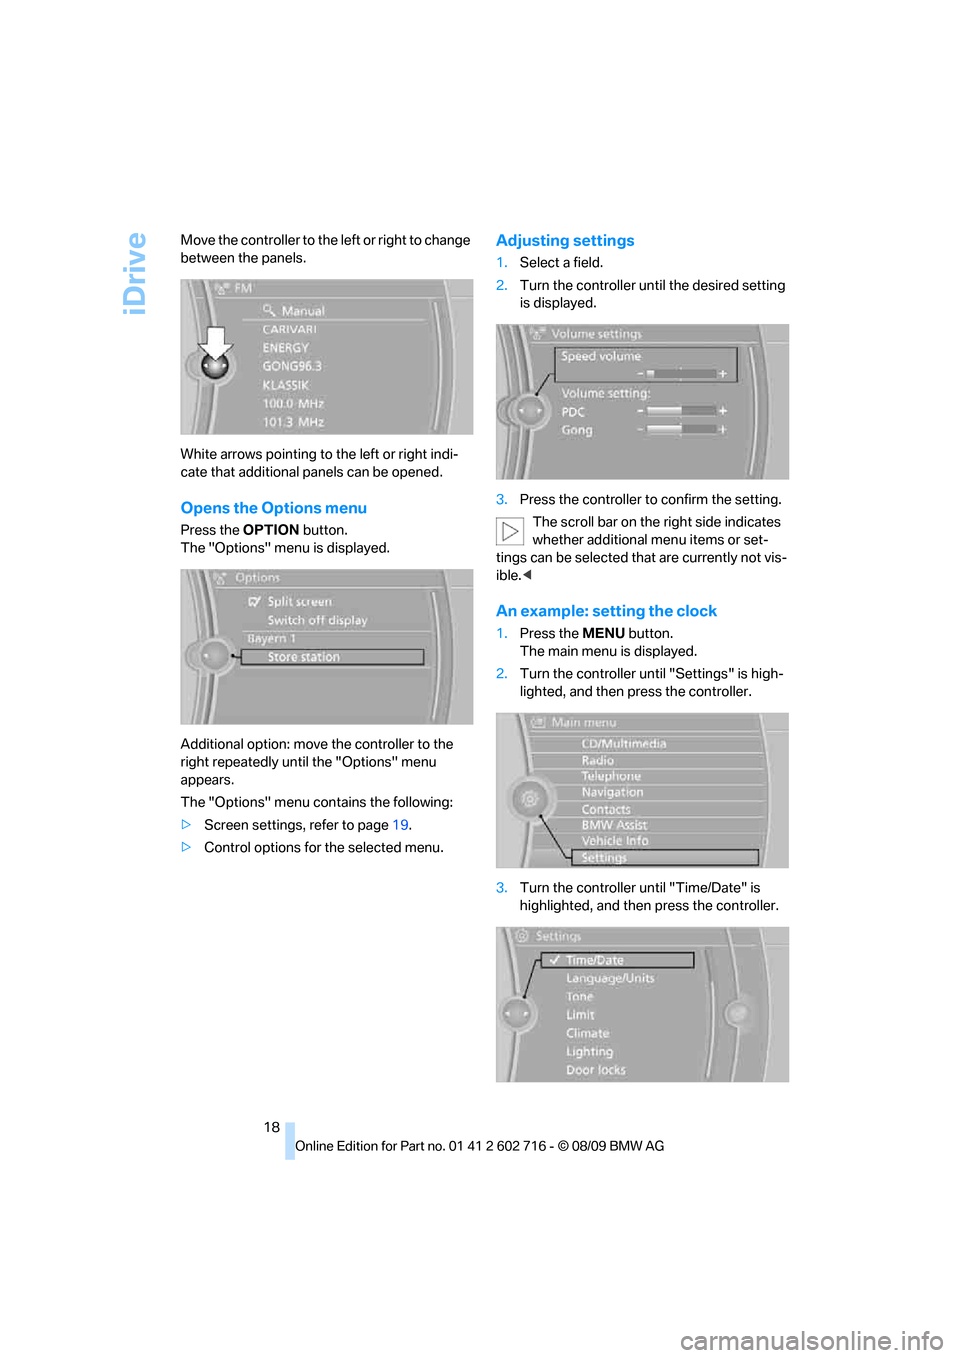
18 Move the controller to the left or right to change
between the panels.
White arrows pointing to the left or right indi-
cate that additional panels can be opened.
Opens the Options menu
Press the OPTION button.
The "Options" menu is displayed.
Additional option: move the controller to the
right repeatedly until the "Options" menu
appears.
The "Options" menu contains the following:
>Screen settings, refer to page19.
>Control options for the selected menu.
Adjusting settings
1.Select a field.
2.Turn the controller until the desired setting
is displayed.
3.Press the controller to confirm the setting.
The scroll bar on the right side indicates
whether additional menu items or set-
tings can be selected that are currently not vis-
ible.<
An example: setting the clock
1.Press the MENU button.
The main menu is displayed.
2.Turn the controller until "Settings" is high-
lighted, and then press the controller.
3.Turn the controller until "Time/Date" is
highlighted, and then press the controller.
Page 21 of 252
At a glance
19Reference
Controls
Driving tips
Communications
Navigation
Entertainment
Mobility
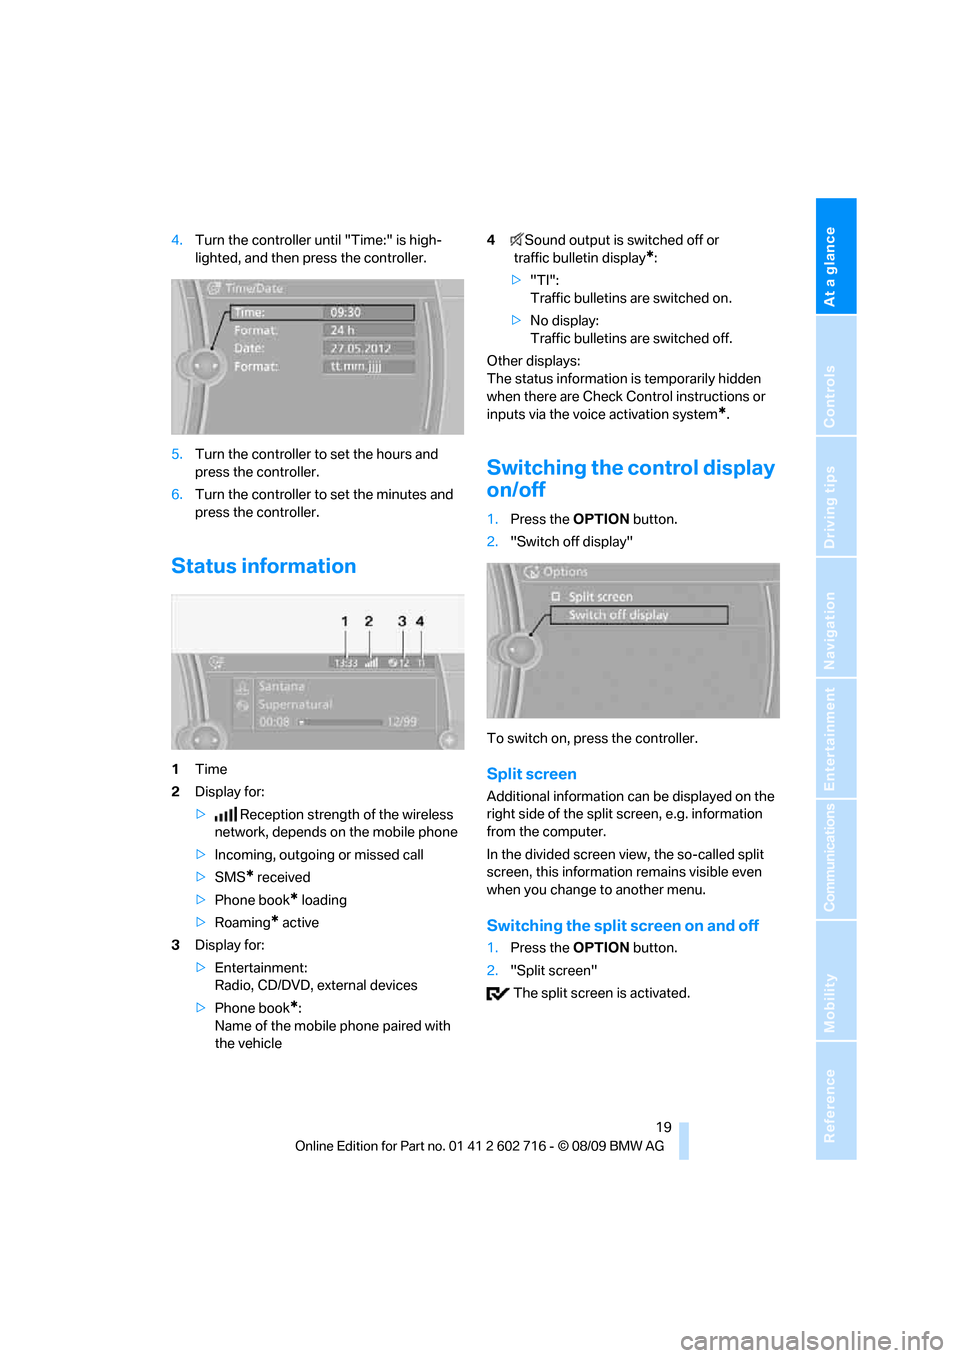
4.Turn the controller until "Time:" is high-
lighted, and then press the controller.
5.Turn the controller to set the hours and
press the controller.
6.Turn the controller to set the minutes and
press the controller.
Status information
1Time
2Display for:
>Reception strength of the wireless
network, depends on the mobile phone
>Incoming, outgoing or missed call
>SMS
* received
>Phone book
* loading
>Roaming
* active
3Display for:
>Entertainment:
Radio, CD/DVD, external devices
>Phone book
*:
Name of the mobile phone paired with
the vehicle4Sound output is switched off or
traffic bulletin display
*:
>"TI":
Traffic bulletins are switched on.
>No display:
Traffic bulletins are switched off.
Other displays:
The status information is temporarily hidden
when there are Check Control instructions or
inputs via the voice activation system
*.
Switching the control display
on/off
1.Press the OPTION button.
2."Switch off display"
To switch on, press the controller.
Split screen
Additional information can be displayed on the
right side of the split screen, e.g. information
from the computer.
In the divided screen view, the so-called split
screen, this information remains visible even
when you change to another menu.
Switching the split screen on and off
1.Press the OPTION button.
2."Split screen"
The split screen is activated.
Page 25 of 252
At a glance
23Reference
Controls
Driving tips
Communications
Navigation
Entertainment
Mobility
In dialogs that call for a text of your choice, the
procedure can only be canceled using the but-
ton on the steering wheel.
Possible commands
The commands available in each case depend
on the menu item selected on the Control Dis-
play.
To have the possible commands read aloud:
For example, if "CD/DVD" is selected, the com-
mands for operating CD/Multimedia are read
aloud.
Calling up functions immediately via
short commands
Short commands enable you to perform certain
functions immediately, irrespective of which
menu item is selected, refer to page228.
An example: selecting the track of a CD
1.Switch on Entertainment sound output if
necessary.
2.Press the button on the steering wheel.
Setting the voice dialog
You can set whether the system should use the
standard dialog or a shorter variant. In the
shorter variant of the voice dialog, the prompts
and responses from the system are abbrevi-
ated.
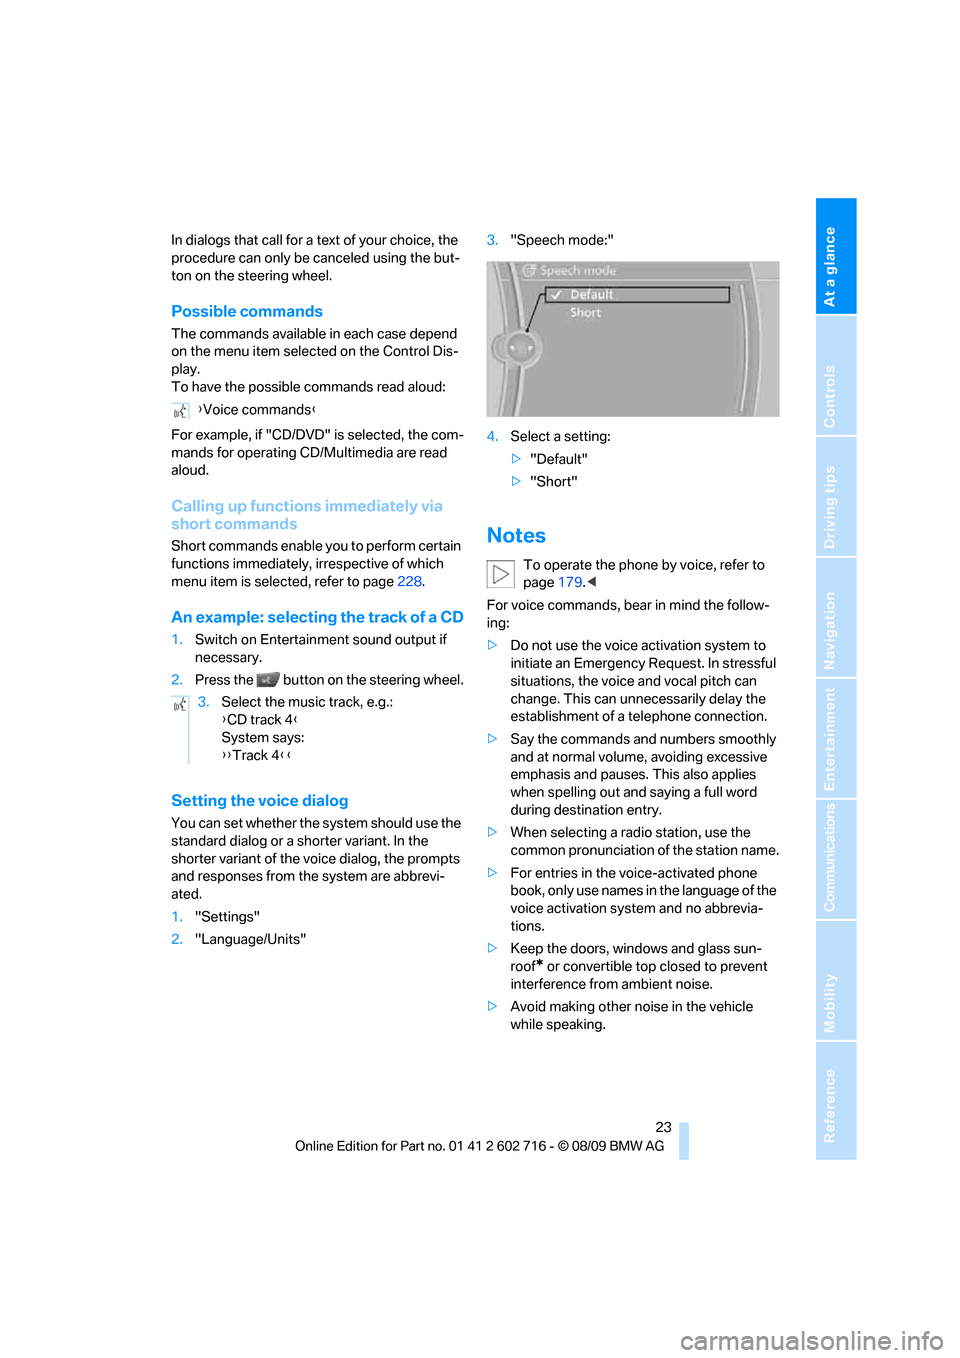
1."Settings"
2."Language/Units"3."Speech mode:"
4.Select a setting:
>"Default"
>"Short"
Notes
To operate the phone by voice, refer to
page179.<
For voice commands, bear in mind the follow-
ing:
>Do not use the voice activation system to
initiate an Emergency Request. In stressful
situations, the voice and vocal pitch can
change. This can unnecessarily delay the
establishment of a telephone connection.
>Say the commands and numbers smoothly
and at normal volume, avoiding excessive
emphasis and pauses. This also applies
when spelling out and saying a full word
during destination entry.
>When selecting a radio station, use the
common pronunciation of the station name.
>For entries in the voice-activated phone
book, only use names in the language of the
voice activation system and no abbrevia-
tions.
>Keep the doors, windows and glass sun-
roof
* or convertible top closed to prevent
interference from ambient noise.
>Avoid making other noise in the vehicle
while speaking. {Voice commands}
3.Select the music track, e.g.:
{CD track 4}
System says:
{{Track 4}}
Page 35 of 252
Controls
33Reference
At a glance
Driving tips
Communications
Navigation
Entertainment
Mobility
Alarm system
The concept
The vehicle alarm system responds:
>To the opening of a door, the hood, or the
luggage compartment lid
>To movements in the vehicle interior: inte-
rior motion sensor, refer to page33
>To changes in the vehicle's tilt if someone
attempts to steal the wheels or tow the
vehicle
>To interruptions in battery voltage
Unauthorized operations are briefly signaled by
the alarm system:
>with an acoustic alarm
>by switching on
the hazard warning flashers
>by flashing the high beams
Arming and disarming alarm system
When you lock or unlock the vehicle, either with
the remote control or at the door lock, the alarm
system is armed or disarmed at the same time.
You can open the luggage compartment lid,
even with the system armed, by using the
button of the remote control, refer to
page28. When the luggage compartment lid is
closed, it is once again locked and monitored.
Switching off alarm
>Unlock the vehicle using the remote control,
refer to page28, or
>insert the remote control all the way into the
ignition lock.
Indicator lamp displays
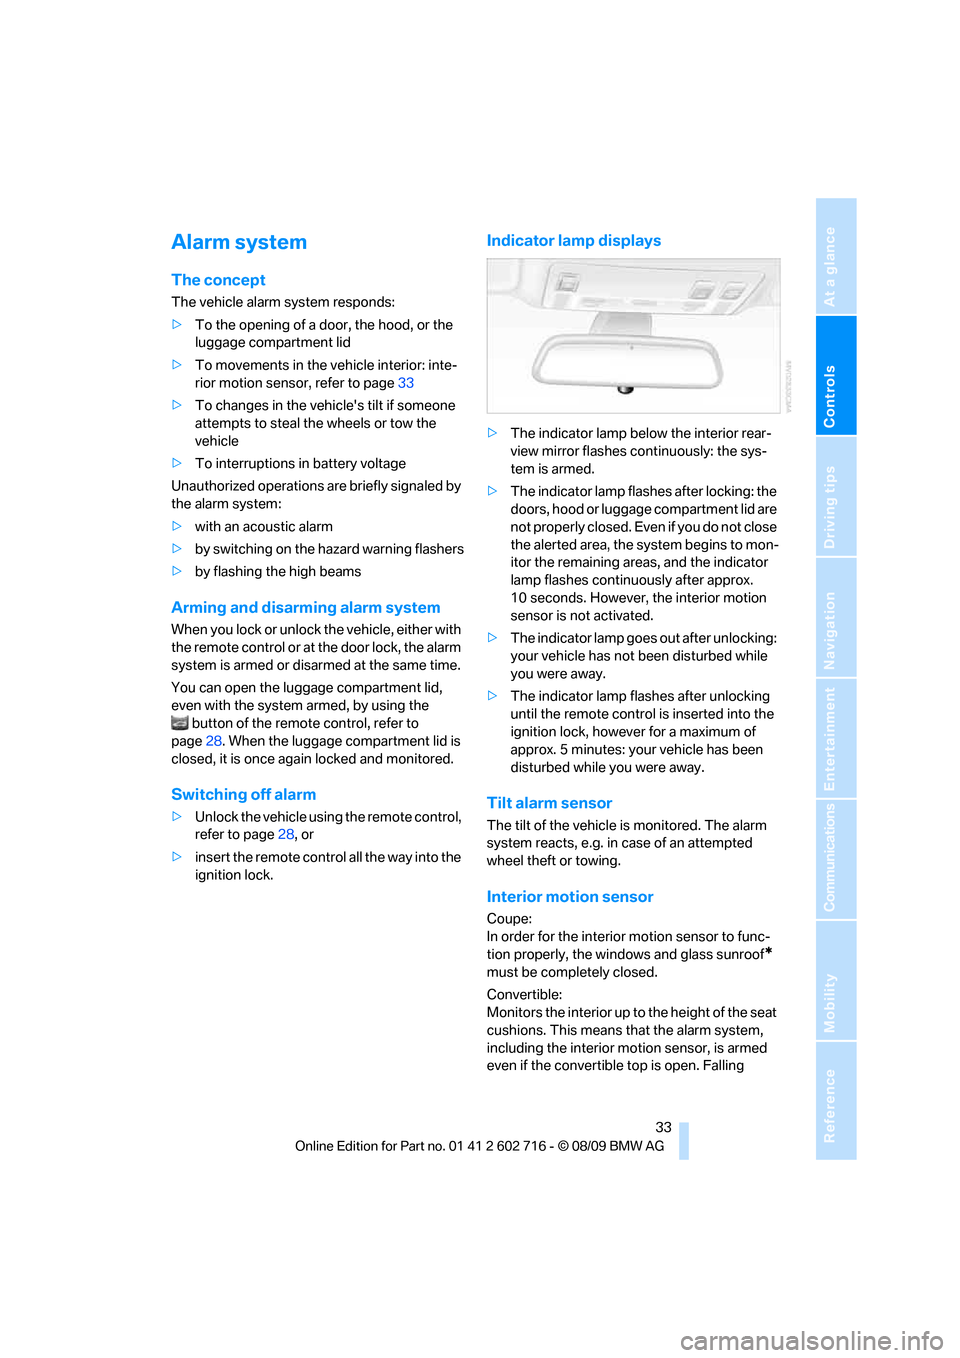
>The indicator lamp below the interior rear-
view mirror flashes continuously: the sys-
tem is armed.
>The indicator lamp flashes after locking: the
doors, hood or luggage compartment lid are
not properly closed. Even if you do not close
the alerted area, the system begins to mon-
itor the remaining areas, and the indicator
lamp flashes continuously after approx.
10 seconds. However, the interior motion
sensor is not activated.
>The indicator lamp goes out after unlocking:
your vehicle has not been disturbed while
you were away.
>The indicator lamp flashes after unlocking
until the remote control is inserted into the
ignition lock, however for a maximum of
approx. 5 minutes: your vehicle has been
disturbed while you were away.
Tilt alarm sensor
The tilt of the vehicle is monitored. The alarm
system reacts, e.g. in case of an attempted
wheel theft or towing.
Interior motion sensor
Coupe:
In order for the interior motion sensor to func-
tion properly, the windows and glass sunroof
*
must be completely closed.
Convertible:
Monitors the interior up to the height of the seat
cushions. This means that the alarm system,
including the interior motion sensor, is armed
even if the convertible top is open. Falling
Page 66 of 252
Driving
64
Maintaining, storing and increasing
speed
Press lever to resistance point, arrow 1:
The speed currently being driven is maintained
and stored. The display1 in the speedometer,
see below, indicates this regulated speed.
Every time you press the lever, the vehicle's
speed increases by roughly 1 mph/1 km/h.
Press lever to resistance point for a longer time:
The vehicle accelerates without pressure on
the accelerator pedal. The system maintains
and stores your current speed as soon as you
release the lever.
Press the lever beyond the resistance point:
The speed is increased to the next fives posi-
tion in the mph display or the next tens position
in the km/h display.
Press and hold the lever beyond the resistance
point:
The vehicle accelerates more quickly.
Maintaining speed, storing speed, and
decelerating
Pull the lever, arrow2:
Functions are the same as1; the speed is
reduced.
Interrupting system
Press the lever up or down, arrow3.
The display1 in the speedometer changes
color.
In addition, the system is interrupted:
>when you apply the brakes, even with the
parking brake
>when you shift very slowly, when you shift
the manual transmission into idling mode,
or when you shift the automatic transmis-
sion into the N position
>when DTC is activated or DSC is deacti-
vated
>when the DSC comes on
Resuming stored speed
Press button4:
The stored speed is resumed and maintained.
Deactivating system
>Press the lever up or down twice, arrow3
>Switch off the ignition
The speed stored in the memory is deleted.
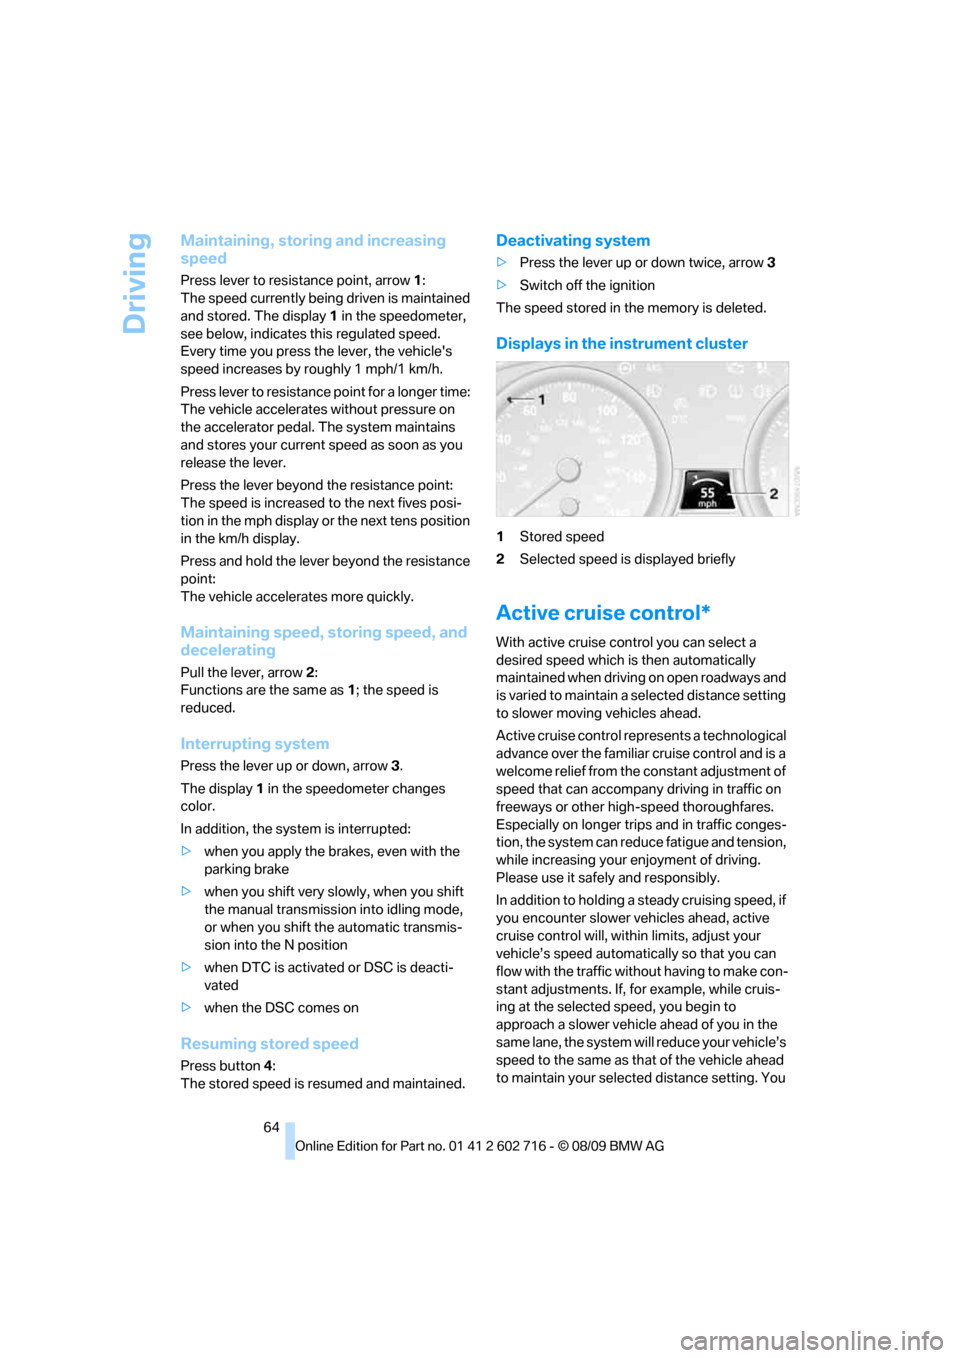
Displays in the instrument cluster
1Stored speed
2Selected speed is displayed briefly
Active cruise control*
With active cruise control you can select a
desired speed which is then automatically
maintained when driving on open roadways and
is varied to maintain a selected distance setting
to slower moving vehicles ahead.
Active cruise control represents a technological
advance over the familiar cruise control and is a
welcome relief from the constant adjustment of
speed that can accompany driving in traffic on
freeways or other high-speed thoroughfares.
Especially on longer trips and in traffic conges-
tion, the system can reduce fatigue and tension,
while increasing your enjoyment of driving.
Please use it safely and responsibly.
In addition to holding a steady cruising speed, if
you encounter slower vehicles ahead, active
cruise control will, within limits, adjust your
vehicle’s speed automatically so that you can
flow with the traffic without having to make con-
stant adjustments. If, for example, while cruis-
ing at the selected speed, you begin to
approach a slower vehicle ahead of you in the
same lane, the system will reduce your vehicle’s
speed to the same as that of the vehicle ahead
to maintain your selected distance setting. You
Page 69 of 252
Controls
67Reference
At a glance
Driving tips
Communications
Navigation
Entertainment
Mobility
Use good judgment to select the appro-
priate following distance, given road con-
ditions, traffic, applicable laws and state driving
recommendations for safe following distance.
Otherwise, a violation of the law or risk of an
accident could result.<
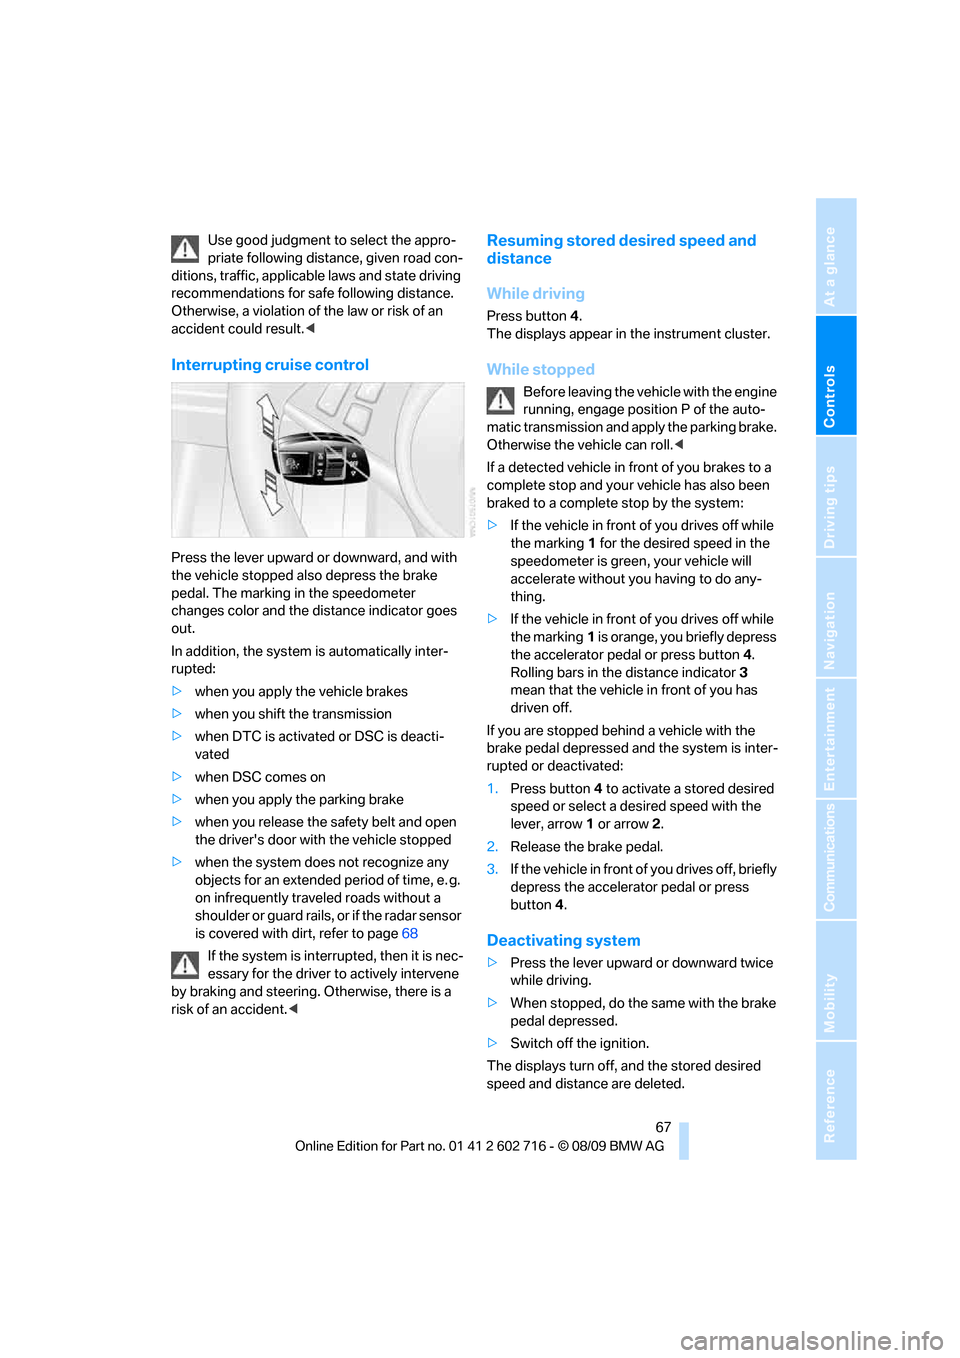
Interrupting cruise control
Press the lever upward or downward, and with
the vehicle stopped also depress the brake
pedal. The marking in the speedometer
changes color and the distance indicator goes
out.
In addition, the system is automatically inter-
rupted:
>when you apply the vehicle brakes
>when you shift the transmission
>when DTC is activated or DSC is deacti-
vated
>when DSC comes on
>when you apply the parking brake
>when you release the safety belt and open
the driver's door with the vehicle stopped
>when the system does not recognize any
objects for an extended period of time, e. g.
on infrequently traveled roads without a
shoulder or guard rails, or if the radar sensor
is covered with dirt, refer to page68
If the system is interrupted, then it is nec-
essary for the driver to actively intervene
by braking and steering. Otherwise, there is a
risk of an accident.<
Resuming stored desired speed and
distance
While driving
Press button4.
The displays appear in the instrument cluster.
While stopped
Before leaving the vehicle with the engine
running, engage position P of the auto-
matic transmission and apply the parking brake.
Otherwise the vehicle can roll.<
If a detected vehicle in front of you brakes to a
complete stop and your vehicle has also been
braked to a complete stop by the system:
>If the vehicle in front of you drives off while
the marking1 for the desired speed in the
speedometer is green, your vehicle will
accelerate without you having to do any-
thing.
>If the vehicle in front of you drives off while
the marking1 is orange, you briefly depress
the accelerator pedal or press button4.
Rolling bars in the distance indicator3
mean that the vehicle in front of you has
driven off.
If you are stopped behind a vehicle with the
brake pedal depressed and the system is inter-
rupted or deactivated:
1.Press button4 to activate a stored desired
speed or select a desired speed with the
lever, arrow1 or arrow2.
2.Release the brake pedal.
3.If the vehicle in front of you drives off, briefly
depress the accelerator pedal or press
button4.
Deactivating system
>Press the lever upward or downward twice
while driving.
>When stopped, do the same with the brake
pedal depressed.
>Switch off the ignition.
The displays turn off, and the stored desired
speed and distance are deleted.
Page 76 of 252
Controls Overview
74
For different routes
You can display the average speed and average
fuel consumption for two different routes on the
Control Display, refer to the following and to
Trip computer.
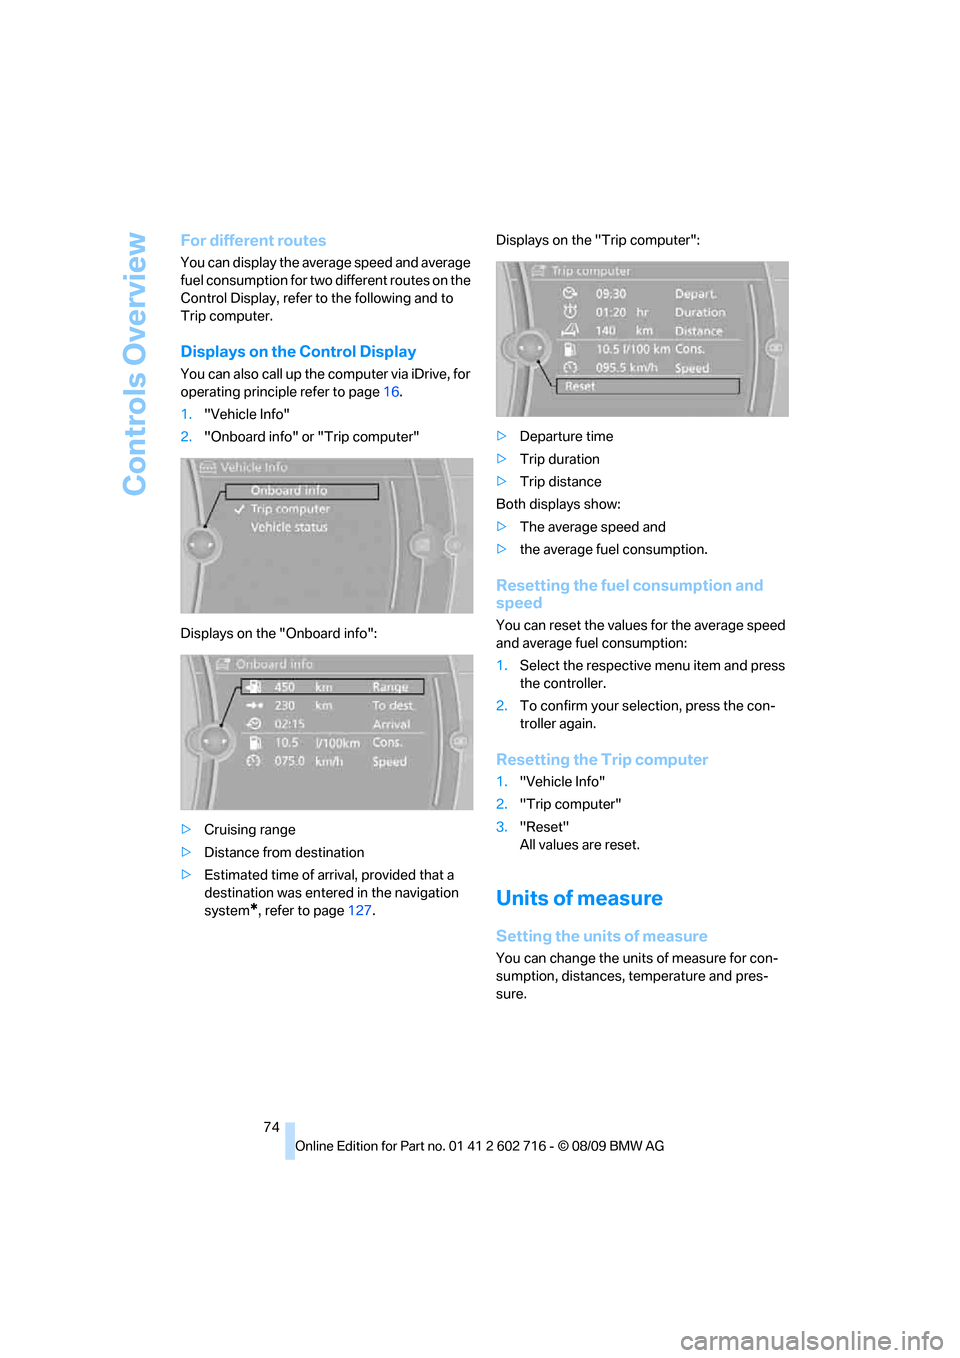
Displays on the Control Display
You can also call up the computer via iDrive, for
operating principle refer to page16.
1."Vehicle Info"
2."Onboard info" or "Trip computer"
Displays on the "Onboard info":
>Cruising range
>Distance from destination
>Estimated time of arrival, provided that a
destination was entered in the navigation
system
*, refer to page127.Displays on the "Trip computer":
>Departure time
>Trip duration
>Trip distance
Both displays show:
>The average speed and
>the average fuel consumption.
Resetting the fuel consumption and
speed
You can reset the values for the average speed
and average fuel consumption:
1.Select the respective menu item and press
the controller.
2.To confirm your selection, press the con-
troller again.
Resetting the Trip computer
1."Vehicle Info"
2."Trip computer"
3."Reset"
All values are reset.
Units of measure
Setting the units of measure
You can change the units of measure for con-
sumption, distances, temperature and pres-
sure.
Page 85 of 252
Controls
83Reference
At a glance
Driving tips
Communications
Navigation
Entertainment
Mobility
System limits
Even with PDC, final responsibility for
estimating the distance between the
vehicle and any obstacles always remains with
the driver. Even when sensors are provided,
there is a blind spot in which objects can no
longer be detected. The system is also subject
to the physical limits that apply to all forms of
ultrasonic measurement, such as those
encountered with tow bars and trailer cou-
plings, or thin and wedge-shaped objects etc.
Low objects already displayed, e. g. curbs, can
also disappear from the detection area of the
sensors again before or after a continuous tone
already sounds. Higher, protruding objects, e.g.
ledges, cannot be detected. For this reason,
drive with care; otherwise, there is a danger of
personal injury or property damage.
Loud sources of sound, inside and outside the
vehicle, could drown out the PDC signal tone.<
Driving stability control
systems
Your BMW is equipped with an extended array
of systems designed to enhance and maintain
vehicle stability under extreme conditions.
Antilock Brake System ABS
ABS prevents locking of the wheels during
braking. Safe steering response is maintained
even during full braking. Active safety is thus
increased.
The ABS is operational every time you start the
engine. For information on safe braking, refer to
page120.
CBC Cornering Brake Control
When braking during curves or when braking
during a lane change, driving stability and steer-
ing response are improved further.
Electronic brake-force distribution
The system controls the brake pressure in the
rear wheels to ensure stable braking behavior.
Brake assistant
When you apply the brakes rapidly, this system
produces maximum braking force boosting and
thus helps to achieve the shortest possible
braking distance during full braking maneuvers.
This system exploits all of the benefits provided
by ABS.
Do not reduce the pressure on the brake pedal
for the duration of the full braking.
Adaptive brake assistant*
In conjunction with the active cruise control
with the stop-and-go function, the adaptive
brake assistant ensures that the brake
responds even more quickly during braking
with the brake assistant.
DSC Dynamic Stability Control
DSC prevents traction loss in the driving wheels
when starting off and accelerating. The system
also identifies unstable driving conditions, such
as a loss of traction at the rear of the vehicle or
sliding of the vehicle in its front wheels. In these
cases, DSC helps the vehicle maintain a safe
course within physical limits by reducing engine
output and through braking actions in the indi-
vidual wheels.
The laws of physics cannot be repealed,
even with DSC. An appropriate driving
style always remains the responsibility of the
driver. Therefore, do not restrict the additional
safety margin with a risky driving style, as other-
wise there is a risk of an accident.<
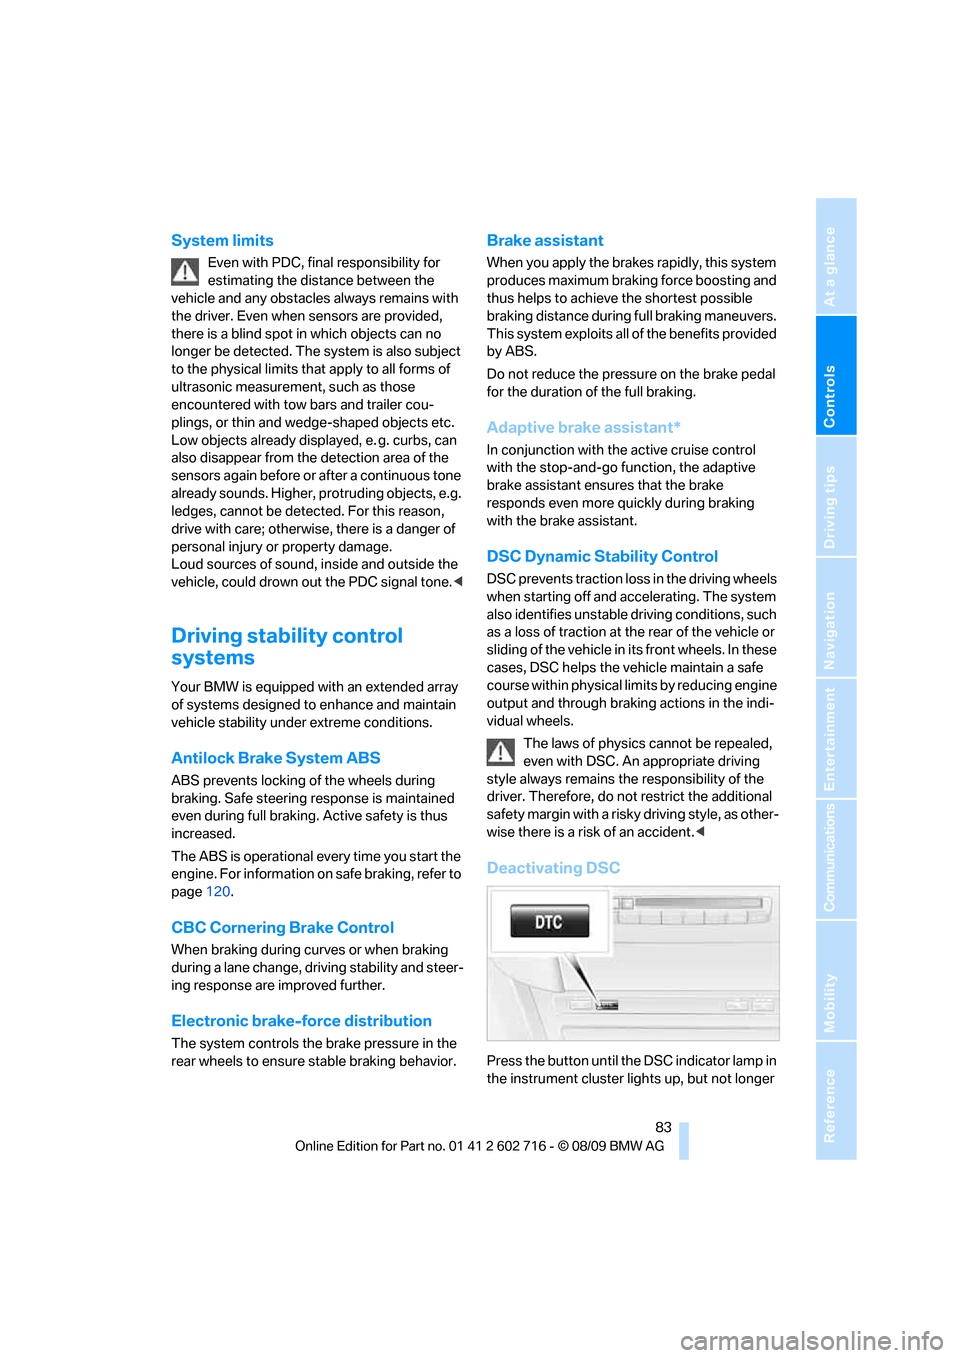
Deactivating DSC
Press the button until the DSC indicator lamp in
the instrument cluster lights up, but not longer
Page 87 of 252
Controls
85Reference
At a glance
Driving tips
Communications
Navigation
Entertainment
Mobility
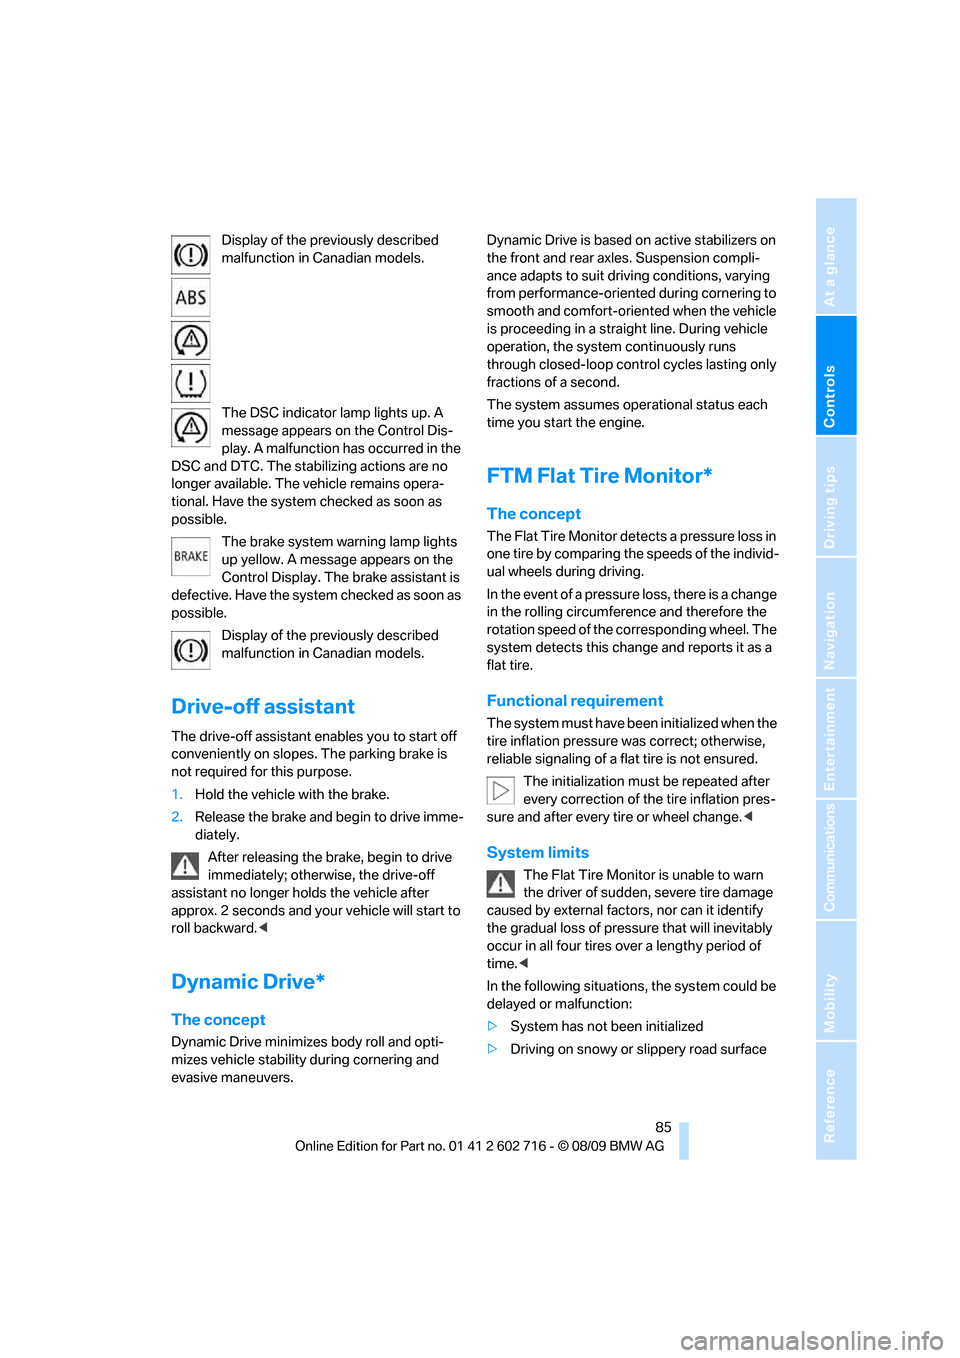
Display of the previously described
malfunction in Canadian models.
The DSC indicator lamp lights up. A
message appears on the Control Dis-
play. A malfunction has occurred in the
DSC and DTC. The stabilizing actions are no
longer available. The vehicle remains opera-
tional. Have the system checked as soon as
possible.
The brake system warning lamp lights
up yellow. A message appears on the
Control Display. The brake assistant is
defective. Have the system checked as soon as
possible.
Display of the previously described
malfunction in Canadian models.
Drive-off assistant
The drive-off assistant enables you to start off
conveniently on slopes. The parking brake is
not required for this purpose.
1.Hold the vehicle with the brake.
2.Release the brake and begin to drive imme-
diately.
After releasing the brake, begin to drive
immediately; otherwise, the drive-off
assistant no longer holds the vehicle after
approx. 2 seconds and your vehicle will start to
roll backward.<
Dynamic Drive*
The concept
Dynamic Drive minimizes body roll and opti-
mizes vehicle stability during cornering and
evasive maneuvers.Dynamic Drive is based on active stabilizers on
the front and rear axles. Suspension compli-
ance adapts to suit driving conditions, varying
from performance-oriented during cornering to
smooth and comfort-oriented when the vehicle
is proceeding in a straight line. During vehicle
operation, the system continuously runs
through closed-loop control cycles lasting only
fractions of a second.
The system assumes operational status each
time you start the engine.
FTM Flat Tire Monitor*
The concept
The Flat Tire Monitor detects a pressure loss in
one tire by comparing the speeds of the individ-
ual wheels during driving.
In the event of a pressure loss, there is a change
in the rolling circumference and therefore the
rotation speed of the corresponding wheel. The
system detects this change and reports it as a
flat tire.
Functional requirement
The system must have been initialized when the
tire inflation pressure was correct; otherwise,
reliable signaling of a flat tire is not ensured.
The initialization must be repeated after
every correction of the tire inflation pres-
sure and after every tire or wheel change.<
System limits
The Flat Tire Monitor is unable to warn
the driver of sudden, severe tire damage
caused by external factors, nor can it identify
the gradual loss of pressure that will inevitably
occur in all four tires over a lengthy period of
time.<
In the following situations, the system could be
delayed or malfunction:
>System has not been initialized
>Driving on snowy or slippery road surface
Page 88 of 252
Technology for comfort, convenience and safety
86 >Sporty driving style: slip in the drive wheels,
high lateral acceleration
>Driving with snow chains
*
Initializing system
The initialization finishes during driving,
which can be interrupted at any time.
When driving resumes, the initialization is con-
tinued automatically. The system is initialized
after this activation phase.
The initialization process adopts the set infla-
tion tire pressures as reference values for the
detection of a flat tire. Initialization is started by
confirming the inflation pressures.
The system is not initialized when traveling with
snow chains
*.<
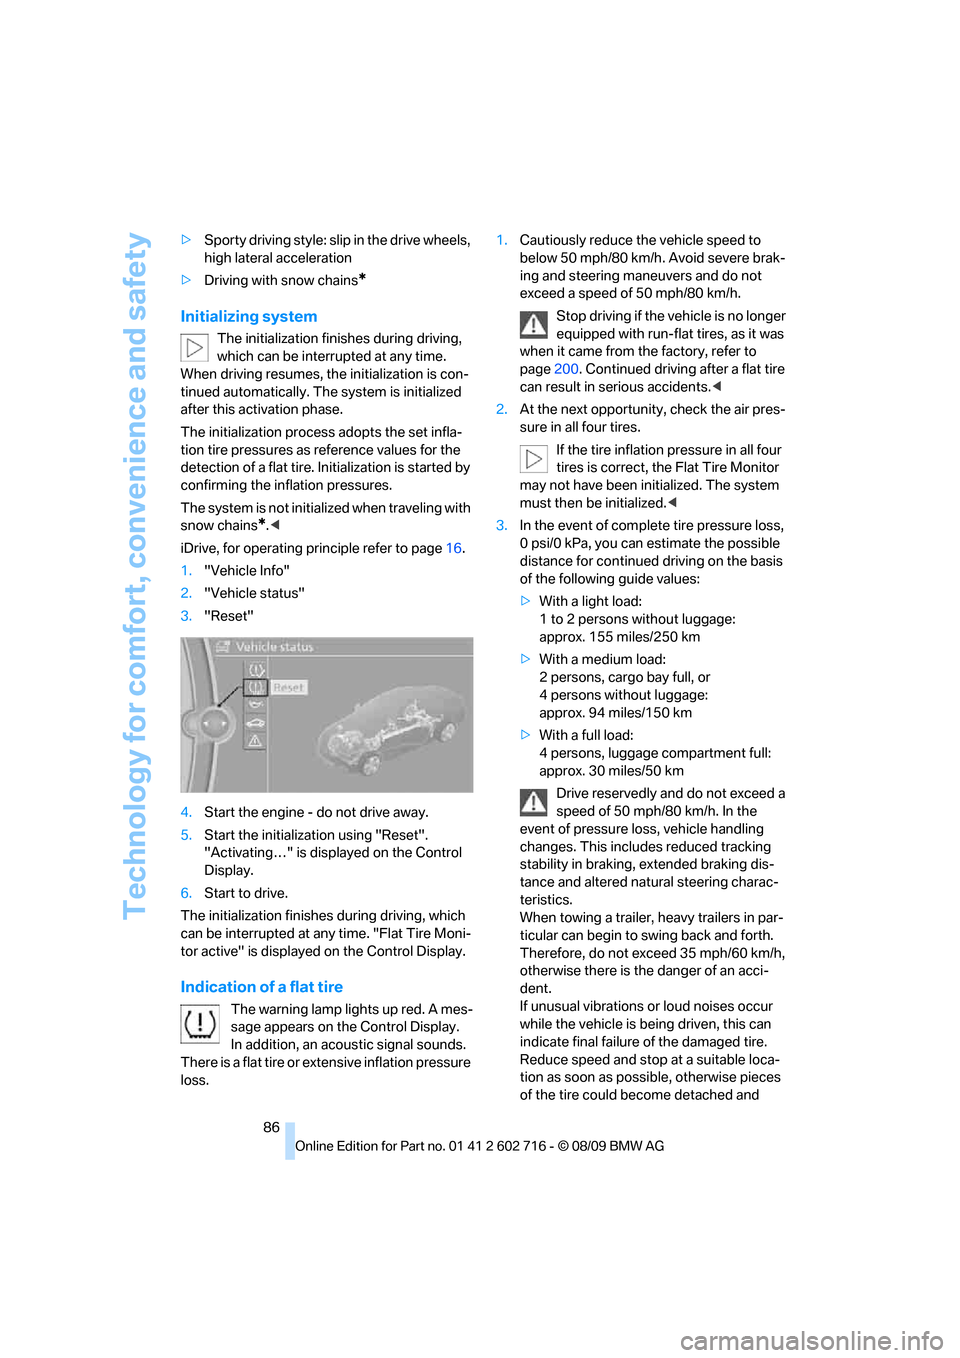
iDrive, for operating principle refer to page16.
1."Vehicle Info"
2."Vehicle status"
3."Reset"
4.Start the engine - do not drive away.
5.Start the initialization using "Reset".
"Activating…" is displayed on the Control
Display.
6.Start to drive.
The initialization finishes during driving, which
can be interrupted at any time. "Flat Tire Moni-
tor active" is displayed on the Control Display.
Indication of a flat tire
The warning lamp lights up red. A mes-
sage appears on the Control Display.
In addition, an acoustic signal sounds.
There is a flat tire or extensive inflation pressure
loss.1.Cautiously reduce the vehicle speed to
below 50 mph/80 km/h. Avoid severe brak-
ing and steering maneuvers and do not
exceed a speed of 50 mph/80 km/h.
Stop driving if the vehicle is no longer
equipped with run-flat tires, as it was
when it came from the factory, refer to
page200. Continued driving after a flat tire
can result in serious accidents.<
2.At the next opportunity, check the air pres-
sure in all four tires.
If the tire inflation pressure in all four
tires is correct, the Flat Tire Monitor
may not have been initialized. The system
must then be initialized.<
3.In the event of complete tire pressure loss,
0 psi/0 kPa, you can estimate the possible
distance for continued driving on the basis
of the following guide values:
>With a light load:
1 to 2 persons without luggage:
approx. 155 miles/250 km
>With a medium load:
2 persons, cargo bay full, or
4 persons without luggage:
approx. 94 miles/150 km
>With a full load:
4 persons, luggage compartment full:
approx. 30 miles/50 km
Drive reservedly and do not exceed a
speed of 50 mph/80 km/h. In the
event of pressure loss, vehicle handling
changes. This includes reduced tracking
stability in braking, extended braking dis-
tance and altered natural steering charac-
teristics.
When towing a trailer, heavy trailers in par-
ticular can begin to swing back and forth.
Therefore, do not exceed 35 mph/60 km/h,
otherwise there is the danger of an acci-
dent.
If unusual vibrations or loud noises occur
while the vehicle is being driven, this can
indicate final failure of the damaged tire.
Reduce speed and stop at a suitable loca-
tion as soon as possible, otherwise pieces
of the tire could become detached and