remote start BMW 650I XDRIVE CONVERTIBLE 2013 Owners Manual
[x] Cancel search | Manufacturer: BMW, Model Year: 2013, Model line: 650I XDRIVE CONVERTIBLE, Model: BMW 650I XDRIVE CONVERTIBLE 2013Pages: 240, PDF Size: 9.64 MB
Page 31 of 240
Take the used battery to a recycling cen‐
ter or to your service center.
New remote controls
You can obtain new remote controls from your
service center.
Loss of the remote controls
Lost remote controls can be blocked by your
service center.
Emergency detection of remote control
It is possible to switch on the ignition or start the
engine in situations such as the following:▷Interference of radio transmission to remote
control by external sources.▷Discharged battery in the remote control.▷Interference of radio transmission by mobile
devices in close proximity to the remote
control.▷Interference of radio transmission by
charger while charging items such as mobile
devices in the vehicle.
A Check Control message is displayed if an at‐
tempt is made to switch on the ignition or start
the engine.
Starting the engine in case of
emergency detection of remote control
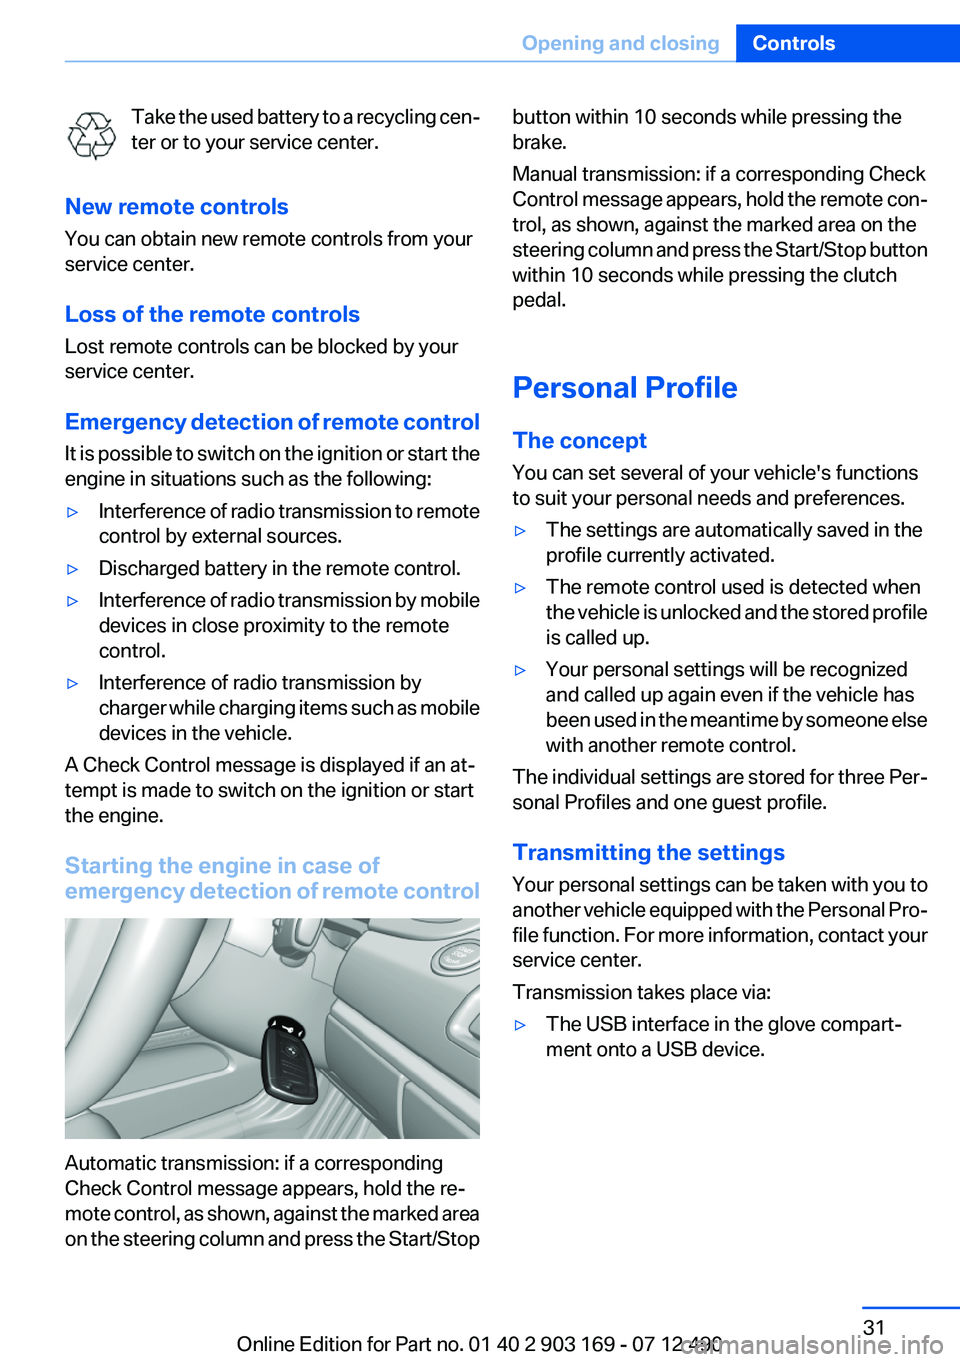
Automatic transmission: if a corresponding
Check Control message appears, hold the re‐
mote control, as shown, against the marked area
on the steering column and press the Start/Stop
button within 10 seconds while pressing the
brake.
Manual transmission: if a corresponding Check
Control message appears, hold the remote con‐
trol, as shown, against the marked area on the
steering column and press the Start/Stop button
within 10 seconds while pressing the clutch
pedal.
Personal Profile
The concept
You can set several of your vehicle's functions
to suit your personal needs and preferences.▷The settings are automatically saved in the
profile currently activated.▷The remote control used is detected when
the vehicle is unlocked and the stored profile
is called up.▷Your personal settings will be recognized
and called up again even if the vehicle has
been used in the meantime by someone else
with another remote control.
The individual settings are stored for three Per‐
sonal Profiles and one guest profile.
Transmitting the settings
Your personal settings can be taken with you to
another vehicle equipped with the Personal Pro‐
file function. For more information, contact your
service center.
Transmission takes place via:
▷The USB interface in the glove compart‐
ment onto a USB device.Seite 31Opening and closingControls31
Online Edition for Part no. 01 40 2 903 169 - 07 12 490
Page 38 of 240
Automatic locking
The setting is stored for the remote control cur‐
rently in use.1."Settings"2."Door locks"3.Select the desired function:▷"Lock if no door is opened"
The vehicle locks automatically after a
short period of time if a door is not
opened.▷"Lock after start. to drive"
The vehicle locks automatically after
you drive away.
Doors
Automatic Soft Closing
To close the doors, push lightly.
It is closed automatically.
Danger of pinching
Make sure that the closing path of the
doors is clear; otherwise, injuries may result.◀
Trunk lid
Opening
During opening, the trunk lid pivots back and up.
Ensure that adequate clearance is available be‐
fore opening.
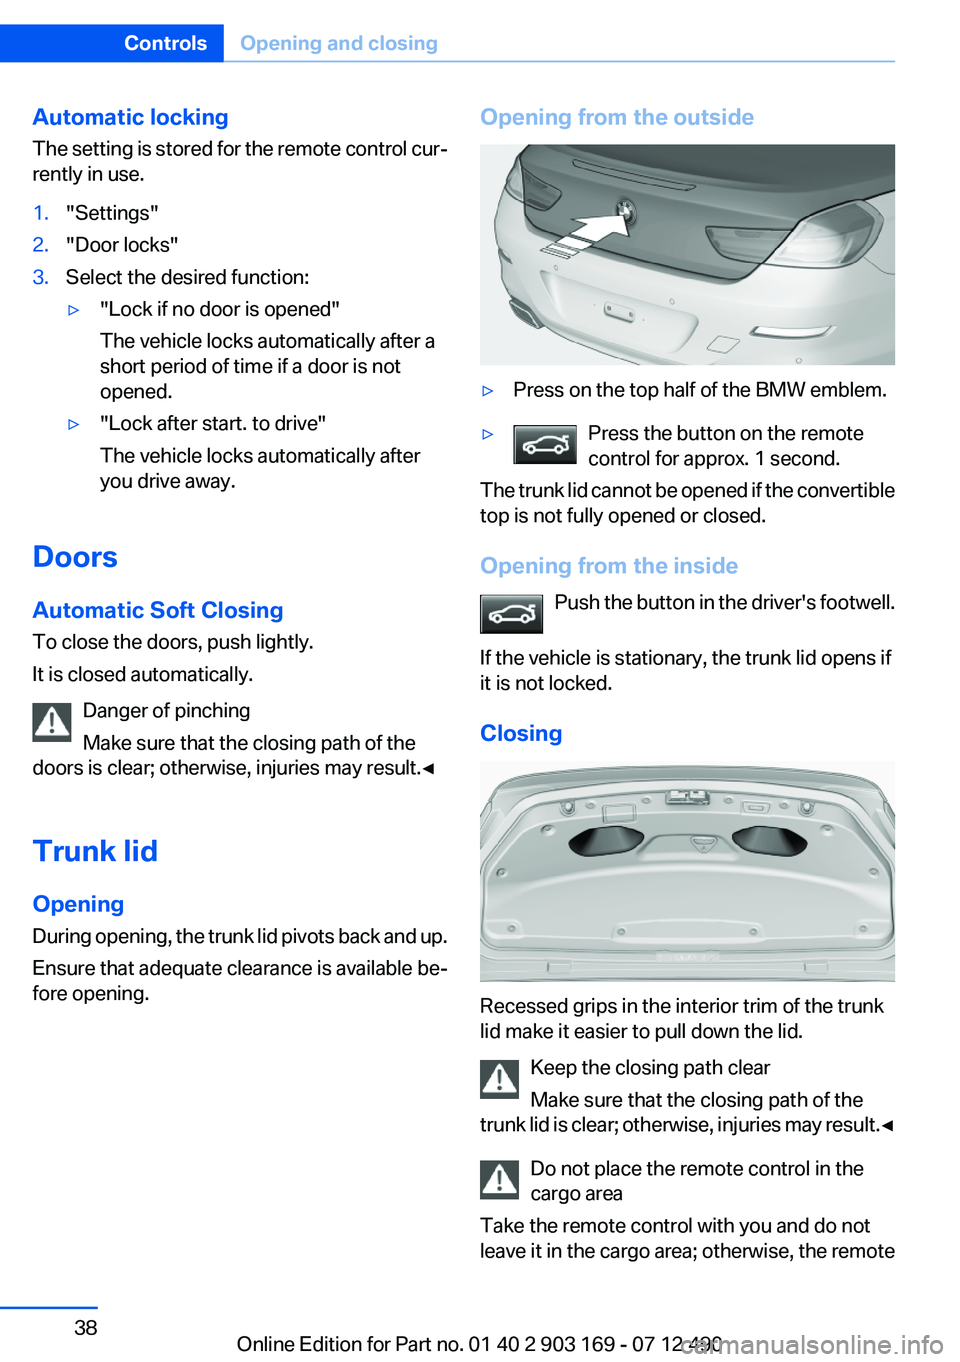
Opening from the outside▷Press on the top half of the BMW emblem.▷Press the button on the remote
control for approx. 1 second.
The trunk lid cannot be opened if the convertible
top is not fully opened or closed.
Opening from the inside Push the button in the driver's footwell.
If the vehicle is stationary, the trunk lid opens if
it is not locked.
Closing
Recessed grips in the interior trim of the trunk
lid make it easier to pull down the lid.
Keep the closing path clear
Make sure that the closing path of the
trunk lid is clear; otherwise, injuries may result. ◀
Do not place the remote control in the
cargo area
Take the remote control with you and do not
leave it in the cargo area; otherwise, the remote
Seite 38ControlsOpening and closing38
Online Edition for Part no. 01 40 2 903 169 - 07 12 490
Page 39 of 240
control is locked inside the vehicle when the
trunk lid is closed.◀
Locking the vehicle
Press the button on the inside of the trunk lid.
When the driver's door is closed, the vehicle is
completely locked.
Locking separately
The trunk lid can be locked separately using the
switch in the center armrest.
▷Trunk lid secured, arrow 1.▷Trunk lid not secured, ar‐
row 2.
Slide the switch into the arrow 1 position. This
secures the trunk lid and disconnects it from the
central locking system.
When the center armrest is locked with the
integrated key, the trunk lid cannot be opened.
This is beneficial when the vehicle is parked us‐
ing valet service. The infrared remote control
can be handed out without the key.
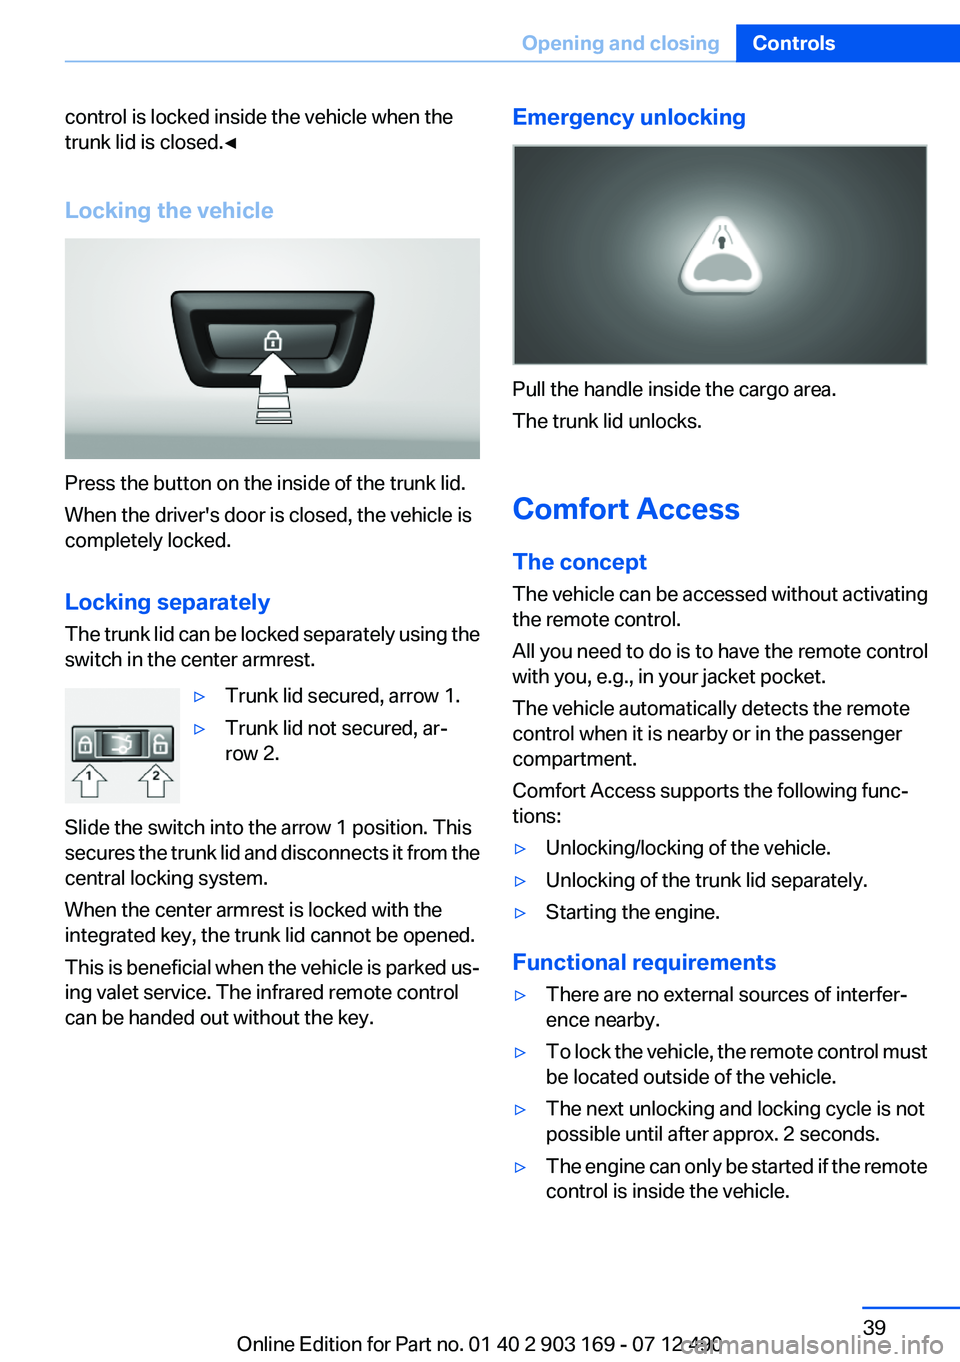
Emergency unlocking
Pull the handle inside the cargo area.
The trunk lid unlocks.
Comfort Access
The concept
The vehicle can be accessed without activating
the remote control.
All you need to do is to have the remote control
with you, e.g., in your jacket pocket.
The vehicle automatically detects the remote
control when it is nearby or in the passenger
compartment.
Comfort Access supports the following func‐
tions:
▷Unlocking/locking of the vehicle.▷Unlocking of the trunk lid separately.▷Starting the engine.
Functional requirements
▷There are no external sources of interfer‐
ence nearby.▷To lock the vehicle, the remote control must
be located outside of the vehicle.▷The next unlocking and locking cycle is not
possible until after approx. 2 seconds.▷The engine can only be started if the remote
control is inside the vehicle.Seite 39Opening and closingControls39
Online Edition for Part no. 01 40 2 903 169 - 07 12 490
Page 41 of 240
Door lock and armed alarm system
Unlocking via the door lock will trigger the alarm
on some country-specific versions.
In order to terminate this alarm, unlock vehicle
with the remote control or switch on the ignition,
if necessary, by emergency detection of the re‐
mote control.
Trunk lid and armed alarm system
The trunk lid can be opened using the remote
control, even if the alarm system is armed.
Press the button on the remote control
for approx. 1 second.
After the trunk lid is closed, it is locked and
monitored again by the alarm system. The haz‐
ard warning system flashes once.
In some vehicle equipment variants, the trunk lid
can only be opened using the remote control if
the vehicle was unlocked first.
Panic mode Press the button on the remote control
for at least 3 seconds.
Switching off the alarm▷Unlock the vehicle using the remote control.▷With Comfort Access: if you are carrying the
remote control with you, pull on the door
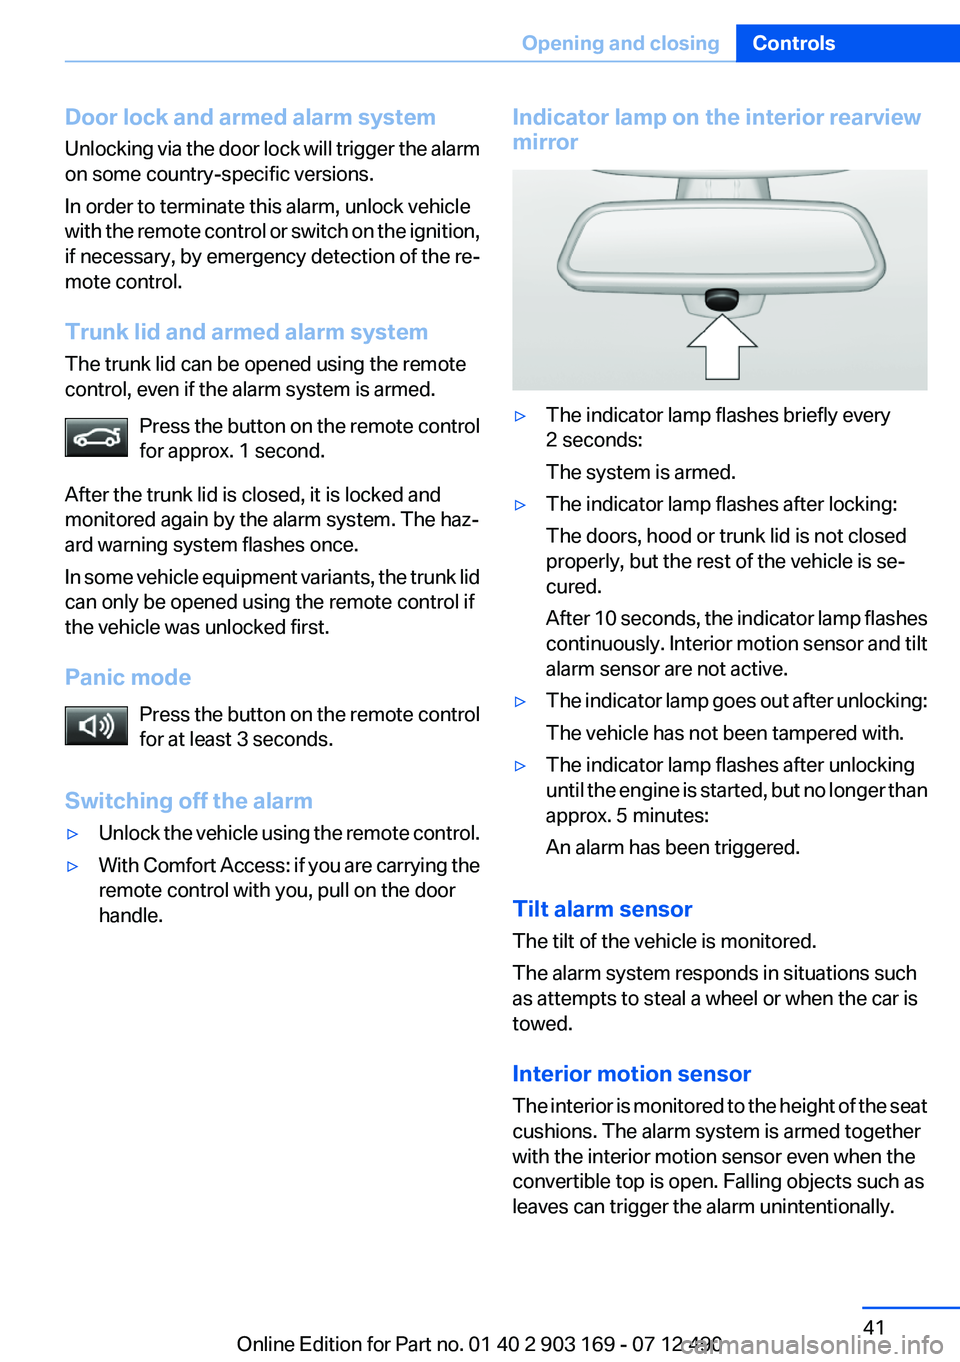
handle.Indicator lamp on the interior rearview
mirror▷The indicator lamp flashes briefly every
2 seconds:
The system is armed.▷The indicator lamp flashes after locking:
The doors, hood or trunk lid is not closed
properly, but the rest of the vehicle is se‐
cured.
After 10 seconds, the indicator lamp flashes
continuously. Interior motion sensor and tilt
alarm sensor are not active.▷The indicator lamp goes out after unlocking:
The vehicle has not been tampered with.▷The indicator lamp flashes after unlocking
until the engine is started, but no longer than
approx. 5 minutes:
An alarm has been triggered.
Tilt alarm sensor
The tilt of the vehicle is monitored.
The alarm system responds in situations such
as attempts to steal a wheel or when the car is
towed.
Interior motion sensor
The interior is monitored to the height of the seat
cushions. The alarm system is armed together
with the interior motion sensor even when the
convertible top is open. Falling objects such as
leaves can trigger the alarm unintentionally.
Seite 41Opening and closingControls41
Online Edition for Part no. 01 40 2 903 169 - 07 12 490
Page 57 of 240
Two different driver's seat, exterior mirror, and
steering wheel positions can be stored and re‐
trieved for each remote control. The adjustment
of the lumbar support is not stored.
Storing1.Switch on the ignition.2.Set the desired position.3. Press the button. The LED in the
button lights up.4.Press the desired button 1 or 2. The LED
goes out.
If the M button is pressed accidentally:
Press the button again.
The LED goes out.
Calling up settings Do not retrieve the memory while driving
Do not retrieve the memory setting while
driving, as an unexpected movement of the seat
or steering wheel could result in an accident.◀
Comfort function
1.Open the driver's door.2.Switch off the ignition.3.Briefly press the desired button 1 or 2.
The corresponding seat position is performed
automatically.
The procedure stops when a switch for adjust‐
ing the seat or one of the buttons is pressed.
Safety mode
1.Close the driver's door or switch on the ig‐
nition.2.Press and hold the desired button 1 or 2 until
the adjustment procedure is completed.Calling up of a seat position
deactivated
After a brief period, the calling up of stored seat
positions is deactivated to save battery power.
To reactivate calling up of a seat position:▷Open or close the door or trunk lid.▷Press a button on the remote control.▷Press the Start/Stop button.
Mirrors
Exterior mirrors
At a glance
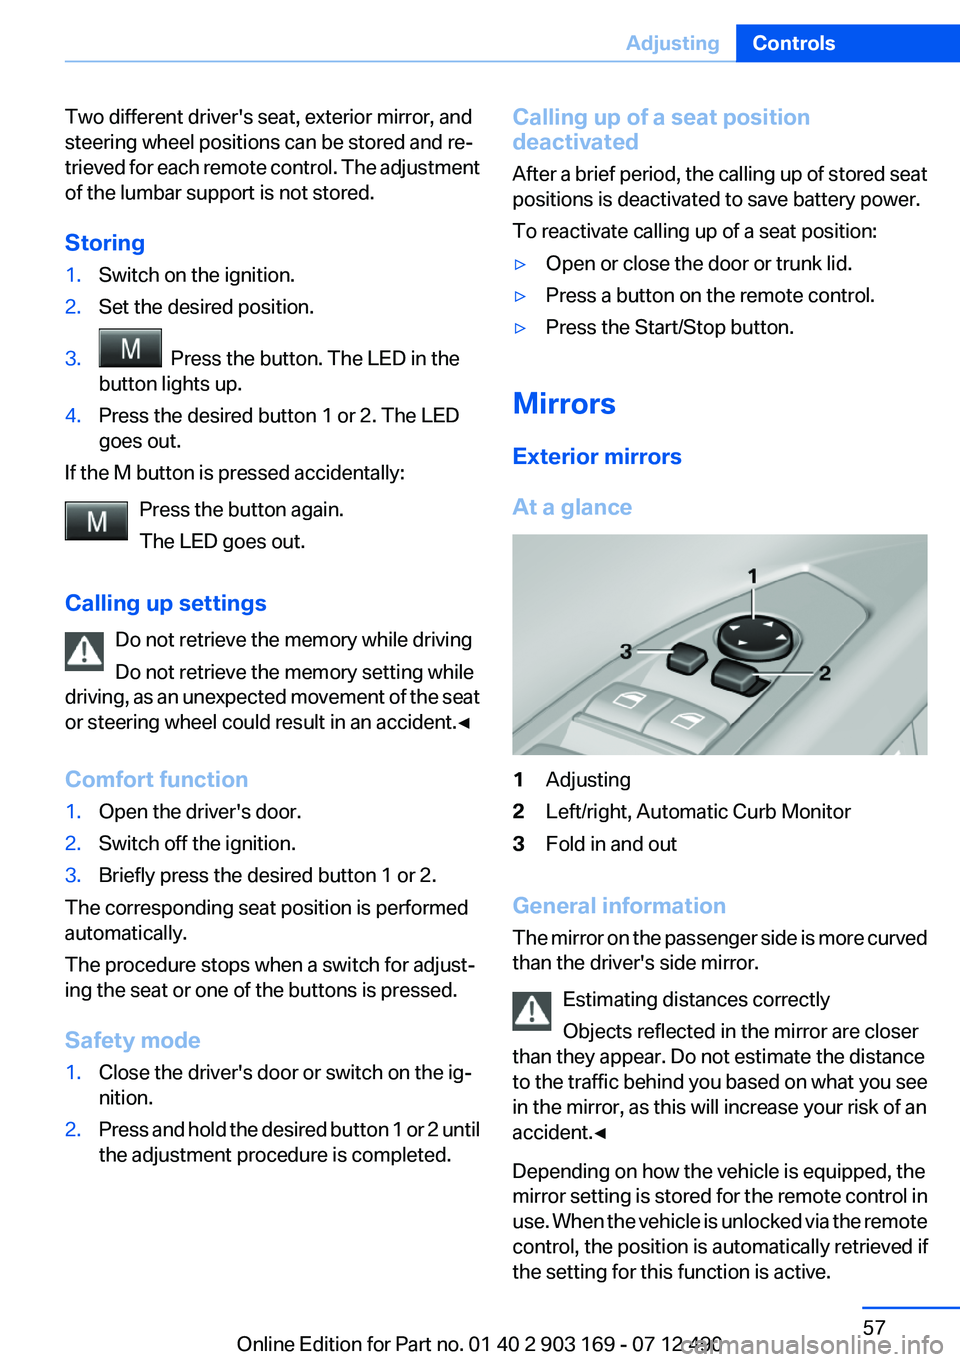
1Adjusting2Left/right, Automatic Curb Monitor3Fold in and out
General information
The mirror on the passenger side is more curved
than the driver's side mirror.
Estimating distances correctly
Objects reflected in the mirror are closer
than they appear. Do not estimate the distance
to the traffic behind you based on what you see
in the mirror, as this will increase your risk of an
accident.◀
Depending on how the vehicle is equipped, the
mirror setting is stored for the remote control in
use. When the vehicle is unlocked via the remote
control, the position is automatically retrieved if
the setting for this function is active.
Seite 57AdjustingControls57
Online Edition for Part no. 01 40 2 903 169 - 07 12 490
Page 64 of 240
▷While the driver's seat belt is unbuckled, if
the driver's door is open and the low beams
are switched off.
When the ignition is switched off, by opening or
closing the driver's door or unbuckling the driv‐
er's seat belt, the radio ready state remains ac‐
tive.
Radio ready state
Activate radio ready state:
▷When the ignition is switched off: press ON/
OFF button on the radio.▷When the engine is running: press the Start/
Stop button.
Some electronic systems/power consumers re‐
main ready for operation.
Radio ready state switches off automatically:
▷After approx. 8 minutes.▷When the vehicle is locked using the central
locking system.▷Shortly before the battery is discharged
completely, so that the engine can still be
started.
Starting the engine
General information Enclosed areas
Do not let the engine run in enclosed
areas; otherwise, breathing of exhaust fumes
may lead to loss of consciousness and death.
The exhaust gases contain carbon monoxide, an
odorless and colorless but highly toxic gas.◀
Unattended vehicle
Do not leave the vehicle unattended with
the engine running; doing so poses a risk of dan‐
ger.
Before leaving the vehicle with the engine run‐
ning, set the parking brake and place the trans‐
mission in position P or neutral to prevent the
vehicle from moving.◀
Repeated starting in quick succession
Avoid repeated unsuccessful attempts to
start the vehicle or starting the vehicle several
times in quick succession. Otherwise, the fuel is
not burned or is inadequately burned, posing a
risk of overheating and damage to the catalytic
converter.◀
Do not wait for the engine to warm up while the
vehicle remains stationary. Start driving at mod‐
erate engine speeds.
Manual transmission
Starting the engine1.Depress the brake pedal.2.Press on the clutch and shift to neutral.3.Press the Start/Stop button.
The ignition is activated automatically for a cer‐
tain time and is stopped as soon as the engine
starts.
Automatic transmission
Starting the engine
1.Depress the brake pedal.2.Press the Start/Stop button.
The ignition is activated automatically for a cer‐
tain time and is stopped as soon as the engine
starts.
Engine stop
General information Take the remote control with you
Take the remote control with you when
leaving the vehicle so that children, for example,
cannot start the engine.◀
Set the parking brake and further secure
the vehicle as required
Set the parking brake firmly when parking; oth‐
erwise, the vehicle could roll. On steep upward
Seite 64ControlsDriving64
Online Edition for Part no. 01 40 2 903 169 - 07 12 490
Page 69 of 240
Activating
This function can be activated when the driver's
door is closed and the safety belt is fastened,
and while driving.
Press the button.
The LED and the letters AUTO H light
up.
The indicator lamp lights up.
Automatic Hold is activated.
Deactivating Press the button again.
The LED and the letters AUTO H go
out.
Automatic Hold is deactivated.
If the vehicle is being held by Automatic Hold,
press on the brake pedal to deactivate it.
When the parking brake is set manually, Auto‐
matic Hold is deactivated automatically.
Driving
Automatic Hold is activated: the vehicle is auto‐
matically secured against rolling after braking to
a standstill.
The indicator lamp lights up green.
Step on the accelerator pedal to drive
off.
The brake is released automatically.
The indicator lamp goes out.
Lower lamp: indicator lamp in Canadian models
Before driving into a car wash
Deactivate Automatic Hold; otherwise, the
parking brake will be set when the vehicle is sta‐
tionary and the vehicle will no longer be able to
roll.◀Parking
The parking brake is automatically set if the en‐
gine is switched off while the vehicle is being
held by Automatic Hold.
The indicator lamp changes from green
to red.
The parking brake is not set if the engine
is switched off while the vehicle is coast‐
ing to a halt. Automatic Hold is deacti‐
vated.
Lower lamp: indicator lamp in Canadian models
Automatic Hold remains activated during an en‐
gine stop brought about by the Auto Start/Stop
function.
Take the remote control with you
Take the remote control with you when
leaving the vehicle so that children, for example,
cannot release the parking brake.◀
Malfunction
In the event of a failure or malfunction of the
parking brake, secure the vehicle against rolling
using a wheel chock, for example, when leaving
it.
Turn signal, high beams,
headlamp flasher
Turn signal
Using turn signals
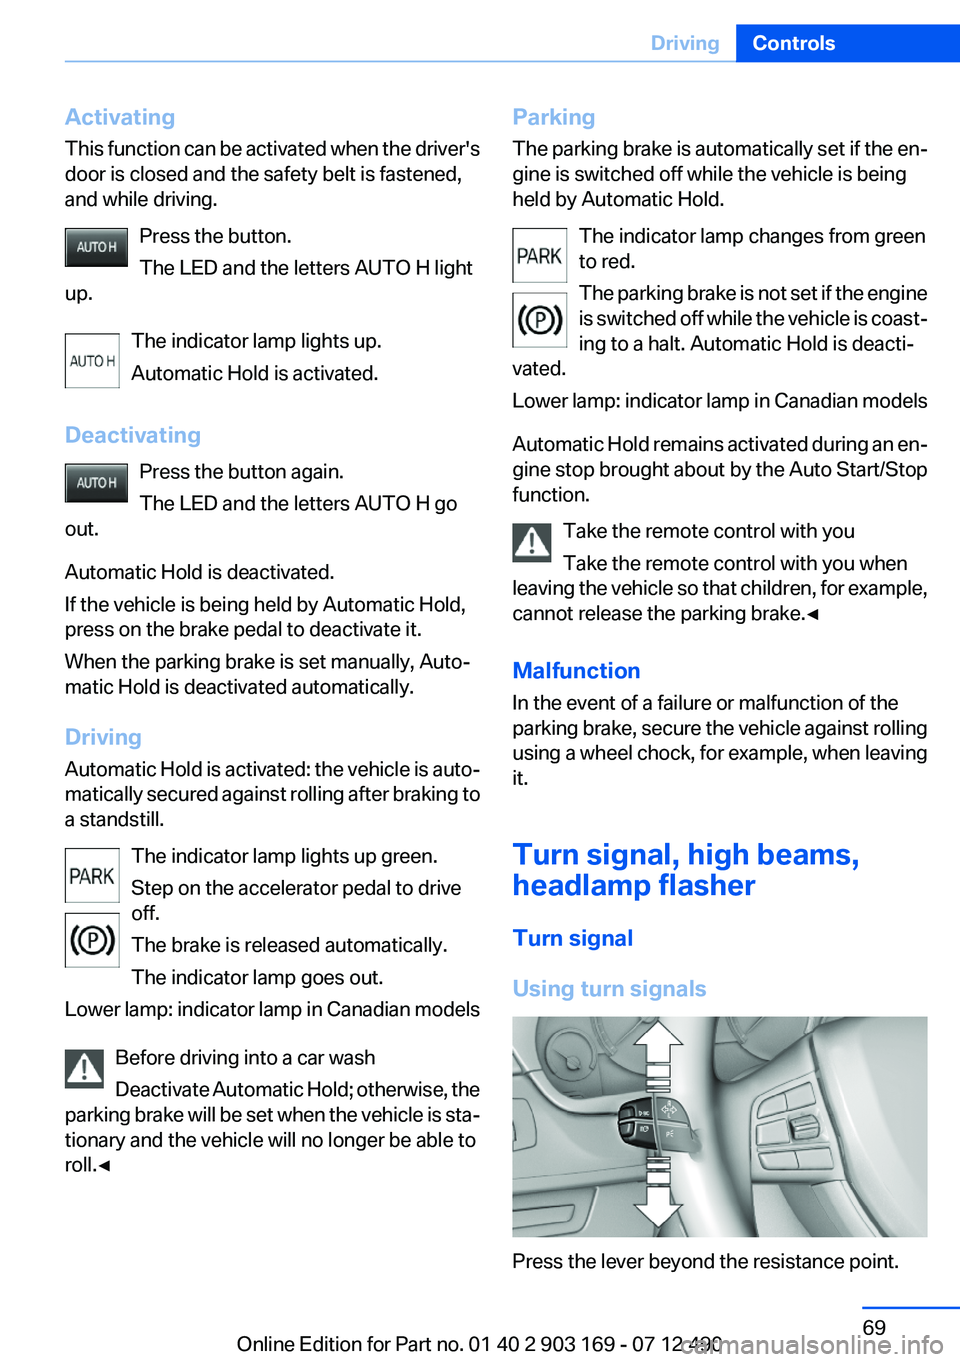
Press the lever beyond the resistance point.
Seite 69DrivingControls69
Online Edition for Part no. 01 40 2 903 169 - 07 12 490
Page 93 of 240
LampsVehicle equipment
All standard, country-specific and optional
equipment that is offered in the model series is
described in this chapter. Therefore, equipment
is also described that is not available in a vehicle,
e. g., because of the selected optional equip‐
ment or country variant. This also applies for
safety-related functions and systems.
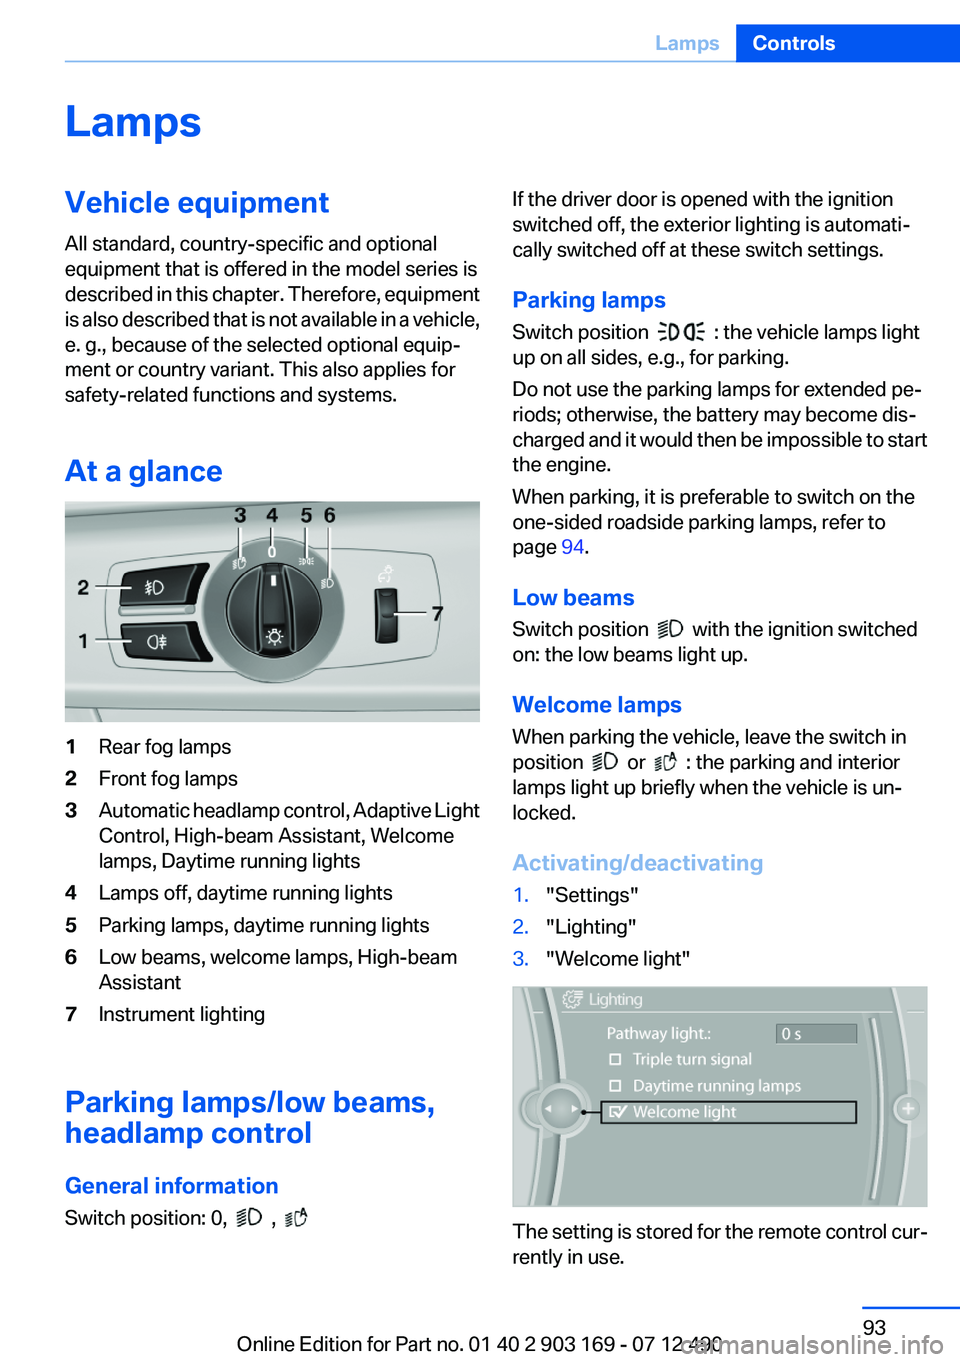
At a glance1Rear fog lamps2Front fog lamps3Automatic headlamp control, Adaptive Light
Control, High-beam Assistant, Welcome
lamps, Daytime running lights4Lamps off, daytime running lights5Parking lamps, daytime running lights6Low beams, welcome lamps, High-beam
Assistant7Instrument lighting
Parking lamps/low beams,
headlamp control
General information
Switch position: 0,
,
If the driver door is opened with the ignition
switched off, the exterior lighting is automati‐
cally switched off at these switch settings.
Parking lamps
Switch position
: the vehicle lamps light
up on all sides, e.g., for parking.
Do not use the parking lamps for extended pe‐
riods; otherwise, the battery may become dis‐
charged and it would then be impossible to start
the engine.
When parking, it is preferable to switch on the
one-sided roadside parking lamps, refer to
page 94.
Low beams
Switch position
with the ignition switched
on: the low beams light up.
Welcome lamps
When parking the vehicle, leave the switch in
position
or : the parking and interior
lamps light up briefly when the vehicle is un‐
locked.
Activating/deactivating
1."Settings"2."Lighting"3."Welcome light"
The setting is stored for the remote control cur‐
rently in use.
Seite 93LampsControls93
Online Edition for Part no. 01 40 2 903 169 - 07 12 490
Page 110 of 240
▷On: the LED lights up.▷Off: the LED goes out.
The state is stored for the remote control cur‐
rently in use.
Setting the warning time
The warning time can be set via iDrive.
These settings have no effect on the time of the
warning with which Active Cruise Control ACC
prompts the driver to intervene or brake.
1.Activate collision warning.2.Activate the desired warning time on the
Control Display.
The selected channel is stored for the remote
control currently in use.
Display
Warning stages
Prewarning
This warning is issued, for example, when there
is the impending danger of a collision or the dis‐
tance to the vehicle ahead is too small.
Acute warning with braking function
Warning of the imminent danger of a collision
when the vehicle approaches another object at
a relatively high differential speed.
The acute warning prompts the driver to inter‐
vene and, if there is the danger of a collision, is
accompanied by a braking intervention.
The braking intervention is executed with lim‐
ited braking force and for a brief period only. The
intervention will not bring the vehicle to a com‐
plete standstill.
The braking intervention is executed only if DSC
Dynamic Stability Control is switched on.
Adapting your speed and driving style
The acute warning does not relieve the
driver of the responsibility to adapt his or her
driving speed and style to the traffic condi‐
tions.◀
The braking intervention can be interrupted by
pressing on the accelerator or by actively mov‐
ing the steering wheel.
When towing or tow-starting the vehicle, switch
off the collision warning with braking function to
prevent undesired interventions.
The braking function is deactivated if the DSC
Dynamic Stability Control or DTC Dynamic
Traction Control is deactivated.
Display in the instrument cluster
The collision warning can be issued in the in‐
strument cluster, in the Head-up Display, and
acoustically.
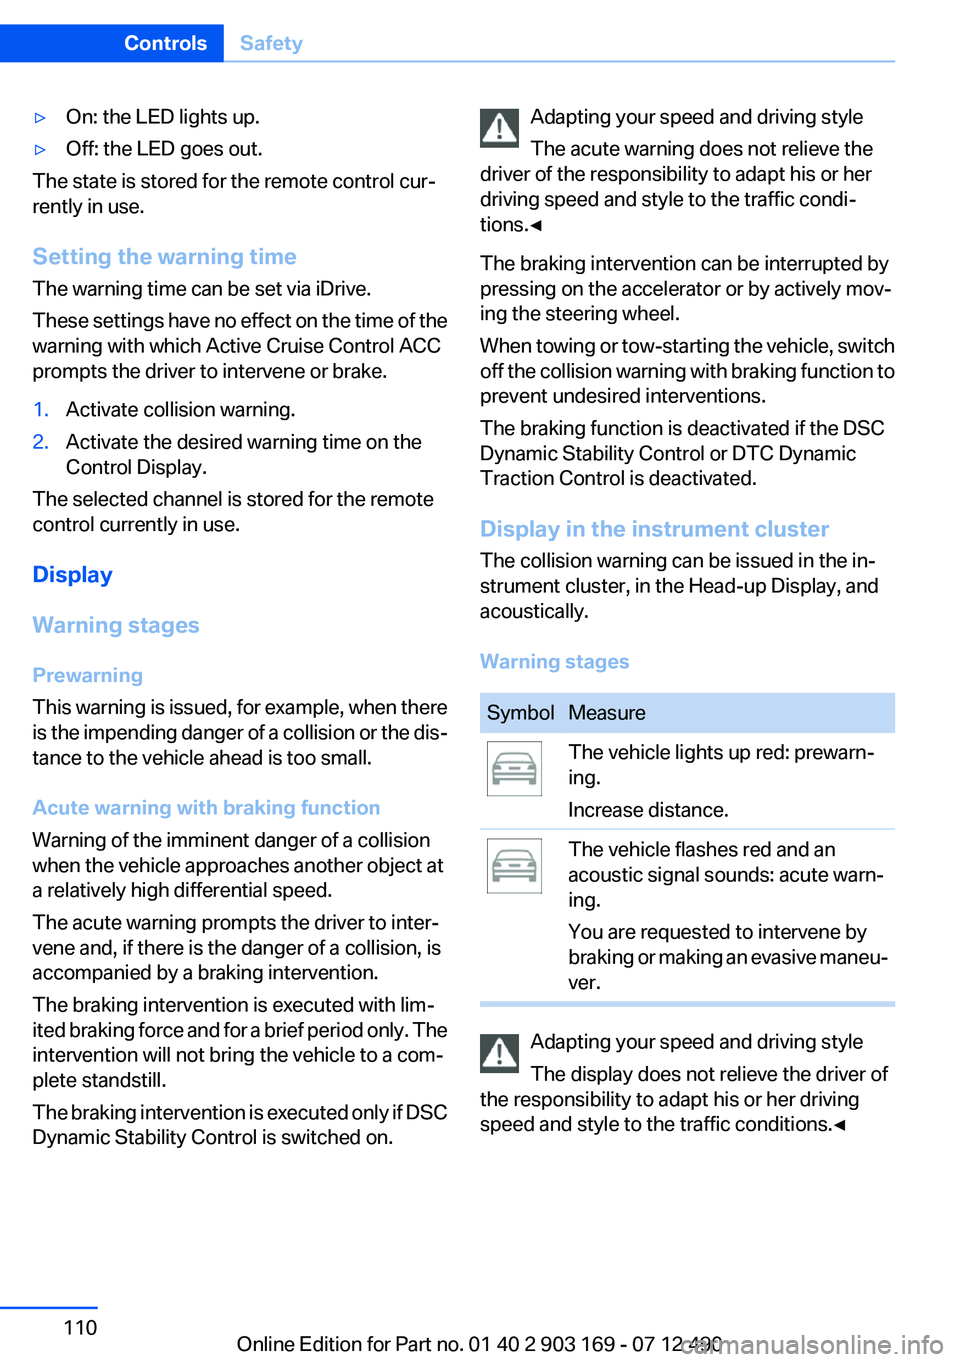
Warning stagesSymbolMeasureThe vehicle lights up red: prewarn‐
ing.
Increase distance.The vehicle flashes red and an
acoustic signal sounds: acute warn‐
ing.
You are requested to intervene by
braking or making an evasive maneu‐
ver.
Adapting your speed and driving style
The display does not relieve the driver of
the responsibility to adapt his or her driving
speed and style to the traffic conditions.◀
Seite 110ControlsSafety110
Online Edition for Part no. 01 40 2 903 169 - 07 12 490
Page 114 of 240
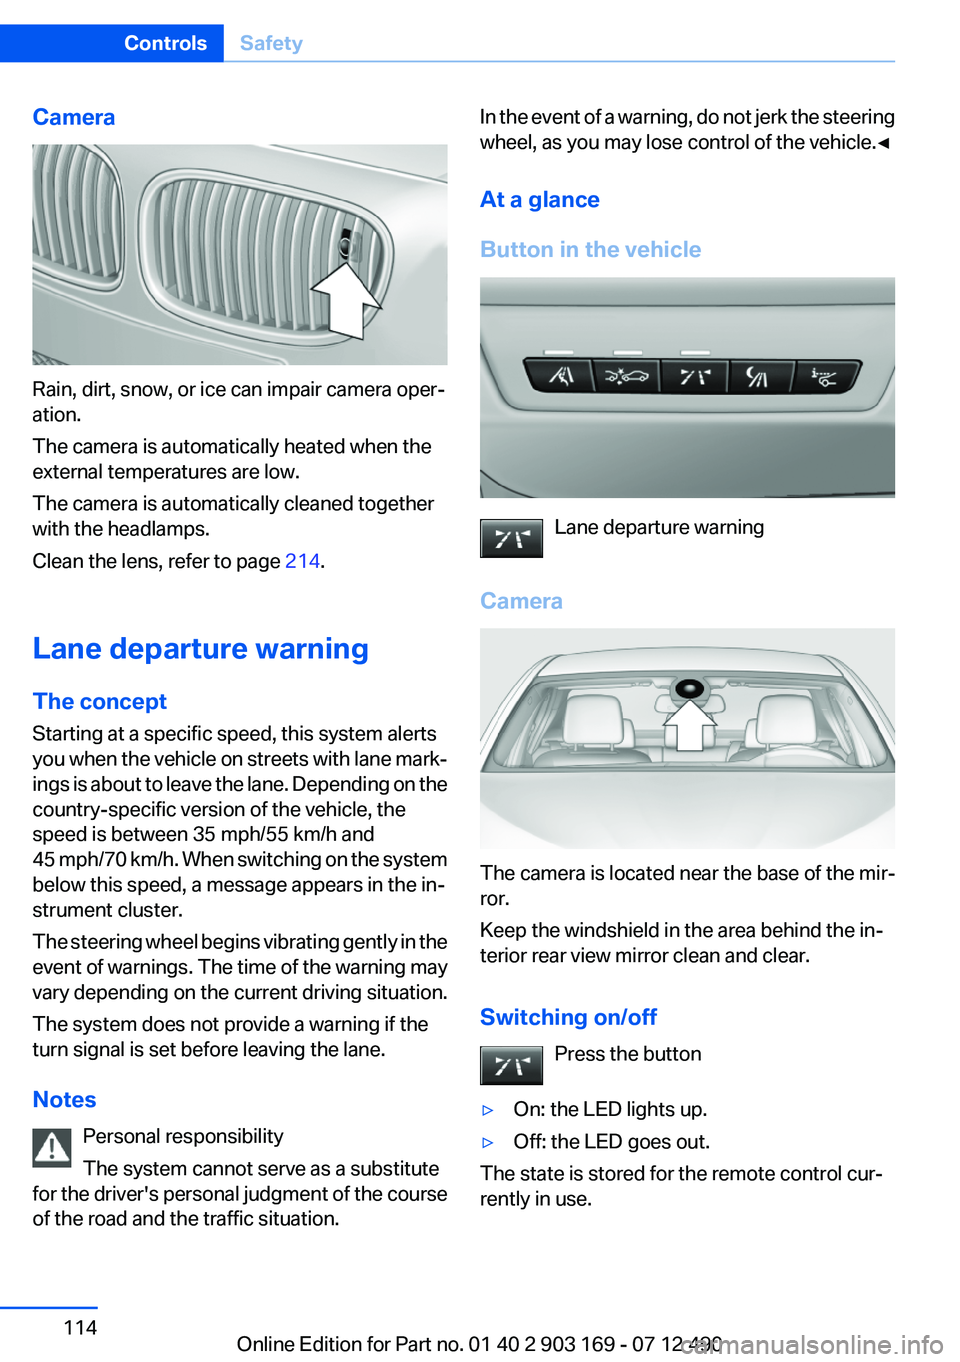
Camera
Rain, dirt, snow, or ice can impair camera oper‐
ation.
The camera is automatically heated when the
external temperatures are low.
The camera is automatically cleaned together
with the headlamps.
Clean the lens, refer to page 214.
Lane departure warning
The concept
Starting at a specific speed, this system alerts
you when the vehicle on streets with lane mark‐
ings is about to leave the lane. Depending on the
country-specific version of the vehicle, the
speed is between 35 mph/55 km/h and
45 mph/70 km/h. When switching on the system
below this speed, a message appears in the in‐
strument cluster.
The steering wheel begins vibrating gently in the
event of warnings. The time of the warning may
vary depending on the current driving situation.
The system does not provide a warning if the
turn signal is set before leaving the lane.
Notes Personal responsibility
The system cannot serve as a substitute
for the driver's personal judgment of the course
of the road and the traffic situation.
In the event of a warning, do not jerk the steering
wheel, as you may lose control of the vehicle.◀
At a glance
Button in the vehicle
Lane departure warning
Camera
The camera is located near the base of the mir‐
ror.
Keep the windshield in the area behind the in‐
terior rear view mirror clean and clear.
Switching on/off Press the button
▷On: the LED lights up.▷Off: the LED goes out.
The state is stored for the remote control cur‐
rently in use.
Seite 114ControlsSafety114
Online Edition for Part no. 01 40 2 903 169 - 07 12 490