rear seats BMW 7 SERIES 2016 G11 Owner's Manual
[x] Cancel search | Manufacturer: BMW, Model Year: 2016, Model line: 7 SERIES, Model: BMW 7 SERIES 2016 G11Pages: 314, PDF Size: 7.9 MB
Page 36 of 314
BMW Touch CommandVehicle features and options
This chapter describes all standard, country-
specific and optional features offered with the
series. It also describes features that are not
necessarily available in your car, e. g., due to
the selected options or country versions. This
also applies to safety-related functions and
systems. The respectively applicable country
provisions must be observed when using the
respective features and systems.
BMW Touch Command The concept
Important functions of the vehicle can be used
via BMW Touch Command.▷Seat adjustments for front passenger seat
and seats in the rear.▷Climate control in the rear.▷Sun protection.▷Ambient light.▷Ambient light accent.▷Bowers & Wilkins loudspeaker lighting.▷Audio sources front.▷Rear entertainment.▷Some functions of the telephone in the
rear.
General information
Depending on the vehicle's equipment, BMW
Touch Command is located in the rear console
or in the center armrest in the rear.
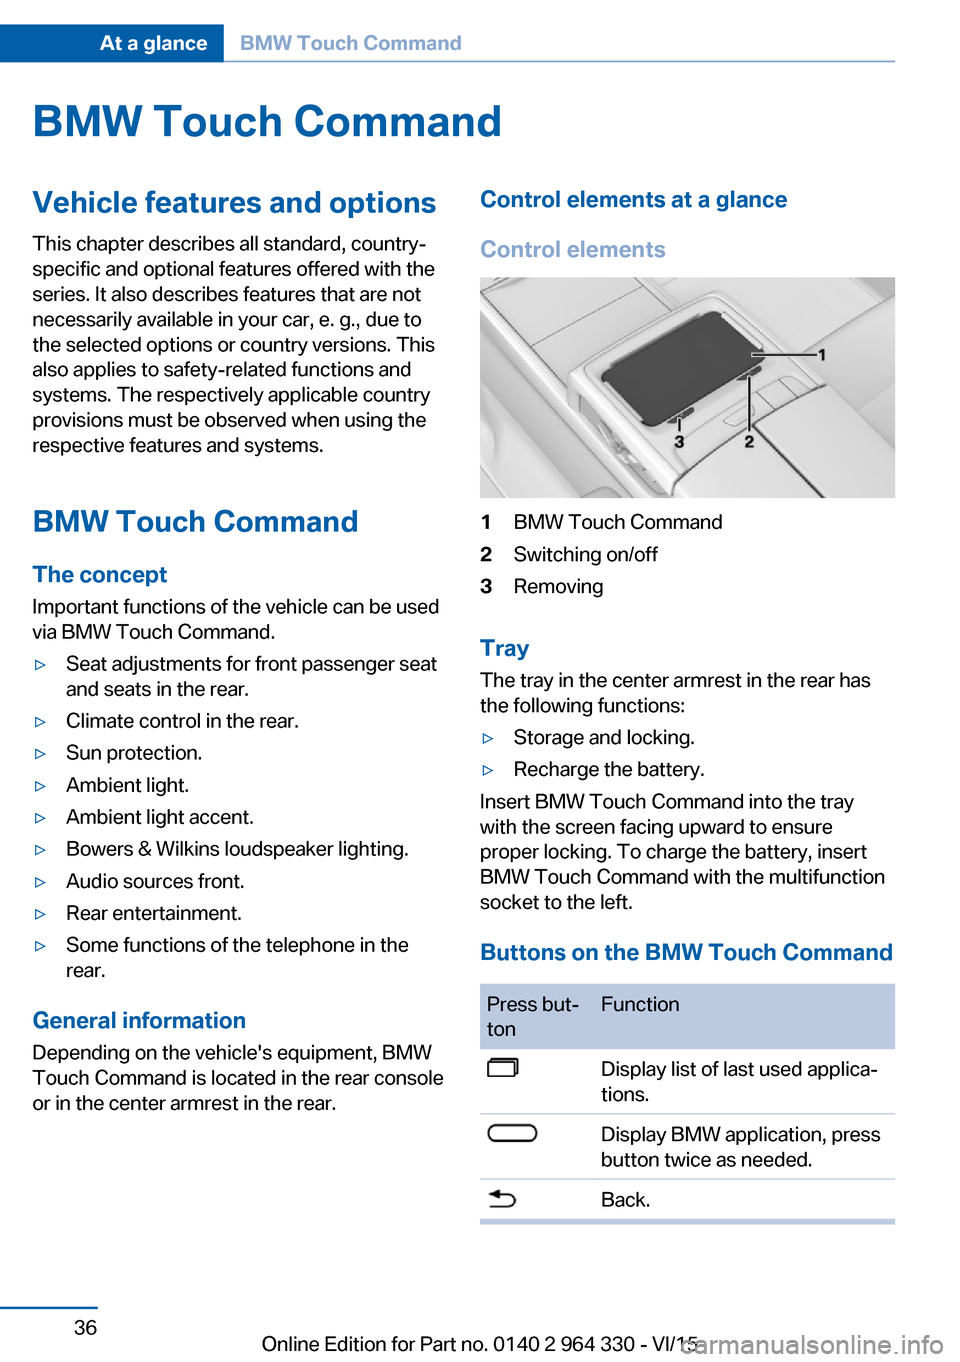
Control elements at a glance
Control elements1BMW Touch Command2Switching on/off3Removing
Tray
The tray in the center armrest in the rear has
the following functions:
▷Storage and locking.▷Recharge the battery.
Insert BMW Touch Command into the tray
with the screen facing upward to ensure
proper locking. To charge the battery, insert
BMW Touch Command with the multifunction
socket to the left.
Buttons on the BMW Touch Command
Press but‐
tonFunctionDisplay list of last used applica‐
tions.Display BMW application, press
button twice as needed.Back.Seite 36At a glanceBMW Touch Command36
Online Edition for Part no. 0140 2 964 330 - VI/15
Page 71 of 314
ClosingWARNING
When operating the windows, body parts
and objects can be jammed. There is risk of in‐
juries or risk of property damage. Make sure
that the area of movement of the windows is
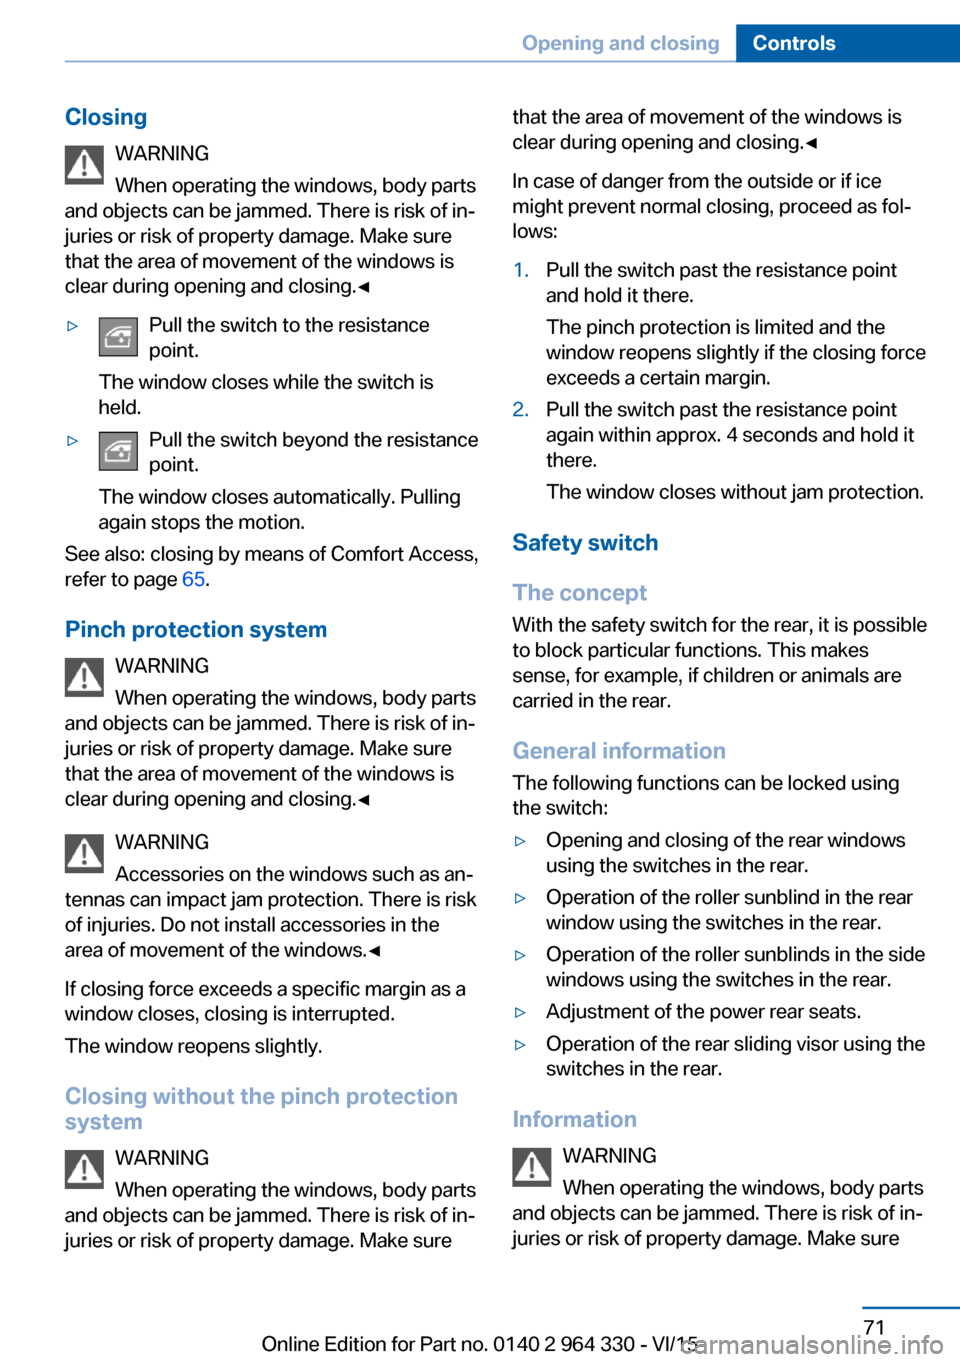
clear during opening and closing.◀▷Pull the switch to the resistance
point.
The window closes while the switch is
held.▷Pull the switch beyond the resistance
point.
The window closes automatically. Pulling
again stops the motion.
See also: closing by means of Comfort Access,
refer to page 65.
Pinch protection system WARNING
When operating the windows, body parts
and objects can be jammed. There is risk of in‐
juries or risk of property damage. Make sure
that the area of movement of the windows is
clear during opening and closing.◀
WARNING
Accessories on the windows such as an‐
tennas can impact jam protection. There is risk
of injuries. Do not install accessories in the
area of movement of the windows.◀
If closing force exceeds a specific margin as a
window closes, closing is interrupted.
The window reopens slightly.
Closing without the pinch protection system
WARNING
When operating the windows, body parts
and objects can be jammed. There is risk of in‐
juries or risk of property damage. Make sure
that the area of movement of the windows is
clear during opening and closing.◀
In case of danger from the outside or if ice
might prevent normal closing, proceed as fol‐
lows:1.Pull the switch past the resistance point
and hold it there.
The pinch protection is limited and the
window reopens slightly if the closing force
exceeds a certain margin.2.Pull the switch past the resistance point
again within approx. 4 seconds and hold it
there.
The window closes without jam protection.
Safety switch
The concept With the safety switch for the rear, it is possible
to block particular functions. This makes sense, for example, if children or animals are
carried in the rear.
General information
The following functions can be locked using
the switch:
▷Opening and closing of the rear windows
using the switches in the rear.▷Operation of the roller sunblind in the rear
window using the switches in the rear.▷Operation of the roller sunblinds in the side
windows using the switches in the rear.▷Adjustment of the power rear seats.▷Operation of the rear sliding visor using the
switches in the rear.
Information
WARNING
When operating the windows, body parts
and objects can be jammed. There is risk of in‐
juries or risk of property damage. Make sure
Seite 71Opening and closingControls71
Online Edition for Part no. 0140 2 964 330 - VI/15
Page 76 of 314
AdjustingVehicle features and options
This chapter describes all standard, country-
specific and optional features offered with the
series. It also describes features that are not
necessarily available in your car, e. g., due to
the selected options or country versions. This
also applies to safety-related functions and
systems. The respectively applicable country
provisions must be observed when using the
respective features and systems.
Sitting safely The ideal seating position can make a vital
contribution to relaxed, fatigue-free driving.
The seating position plays an important role in
an accident in combination with:▷Safety belts, refer to page 80.▷Head restraints, refer to page 82.▷Airbags, refer to page 136.
Front seats
Information WARNING
Seat adjustments while driving can lead
to unexpected movements of the seat. Vehicle
control could be lost. There is risk of an acci‐
dent. Only adjust the side on the driver's side
when the vehicle is stationary.◀
WARNING
With a backrest inclined too far to the
rear, the protective effect of the safety belt
cannot be ensured anymore. There is a danger
of sliding under the safety belt in an accident.
There is risk of injuries or danger to life. Adjust
the seat prior to starting the trip. Adjust the
backrest in an as upright position as possible
and do not adjust again while driving.◀
WARNING
There is risk of jamming when moving
the seats. There is risk of injuries or risk of
property damage. Make sure that the area of
movement of the seat is clear prior to any ad‐
justment.◀
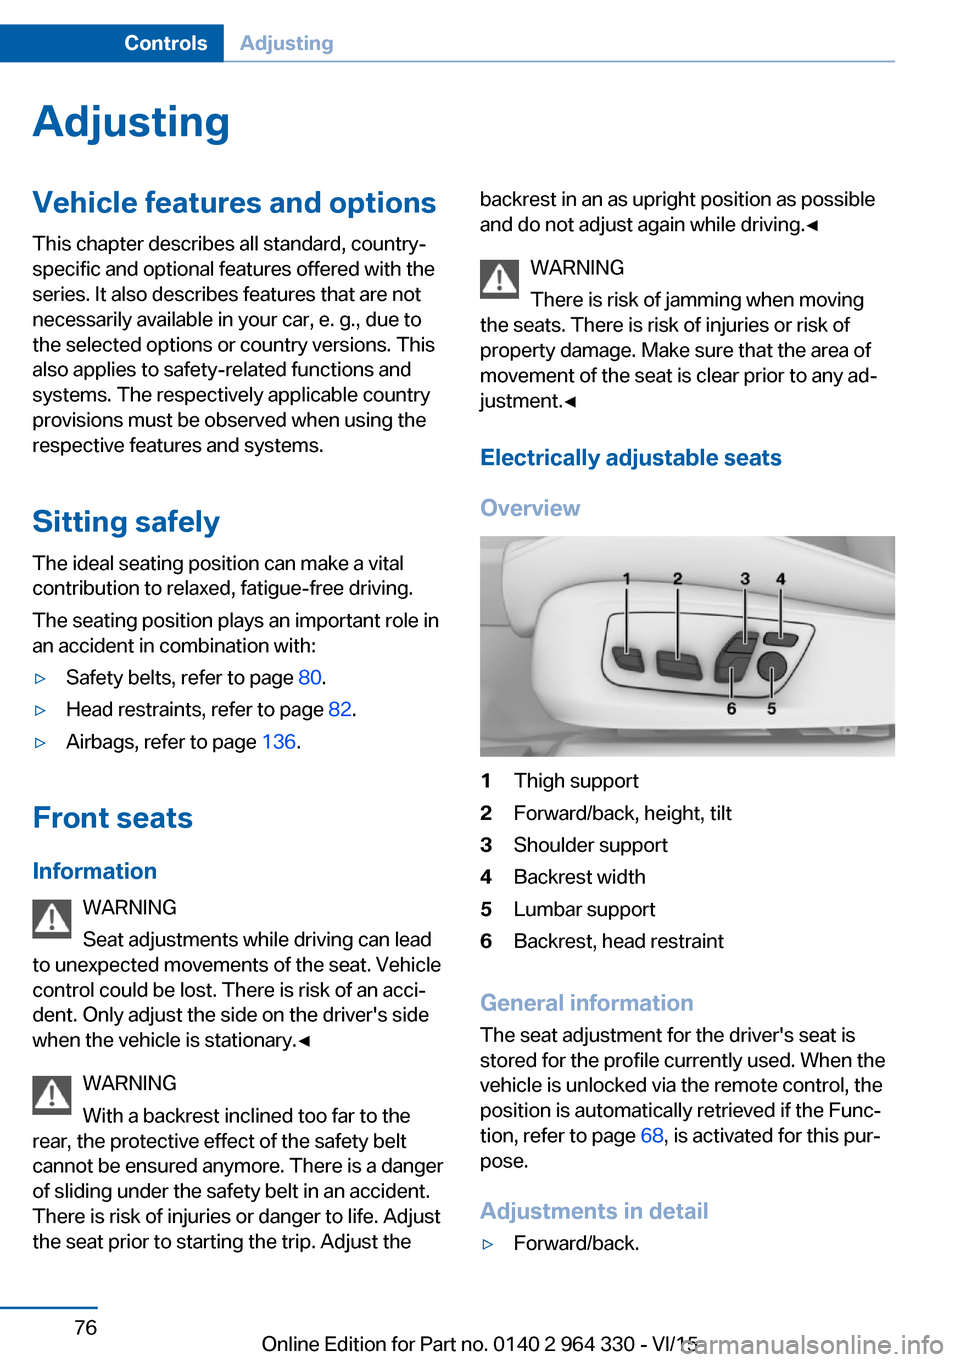
Electrically adjustable seats
Overview1Thigh support2Forward/back, height, tilt3Shoulder support4Backrest width5Lumbar support6Backrest, head restraint
General information
The seat adjustment for the driver's seat is
stored for the profile currently used. When the
vehicle is unlocked via the remote control, the
position is automatically retrieved if the Func‐
tion, refer to page 68, is activated for this pur‐
pose.
Adjustments in detail
▷Forward/back.Seite 76ControlsAdjusting76
Online Edition for Part no. 0140 2 964 330 - VI/15
Page 78 of 314
▷Reduces strain on the shoulder muscles.
Gentleman function
The concept The front passenger seat can be adjusted with
the switches of the driver's seat, e.g. to in‐
crease the legroom in the rear.
Overview
Gentleman function
Switching on
1. Press button. The LED lights up.2.Adjust the front passenger seat on your
own seat.
If needed, store the memory position, refer
to page 87, for the front passenger seat.
Switch off
Press button and hold until LED goes
out.
The function deactivates itself automatically
after some time.
BMW Touch Command
The front passenger seat can also be operated
using BMW Touch Command.
Rear seats
General information
The seats in the rear can be used using the
seat adjustment switch in the center armrest
or via BMW Touch Command.
Information WARNING
There is a risk of jamming when folding
down the center armrest in the rear. There is
risk of injuries. Make sure that the area of
movement of the center armrest is clear during
folding down.◀
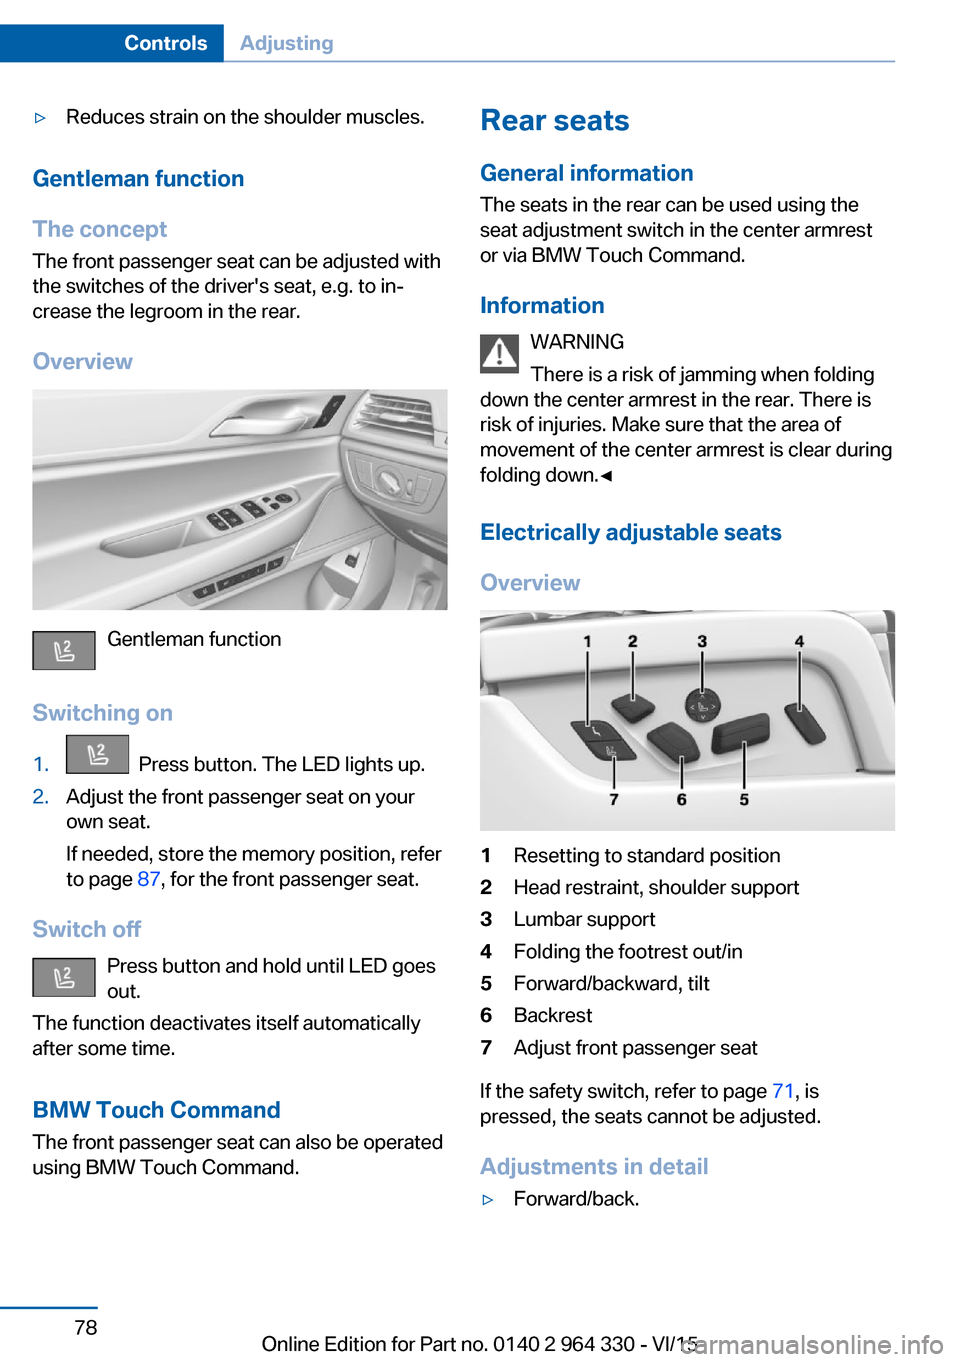
Electrically adjustable seats
Overview1Resetting to standard position2Head restraint, shoulder support3Lumbar support4Folding the footrest out/in5Forward/backward, tilt6Backrest7Adjust front passenger seat
If the safety switch, refer to page 71, is
pressed, the seats cannot be adjusted.
Adjustments in detail
▷Forward/back.Seite 78ControlsAdjusting78
Online Edition for Part no. 0140 2 964 330 - VI/15
Page 80 of 314
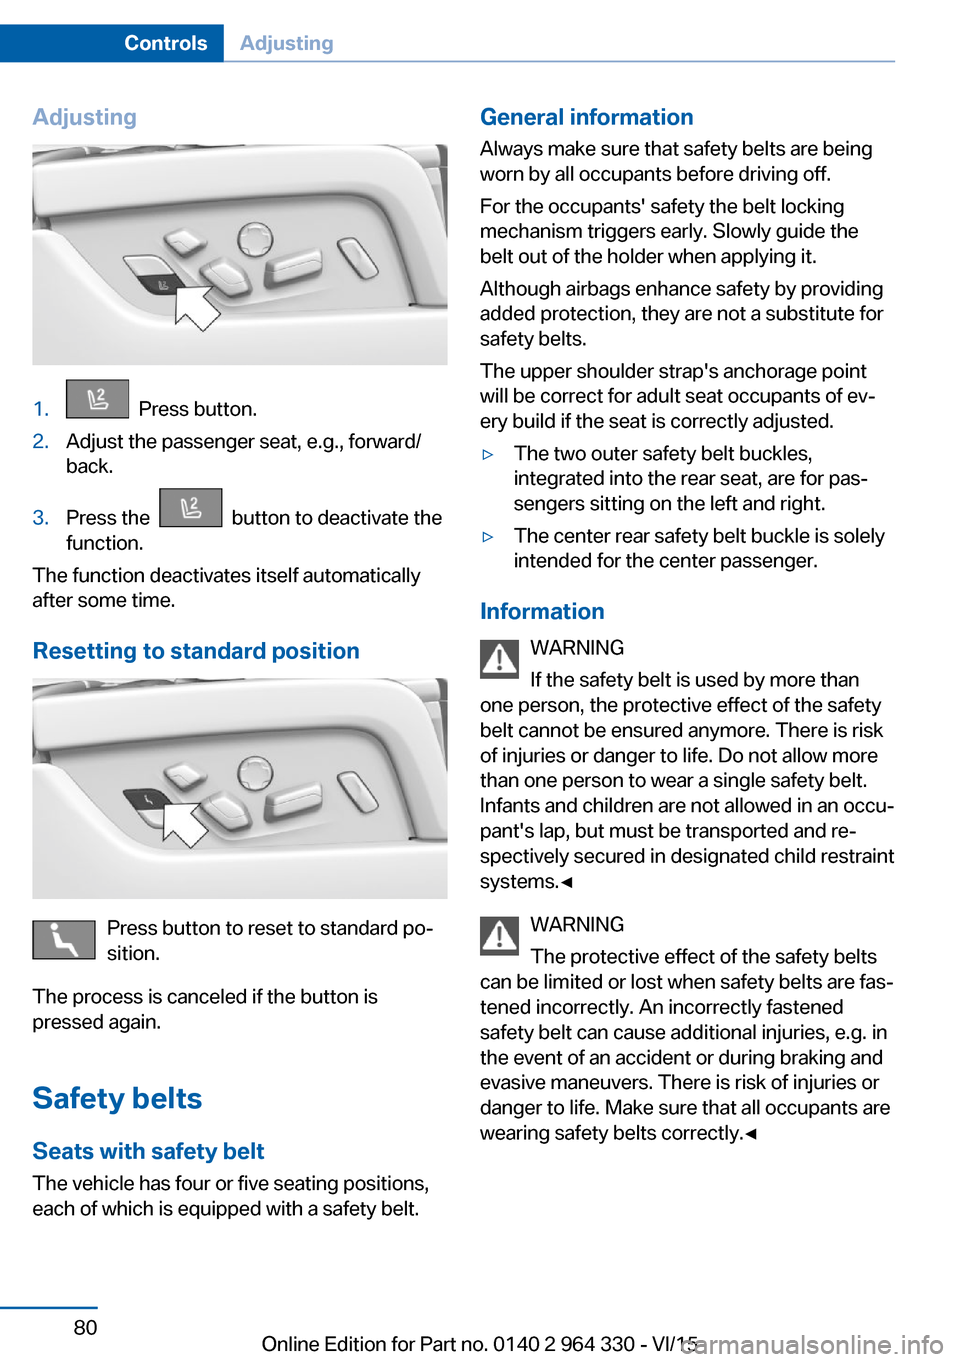
Adjusting1. Press button.2.Adjust the passenger seat, e.g., forward/
back.3.Press the button to deactivate the
function.
The function deactivates itself automatically
after some time.
Resetting to standard position
Press button to reset to standard po‐
sition.
The process is canceled if the button is
pressed again.
Safety belts Seats with safety belt
The vehicle has four or five seating positions,
each of which is equipped with a safety belt.
General information
Always make sure that safety belts are being
worn by all occupants before driving off.
For the occupants' safety the belt locking
mechanism triggers early. Slowly guide the
belt out of the holder when applying it.
Although airbags enhance safety by providing
added protection, they are not a substitute for
safety belts.
The upper shoulder strap's anchorage point
will be correct for adult seat occupants of ev‐
ery build if the seat is correctly adjusted.▷The two outer safety belt buckles,
integrated into the rear seat, are for pas‐
sengers sitting on the left and right.▷The center rear safety belt buckle is solely
intended for the center passenger.
Information
WARNING
If the safety belt is used by more than
one person, the protective effect of the safety
belt cannot be ensured anymore. There is risk
of injuries or danger to life. Do not allow more
than one person to wear a single safety belt.
Infants and children are not allowed in an occu‐
pant's lap, but must be transported and re‐
spectively secured in designated child restraint
systems.◀
WARNING
The protective effect of the safety belts
can be limited or lost when safety belts are fas‐
tened incorrectly. An incorrectly fastened
safety belt can cause additional injuries, e.g. in
the event of an accident or during braking and
evasive maneuvers. There is risk of injuries or
danger to life. Make sure that all occupants are
wearing safety belts correctly.◀
Seite 80ControlsAdjusting80
Online Edition for Part no. 0140 2 964 330 - VI/15
Page 82 of 314
Front head restraintsInformation WARNING
A missing protective effect due to re‐
moved or not correctly adjusted head re‐
straints can cause injuries in the head and
neck area. There is risk of injuries. Install head
restraints on occupied seats prior to driving
and make sure that the center of the head re‐
straint supports the back of the head at eye
level.◀
WARNING
Objects on the head restraint reduce the
protective effect in the head and neck area.
There is risk of injuries.▷Do not use seat or head restraint covers.▷Do not hang objects, e.g., clothes hangers,
directly on the head restraint.▷Only use accessories that have been de‐
termined to be safe for attachment to a
head restraint.▷Do not use any accessories, e.g. pillows,
while driving.◀
Correctly adjusted head restraint
General information
A correctly adjusted head restraint reduces the
risk of injury to cervical vertebrae in the event
of an accident.
Height Adjust the head restraint so that its center is
approximately at ear level.
Distance
Adjust the distance so that the head restraint
is as close as possible to the back of the head.
Active head restraint
In the event of a rear-end collision with a cer‐
tain severity, the active head restraint automat‐
ically reduces the distance from the head.
Wear and tear after accidents or when dam‐
aged otherwise:
Have the active head restraint checked and if
needed replaced.
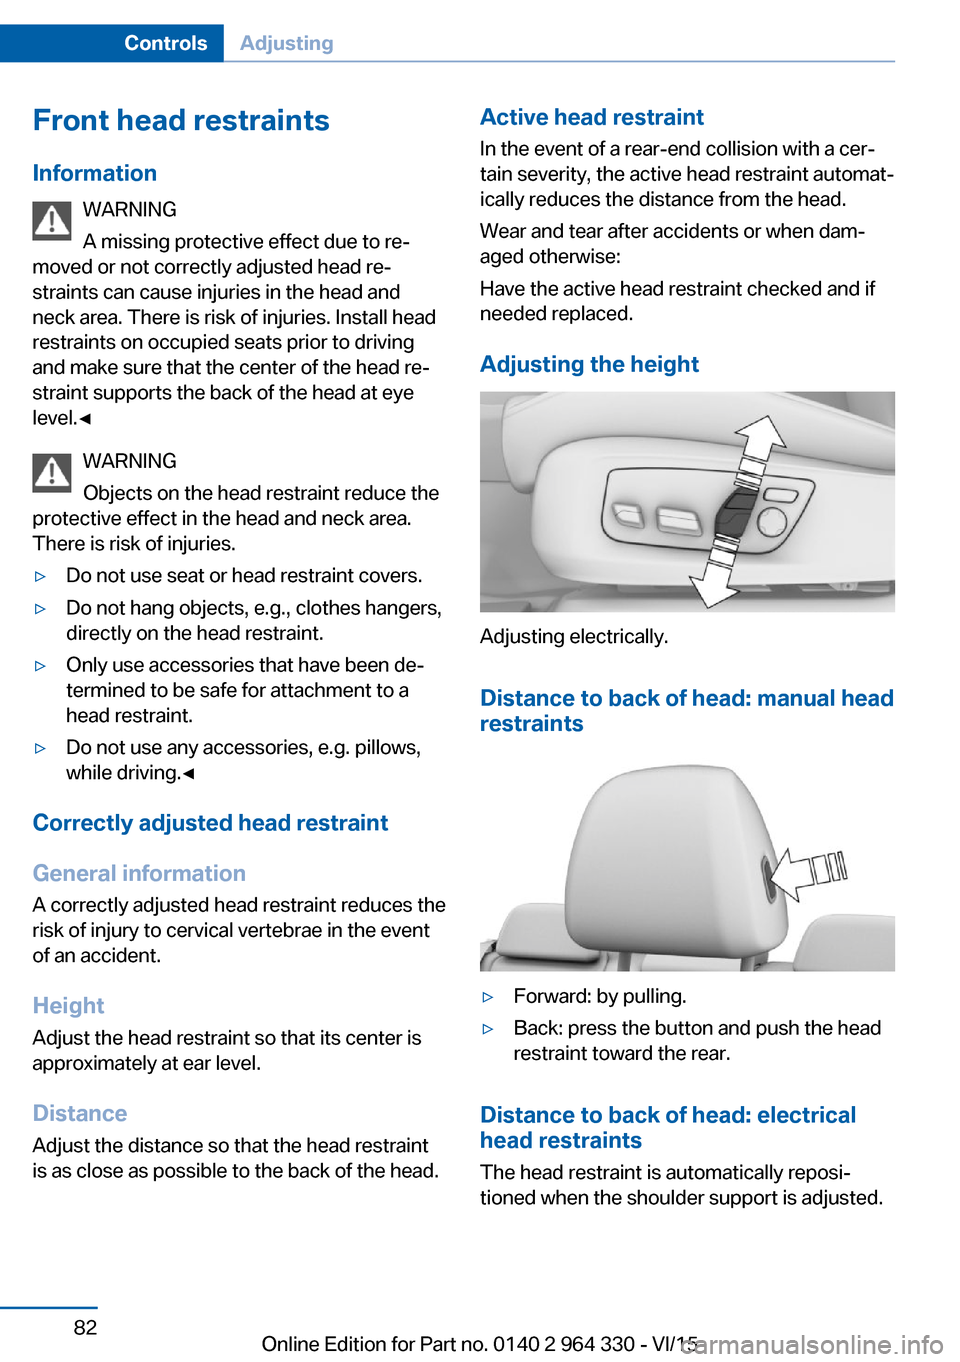
Adjusting the height
Adjusting electrically.
Distance to back of head: manual headrestraints
▷Forward: by pulling.▷Back: press the button and push the head
restraint toward the rear.
Distance to back of head: electrical
head restraints
The head restraint is automatically reposi‐
tioned when the shoulder support is adjusted.
Seite 82ControlsAdjusting82
Online Edition for Part no. 0140 2 964 330 - VI/15
Page 83 of 314
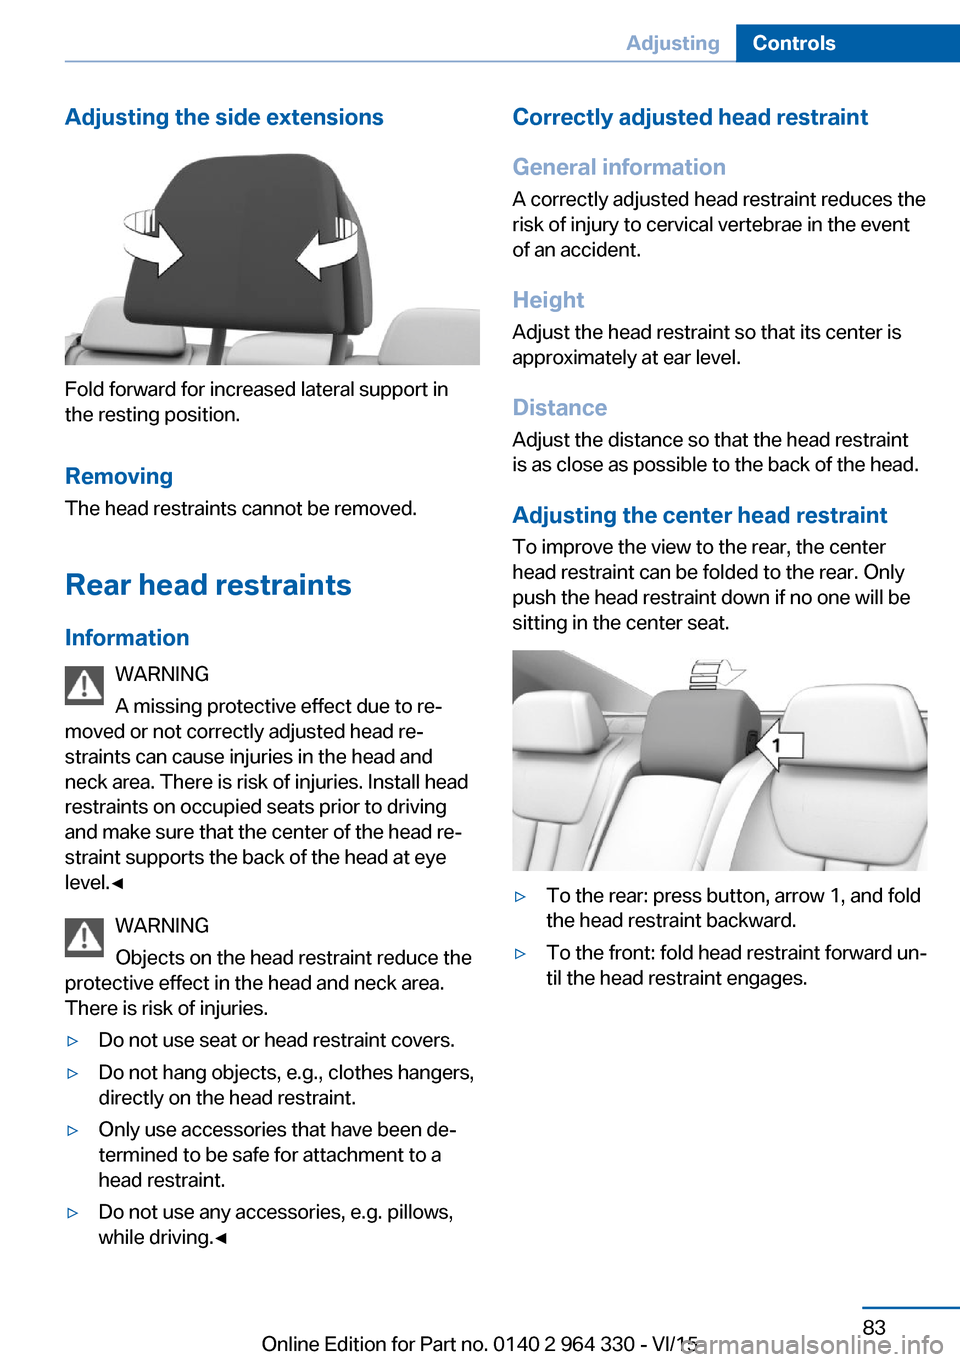
Adjusting the side extensions
Fold forward for increased lateral support in
the resting position.
Removing The head restraints cannot be removed.
Rear head restraints
Information WARNING
A missing protective effect due to re‐
moved or not correctly adjusted head re‐
straints can cause injuries in the head and
neck area. There is risk of injuries. Install head
restraints on occupied seats prior to driving
and make sure that the center of the head re‐
straint supports the back of the head at eye
level.◀
WARNING
Objects on the head restraint reduce the
protective effect in the head and neck area.
There is risk of injuries.
▷Do not use seat or head restraint covers.▷Do not hang objects, e.g., clothes hangers,
directly on the head restraint.▷Only use accessories that have been de‐
termined to be safe for attachment to a
head restraint.▷Do not use any accessories, e.g. pillows,
while driving.◀Correctly adjusted head restraint
General information
A correctly adjusted head restraint reduces the
risk of injury to cervical vertebrae in the event
of an accident.
Height Adjust the head restraint so that its center is
approximately at ear level.
Distance
Adjust the distance so that the head restraint
is as close as possible to the back of the head.
Adjusting the center head restraint To improve the view to the rear, the center
head restraint can be folded to the rear. Only
push the head restraint down if no one will be
sitting in the center seat.▷To the rear: press button, arrow 1, and fold
the head restraint backward.▷To the front: fold head restraint forward un‐
til the head restraint engages.Seite 83AdjustingControls83
Online Edition for Part no. 0140 2 964 330 - VI/15
Page 91 of 314
Switching onOn the screens in the rear:1."My Vehicle"2."Seat comfort"3."BMW Vitality Program"
Switch off
On the screens in the rear:
1.Press left arrow button on the remote con‐
trol in the rear.2."Stop"
BMW Touch Command
The vitality program can also be operated us‐
ing BMW Touch Command.
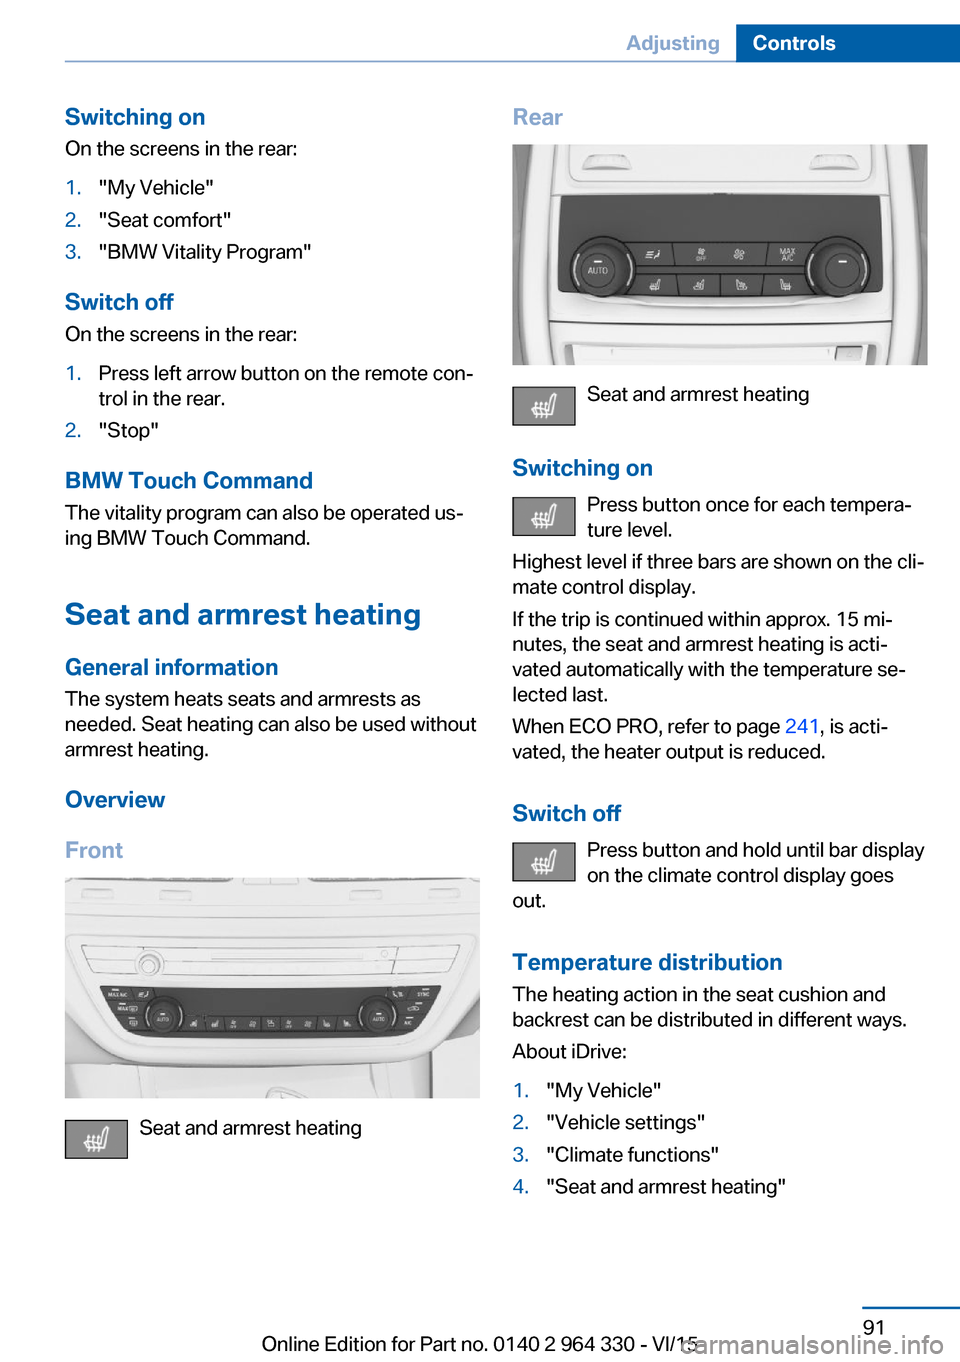
Seat and armrest heating
General information The system heats seats and armrests as
needed. Seat heating can also be used without
armrest heating.
Overview
Front
Seat and armrest heating
Rear
Seat and armrest heating
Switching on Press button once for each tempera‐
ture level.
Highest level if three bars are shown on the cli‐
mate control display.
If the trip is continued within approx. 15 mi‐
nutes, the seat and armrest heating is acti‐
vated automatically with the temperature se‐
lected last.
When ECO PRO, refer to page 241, is acti‐
vated, the heater output is reduced.
Switch off Press button and hold until bar display
on the climate control display goes
out.
Temperature distribution The heating action in the seat cushion and
backrest can be distributed in different ways.
About iDrive:
1."My Vehicle"2."Vehicle settings"3."Climate functions"4."Seat and armrest heating"Seite 91AdjustingControls91
Online Edition for Part no. 0140 2 964 330 - VI/15
Page 94 of 314
Installing child restraint
systems
Information
Pay attention to the specifications of the child
restraint system manufacturer when selecting,
installing, and using child restraint systems.
WARNING
The stability of the child restraint system
is limited or compromised with incorrect seat
adjustment or improper installation of the child
seat. There is risk of injuries or danger to life.
Make sure that the child restraint system fits
securely against the backrest. If possible, ad‐
just the backrest tilt for all affected backrests
and correctly adjust the seats. Make sure that
seats and backrests are securely engaged. If
possible, adjust the height of the head re‐
straints or remove them.◀
On the front passenger seat
Deactivating airbags WARNING
Active front-seat passenger airbags can
injure a child in a child restraint system when
the airbags are activated. There is risk of inju‐
ries. Make sure that the front-seat passenger
airbags are deactivated and that the PASSEN‐
GER AIRBAG OFF indicator lamp lights up.◀
After installing a child restraint system in the
front passenger seat, make sure that the front,
knee and side airbags on the front passenger
side are deactivated.
Deactivate the front-seat passenger airbags
automatically, refer to page 138.
Seat position and height Before installing a child restraint system, move
the front passenger seat as far back as possi‐
ble and bring it up to medium height to obtain
the best possible position for the belt and tooffer optimal protection in the event of an acci‐
dent.
If the upper anchorage of the safety belt is lo‐
cated in front of the belt guide of the child seat,
move the passenger seat carefully forward un‐
til the best possible belt guide position is
reached.
Backrest width Adjustable backrest width: before installing a
child restraint system in the front passenger
seat, open the backrest width completely. Do
not change the backrest width again and do
not call up a memory position.
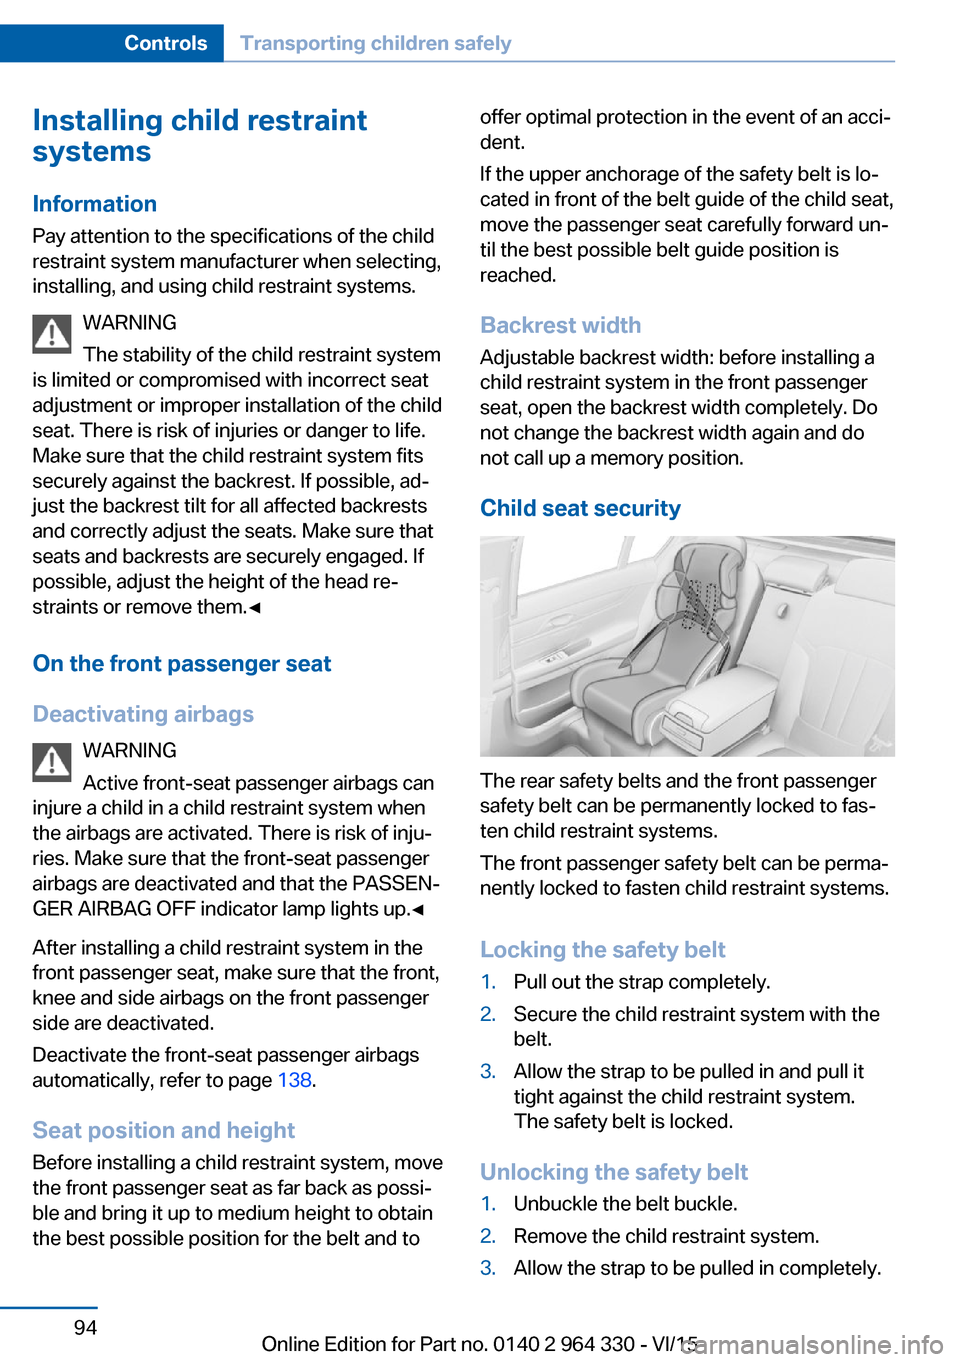
Child seat security
The rear safety belts and the front passenger
safety belt can be permanently locked to fas‐
ten child restraint systems.
The front passenger safety belt can be perma‐
nently locked to fasten child restraint systems.
Locking the safety belt
1.Pull out the strap completely.2.Secure the child restraint system with the
belt.3.Allow the strap to be pulled in and pull it
tight against the child restraint system.
The safety belt is locked.
Unlocking the safety belt
1.Unbuckle the belt buckle.2.Remove the child restraint system.3.Allow the strap to be pulled in completely.Seite 94ControlsTransporting children safely94
Online Edition for Part no. 0140 2 964 330 - VI/15
Page 95 of 314
LATCH child restraint systemLATCH: Lower Anchors and Tether for Chil‐
dren.
Information
Pay attention to the operating and safety infor‐
mation of the child restraint system manufac‐
turer when installing and using LATCH child
restraint fixing system.
Mounts for the lower LATCH anchors
General information
The lower anchors may be used to attach the
CRS to the vehicle seat up to a combined child
and CRS weight of 65 lb/30 kg when the child
is restrained by the internal harnesses.
Information WARNING
If the LATCH child restraint fixing sys‐
tems are not correctly engaged, the protective
effect of the LATCH child restraint fixing sys‐
tem can be limited. There is risk of injuries or
danger to life. Make sure that the lower an‐
chors are securely engaged and that the
LATCH child restraint fixing system fits se‐
curely against the backrest.◀
Position The corresponding symbol shows the
mounts for the lower LATCH anchors.
Seats equipped with lower anchors are
marked with a pair, 2, of LATCH sym‐
bols. It is not recommended to use the
inner lower anchors of standard outer
LATCH positions to fasten a child restraint system on the middle seat. Use the vehicle
seat belt instead for the middle seat.Before installing LATCH child
restraint systems
Pull the belt away from the area of the child re‐
straint system.
Without comfort seats in the rear:
Assembly of LATCH child restraint
systems1.Install child restraint system, see manufac‐
turer's information.2.Ensure that both LATCH anchors are prop‐
erly connected.
With comfort rear seats: Assembly of
LATCH child restraint fixing systems
1.Before mounting, adjust the seats to their
basic position, refer to page 80.2.For better accessibility, tilt the backrest
back slightly.3.Install child restraint system, see manufac‐
turer's information.4.Ensure that both LATCH anchors are prop‐
erly connected.5.After mounting, move the backrest back up
slightly so that the child restraint system
rests lightly against the backrest.
Child restraint fixing system with a
tether strap
Mounting points The respective symbol shows the an‐
chor for the upper retaining strap.
Seats with an upper Top Tether are
marked with this symbol. It can be found on
the rear seat backrest or the rear window shelf.
Seite 95Transporting children safelyControls95
Online Edition for Part no. 0140 2 964 330 - VI/15