alarm BMW 740I 1998 Owners Manual
[x] Cancel search | Manufacturer: BMW, Model Year: 1998, Model line: 740I, Model: BMW 740I 1998Pages: 211, PDF Size: 1.68 MB
Page 7 of 211
6n
For your own safety
Use unleaded gasoline only. Fuels
containing up to 10% ethanol or
other oxygenates with up to 2.8% oxy-
gen by weight (i.e., 15% MTBE or
3% methanol plus an equivalent
amount of co-solvent) will not void the
applicable warranties with respect to
defects in materials or workmanship.
Field experience has indicated signifi-
cant differences in fuel quality (i.e., vol-
atility, composition, additives, etc.)
among gasolines offered for sale in the
United States and Canada. The use of
poor-quality fuels may result in drive-
ability, starting and stalling problems,
especially under certain environmental
conditions, such as high ambient tem-
perature and high altitude.
Should you encounter driveability prob-
lems that you suspect could be related
to the fuel you are using, we recom-
mend that you respond by switching to
a recognized high-quality brand.
Failure to comply with these recom-
mendations may result in unscheduled
maintenance.
Follow the relevant safety rules when
you are handling gasoline.
<
Important safety information!
For your own safety, use genuine
parts and accessories approved by
BMW.
When you purchase accessories tested
and approved by BMW and Original
BMW Parts, you simultaneously acquire
the assurance that they have been thor-
oughly tested by BMW to ensure opti-
mum performance when installed on
your vehicle.
BMW warrants these parts to be free
from defects in material and workman-
ship.
BMW will not accept any liability for
damage resulting from installation of
parts and accessories not approved by
BMW.
BMW cannot test every product from
other manufacturers to verify if it can be
used on a BMW safely and without risk
to either the vehicle, its operation, or its
occupants.
Original BMW Parts, BMW Accessories
and other products approved by BMW,
together with professional advice on
using these items, are available from all
BMW centers.
Installation and operation of non-BMW
approved accessories such as alarms,
radios, amplifiers, radar detectors,
wheels, suspension components, brake
dust shields, telephones (including op-
eration of any portable cellular phone
from within the vehicle without using an
externally-mounted antenna) or trans-
ceiver equipment (C.B., walkie-talkie,
ham radio, for instance) may cause ex-
tensive damage to the vehicle, compro-
mise its safety, interfere with the vehi-
cle's electrical system, or affect the
validity of the BMW Limited Warranty.
See your authorized BMW center for
additional information.
<
Maintenance, replacement, or re-
pair of the emission control de-
vices and systems may be performed
by any automotive repair establishment
or individual using any certified automo-
tive part.
<
Page 11 of 211

Contents
Overview
Controls and features
Cockpit16
Instrument cluster18
Indicator and warning lamps20
Multifunction steering wheel
(MFL)23
Hazard warning flashers24
Warning triangle24
First-aid kit24
Refueling25
Fuel specifications25
Tire inflation pressure26
Locks and security systems:
Keys30
Electronic vehicle
immobilizer31
Central locking system32
Door locks – outside32
Radio remote control33
Door locks – inside36
Luggage compartment lid37
Luggage compartment39
Alarm system40
Electric power windows42
Security glass43
Sliding/Tilt sunroof44
Adjustments:
Seats46
Steering wheel49
Mirrors50
Seat, mirror and steering wheel
memory51
Car Memory, Key Memory53
Passenger safety systems:
Safety belts54
Airbags55
Child restraints57
Child restraint installation58
Child-safety locks58
Driving:
Steering/Ignition lock59
Starting engine59
Switching off engine60Parking brake61
Automatic transmission62
Automatic transmission with
Steptronic65
Turn signal/Headlamp flasher68
Washer/Wiper system/Rain
sensor68
Rear window defroster70
Cruise control70
Everything under control:
Odometer, outside temperature
display72
Tachometer72
Energy control73
Fuel gauge73
Temperature gauge74
Service Interval Display74
Check Control 75
Multi-Information Display
(MID)78
Digital clock79
Onboard computer84
Technology for safety and
convenience:
Park Distance Control PDC90
Automatic Stability Control plus
Traction (ASC+T)/Dynamic Sta-
bility Control (DSC)92
Electronic Damper Control
(EDC)93
Tire Pressure Control (RDC)94
Page 29 of 211
28n
Locks and security systems:
Keys30
Electronic vehicle
immobilizer31
Central locking system32
Door locks – outside32
Radio remote control33
Door locks – inside36
Luggage compartment lid37
Luggage compartment39
Alarm system40
Electric power windows42
Security glass43
Sliding/Tilt sunroof44
Adjustments:
Seats46
Steering wheel49
Mirrors50
Seat, mirror and steering wheel
memory51
Car Memory, Key Memory53
Passenger safety systems:
Safety belts54
Airbags55
Child restraints57
Child restraint installation58
Child-safety locks58
Driving:
Steering/Ignition lock59
Starting engine59
Switching off engine60
Page 33 of 211
32n
Central locking system Door locks – outsideThe conceptThe central locking system is ready for
operation as soon as you close the
driver's door. The system engages and
releases the locks on the
>doors
>luggage compartment lid
>fuel filler door.
The central locking system can be
operated
>from outside via the driver's door or
luggage compartment lock and with
the remote control
>from inside via the central locking
button.
The fuel filler door remains unlocked
when you activate the system from in-
side the vehicle.
The anti-theft system is automatically
armed whenever you activate the cen-
tral locking system from outside the ve-
hicle. The alarm system is also acti-
vated or deactivated.
In the event of an accident, the central
locking system unlocks automatically
(only those doors which were not
locked separately with the safety lock
buttons). Refer to page 36. In addition,
the hazard warning flashers and interior
lamps come on.
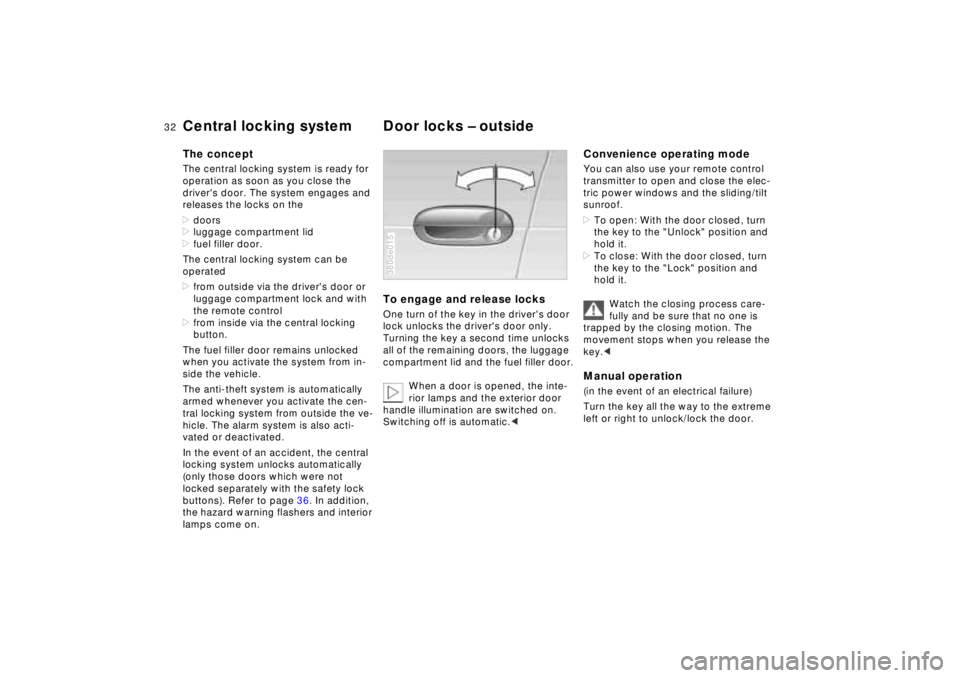
To engage and release locksOne turn of the key in the driver's door
lock unlocks the driver's door only.
Turning the key a second time unlocks
all of the remaining doors, the luggage
compartment lid and the fuel filler door.
When a door is opened, the inte-
rior lamps and the exterior door
handle illumination are switched on.
Switching off is automatic.< 380de015
Convenience operating modeYou can also use your remote control
transmitter to open and close the elec-
tric power windows and the sliding/tilt
sunroof.
>To open: With the door closed, turn
the key to the "Unlock" position and
hold it.
>To close: With the door closed, turn
the key to the "Lock" position and
hold it.
Watch the closing process care-
fully and be sure that no one is
trapped by the closing motion. The
movement stops when you release the
key.< Manual operation(in the event of an electrical failure)
Turn the key all the way to the extreme
left or right to unlock/lock the door.
Page 34 of 211
33n
RepairsIndexOverview Controls Car care Technology Data
Radio remote controlThe remote control makes opening and
locking the doors of your vehicle very
convenient. Furthermore, it provides
three additional functions which can
only be executed by means of the re-
mote control:
>Switching on the interior lamps and il-
luminating the exterior door handles.
With this function, you can also
"search for" your vehicle, when
parked in an underground garage, for
instance
>To open luggage compartment lid
The luggage compartment lid will
open slightly, regardless of whether
the lid was previously locked or un-
locked
>Panic Mode
In case of danger, you can trigger an
alarm.
The anti-theft system is also deacti-
vated/activated simultaneously with
the unlocking or locking of the vehicle,
and the alarm system is disarmed/
armed.
When the vehicle is unlocked, the inte-
rior lamps and the exterior door handle
illumination are switched on.
Master keysKeys with a transmitter for remote con-
trol are master keys. Refer to page 30.
Since children might be able to
lock the doors from the inside,
take the vehicle's keys with you so that
the vehicle can be opened again from
the outside at any time.<
Every transmission is indicated by a
light signal. If the signal no longer lights
up when a button is pressed and lock-
ing with the remote control no longer
functions:
Change the battery. Refer to page 168.380us644
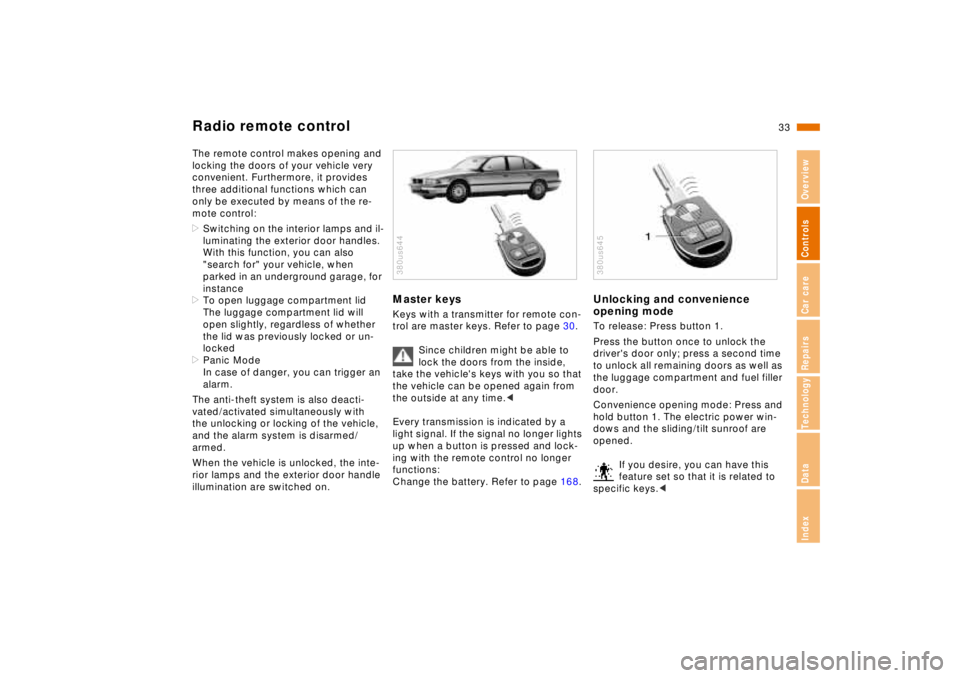
Unlocking and convenience
opening modeTo release: Press button 1.
Press the button once to unlock the
driver's door only; press a second time
to unlock all remaining doors as well as
the luggage compartment and fuel filler
door.
Convenience opening mode: Press and
hold button 1. The electric power win-
dows and the sliding/tilt sunroof are
opened.
If you desire, you can have this
feature set so that it is related to
specific keys.< 380us645
Page 35 of 211
34n
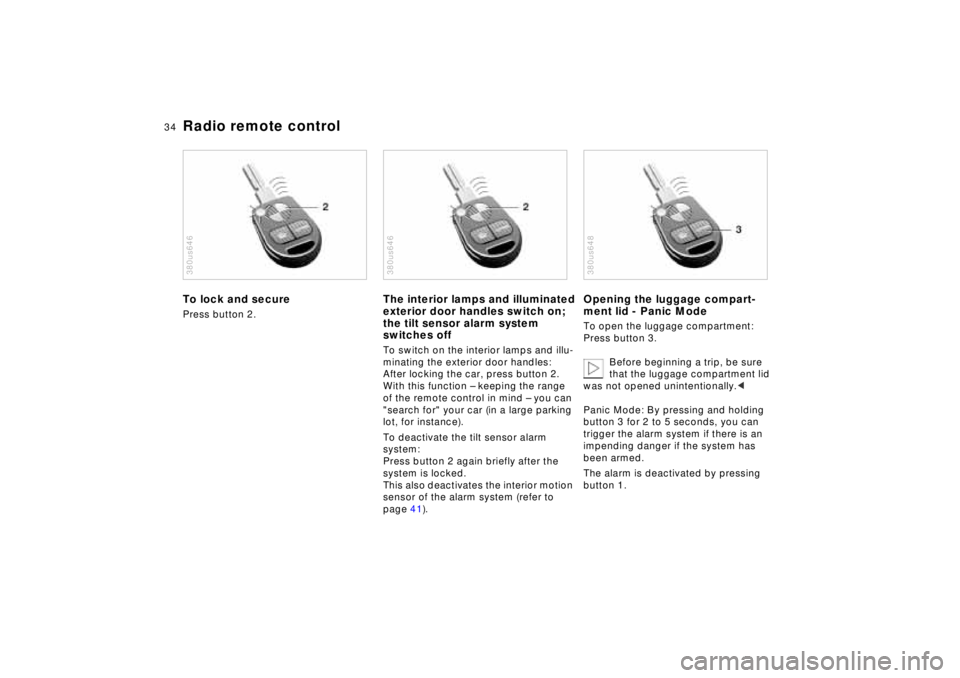
Radio remote controlTo lock and securePress button 2.380us646
The interior lamps and illuminated
exterior door handles switch on;
the tilt sensor alarm system
switches offTo switch on the interior lamps and illu-
minating the exterior door handles:
After locking the car, press button 2.
With this function – keeping the range
of the remote control in mind – you can
"search for" your car (in a large parking
lot, for instance).
To deactivate the tilt sensor alarm
system:
Press button 2 again briefly after the
system is locked.
This also deactivates the interior motion
sensor of the alarm system (refer to
page 41).380us646
Opening the luggage compart-
ment lid - Panic ModeTo open the luggage compartment:
Press button 3.
Before beginning a trip, be sure
that the luggage compartment lid
was not opened unintentionally.<
Panic Mode: By pressing and holding
button 3 for 2 to 5 seconds, you can
trigger the alarm system if there is an
impending danger if the system has
been armed.
The alarm is deactivated by pressing
button 1.380us648
Page 41 of 211
40n
Alarm systemThe vehicle alarm system responds:
>When a door, the hood or the lug-
gage compartment lid is opened
>To movement inside the vehicle (inte-
rior motion sensor)
>To variations in the vehicle tilt sensor
such as occur during attempts to
steal the wheels or tow the vehicle
>To interruption of battery voltage.
The system responds to unauthorized
vehicle entry and attempted theft by si-
multaneously activating the following:
>Sounding an acoustical alarm for
30 seconds
>The hazard warning flashers are acti-
vated for approx. five minutes
>The high beams flash on and off in
the same rhythm.
To arm and disarm the alarm
systemWhen the vehicle is locked or unlocked
by using a key or with the remote con-
trol, the alarm system is also simulta-
neously armed or disarmed.
The interior motion sensor is activated
approx. 30 seconds after you have fin-
ished locking the car.
The system indicates that it has been
correctly armed by switching on the
hazard flashers for a single cycle and by
emitting an acoustical signal.
When the system is active, you can still
gain access to the luggage compart-
ment by pressing button 3 on the re-
mote control transmitter. When the lid is
closed, it is armed once again.
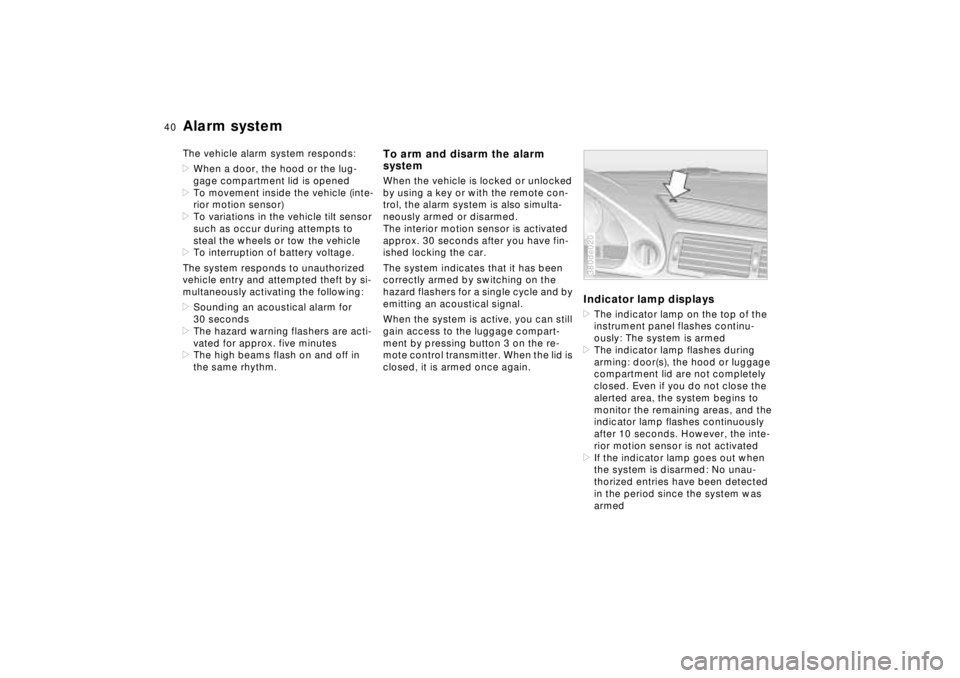
Indicator lamp displays>The indicator lamp on the top of the
instrument panel flashes continu-
ously: The system is armed
>The indicator lamp flashes during
arming: door(s), the hood or luggage
compartment lid are not completely
closed. Even if you do not close the
alerted area, the system begins to
monitor the remaining areas, and the
indicator lamp flashes continuously
after 10 seconds. However, the inte-
rior motion sensor is not activated
>If the indicator lamp goes out when
the system is disarmed: No unau-
thorized entries have been detected
in the period since the system was
armed380de020
Page 42 of 211
41n
RepairsIndexOverview Controls Car care Technology Data
Alarm system>If the indicator lamp flashes for
10 seconds when the system is
disarmed: An attempted entry has
been detected in the period since the
system was armed.
Following triggering of an alarm, the in-
dicator lamp will flash continuously.Tilt alarm sensorThe tilt alarm sensor and interior motion
sensor may be switched off at the same
time. By doing this, you can prevent
false alarms on garage ramps or when
the vehicle is transported by trailer or
train, for instance.
Lock the vehicle twice (= arm the sys-
tem). In other words, press button 2 of
the remote control twice in succession
or lock the vehicle twice with the key.
The indicator lamp lights up briefly and
then flashes continuously. The tilt alarm
sensor and the interior motion sensor
are deactivated for as long as the sys-
tem remains armed.
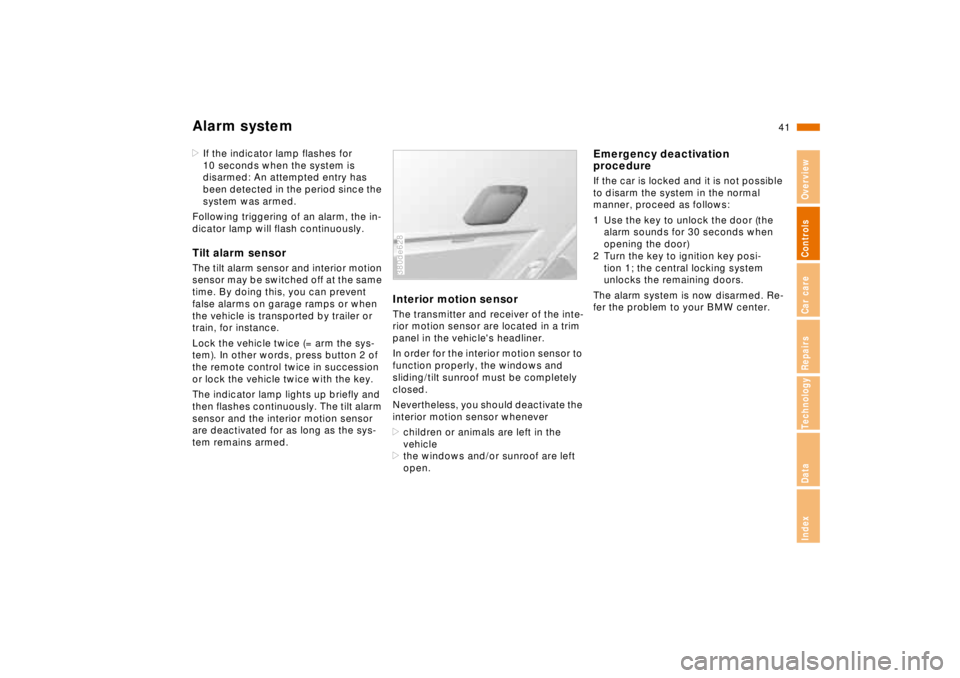
Interior motion sensorThe transmitter and receiver of the inte-
rior motion sensor are located in a trim
panel in the vehicle's headliner.
In order for the interior motion sensor to
function properly, the windows and
sliding/tilt sunroof must be completely
closed.
Nevertheless, you should deactivate the
interior motion sensor whenever
>children or animals are left in the
vehicle
>the windows and/or sunroof are left
open.380de628
Emergency deactivation
procedureIf the car is locked and it is not possible
to disarm the system in the normal
manner, proceed as follows:
1 Use the key to unlock the door (the
alarm sounds for 30 seconds when
opening the door)
2 Turn the key to ignition key posi-
tion 1; the central locking system
unlocks the remaining doors.
The alarm system is now disarmed. Re-
fer the problem to your BMW center.
Page 89 of 211
88n
Onboard computerCodeYou can program a code into the on-
board computer for supplementary pro-
tection against unauthorized attempts
to start the engine or tamper with the
vehicle. This feature provides you with
an extra measure of security extending
beyond that furnished by the vehicle im-
mobilization system (refer to page 31).
The system prevents the engine from
starting.
A code number is used to arm the sys-
tem. The code is then required for sub-
sequent starting attempts. Therefore:
Always remember the code number.
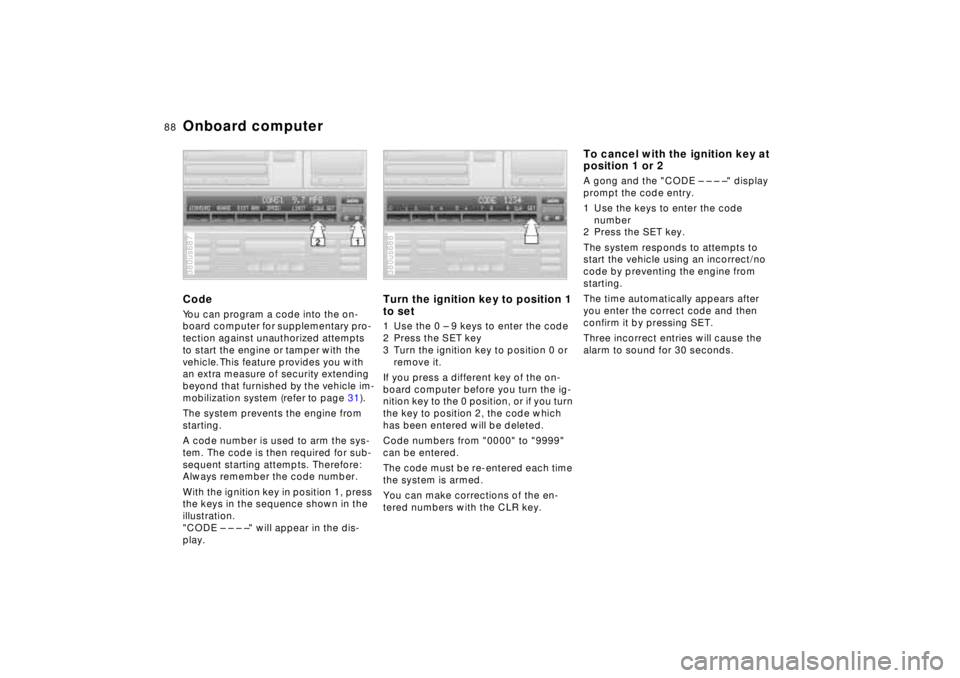
With the ignition key in position 1, press
the keys in the sequence shown in the
illustration.
"CODE – – – –" will appear in the dis-
play.380us687
Turn the ignition key to position 1
to set1 Use the 0 – 9 keys to enter the code
2 Press the SET key
3 Turn the ignition key to position 0 or
remove it.
If you press a different key of the on-
board computer before you turn the ig-
nition key to the 0 position, or if you turn
the key to position 2, the code which
has been entered will be deleted.
Code numbers from "0000" to "9999"
can be entered.
The code must be re-entered each time
the system is armed.
You can make corrections of the en-
tered numbers with the CLR key.380us688
To cancel with the ignition key at
position 1 or 2A gong and the "CODE – – – –" display
prompt the code entry.
1 Use the keys to enter the code
number
2 Press the SET key.
The system responds to attempts to
start the vehicle using an incorrect/no
code by preventing the engine from
starting.
The time automatically appears after
you enter the correct code and then
confirm it by pressing SET.
Three incorrect entries will cause the
alarm to sound for 30 seconds.
Page 109 of 211
108n
Integrated Universal Remote Control
*
The conceptThe Integrated Universal Remote Con-
trol replaces up to three hand-held
transmitters of different devices such as
garage-door openers, alarm systems,
or door locking systems. The Integrated
Universal Remote Control recognizes
and "learns" the transmitted signal of
each of the original hand-held transmit-
ters.
The signal of an original hand-held
transmitter can be programmed on one
of the three channel keys. Following
that, each of the devices can be actu-
ated with the appropriately-program-
med channel key. Transmission of the
signal is signaled by the indicator lamp.
If the vehicle is sold, the memory of the
channel keys should be cleared as de-
scribed on page 110.
During programming and before
every remote actuation of a pro-
grammed device by the Integrated Uni-
versal Remote Control, check to be
sure that there are no persons, animals
or objects within the actuation range of
the device in order to prevent possible
injuries or damage. Also, comply with
the safety precautions of the original
hand-held transmitter.<
To Canadian residents:
During programming, your hand-
held transmitter may automatically stop
transmitting after two seconds, which
may not be long enough to program the
BMW Universal Transmitter. If you are
programming from one of these hand-
held transmitters, the Universal Trans-
mitter's light may begin to flash in a se-
ries of double-blinks. If this occurs,
continue to hold the button on the Uni-
versal Transmitter while you reactivate
your hand-held transmitter. You may
have to repeat this function several
times while programming.<
Before programming, read the
"User information" section on
page 110.<
Original hand-held transmitter
If this symbol is present on the
packaging or in the instructions
of the original hand-held trans-
mitter, it may be assumed that this
hand-held transmitter is compatible
with the Integrated Universal Remote
Control.
Checking for the conversion codeTo determine whether the original
hand-held transmitter is provided with a
conversion-code system, you may ei-
ther read the instructions for the original
hand-held transmitter or program a
channel key as described on page 109
(left-hand column under "Program-
ming").
Then press and hold the programmed
channel key of the Integrated Universal
Remote Control. If the indicator lamp of
the Integrated Universal Remote Con-
trol flashes for two seconds and then
comes on steadily, the original hand-
held transmitter is provided with a con-
version-code system. With a conver-
sion-code system, program the channel
keys as described on page 109 (right-
hand column under "Programming a
hand-held transmitter with conversion
code").
If you have additional questions,
please consult your BMW center
or call 1-800-355-3515.<