change wheel BMW 740I 1998 Owners Manual
[x] Cancel search | Manufacturer: BMW, Model Year: 1998, Model line: 740I, Model: BMW 740I 1998Pages: 211, PDF Size: 1.68 MB
Page 54 of 211
53n
RepairsIndexOverview Controls Car care Technology Data
Car Memory, Key MemoryHow the system functionsYou have probably frequently wished
that you could configure individual
functions of your vehicles to reflect your
own personal requirements. In engi-
neering your vehicle, BMW has in-
cluded several user-defined functions
in the vehicle's design. Your authorized
BMW center can make these settings
for you.
There are settings related to the vehicle
("Car Memory") and settings related to
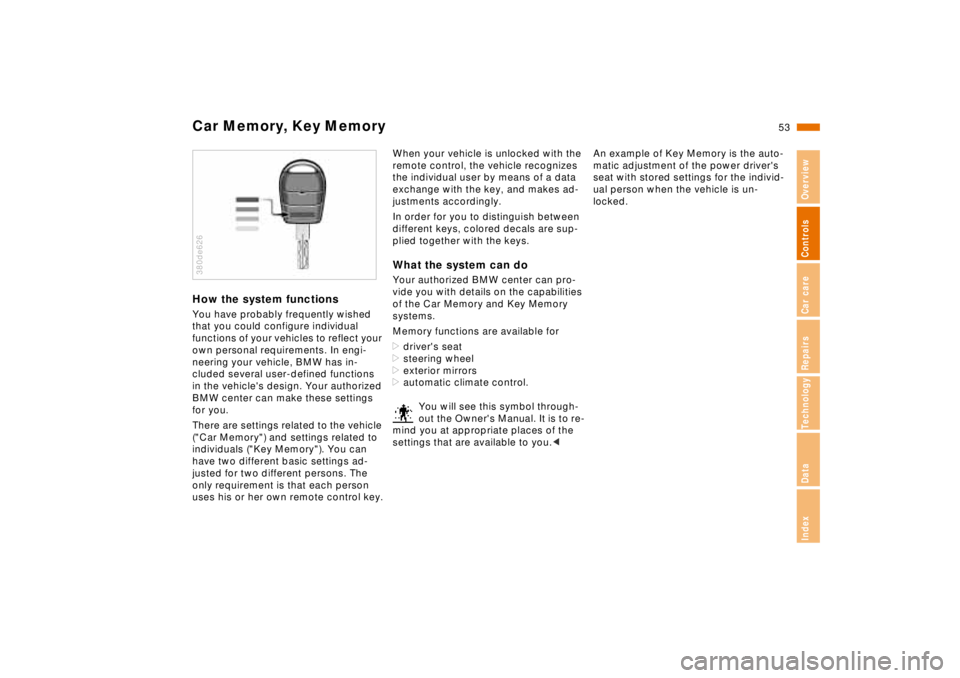
individuals ("Key Memory"). You can
have two different basic settings ad-
justed for two different persons. The
only requirement is that each person
uses his or her own remote control key.380de626
When your vehicle is unlocked with the
remote control, the vehicle recognizes
the individual user by means of a data
exchange with the key, and makes ad-
justments accordingly.
In order for you to distinguish between
different keys, colored decals are sup-
plied together with the keys.What the system can doYour authorized BMW center can pro-
vide you with details on the capabilities
of the Car Memory and Key Memory
systems.
Memory functions are available for
>driver's seat
>steering wheel
>exterior mirrors
>automatic climate control.
You will see this symbol through-
out the Owner's Manual. It is to re-
mind you at appropriate places of the
settings that are available to you.<
An example of Key Memory is the auto-
matic adjustment of the power driver's
seat with stored settings for the individ-
ual person when the vehicle is un-
locked.
Page 67 of 211
66n
Automatic transmission with Steptronic
*
Before exiting the vehicle when
the engine is running, place the
selector lever in the "Park" or "Neutral"
position and apply the parking brake. If
you do not, the vehicle can move.
Do not leave the car unattended with
the engine running. An unattended ve-
hicle with a running engine represents a
potential safety hazard.<
P - ParkSelect "Park" only when the vehicle is
stationary. The transmission locks to
prevent the rear wheels from turning.R - ReverseSelect "Reverse" only when the vehicle
is stationary.N - NeutralSelect "Neutral" only if your journey is
interrupted for a longer period.D - Drive
(automatic shift program)This position is designed for driving un-
der all normal operating conditions. All
forward gears are available; the Adap-
tive Transmission Control (ATC) is fully
operational."Kickdown" (automatic downshift)In the "Kickdown" mode, you achieve
maximum performance.
Press the accelerator pedal past the in-
creased resistance point at the full-
throttle position.
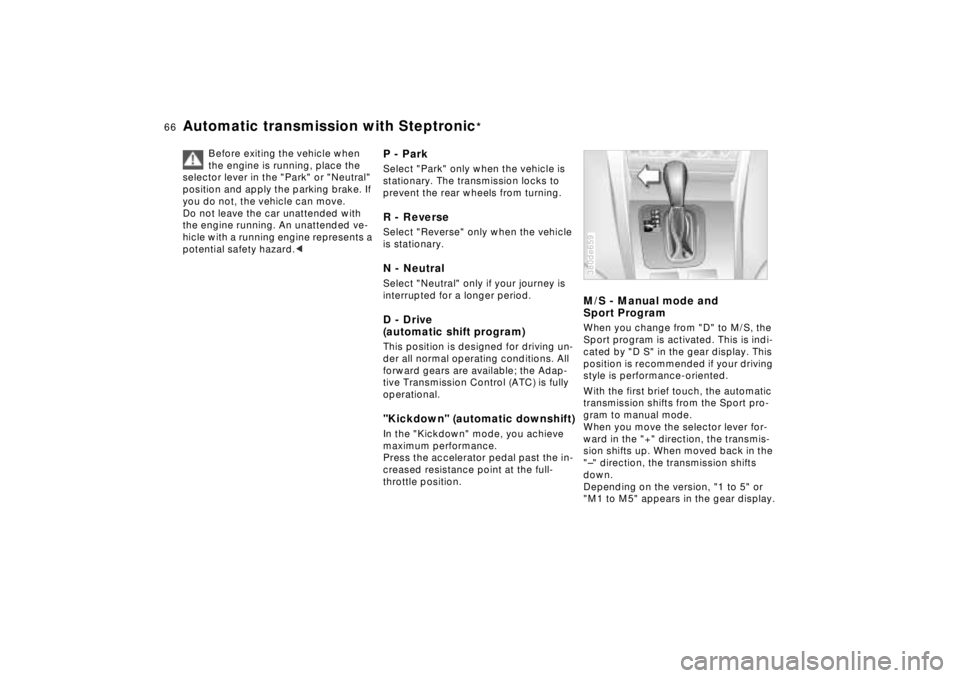
M/S - Manual mode and
Sport ProgramWhen you change from "D" to M/S, the
Sport program is activated. This is indi-
cated by "D S" in the gear display. This
position is recommended if your driving
style is performance-oriented.
With the first brief touch, the automatic
transmission shifts from the Sport pro-
gram to manual mode.
When you move the selector lever for-
ward in the "+" direction, the transmis-
sion shifts up. When moved back in the
"–" direction, the transmission shifts
down.
Depending on the version, "1 to 5" or
"M1 to M5" appears in the gear display.380de659
Page 96 of 211

95n
RepairsIndexOverview Controls Car care Technology Data
Tire Pressure Control (RDC)
*
Flat tireIf there is a tire failure with a loss of air
pressure, the message "TIRE DEFECT"
appears in the Check Control. In addi-
tion, a gong sounds.
If this occurs, reduce vehicle speed im-
mediately and stop the vehicle. Avoid
hard brake applications. Do not over-
steer. Replace the wheel and flat tire.
The spare tire which is available in
your vehicle as standard equip-
ment is equipped with the electronics
required for RDC and, following activa-
tion of the system, is also monitored af-
ter it is mounted.<
The RDC cannot alert you to se-
vere and sudden tire damage
caused by external factors.<
Have the tires changed by your
authorized BMW center.
Your authorized BMW center has been
trained to work with the RDC system
and is equipped with the necessary
special tools to do so.<
System interferenceUnder certain local conditions, the RDC
may malfunction for brief periods be-
cause of interference from outside sys-
tems or electronic devices which have
the same radio frequency.
During the period of the malfunction,
the message "TIRE CONTROL INAC-
TIVE" appears in the Check Control.
You will also see the same message
>in the event of a system fault
>if a wheel is mounted without the
RDC electronics
>if, in addition to the spare tire, addi-
tional wheels with RDC electronics
are on board.
Please contact your authorized BMW
center for additional information.
Page 136 of 211

135n
RepairsIndexOverview Controls Car care Technology Data
Winter tires Snow chains
*
Choosing the right tireBMW recommends winter tires (M+S
radial tires) for driving in adverse winter
road conditions. While tires known as
all-season tires (M+S designation) pro-
vide better winter traction than summer
tires with load ratings H, V, W and ZR,
they generally do not achieve the per-
formance of winter tires.
In the interests of sure tracking and safe
steering response at all four wheels,
mount winter tires which are made by
the same manufacturer and which have
the same tread configuration.
Mount only winter tires which have
been approved by BMW. Any BMW
center will be glad to provide you with
information on the best winter tires for
your particular driving conditions.
Do not exceed specified
maximum speeds
Never exceed the maximum
speed for which the tires are
rated.
Unprofessional attempts by laymen to
service tires can lead to damage and
accidents.
Have this work performed by skilled
professionals only. Any BMW center
has the required technical knowledge
and the proper equipment and will be
happy to assist you.<
Tire condition, tire pressureWinter tires display a perceptible loss in
their ability to cope with winter driving
conditions once the tread wears to be-
low 0.16 in (4 mm), and should thus be
replaced.
Comply with the specified tire inflation
pressures - and be sure to have the
wheel and tire assemblies balanced ev-
ery time you change the tires.StorageStore tires in a cool, dry place, away
from light whenever possible. Protect
the tires against contact with oil, grease
and fuel.
Use narrow-link BMW snow chains on
summer or winter tires only in pairs and
only on the rear wheels. Comply with all
manufacturer's safety precautions when
mounting the chains.
Page 171 of 211
170n
Changing tires
Safety measures in the event of a
flat tire or wheel change:
Stop the vehicle as far as possible from
passing traffic. Park on a firm, flat, sur-
face.
Switch on the hazard flashers.
Turn the steering wheel to the straight-
ahead position, remove the key and en-
gage the steering lock. Make sure that
the selector lever is in Park, and engage
the parking brake.
All passengers should be outside the
car and well away from your immediate
working area (for instance, behind a
guardrail).
If a warning triangle or portable hazard
warning lamp is available, set it up on
the roadside at an appropriate distance
from the rear of the vehicle.
Comply with all safety guidelines and
regulations.
Change the wheel only on a level, firm
surface which is not slippery. Avoid
jacking the car on a soft or slippery sup-
port surface (snow, ice, loose gravel,
etc.), since it could slide sideways.
Position the jack on a firm support sur-
face.
Do not place wooden blocks or similar
objects under the jack. If this is done,
the jack might not be able to reach its
full support capacity because of the
limited height. Do not lie under the vehi-
cle or start the engine when the vehicle
is supported by the jack - risk of fatal
injury.<
What you will needIn order to avoid rattling noises later,
note the position of the tools when you
remove them and return them to their
original position when you are through
using them.
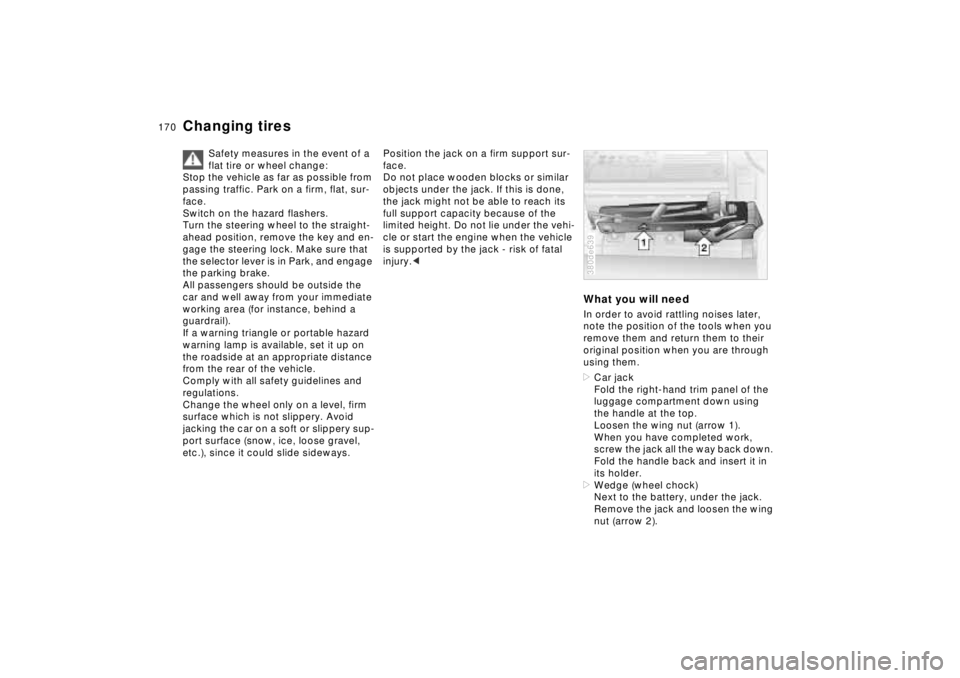
>Car jack
Fold the right-hand trim panel of the
luggage compartment down using
the handle at the top.
Loosen the wing nut (arrow 1).
When you have completed work,
screw the jack all the way back down.
Fold the handle back and insert it in
its holder.
>Wedge (wheel chock)
Next to the battery, under the jack.
Remove the jack and loosen the wing
nut (arrow 2).380de639
Page 172 of 211
171n
RepairsIndexOverview Controls Car care Technology Data
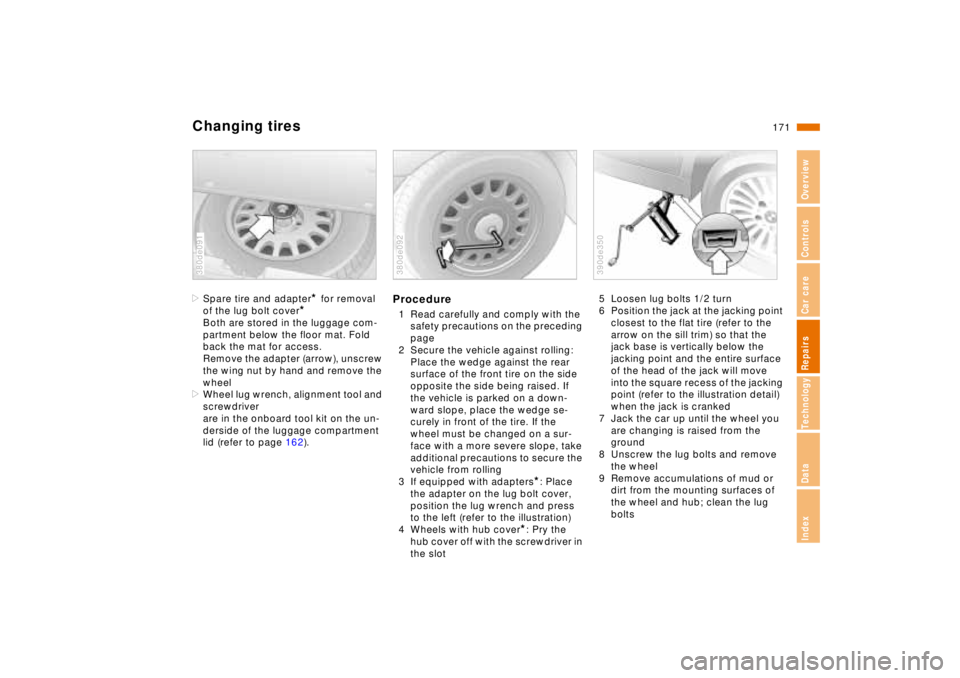
Changing tires>Spare tire and adapter
* for removal
of the lug bolt cover
*
Both are stored in the luggage com-
partment below the floor mat. Fold
back the mat for access.
Remove the adapter (arrow), unscrew
the wing nut by hand and remove the
wheel
>Wheel lug wrench, alignment tool and
screwdriver
are in the onboard tool kit on the un-
derside of the luggage compartment
lid (refer to page 162).
380de091
Procedure1 Read carefully and comply with the
safety precautions on the preceding
page
2 Secure the vehicle against rolling:
Place the wedge against the rear
surface of the front tire on the side
opposite the side being raised. If
the vehicle is parked on a down-
ward slope, place the wedge se-
curely in front of the tire. If the
wheel must be changed on a sur-
face with a more severe slope, take
additional precautions to secure the
vehicle from rolling
3 If equipped with adapters
*: Place
the adapter on the lug bolt cover,
position the lug wrench and press
to the left (refer to the illustration)
4 Wheels with hub cover
*: Pry the
hub cover off with the screwdriver in
the slot
380de092
5 Loosen lug bolts 1/2 turn
6 Position the jack at the jacking point
closest to the flat tire (refer to the
arrow on the sill trim) so that the
jack base is vertically below the
jacking point and the entire surface
of the head of the jack will move
into the square recess of the jacking
point (refer to the illustration detail)
when the jack is cranked
7 Jack the car up until the wheel you
are changing is raised from the
ground
8 Unscrew the lug bolts and remove
the wheel
9 Remove accumulations of mud or
dirt from the mounting surfaces of
the wheel and hub; clean the lug
bolts390de350
Page 190 of 211
189n
RepairsIndexOverview Controls Car care Technology Data
Tire Pressure Control (RDC)
*
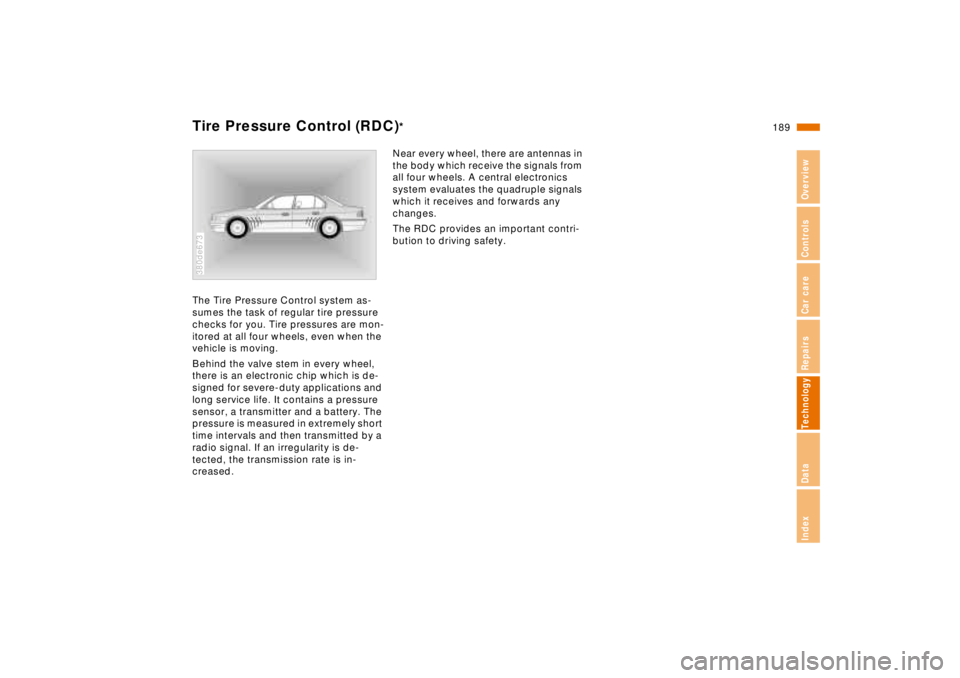
The Tire Pressure Control system as-
sumes the task of regular tire pressure
checks for you. Tire pressures are mon-
itored at all four wheels, even when the
vehicle is moving.
Behind the valve stem in every wheel,
there is an electronic chip which is de-
signed for severe-duty applications and
long service life. It contains a pressure
sensor, a transmitter and a battery. The
pressure is measured in extremely short
time intervals and then transmitted by a
radio signal. If an irregularity is de-
tected, the transmission rate is in-
creased.380de673
Near every wheel, there are antennas in
the body which receive the signals from
all four wheels. A central electronics
system evaluates the quadruple signals
which it receives and forwards any
changes.
The RDC provides an important contri-
bution to driving safety.
Page 203 of 211

Everything from A to ZAABS125
Accessories6
Activated-charcoal filter105
Active seat48
Adaptive Transmission
Control (ATC)63
Adding engine oil143
Adding washer fluid142
Adjust the backrest46
Adjusting steering wheel49
Air distribution102
Air flow103
Air jets100
Air pressure132
Airbags55
Alarm system40
Deactivating in an
emergency41
Antenna diversity186
Antifreeze146
Antifreeze, radiator128, 146
Antilock Brake System
(ABS)125
Anti-theft alarm system
32,40
Approved gross vehicle
weight196
Aquaplaning123,132
Armrest111
ASC+T (Automatic Stability
Control plus Traction)92Ashtray114
AUC (Automatic recirculated-
air control)103
Audio System78
Automatic car washes150
Automatic climate
control100
Automatic climate control,
removing window
condensation102
Automatic recirculated-air
control (AUC)103
Automatic Soft-Close
feature38
Automatic Stability Control
plus Traction (ASC+T)92
Automatic steering wheel
adjustment49
Automatic transmission62
Automatic transmission with
Steptronic65
Automatic windshield
washer69
Average fuel consumption 85
Average speed86
Axle loads196
BBackup lamps, bulb
replacement166
Battery173,198
Battery capacity198Battery change, radio remote
control168
Battery charge current20
Battery, discharged179
Battery, removal and
installation175
Belts54
Beverage holders113
Blower103
Body-cavity protectant151
Brake faults128
Brake fluid147
Brake hydraulic system20
Brake lamps, bulb
replacement166
Brakes126
Break-in procedure122
Break-resistant security
glass, care153
Bulb replacement163
CCar jack170
Car Memory53
Car radio reception131, 186
Car telephone113
Car wash150
Care, exterior152
Care, interior154
Caring for the vehicle
finish152
Caring for your car150Catalytic converter124
Cellular phone131
Center (high-mount) brake
lamp166
Central locking system32
Central locking system,
button36
Changing a wheel170
Charge indicator lamp20
Charging the battery174
Check Control75
CHECK key75
Checking the engine oil143
Checking tire pressure26
Child restraints57
Childproof door locks58
Cigarette lighter115
Clock,
refer to Digital clock79
Code88
Refer to the Radio Owner's
Manuel
Codes, tires134
Coin tray113
Cold start60
Comfort seats47
Connecting a car vacuum
cleaner115
Consumption display73
Contour seat48
Page 208 of 211

Repairs
Index
Overview
Controls
Car care
Technology
Data
Owner service procedures from A to Z207 n
A
Adding brake fluid 147
Adding engine coolant 146
Adding engine oil 143
Adding fluid, power steering 148
Air pressure 26
B
Backup lamps, bulb
replacement 166
Battery change, radio remote control 168
Battery, checking charge condition 174
Battery, discharged 179
Brake lamps, bulb replacement 166
Brakes, brake faults 128
Bulb replacement 163
C
Changing a wheel 170
Charging the battery 174
Check Control 75
Checking the engine oil 143
Checking tire pressure 26
D
Defrosting, windows102
Difficult steering 130
Doors, manual operation 32
E
Electrical accessories,
failure 176
Electrical fault fuel filler door 178
Sliding/Tilt sunroof 178
Emergency release Doors 32
Fuel filler door 178
Luggage compartment
lid 37
Sliding/Tilt sunroof 178
Engine oil specifications 144
F
Failure messages75
Filling the windshield washer fluid reservoir 142
First-aid kit 24
Fittings, tow-starting and towing 180
Fog lamp,
replace the bulb 165
Footwell lamps, bulb replacement 167 Fuel filler door,
manual release after
electrical fault 178
Fuses, replacing 176
G
Glove compartment lamp,
bulb replacement 167
H
Hazard warning flashers 24
Hazard warning triangle 24
High beam headlamps, bulb replacement 164,165
Hood release 137
I
Indicator lamps 20
Interior lamps, bulb replacement 167
Interior motion sensor, deactivation 41
J
Jump starting 179
L
License plate lamps, bulb
replacement 166
Low beam headlamps, bulb
replacement 164 Luggage compartment
lamps, bulb
replacement 167
Luggage compartment lid, emergency release 37
M
Maintenance74,149
Malfunction displays 75
N
New transmitter, radio re-
mote control 168
O
Oil level check 143
Oil specifications 144
Onboard tool kit 162
P
Power steering,
adding fluid 148
Pressure, tires 26
R
Radio remote control,
battery change 168
Radio remote control, new transmitter 168
Rear lamp assembly 166
Removing condensation, windows 102
Page 209 of 211

Owner service procedures from A to ZSSecurity glass, care153
Sliding/tilt sunroof, closing
after electrical fault178
Sliding/tilt sunroof, power
supply interruption45
Snow chains135
Spare tire171
Starting assistance179
Starting problems
59,124,179,180TTail lamps, bulb
replacement166
Tilt sensor alarm system,
deactivation41
Tire damage132
Tire failure170
Tire inflation pressure26
Tools162
Towing180
Towing eyes180
Tow-starting180
Turn signal,
replace the bulb165UUse of antifreeze,
radiator146
WWarning lamps20
Warnings75
Washer fluid reservoir,
filling142
Wheel change170
Windows, demisting102
Windshield washer nozzle
adjustment142
Wiper blades, replacing162
Work in the engine
compartment137