sport mode BMW 745Li 2004 E66 Owner's Manual
[x] Cancel search | Manufacturer: BMW, Model Year: 2004, Model line: 745Li, Model: BMW 745Li 2004 E66Pages: 232, PDF Size: 5.27 MB
Page 9 of 232

7
Reference
At a glance
Controls
Driving tips
Communications
Navigation
Entertainment
Mobility
Service and warranty
We recommend that you read this publica-
tion thoroughly.
Your BMW is covered by the following war-
ranties:
Ð New Vehicle Limited Warranty
Ð Rust Perforation Limited Warranty
Ð Federal Emissions System Defect
Warranty
Ð Federal Emissions Performance Warranty
Ð California Emission Control System
Limited Warranty
Detailed information about these warran-
ties is listed in the Service and Warranty
Information Booklet for US models or in the
Warranty and Service Guide Booklet for
Canadian models.
Reporting safety defects
The following only applies to vehicles
owned and operated in the US.
If you believe that your vehicle has a defect
which could cause a crash or could cause
injury or death, you should immediately
inform the National Highway Traffic Safety
Administration (NHTSA) in addition to noti-
fying BMW of North America, LLC, P.O.
Box 1227, Westwood, New Jersey 07675-
1227, Telephone (800) 831-1117.
If NHTSA receives similar complaints, it
may open an investigation, and if it finds
that a safety defect exists in a group of
vehicles, it may order a recall and remedy
campaign. However, NHTSA cannot
become involved in individual problems
between you, your dealer, or BMW of North
America, LLC.
To contact NHTSA, you may either call the
Auto Safety Hotline toll-free at 1-800-424-
9393 (or 366-0123 in Washington, D.C.
area) or write to: NHTSA, U.S. Department
of Transportation, Washington, D.C.
20590. You can also obtain other informa-
tion about motor vehicle safety from the
Hotline.
Page 18 of 232
Cockpit
16
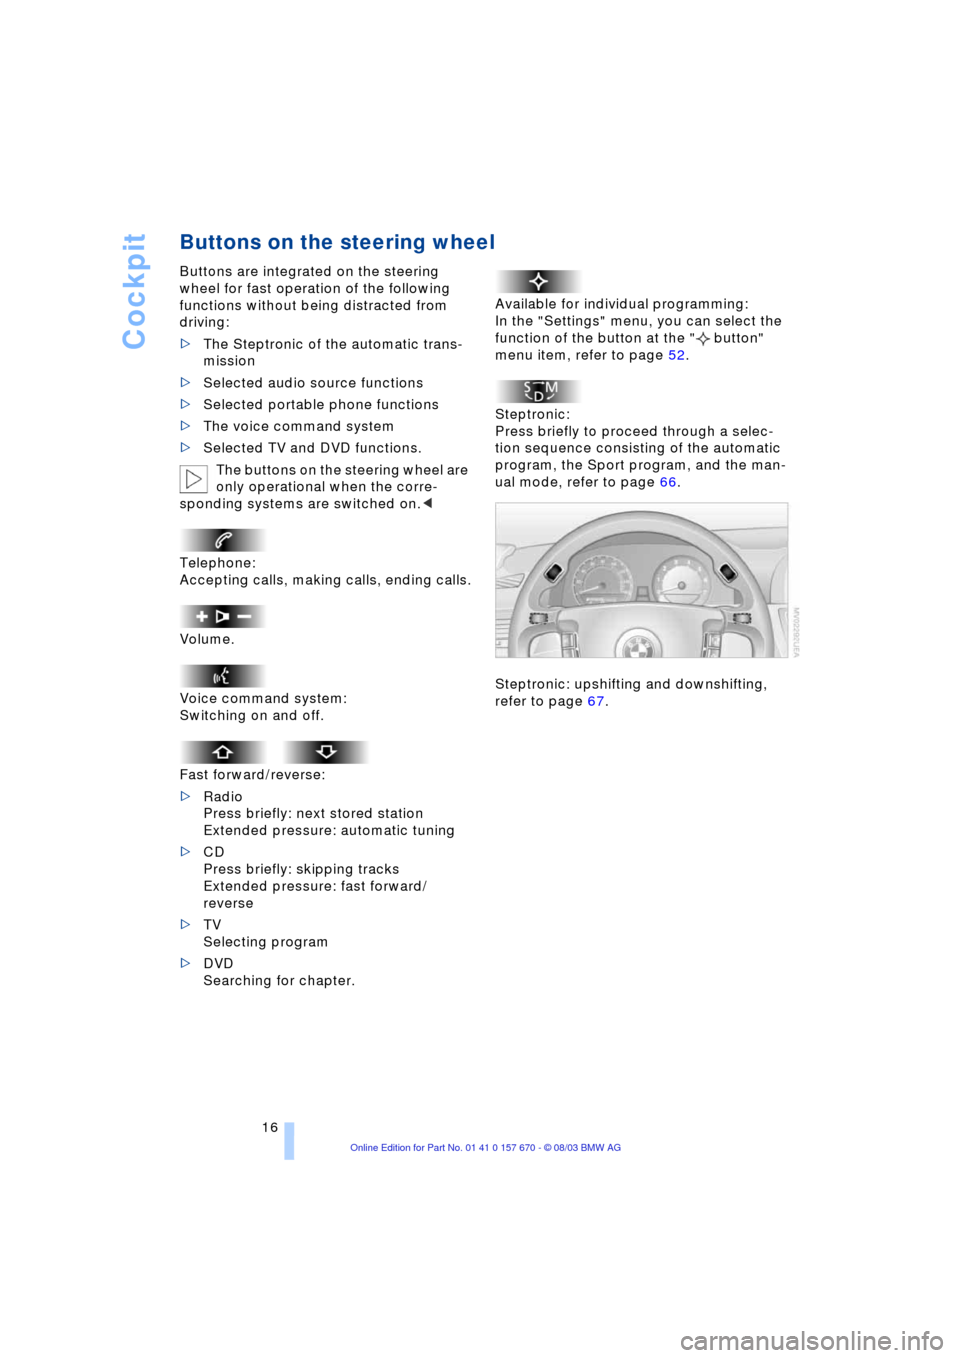
Buttons on the steering wheel
Buttons are integrated on the steering
wheel for fast operation of the following
functions without being distracted from
driving:
>The Steptronic of the automatic trans-
mission
>Selected audio source functions
>Selected portable phone functions
>The voice command system
>Selected TV and DVD functions.
The buttons on the steering wheel are
only operational when the corre-
sponding systems are switched on.<
Telephone:
Accepting calls, making calls, ending calls.
Volume.
Voice command system:
Switching on and off.
Fast forward/reverse:
>Radio
Press briefly: next stored station
Extended pressure: automatic tuning
>CD
Press briefly: skipping tracks
Extended pressure: fast forward/
reverse
>TV
Selecting program
>DVD
Searching for chapter.Available for individual programming:
In the "Settings" menu, you can select the
function of the button at the " button"
menu item, refer to page 52.
Steptronic:
Press briefly to proceed through a selec-
tion sequence consisting of the automatic
program, the Sport program, and the man-
ual mode, refer to page 66.
Steptronic: upshifting and downshifting,
refer to page 67.
Page 42 of 232
Opening and closing
40 >To a change in the vehicle's tilt if some-
one attempts to steal the wheels or tow
the vehicle
>To interruption of battery voltage.
The system responds to unauthorized vehi-
cle entry and attempted theft by simulta-
neously activating:
>An acoustic alarm, which lasts for a
period of approx. 30 seconds
>The hazard warning flashers for approx.
five minutes
>The high beams, which flash on and off
in the same rhythm.
Arming and disarming the alarm
system
When you lock or unlock the vehicle, either
with the remote control unit or at the door
lock, the alarm system is armed or dis-
armed at the same time.
The system indicates that it has been cor-
rectly armed by switching on the hazard
warning flashers for a single cycle and by
emitting an acoustic signal.
You can have different acknowledg-
ment signals set to confirm arming
and disarming.<
You can also open the luggage compart-
ment lid with the system armed using
button 3 on the remote control, refer to
page 34. When you close the lid, the sys-
tem is rearmed.
Pressing the Panic mode button for a
longer period triggers the alarm, refer
to page 34.<
To deactivate the alarm
>unlock the vehicle using the remote
control, refer to page 34
>insert the remote control all the way into
the ignition lock, engaging the detent.
Indicator lamp displays
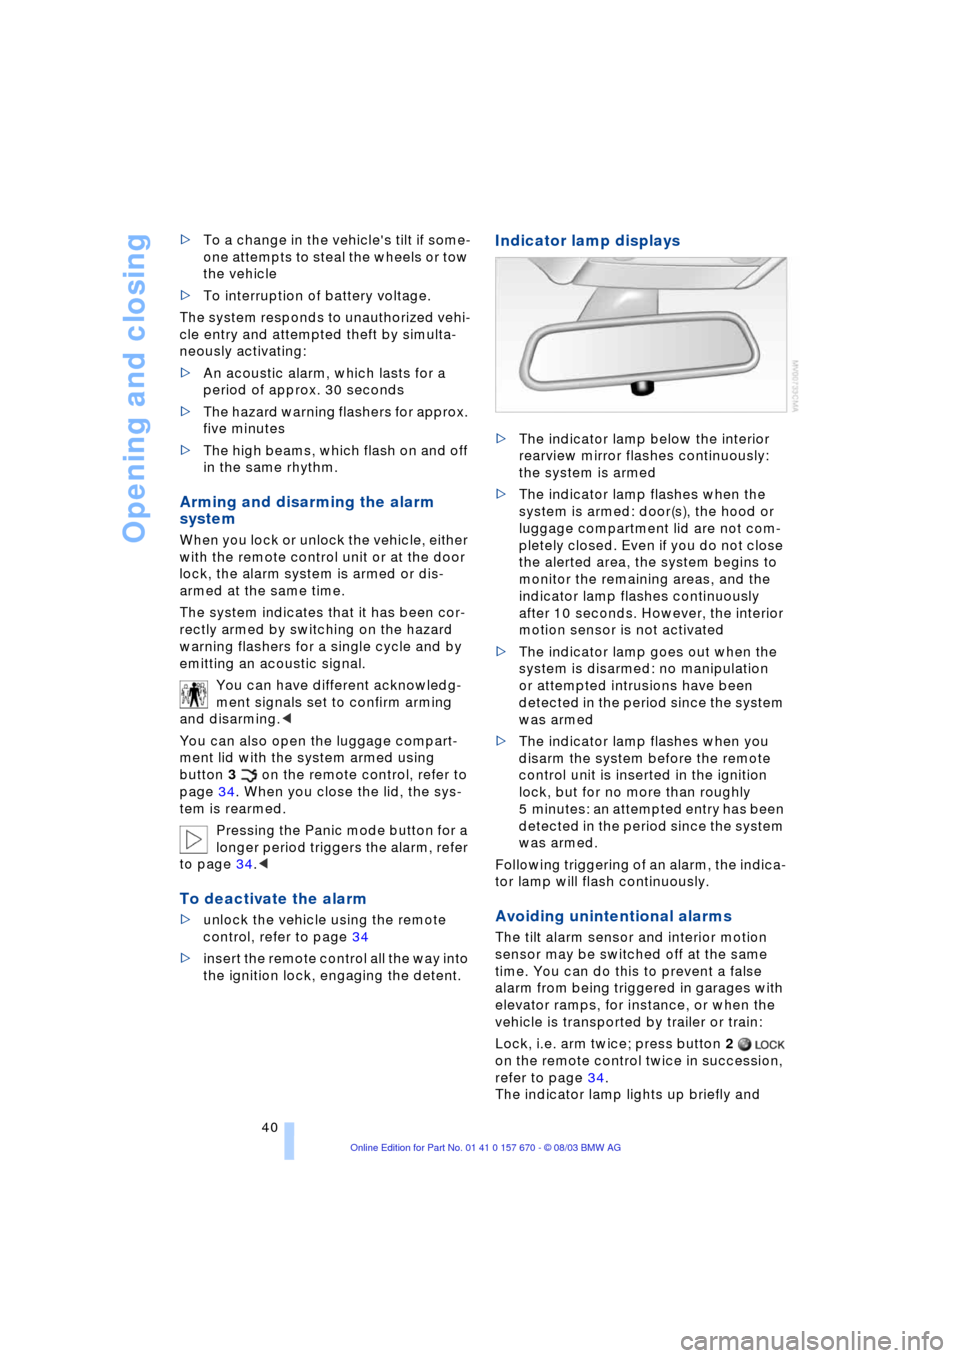
>The indicator lamp below the interior
rearview mirror flashes continuously:
the system is armed
>The indicator lamp flashes when the
system is armed: door(s), the hood or
luggage compartment lid are not com-
pletely closed. Even if you do not close
the alerted area, the system begins to
monitor the remaining areas, and the
indicator lamp flashes continuously
after 10 seconds. However, the interior
motion sensor is not activated
>The indicator lamp goes out when the
system is disarmed: no manipulation
or attempted intrusions have been
detected in the period since the system
was armed
>The indicator lamp flashes when you
disarm the system before the remote
control unit is inserted in the ignition
lock, but for no more than roughly
5 minutes: an attempted entry has been
detected in the period since the system
was armed.
Following triggering of an alarm, the indica-
tor lamp will flash continuously.
Avoiding unintentional alarms
The tilt alarm sensor and interior motion
sensor may be switched off at the same
time. You can do this to prevent a false
alarm from being triggered in garages with
elevator ramps, for instance, or when the
vehicle is transported by trailer or train:
Lock, i.e. arm twice; press button 2
on the remote control twice in succession,
refer to page 34.
The indicator lamp lights up briefly and
Page 60 of 232
Transporting children safely
58
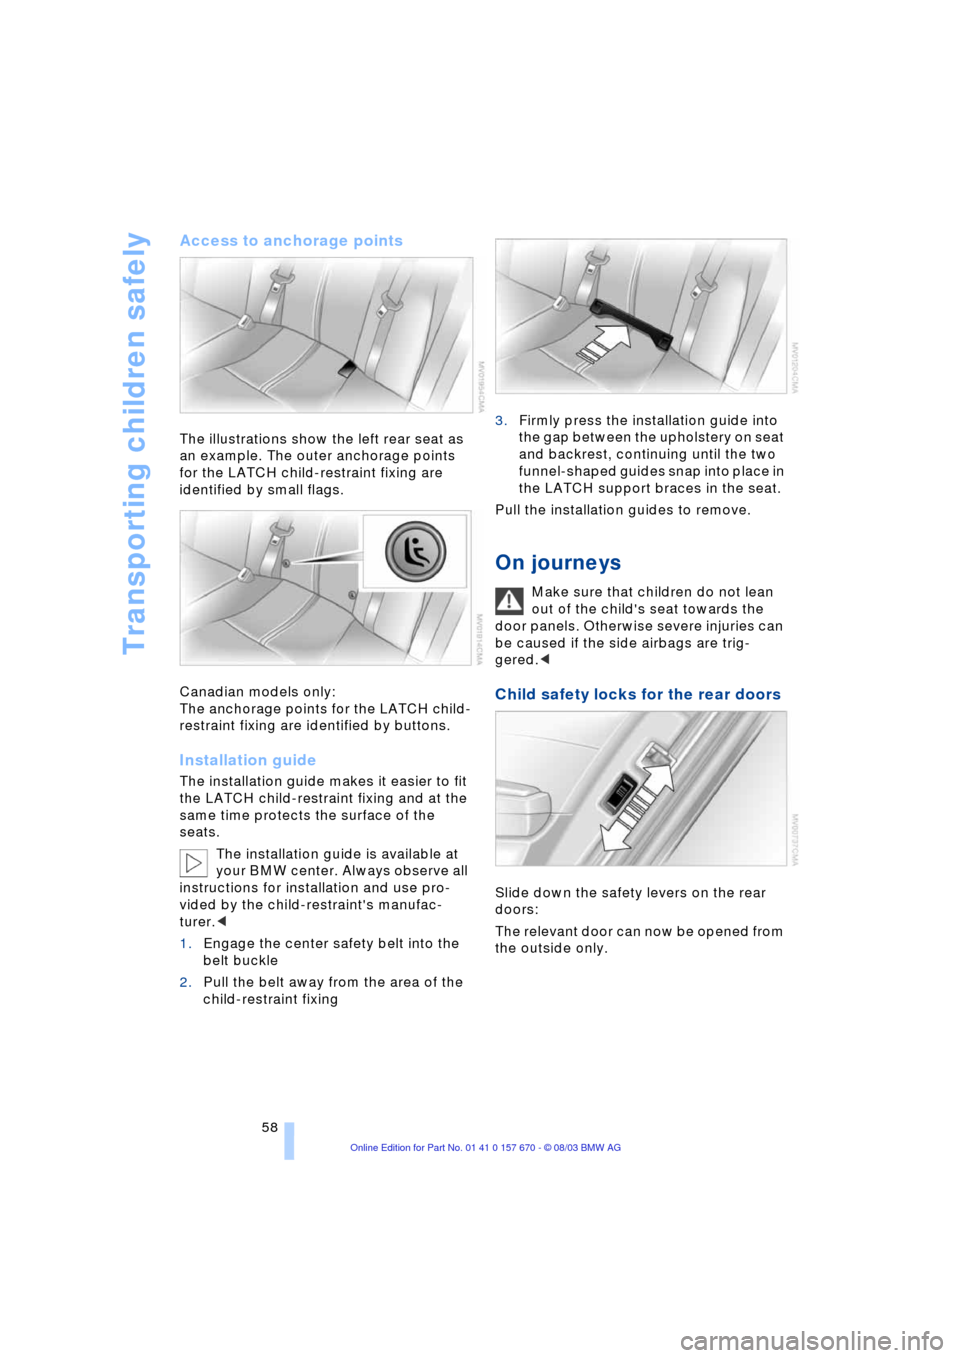
Access to anchorage points
The illustrations show the left rear seat as
an example. The outer anchorage points
for the LATCH child-restraint fixing are
identified by small flags.
Canadian models only:
The anchorage points for the LATCH child-
restraint fixing are identified by buttons.
Installation guide
The installation guide makes it easier to fit
the LATCH child-restraint fixing and at the
same time protects the surface of the
seats.
The installation guide is available at
your BMW center. Always observe all
instructions for installation and use pro-
vided by the child-restraint's manufac-
turer.<
1.Engage the center safety belt into the
belt buckle
2.Pull the belt away from the area of the
child-restraint fixing3.Firmly press the installation guide into
the gap between the upholstery on seat
and backrest, continuing until the two
funnel-shaped guides snap into place in
the LATCH support braces in the seat.
Pull the installation guides to remove.
On journeys
Make sure that children do not lean
out of the child's seat towards the
door panels. Otherwise severe injuries can
be caused if the side airbags are trig-
gered.<
Child safety locks for the rear doors
Slide down the safety levers on the rear
doors:
The relevant door can now be opened from
the outside only.
Page 68 of 232
Driving
66 ized. The indicator lamp in the
Info Display lights up red
>Releasing: the parking brake is ready
for operation. The indicator
lamp in the Info Display goes out.
Automatic transmission
with Steptronic
While you can drive as with any conven-
tional automatic transmission, you also
enjoy the option of shifting manually at the
steering wheel, refer to page 67.
Transmission range selection
P R N D
Program display
S or M1 Ð M6
Buttons on the steering wheel
Press briefly to proceed through a selec-
tion sequence consisting of the automatic
program, the sport program, and the man-
ual mode.Steptronic:
Upshifting and downshifting, refer to Sport
program and manual operation.
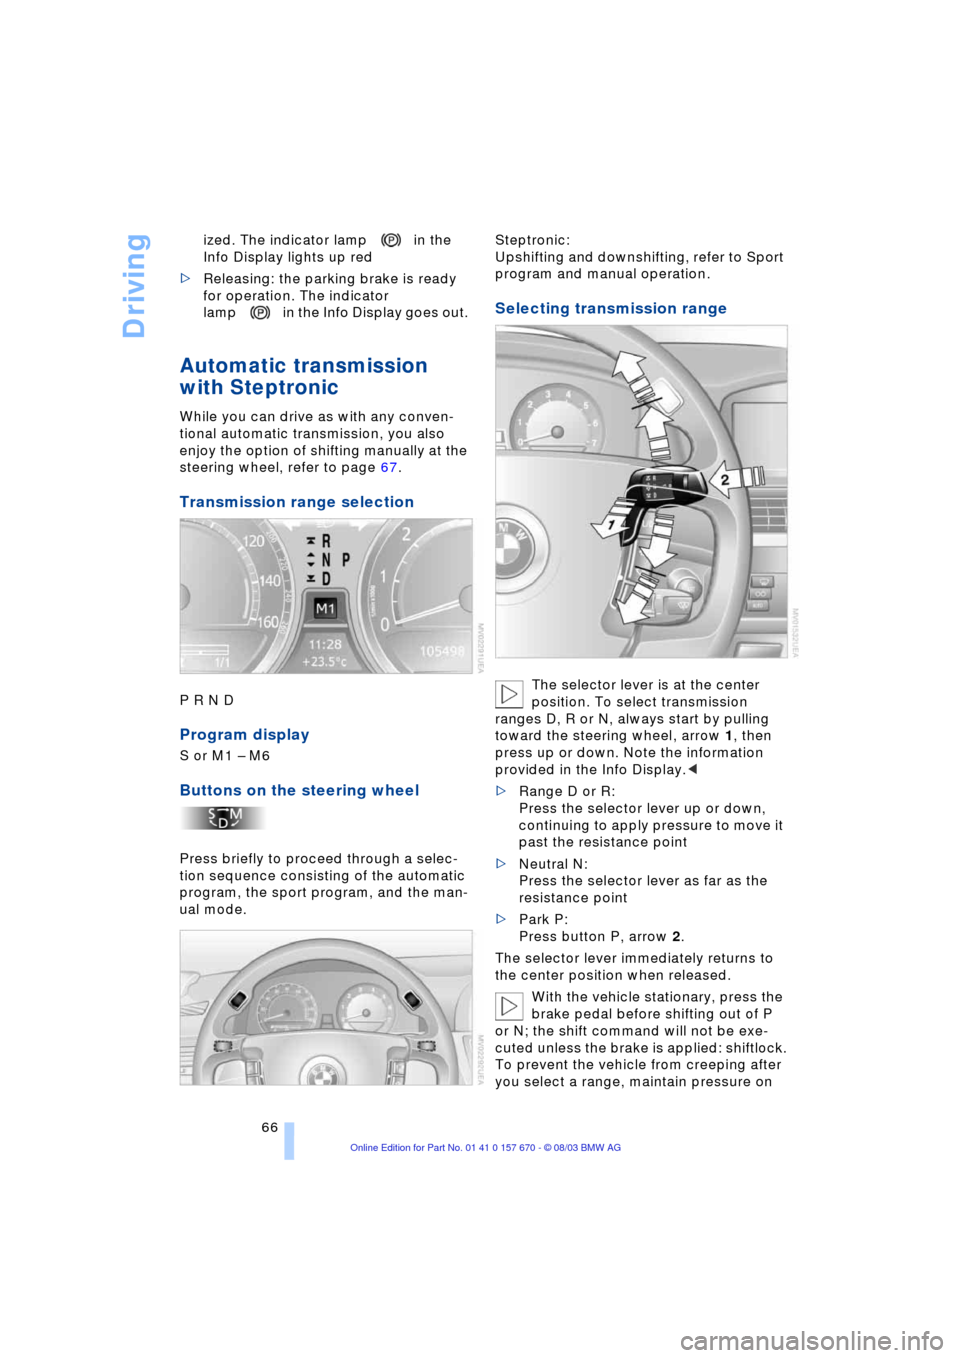
Selecting transmission range
The selector lever is at the center
position. To select transmission
ranges D, R or N, always start by pulling
toward the steering wheel, arrow 1, then
press up or down. Note the information
provided in the Info Display.<
>Range D or R:
Press the selector lever up or down,
continuing to apply pressure to move it
past the resistance point
>Neutral N:
Press the selector lever as far as the
resistance point
>Park P:
Press button P, arrow 2.
The selector lever immediately returns to
the center position when released.
With the vehicle stationary, press the
brake pedal before shifting out of P
or N; the shift command will not be exe-
cuted unless the brake is applied: shiftlock.
To prevent the vehicle from creeping after
you select a range, maintain pressure on
Page 69 of 232
Controls
67Reference
At a glance
Driving tips
Communications
Navigation
Entertainment
Mobility
the brake pedal until you are ready to start.
You can activate the Automatic Hold fea-
ture to suppress the vehicle's tendency to
creep, refer to page 63.<
Shift commands are transmitted electroni-
cally. To help avoid malfunctions, each
command undergoes a plausibility check
prior to execution.
Remember to observe the Check Control
for status messages.
You can find additional information on the
Check Control on page 82.
To prevent the vehicle from rolling,
always select position P and engage
the parking brake before leaving the vehi-
cle with the engine running. Note the infor-
mation provided in the Info Display.
Never leave an unattended vehicle with the
engine running, as such a vehicle repre-
sents a potential safety hazard.<
P Park
Select P only when the vehicle is station-
ary. The transmission lockout prevents the
rear wheels from turning. The lockout dis-
engages when you press the selector lever
toward D, N or R while the engine is run-
ning.
P is engaged automatically as soon as
you switch off the engine unless N is
engaged and the remote control is inserted
in the ignition lock, refer to page 61.<
R Reverse
Select R only when the vehicle is station-
ary.
N Neutral
Select N only if your journey is interrupted
for a long period.
>From D press the selector lever up
>From R press the selector lever down.
Note the arrows indicating direction in the
range display.
N remains engaged whenever the
remote control unit remains in the
ignition lock after the ignition is switched
off. This function is useful in automatic car washes, etc.
After approx. 30 minutes the system auto-
matically engages P. Remember to
observe the Check Control for status mes-
sages.
Switching off the engine, refer to
page 61.<
D Drive, automatic driving position
This is the range recommended for normal
vehicle operation. All forward gears are
available.
Under normal operating conditions, fuel
consumption is lowest when driving in
position D.
Kickdown
The kickdown mode provides maximum
acceleration.
Press the accelerator pedal beyond the
full-throttle resistance point.
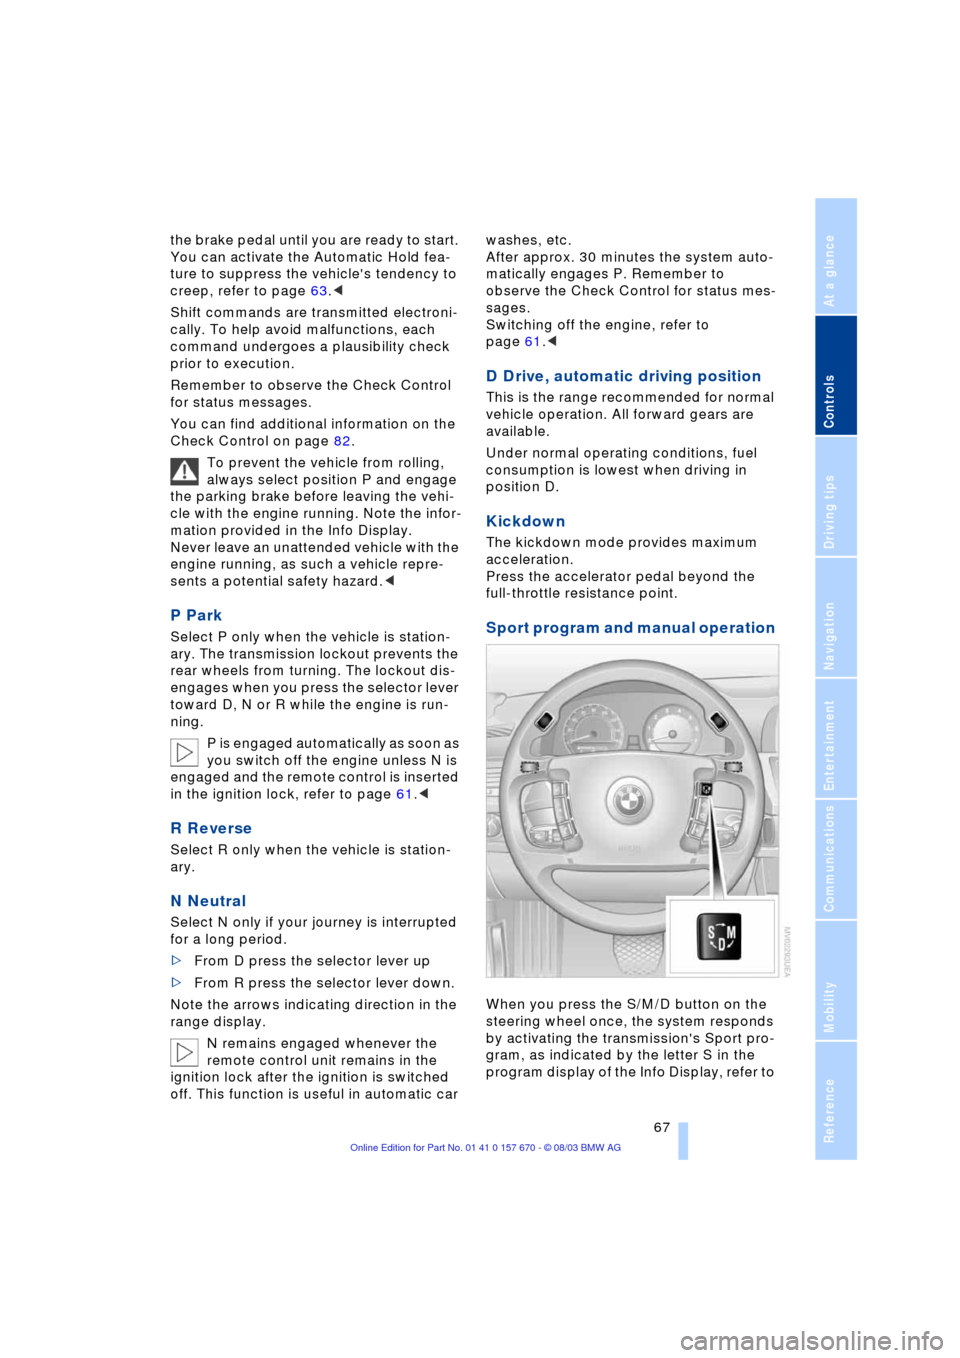
Sport program and manual operation
When you press the S/M/D button on the
steering wheel once, the system responds
by activating the transmission's Sport pro-
gram, as indicated by the letter S in the
program display of the Info Display, refer to
Page 96 of 232
Technology for comfort, convenience and safety
94 In the event of a malfunction, the
warning lamp lights up yellow.
Have the system checked and
repaired at your BMW center as soon as
possible.
Check Control messages, refer to page 82.
Please take note of the additional informa-
tion on the Control Display.
Warning lamp on Canadian models.
Dynamic Drive
The concept
Dynamic Drive minimizes body roll and
optimizes vehicle stability during cornering
and evasive maneuvers.
Active stabilizers at the front and rear axles
form the basis for Dynamic Drive. Suspen-
sion compliance adapts to suit driving con-
ditions, varying from performance-oriented
during cornering to smooth and comfort-
oriented when the vehicle is proceeding in
a straight line.
The system assumes operational status
each time you start the engine.
Driving with Dynamic Drive
During vehicle operation, the system con-
tinuously runs through closed-loop control
cycles lasting only fractions of a second.
In case of malfunction
The symbol will light up, accompa-
nied by a status message in the
Check Control. Please take note of
the additional information on the Control
Display.
You can find more information on the
Check Control starting on page 82.
If the Dynamic Drive system switches
off in response to malfunction, please
remember to adapt your speed accord-
ingly, especially in curves.
The suspension will be noticeably softer
and the vehicle will display a greater ten-dency to tilt during cornering and in cross-
winds.
If a Check Control message stating that
you should stop appears in addition to the
red symbol, stop immediately and switch
off the engine. In this case the oil level in
the reservoir may have dropped below the
minimum, possibly owing to a leak in the
hydraulic system.
Please observe the additional instructions
provided on the Control Display.<
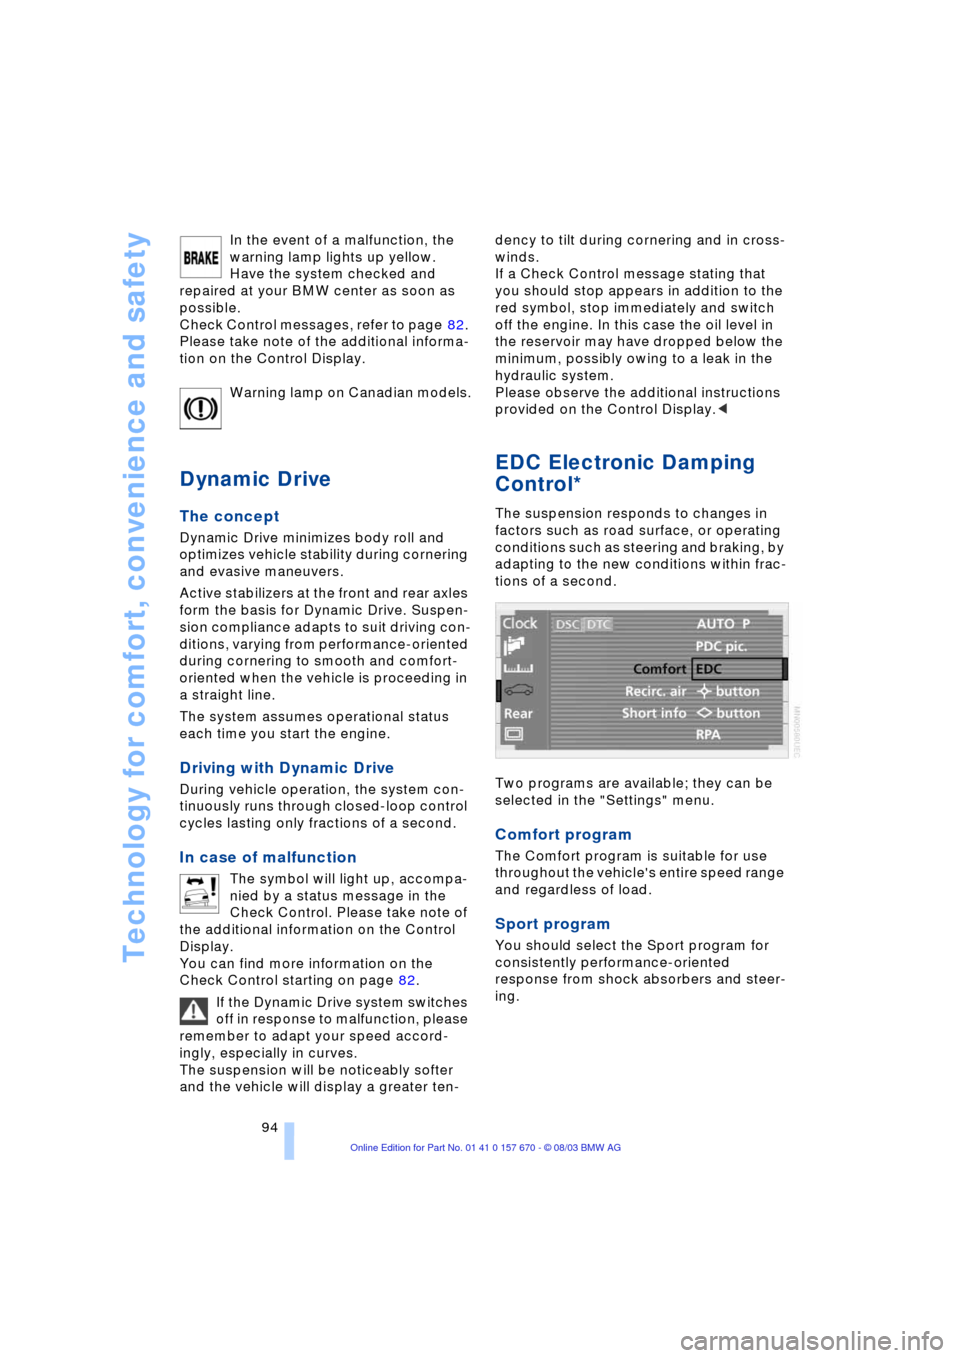
EDC Electronic Damping
Control*
The suspension responds to changes in
factors such as road surface, or operating
conditions such as steering and braking, by
adapting to the new conditions within frac-
tions of a second.
Two programs are available; they can be
selected in the "Settings" menu.
Comfort program
The Comfort program is suitable for use
throughout the vehicle's entire speed range
and regardless of load.
Sport program
You should select the Sport program for
consistently performance-oriented
response from shock absorbers and steer-
ing.
Page 126 of 232
Things to remember when driving
124 Warning lamp for Canadian models.
The brake pads have reached their mini-
mum pad thickness. Have them replaced
at your BMW center as soon as possible.
For your own safety: use only brake
pads that BMW has released for your
particular vehicle model. As BMW cannot
assess the suitability of other brake pads
for use on your vehicle, we are unable to
assume continued responsibility for the
vehicle's operating safety if non-approved
pads are installed.<
Cargo loading
To avoid loading the tires beyond
their approved carrying capacity,
never overload the vehicle. Overloading
can lead to overheating and increases the
rate at which damage develops inside the
tires. The ultimate result can assume the
form of a sudden air loss.<
Determining loading limit
1.Locate the following statement on your
vehicle's door pillar
*:
The combined weight of occu-
pants and cargo should never
exceed XXX lbs. or YYY kg, as other-
wise the vehicle may be damaged and
unstable driving conditions may
result.<
2.Determine the combined weight of the
driver and passenger that will be riding
in your vehicle3.Subtract the combined weight of the
driver and passenger from XXX lbs. or
YYY kg
4.The resulting figure equals the available
amount of cargo and luggage load
capacity.
For example, if the XXX amount equals
1,400 lbs. and there will be five 150-
pound passengers in your vehicle, the
amount of available cargo and luggage
load capacity is 650 lbs.:
1,400 Ibs. minus 750 Ibs. = 650 Ibs.
5.Determine the combined weight of lug-
gage and cargo being loaded on the
vehicle. That weight should not exceed
the available cargo and luggage load
capacity calculated in step 4
6.If your vehicle will be towing a trailer,
part of the load from your trailer will be
transferred to your vehicle. Consult the
manual for transporting a trailer to
determine how this may reduce the
available cargo and luggage load
capacity of your vehicle.
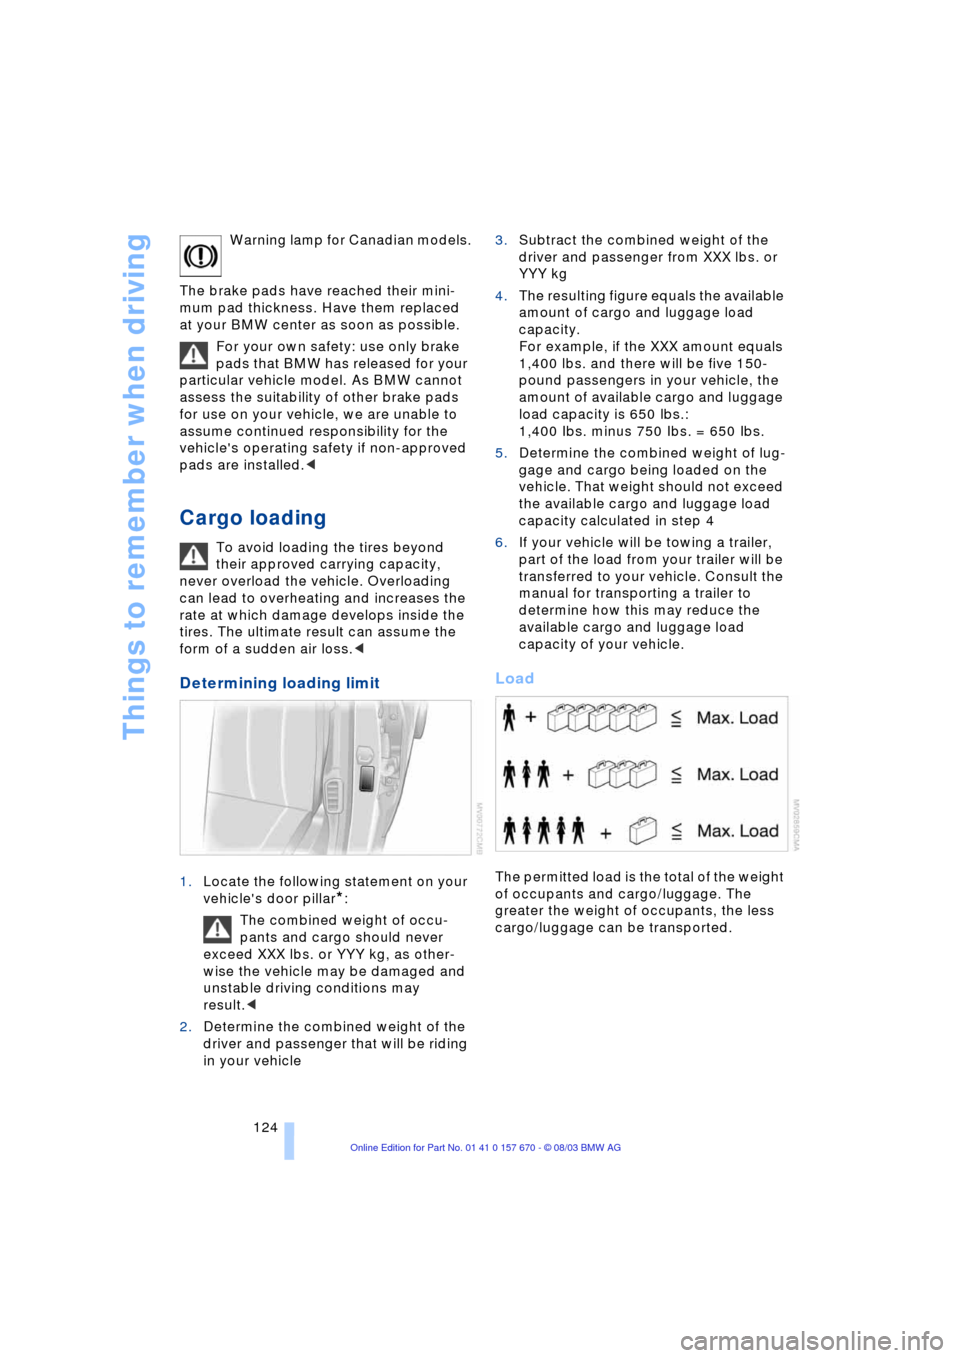
Load
The permitted load is the total of the weight
of occupants and cargo/luggage. The
greater the weight of occupants, the less
cargo/luggage can be transported.
Page 218 of 232
Everything from A to Z
216
A
"ABC..." for
navigation 132, 133
ABS Antilock Braking
System 91
ACC, refer to Active cruise
control 73
"ACCEPT" for
navigation 136, 143
Accessories 6
Activated-charcoal
filter 108
"Activation time" 109
Active cruise control 73
Ð malfunctions 79
Ð selecting distance 76
Active head restraints,
front 47
Active seat 51
Active seat ventilation 50
Adapter for spare key 32
Adaptive Head Light 99
Adding engine oil 195
"Address book" 142
Adjusting cooling capacity
of rear air conditioner 108
Airbags 97
Air conditioner in the
rear 108
Air distribution 103, 106
Airing, refer to
Ventilation 105
Air pressure, refer to Tire
inflation pressure 188
Air supply 104
Ð rear air conditioner 108
Air vent outlets 102
AKI, refer to Fuel
specifications 187
Alarm system 39
Ð avoiding unintentional
alarms 40All-season tires 192
"AM..." 148, 152, 154
AM waveband 152
Anchorages 125
"ANGLE" for DVD
mode 168
Antifreeze 196
Ð washer fluid 71
Antifreeze protection
Ð coolant 196
Ð radiator 196
Antilock Braking System
ABS 91
Anti-theft alarm
system 33, 39
Approved gross vehicle
weight 214
Aquaplaning, refer to
Hydroplaning 122
"Arrow display" for
navigation 140
"AS ADDRESS"
Ð creating a directory 142
Ð current position 143
Ð destination
entry 132, 134, 135
Ð destination list 136
Ð home address 142
Ð last destinations 136
"AS DEST."
Ð creating a directory 142
Ð destination
entry 134, 135
Ð home address 142
Ð last destinations 136
"AS DESTINATION"
Ð creating a directory 142
Ashtray 115
Assistance window, refer to
Control Center 22
Ð help texts 22
Ð status lines 23AUC Automatic
recirculated-air
control 104
"Audio" 148, 152
Audio 148
Ð adjusting the tone 149
Ð controls 148
Ð switching on/off 149
Ð volume 149
"AUDIO" for DVD
mode 168
"AUTO", automatic climate
control 106
Automatic
Ð air distribution 103
Ð cruise control 71
Ð curb monitor 54
Ð headlamp control 99
Ð luggage compartment lid
control 34, 38
Ð steering wheel
adjustment 52
Automatic car wash, refer
to the Caring for your
vehicle brochure
Automatic climate
control 102
Ð automatic air
distribution 103
Ð rear air conditioner 108
Ð rear cooler 113
Ð settings in Control
Center 106
Automatic Hold
Ð parking 63
Ð parking brake 63
Automatic recirculated-air
control AUC 104
Automatic transmission
with Steptronic 66
Ð manual operation 67
Ð sport program 67
"AUTO P" 53, 63
Everything from A to Z
Index
Page 227 of 232
Reference 225
At a glance
Controls
Driving tips
Communications
Navigation
Entertainment
Mobility
Side marker lamps 99
Side window blind, refer to
Sun blinds 112
Sitting safely 44
Ð with airbags 44
Ð with safety belts 44
Ski bag 117
Sliding/tilt sunroof, refer to
Glass roof, electric 42
Snow chains 193, 193
Soft Close Automatic
Ð doors 37
Ð luggage compartment
lid 38
SOS 177
Sound system adjustments
Ð midrange setting 151
Spare fuses 206
Spare key 32
Ð adapter 32
Spare tire 203
"Spark plugs" 81, 198
Speed limit
Ð "Limit" 86
Speedometer 12
"Speed Vol." for audio
mode 150
"Sport"
Ð "EDC" 94
Sport program with the
automatic
transmission 67
Sports seat 45
Stability control, refer to
Driving stability control 92
Standard during
TV mode 164
Standing lamps 100
Ð replacing bulbs 201
Start/Stop button 60
Starting 61
Starting assistance 207
Starting problems 61, 208
Starting the destination
guidance 139
Starting the engine 61
"State inspection" 82
Station, refer to Radio 152"Stationary" 106, 109
Status lines in Control
Center 23
Steering wheel 16
Ð adjustment 52
Ð adjustment, automatic 52
Ð heater 52
Ð individual button
assignment options 52
Ð memory 53
Steptronic 66
Stopwatch 87
Storage, refer to the Caring
for your vehicle brochure
Storage
compartments 114, 115
Storing desired speeds,
refer to Programmable
cruise control 73
Storing destination per
voice 142
Storing seating position,
refer to Seat, mirror and
steering wheel
memory 53
Straps, refer to
Loading 125
"SUBTITLE" for
DVD mode 168
Summer tires 192
Sun blinds 112
Supply reservoir, washer
system 71
Switch for battery 205
Switching air conditioner
mode on and off
manually 104
Switching off rear air
conditioner 108
Switching off the engine 61
Switching off the portable
phone 178
Switching off the tilt alarm
sensor 34, 40Switching on
Ð audio 149
Ð CD changer 160
Ð CD player 158
Ð DVD changer 166
Ð portable phone 178
Ð radio 152
Ð TV 163
Symbols 4
Ð Control Center 19
T
Tachometer 80
Tail lamps 202
Target cursor for
navigation 134, 135
Technical data 212
Technical modifications 6
Telephone
Ð operation with the
telephone keypad,
folding 176
Ð refer to Portable phone
Telephone keypad,
folding 176
Television, refer to TV 163
Temperature
adjustment 104
Temperature display,
outside temperature 80
Temperature
distribution 50
Third brake lamp, refer to
Brake lamps 202
Tilt function, passenger-
side mirror 54
Time of arrival 85
Timing 87
"Tint" for TV mode 164
Tire inflation pressure 188
Tire pressure monitoring,
refer to Flat Tire
Monitor 95
Tire Quality Grading 190