radio controls BMW 750I 2006 Owners Manual
[x] Cancel search | Manufacturer: BMW, Model Year: 2006, Model line: 750I, Model: BMW 750I 2006Pages: 247, PDF Size: 8.66 MB
Page 5 of 247
Reference
At a glance
Controls
Driving tips
Communications
Navigation
Entertainment
Mobility
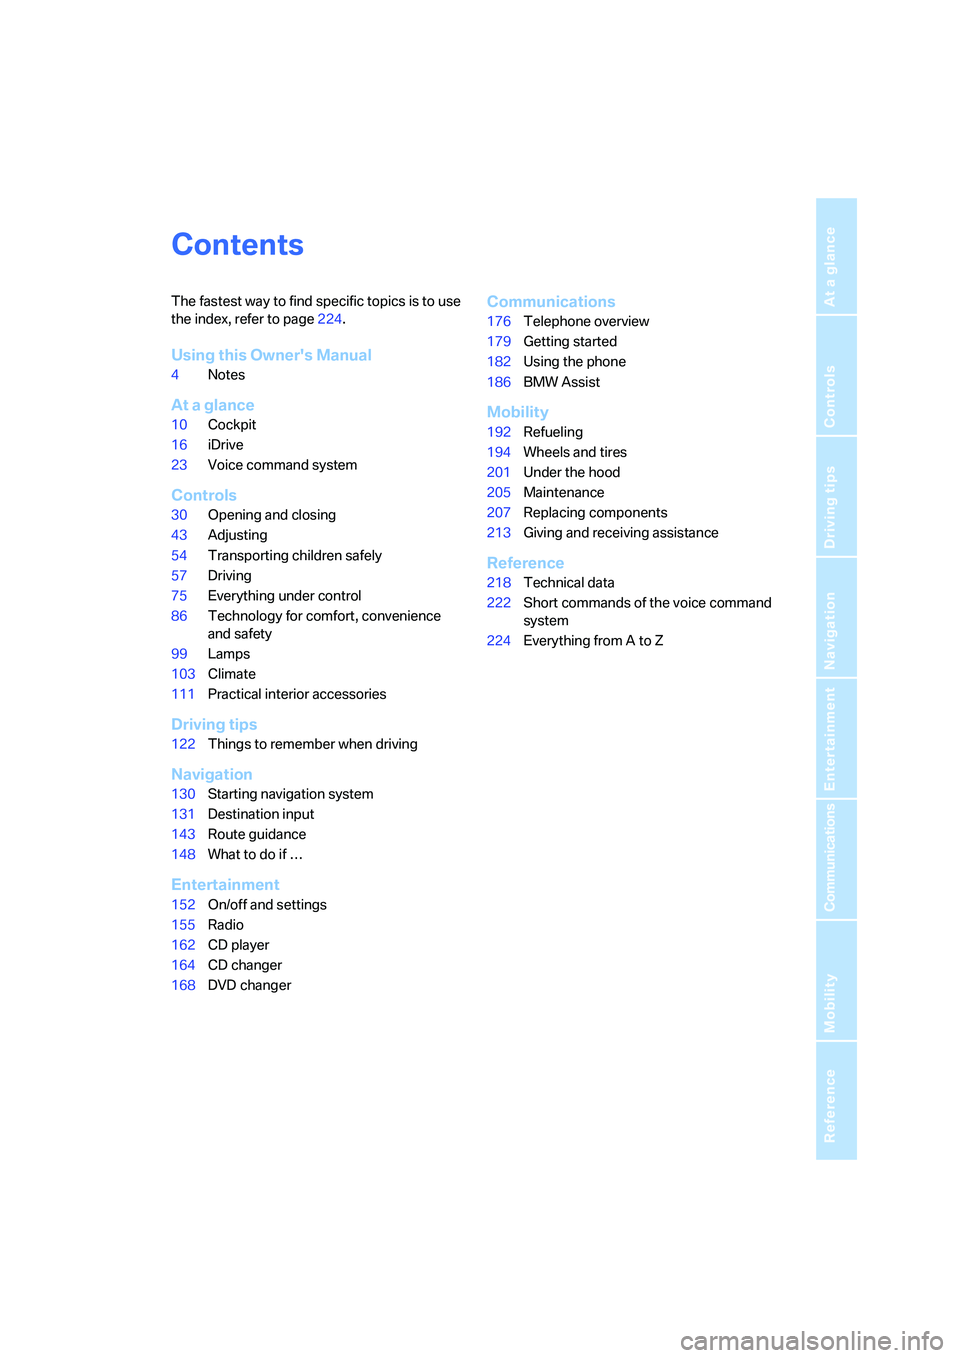
Contents
The fastest way to find specific topics is to use
the index, refer to page224.
Using this Owner's Manual
4Notes
At a glance
10Cockpit
16iDrive
23Voice command system
Controls
30Opening and closing
43Adjusting
54Transporting children safely
57Driving
75Everything under control
86Technology for comfort, convenience
and safety
99Lamps
103Climate
111Practical interior accessories
Driving tips
122Things to remember when driving
Navigation
130Starting navigation system
131Destination input
143Route guidance
148What to do if …
Entertainment
152On/off and settings
155Radio
162CD player
164CD changer
168DVD changer
Communications
176Telephone overview
179Getting started
182Using the phone
186BMW Assist
Mobility
192Refueling
194Wheels and tires
201Under the hood
205Maintenance
207Replacing components
213Giving and receiving assistance
Reference
218Technical data
222Short commands of the voice command
system
224Everything from A to Z
Page 13 of 247
At a glance
11Reference
Controls
Driving tips
Communications
Navigation
Entertainment
Mobility
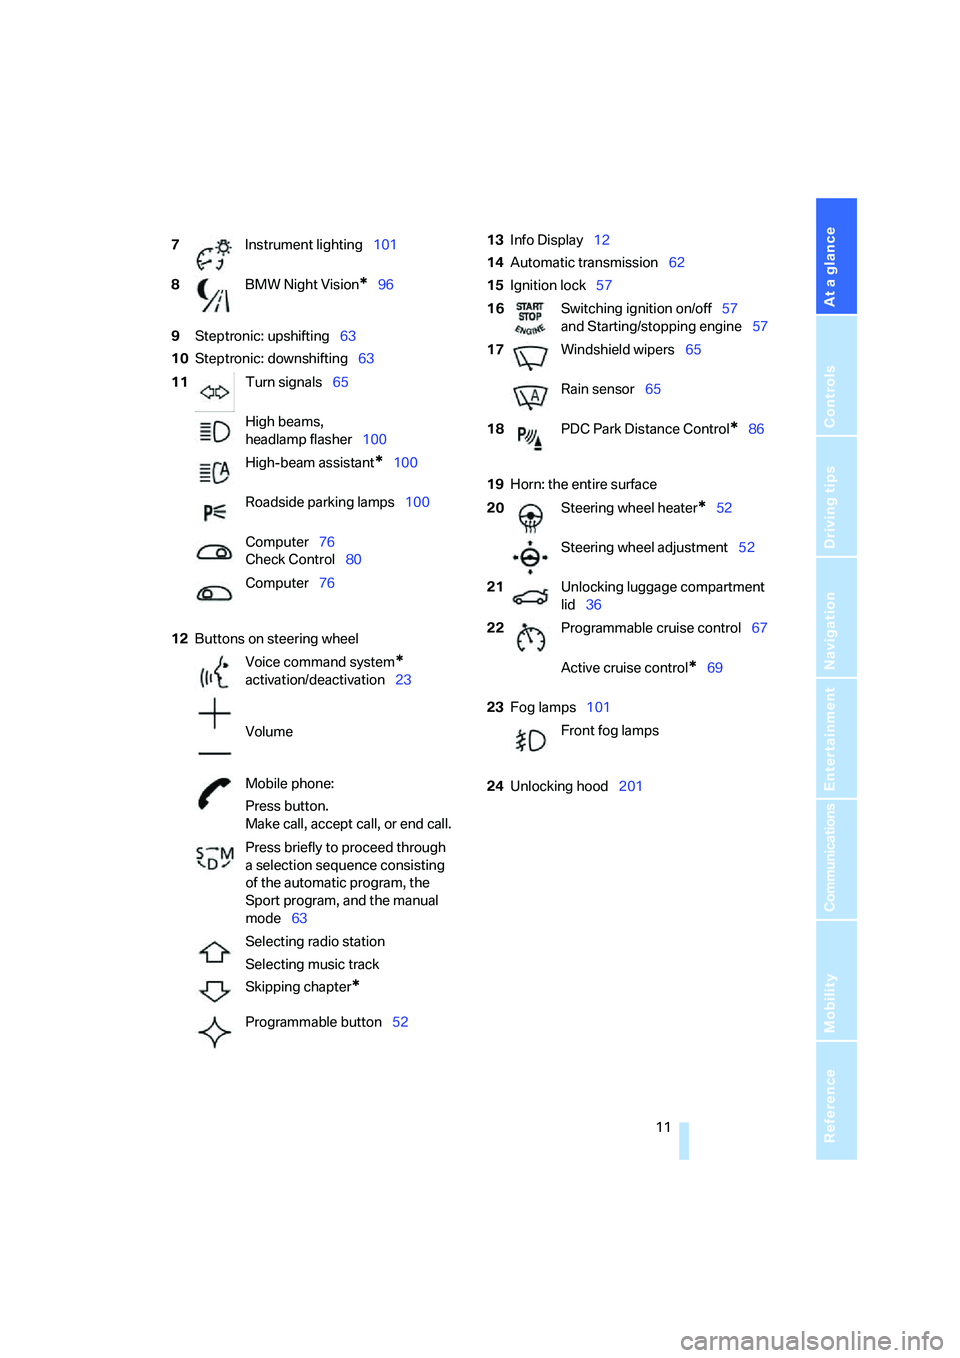
9Steptronic: upshifting63
10Steptronic: downshifting63
12Buttons on steering wheel13Info Display12
14Automatic transmission62
15Ignition lock57
19Horn: the entire surface
23Fog lamps101
24Unlocking hood201 7Instrument lighting101
8BMW Night Vision
*96
11Turn signals65
High beams,
headlamp flasher100
High-beam assistant
*100
Roadside parking lamps100
Computer76
Check Control80
Computer76
Voice command system
*
activation/deactivation23
Volume
Mobile phone:
Press button.
Make call, accept call, or end call.
Press briefly to proceed through
a selection sequence consisting
of the automatic program, the
Sport program, and the manual
mode63
Selecting radio station
Selecting music track
Skipping chapter
*
Programmable button52
16Switching ignition on/off57
and Starting/stopping engine57
17Windshield wipers65
Rain sensor65
18PDC Park Distance Control
*86
20Steering wheel heater
*52
Steering wheel adjustment52
21Unlocking luggage compartment
lid36
22Programmable cruise control67
Active cruise control
*69
Front fog lamps
Page 17 of 247
At a glance
15Reference
Controls
Driving tips
Communications
Navigation
Entertainment
Mobility
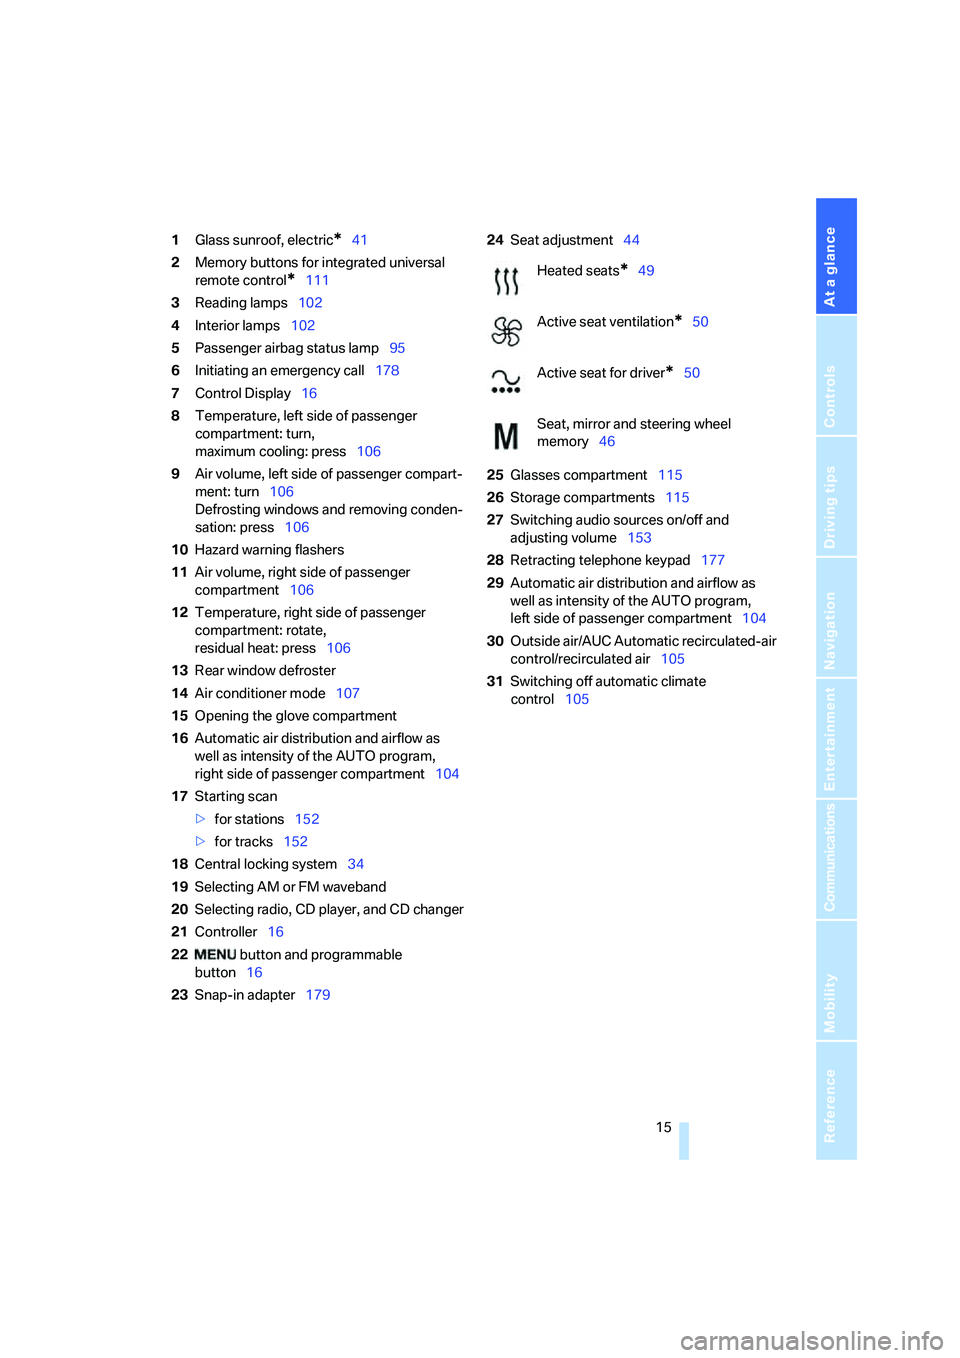
1Glass sunroof, electric*41
2Memory buttons for integrated universal
remote control
*111
3Reading lamps102
4Interior lamps102
5Passenger airbag status lamp95
6Initiating an emergency call178
7Control Display16
8Temperature, left side of passenger
compartment: turn,
maximum cooling: press106
9Air volume, left side of passenger compart-
ment: turn106
Defrosting windows and removing conden-
sation: press106
10Hazard warning flashers
11Air volume, right side of passenger
compartment106
12Temperature, right side of passenger
compartment: rotate,
residual heat: press106
13Rear window defroster
14Air conditioner mode107
15Opening the glove compartment
16Automatic air distribution and airflow as
well as intensity of the AUTO program,
right side of passenger compartment104
17Starting scan
>for stations152
>for tracks152
18Central locking system34
19Selecting AM or FM waveband
20Selecting radio, CD player, and CD changer
21Controller16
22 button and programmable
button16
23Snap-in adapter17924Seat adjustment44
25Glasses compartment115
26Storage compartments115
27Switching audio sources on/off and
adjusting volume153
28Retracting telephone keypad177
29Automatic air distribution and airflow as
well as intensity of the AUTO program,
left side of passenger compartment104
30Outside air/AUC Automatic recirculated-air
control/recirculated air105
31Switching off automatic climate
control105
Heated seats*49
Active seat ventilation
*50
Active seat for driver
*50
Seat, mirror and steering wheel
memory46
Page 23 of 247
At a glance
21Reference
Controls
Driving tips
Communications
Navigation
Entertainment
Mobility
5Telephone status
>Green, yellow and red flashing:
Linking of a mobile phone.
>Green:
Incoming or outgoing call.
>Red:
No network available.
>Yellow:
The network of another provider is being
used, partner network.
>Flashing yellow:
The network of another provider is being
used, external network.
Roaming in a partner or external net-
work incurs higher call charges than
in your home network.<
6Display of Check Control81
>You can use the "Car Data" menu to dis-
play the message on the Control Dis-
play.
Status service requirement display78
>Red:
At least one service interval has been
exceeded.
7Display of temperature selection and inten-
sity of the AUTO program, right side of pas-
senger compartment
8Air volume, right side of passenger com-
partment
9Entertainment
Display for radio, CD, and DVD
With compressed audio files, the informa-
tion about the track is displayed166
10Air volume, left side of passenger compart-
ment
11Display of temperature selection and inten-
sity of the AUTO program, left side of pas-
senger compartment
Assistance window*
The status lines in the assistance window show
the following:
>Outside temperature
>Navigation system destination>Time
>Date
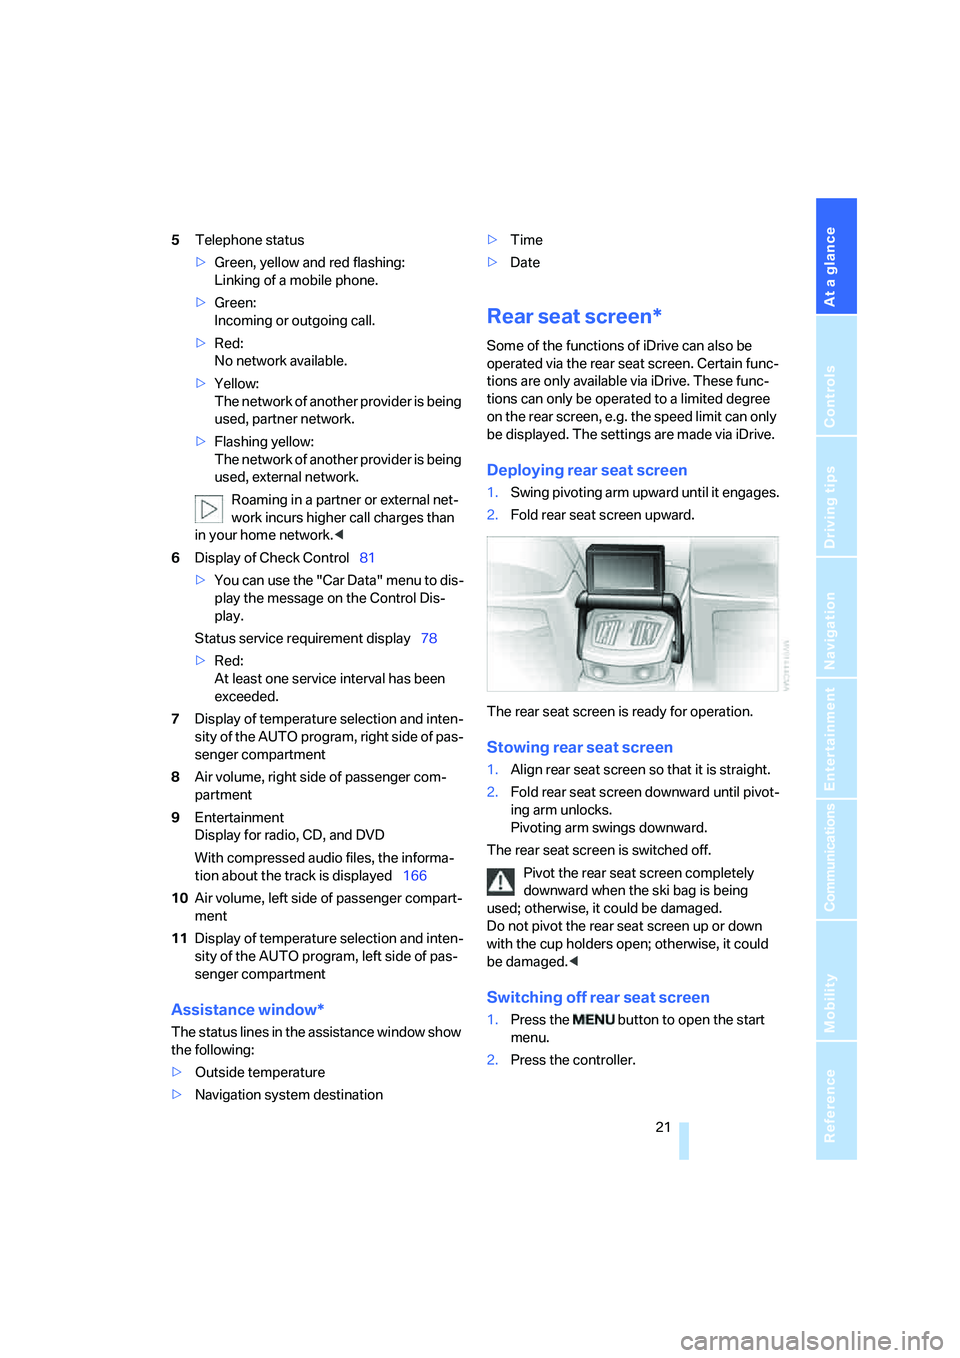
Rear seat screen*
Some of the functions of iDrive can also be
operated via the rear seat screen. Certain func-
tions are only available via iDrive. These func-
tions can only be operated to a limited degree
on the rear screen, e.g. the speed limit can only
be displayed. The settings are made via iDrive.
Deploying rear seat screen
1.Swing pivoting arm upward until it engages.
2.Fold rear seat screen upward.
The rear seat screen is ready for operation.
Stowing rear seat screen
1.Align rear seat screen so that it is straight.
2.Fold rear seat screen downward until pivot-
ing arm unlocks.
Pivoting arm swings downward.
The rear seat screen is switched off.
Pivot the rear seat screen completely
downward when the ski bag is being
used; otherwise, it could be damaged.
Do not pivot the rear seat screen up or down
with the cup holders open; otherwise, it could
be damaged.<
Switching off rear seat screen
1.Press the button to open the start
menu.
2.Press the controller.
Page 25 of 247
At a glance
23Reference
Controls
Driving tips
Communications
Navigation
Entertainment
Mobility
Voice command system
The concept
The voice command system allows you to con-
trol operation of various vehicle systems with-
out ever removing your hands from the steering
wheel. The system operates on the basis of
voice commands that you will learn easily after
using them a few times. In many cases, the
voice command system assists you with
announcements or questions while you are
making your entries.
The voice command system transforms your
oral commands and dialog answers into control
signals for the selected systems.
Please take the time to acquaint yourself
with how a particular system operates
before proceeding to control it using the voice
command system.<
Note
Use iDrive to set the language that will be used
for the voice command system in order to be
able to identify the commands to be spoken.
Setting the language of iDrive, refer to page84.
Symbols used
{...} Verbal instructions to use with the voice
command system.
{{...}} Identifies the answers generated by the
voice command system.
Systems available for use with voice
command
>{Navigation}, refer to page130
>{Radio}, refer to page155
>{Telephone}, refer to page182
>{CD}, refer to page162
>{CD changer}, refer to page164
>{Notepad}, refer to page25
>{DVD}, refer to page168The Info Display, refer to page24, will display
either the equipment that you are now operat-
ing or any current error messages.
Voice commands
Voice command system activation
Briefly press the button on the steering
wheel.
An acoustic signal and the display "SVS active"
on the Info Display, refer to page24, indicate
that the system is ready for operation. The sys-
tem automatically starts in the main menu.
From here, you can call up all the equipment
that can be operated.
Canceling voice command
Briefly press the button on the steering
wheel
or
In dialogs in which any text can be spoken, e.g.
names, notes, canceling is only possible using
the button.
The system automatically switches over
to its telephone mode if you receive a call
during voice input. "SVS active" appears on the
Info Display, refer to page24.<
Voice commands
The voice command system operates on the
basis of specific, predefined commands; these
commands should be spoken precisely as indi-
cated. You can have the possible commands
read back at any stage. To do so, say the com-
mand {Options}.
In addition to the commands described, there
are often other commands that run the same
function. Instead of {Options}, you can, for
example, also say {What now}. In addition,
*
These sections contain information on
using the voice command system.
{Cancel}.
Page 33 of 247
Controls
31Reference
At a glance
Driving tips
Communications
Navigation
Entertainment
Mobility
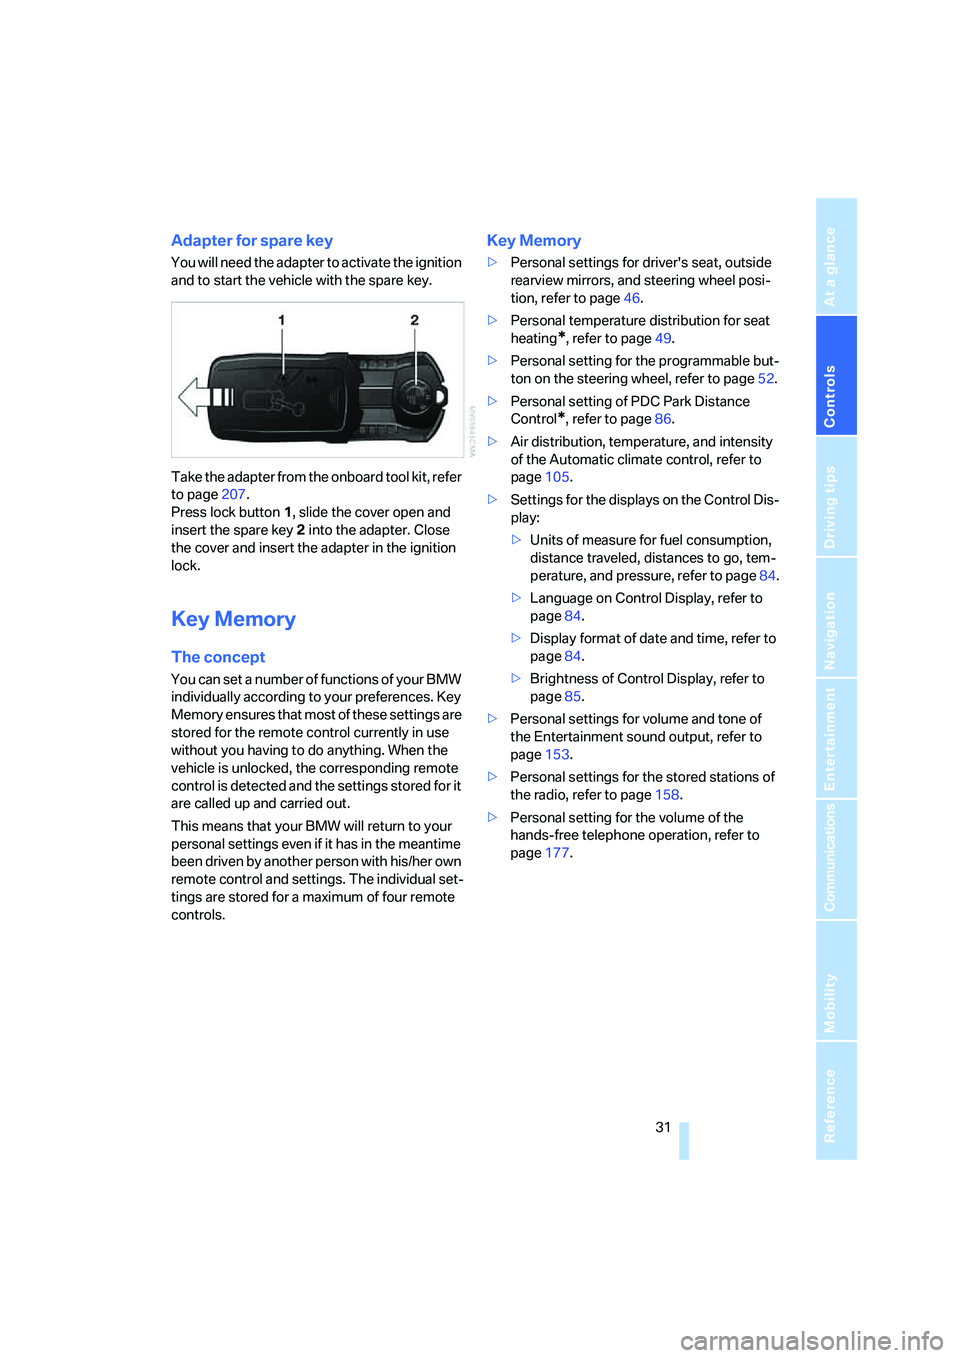
Adapter for spare key
You will need the adapter to activate the ignition
and to start the vehicle with the spare key.
Take the adapter from the onboard tool kit, refer
to page207.
Press lock button1, slide the cover open and
insert the spare key2 into the adapter. Close
the cover and insert the adapter in the ignition
lock.
Key Memory
The concept
You can set a number of functions of your BMW
individually according to your preferences. Key
Memory ensures that most of these settings are
stored for the remote control currently in use
without you having to do anything. When the
vehicle is unlocked, the corresponding remote
control is detected and the settings stored for it
are called up and carried out.
This means that your BMW will return to your
personal settings even if it has in the meantime
been driven by another person with his/her own
remote control and settings. The individual set-
tings are stored for a maximum of four remote
controls.
Key Memory
>Personal settings for driver's seat, outside
rearview mirrors, and steering wheel posi-
tion, refer to page46.
>Personal temperature distribution for seat
heating
*, refer to page49.
>Personal setting for the programmable but-
ton on the steering wheel, refer to page52.
>Personal setting of PDC Park Distance
Control
*, refer to page86.
>Air distribution, temperature, and intensity
of the Automatic climate control, refer to
page105.
>Settings for the displays on the Control Dis-
play:
>Units of measure for fuel consumption,
distance traveled, distances to go, tem-
perature, and pressure, refer to page84.
>Language on Control Display, refer to
page84.
>Display format of date and time, refer to
page84.
>Brightness of Control Display, refer to
page85.
>Personal settings for volume and tone of
the Entertainment sound output, refer to
page153.
>Personal settings for the stored stations of
the radio, refer to page158.
>Personal setting for the volume of the
hands-free telephone operation, refer to
page177.
Page 35 of 247
Controls
33Reference
At a glance
Driving tips
Communications
Navigation
Entertainment
Mobility
Engaging locks
Press the button. The hazard warning
flashers blink once.
Switching on interior lamps and
perimeter lighting
Press the button if the vehicle is
locked.
Switching on interior lamps
Press the button.
You can also use this function to locate your
vehicle in parking garages etc.
Panic mode*
You can also trigger the alarm system in case of
danger:
Press the button for at least 3 seconds.
To deactivate the alarm: press any button
Opening luggage compartment lid
Press the button for approx. one second.
The luggage compartment lid opens, regard-
less of whether it was previously locked or
unlocked.
During opening, the luggage compart-
ment lid pivots back and up. Ensure that
adequate clearance is available before opening.
To avoid being inadvertently locked out, never
set the remote control down in the luggage
compartment. A previously locked luggage
compartment lid is also locked again after clos-
ing.<
Automatic luggage compartment lid
operation*
Opening luggage compartment lid
Press the button for approx. one second.
The luggage compartment lid opens all the way,
regardless of whether it was previously locked
or unlocked.
To interrupt the opening process:
Press the button again while opening is in
progress.During opening, the luggage compart-
ment lid pivots back and up. Ensure that
adequate clearance is available before opening.
To avoid being inadvertently locked out, never
set the remote control down in the luggage
compartment. A previously locked luggage
compartment lid is also locked again after clos-
ing.<
Malfunction
Local radio waves can cause the remote control
to malfunction.
Should the remote control fail to operate owing
to interference of this kind, the vehicle can be
opened and closed via the door lock with a key.
If it is no longer possible to lock the vehicle with
a remote control, then its battery is discharged.
Use this remote control during an extended
drive; this will recharge the battery, refer to
page30.
For US owners only
The transmitter and receiver units comply with
part 15 of the FCC/Federal Communication
Commission regulations. Operation is gov-
erned by the following:
FCC ID:
>LX8766S
>LX8766E
>LX8CAS
>LX8CAS2
Compliance statement:
This device complies with part 15 of the FCC
Rules. Operation is subject to the following two
conditions:
>This device may not cause harmful interfer-
ence, and
>this device must accept any interference
received, including interference that may
cause undesired operation.
Any unauthorized modifications or
changes to these devices could void the
user's authority to operate this equipment.<
Page 41 of 247
Controls
39Reference
At a glance
Driving tips
Communications
Navigation
Entertainment
Mobility
Unlocking luggage compartment lid
separately
Press the button on the outside of the trunk lid,
refer to page35. This corresponds to pressing
the button.
If a remote control accidentally left in the
luggage compartment is detected in the
locked vehicle, the luggage compartment lid
opens again.<
Radio ready state
By briefly pressing the Start/Stop button, you
switch on the radio ready state, refer to
page57.
When doing so, do not depress the brake
pedal; otherwise, the engine will start.<
Starting engine
You can start the engine or switch on the igni-
tion, as long as a remote control is in the pas-
senger compartment. The remote does not
have to be inserted into the ignition lock, refer to
page57.
Before driving into a car wash
1.Insert remote control into ignition lock.
2.Shift transmission into position N.
3.Switch engine off.
4.Leave the remote control in the ignition
lock.
The vehicle can roll.
Malfunction
Local radio waves can disrupt the function of
Comfort Access. Should the remote control fail
to operate owing to interference of this kind,
you can respond by using the buttons on the
remote control or by using a key to unlock or
lock your vehicle at one of the doors. To start
the engine after this, insert the remote control
into the ignition lock.
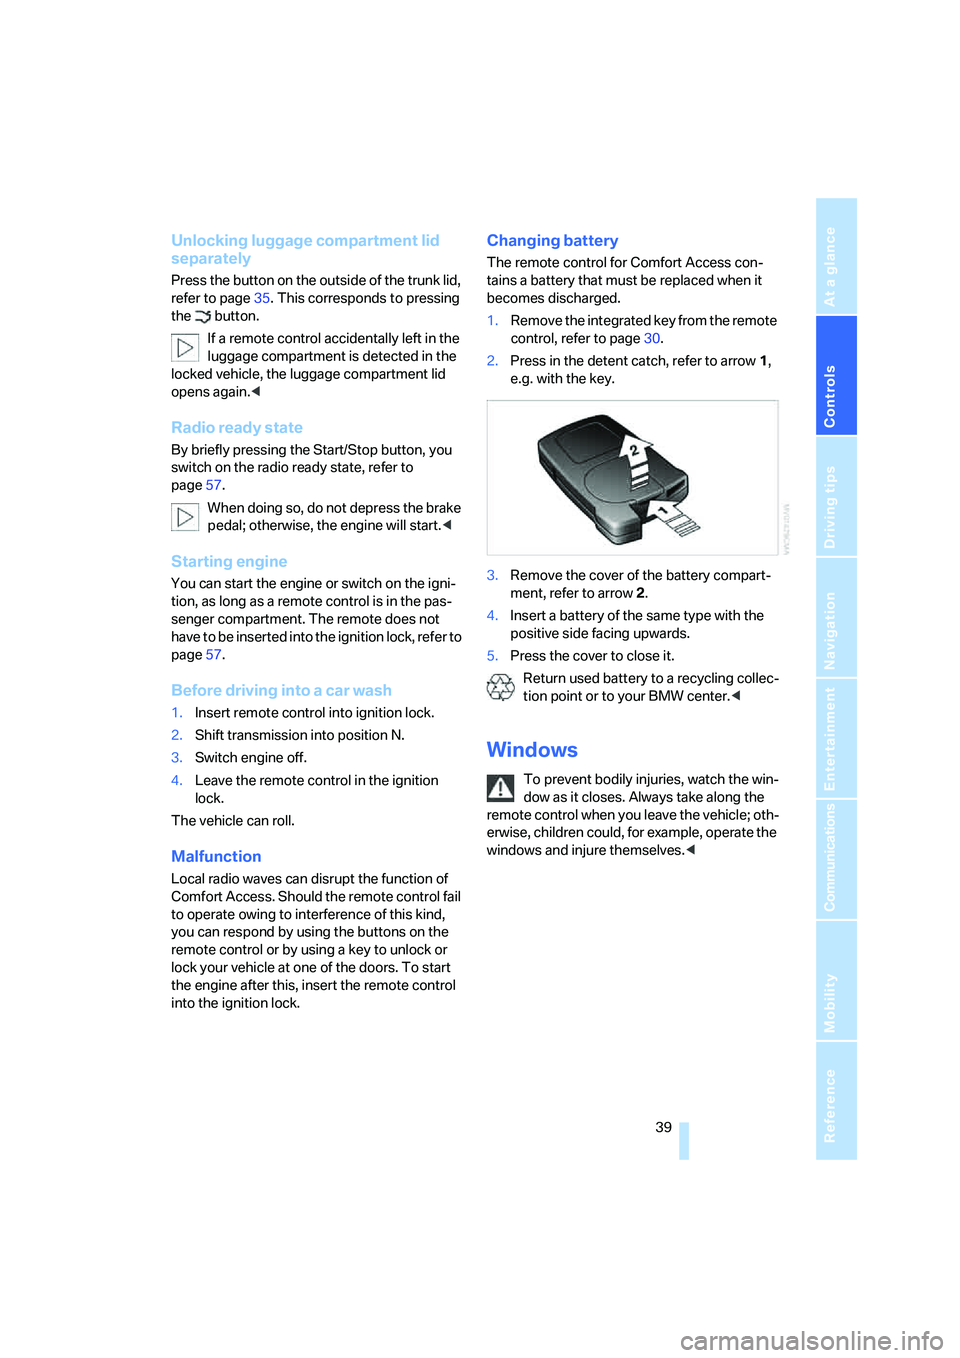
Changing battery
The remote control for Comfort Access con-
tains a battery that must be replaced when it
becomes discharged.
1.Remove the integrated key from the remote
control, refer to page30.
2.Press in the detent catch, refer to arrow1,
e.g. with the key.
3.Remove the cover of the battery compart-
ment, refer to arrow2.
4.Insert a battery of the same type with the
positive side facing upwards.
5.Press the cover to close it.
Return used battery to a recycling collec-
tion point or to your BMW center.<
Windows
To prevent bodily injuries, watch the win-
dow as it closes. Always take along the
remote control when you leave the vehicle; oth-
erwise, children could, for example, operate the
windows and injure themselves.<
Page 43 of 247
Controls
41Reference
At a glance
Driving tips
Communications
Navigation
Entertainment
Mobility
In order to deactivate the function again,
you must insert the remote control into
the ignition lock or, with Comfort Access, you
must switch into radio ready state.<
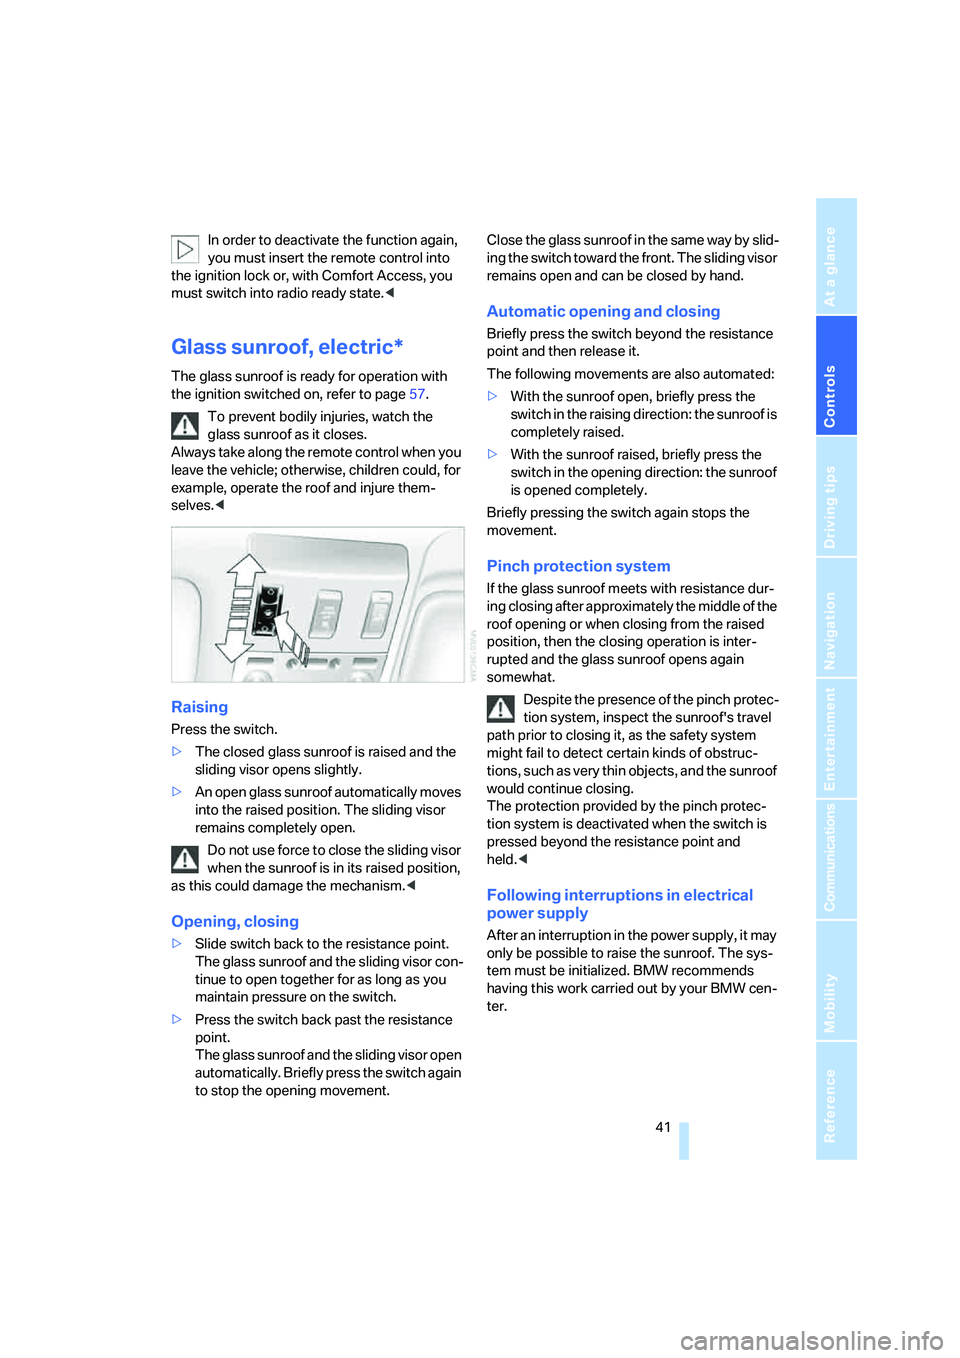
Glass sunroof, electric*
The glass sunroof is ready for operation with
the ignition switched on, refer to page57.
To prevent bodily injuries, watch the
glass sunroof as it closes.
Always take along the remote control when you
leave the vehicle; otherwise, children could, for
example, operate the roof and injure them-
selves.<
Raising
Press the switch.
>The closed glass sunroof is raised and the
sliding visor opens slightly.
>An open glass sunroof automatically moves
into the raised position. The sliding visor
remains completely open.
Do not use force to close the sliding visor
when the sunroof is in its raised position,
as this could damage the mechanism.<
Opening, closing
>Slide switch back to the resistance point.
The glass sunroof and the sliding visor con-
tinue to open together for as long as you
maintain pressure on the switch.
>Press the switch back past the resistance
point.
The glass sunroof and the sliding visor open
automatically. Briefly press the switch again
to stop the opening movement.Close the glass sunroof in the same way by slid-
ing the switch toward the front. The sliding visor
remains open and can be closed by hand.
Automatic opening and closing
Briefly press the switch beyond the resistance
point and then release it.
The following movements are also automated:
>With the sunroof open, briefly press the
switch in the raising direction: the sunroof is
completely raised.
>With the sunroof raised, briefly press the
switch in the opening direction: the sunroof
is opened completely.
Briefly pressing the switch again stops the
movement.
Pinch protection system
If the glass sunroof meets with resistance dur-
ing closing after approximately the middle of the
roof opening or when closing from the raised
position, then the closing operation is inter-
rupted and the glass sunroof opens again
somewhat.
Despite the presence of the pinch protec-
tion system, inspect the sunroof's travel
path prior to closing it, as the safety system
might fail to detect certain kinds of obstruc-
tions, such as very thin objects, and the sunroof
would continue closing.
The protection provided by the pinch protec-
tion system is deactivated when the switch is
pressed beyond the resistance point and
held.<
Following interruptions in electrical
power supply
After an interruption in the power supply, it may
only be possible to raise the sunroof. The sys-
tem must be initialized. BMW recommends
having this work carried out by your BMW cen-
ter.
Page 59 of 247
Controls
57Reference
At a glance
Driving tips
Communications
Navigation
Entertainment
Mobility
Driving
Ignition lock
Insert the remote control all the way into the
ignition lock. Radio ready state is switched on.
Individual electrical devices are ready for use.
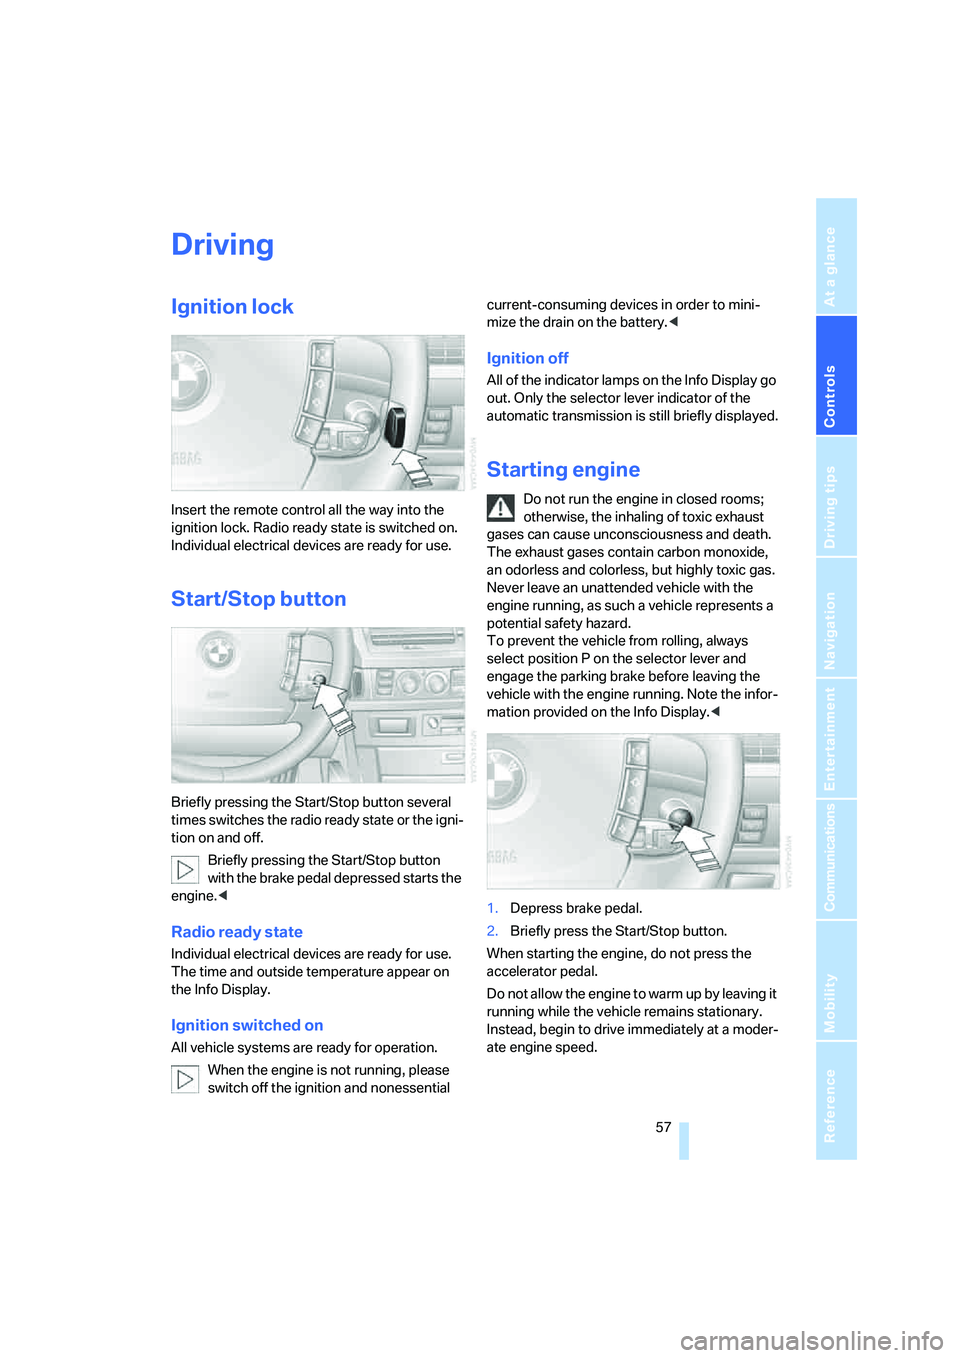
Start/Stop button
Briefly pressing the Start/Stop button several
times switches the radio ready state or the igni-
tion on and off.
Briefly pressing the Start/Stop button
with the brake pedal depressed starts the
engine.<
Radio ready state
Individual electrical devices are ready for use.
The time and outside temperature appear on
the Info Display.
Ignition switched on
All vehicle systems are ready for operation.
When the engine is not running, please
switch off the ignition and nonessential current-consuming devices in order to mini-
mize the drain on the battery.<
Ignition off
All of the indicator lamps on the Info Display go
out. Only the selector lever indicator of the
automatic transmission is still briefly displayed.
Starting engine
Do not run the engine in closed rooms;
otherwise, the inhaling of toxic exhaust
gases can cause unconsciousness and death.
The exhaust gases contain carbon monoxide,
an odorless and colorless, but highly toxic gas.
Never leave an unattended vehicle with the
engine running, as such a vehicle represents a
potential safety hazard.
To prevent the vehicle from rolling, always
select position P on the selector lever and
engage the parking brake before leaving the
vehicle with the engine running. Note the infor-
mation provided on the Info Display.<
1.Depress brake pedal.
2.Briefly press the Start/Stop button.
When starting the engine, do not press the
accelerator pedal.
Do not allow the engine to warm up by leaving it
running while the vehicle remains stationary.
Instead, begin to drive immediately at a moder-
ate engine speed.