change time BMW 750I XDRIVE 2012 F01 Owner's Guide
[x] Cancel search | Manufacturer: BMW, Model Year: 2012, Model line: 750I XDRIVE, Model: BMW 750I XDRIVE 2012 F01Pages: 299, PDF Size: 8.49 MB
Page 182 of 299
2. "DVD menu"
The
DVD menu is displayed. The display de‐
pends on the contents of the DVD.
3. To select menu items: move the controller
and press it.
To change to the video menu: turn the controller
and press it.
DVD/VCD settings
For some DVDs, settings can only be made via
the DVD menu; refer also to the information on
the DVD.
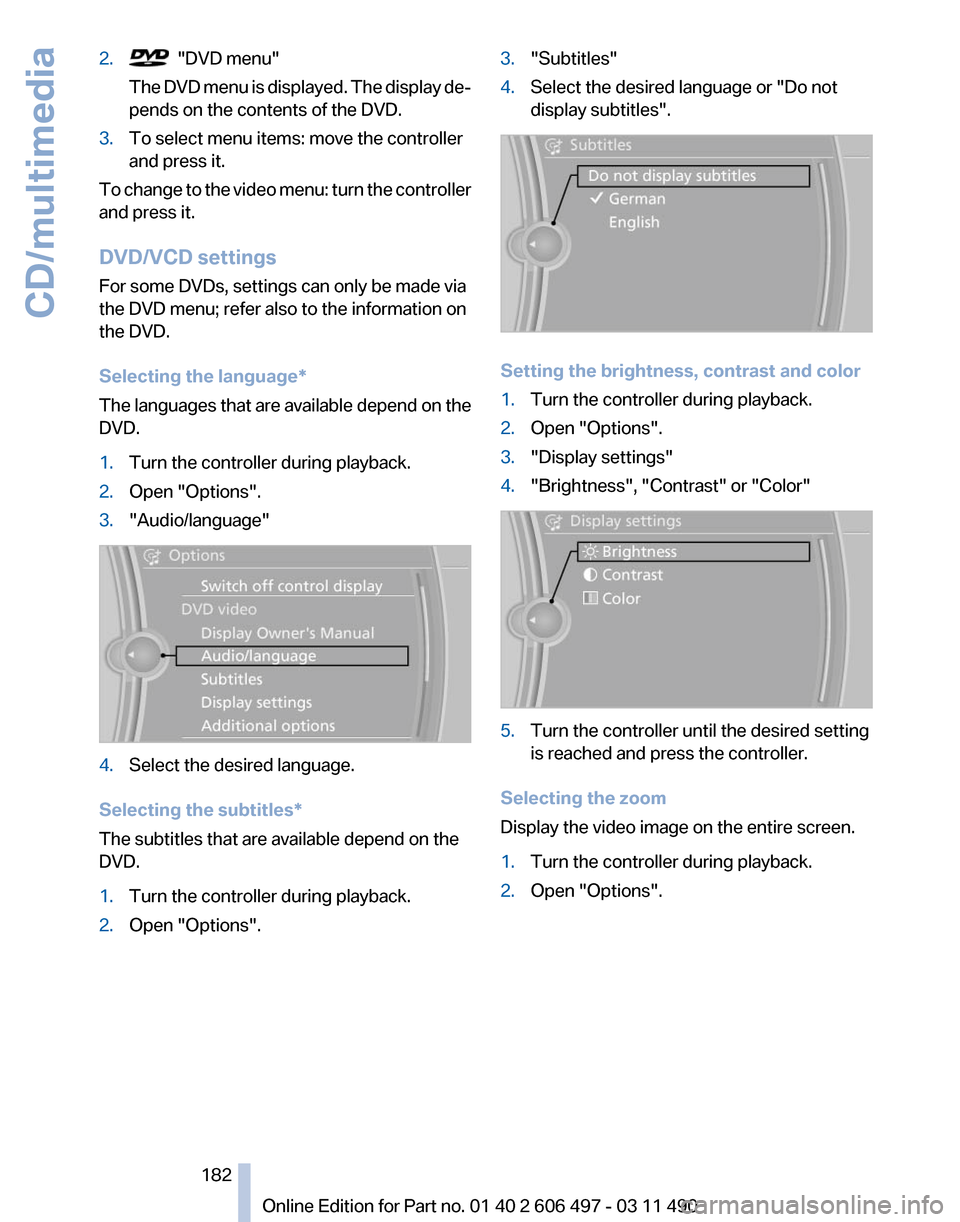
Selecting the language
*
The languages that are available depend on the
DVD.
1. Turn the controller during playback.
2. Open "Options".
3. "Audio/language" 4.
Select the desired language.
Selecting the subtitles*
The subtitles that are available depend on the
DVD.
1. Turn the controller during playback.
2. Open "Options". 3.
"Subtitles"
4. Select the desired language or "Do not
display subtitles". Setting the brightness, contrast and color
1.
Turn the controller during playback.
2. Open "Options".
3. "Display settings"
4. "Brightness", "Contrast" or "Color" 5.
Turn the controller until the desired setting
is reached and press the controller.
Selecting the zoom
Display the video image on the entire screen.
1. Turn the controller during playback.
2. Open "Options".
Seite 182
182 Online Edition for Part no. 01 40 2 606 497 - 03 11 490
CD/multimedia
Page 184 of 299
Sliding in CDs/DVDs
Do not insert the CD/DVD until the LEDs
on
the DVD slot are flashing; otherwise, the CD/
DVD or the DVD changer could be damaged.
Do not continue to push on the CD/DVD; this
may cause it to jam and prevent it from being
able to eject again.◀
Filling all empty DVD compartments
1. Hold the button down.
The LEDs on the empty CD compartments
flash.
2. Wait for the LEDs on the DVD slot to begin
flashing
and then insert each CD or DVD into
the center of the slot.
The CDs/DVDs are drawn in automatically
and placed into the vacant compartments.
Sliding in CDs/DVDs
Do not insert the CD/DVD until the LEDs
on
the DVD slot are flashing; otherwise, the CD/
DVD or the DVD changer could be damaged.
Do not continue to push on the CD/DVD; this
may cause it to jam and prevent it from being
able to eject again.◀
After they are inserted, it may take several mi‐
nutes for the CDs/DVDs to be read in.
Removing a single CD/DVD
1. Press the button.
2. Select the DVD compartment.
The CD/DVD is partially ejected.
3. Remove the CD/DVD.
Removing all CDs/DVDs
1. Hold the button down.
2. Remove the CDs/DVDs.
Malfunctions
If
all LEDs on the DVD changer are flashing rap‐
idly, a malfunction has occurred. To eliminate the malfunction:
1.
Press one of the buttons:
▷ ▷
The CD/DVD last inserted is ejected.
2. Remove the CD/DVD.
The DVD changer is functional again after the
LEDs stop flashing rapidly.
Audio playback*
The audio track of a DVD can be played back
even if video playback is not possible in the ve‐
hicle.
Only
the main film without the previews or extras
can be played back.
Starting playback
A DVD is located in the DVD changer.
1. "CD/Multimedia"
2. "CD/DVD"
3. Select the desired DVD.
Selecting a chapter using the button Press the button repeatedly until the
desired chapter is played.
Selecting a chapter using iDrive
1. "CD/Multimedia"
2. "CD/DVD"
3. Select the desired DVD.
4. Select the desired chapter.
Fast forward/reverse Press and hold the button.
Selecting the language
*
The languages that are available depend on the
DVD. Seite 184
184 Online Edition for Part no. 01 40 2 606 497 - 03 11 490
CD/multimedia
Page 185 of 299
1.
"CD/Multimedia"
2. "CD/DVD"
3. Select the desired DVD.
4. Open "Options".
5. "Audio/language"
6. Select the desired language.
Notes
CD/DVD player and changer Do not remove the cover
BMW CD/DVD players and changers are
officially designated Class 1 laser products. Do
not operate if the cover is damaged; otherwise,
severe eye damage may occur.◀
CDs and DVDs
Use of CDs/DVDs
▷Do not use self-recorded CDs/DVDs
with labels applied, as these can be‐
come detached during playback due
to
heat buildup and can cause irrepar‐
able damage to the device.
▷ Only use round CDs/DVDs with a standard
diameter of 4.7 in/12 cm and do not play
CDs/DVDs
with an adapter, e.g., single CDs;
otherwise, the CDs or the adapter may jam
and no longer eject.
▷ Do not use combined CDs/DVDs, e.g., DVD
Plus, as the CDs/DVDs can jam and will no
longer eject.◀
General malfunctions
▷ CD/DVD changers and players have been
optimized for performance in vehicles. In
some
instances they may be more sensitive
to faulty CDs/DVDs than stationary devices
would be.
▷ If a CD/DVD cannot be played, first check
whether it has been inserted correctly. Humidity
High
levels of humidity can lead to condensation
on the CD/DVD or the laser's scan lens, and
temporarily prevent playback.
Malfunctions involving individual CDs/
DVDs
If malfunctions occur only with particular CDs/
DVDs, this can be due to one of the following
causes:
Home-recorded CDs/DVDs
▷ Possible reasons for malfunctions with
home-recorded
CDs/DVDs are inconsistent
data creation or recording processes, or
poor quality or old age of the blank CD/DVD.
▷ Only label CDs/DVDs on the upper side with
a pen intended for this purpose.
Damage
▷ Avoid fingerprints, dust, scratches and
moisture.
▷ Store CDs/DVDs in a sleeve.
▷ Do not subject CDs/DVDs to temperatures
over 122 ℉/50 ℃, high humidity or direct
sunlight.
CDs/DVDs with copy protection
CDs/DVDs are often provided with a copy pro‐
tection feature by the manufacturer. This can
mean
that some CDs/DVDs cannot be played or
can only be played to a limited extent.
MACROVISION
This product contains copyrighted technology
that is based on multiple registered US patents
and the intellectual property of the Macrovision
Corporation and other manufacturers. The use
of this copy protection must be approved by
Macrovision. Media protected by this product -
unless otherwise agreed with Macrovision - may
only be used for private purposes. Copying of
this technology is prohibited.
Seite 185
185Online Edition for Part no. 01 40 2 606 497 - 03 11 490
Reference Mobility Communication
Entertainment Navigation Driving tips Controls At a glance
Page 189 of 299
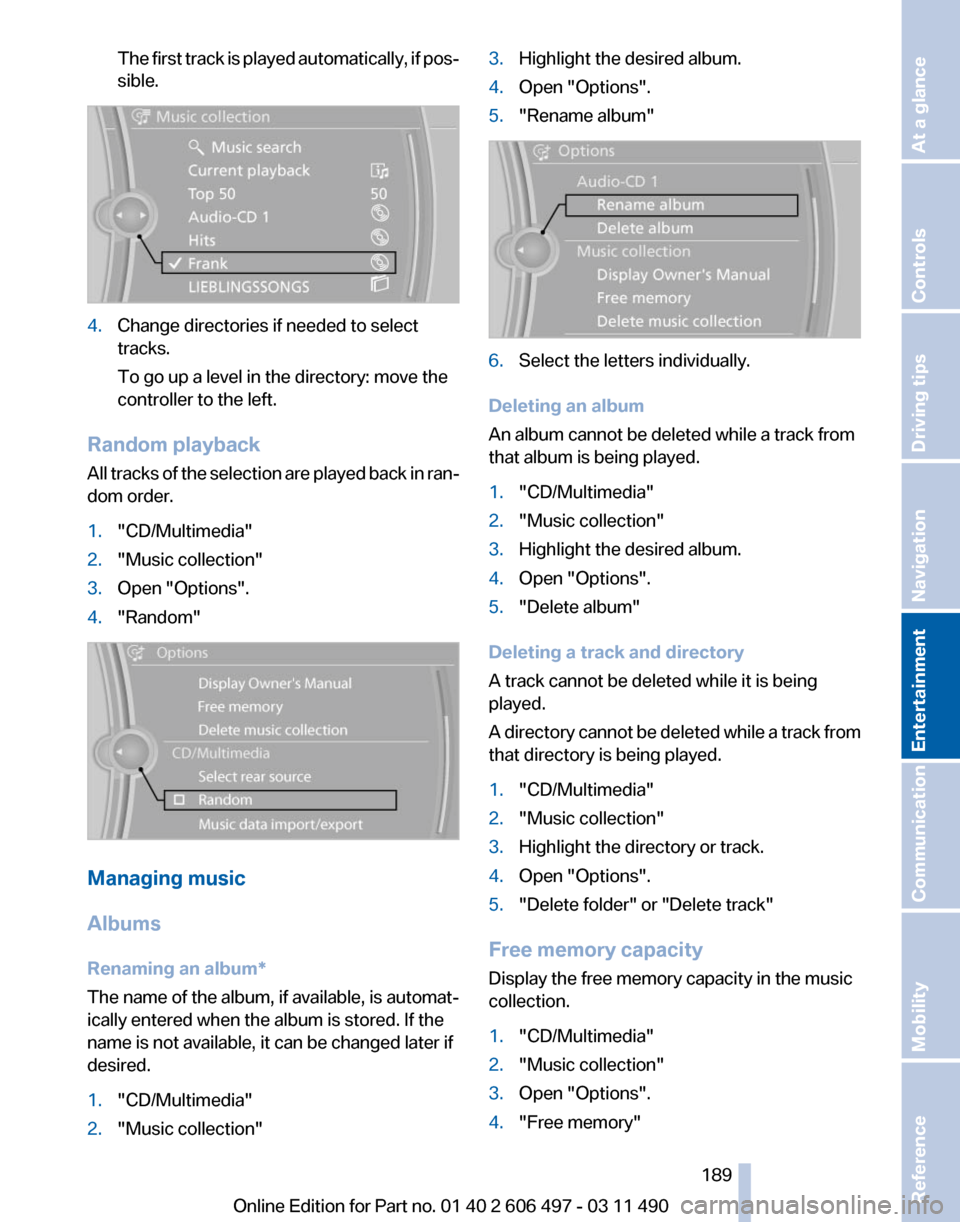
The first track is played automatically, if pos‐
sible.
4.
Change directories if needed to select
tracks.
To go up a level in the directory: move the
controller to the left.
Random playback
All tracks of the selection are played back in ran‐
dom order.
1. "CD/Multimedia"
2. "Music collection"
3. Open "Options".
4. "Random" Managing music
Albums
Renaming an album
*
The name of the album, if available, is automat‐
ically entered when the album is stored. If the
name is not available, it can be changed later if
desired.
1. "CD/Multimedia"
2. "Music collection" 3.
Highlight the desired album.
4. Open "Options".
5. "Rename album" 6.
Select the letters individually.
Deleting an album
An album cannot be deleted while a track from
that album is being played.
1. "CD/Multimedia"
2. "Music collection"
3. Highlight the desired album.
4. Open "Options".
5. "Delete album"
Deleting a track and directory
A track cannot be deleted while it is being
played.
A
directory cannot be deleted while a track from
that directory is being played.
1. "CD/Multimedia"
2. "Music collection"
3. Highlight the directory or track.
4. Open "Options".
5. "Delete folder" or "Delete track"
Free memory capacity
Display the free memory capacity in the music
collection.
1. "CD/Multimedia"
2. "Music collection"
3. Open "Options".
4. "Free memory"
Seite 189
189Online Edition for Part no. 01 40 2 606 497 - 03 11 490
Reference Mobility Communication
Entertainment Navigation Driving tips Controls At a glance
Page 193 of 299
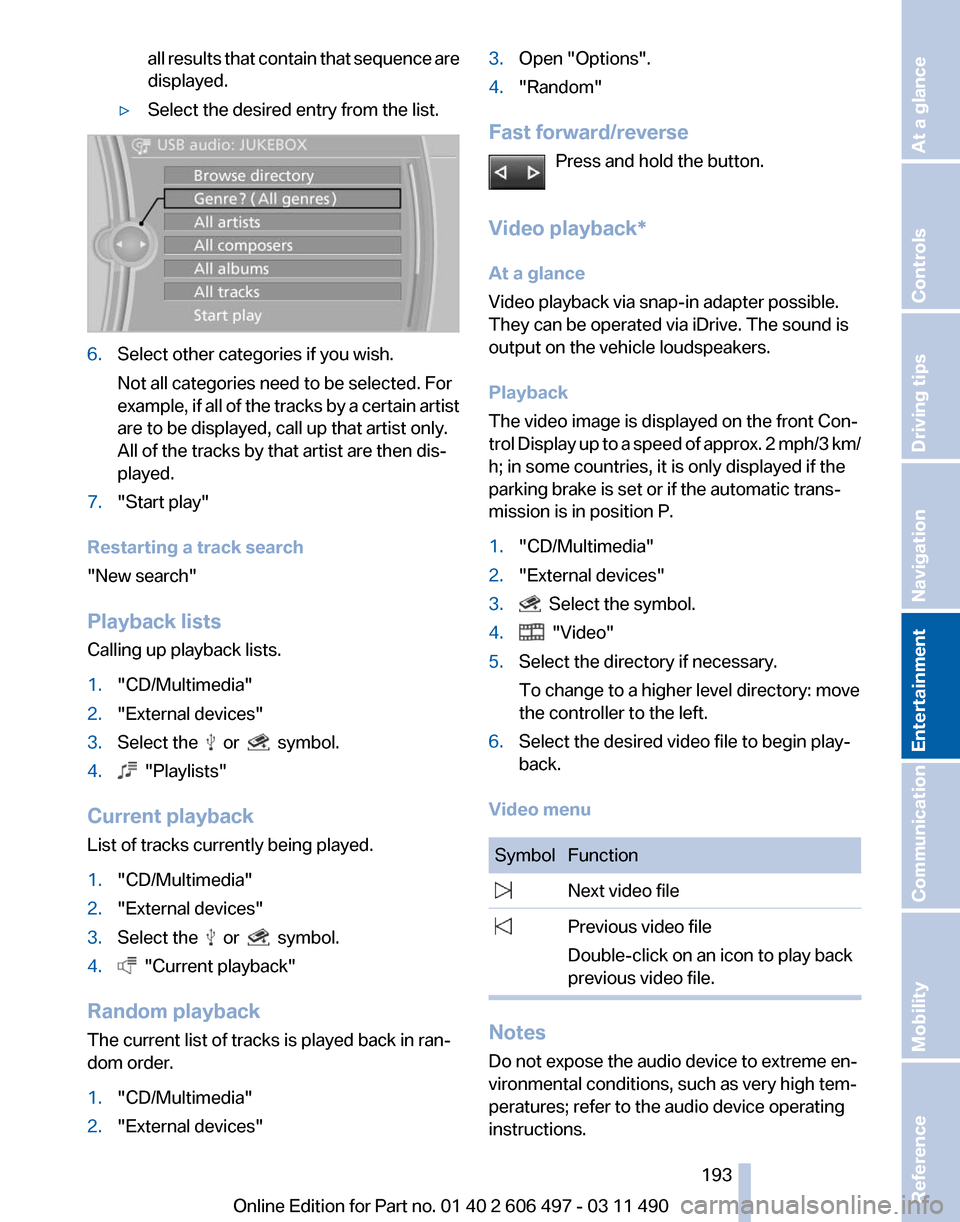
all results that contain that sequence are
displayed.
▷ Select the desired entry from the list. 6.
Select other categories if you wish.
Not all categories need to be selected. For
example,
if all of the tracks by a certain artist
are to be displayed, call up that artist only.
All of the tracks by that artist are then dis‐
played.
7. "Start play"
Restarting a track search
"New search"
Playback lists
Calling up playback lists.
1. "CD/Multimedia"
2. "External devices"
3. Select the or symbol.
4. "Playlists"
Current playback
List of tracks currently being played.
1. "CD/Multimedia"
2. "External devices"
3. Select the or symbol.
4. "Current playback"
Random playback
The current list of tracks is played back in ran‐
dom order.
1. "CD/Multimedia"
2. "External devices" 3.
Open "Options".
4. "Random"
Fast forward/reverse Press and hold the button.
Video playback*
At a glance
Video playback via snap-in adapter possible.
They can be operated via iDrive. The sound is
output on the vehicle loudspeakers.
Playback
The video image is displayed on the front Con‐
trol
Display up to a speed of approx. 2 mph/3 km/
h; in some countries, it is only displayed if the
parking brake is set or if the automatic trans‐
mission is in position P.
1. "CD/Multimedia"
2. "External devices"
3. Select the symbol.
4. "Video"
5. Select the directory if necessary.
To change to a higher level directory: move
the controller to the left.
6. Select the desired video file to begin play‐
back.
Video menu Symbol Function
Next video file
Previous video file
Double-click on an icon to play back
previous video file. Notes
Do not expose the audio device to extreme en‐
vironmental conditions, such as very high tem‐
peratures; refer to the audio device operating
instructions. Seite 193
193Online Edition for Part no. 01 40 2 606 497 - 03 11 490
Reference Mobility Communication
Entertainment Navigation Driving tips Controls At a glance
Page 195 of 299
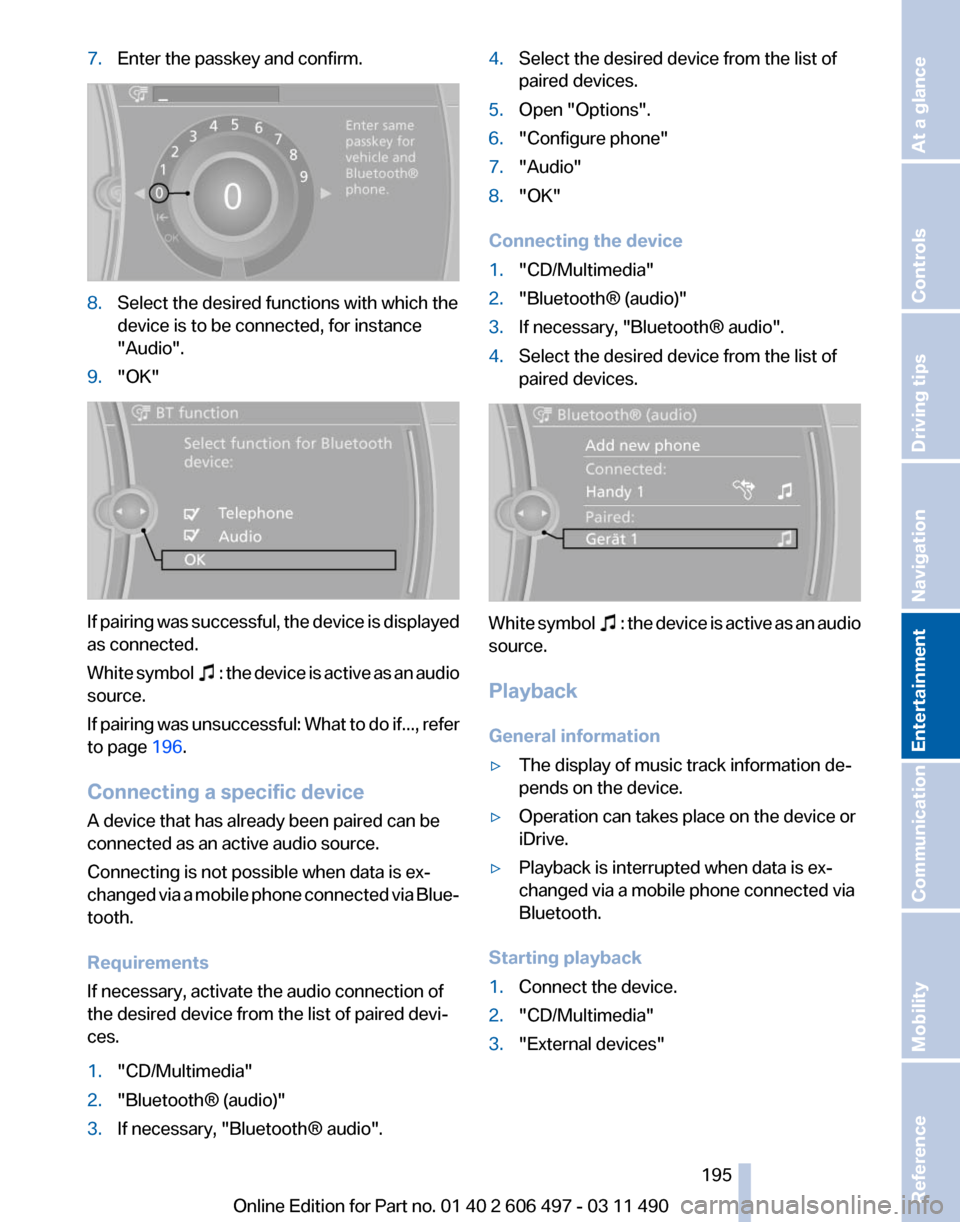
7.
Enter the passkey and confirm. 8.
Select the desired functions with which the
device is to be connected, for instance
"Audio".
9. "OK" If pairing was successful, the device is displayed
as connected.
White
symbol : the device is active as an audio
source.
If
pairing was unsuccessful: What to do if..., refer
to page 196.
Connecting a specific device
A device that has already been paired can be
connected as an active audio source.
Connecting is not possible when data is ex‐
changed via a mobile phone connected via Blue‐
tooth.
Requirements
If necessary, activate the audio connection of
the desired device from the list of paired devi‐
ces.
1. "CD/Multimedia"
2. "Bluetooth® (audio)"
3. If necessary, "Bluetooth® audio". 4.
Select the desired device from the list of
paired devices.
5. Open "Options".
6. "Configure phone"
7. "Audio"
8. "OK"
Connecting the device
1. "CD/Multimedia"
2. "Bluetooth® (audio)"
3. If necessary, "Bluetooth® audio".
4. Select the desired device from the list of
paired devices. White symbol : the device is active as an audio
source.
Playback
General information
▷ The display of music track information de‐
pends on the device.
▷ Operation can takes place on the device or
iDrive.
▷ Playback is interrupted when data is ex‐
changed via a mobile phone connected via
Bluetooth.
Starting playback
1. Connect the device.
2. "CD/Multimedia"
3. "External devices"
Seite 195
195Online Edition for Part no. 01 40 2 606 497 - 03 11 490
Reference Mobility Communication
Entertainment Navigation Driving tips Controls At a glance
Page 198 of 299
The previous version may only be restored when
the vehicle is stationary.
1.
"Settings"
2. "Software update"
3. "Restore previous version"
4. "OK" Double-click.
All listed software updates are removed.
Note
While the software is being updated or a previ‐
ous version is being restoredBMW Assist*, Of‐
fice functions* and the connected devices are
temporarily unavailable. Wait several minutes
for the functions to become available again.
Rear audio remote control*
The concept
The rear audio remote control can be used to
control
the following audio functions in the front:
▷ "Radio"
▷ "CD/Multimedia"
The unit is operated in the same manner as the
corresponding buttons on the
CD/DVD* player.
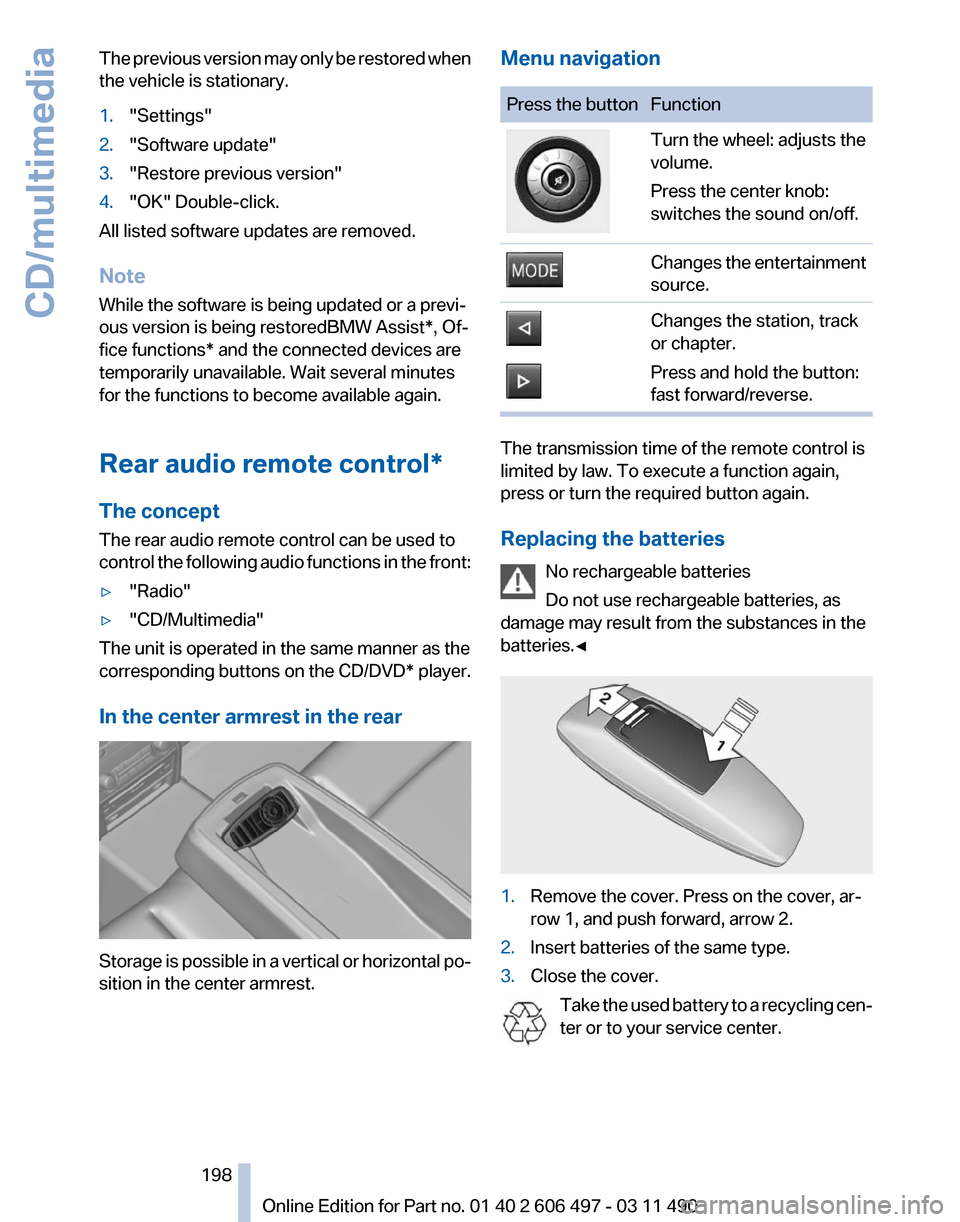
In the center armrest in the rear Storage is possible in a vertical or horizontal po‐
sition in the center armrest. Menu navigation Press the button Function
Turn the wheel: adjusts the
volume.
Press the center knob:
switches the sound on/off.
Changes the entertainment
source.
Changes the station, track
or chapter.
Press and hold the button:
fast forward/reverse.
The transmission time of the remote control is
limited by law. To execute a function again,
press or turn the required button again.
Replacing the batteries
No rechargeable batteries
Do not use rechargeable batteries, as
damage may result from the substances in the
batteries.◀ 1.
Remove the cover. Press on the cover, ar‐
row 1, and push forward, arrow 2.
2. Insert batteries of the same type.
3. Close the cover.
Take the used battery to a recycling cen‐
ter or to your service center. Seite 198
198 Online Edition for Part no. 01 40 2 606 497 - 03 11 490
CD/multimedia
Page 200 of 299
Remote control
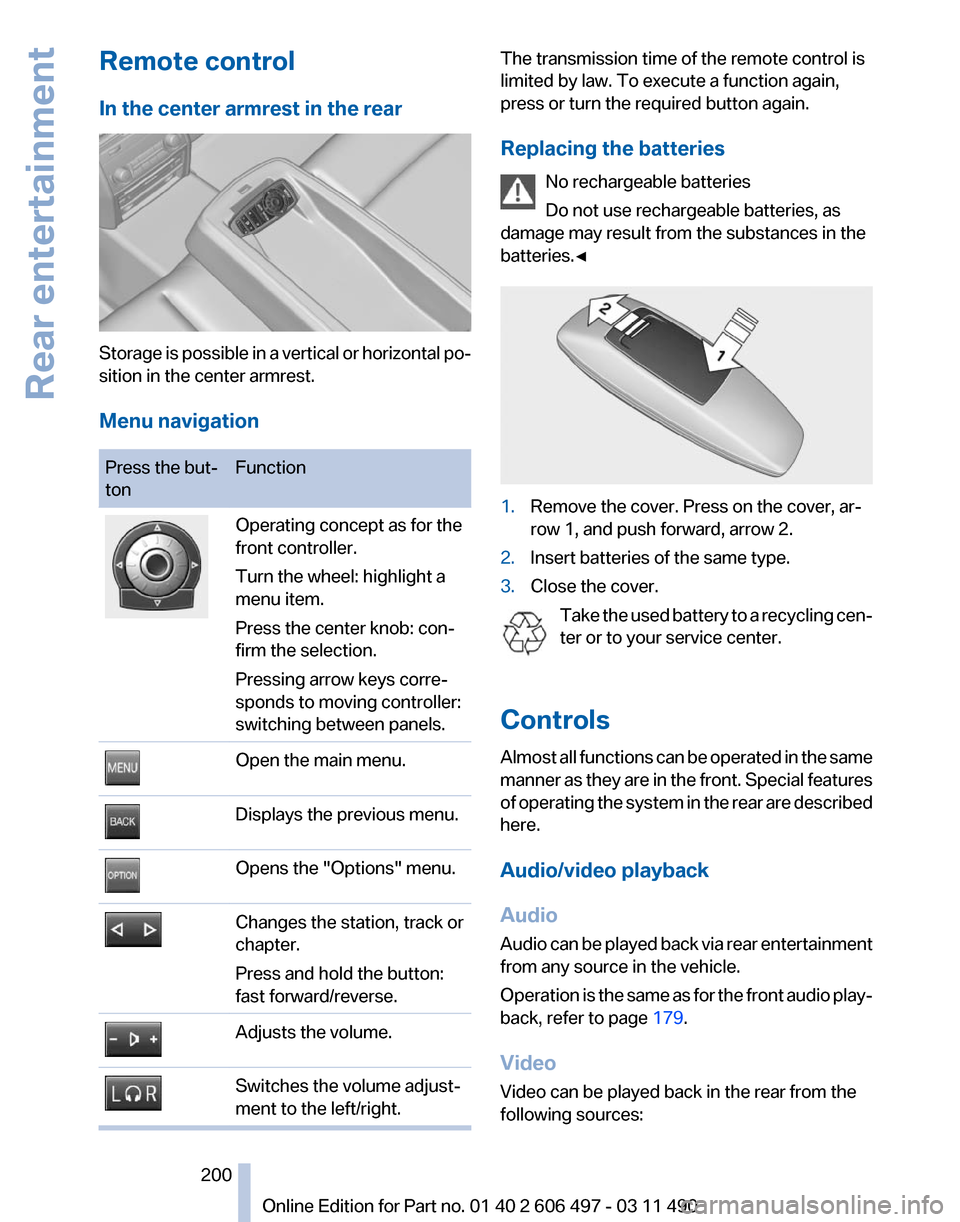
In the center armrest in the rear
Storage is possible in a vertical or horizontal po‐
sition in the center armrest.
Menu navigation
Press the but‐
ton
Function Operating concept as for the
front controller.
Turn the wheel: highlight a
menu item.
Press the center knob: con‐
firm the selection.
Pressing arrow keys corre‐
sponds to moving controller:
switching between panels.
Open the main menu.
Displays the previous menu.
Opens the "Options" menu.
Changes the station, track or
chapter.
Press and hold the button:
fast forward/reverse.
Adjusts the volume.
Switches the volume adjust‐
ment to the left/right. The transmission time of the remote control is
limited by law. To execute a function again,
press or turn the required button again.
Replacing the batteries
No rechargeable batteries
Do not use rechargeable batteries, as
damage may result from the substances in the
batteries.◀ 1.
Remove the cover. Press on the cover, ar‐
row 1, and push forward, arrow 2.
2. Insert batteries of the same type.
3. Close the cover.
Take the used battery to a recycling cen‐
ter or to your service center.
Controls
Almost
all functions can be operated in the same
manner as they are in the front. Special features
of operating the system in the rear are described
here.
Audio/video playback
Audio
Audio can be played back via rear entertainment
from any source in the vehicle.
Operation is the same as for the front audio play‐
back, refer to page 179.
Video
Video can be played back in the rear from the
following sources: Seite 200
200 Online Edition for Part no. 01 40 2 606 497 - 03 11 490
Rear entertainment
Page 201 of 299
▷
DVD changer*.
▷ Rear CD/DVD player.
▷ External device in rear.
If a video image is being played back in the rear,
the rear CD/DVD player cannot be selected in
the front.
Operation
is the same as for the front video play‐
back, refer to page 181.
Radio
When the same radio source is selected in the
front and rear (e.g., FM/AM), the same radio sta‐
tion is played.
Operation is the same as for the front radio, refer
to page 172.
CD/multimedia
CD/DVD
When the same audio source (front CD/DVD
player, rear CD/DVD player, DVD changer) is se‐
lected in the front and rear, the same material is
played.
Operation is the same as for the front CD/DVD,
refer to page 179.
Notes on CDs/DVDs, refer to page 185.
Music collection*
Music can only be stored and data can only be
exported and imported via the front CD/DVD
player or the USB interface in the glove com‐
partment.
When music collections are selected in the front
and rear, they are played back separately.
Operation is the same as for the front music col‐
lection, refer to page 186.
Tone
Only treble and bass can be set in the rear. The
settings are made separately for the left and
right headphones.
Operation is the same as for the front tone, refer
to page 170. Adjusting
The following settings are available:
▷
"Rear displays"
▷ "Language/Units": language can be set
globally for all screens.
▷ "Tone"
Options menu
The split screen is not available and there is no
Integrated Owner's Manual.
Operation
is the same as for the front menu op‐
tions, refer to page 21.
Enabling
Enabling operation in the rear
Only possible via the iDrive in the front.
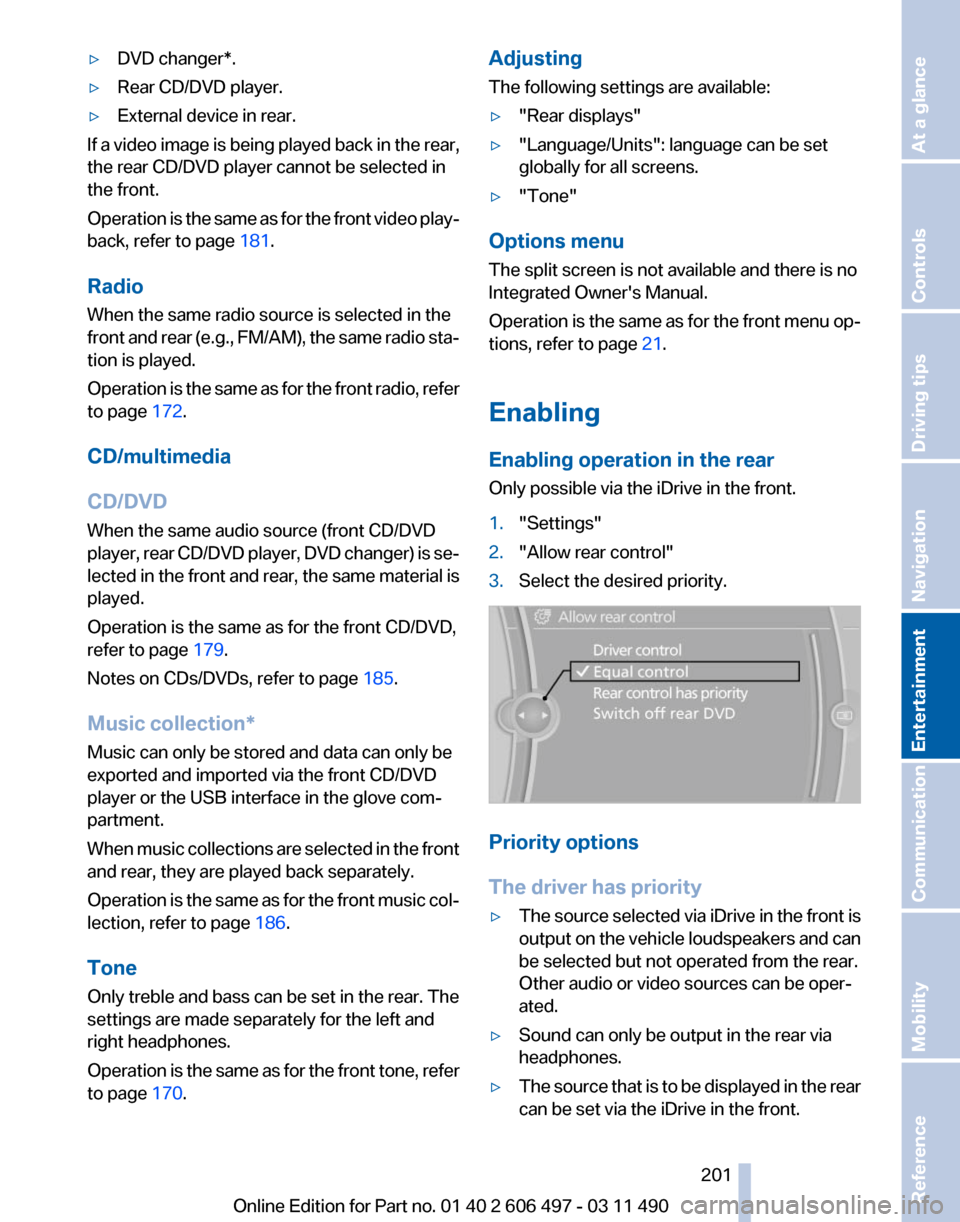
1. "Settings"
2. "Allow rear control"
3. Select the desired priority. Priority options
The driver has priority
▷
The source selected via iDrive in the front is
output
on the vehicle loudspeakers and can
be selected but not operated from the rear.
Other audio or video sources can be oper‐
ated.
▷ Sound can only be output in the rear via
headphones.
▷ The source that is to be displayed in the rear
can be set via the iDrive in the front.
Seite 201
201Online Edition for Part no. 01 40 2 606 497 - 03 11 490
Reference Mobility Communication
Entertainment Navigation Driving tips Controls At a glance
Page 203 of 299
Due to the large number of different audio and
video devices available on the market, it cannot
be ensured that every audio and video device
will be displayed correctly on the screen.
Connecting an external device
1.
Fold down the cover in front of the cinch
sockets on the CD/DVD player.
2. Connect the external device to the RCA
sockets.
▷Video: yellow socket.
▷ Audio: white and red socket.
Starting playback
1. "CD/Multimedia"
2. "External devices"
3. Select the or symbol.
Volume
The volume of the sound output is dependent
on the audio device. If this volume differs mark‐
edly
from the volume of the other audio sources,
it is advisable to adjust the volumes.
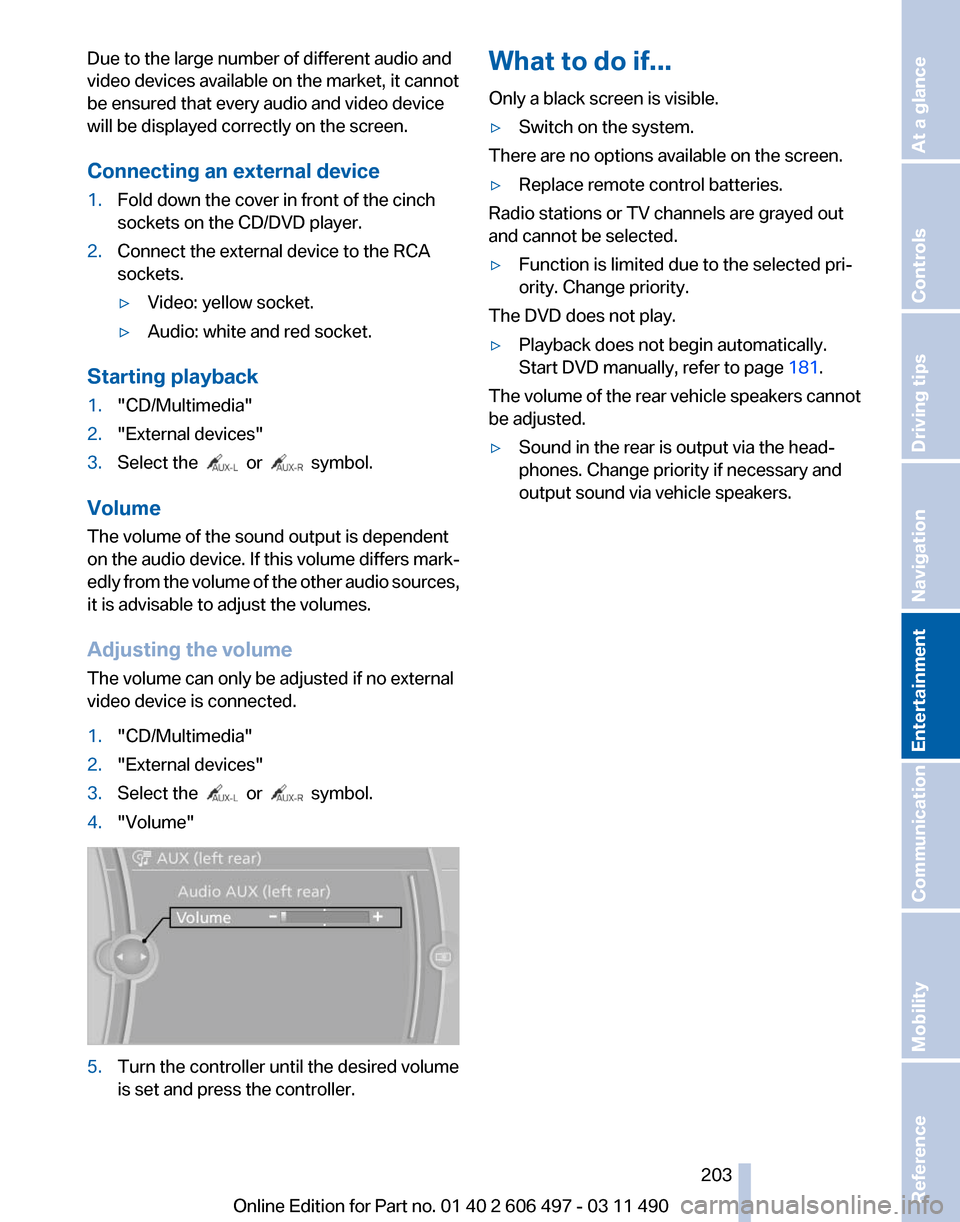
Adjusting the volume
The volume can only be adjusted if no external
video device is connected.
1. "CD/Multimedia"
2. "External devices"
3. Select the or symbol.
4. "Volume" 5.
Turn the controller until the desired volume
is set and press the controller. What to do if...
Only a black screen is visible.
▷
Switch on the system.
There are no options available on the screen.
▷ Replace remote control batteries.
Radio stations or TV channels are grayed out
and cannot be selected.
▷ Function is limited due to the selected pri‐
ority. Change priority.
The DVD does not play.
▷ Playback does not begin automatically.
Start DVD manually, refer to page 181.
The volume of the rear vehicle speakers cannot
be adjusted.
▷ Sound in the rear is output via the head‐
phones. Change priority if necessary and
output sound via vehicle speakers.
Seite 203
203Online Edition for Part no. 01 40 2 606 497 - 03 11 490
Reference Mobility Communication
Entertainment Navigation Driving tips Controls At a glance