BMW 750IL SEDAN 1998 Owners Manual
Manufacturer: BMW, Model Year: 1998, Model line: 750IL SEDAN, Model: BMW 750IL SEDAN 1998Pages: 211, PDF Size: 1.68 MB
Page 101 of 211
100n
Automatic climate control
380us632
Page 102 of 211
101n
RepairsIndexOverview Controls Car care Technology Data
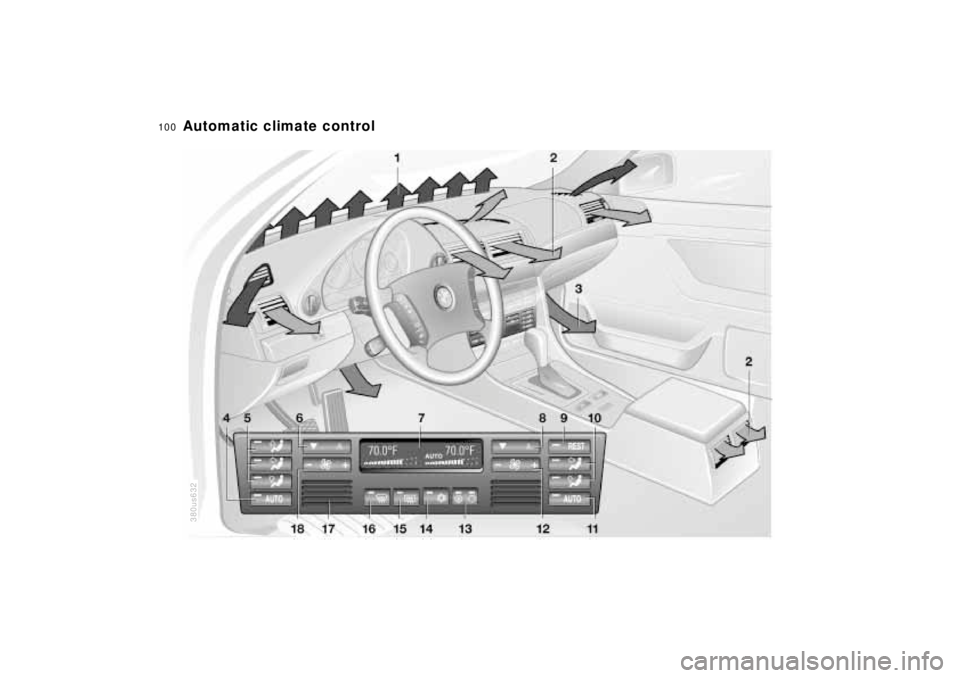
Automatic climate control1 Air flow directed against windshield
and door windows
2 Air flow toward the upper body
The rotary dials allow infinitely-vari-
able regulation of the air supply,
changes in the air-flow direction,
and temperature regulation.
(Change air-flow direction in the
rear passenger area with the levers
in the center of the vent). In the
closed position, air flows out at the
upper center of the instrument
panel only104
3 Front footwell ventilation
There are corresponding air vents in
the rear footwell as well
4 Automatic air distribution –
left-hand side102
5 Individual air distribution –
left-hand side102
6 Temperature control –
left-hand side103
7 Temperature and air flow display,
left- and right-hand
sides103,104
8 Temperature control –
right-hand side103
9 Residual heat mode104
10 Individual air distribution –
right-hand side10211 Automatic air distribution –
right-hand side102
12 Air supply – right-hand side104
13 Recirculated-air mode/Automatic
recirculated-air control (AUC)103
14 Air conditioner103
15 Rear window defroster70, 103
16 Defrosting the windows and remove
condensation103
17 Air grill for interior temperature sen-
sor - please keep clear and unob-
structed
18 Air supply – left-hand side104
Page 103 of 211
102n
Automatic climate controlTips for pleasant drivingUse the automatic system, i.e., press
AUTO button 4. Select an interior tem-
perature that is comfortable for you -
we recommend 707 (226) as a com-
fortable setting. When the outside tem-
perature is above 427 (56), you can
also use the air conditioning system 14.
This will dry the air and prevent window
fogging, for example if people are wear-
ing damp clothes in the vehicle. Set the
outlets 2 so that the air flows past you
and does not flow directly at you. Set
the rotary dial between the air outlets 2
for the upper body to a medium posi-
tion, since air that is somewhat cooler
promotes driving without fatigue.
The following description will guide you
through additional individual settings.
You can make the settings of your
vehicle in such a manner that,
when you unlock the car with your per-
sonalized remote control, your own per-
sonalized setting of the automatic cli-
mate control is initiated.<
Automatic air distribution
The AUTO program as-
sumes the adjustment of
the air distribution and the air supply for
you and in addition adapts the tempera-
ture to external influences (summer,
winter) to meet preferences you can
specify. This program maintains a com-
fortable in-car climate regardless of the
season. Select an interior temperature
that is comfortable for you - we recom-
mend 707 (226) as a comfortable
setting.
The temperature setting and the word
"AUTO" for the air flow appear in the
display 7 (refer to the overview on
page 100). Open the ventilation outlet
for the upper body area. Switch on the
air conditioner in warm weather. The
maximum cooling capacity is achieved
when you set the rotary dial 3 (refer to
page 104) to cold.
Individual air distribution
You can cancel the AUTO
program by selecting spe-
cific distribution patterns to
suit your own individual re-
quirements. You can direct
air to flow onto the windows , toward
the upper body , and into the footwell
.
To defrost windshield and door
windows
This program quickly removes
ice and condensation from the
windshield and the side windows.
Air conditioner
The air is cooled and dehumidi-
fied and - depending on the tem-
perature setting - warmed again when
the air conditioner system is switched
on.
Depending on the weather, the wind-
shield may fog over briefly when the en-
gine is started.
At outside temperatures below approx.
427 (56), switch off the air condi-
tioner. This will help to prevent the win-
dows from fogging up.
If the windows fog over immediately af-
ter the air conditioner is switched off,
switch it back on.
Condensation forms in the air con-
ditioner system during operation,
which then exits under the vehicle.
Traces of condensed water of this kind
are thus normal.<
Page 104 of 211
103n
RepairsIndexOverview Controls Car care Technology Data
Automatic climate controlAutomatic recirculated-air control
(AUC)
You can respond to unpleasant
external odors by temporarily
stopping the flow of outside air. The
system then recirculates the air cur-
rently within the vehicle. Press the but-
ton repeatedly to run through the fol-
lowing control sequence:
>Indicator lamps off: Fresh air flows
into the vehicle
>Left-hand indicator lamp on – AUC
mode: The system detects pollutants
in the outside air and responds by
deactivating the outside air flow when
required. The system then recircu-
lates the air currently within the vehi-
cle
>Right-hand indicator lamp on: The
flow of external air into the vehicle is
permanently blocked. The system
then recirculates the air currently
within the vehicle.
If you have a multi-function steering
wheel with the AUC button (refer to
page 23), you can also switch between
"OFF" and AUC from there.
If the windows fog over in the re-
circulated-air mode, switch this
mode off and increase the air supply as
required.<
Rear window defroster
When the rear window defroster
is activated, the indicator lamp
comes on. The rear window defroster
switches off automatically.
Temperature
You can make individual
temperature settings on the
driver's side and the front passenger
side. Your settings will be shown in the
display 7. The displayed temperatures
are reference values for the interior
temperature. We recommend 707
(226) as a comfortable setting,
whether the air conditioner is operating
or not. When you start the vehicle, the
system ensures that the selected tem-
perature is achieved as quickly as pos-
sible. It then maintains this tempera-
ture, regardless of the season.
You can set uncontrolled heater
output at up to 907 (326). Full
cooling output is available from the air
conditioner down to 607 (166).<
Air supply
In the "AUTO" program, the
air flow is controlled auto-
matically. AUTO will appear in the dis-
play, refer to the overview on page 100.
Use "+" and "–" to vary the air flow.
When your setting is displayed by bars,
the automatic air flow is switched off.
Automatic air distribution maintains its
setting. You can reactivate the auto-
matic air flow by pressing the "AUTO"
button.
When you press "– " during operation at
minimum blower speed all displays are
canceled: The fan, heating and air con-
ditioner are switched off. The outside
air supply is closed. By pressing any
button of the automatic climate control
(except the "REST" button 9), you can
switch the system back on.
Page 105 of 211
104n
Automatic climate controlResidual heat mode
The heat which is stored in
the engine is utilized for
heating of the interior when the engine
has been switched off (while waiting at
a railroad crossing, for instance).
In ignition key position 1, you can alter
the settings of the automatic climate
control. In ignition key position 0, the
system automatically directs heated air
to the windshield, side windows and
footwells.
This function may be activated
when the outside temperature is
below approx. 597 (156), the engine
is at operating temperature, and the
battery is adequately charged.<
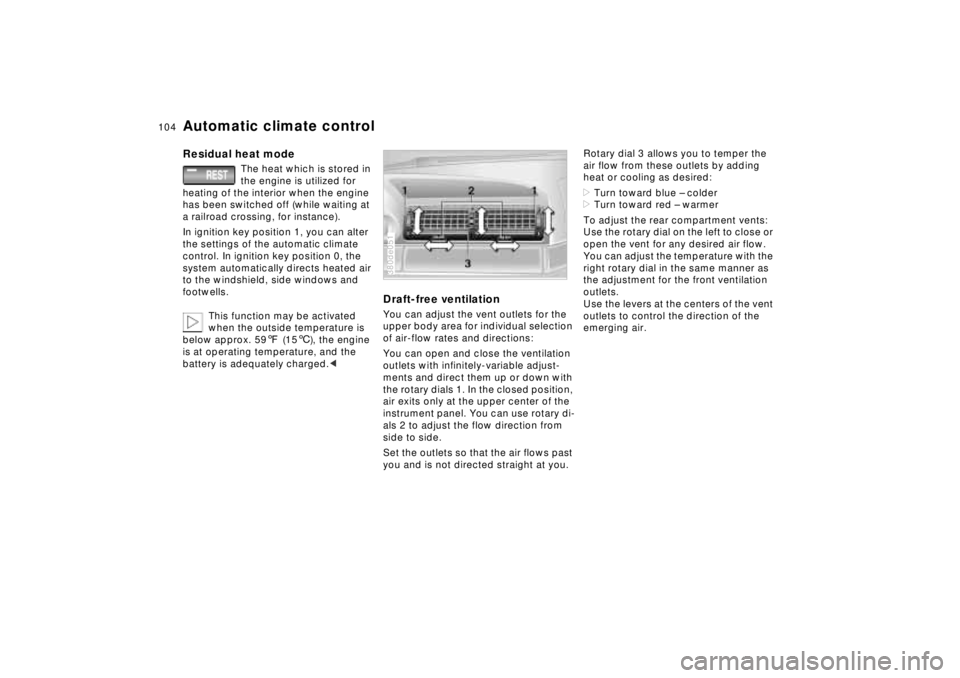
Draft-free ventilationYou can adjust the vent outlets for the
upper body area for individual selection
of air-flow rates and directions:
You can open and close the ventilation
outlets with infinitely-variable adjust-
ments and direct them up or down with
the rotary dials 1. In the closed position,
air exits only at the upper center of the
instrument panel. You can use rotary di-
als 2 to adjust the flow direction from
side to side.
Set the outlets so that the air flows past
you and is not directed straight at you.380de051
Rotary dial 3 allows you to temper the
air flow from these outlets by adding
heat or cooling as desired:
>Turn toward blue – colder
>Turn toward red – warmer
To adjust the rear compartment vents:
Use the rotary dial on the left to close or
open the vent for any desired air flow.
You can adjust the temperature with the
right rotary dial in the same manner as
the adjustment for the front ventilation
outlets.
Use the levers at the centers of the vent
outlets to control the direction of the
emerging air.
Page 106 of 211
105n
RepairsIndexOverview Controls Car care Technology Data
Automatic climate control Rear passenger-area air conditioning
*
Microfilter, activated-charcoal
filterThe microfilter removes dust and pollen
from the incoming air. The activated-
charcoal filter provides additional pro-
tection by filtering gaseous pollutants
from the outside air. Your BMW center
replaces the filter assemblies as a stan-
dard part of your scheduled mainte-
nance. A substantial reduction in air
flow indicates that the filter needs to be
replaced early.
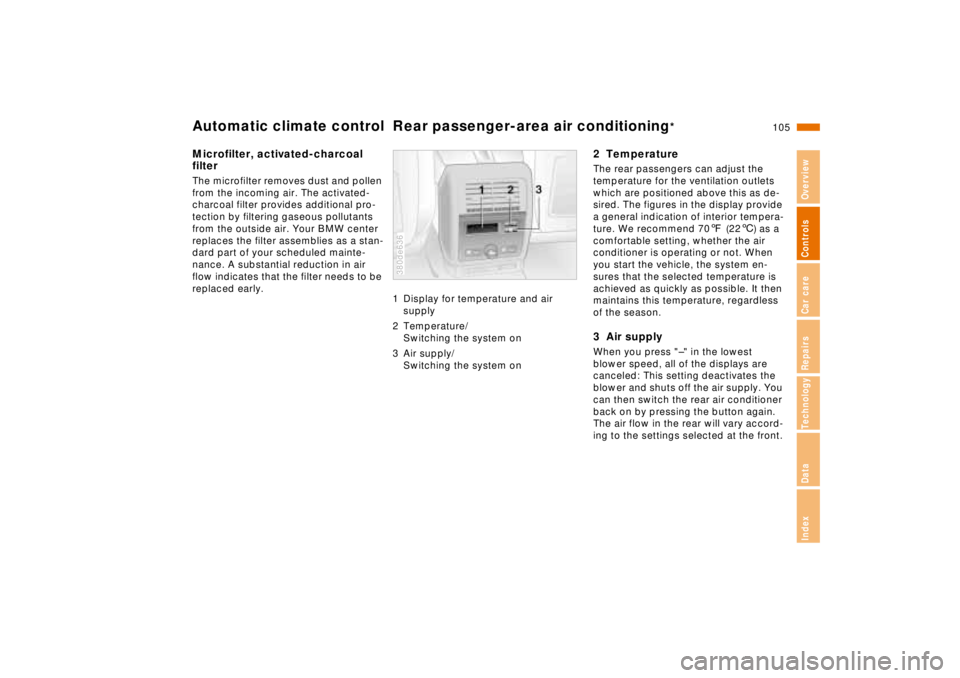
1 Display for temperature and air
supply
2 Temperature/
Switching the system on
3 Air supply/
Switching the system on
380de636
2 TemperatureThe rear passengers can adjust the
temperature for the ventilation outlets
which are positioned above this as de-
sired. The figures in the display provide
a general indication of interior tempera-
ture. We recommend 707 (226) as a
comfortable setting, whether the air
conditioner is operating or not. When
you start the vehicle, the system en-
sures that the selected temperature is
achieved as quickly as possible. It then
maintains this temperature, regardless
of the season.3 Air supplyWhen you press "–" in the lowest
blower speed, all of the displays are
canceled: This setting deactivates the
blower and shuts off the air supply. You
can then switch the rear air conditioner
back on by pressing the button again.
The air flow in the rear will vary accord-
ing to the settings selected at the front.
Page 107 of 211
106n
Seat heating
*
Steering wheel heating
*
The seat cushion and backrest can be
heated with ignition key in position 2.
You can call up different heating modes
by repeatedly pressing the keys.
The highest heating mode is on when
the three indicator lamps are lit; one
lamp is lit for lowest heating. Tempera-
ture regulation in each mode is with a
thermostat.
You can also switch the higher heating
modes off directly:
Press the key and hold it slightly longer.380de618
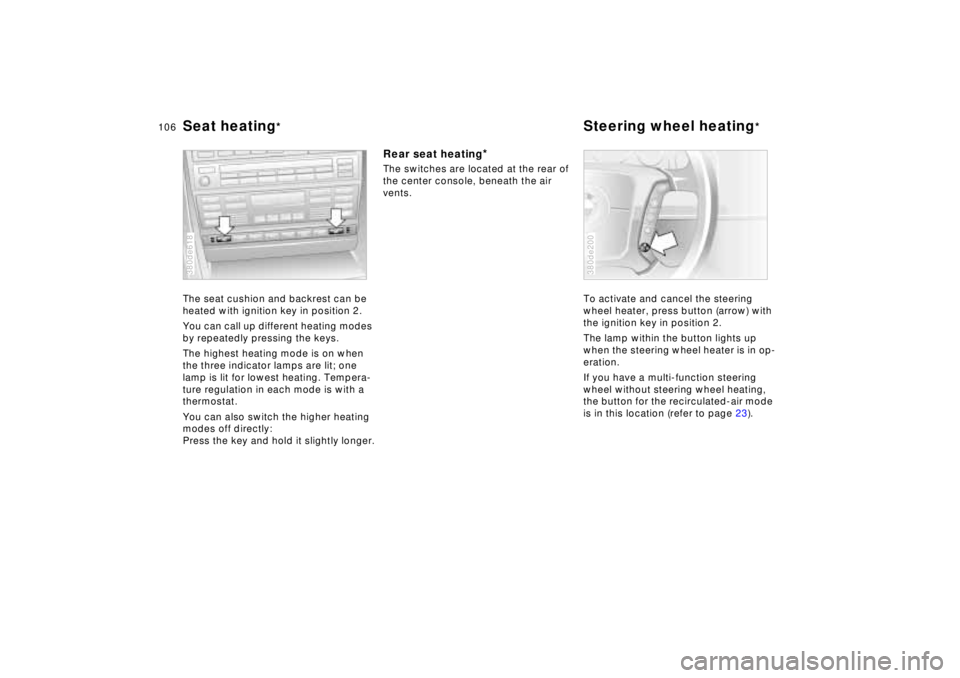
Rear seat heating
*
The switches are located at the rear of
the center console, beneath the air
vents.
To activate and cancel the steering
wheel heater, press button (arrow) with
the ignition key in position 2.
The lamp within the button lights up
when the steering wheel heater is in op-
eration.
If you have a multi-function steering
wheel without steering wheel heating,
the button for the recirculated-air mode
is in this location (refer to page 23).
380de200
Page 108 of 211
107n
RepairsIndexOverview Controls Car care Technology Data
Roller sun blind
*
Independent ventilation system
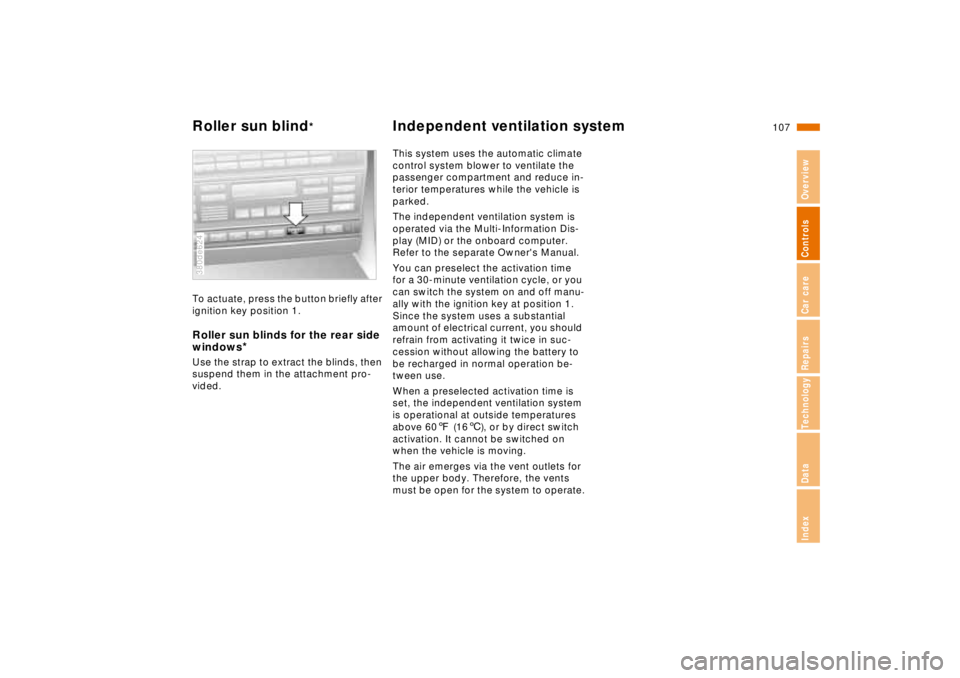
To actuate, press the button briefly after
ignition key position 1.Roller sun blinds for the rear side
windows
*
Use the strap to extract the blinds, then
suspend them in the attachment pro-
vided.380de624
This system uses the automatic climate
control system blower to ventilate the
passenger compartment and reduce in-
terior temperatures while the vehicle is
parked.
The independent ventilation system is
operated via the Multi-Information Dis-
play (MID) or the onboard computer.
Refer to the separate Owner's Manual.
You can preselect the activation time
for a 30-minute ventilation cycle, or you
can switch the system on and off manu-
ally with the ignition key at position 1.
Since the system uses a substantial
amount of electrical current, you should
refrain from activating it twice in suc-
cession without allowing the battery to
be recharged in normal operation be-
tween use.
When a preselected activation time is
set, the independent ventilation system
is operational at outside temperatures
above 607 (166), or by direct switch
activation. It cannot be switched on
when the vehicle is moving.
The air emerges via the vent outlets for
the upper body. Therefore, the vents
must be open for the system to operate.
Page 109 of 211
108n
Integrated Universal Remote Control
*
The conceptThe Integrated Universal Remote Con-
trol replaces up to three hand-held
transmitters of different devices such as
garage-door openers, alarm systems,
or door locking systems. The Integrated
Universal Remote Control recognizes
and "learns" the transmitted signal of
each of the original hand-held transmit-
ters.
The signal of an original hand-held
transmitter can be programmed on one
of the three channel keys. Following
that, each of the devices can be actu-
ated with the appropriately-program-
med channel key. Transmission of the
signal is signaled by the indicator lamp.
If the vehicle is sold, the memory of the
channel keys should be cleared as de-
scribed on page 110.
During programming and before
every remote actuation of a pro-
grammed device by the Integrated Uni-
versal Remote Control, check to be
sure that there are no persons, animals
or objects within the actuation range of
the device in order to prevent possible
injuries or damage. Also, comply with
the safety precautions of the original
hand-held transmitter.<
To Canadian residents:
During programming, your hand-
held transmitter may automatically stop
transmitting after two seconds, which
may not be long enough to program the
BMW Universal Transmitter. If you are
programming from one of these hand-
held transmitters, the Universal Trans-
mitter's light may begin to flash in a se-
ries of double-blinks. If this occurs,
continue to hold the button on the Uni-
versal Transmitter while you reactivate
your hand-held transmitter. You may
have to repeat this function several
times while programming.<
Before programming, read the
"User information" section on
page 110.<
Original hand-held transmitter
If this symbol is present on the
packaging or in the instructions
of the original hand-held trans-
mitter, it may be assumed that this
hand-held transmitter is compatible
with the Integrated Universal Remote
Control.
Checking for the conversion codeTo determine whether the original
hand-held transmitter is provided with a
conversion-code system, you may ei-
ther read the instructions for the original
hand-held transmitter or program a
channel key as described on page 109
(left-hand column under "Program-
ming").
Then press and hold the programmed
channel key of the Integrated Universal
Remote Control. If the indicator lamp of
the Integrated Universal Remote Con-
trol flashes for two seconds and then
comes on steadily, the original hand-
held transmitter is provided with a con-
version-code system. With a conver-
sion-code system, program the channel
keys as described on page 109 (right-
hand column under "Programming a
hand-held transmitter with conversion
code").
If you have additional questions,
please consult your BMW center
or call 1-800-355-3515.<
Page 110 of 211
109n
RepairsIndexOverview Controls Car care Technology Data
Integrated Universal Remote Control
*
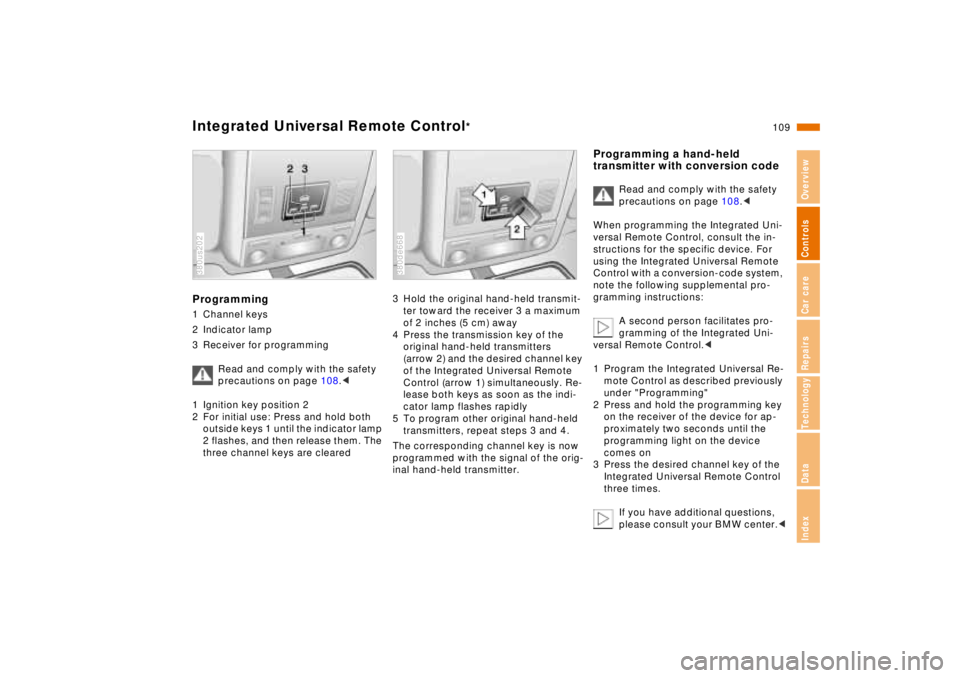
Programming1 Channel keys
2 Indicator lamp
3 Receiver for programming
Read and comply with the safety
precautions on page 108.<
1 Ignition key position 2
2 For initial use: Press and hold both
outside keys 1 until the indicator lamp
2 flashes, and then release them. The
three channel keys are cleared380us202
3 Hold the original hand-held transmit-
ter toward the receiver 3 a maximum
of 2 inches (5 cm) away
4 Press the transmission key of the
original hand-held transmitters
(arrow 2) and the desired channel key
of the Integrated Universal Remote
Control (arrow 1) simultaneously. Re-
lease both keys as soon as the indi-
cator lamp flashes rapidly
5 To program other original hand-held
transmitters, repeat steps 3 and 4.
The corresponding channel key is now
programmed with the signal of the orig-
inal hand-held transmitter.380de668
Programming a hand-held
transmitter with conversion code
Read and comply with the safety
precautions on page 108.<
When programming the Integrated Uni-
versal Remote Control, consult the in-
structions for the specific device. For
using the Integrated Universal Remote
Control with a conversion-code system,
note the following supplemental pro-
gramming instructions:
A second person facilitates pro-
gramming of the Integrated Uni-
versal Remote Control.<
1 Program the Integrated Universal Re-
mote Control as described previously
under "Programming"
2 Press and hold the programming key
on the receiver of the device for ap-
proximately two seconds until the
programming light on the device
comes on
3 Press the desired channel key of the
Integrated Universal Remote Control
three times.
If you have additional questions,
please consult your BMW center.<