BMW 750IL SEDAN 1998 Owners Manual
Manufacturer: BMW, Model Year: 1998, Model line: 750IL SEDAN, Model: BMW 750IL SEDAN 1998Pages: 211, PDF Size: 1.68 MB
Page 161 of 211
160n
Page 162 of 211
Overview
Controls and features
Operation, care
and maintenance
Owner service procedures
Technical data
Index Advanced technology
161n
RepairsIndexOverview Controls Car care Technology Data
Replacement procedures:
Onboard tool kit162
Windshield wiper blades162
Lamps and bulbs163
Remote control168
Changing tires170
Battery173
Fuses176
In case of electrical
malfunction:
Fuel filler door178
Sliding/Tilt sunroof178
Assistance, giving and
receiving:
Jump-starting179
Towing the vehicle180
Page 163 of 211
162n
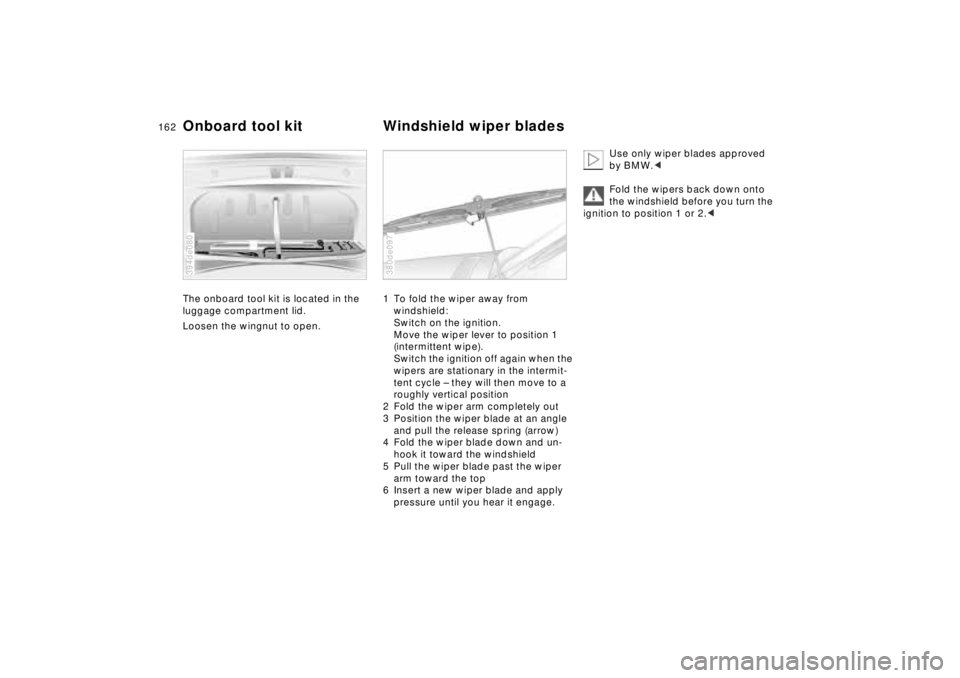
The onboard tool kit is located in the
luggage compartment lid.
Loosen the wingnut to open.
394de080
1 To fold the wiper away from
windshield:
Switch on the ignition.
Move the wiper lever to position 1
(intermittent wipe).
Switch the ignition off again when the
wipers are stationary in the intermit-
tent cycle – they will then move to a
roughly vertical position
2 Fold the wiper arm completely out
3 Position the wiper blade at an angle
and pull the release spring (arrow)
4 Fold the wiper blade down and un-
hook it toward the windshield
5 Pull the wiper blade past the wiper
arm toward the top
6 Insert a new wiper blade and apply
pressure until you hear it engage.380de097
Use only wiper blades approved
by BMW.<
Fold the wipers back down onto
the windshield before you turn the
ignition to position 1 or 2.<
Onboard tool kit Windshield wiper blades
Page 164 of 211
163n
RepairsIndexOverview Controls Car care Technology Data
Lamps and bulbsThe lamps and bulbs make essential
contributions to the safety of your vehi-
cle. Observe the following instructions
during bulb replacement carefully. If
you are not familiar with any of the pro-
cedures, consult your authorized BMW
center.
Do not touch the glass portion of a
new bulb with your bare hands
since even small amounts of impurities
burn in to the surface, thus reducing the
service life of the bulb. Use a clean
cloth, paper napkin, or a similar mate-
rial, or hold the bulb by its metallic
base.<
A replacement bulb set is available from
your BMW center.
Whenever working on the electri-
cal system, switch off the electri-
cal accessory you are working on or
disconnect the cable from the negative
terminal of the battery. Failure to do this
could result in short circuits.
To prevent injuries and damage, comply
with any instructions provided by the
bulb manufacturer.<
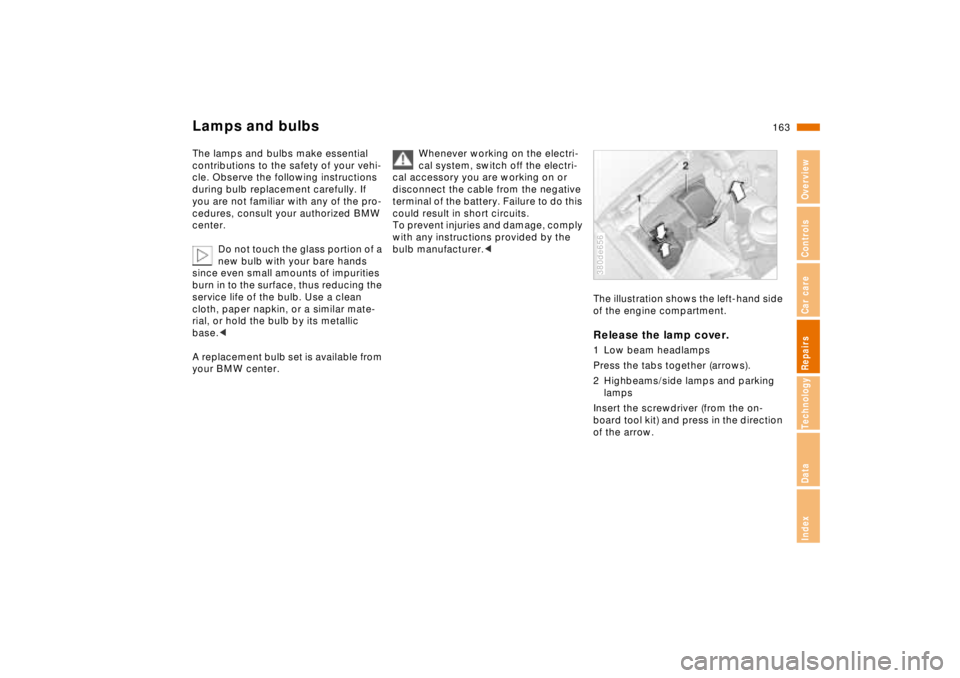
The illustration shows the left-hand side
of the engine compartment.Release the lamp cover.1 Low beam headlamps
Press the tabs together (arrows).
2 Highbeams/side lamps and parking
lamps
Insert the screwdriver (from the on-
board tool kit) and press in the direction
of the arrow.380de656
Page 165 of 211
164n
Lamps and bulbs
For checking and adjusting head-
lamp aim, please contact your
BMW center.<
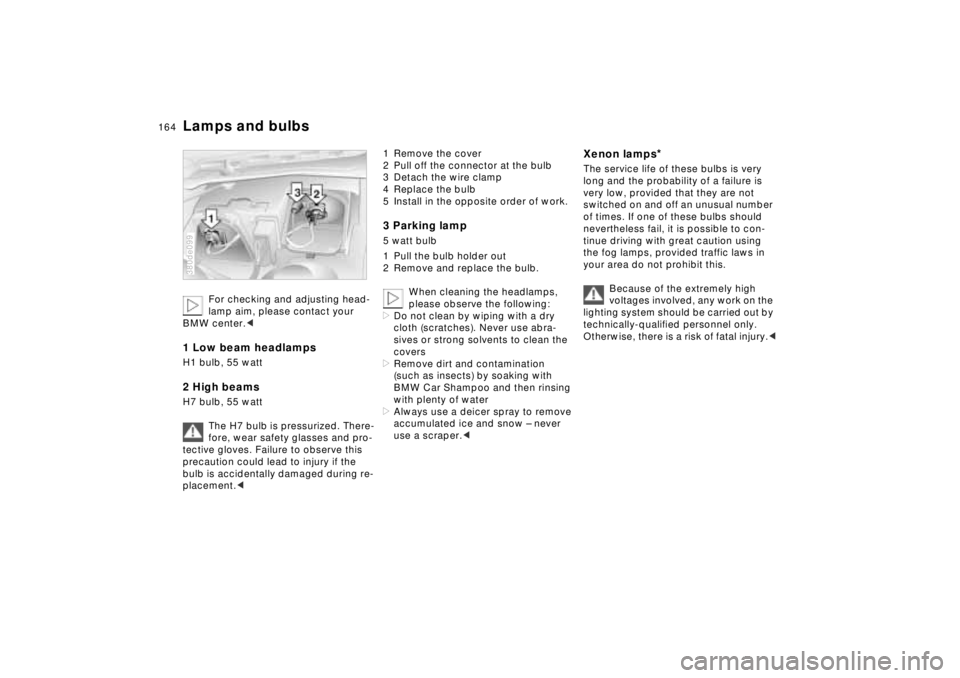
1 Low beam headlampsH1 bulb, 55 watt 2 High beamsH7 bulb, 55 watt
The H7 bulb is pressurized. There-
fore, wear safety glasses and pro-
tective gloves. Failure to observe this
precaution could lead to injury if the
bulb is accidentally damaged during re-
placement.< 380de099
1 Remove the cover
2 Pull off the connector at the bulb
3 Detach the wire clamp
4 Replace the bulb
5 Install in the opposite order of work.3 Parking lamp5 watt bulb
1 Pull the bulb holder out
2 Remove and replace the bulb.
When cleaning the headlamps,
please observe the following:
>Do not clean by wiping with a dry
cloth (scratches). Never use abra-
sives or strong solvents to clean the
covers
>Remove dirt and contamination
(such as insects) by soaking with
BMW Car Shampoo and then rinsing
with plenty of water
>Always use a deicer spray to remove
accumulated ice and snow – never
use a scraper.<
Xenon lamps
*
The service life of these bulbs is very
long and the probability of a failure is
very low, provided that they are not
switched on and off an unusual number
of times. If one of these bulbs should
nevertheless fail, it is possible to con-
tinue driving with great caution using
the fog lamps, provided traffic laws in
your area do not prohibit this.
Because of the extremely high
voltages involved, any work on the
lighting system should be carried out by
technically-qualified personnel only.
Otherwise, there is a risk of fatal injury.<
Page 166 of 211
165n
RepairsIndexOverview Controls Car care Technology Data
Lamps and bulbsTurn signals/Parking lamps
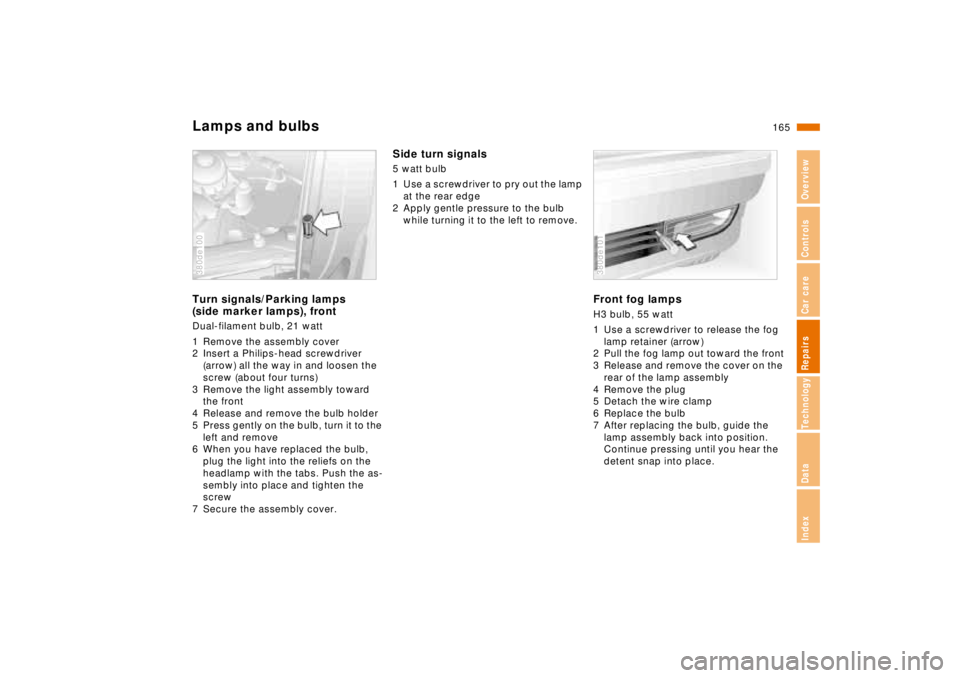
(side marker lamps), frontDual-filament bulb, 21 watt
1 Remove the assembly cover
2 Insert a Philips-head screwdriver
(arrow) all the way in and loosen the
screw (about four turns)
3 Remove the light assembly toward
the front
4 Release and remove the bulb holder
5 Press gently on the bulb, turn it to the
left and remove
6 When you have replaced the bulb,
plug the light into the reliefs on the
headlamp with the tabs. Push the as-
sembly into place and tighten the
screw
7 Secure the assembly cover.380de100
Side turn signals5 watt bulb
1 Use a screwdriver to pry out the lamp
at the rear edge
2 Apply gentle pressure to the bulb
while turning it to the left to remove.
Front fog lampsH3 bulb, 55 watt
1 Use a screwdriver to release the fog
lamp retainer (arrow)
2 Pull the fog lamp out toward the front
3 Release and remove the cover on the
rear of the lamp assembly
4 Remove the plug
5 Detach the wire clamp
6 Replace the bulb
7 After replacing the bulb, guide the
lamp assembly back into position.
Continue pressing until you hear the
detent snap into place.380de101
Page 167 of 211
166n
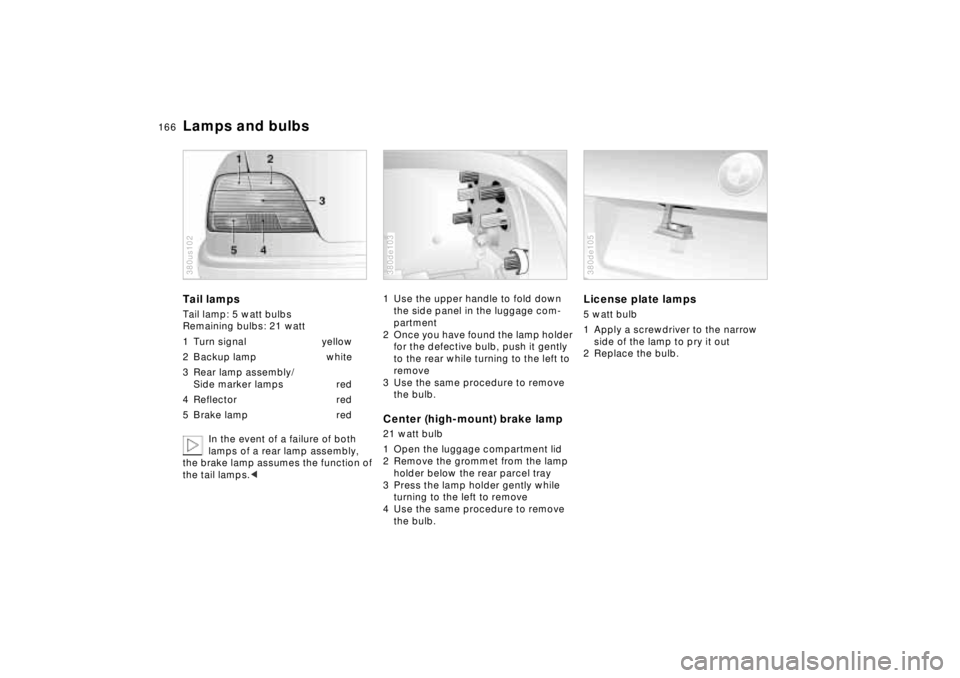
Lamps and bulbsTail lampsTail lamp: 5 watt bulbs
Remaining bulbs: 21 watt
1 Turn signal yellow
2 Backup lamp white
3 Rear lamp assembly/
Side marker lamps red
4 Reflector red
5 Brake lamp red
In the event of a failure of both
lamps of a rear lamp assembly,
the brake lamp assumes the function of
the tail lamps.< 380us102
1 Use the upper handle to fold down
the side panel in the luggage com-
partment
2 Once you have found the lamp holder
for the defective bulb, push it gently
to the rear while turning to the left to
remove
3 Use the same procedure to remove
the bulb.Center (high-mount) brake lamp21 watt bulb
1 Open the luggage compartment lid
2 Remove the grommet from the lamp
holder below the rear parcel tray
3 Press the lamp holder gently while
turning to the left to remove
4 Use the same procedure to remove
the bulb.380de103
License plate lamps5 watt bulb
1 Apply a screwdriver to the narrow
side of the lamp to pry it out
2 Replace the bulb.380de105
Page 168 of 211

167n
RepairsIndexOverview Controls Car care Technology Data
Lamps and bulbsInterior lampsFront:
Interior lamp (10 watt bulb) with reading
lamps (10 watt bulbs)
1 Interior lamp: Use a screwdriver to
press out the lamp sideways and re-
move the lens. Pull the bulb out of the
contact studs
2 Reading lamp: Gently press against
the lamp while turning it to the left to
remove.
Rear:
Interior lamp (10 watt bulb) with reading
lamp (5 watt bulb)
1 Use a screwdriver at the top of the
recesses to press out the light
2 Interior lamp: Push the tab back on
the reflector and change the bulb
3 Reading lamp: Gently press against
the lamp while turning it to the left to
remove.
Indirect lighting (1 watt bulb)
1 Unclip the lamp holder
2 Replace the bulb.
Footwell lamps5 watt bulb
1 Use a screwdriver to remove the lens
to the side
2 Replace the bulb.Door warning lamps5 watt bulb
1 Apply a screwdriver to the narrow
side of the lamp to pry it out
2 Turn the bulb holder to the left to
remove
3 Replace the bulb.Door handle lampsPlease contact your BMW center in the
case of a malfunction.
Glove compartment lamp5 watt bulb
1 Apply a screwdriver to the recess to
pry the lamp out
2 Remove the reflector
3 Replace the bulb.Luggage compartment lamps10 watt bulbs
Lamps on the underside of the package
tray and in the luggage compartment
lid:
1 Apply a screwdriver to the recess to
pry the lamp out
2 Remove the reflector
3 Replace the bulb.
Page 169 of 211
168n
Remote controlChanging batteryReplace the battery when the message
"REMOTE KEY BATTERY" appears in
the Check Control. The LED no longer
lights up when a button is pressed and
it is no longer possible to lock the car
using the remote key.
Install only a battery of the type that is
specified in the battery compartment
(CR 2016). Be sure the battery is in-
stalled in the correct position.
1 Use a screwdriver to lift the cover at
the recess (arrow)365de017
2 Loosen the two screws (arrows) and
remove the cover.
The battery type and its installation po-
sition are stamped into the base of the
battery compartment.
Return used batteries to a recy-
cling point or to your authorized
BMW center.< 365de018
New transmitterIf you place a new transmitter into ser-
vice (either a replacement or an addi-
tional transmitter), it must be initialized:
1 Enter the vehicle and close the
driver's door
2 Briefly (max. 5 seconds) turn the
ignition key to position 1 in the steer-
ing lock, then return it to position 0
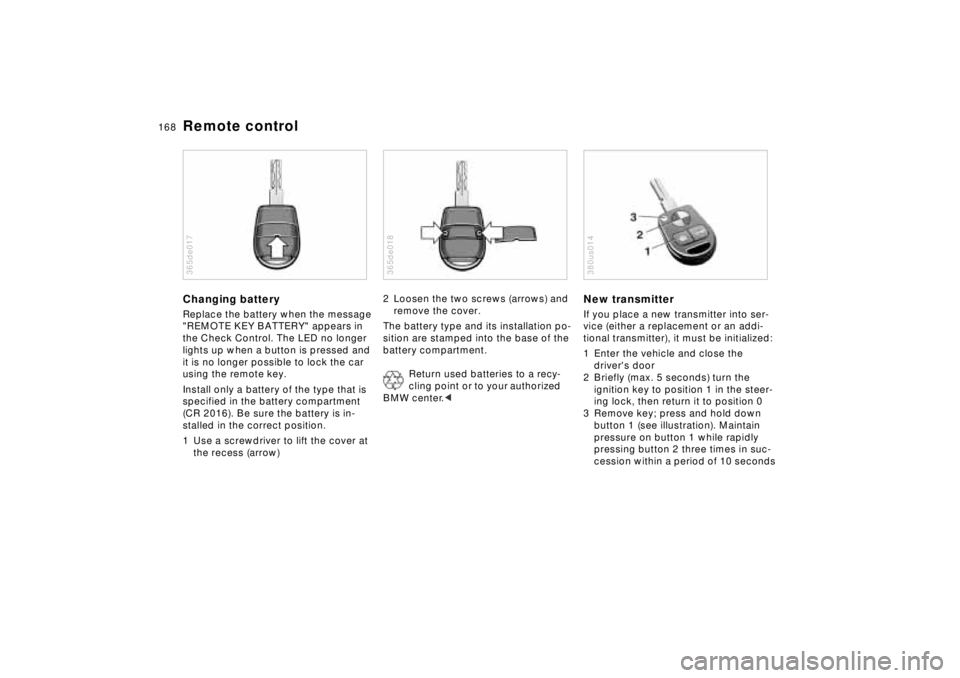
3 Remove key; press and hold down
button 1 (see illustration). Maintain
pressure on button 1 while rapidly
pressing button 2 three times in suc-
cession within a period of 10 seconds380us014
Page 170 of 211

169n
RepairsIndexOverview Controls Car care Technology Data
Remote control4 Release button 1, LED 3 will flash
slowly for a maximum of 10 seconds
5 The central locking system activates
and releases all lock mechanisms in
rapid succession to indicate that the
initialization procedure has been
successfully completed.
If the LED does not flash or the central
locking system fails to respond, you
must repeat the initialization procedure.
If you possess additional transmitters
for your vehicle (up to a maximum
of four units), you must now initialize
these as well. Be sure that no more
than 30 seconds is allowed to elapse
between the individual initialization pro-
cedures. Do not actuate the steering
lock during this time.
In the event of a system malfunction,
please contact your authorized BMW
center, who can also provide you with
replacement transmitters.To prevent unauthorized use of the
transmitter, surrender only the
door and ignition key or the spare key
(refer to page 30) for valet parking).<