Cool BMW 750LI 2012 F02 Owner's Manual
[x] Cancel search | Manufacturer: BMW, Model Year: 2012, Model line: 750LI, Model: BMW 750LI 2012 F02Pages: 299, PDF Size: 8.49 MB
Page 46 of 299
If you are no longer able to move the roller blinds
after having activated them consecutively a
number of times, the system is blocked for a
limited
time to prevent overheating. Let the sys‐
tem cool.
The roller sunblinds cannot be moved at low in‐
terior temperatures.
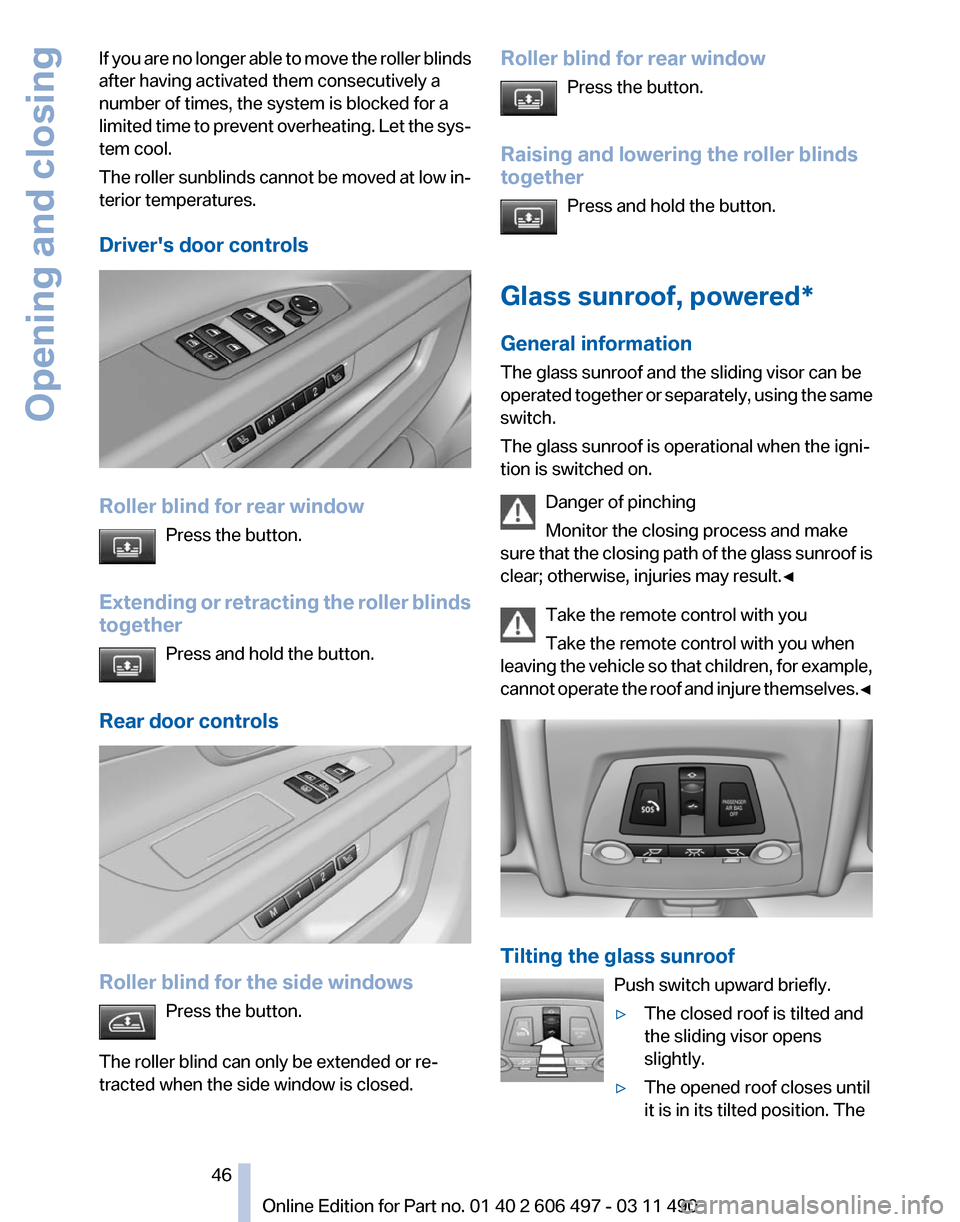
Driver's door controls Roller blind for rear window
Press the button.
Extending
or retracting the roller blinds
together
Press and hold the button.
Rear door controls Roller blind for the side windows
Press the button.
The roller blind can only be extended or re‐
tracted when the side window is closed. Roller blind for rear window
Press the button.
Raising and lowering the roller blinds
together Press and hold the button.
Glass sunroof, powered*
General information
The glass sunroof and the sliding visor can be
operated
together or separately, using the same
switch.
The glass sunroof is operational when the igni‐
tion is switched on.
Danger of pinching
Monitor the closing process and make
sure that the closing path of the glass sunroof is
clear; otherwise, injuries may result.◀
Take the remote control with you
Take the remote control with you when
leaving the vehicle so that children, for example,
cannot operate the roof and injure themselves.◀ Tilting the glass sunroof
Push switch upward briefly.
▷The closed roof is tilted and
the sliding visor opens
slightly.
▷ The opened roof closes until
it is in its tilted position. The Seite 46
46 Online Edition for Part no. 01 40 2 606 497 - 03 11 490
Opening and closing
Page 51 of 299
Front active seat ventilation*
The seat cushion and backrest surfaces are
cooled by means of integrated fans.
The
ventilation rapidly cools the seat, e.g., if the
vehicle interior is overheated or for continuous
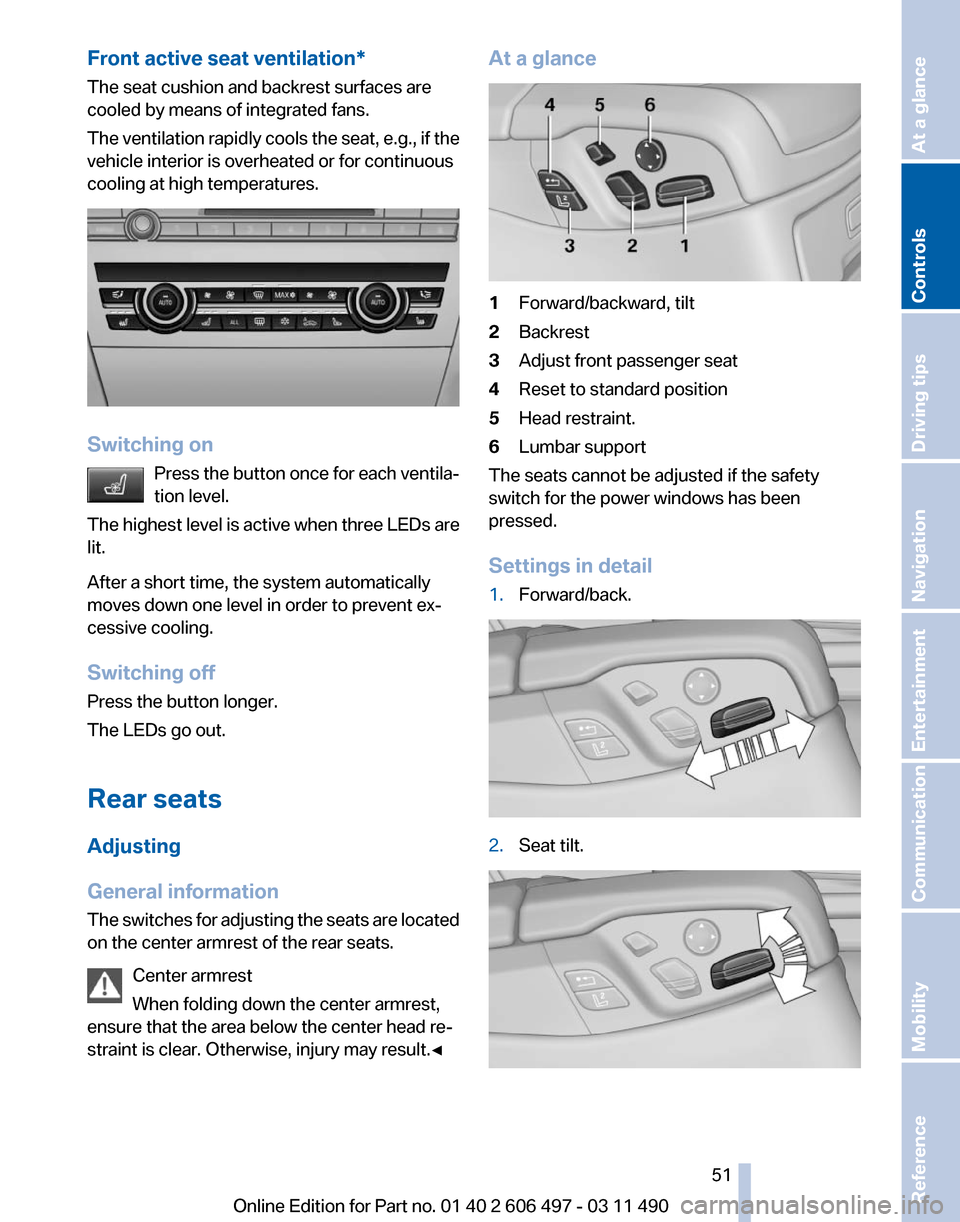
cooling at high temperatures. Switching on
Press
the button once for each ventila‐
tion level.
The highest level is active when three LEDs are
lit.
After a short time, the system automatically
moves down one level in order to prevent ex‐
cessive cooling.
Switching off
Press the button longer.
The LEDs go out.
Rear seats
Adjusting
General information
The switches for adjusting the seats are located
on the center armrest of the rear seats.
Center armrest
When folding down the center armrest,
ensure that the area below the center head re‐
straint is clear. Otherwise, injury may result.◀ At a glance
1
Forward/backward, tilt
2 Backrest
3 Adjust front passenger seat
4 Reset to standard position
5 Head restraint.
6 Lumbar support
The seats cannot be adjusted if the safety
switch for the power windows has been
pressed.
Settings in detail
1. Forward/back. 2.
Seat tilt. Seite 51
51Online Edition for Part no. 01 40 2 606 497 - 03 11 490
Reference Mobility Communication Entertainment Navigation Driving tips
Controls At a glance
Page 72 of 299
Windshield washer nozzles
The washer jets are automatically heated*
whenever the ignition is switched on.
Fold-out position of the wipers
Required when changing the wiper blades or
under frosty conditions, for example.
1.
Switch off the ignition.
2. Under frosty conditions, ensure that the
wiper blades are not frozen onto the wind‐
shield.
3. Press the wiper lever up beyond the point of
resistance
and hold it for approx. 3 seconds,
until the wiper remains in a nearly vertical
position.
After the wipers are folded back down, the wiper
system must be reactivated.
Fold the wipers back down
Before switching the ignition on, fold the
wipers
back down to the windshield; otherwise,
the wipers may become damaged when they are
switched on.◀
1. Switch on the ignition.
2. Press the wiper levers down. The wipers
move
to their resting position and are ready
for operation.
Washer fluid
General information Antifreeze for washer fluid
Antifreeze is flammable. Therefore, keep
it away from sources of ignition.
Only
keep it in the closed original container and
inaccessible to children.
Follow the instructions on the container.◀ Washer fluid reservoir
Adding washer fluid
Only add washer fluid when the engine is
cool, and then close the cover completely to
avoid
contact between the washer fluid and hot
engine parts.
Otherwise, there is the danger of fire and a risk
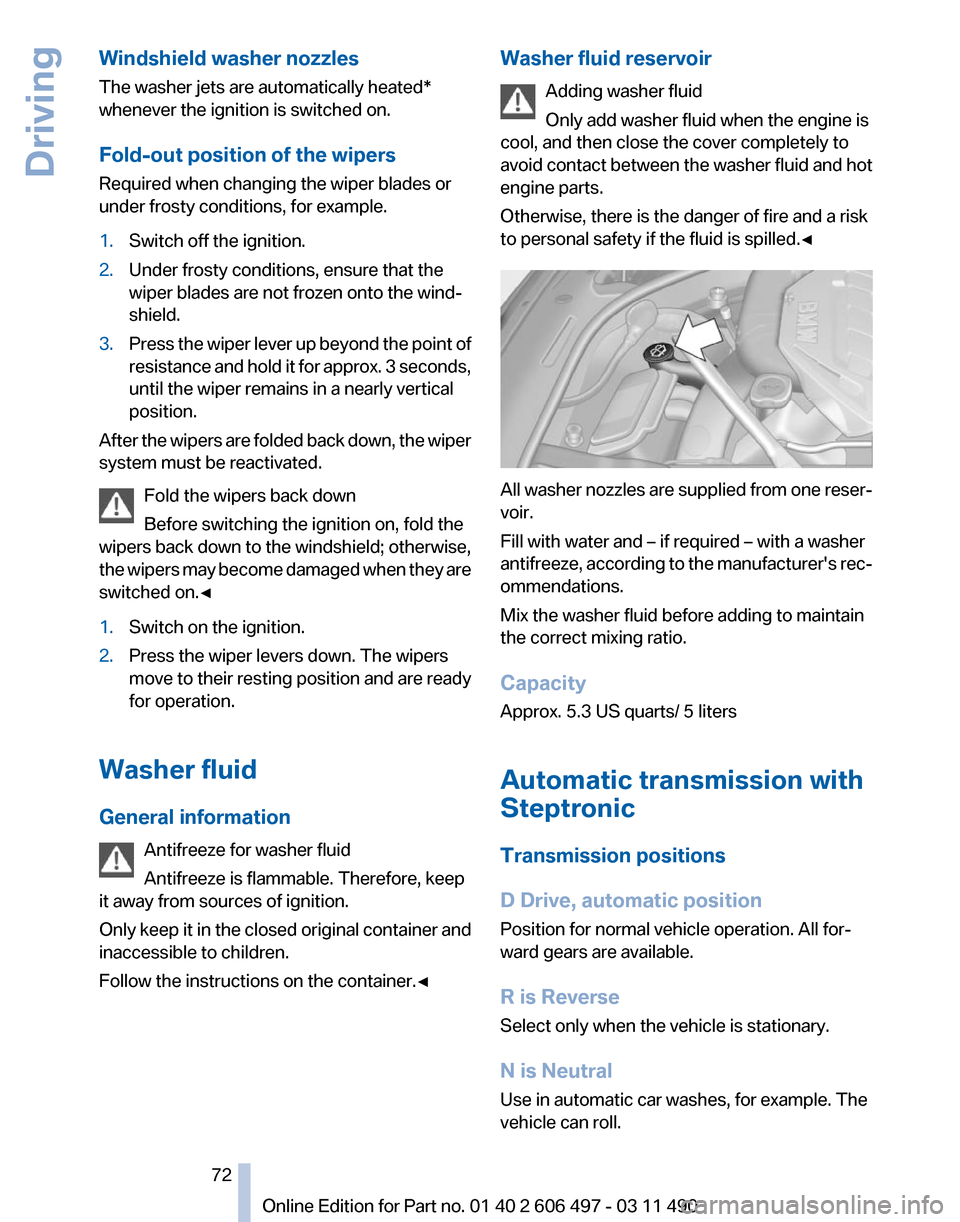
to personal safety if the fluid is spilled.◀ All washer nozzles are supplied from one reser‐
voir.
Fill with water and – if required – with a washer
antifreeze,
according to the manufacturer's rec‐
ommendations.
Mix the washer fluid before adding to maintain
the correct mixing ratio.
Capacity
Approx. 5.3 US quarts/ 5 liters
Automatic transmission with
Steptronic
Transmission positions
D Drive, automatic position
Position for normal vehicle operation. All for‐
ward gears are available.
R is Reverse
Select only when the vehicle is stationary.
N is Neutral
Use in automatic car washes, for example. The
vehicle can roll. Seite 72
72 Online Edition for Part no. 01 40 2 606 497 - 03 11 490
Driving
Page 76 of 299
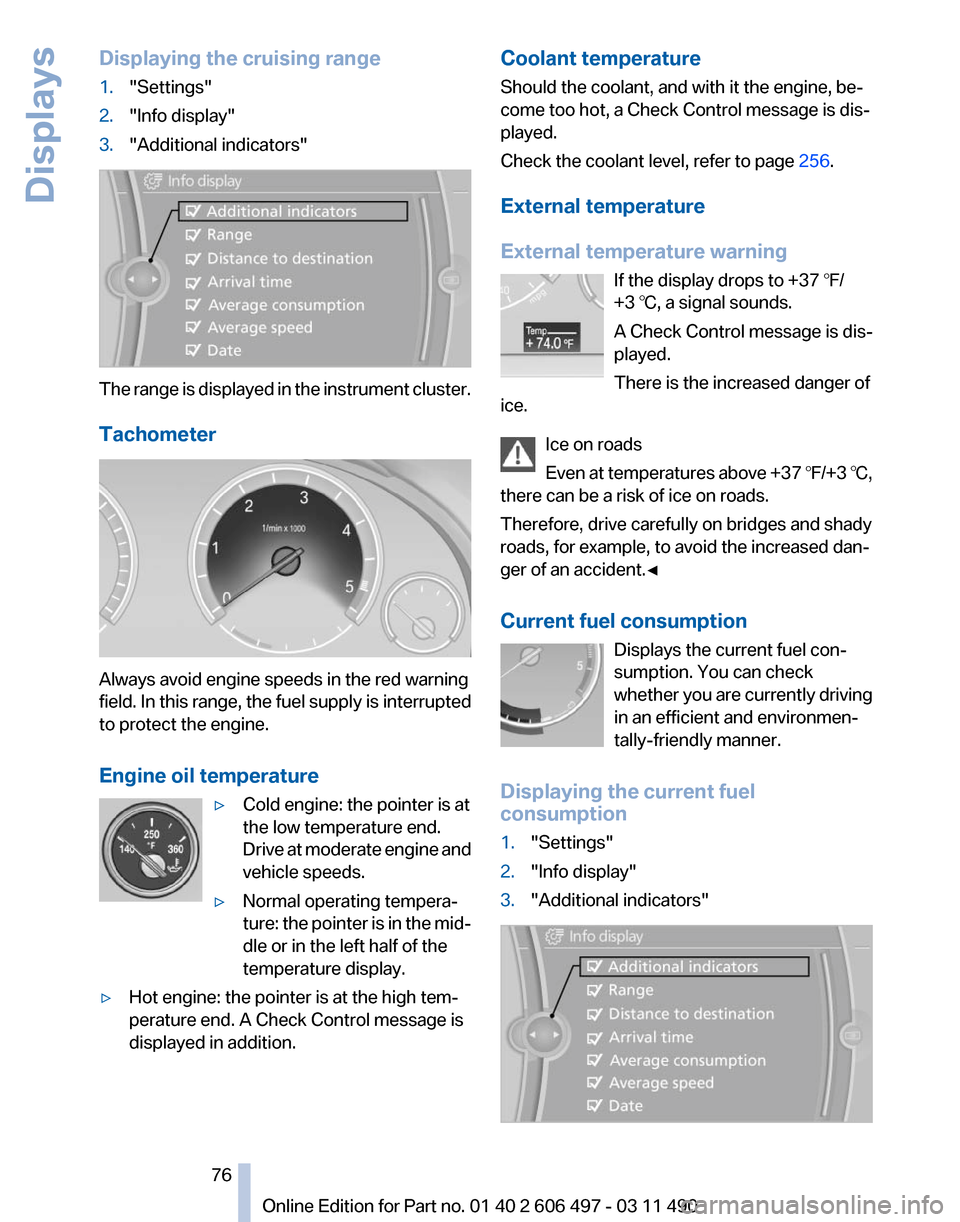
Displaying the cruising range
1.
"Settings"
2. "Info display"
3. "Additional indicators" The range is displayed in the instrument cluster.
Tachometer
Always avoid engine speeds in the red warning
field.
In this range, the fuel supply is interrupted
to protect the engine.
Engine oil temperature
▷Cold engine: the pointer is at
the low temperature end.
Drive
at moderate engine and
vehicle speeds.
▷ Normal operating tempera‐
ture:
the pointer is in the mid‐
dle or in the left half of the
temperature display.
▷ Hot engine: the pointer is at the high tem‐
perature end. A Check Control message is
displayed in addition. Coolant temperature
Should the coolant, and with it the engine, be‐
come too hot, a Check Control message is dis‐
played.
Check the coolant level, refer to page
256.
External temperature
External temperature warning If the display drops to +37 ℉/
+3 ℃, a signal sounds.
A Check Control message is dis‐
played.
There is the increased danger of
ice.
Ice on roads
Even
at temperatures above +37 ℉/+3 ℃,
there can be a risk of ice on roads.
Therefore, drive carefully on bridges and shady
roads, for example, to avoid the increased dan‐
ger of an accident.◀
Current fuel consumption
Displays the current fuel con‐
sumption. You can check
whether you are currently driving
in an efficient and environmen‐
tally-friendly manner.
Displaying the current fuel
consumption
1. "Settings"
2. "Info display"
3. "Additional indicators" Seite 76
76 Online Edition for Part no. 01 40 2 606 497 - 03 11 490
Displays
Page 95 of 299
▷
When braking hard.
▷ When using the turn signal.
System limits Personal responsibility
The system cannot serve as a substitute
for
the driver's personal judgment of the course
of the road and the traffic situation.
In the event of a warning, do not jerk the steering
wheel, as you may lose control of the vehicle.◀
The system may not be fully functional in the
following situations:
▷ In heavy fog, rain or snowfall.
▷ In the event of worn, poorly visible, merging,
diverging,
or multiple lane markings such as
in construction areas.
▷ When lane markings are covered in snow,
ice, dirt or water.
▷ In tight curves or on narrow lanes.
▷ When the lane markings are covered by ob‐
jects.
▷ When driving very close to the vehicle in
front of you.
▷ When driving toward bright lights.
▷ When the windshield in front of the interior
rearview mirror is fogged over, dirty or cov‐
ered with stickers, etc.
Malfunctions
Steering wheel vibration
Frequent
activation of the steering wheel vibra‐
tion causes the system to overheat.
This causes the lane departure warning to be‐
come deactivated.
Let the system cool and reactivate it by pressing
the button. Camera
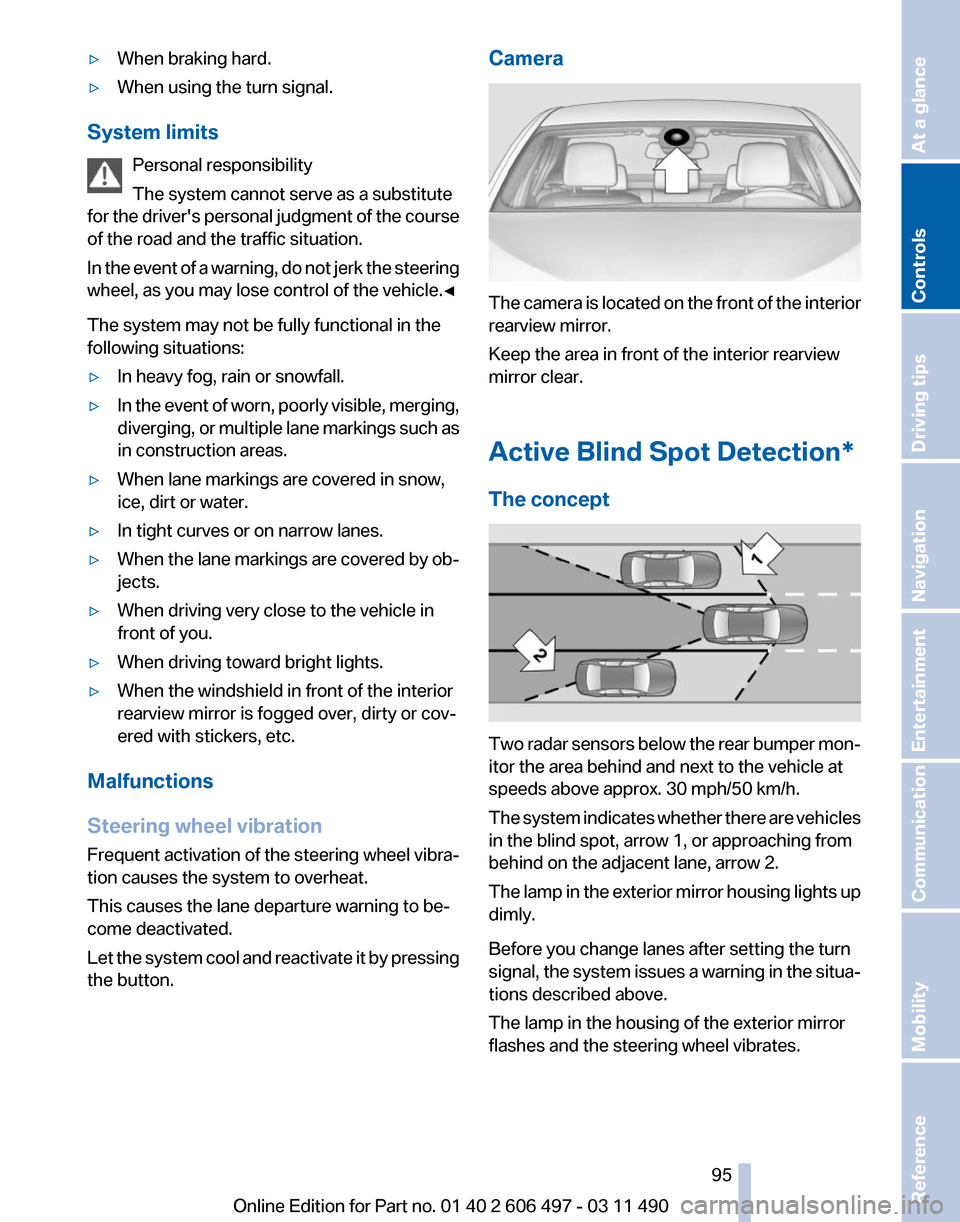
The camera is located on the front of the interior
rearview mirror.
Keep the area in front of the interior rearview
mirror clear.
Active Blind Spot Detection
*
The concept Two radar sensors below the rear bumper mon‐
itor the area behind and next to the vehicle at
speeds above approx. 30 mph/50 km/h.
The
system indicates whether there are vehicles
in the blind spot, arrow 1, or approaching from
behind on the adjacent lane, arrow 2.
The lamp in the exterior mirror housing lights up
dimly.
Before you change lanes after setting the turn
signal, the system issues a warning in the situa‐
tions described above.
The lamp in the housing of the exterior mirror
flashes and the steering wheel vibrates.
Seite 95
95Online Edition for Part no. 01 40 2 606 497 - 03 11 490
Reference Mobility Communication Entertainment Navigation Driving tips
Controls At a glance
Page 96 of 299
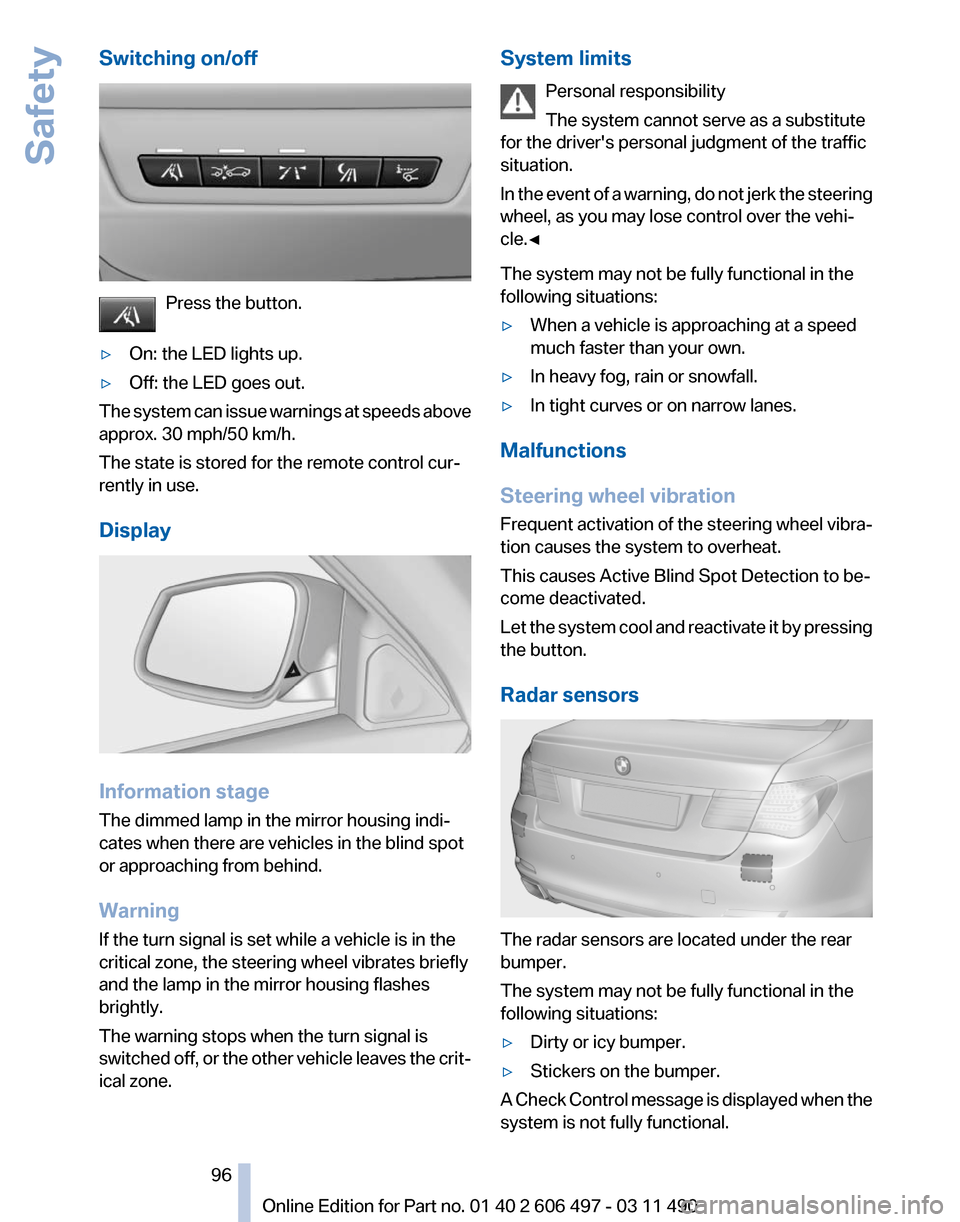
Switching on/off
Press the button.
▷ On: the LED lights up.
▷ Off: the LED goes out.
The system can issue warnings at speeds above
approx. 30 mph/50 km/h.
The state is stored for the remote control cur‐
rently in use.
Display Information stage
The dimmed lamp in the mirror housing indi‐
cates when there are vehicles in the blind spot
or approaching from behind.
Warning
If the turn signal is set while a vehicle is in the
critical zone, the steering wheel vibrates briefly
and the lamp in the mirror housing flashes
brightly.
The warning stops when the turn signal is
switched
off, or the other vehicle leaves the crit‐
ical zone. System limits
Personal responsibility
The system cannot serve as a substitute
for the driver's personal judgment of the traffic
situation.
In
the event of a warning, do not jerk the steering
wheel, as you may lose control over the vehi‐
cle.◀
The system may not be fully functional in the
following situations:
▷ When a vehicle is approaching at a speed
much faster than your own.
▷ In heavy fog, rain or snowfall.
▷ In tight curves or on narrow lanes.
Malfunctions
Steering wheel vibration
Frequent
activation of the steering wheel vibra‐
tion causes the system to overheat.
This causes Active Blind Spot Detection to be‐
come deactivated.
Let the system cool and reactivate it by pressing
the button.
Radar sensors The radar sensors are located under the rear
bumper.
The system may not be fully functional in the
following situations:
▷
Dirty or icy bumper.
▷ Stickers on the bumper.
A Check Control message is displayed when the
system is not fully functional. Seite 96
96 Online Edition for Part no. 01 40 2 606 497 - 03 11 490
Safety
Page 125 of 299
Climate control
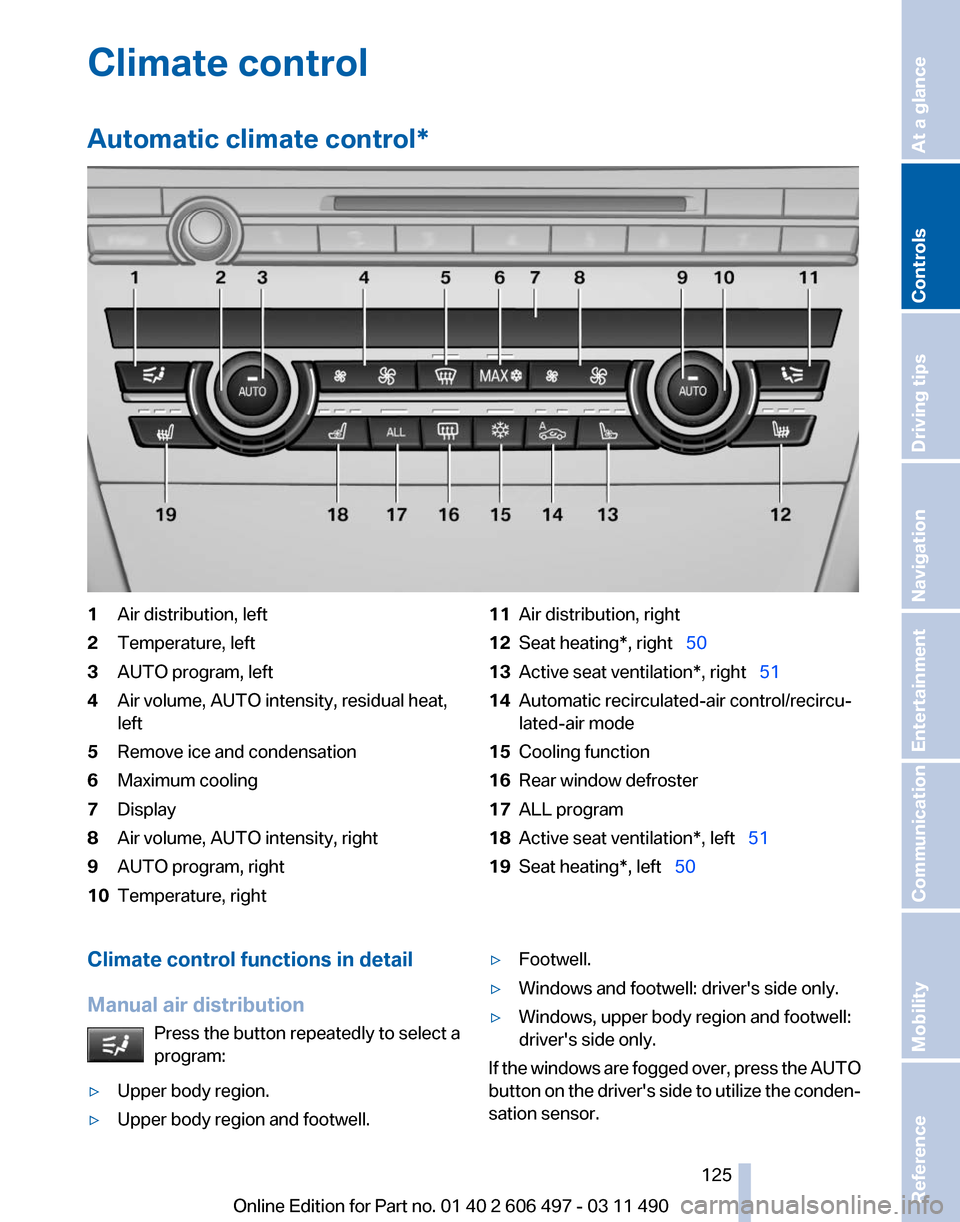
Automatic climate control
*1
Air distribution, left
2 Temperature, left
3 AUTO program, left
4 Air volume, AUTO intensity, residual heat,
left
5 Remove ice and condensation
6 Maximum cooling
7 Display
8 Air volume, AUTO intensity, right
9 AUTO program, right
10 Temperature, right 11
Air distribution, right
12 Seat heating*, right 50
13 Active seat ventilation*, right 51
14 Automatic recirculated-air control/recircu‐
lated-air mode
15 Cooling function
16 Rear window defroster
17 ALL program
18 Active seat ventilation*, left 51
19 Seat heating*, left 50
Climate control functions in detail
Manual air distribution Press the button repeatedly to select a
program:
▷ Upper body region.
▷ Upper body region and footwell. ▷
Footwell.
▷ Windows and footwell: driver's side only.
▷ Windows, upper body region and footwell:
driver's side only.
If the windows are fogged over, press the AUTO
button
on the driver's side to utilize the conden‐
sation sensor.
Seite 125
125Online Edition for Part no. 01 40 2 606 497 - 03 11 490
Reference Mobility Communication Entertainment Navigation Driving tips
Controls At a glance
Page 126 of 299
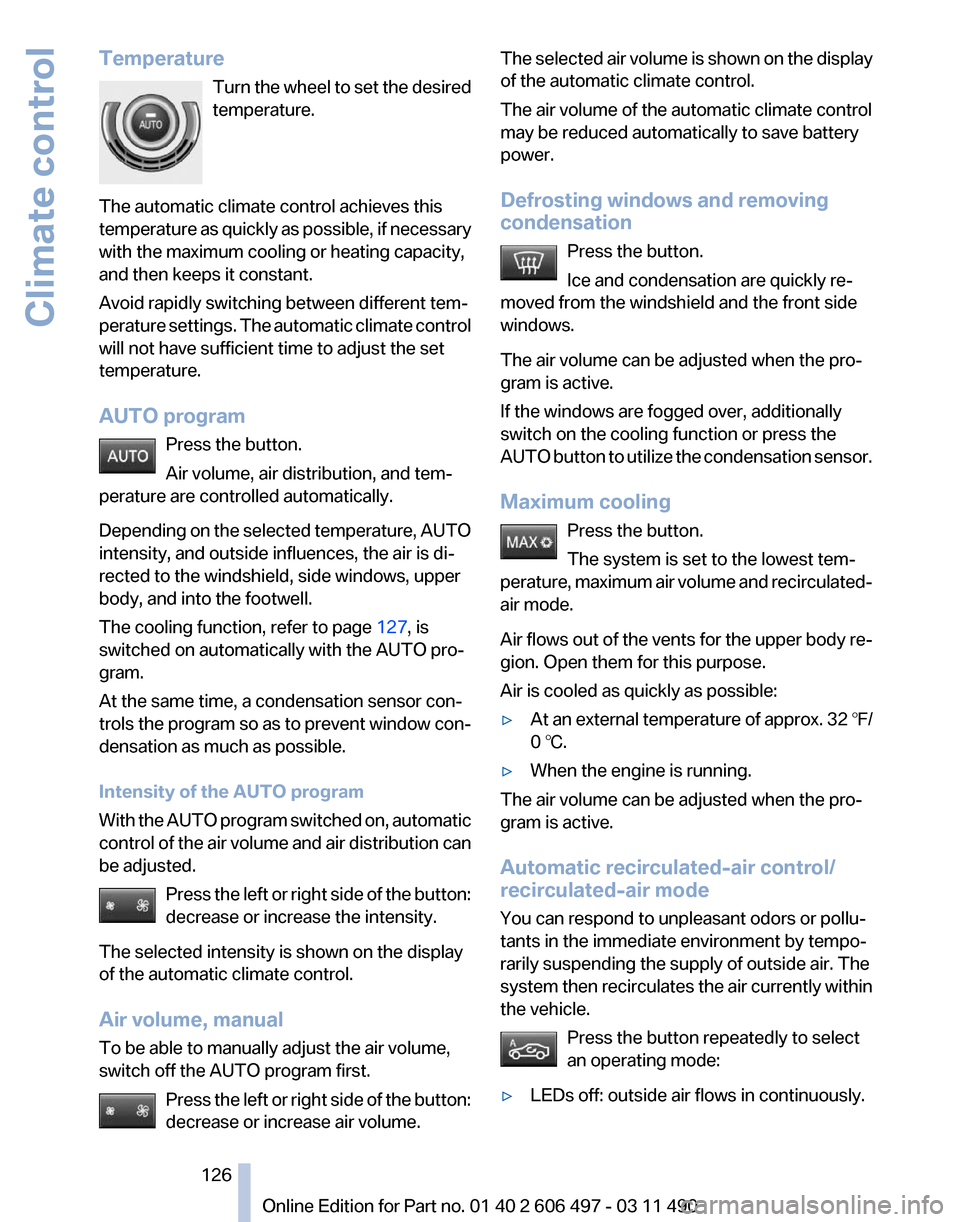
Temperature
Turn the wheel to set the desired
temperature.
The automatic climate control achieves this
temperature as quickly as possible, if necessary
with the maximum cooling or heating capacity,
and then keeps it constant.
Avoid rapidly switching between different tem‐
perature settings. The automatic climate control
will not have sufficient time to adjust the set
temperature.
AUTO program Press the button.
Air volume, air distribution, and tem‐
perature are controlled automatically.
Depending on the selected temperature, AUTO
intensity, and outside influences, the air is di‐
rected to the windshield, side windows, upper
body, and into the footwell.
The cooling function, refer to page 127, is
switched on automatically with the AUTO pro‐
gram.
At the same time, a condensation sensor con‐
trols the program so as to prevent window con‐
densation as much as possible.
Intensity of the AUTO program
With the AUTO program switched on, automatic
control of the air volume and air distribution can
be adjusted.
Press the left or right side of the button:
decrease or increase the intensity.
The selected intensity is shown on the display
of the automatic climate control.
Air volume, manual
To be able to manually adjust the air volume,
switch off the AUTO program first. Press the left or right side of the button:
decrease or increase air volume. The selected air volume is shown on the display
of the automatic climate control.
The air volume of the automatic climate control
may be reduced automatically to save battery
power.
Defrosting windows and removing
condensation
Press the button.
Ice and condensation are quickly re‐
moved from the windshield and the front side
windows.
The air volume can be adjusted when the pro‐
gram is active.
If the windows are fogged over, additionally
switch on the cooling function or press the
AUTO
button to utilize the condensation sensor.
Maximum cooling Press the button.
The system is set to the lowest tem‐
perature, maximum air volume and recirculated-
air mode.
Air flows out of the vents for the upper body re‐
gion. Open them for this purpose.
Air is cooled as quickly as possible:
▷ At an external temperature of approx. 32 ℉/
0 ℃.
▷ When the engine is running.
The air volume can be adjusted when the pro‐
gram is active.
Automatic recirculated-air control/
recirculated-air mode
You can respond to unpleasant odors or pollu‐
tants in the immediate environment by tempo‐
rarily suspending the supply of outside air. The
system
then recirculates the air currently within
the vehicle.
Press the button repeatedly to select
an operating mode:
▷ LEDs off: outside air flows in continuously. Seite 126
126 Online Edition for Part no. 01 40 2 606 497 - 03 11 490
Climate control
Page 127 of 299
▷
Left LED on, automatic recirculated-air con‐
trol: a sensor detects pollutants in the out‐
side air and controls the shut-off automati‐
cally.
▷ Right LED on, recirculated-air mode: the
supply of outside air into the vehicle is per‐
manently blocked.
If the windows are fogged over, switch off the
recirculated-air mode and press the AUTO but‐
ton on the driver's side to utilize the condensa‐
tion sensor. Make sure that air can flow onto the
windshield.
Continuous recirculated-air mode
The recirculated-air mode should not be
used for an extended period of time, as the air
quality inside the vehicle deteriorates steadily.◀
Cooling function
The passenger compartment can only be
cooled with the engine running.
Press the button.
The air is cooled and dehumidified and
– depending on the temperature setting –
warmed again.
Depending on the weather, the windshield may
fog up briefly when the engine is started.
The cooling function is switched on automati‐
cally with the AUTO program.
When using the automatic climate control, con‐
densation water, refer to page 146, develops
that exits underneath the vehicle.
Rear window defroster
Press the button.
The rear window defroster switches off
automatically after a certain period of time.
ALL program
The current settings on the driver's side
for temperature, air volume, air distri‐
bution, and AUTO program are transferred to
the front passenger side and to the left and right
rear. The program is switched off if the settings on
the front passenger side or in the rear are
changed.
Residual heat
The
heat stored in the engine is used to heat the
interior.
Functional requirement
▷ Up to 20 minutes after the engine has been
switched off.
▷ Warm engine.
▷ The battery is sufficiently charged.
▷ External temperature below 77 ℉/25 ℃.
Switching on
1. Switch off the ignition.
2. Press the right side of the button on
the driver's side. is shown on the display of the automatic cli‐
mate control.
The
interior temperature, air volume and air dis‐
tribution can be adjusted with the ignition
switched on.
Switching off
At the lowest fan speed, press the left side of the
button on the driver's side. on the display of the automatic climate control
goes out.
Switching the system on/off
Switching off
▷ Complete system:
At the lowest fan speed, press the
left
side of the button on the driver's
side. ▷
On the front passenger side:
At the lowest fan speed, press the
left side of the button on the front
passenger side. Seite 127
127Online Edition for Part no. 01 40 2 606 497 - 03 11 490
Reference Mobility Communication Entertainment Navigation Driving tips
Controls At a glance
Page 128 of 299
Switching on
Press any button.
Microfilter/activated-charcoal filter
The microfilter removes dust and pollen from
the incoming air.
The activated-charcoal filter removes gaseous
pollutants from the outside air that enters the
vehicle.
This combined filter should be replaced during
scheduled
maintenance of your vehicle., refer to
page 258
Ventilation
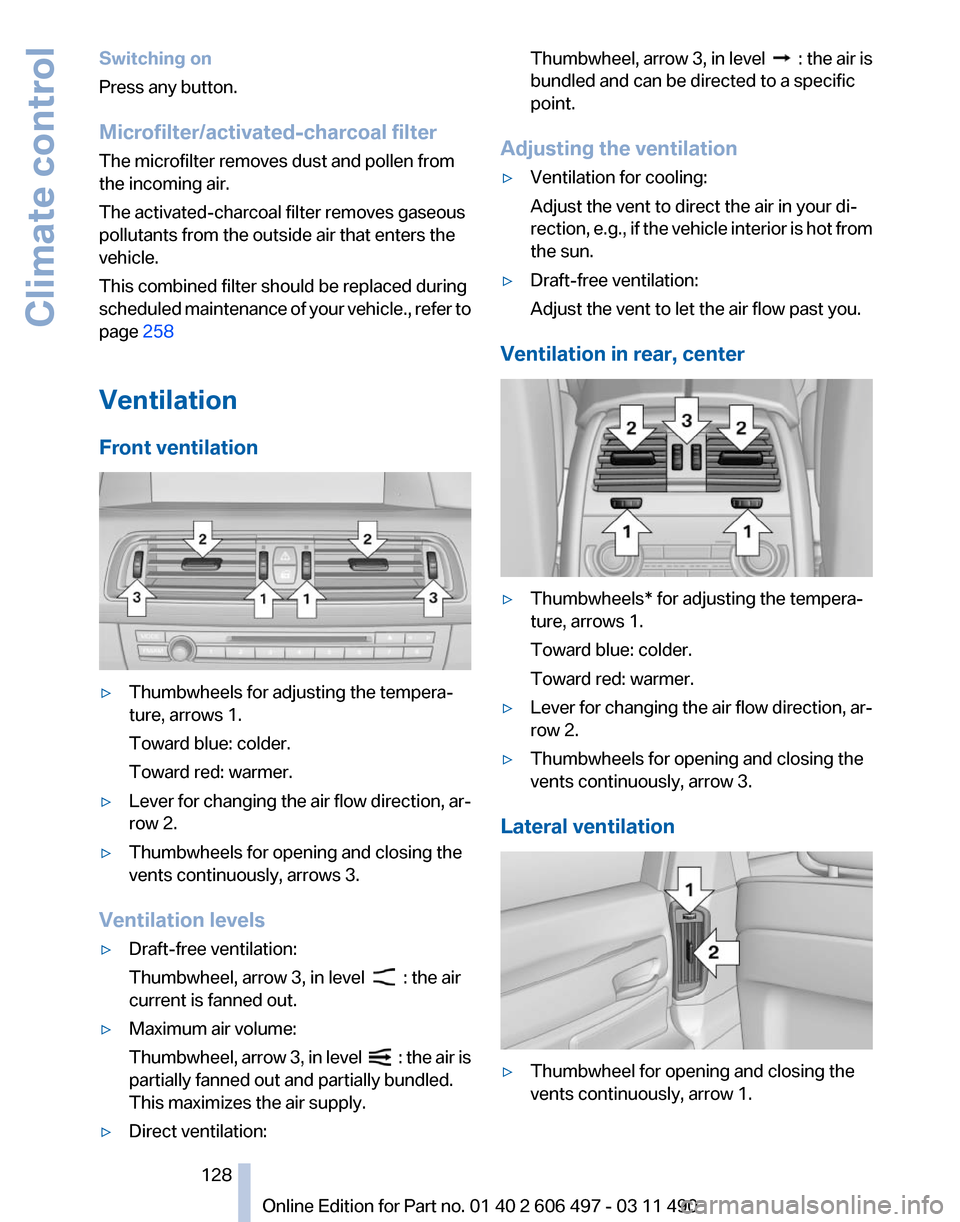
Front ventilation ▷
Thumbwheels for adjusting the tempera‐
ture, arrows 1.
Toward blue: colder.
Toward red: warmer.
▷ Lever for changing the air flow direction, ar‐
row 2.
▷ Thumbwheels for opening and closing the
vents continuously, arrows 3.
Ventilation levels
▷ Draft-free ventilation:
Thumbwheel, arrow 3, in level : the air
current is fanned out.
▷ Maximum air volume:
Thumbwheel,
arrow 3, in level : the air is
partially fanned out and partially bundled.
This maximizes the air supply.
▷ Direct ventilation: Thumbwheel, arrow 3, in level :
the air is
bundled and can be directed to a specific
point.
Adjusting the ventilation
▷ Ventilation for cooling:
Adjust the vent to direct the air in your di‐
rection,
e.g., if the vehicle interior is hot from
the sun.
▷ Draft-free ventilation:
Adjust the vent to let the air flow past you.
Ventilation in rear, center ▷
Thumbwheels* for adjusting the tempera‐
ture, arrows 1.
Toward blue: colder.
Toward red: warmer.
▷ Lever for changing the air flow direction, ar‐
row 2.
▷ Thumbwheels for opening and closing the
vents continuously, arrow 3.
Lateral ventilation ▷
Thumbwheel for opening and closing the
vents continuously, arrow 1.
Seite 128
128 Online Edition for Part no. 01 40 2 606 497 - 03 11 490
Climate control