window BMW 750LI XDRIVE SEDAN 2015 Owner's Manual
[x] Cancel search | Manufacturer: BMW, Model Year: 2015, Model line: 750LI XDRIVE SEDAN, Model: BMW 750LI XDRIVE SEDAN 2015Pages: 314, PDF Size: 7.9 MB
Page 137 of 314
Ejection MitigationThe head airbag system is designed as an
ejection mitigation countermeasure to reduce
the likelihood of ejections of vehicle occupants
through side windows during rollovers or side
impact events.
Knee airbag The knee airbag supports the legs in a frontal
impact.
Protective action
Airbags are not triggered in every impact situa‐
tion, e.g., in less severe accidents or rear-end
collisions.
Information for optimum effect of the
airbags
WARNING
If the seat position is incorrect or the de‐
ployment area of the airbags is impacted, the
airbag system cannot protect as intended or
cause additional injuries due to triggering.
There is risk of injuries or danger to life. Ob‐
serve the Information for optimum protective
effect of the airbag system.◀▷Keep at a distance from the airbags.▷Always grasp the steering wheel on the
steering wheel rim. Hold your hands at the
3 o'clock and 9 o'clock positions, to keep
the risk of injury to your hands or arms as
low as possible when the airbag is trig‐
gered.▷Make sure that the front passenger is sit‐
ting correctly, i.e., keeps his or her feet and
legs in the floor area.▷Make sure that occupants keep their heads
away from the side airbag.▷There should be no persons, animals or
objects between an airbag and a person.▷Do not use the cover of the front airbag on
the front passenger side as a storage area.▷Dashboard and windshield on the front
passenger side must stay clear - do not at‐
tach adhesive labels or coverings and do
not attach brackets or cables, e. g., for GPS
devices or' mobile phones.▷Do not apply adhesive materials to the air‐
bag cover panels, do not cover them or
modify them in any way.▷Do not place slip covers, seat cushions or
other objects on the front passenger seat
that are not specifically suited for seats
with integrated side airbags.▷Do not hang pieces of clothing, such as
jackets, over the backrests.▷Never modify either the individual compo‐
nents or the wiring in the airbag system.
This also applies to steering wheel covers,
the dashboard, and the seats.▷Do not remove the airbag system.
Even when you follow all instructions very
closely, injury from contact with the airbags
cannot be ruled out in certain situations.
The ignition and inflation noise may lead to
short-term and, in most cases, temporary
hearing impairment in sensitive individuals.
Warnings and information on the airbags are
also found on the sun visors.
Functional readiness of the airbag
system
Information WARNING
Individual components can be hot after
triggering of the airbag system. There is risk of
injuries. Do not touch individual components.◀
WARNING
Improperly executed work can lead to
failure, malfunction or unintentional triggering
of the airbag system. In the case of a malfunc‐
tion, the airbag system could not trigger as in‐
tended in the event of an accident despite re‐
Seite 137SafetyControls137
Online Edition for Part no. 0140 2 964 330 - VI/15
Page 160 of 314
▷NBG009014A.
Compliance statement:
This device complies with part 15 of the FCC
Rules. Operation is subject to the following
two conditions:
▷This device may not cause harmful inter‐
ference, and▷this device must accept any interference
received, including interference that may
cause undesired operation.
Any unauthorized modifications or changes to
these devices could void the user's authority to
operate this equipment.
Brake force display
The concept
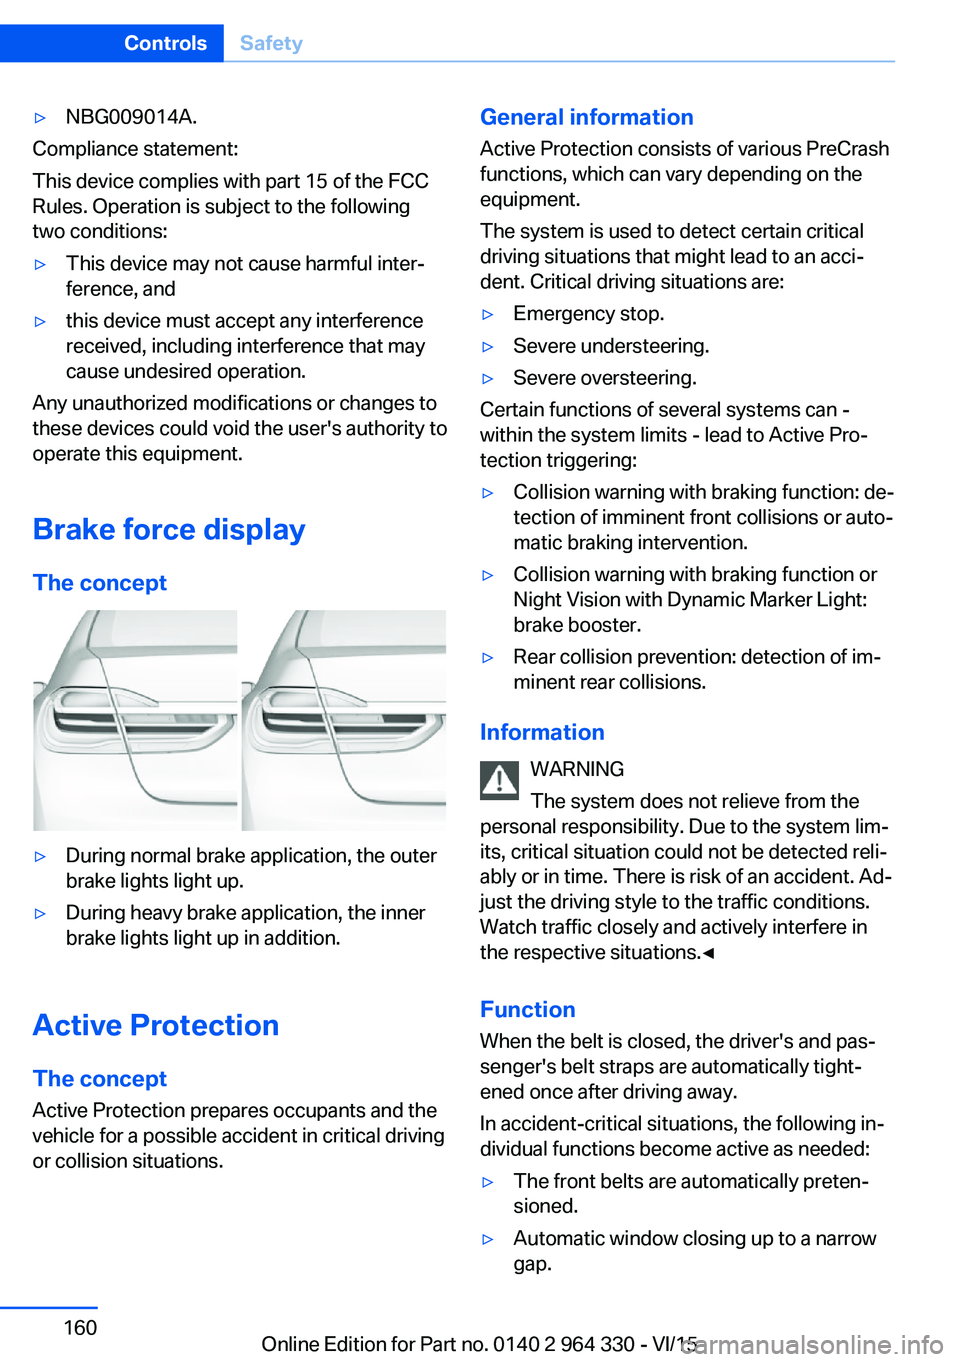
▷During normal brake application, the outer
brake lights light up.▷During heavy brake application, the inner
brake lights light up in addition.
Active Protection
The concept
Active Protection prepares occupants and the
vehicle for a possible accident in critical driving
or collision situations.
General information
Active Protection consists of various PreCrash
functions, which can vary depending on the
equipment.
The system is used to detect certain critical
driving situations that might lead to an acci‐
dent. Critical driving situations are:▷Emergency stop.▷Severe understeering.▷Severe oversteering.
Certain functions of several systems can -
within the system limits - lead to Active Pro‐
tection triggering:
▷Collision warning with braking function: de‐
tection of imminent front collisions or auto‐
matic braking intervention.▷Collision warning with braking function or
Night Vision with Dynamic Marker Light:
brake booster.▷Rear collision prevention: detection of im‐
minent rear collisions.
Information
WARNING
The system does not relieve from the
personal responsibility. Due to the system lim‐
its, critical situation could not be detected reli‐
ably or in time. There is risk of an accident. Ad‐
just the driving style to the traffic conditions.
Watch traffic closely and actively interfere in
the respective situations.◀
Function
When the belt is closed, the driver's and pas‐
senger's belt straps are automatically tight‐
ened once after driving away.
In accident-critical situations, the following in‐
dividual functions become active as needed:
▷The front belts are automatically preten‐
sioned.▷Automatic window closing up to a narrow
gap.Seite 160ControlsSafety160
Online Edition for Part no. 0140 2 964 330 - VI/15
Page 188 of 314
Cameras
Front camera
Rearview camera
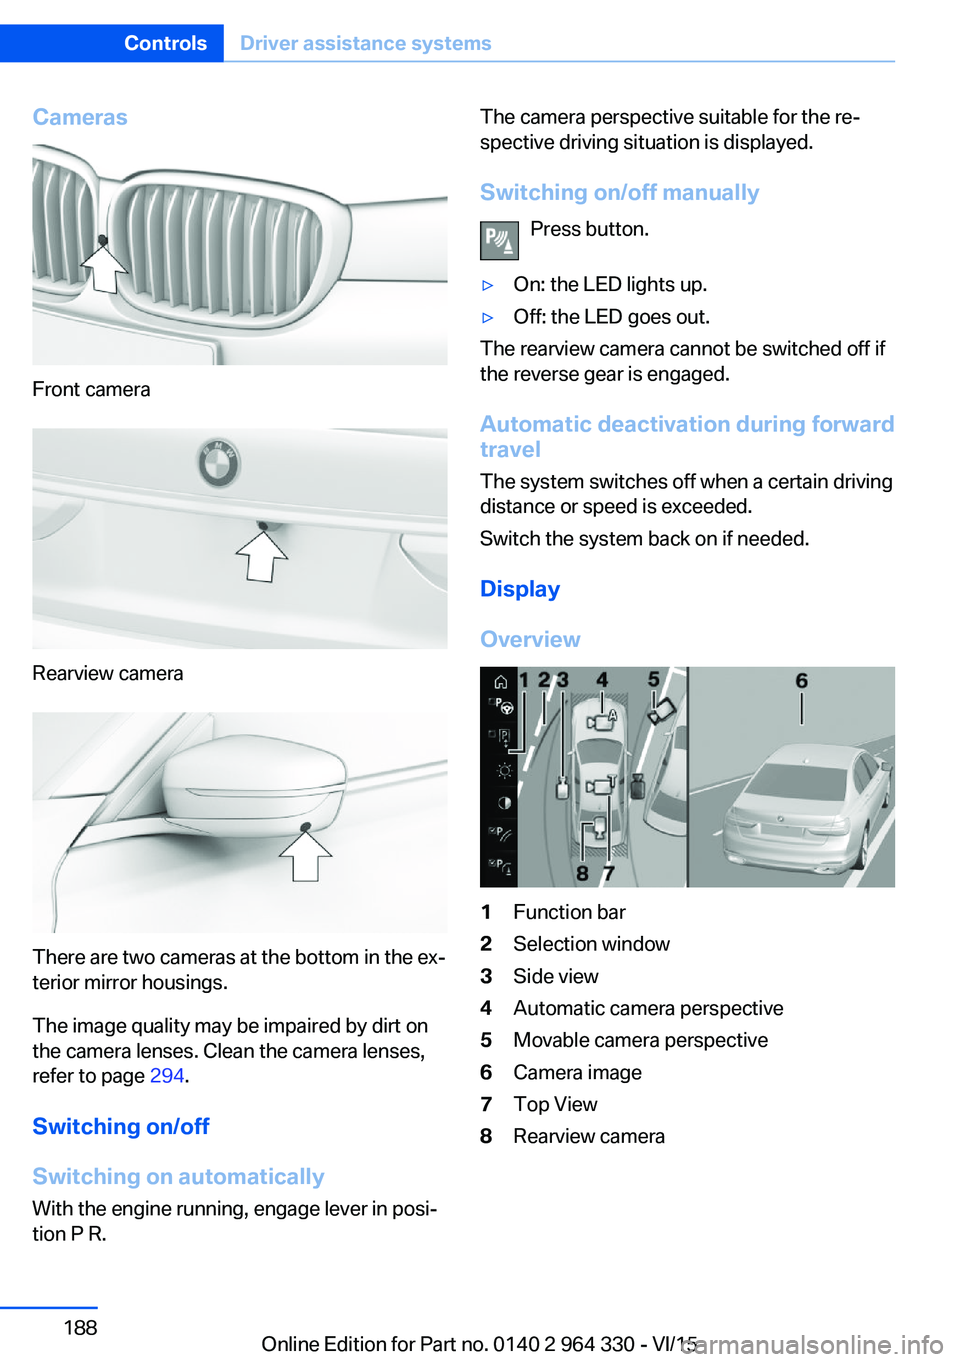
There are two cameras at the bottom in the ex‐
terior mirror housings.
The image quality may be impaired by dirt on
the camera lenses. Clean the camera lenses,
refer to page 294.
Switching on/off
Switching on automatically With the engine running, engage lever in posi‐
tion P R.
The camera perspective suitable for the re‐
spective driving situation is displayed.
Switching on/off manually Press button.▷On: the LED lights up.▷Off: the LED goes out.
The rearview camera cannot be switched off if
the reverse gear is engaged.
Automatic deactivation during forward
travel
The system switches off when a certain driving
distance or speed is exceeded.
Switch the system back on if needed.
Display
Overview
1Function bar2Selection window3Side view4Automatic camera perspective5Movable camera perspective6Camera image7Top View8Rearview cameraSeite 188ControlsDriver assistance systems188
Online Edition for Part no. 0140 2 964 330 - VI/15
Page 189 of 314
Selecting the camera perspectiveGeneral information
The individual camera perspectives can be se‐
lected in the selection window via iDrive.
Side view
The side view can be selected for the right or
left vehicle side.
This view helps when positioning the vehicle at
the curb or with other obstacles on the side by
displaying the side surroundings.
The side view looks from rear to front and in
case of danger, focuses automatically on pos‐
sible obstacles.
Automatic camera perspective
The automatic camera perspective shows a
steering-dependent view in the respective
driving direction.
This perspective adapts to the respective driv‐ ing situation.
As soon as obstacles are detected, the view
changes to a fixed display of the area in front or
at the rear behind the bumper or if necessary,
changes to a side view.
Movable camera perspective
With selection of the movable camera per‐
spective, a circle appears on the Control Dis‐
play.
By turning the controller or via touch function,
specified perspectives on the circle can be se‐
lected.
The current perspective is marked with a cam‐
era symbol.
With BMW Gesture Control: an additional cam‐
era symbols appears on the circuit. This cam‐
era symbol is freely movable via BMW Gesture
Control, refer to page 30.
Exit the circle by pressing the controller or via
touch function on the active camera symbol.Top view
The top view shows the vehicle and surround‐
ings from above.
Rearview camera
This view shows the picture of the rearview
camera.
Function bar
Assistance functions can be activated, refer to
page 189, via the function bar and settings ap‐
plied.▷ "Parking Assistant", refer to page 193.▷ "Brightness", refer to page 192.▷ "Contrast", refer to page 192.▷ "Parking aid lines", refer to page 190.▷ "Obstacle marking", refer to page 190.▷ "Car wash", refer to page 190.▷ "Settings": apply settings, e.g. to use
the activation points for Panorama View.
Assistance functions
Activate/deactivate assistance
functions
More than one assistance function can be ac‐
tive at the same time.
The following assistance functions can be
manually activated:
▷ "Parking aid lines"▷ "Obstacle marking"▷ "Car wash"
The following assistance functions are auto‐
matically displayed:
▷Side protection, refer to page 191.▷Rim protection, refer to page 191.▷Door opening angle, refer to page 191.Seite 189Driver assistance systemsControls189
Online Edition for Part no. 0140 2 964 330 - VI/15
Page 203 of 314
Climate controlVehicle features and options
This chapter describes all standard, country-
specific and optional features offered with the
series. It also describes features that are not
necessarily available in your car, e. g., due to
the selected options or country versions. This
also applies to safety-related functions and
systems. The respectively applicable country
provisions must be observed when using the
respective features and systems.
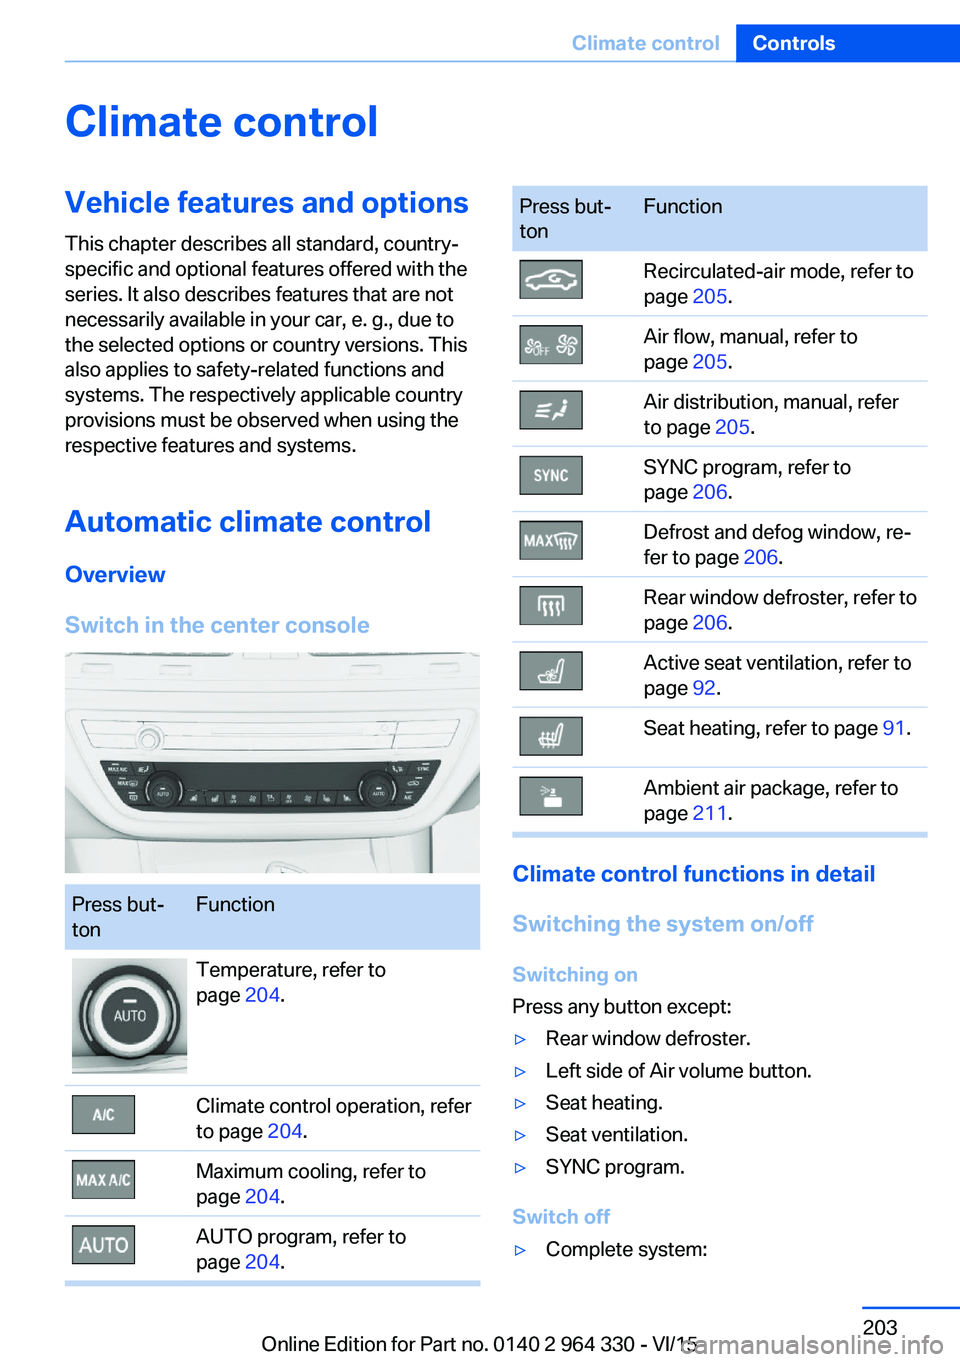
Automatic climate control Overview
Switch in the center consolePress but‐
tonFunctionTemperature, refer to
page 204.Climate control operation, refer
to page 204.Maximum cooling, refer to
page 204.AUTO program, refer to
page 204.Press but‐
tonFunctionRecirculated-air mode, refer to
page 205.Air flow, manual, refer to
page 205.Air distribution, manual, refer
to page 205.SYNC program, refer to
page 206.Defrost and defog window, re‐
fer to page 206.Rear window defroster, refer to
page 206.Active seat ventilation, refer to
page 92.Seat heating, refer to page 91.Ambient air package, refer to
page 211.
Climate control functions in detail
Switching the system on/off
Switching on
Press any button except:
▷Rear window defroster.▷Left side of Air volume button.▷Seat heating.▷Seat ventilation.▷SYNC program.
Switch off
▷Complete system:Seite 203Climate controlControls203
Online Edition for Part no. 0140 2 964 330 - VI/15
Page 204 of 314
Press and hold the left button on
the driver's side until the control
clicks off.▷On the front passenger side:
Press and hold the left button on
the front passenger side.
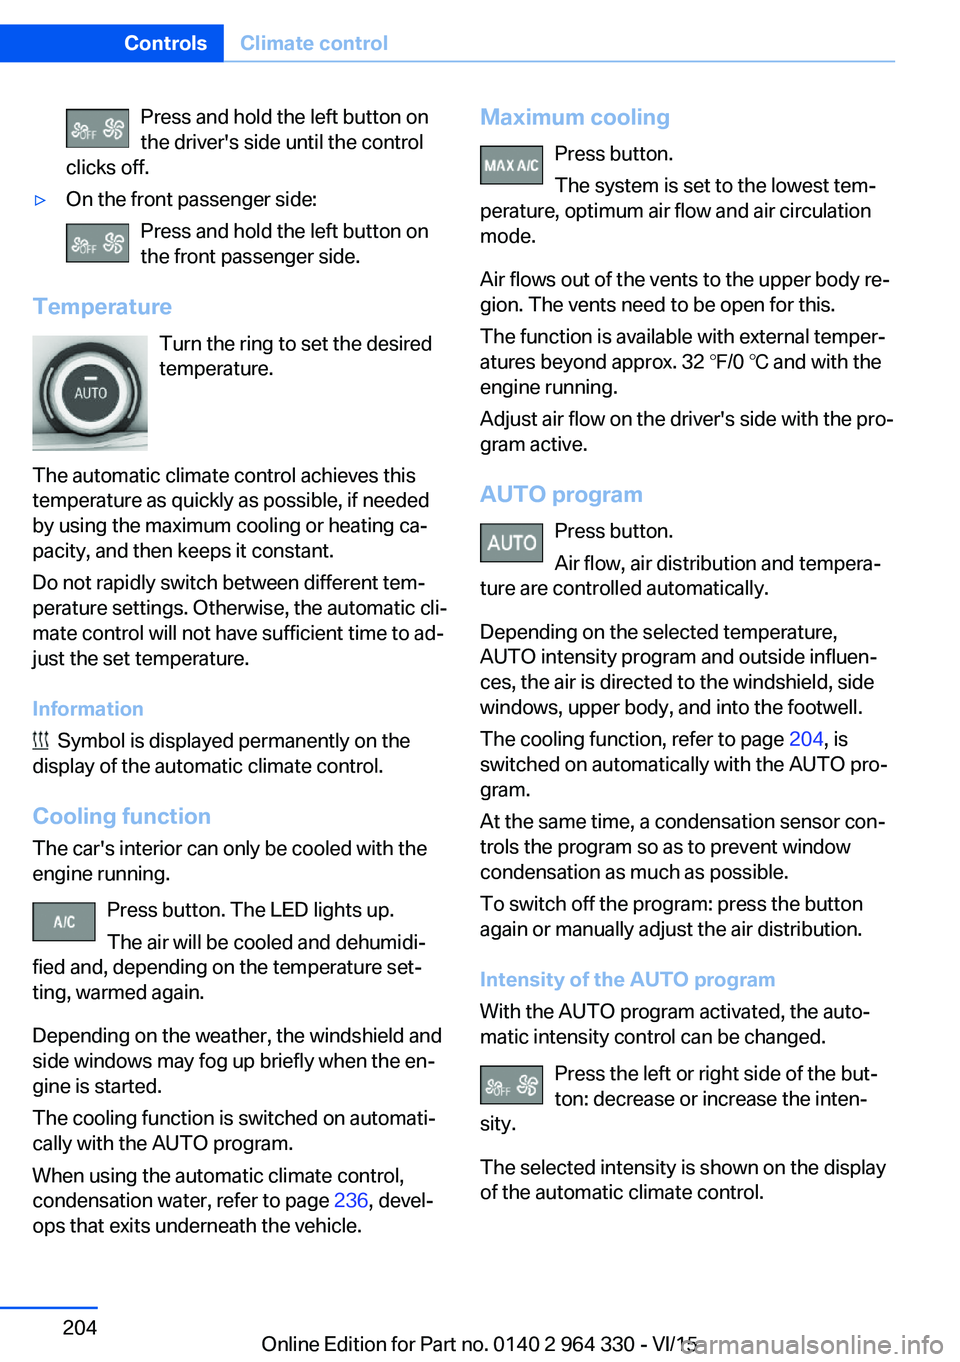
Temperature
Turn the ring to set the desired
temperature.
The automatic climate control achieves this
temperature as quickly as possible, if needed
by using the maximum cooling or heating ca‐
pacity, and then keeps it constant.
Do not rapidly switch between different tem‐
perature settings. Otherwise, the automatic cli‐
mate control will not have sufficient time to ad‐
just the set temperature.
Information
Symbol is displayed permanently on the
display of the automatic climate control.
Cooling function The car's interior can only be cooled with the
engine running.
Press button. The LED lights up.
The air will be cooled and dehumidi‐
fied and, depending on the temperature set‐
ting, warmed again.
Depending on the weather, the windshield and
side windows may fog up briefly when the en‐
gine is started.
The cooling function is switched on automati‐
cally with the AUTO program.
When using the automatic climate control,
condensation water, refer to page 236, devel‐
ops that exits underneath the vehicle.
Maximum cooling
Press button.
The system is set to the lowest tem‐
perature, optimum air flow and air circulation
mode.
Air flows out of the vents to the upper body re‐
gion. The vents need to be open for this.
The function is available with external temper‐
atures beyond approx. 32 ℉/0 ℃ and with the
engine running.
Adjust air flow on the driver's side with the pro‐
gram active.
AUTO program Press button.
Air flow, air distribution and tempera‐
ture are controlled automatically.
Depending on the selected temperature,
AUTO intensity program and outside influen‐
ces, the air is directed to the windshield, side
windows, upper body, and into the footwell.
The cooling function, refer to page 204, is
switched on automatically with the AUTO pro‐
gram.
At the same time, a condensation sensor con‐
trols the program so as to prevent window
condensation as much as possible.
To switch off the program: press the button
again or manually adjust the air distribution.
Intensity of the AUTO program
With the AUTO program activated, the auto‐
matic intensity control can be changed.
Press the left or right side of the but‐
ton: decrease or increase the inten‐
sity.
The selected intensity is shown on the display
of the automatic climate control.Seite 204ControlsClimate control204
Online Edition for Part no. 0140 2 964 330 - VI/15
Page 205 of 314
Automatic recirculated-air control
AUC
The concept
The automatic recirculated air control AUC au‐
tomatically recognizes odors or pollutants in
the outside air. The outside air supply is then
automatically shut off, the interior air is recircu‐
lated.
General information
If the system is activated, a sensor detects pol‐
lutants in the outside air and controls the shut-
off automatically.
If the system is deactivated, outside air contin‐ uously flows into the car's interior.
With constant recirculated-air mode, the air
quality in the car's interior deteriorates and the
fogging of the windows increases.
If there is window condensation,
switch off the recirculated-air mode
and press the button on the driver's side to uti‐ lize the condensation sensor. Make sure that
air can flow to the windshield.
Switching on/off
About iDrive:1."My Vehicle"2."Vehicle settings"3."Climate functions"4."Air quality"5."Automatic air recirculation"
Recirculated-air mode
The concept
You may respond to unpleasant odors or pollu‐
tants in the immediate environment by tempo‐
rarily suspending the supply of outside air. The
system then recirculates the air currently
within the vehicle.
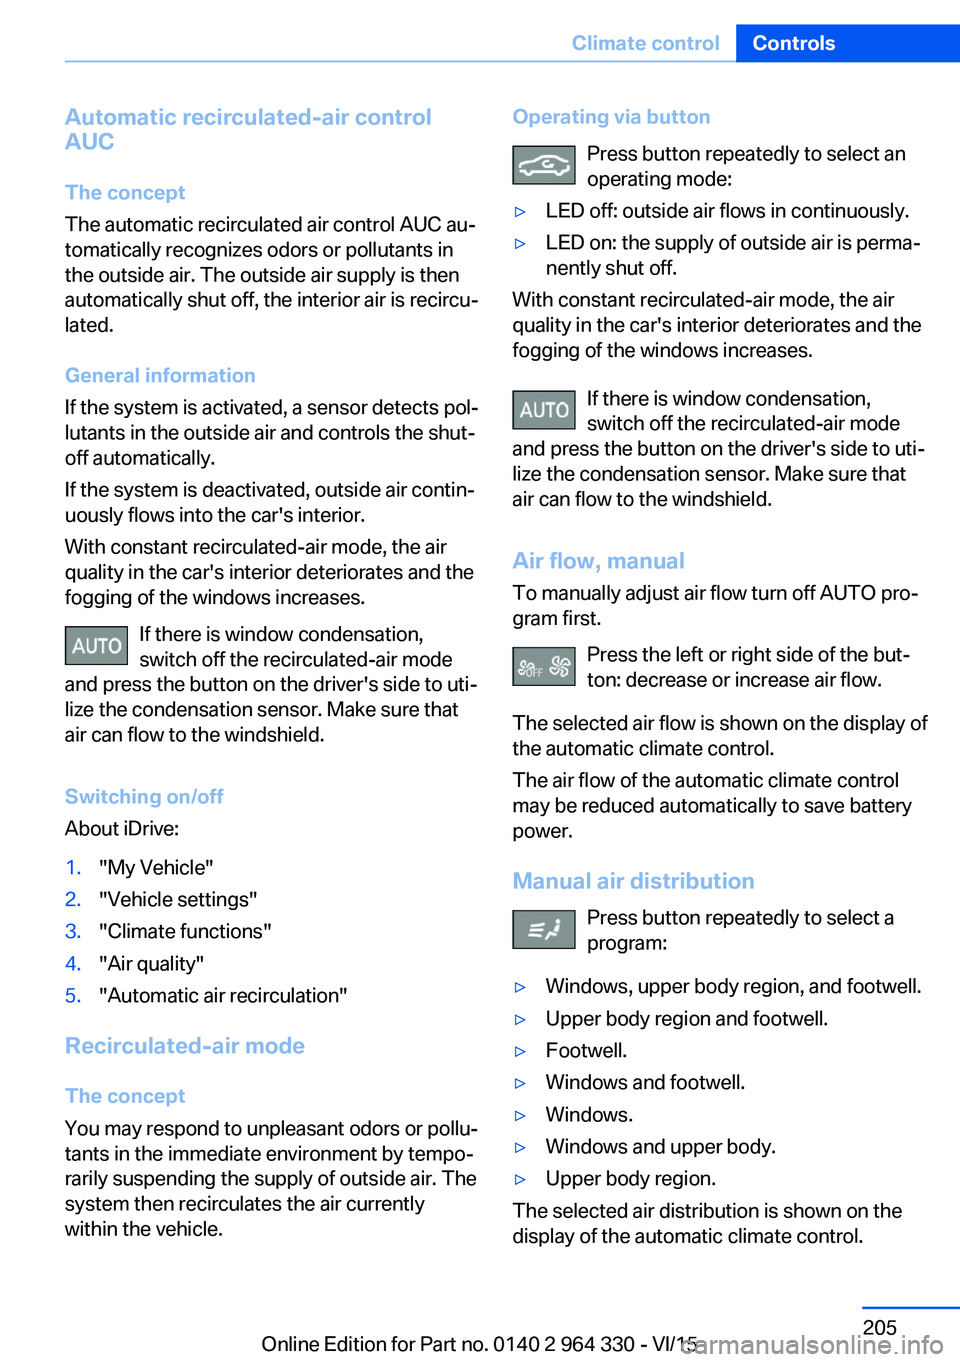
Operating via button
Press button repeatedly to select an
operating mode:▷LED off: outside air flows in continuously.▷LED on: the supply of outside air is perma‐
nently shut off.
With constant recirculated-air mode, the air
quality in the car's interior deteriorates and the
fogging of the windows increases.
If there is window condensation,
switch off the recirculated-air mode
and press the button on the driver's side to uti‐
lize the condensation sensor. Make sure that
air can flow to the windshield.
Air flow, manual
To manually adjust air flow turn off AUTO pro‐
gram first.
Press the left or right side of the but‐
ton: decrease or increase air flow.
The selected air flow is shown on the display of
the automatic climate control.
The air flow of the automatic climate control
may be reduced automatically to save battery
power.
Manual air distribution Press button repeatedly to select a
program:
▷Windows, upper body region, and footwell.▷Upper body region and footwell.▷Footwell.▷Windows and footwell.▷Windows.▷Windows and upper body.▷Upper body region.
The selected air distribution is shown on the
display of the automatic climate control.
Seite 205Climate controlControls205
Online Edition for Part no. 0140 2 964 330 - VI/15
Page 206 of 314
If there is window condensation, press
the button on the driver's side to uti‐
lize the condensation sensor.
SYNC program Press button.
The current settings on the driver's
side for temperature, air flow, air distribution,
and AUTO program are transferred to the front
passenger side and to the left and right rear.
To switch off, press the button again.
The program is switched off if the settings on
the front passenger side or in the rear are
changed.
Defrosts windows and removes
condensation
Press button.
Ice and condensation are quickly re‐
moved from the windshield and the front side
windows.
For this purpose, point the side vents onto the
side windows as needed.
Adjust air flow with the program active. If there is window condensation, you
can also switch on the air conditioning
or press the button to utilize the condensation
sensor.
Rear window defroster Press button.
The rear window defroster switches
off automatically after a certain period of time.
Microfilter/activated-charcoal filter
The microfilter removes dust and pollen from
the incoming air.
The activated-charcoal filter removes gaseous
pollutants from the outside air that enters the
vehicle.This combined filter should be replaced during
scheduled maintenance, refer to page 279, of
your vehicle.
Ventilation
Setting The air flow directions can be individually ad‐
justed:▷Direct ventilation:
The air flow is directly pointed onto the
person. The air flow heats or cools noticea‐
bly, depending on the adjusted tempera‐
ture.▷Indirect ventilation:
If the vents are fully or partly closed, the air
is directly routed into the car's interior.
Indirect ventilation can also be adjusted on
the Control Display.
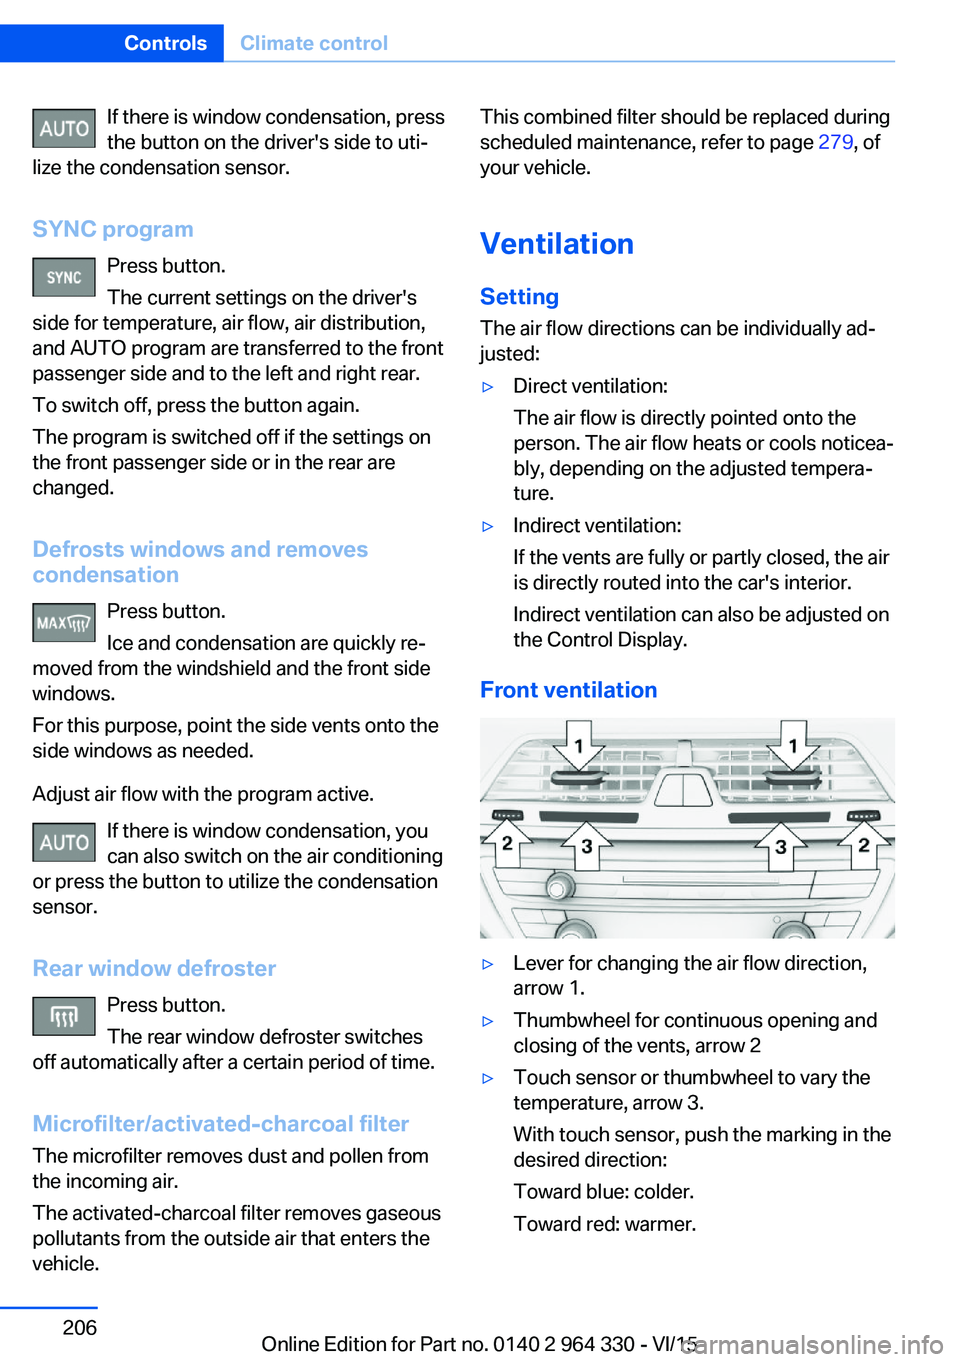
Front ventilation
▷Lever for changing the air flow direction,
arrow 1.▷Thumbwheel for continuous opening and
closing of the vents, arrow 2▷Touch sensor or thumbwheel to vary the
temperature, arrow 3.
With touch sensor, push the marking in the
desired direction:
Toward blue: colder.
Toward red: warmer.Seite 206ControlsClimate control206
Online Edition for Part no. 0140 2 964 330 - VI/15
Page 208 of 314
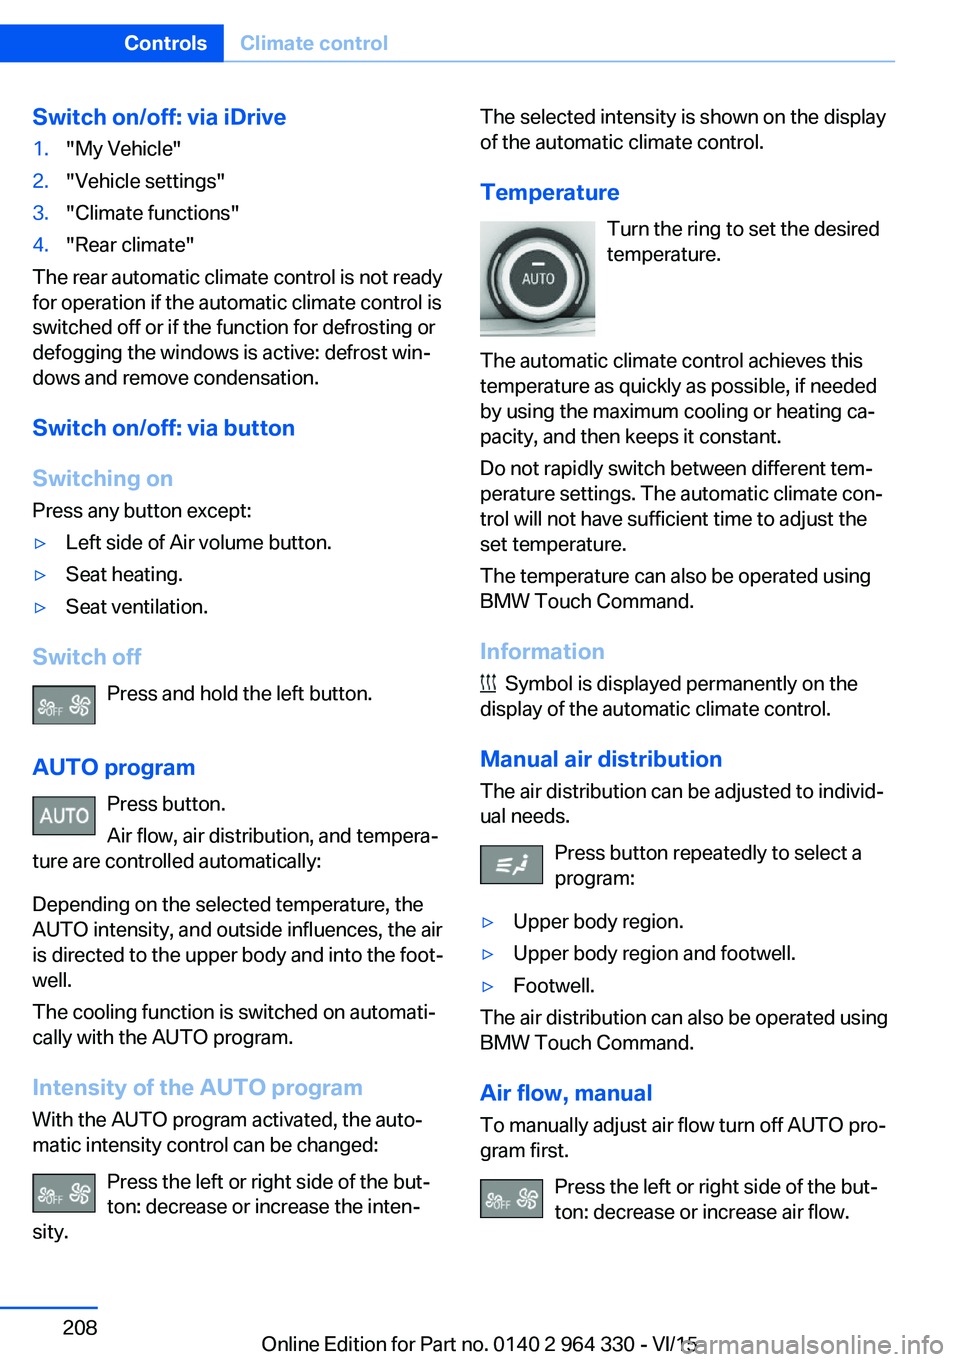
Switch on/off: via iDrive1."My Vehicle"2."Vehicle settings"3."Climate functions"4."Rear climate"
The rear automatic climate control is not ready
for operation if the automatic climate control is
switched off or if the function for defrosting or
defogging the windows is active: defrost win‐
dows and remove condensation.
Switch on/off: via button
Switching on Press any button except:
▷Left side of Air volume button.▷Seat heating.▷Seat ventilation.
Switch off
Press and hold the left button.
AUTO program Press button.
Air flow, air distribution, and tempera‐
ture are controlled automatically:
Depending on the selected temperature, the
AUTO intensity, and outside influences, the air
is directed to the upper body and into the foot‐
well.
The cooling function is switched on automati‐
cally with the AUTO program.
Intensity of the AUTO programWith the AUTO program activated, the auto‐
matic intensity control can be changed:
Press the left or right side of the but‐
ton: decrease or increase the inten‐
sity.
The selected intensity is shown on the display
of the automatic climate control.
Temperature Turn the ring to set the desired
temperature.
The automatic climate control achieves this
temperature as quickly as possible, if needed
by using the maximum cooling or heating ca‐
pacity, and then keeps it constant.
Do not rapidly switch between different tem‐
perature settings. The automatic climate con‐
trol will not have sufficient time to adjust the
set temperature.
The temperature can also be operated using
BMW Touch Command.
Information
Symbol is displayed permanently on the
display of the automatic climate control.
Manual air distribution
The air distribution can be adjusted to individ‐
ual needs.
Press button repeatedly to select a
program:
▷Upper body region.▷Upper body region and footwell.▷Footwell.
The air distribution can also be operated using
BMW Touch Command.
Air flow, manual To manually adjust air flow turn off AUTO pro‐
gram first.
Press the left or right side of the but‐
ton: decrease or increase air flow.
Seite 208ControlsClimate control208
Online Edition for Part no. 0140 2 964 330 - VI/15
Page 210 of 314
tion. Do not switch on parked-car heating in
enclosed areas.◀
WARNING
During parked-car heating operation,
high temperatures can occur underneath the
body, e.g. caused by the exhaust gas system. If
combustible materials, such as leaves or grass,
come in contact with hot parts of the exhaust
gas system, these materials can ignite. There
is risk of fire. Make sure that no combustible
materials can come in contact with hot vehicle
parts during parked-car heating operation.◀
At external temperatures below 32 ℉/0 ℃, wa‐
ter vapor occurs that emerges from below the
vehicle.
Functional requirements▷The vehicle is in the idle or operating readi‐
ness state.▷Battery is sufficiently charged.▷Parked-car heating: the fuel tank is filled to
above the reserve range.
Open the vents to allow air to flow out.
Switching on/off directly
There are different ways to switch the system
on or off.
It switches of automatically after some time.
The system continues to run for some time af‐
ter being switched off.
Via the automatic climate controlbutton
When the vehicle is in standby state, parked-
car ventilation can be switched on or off via the
automatic climate control buttons.
Press any button except:
▷Rear window defroster.▷Left side of Air volume button.▷Seat heating.▷Seat ventilation.▷SYNC program.
Via the iDrive
Parked-car ventilation can be switched on or
off via iDrive.
1."My Vehicle"2."Vehicle settings"3."Climate functions"4."Comfort ventilation" or "Comfort heating/
ventilation"5."Activate now"
symbol on the automatic climate control
signals to switched on system.
Via BMW display key Parked-car ventilation and parked-car heating
can be switched on or off via the BMW display
key.
Switching on directly
1.Switch on the display of the BMW display
key.2."Climate control setting"3. , Tap symbol.4."Activate now"5."Start"
Switching off directly
1.Switch on the display of the BMW display
key.2."Climate control setting"3. , Tap symbol.4."Stop"
Departure time
Different departure times can be adjusted to
ensure a comfortable interior temperature in
the vehicle at the time of departure.
▷One-time departure time: the time can be
set.Seite 210ControlsClimate control210
Online Edition for Part no. 0140 2 964 330 - VI/15