BMW 760Li 2005 E66 Workshop Manual
Manufacturer: BMW, Model Year: 2005, Model line: 760Li, Model: BMW 760Li 2005 E66Pages: 239, PDF Size: 8.03 MB
Page 51 of 239
Controls
49Reference
At a glance
Driving tips
Communications
Navigation
Entertainment
Mobility
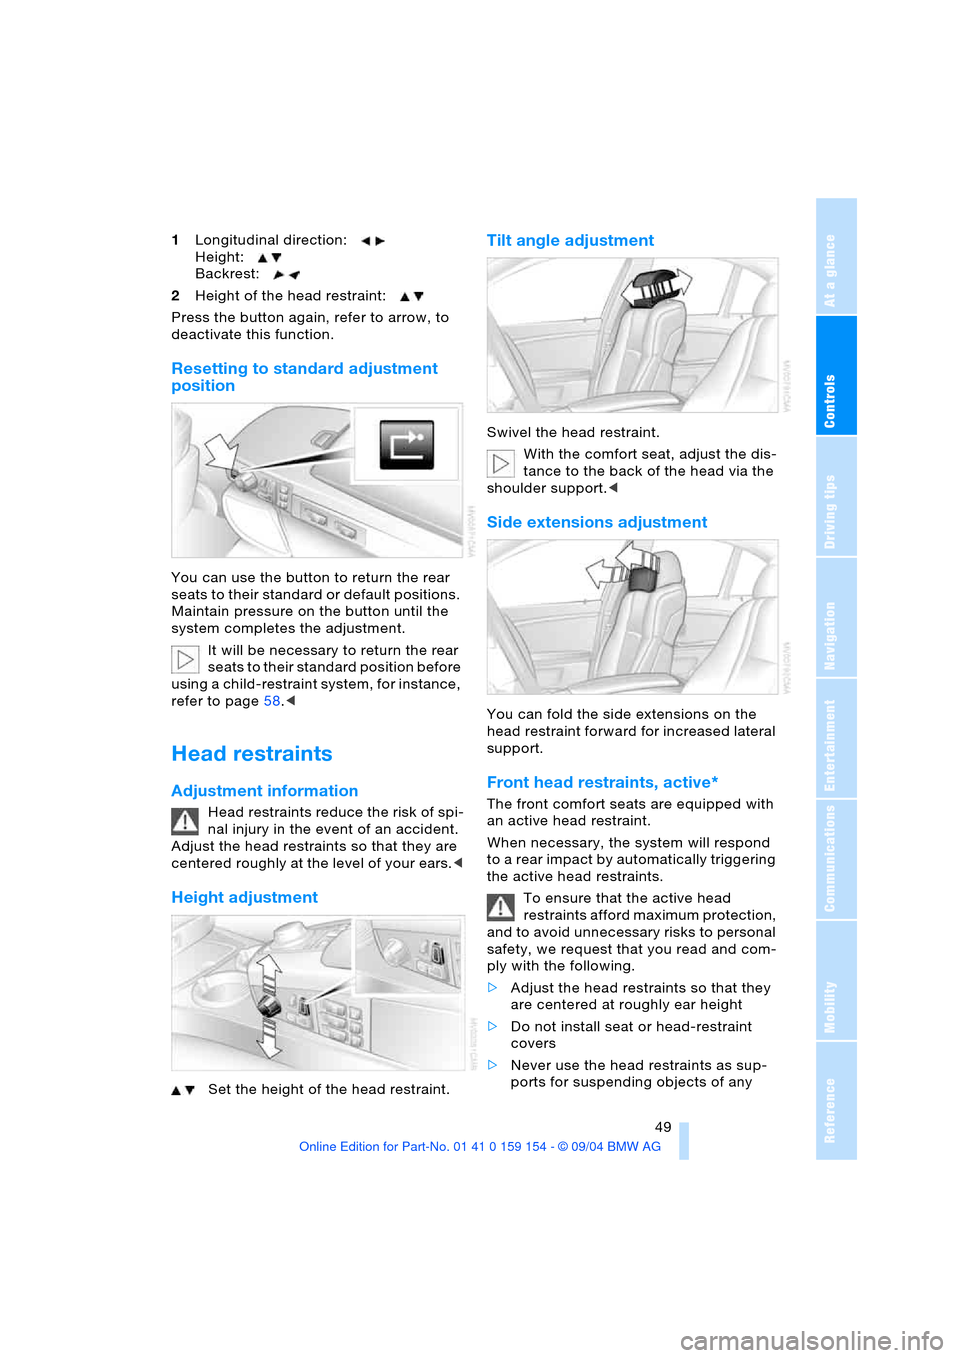
1Longitudinal direction:
Height:
Backrest:
2Height of the head restraint:
Press the button again, refer to arrow, to
deactivate this function.
Resetting to standard adjustment
position
You can use the button to return the rear
seats to their standard or default positions.
Maintain pressure on the button until the
system completes the adjustment.
It will be necessary to return the rear
seats to their standard position before
using a child-restraint system, for instance,
refer to page58.<
Head restraints
Adjustment information
Head restraints reduce the risk of spi-
nal injury in the event of an accident.
Adjust the head restraints so that they are
centered roughly at the level of your ears.<
Height adjustment
Set the height of the head restraint.
Tilt angle adjustment
Swivel the head restraint.
With the comfort seat, adjust the dis-
tance to the back of the head via the
shoulder support.<
Side extensions adjustment
You can fold the side extensions on the
head restraint forward for increased lateral
support.
Front head restraints, active*
The front comfort seats are equipped with
an active head restraint.
When necessary, the system will respond
to a rear impact by automatically triggering
the active head restraints.
To ensure that the active head
restraints afford maximum protection,
and to avoid unnecessary risks to personal
safety, we request that you read and com-
ply with the following.
>Adjust the head restraints so that they
are centered at roughly ear height
>Do not install seat or head-restraint
covers
>Never use the head restraints as sup-
ports for suspending objects of any
Page 52 of 239
Adjustments
50 kind, such as clothes hangers. Refrain
from mounting accessories on either
the seat or the head restraint.<
Rear seats
Adjusting mechanically
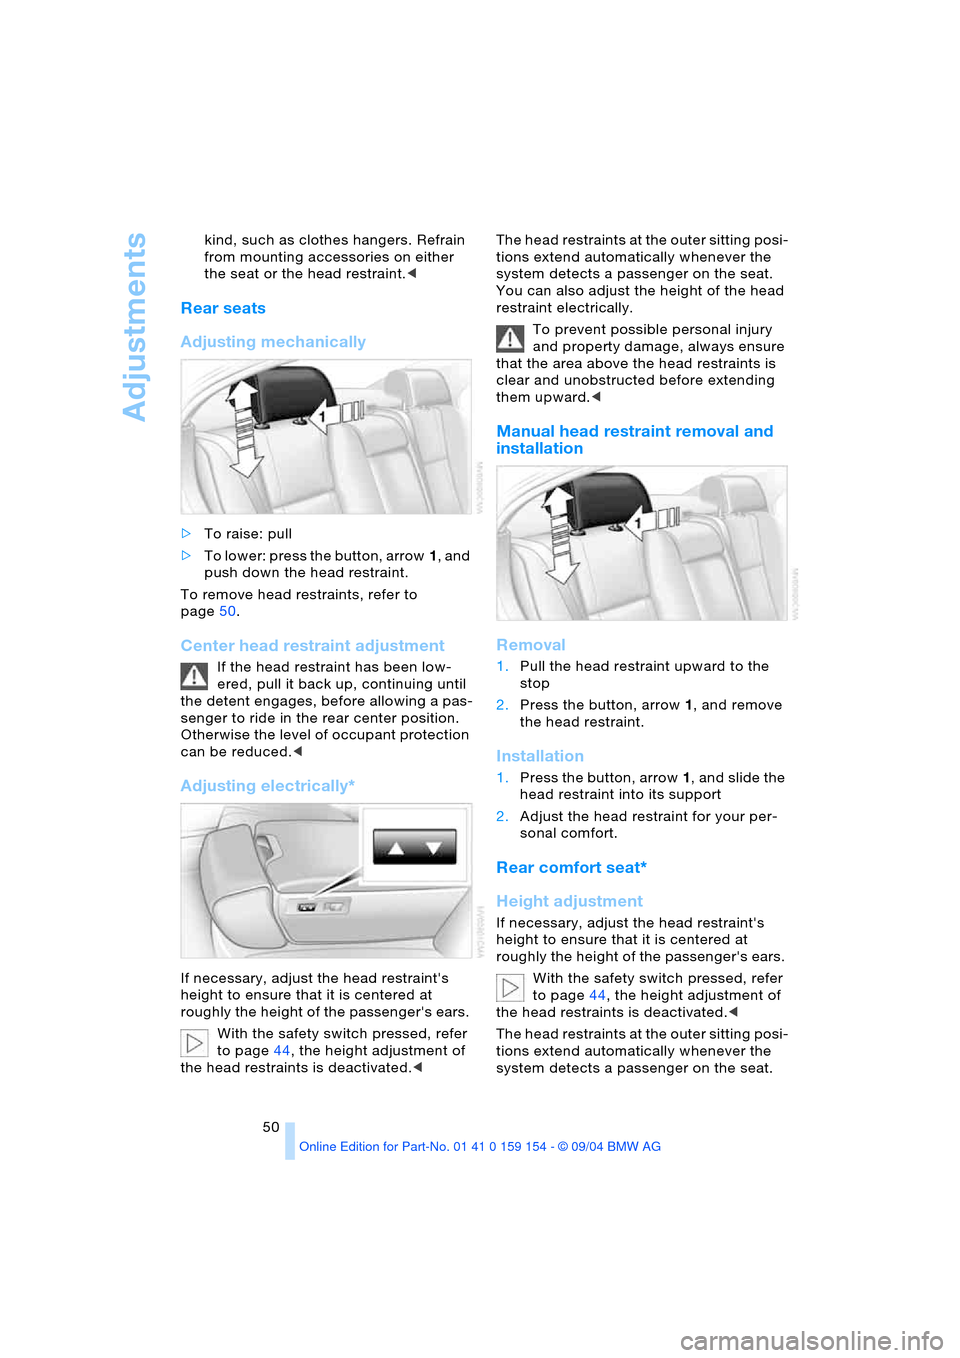
>To raise: pull
>To lower: press the button, arrow1, and
push down the head restraint.
To remove head restraints, refer to
page50.
Center head restraint adjustment
If the head restraint has been low-
ered, pull it back up, continuing until
the detent engages, before allowing a pas-
senger to ride in the rear center position.
Otherwise the level of occupant protection
can be reduced.<
Adjusting electrically*
If necessary, adjust the head restraint's
height to ensure that it is centered at
roughly the height of the passenger's ears.
With the safety switch pressed, refer
to page44, the height adjustment of
the head restraints is deactivated.< The head restraints at the outer sitting posi-
tions extend automatically whenever the
system detects a passenger on the seat.
You can also adjust the height of the head
restraint electrically.
To prevent possible personal injury
and property damage, always ensure
that the area above the head restraints is
clear and unobstructed before extending
them upward.<
Manual head restraint removal and
installation
Removal
1.Pull the head restraint upward to the
stop
2.Press the button, arrow1, and remove
the head restraint.
Installation
1.Press the button, arrow1, and slide the
head restraint into its support
2.Adjust the head restraint for your per-
sonal comfort.
Rear comfort seat*
Height adjustment
If necessary, adjust the head restraint's
height to ensure that it is centered at
roughly the height of the passenger's ears.
With the safety switch pressed, refer
to page44, the height adjustment of
the head restraints is deactivated.<
The head restraints at the outer sitting posi-
tions extend automatically whenever the
system detects a passenger on the seat.
Page 53 of 239
Controls
51Reference
At a glance
Driving tips
Communications
Navigation
Entertainment
Mobility
You can also adjust the height of the head
restraint electrically.
To prevent possible personal injury
and property damage, always ensure
that the area above the head restraints is
clear and unobstructed before extending
them upward.<
Side extensions adjustment
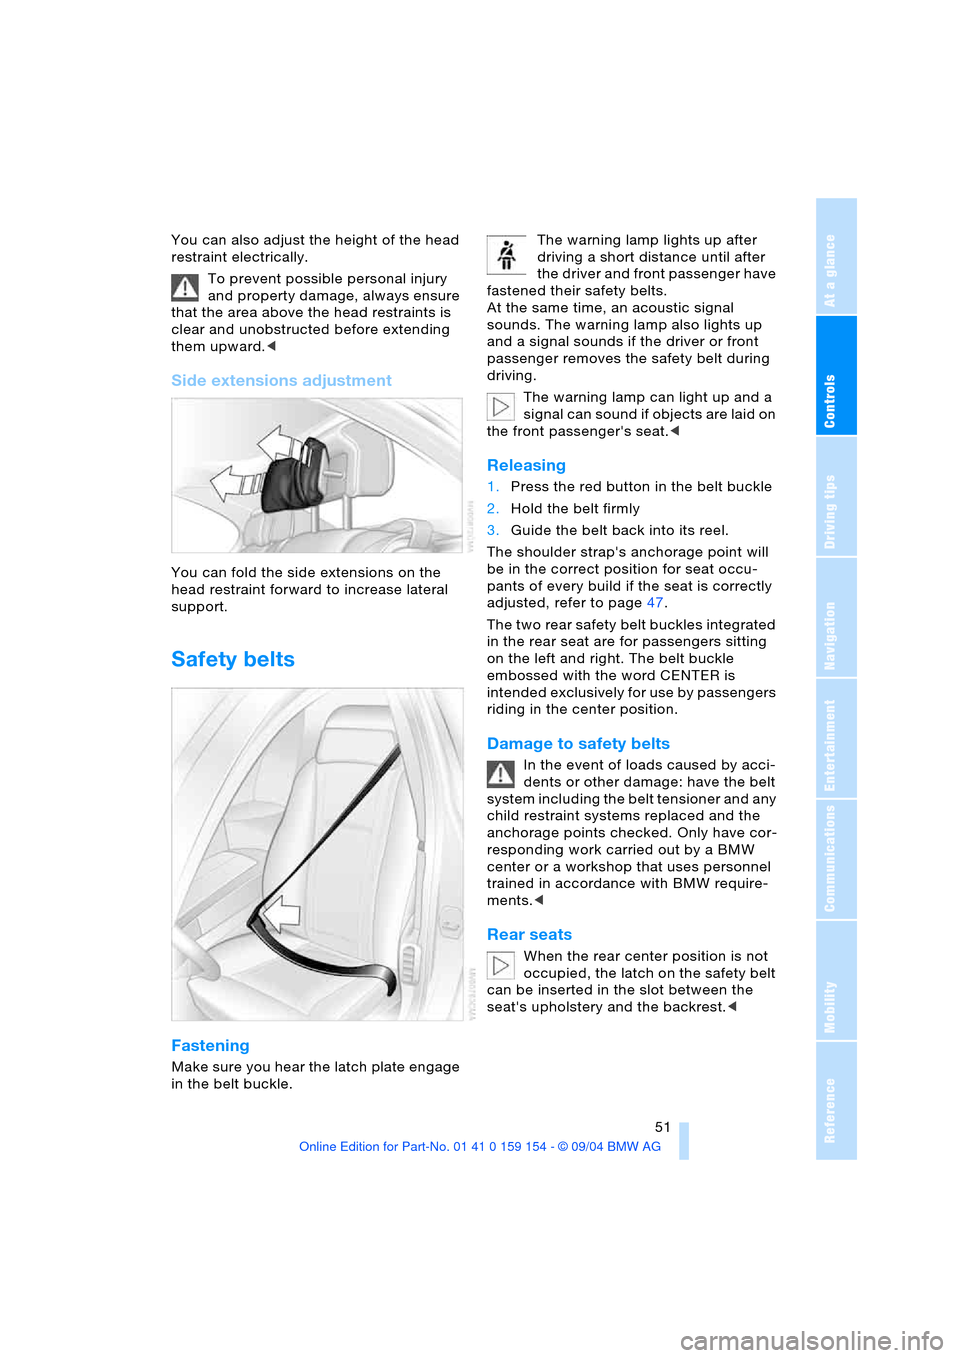
You can fold the side extensions on the
head restraint forward to increase lateral
support.
Safety belts
Fastening
Make sure you hear the latch plate engage
in the belt buckle. The warning lamp lights up after
driving a short distance until after
the driver and front passenger have
fastened their safety belts.
At the same time, an acoustic signal
sounds. The warning lamp also lights up
and a signal sounds if the driver or front
passenger removes the safety belt during
driving.
The warning lamp can light up and a
signal can sound if objects are laid on
the front passenger's seat.<
Releasing
1.Press the red button in the belt buckle
2.Hold the belt firmly
3.Guide the belt back into its reel.
The shoulder strap's anchorage point will
be in the correct position for seat occu-
pants of every build if the seat is correctly
adjusted, refer to page47.
The two rear safety belt buckles integrated
in the rear seat are for passengers sitting
on the left and right. The belt buckle
embossed with the word CENTER is
intended exclusively for use by passengers
riding in the center position.
Damage to safety belts
In the event of loads caused by acci-
dents or other damage: have the belt
system including the belt tensioner and any
child restraint systems replaced and the
anchorage points checked. Only have cor-
responding work carried out by a BMW
center or a workshop that uses personnel
trained in accordance with BMW require-
ments.<
Rear seats
When the rear center position is not
occupied, the latch on the safety belt
can be inserted in the slot between the
seat's upholstery and the backrest.<
Page 54 of 239
Adjustments
52
Heated seats*
Front
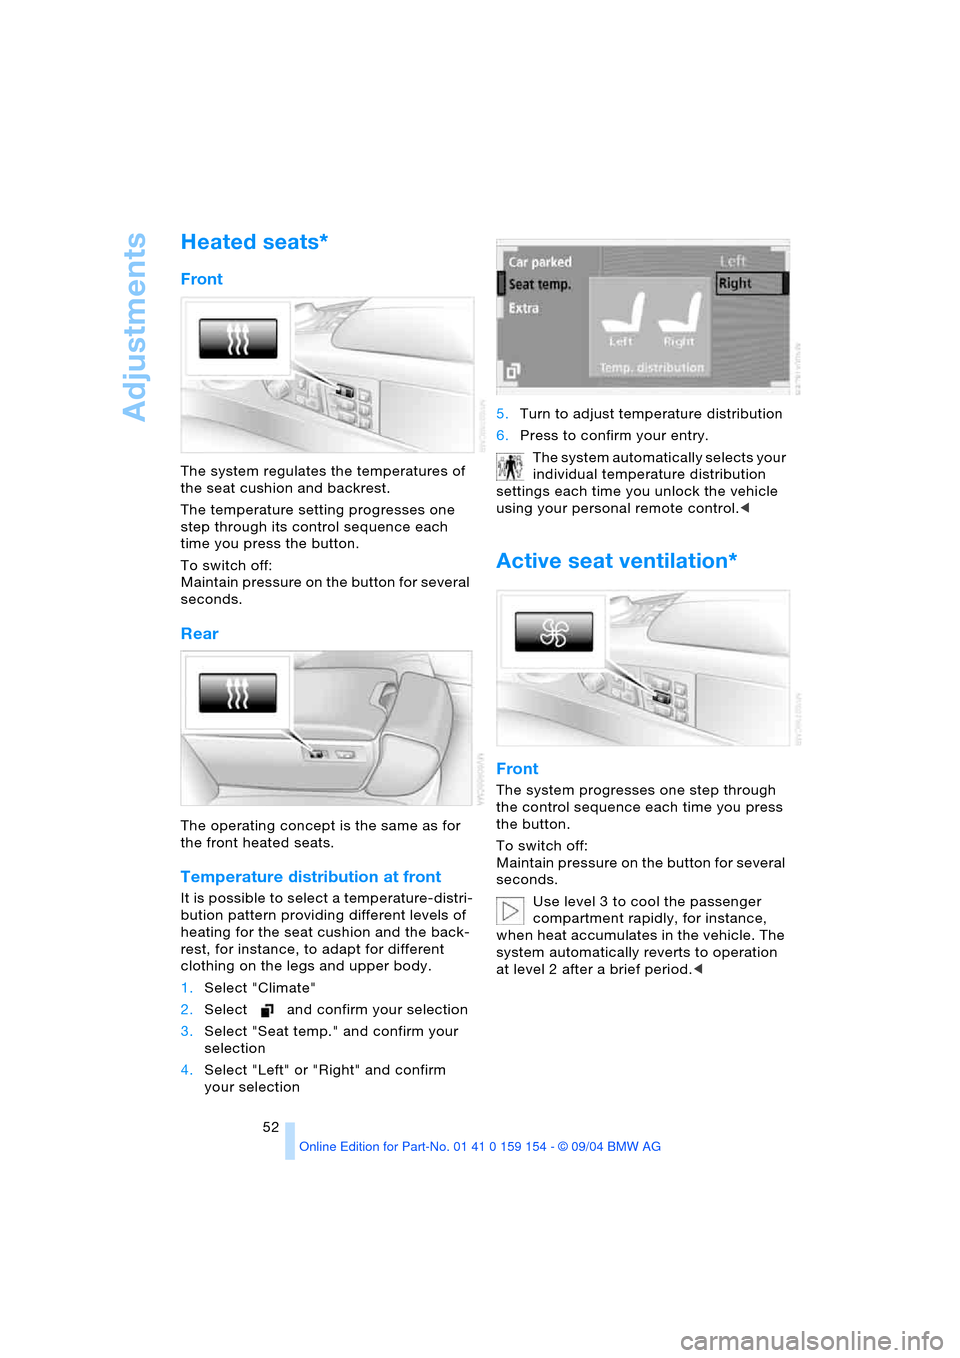
The system regulates the temperatures of
the seat cushion and backrest.
The temperature setting progresses one
step through its control sequence each
time you press the button.
To switch off:
Maintain pressure on the button for several
seconds.
Rear
The operating concept is the same as for
the front heated seats.
Temperature distribution at front
It is possible to select a temperature-distri-
bution pattern providing different levels of
heating for the seat cushion and the back-
rest, for instance, to adapt for different
clothing on the legs and upper body.
1.Select "Climate"
2.Select and confirm your selection
3.Select "Seat temp." and confirm your
selection
4.Select "Left" or "Right" and confirm
your selection 5.Turn to adjust temperature distribution
6.Press to confirm your entry.
The system automatically selects your
individual temperature distribution
settings each time you unlock the vehicle
using your personal remote control.<
Active seat ventilation*
Front
The system progresses one step through
the control sequence each time you press
the button.
To switch off:
Maintain pressure on the button for several
seconds.
Use level 3 to cool the passenger
compartment rapidly, for instance,
when heat accumulates in the vehicle. The
system automatically reverts to operation
at level 2 after a brief period.<
Page 55 of 239
Controls
53Reference
At a glance
Driving tips
Communications
Navigation
Entertainment
Mobility
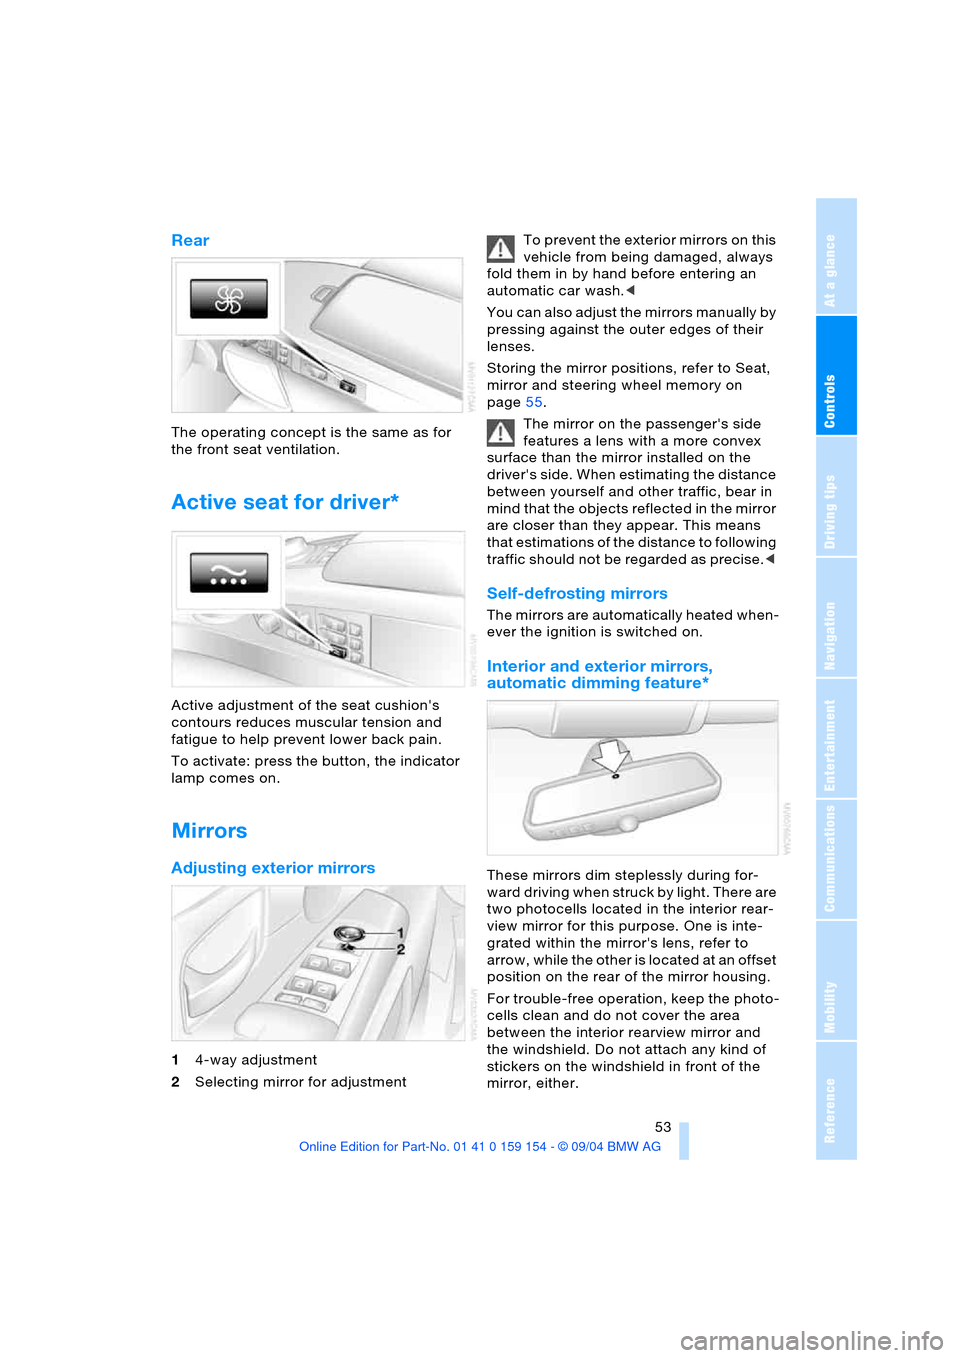
Rear
The operating concept is the same as for
the front seat ventilation.
Active seat for driver*
Active adjustment of the seat cushion's
contours reduces muscular tension and
fatigue to help prevent lower back pain.
To activate: press the button, the indicator
lamp comes on.
Mirrors
Adjusting exterior mirrors
14-way adjustment
2Selecting mirror for adjustment To prevent the exterior mirrors on this
vehicle from being damaged, always
fold them in by hand before entering an
automatic car wash.<
You can also adjust the mirrors manually by
pressing against the outer edges of their
lenses.
Storing the mirror positions, refer to Seat,
mirror and steering wheel memory on
page55.
The mirror on the passenger's side
features a lens with a more convex
surface than the mirror installed on the
driver's side. When estimating the distance
between yourself and other traffic, bear in
mind that the objects reflected in the mirror
are closer than they appear. This means
that estimations of the distance to following
traffic should not be regarded as precise.<
Self-defrosting mirrors
The mirrors are automatically heated when-
ever the ignition is switched on.
Interior and exterior mirrors,
automatic dimming feature*
These mirrors dim steplessly during for-
ward driving when struck by light. There are
two photocells located in the interior rear-
view mirror for this purpose. One is inte-
grated within the mirror's lens, refer to
arrow, while the other is located at an offset
position on the rear of the mirror housing.
For trouble-free operation, keep the photo-
cells clean and do not cover the area
between the interior rearview mirror and
the windshield. Do not attach any kind of
stickers on the windshield in front of the
mirror, either.
Page 56 of 239
Adjustments
54 The mirrors automatically revert to their
clear, undimmed mode whenever you
engage transmission position R.
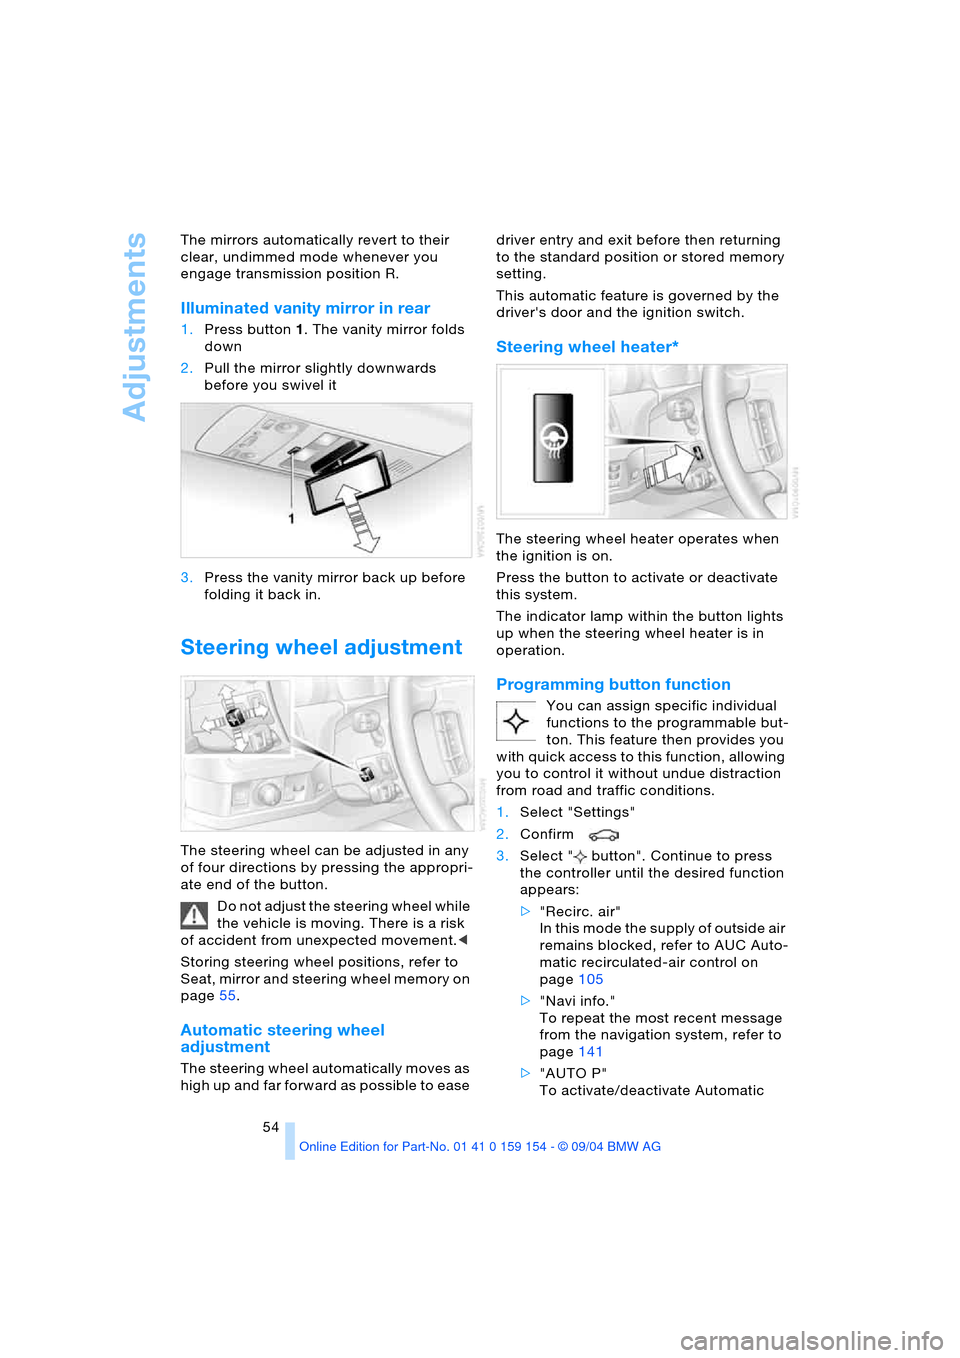
Illuminated vanity mirror in rear
1.Press button1. The vanity mirror folds
down
2.Pull the mirror slightly downwards
before you swivel it
3.Press the vanity mirror back up before
folding it back in.
Steering wheel adjustment
The steering wheel can be adjusted in any
of four directions by pressing the appropri-
ate end of the button.
Do not adjust the steering wheel while
the vehicle is moving. There is a risk
of accident from unexpected movement.<
Storing steering wheel positions, refer to
Seat, mirror and steering wheel memory on
page55.
Automatic steering wheel
adjustment
The steering wheel automatically moves as
high up and far forward as possible to ease driver entry and exit before then returning
to the standard position or stored memory
setting.
This automatic feature is governed by the
driver's door and the ignition switch.
Steering wheel heater*
The steering wheel heater operates when
the ignition is on.
Press the button to activate or deactivate
this system.
The indicator lamp within the button lights
up when the steering wheel heater is in
operation.
Programming button function
You can assign specific individual
functions to the programmable but-
ton. This feature then provides you
with quick access to this function, allowing
you to control it without undue distraction
from road and traffic conditions.
1.Select "Settings"
2.Confirm
3.Select " button". Continue to press
the controller until the desired function
appears:
>"Recirc. air"
In this mode the supply of outside air
remains blocked, refer to AUC Auto-
matic recirculated-air control on
page105
>"Navi info."
To repeat the most recent message
from the navigation system, refer to
page141
>"AUTO P"
To activate/deactivate Automatic
Page 57 of 239
Controls
55Reference
At a glance
Driving tips
Communications
Navigation
Entertainment
Mobility
Hold refer to Automatic Hold on
page65.
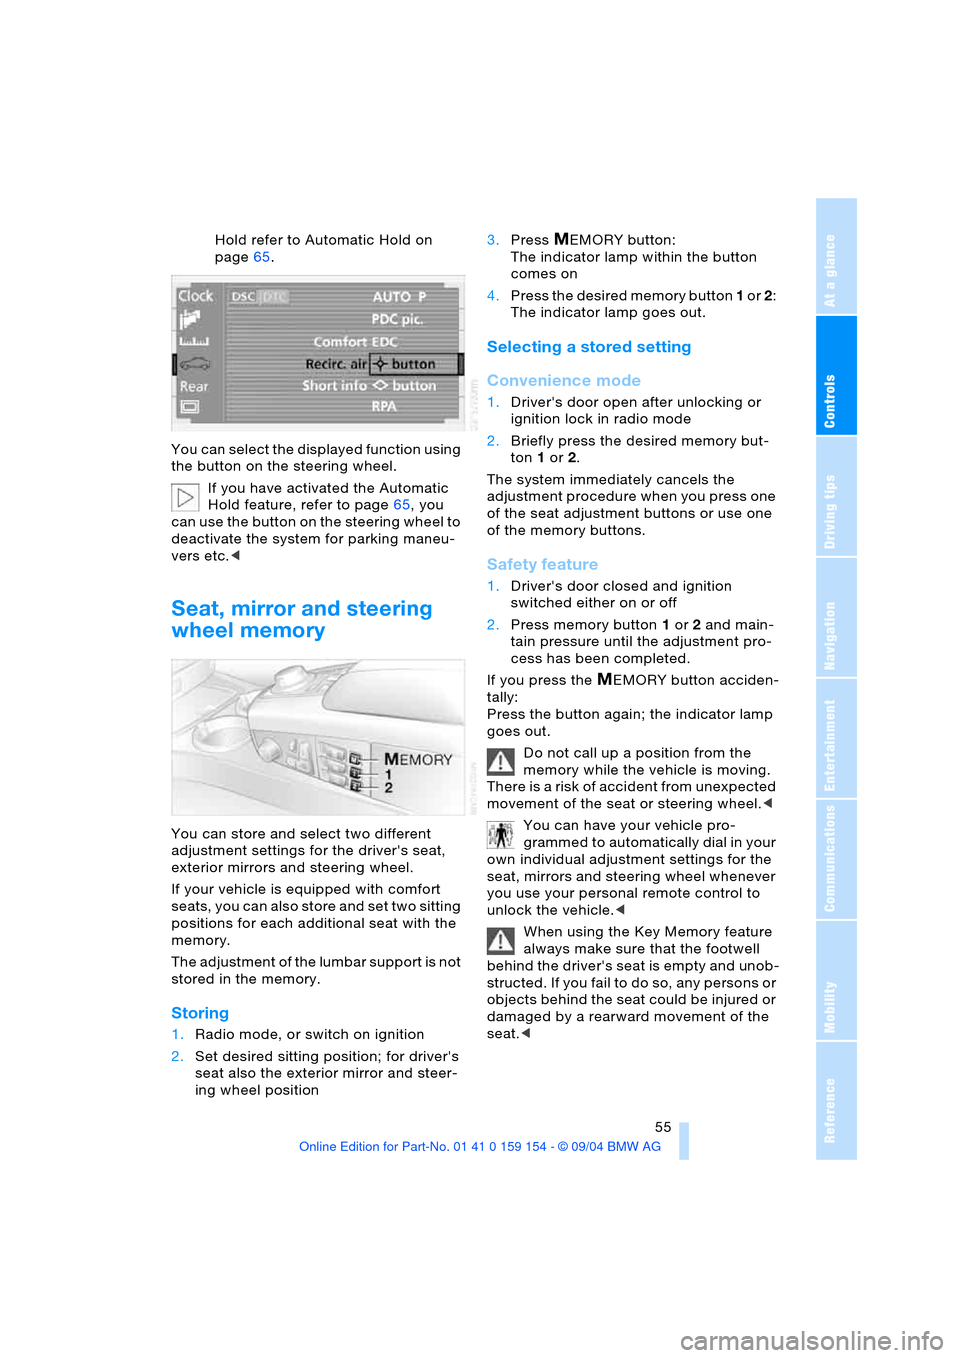
You can select the displayed function using
the button on the steering wheel.
If you have activated the Automatic
Hold feature, refer to page65, you
can use the button on the steering wheel to
deactivate the system for parking maneu-
vers etc.<
Seat, mirror and steering
wheel memory
You can store and select two different
adjustment settings for the driver's seat,
exterior mirrors and steering wheel.
If your vehicle is equipped with comfort
seats, you can also store and set two sitting
positions for each additional seat with the
memory.
The adjustment of the lumbar support is not
stored in the memory.
Storing
1.Radio mode, or switch on ignition
2.Set desired sitting position; for driver's
seat also the exterior mirror and steer-
ing wheel position 3.Press
MEMORY button:
The indicator lamp within the button
comes on
4.Press the desired memory button 1 or 2:
The indicator lamp goes out.
Selecting a stored setting
Convenience mode
1.Driver's door open after unlocking or
ignition lock in radio mode
2.Briefly press the desired memory but-
ton 1 or2.
The system immediately cancels the
adjustment procedure when you press one
of the seat adjustment buttons or use one
of the memory buttons.
Safety feature
1.Driver's door closed and ignition
switched either on or off
2.Press memory button 1 or2 and main-
tain pressure until the adjustment pro-
cess has been completed.
If you press the
MEMORY button acciden-
tally:
Press the button again; the indicator lamp
goes out.
Do not call up a position from the
memory while the vehicle is moving.
There is a risk of accident from unexpected
movement of the seat or steering wheel.<
You can have your vehicle pro-
grammed to automatically dial in your
own individual adjustment settings for the
seat, mirrors and steering wheel whenever
you use your personal remote control to
unlock the vehicle.<
When using the Key Memory feature
always make sure that the footwell
behind the driver's seat is empty and unob-
structed. If you fail to do so, any persons or
objects behind the seat could be injured or
damaged by a rearward movement of the
seat.<
Page 58 of 239
Adjustments
56
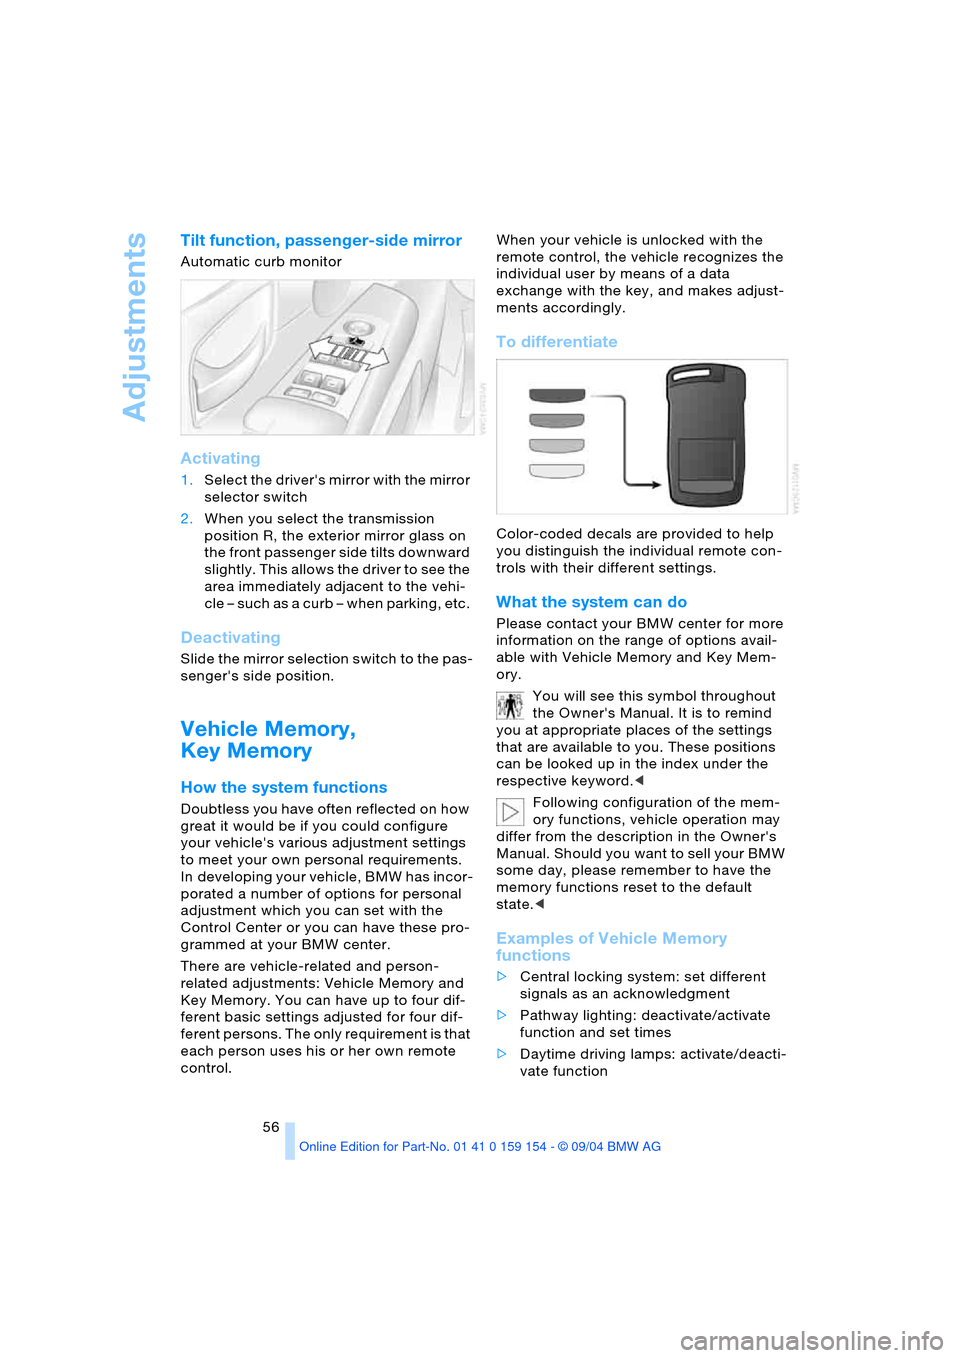
Tilt function, passenger-side mirror
Automatic curb monitor
Activating
1.Select the driver's mirror with the mirror
selector switch
2.When you select the transmission
position R, the exterior mirror glass on
the front passenger side tilts downward
slightly. This allows the driver to see the
area immediately adjacent to the vehi-
cle – such as a curb – when parking, etc.
Deactivating
Slide the mirror selection switch to the pas-
senger's side position.
Vehicle Memory,
Key Memory
How the system functions
Doubtless you have often reflected on how
great it would be if you could configure
your vehicle's various adjustment settings
to meet your own personal requirements.
In developing your vehicle, BMW has incor-
porated a number of options for personal
adjustment which you can set with the
Control Center or you can have these pro-
grammed at your BMW center.
There are vehicle-related and person-
related adjustments: Vehicle Memory and
Key Memory. You can have up to four dif-
ferent basic settings adjusted for four dif-
ferent persons. The only requirement is that
each person uses his or her own remote
control. When your vehicle is unlocked with the
remote control, the vehicle recognizes the
individual user by means of a data
exchange with the key, and makes adjust-
ments accordingly.
To differentiate
Color-coded decals are provided to help
you distinguish the individual remote con-
trols with their different settings.
What the system can do
Please contact your BMW center for more
information on the range of options avail-
able with Vehicle Memory and Key Mem-
ory.
You will see this symbol throughout
the Owner's Manual. It is to remind
you at appropriate places of the settings
that are available to you. These positions
can be looked up in the index under the
respective keyword.<
Following configuration of the mem-
ory functions, vehicle operation may
differ from the description in the Owner's
Manual. Should you want to sell your BMW
some day, please remember to have the
memory functions reset to the default
state.<
Examples of Vehicle Memory
functions
>Central locking system: set different
signals as an acknowledgment
>Pathway lighting: deactivate/activate
function and set times
>Daytime driving lamps: activate/deacti-
vate function
Page 59 of 239
Controls
57Reference
At a glance
Driving tips
Communications
Navigation
Entertainment
Mobility
>Alarm system: set different acknowl-
edgment signals to confirm arming/dis-
arming
>Alarm system: activate/deactivate inte-
rior motion sensor and tilt alarm sensor
>Automatic headlamp control: adjust
sensitivity.
Examples of Key Memory functions
>Seat memory: activate/deactivate func-
tion
>Central locking system: vehicle is
locked as soon as you drive off or if you
have not opened a door or the luggage
compartment lid after unlocking. Acti-
vate/deactivate function
>Automatic climate control: key-specific
storage of the temperature, fan and air
conditioner setting. Activate/deactivate
function
>Check Control: set languages and units
>Seat heating: recall personal tempera-
ture distribution.
Page 60 of 239
Transporting children safely
58
Transporting children safely
The right place for children
Children always in the rear
Accident research shows that the safest
place for children in a vehicle is in the rear
seat.
Older children should be tightly secured
with a safety belt, after they have outgrown
a booster seat that is appropriate for their
age, height and weight.
A child sitting in the rear seat and not
properly restrained may place his or
her head on or near the airbag, if so
equipped. For example, a child, even
though belted, may fall asleep with his or
her head against the side airbag. It may be
difficult for a driver to ensure that children
in the rear seat will remain properly posi-
tioned at all times and do not place their
heads on or near the side airbags. There-
fore, we recommend that the rear side air-
bags, if provided, be deactivated if you plan
to transport children in the rear seat.<
Child-restraint system in the rear
Children under 13 years of age and
children less than 5 ft/150 cm tall
should always ride in the rear and the
restraint systems should be secured with
the vehicle's safety belts.<
Younger children should be secured in an
appropriate forward-facing child-restraint
system that has first been properly
restrained. We strongly urge you to care-
fully read and comply with the instructions
for installation and use provided by the
child restraint‘s manufacturer whenever
you use such a device.
All rear sitting positions in your vehicle
meet the recommendations of SAE J1819,
an industry-recommended practice for
securing child-restraint systems in motor
vehicles.
Exception for front passenger seat
Should it become necessary to use
a child-restraint system on the front
passenger seat, the airbags on the passen-
ger‘s side must be deactivated. The pas-
senger airbag indicator lamp above the
interior rearview mirror must light up con-
tinuously. Otherwise, the front passenger
airbags remain active and there is consid-
erable risk of injury to children if the airbags
are triggered, even with a child-restraint
system. In this case, children should be
seated in the rear and the system should be
checked at your BMW center.<
Never install a rearward-facing child-
restraint system in the front passen-
ger seat of this vehicle if the passenger air-
bag is not deactivated. If you do so, the
child could be severely injured when the
airbag is triggered.
Your vehicle is equipped with an airbag
supplemental restraint system for the front
passenger. Because the backrest on any
rearward-facing child-restraint system, of
the kind designed for infants under 1 year
and 20 Ibs./9 kg, would be within the air-
bag‘s deployment range, you should never
mount such a system in the front passenger
seat, since the impact of the airbag against
the child restraint‘s backrest could lead to
serious or fatal injuries.<
More information on Automatic deactiva-
tion of the front passenger airbags, refer to
page98.
Installing child-restraint
systems
Before installing any child-restraint system
or child seat, read the following:
Observe the child-restraint system
manufacturer's instructions for instal-
lation and use. Otherwise the degree of
protection can be reduced.
Following an accident, have all parts of the