BMW 760Li 2005 E66 Repair Manual
Manufacturer: BMW, Model Year: 2005, Model line: 760Li, Model: BMW 760Li 2005 E66Pages: 239, PDF Size: 8.03 MB
Page 61 of 239
Controls
59Reference
At a glance
Driving tips
Communications
Navigation
Entertainment
Mobility
child restraint system and the affected
vehicle safety-belt system checked and,
if necessary, replaced. Only have corre-
sponding work carried out by a BMW cen-
ter or a workshop that uses personnel
trained in accordance with BMW require-
ments.<
Commercially-available child-restraint sys-
tems are designed to be secured with a lap
belt or with the lap belt portion of a combi-
nation lap/shoulder belt. Improperly or
inadequately installed restraint systems
can increase the risk of injury to children.
Always read and follow the instructions that
come with the system.
Child seat security
All of the rear belt retractors and the front
passenger's safety belt can be locked for
mounting and securing child-restraint sys-
tems.
Information regarding this is located near
the buckle latch of each safety belt.
To lock safety belt
Pull the entire length of the belt from the
belt retractor. Allow the reel to retract the
belt somewhat and engage the buckle,
then tighten the belt against the child-
restraint system. The retraction mechanism
is now locked.
To unlock safety belt
Release the buckle, remove the child-
restraint system and allow the belt retractor
to reel the belt completely in.
Child-restraint system with tether
strap
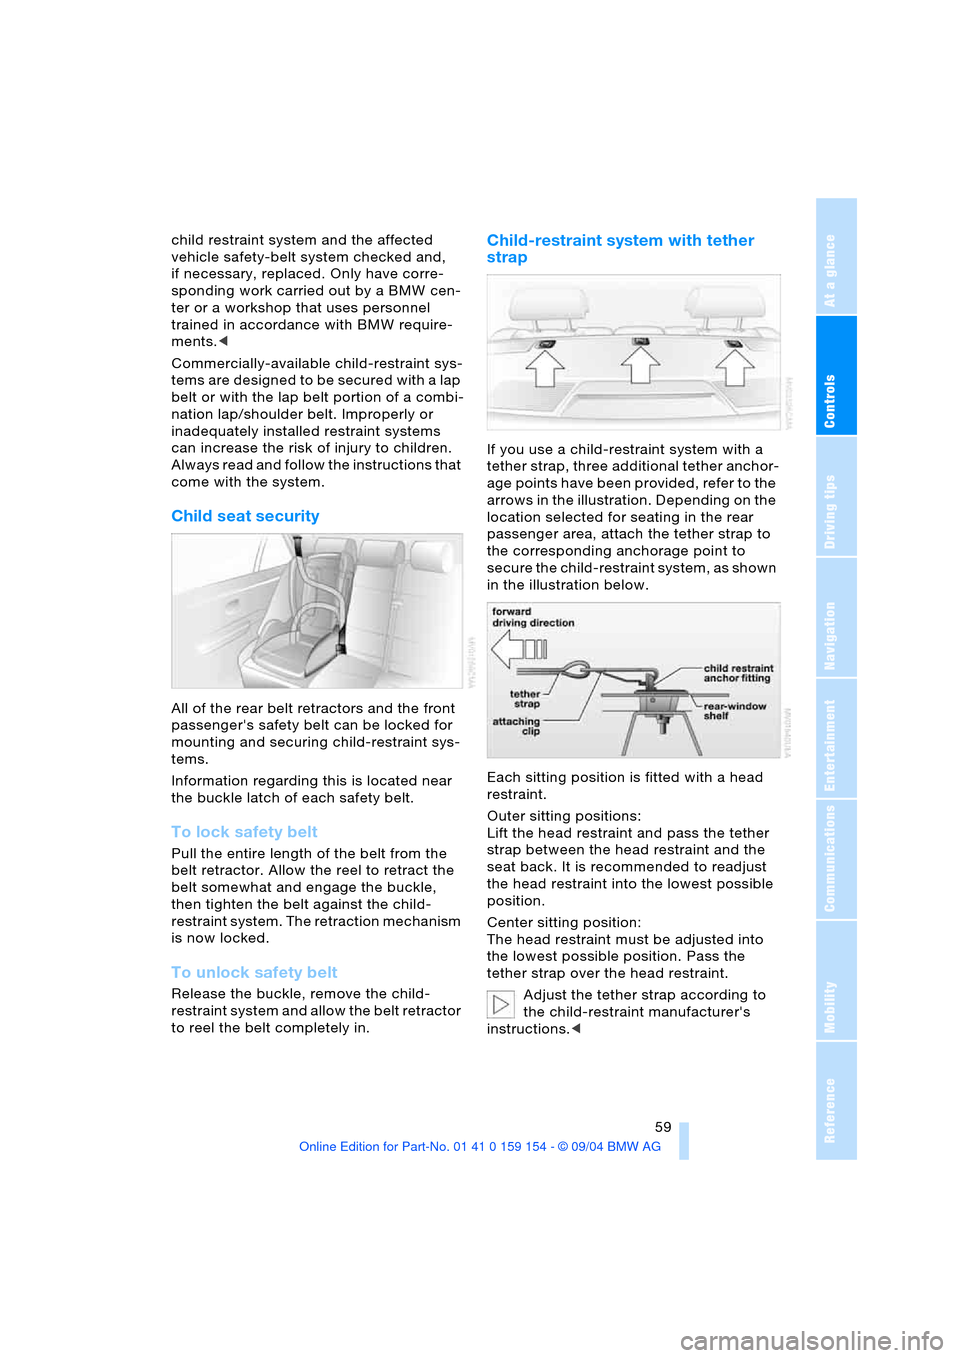
If you use a child-restraint system with a
tether strap, three additional tether anchor-
age points have been provided, refer to the
arrows in the illustration. Depending on the
location selected for seating in the rear
passenger area, attach the tether strap to
the corresponding anchorage point to
secure the child-restraint system, as shown
in the illustration below.
Each sitting position is fitted with a head
restraint.
Outer sitting positions:
Lift the head restraint and pass the tether
strap between the head restraint and the
seat back. It is recommended to readjust
the head restraint into the lowest possible
position.
Center sitting position:
The head restraint must be adjusted into
the lowest possible position. Pass the
tether strap over the head restraint.
Adjust the tether strap according to
the child-restraint manufacturer's
instructions.<
Page 62 of 239
Transporting children safely
60
LATCH child-restraint fixing*
LATCH: Lower Anchor and Tethers for
CHildren.
The rear outer sitting positions are pro-
vided with anchors for a LATCH child-
restraint fixing.
To fit the LATCH child-restraint fixing,
follow the operating and safety
instructions of the manufacturer.<
If the vehicle is equipped with power seats
in the rear, return these to their standard
adjustment setting before using a LATCH
child-restraint fixing, refer to page49.
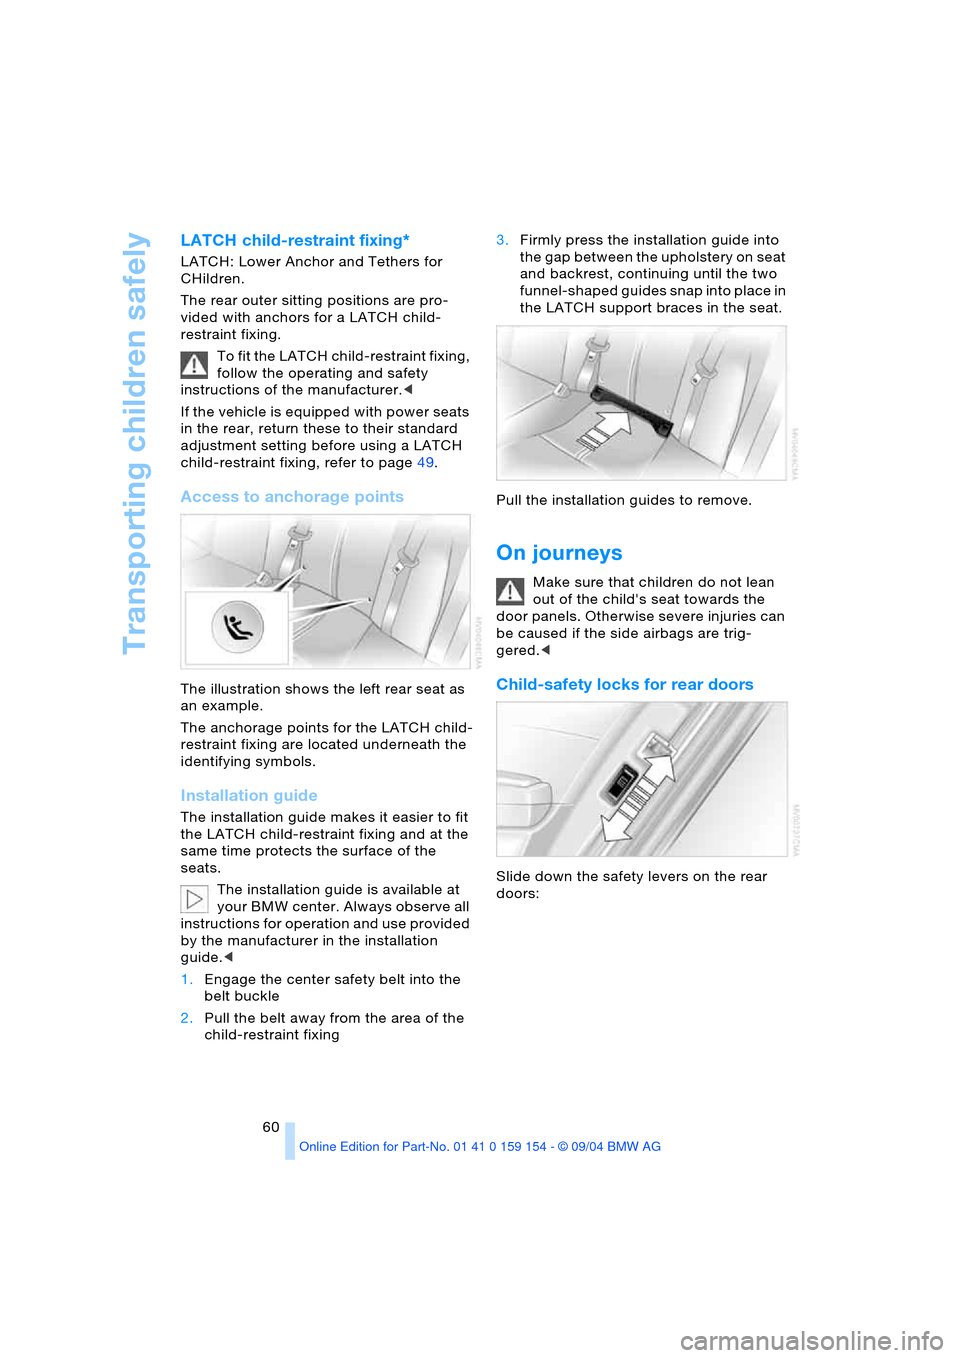
Access to anchorage points
The illustration shows the left rear seat as
an example.
The anchorage points for the LATCH child-
restraint fixing are located underneath the
identifying symbols.
Installation guide
The installation guide makes it easier to fit
the LATCH child-restraint fixing and at the
same time protects the surface of the
seats.
The installation guide is available at
your BMW center. Always observe all
instructions for operation and use provided
by the manufacturer in the installation
guide.<
1.Engage the center safety belt into the
belt buckle
2.Pull the belt away from the area of the
child-restraint fixing3.Firmly press the installation guide into
the gap between the upholstery on seat
and backrest, continuing until the two
funnel-shaped guides snap into place in
the LATCH support braces in the seat.
Pull the installation guides to remove.
On journeys
Make sure that children do not lean
out of the child's seat towards the
door panels. Otherwise severe injuries can
be caused if the side airbags are trig-
gered.<
Child-safety locks for rear doors
Slide down the safety levers on the rear
doors:
Page 63 of 239
Controls
61Reference
At a glance
Driving tips
Communications
Navigation
Entertainment
Mobility
The door can now be opened from the out-
side only.
Safety switch for power windows
and rear seats
If the vehicle is equipped with power seats
in the rear, return these to their standard
adjustment setting before using a child-
restraint system, refer to page49.
Always press the safety switch for the
power windows, refer to page44, when
children are in the rear of the vehicle.
This switch also disables the power rear
seat adjustment.
Incorrect or unsupervised adjustment
of the power seats in the rear could
lead to injuries or damage to the child-
restraint system.<
Page 64 of 239
Driving
62
Driving
Ignition lock
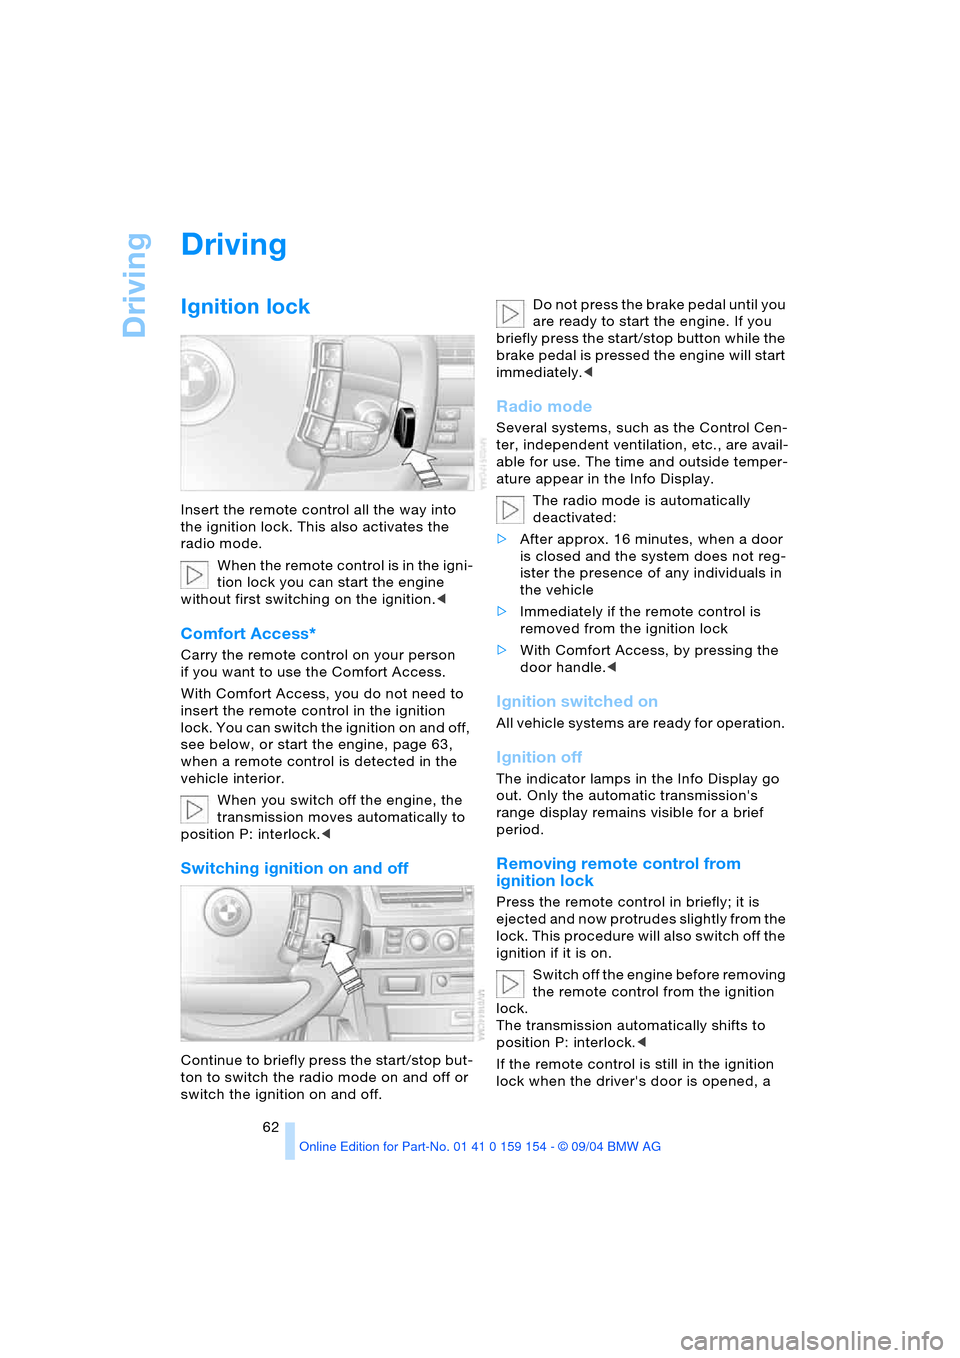
Insert the remote control all the way into
the ignition lock. This also activates the
radio mode.
When the remote control is in the igni-
tion lock you can start the engine
without first switching on the ignition.<
Comfort Access*
Carry the remote control on your person
if you want to use the Comfort Access.
With Comfort Access, you do not need to
insert the remote control in the ignition
lock. You can switch the ignition on and off,
see below, or start the engine, page 63,
when a remote control is detected in the
vehicle interior.
When you switch off the engine, the
transmission moves automatically to
position P: interlock.<
Switching ignition on and off
Continue to briefly press the start/stop but-
ton to switch the radio mode on and off or
switch the ignition on and off. Do not press the brake pedal until you
are ready to start the engine. If you
briefly press the start/stop button while the
brake pedal is pressed the engine will start
immediately.<
Radio mode
Several systems, such as the Control Cen-
ter, independent ventilation, etc., are avail-
able for use. The time and outside temper-
ature appear in the Info Display.
The radio mode is automatically
deactivated:
>After approx. 16 minutes, when a door
is closed and the system does not reg-
ister the presence of any individuals in
the vehicle
>Immediately if the remote control is
removed from the ignition lock
>With Comfort Access, by pressing the
door handle.<
Ignition switched on
All vehicle systems are ready for operation.
Ignition off
The indicator lamps in the Info Display go
out. Only the automatic transmission's
range display remains visible for a brief
period.
Removing remote control from
ignition lock
Press the remote control in briefly; it is
ejected and now protrudes slightly from the
lock. This procedure will also switch off the
ignition if it is on.
Switch off the engine before removing
the remote control from the ignition
lock.
The transmission automatically shifts to
position P: interlock.<
If the remote control is still in the ignition
lock when the driver's door is opened, a
Page 65 of 239
Controls
63Reference
At a glance
Driving tips
Communications
Navigation
Entertainment
Mobility
gong will sound and a message will appear
in the Info Display.
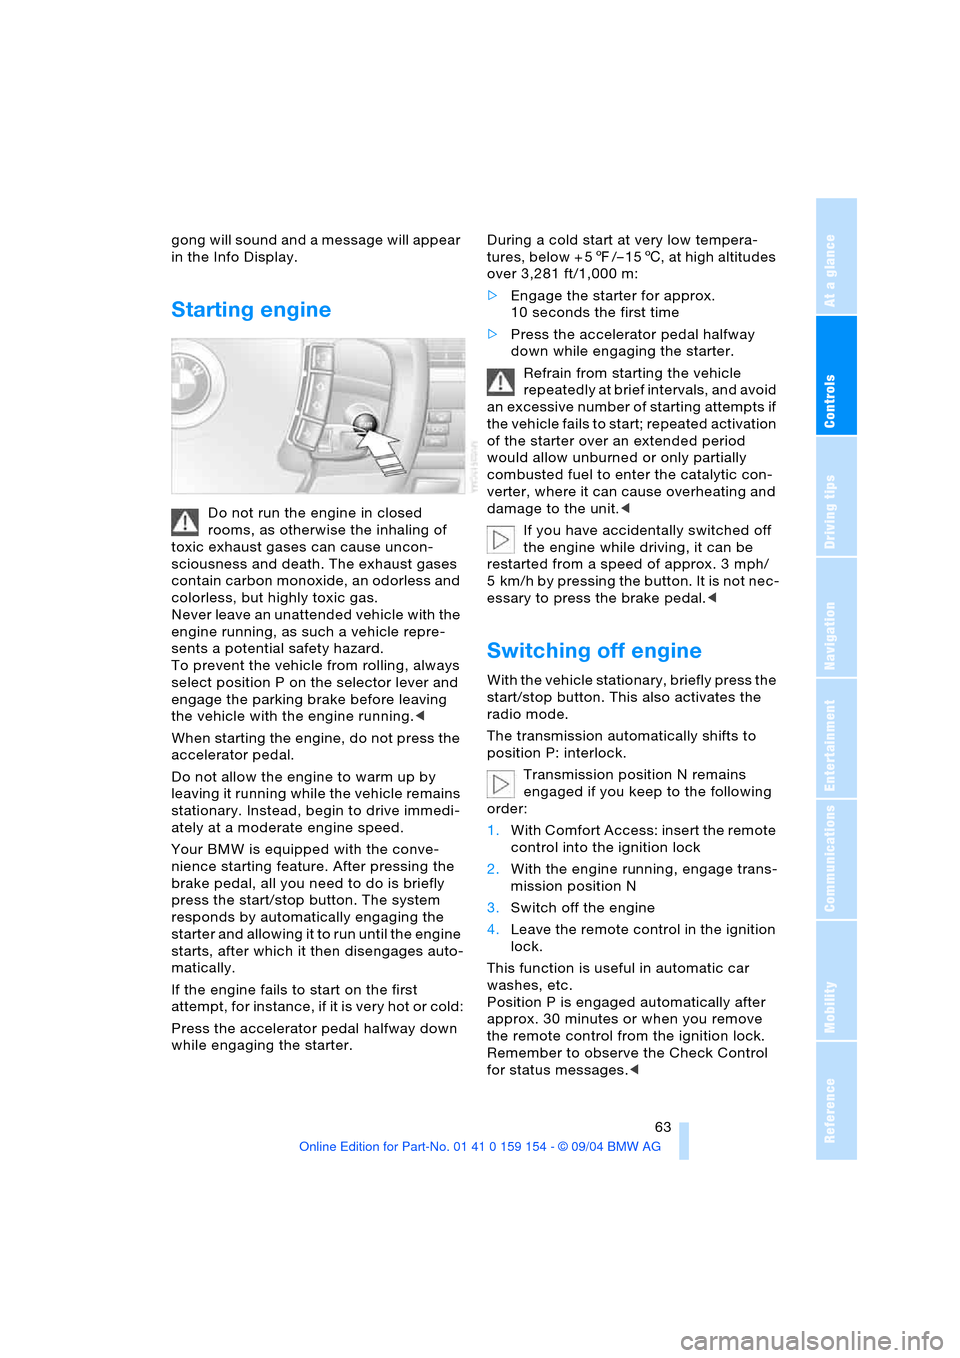
Starting engine
Do not run the engine in closed
rooms, as otherwise the inhaling of
toxic exhaust gases can cause uncon-
sciousness and death. The exhaust gases
contain carbon monoxide, an odorless and
colorless, but highly toxic gas.
Never leave an unattended vehicle with the
engine running, as such a vehicle repre-
sents a potential safety hazard.
To prevent the vehicle from rolling, always
select position P on the selector lever and
engage the parking brake before leaving
the vehicle with the engine running.<
When starting the engine, do not press the
accelerator pedal.
Do not allow the engine to warm up by
leaving it running while the vehicle remains
stationary. Instead, begin to drive immedi-
ately at a moderate engine speed.
Your BMW is equipped with the conve-
nience starting feature. After pressing the
brake pedal, all you need to do is briefly
press the start/stop button. The system
responds by automatically engaging the
starter and allowing it to run until the engine
starts, after which it then disengages auto-
matically.
If the engine fails to start on the first
attempt, for instance, if it is very hot or cold:
Press the accelerator pedal halfway down
while engaging the starter.During a cold start at very low tempera-
tures, below + 57/– 156, at high altitudes
over 3,281 ft/1,000 m:
>Engage the starter for approx.
10 seconds the first time
>Press the accelerator pedal halfway
down while engaging the starter.
Refrain from starting the vehicle
repeatedly at brief intervals, and avoid
an excessive number of starting attempts if
the vehicle fails to start; repeated activation
of the starter over an extended period
would allow unburned or only partially
combusted fuel to enter the catalytic con-
verter, where it can cause overheating and
damage to the unit.<
If you have accidentally switched off
the engine while driving, it can be
restarted from a speed of approx. 3 mph/
5 km/h by pressing the button. It is not nec-
essary to press the brake pedal.<
Switching off engine
With the vehicle stationary, briefly press the
start/stop button. This also activates the
radio mode.
The transmission automatically shifts to
position P: interlock.
Transmission position N remains
engaged if you keep to the following
order:
1.With Comfort Access: insert the remote
control into the ignition lock
2.With the engine running, engage trans-
mission position N
3.Switch off the engine
4.Leave the remote control in the ignition
lock.
This function is useful in automatic car
washes, etc.
Position P is engaged automatically after
approx. 30 minutes or when you remove
the remote control from the ignition lock.
Remember to observe the Check Control
for status messages.<
Page 66 of 239
Driving
64 Should exceptional circumstances
render it necessary for you to switch
off the engine while the vehicle is moving,
press the start/stop button for approxi-
mately 1 second.
If you maintain pressure on the start/stop
button for longer than two seconds while
switching off the ignition, the remote con-
trol will be ejected.<
Before leaving the vehicle, remove
the remote control from the ignition
lock; with Comfort Access, always take the
remote control with you.<
Parking brake
The concept
Your BMW is equipped with an electrome-
chanical parking brake.
The parking brake is primarily intended to
prevent the vehicle from rolling while
parked.
You can operate or use the parking brake in
two different ways:
>Manually, by briefly pressing the button
>Automatically, through activation of the
Automatic Hold mode, refer to page65.
An electrohydraulic mechanism then
engages the parking brake to prevent the
rear wheels from turning whenever you
switch off the engine.
When the engine is running, parking brake
engagement is controlled by the brake sys-
tem's hydraulic circuits, which act on the
disc brakes at the front and rear wheels.
Brake pedal feel
Because this function is activated using
the brake system's hydraulic circuits, the
response of the brake pedal may change
slightly. Engagement may also be accom-
panied by activation noise – this is normal.
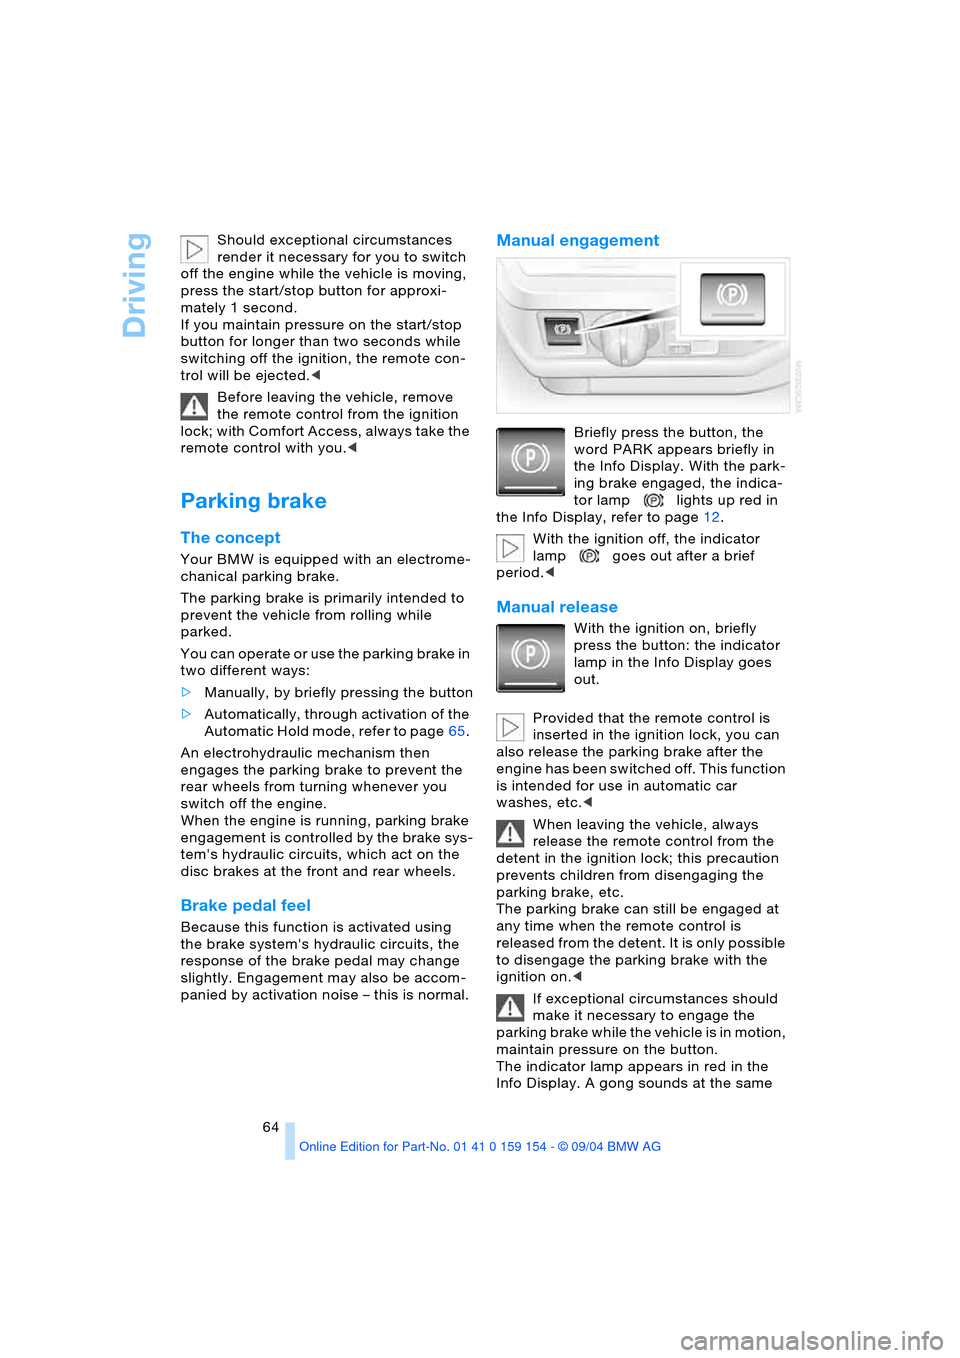
Manual engagement
Briefly press the button, the
word PARK appears briefly in
the Info Display. With the park-
ing brake engaged, the indica-
tor lamp lights up red in
the Info Display, refer to page12.
With the ignition off, the indicator
lamp goes out after a brief
period.<
Manual release
With the ignition on, briefly
press the button: the indicator
lamp in the Info Display goes
out.
Provided that the remote control is
inserted in the ignition lock, you can
also release the parking brake after the
engine has been switched off. This function
is intended for use in automatic car
washes, etc.<
When leaving the vehicle, always
release the remote control from the
detent in the ignition lock; this precaution
prevents children from disengaging the
parking brake, etc.
The parking brake can still be engaged at
any time when the remote control is
released from the detent. It is only possible
to disengage the parking brake with the
ignition on.<
If exceptional circumstances should
make it necessary to engage the
parking brake while the vehicle is in motion,
maintain pressure on the button.
The indicator lamp appears in red in the
Info Display. A gong sounds at the same
Page 67 of 239
Controls
65Reference
At a glance
Driving tips
Communications
Navigation
Entertainment
Mobility
time.
The brake lamps come on.
The vehicle continues to brake automati-
cally for as long as you maintain pressure
on the button.<
When you brake the vehicle to a vir-
tual stop, i.e., down to a speed of
approximately 2 mph/3 km/h or below, the
parking brake remains engaged.
The indicator lamp in the Info Display
lights up red. Briefly press the button to
disengage the parking brake manually.<
Automatic Hold
You can activate this feature after starting
the engine; it then remains operational until
the next time the engine is switched off.
This feature provides supplementary sup-
port during vehicle operation by automati-
cally engaging and releasing the parking
brake during stops at traffic lights, in stop-
and-go traffic, etc. As the vehicle then no
longer tends to creep when the transmis-
sion is engaged, it is no longer necessary to
hold the vehicle by pressing the brake
pedal.
It prevents the vehicle from rolling back-
ward during uphill starts.
The parking brake engages automatically
when you stop the vehicle and switch off
the engine.
You can activate or cancel the Automatic
Hold feature by selecting the "Settings"
menu in the Control Center. A description
of the Control Center is provided on
page17.
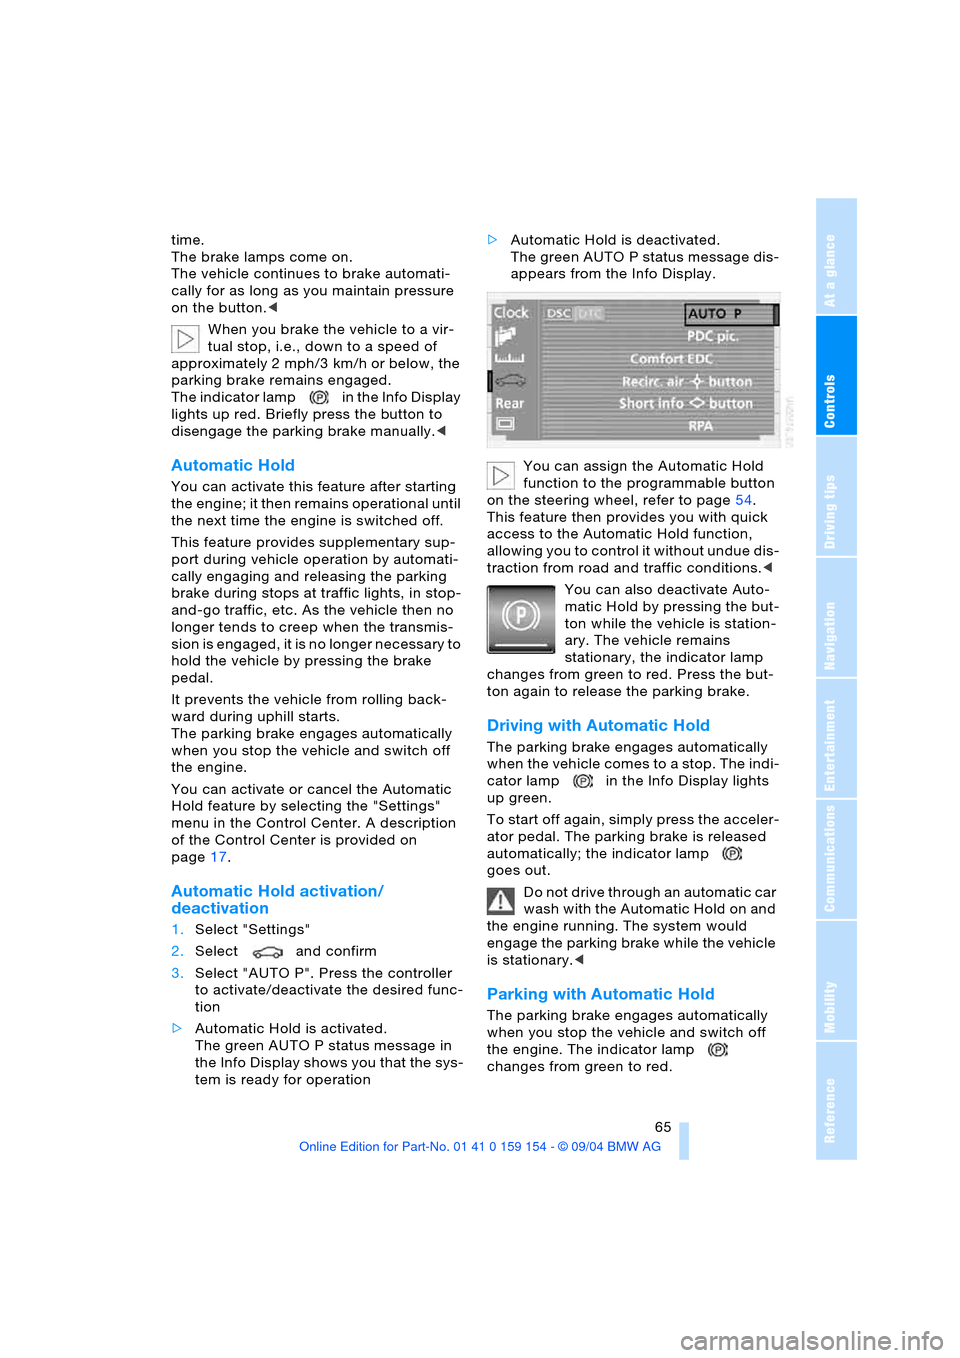
Automatic Hold activation/
deactivation
1.Select "Settings"
2.Select and confirm
3.Select "AUTO P". Press the controller
to activate/deactivate the desired func-
tion
>Automatic Hold is activated.
The green AUTO P status message in
the Info Display shows you that the sys-
tem is ready for operation >Automatic Hold is deactivated.
The green AUTO P status message dis-
appears from the Info Display.
You can assign the Automatic Hold
function to the programmable button
on the steering wheel, refer to page54.
This feature then provides you with quick
access to the Automatic Hold function,
allowing you to control it without undue dis-
traction from road and traffic conditions.<
You can also deactivate Auto-
matic Hold by pressing the but-
ton while the vehicle is station-
ary. The vehicle remains
stationary, the indicator lamp
changes from green to red. Press the but-
ton again to release the parking brake.
Driving with Automatic Hold
The parking brake engages automatically
when the vehicle comes to a stop. The indi-
cator lamp in the Info Display lights
up green.
To start off again, simply press the acceler-
ator pedal. The parking brake is released
automatically; the indicator lamp
goes out.
Do not drive through an automatic car
wash with the Automatic Hold on and
the engine running. The system would
engage the parking brake while the vehicle
is stationary.<
Parking with Automatic Hold
The parking brake engages automatically
when you stop the vehicle and switch off
the engine. The indicator lamp
changes from green to red.
Page 68 of 239
Driving
66 Provided that the remote control is
inserted in the ignition lock, you can
also release the parking brake manually
after the engine has been switched off,
refer to page64. This function is useful in
automatic car washes, etc.
Automatic Hold is deactivated.<
When leaving the vehicle, always
release the remote control from the
detent in the ignition lock; this precaution
prevents children from disengaging the
parking brake, etc.<
For your safety
Automatic Hold is automatically deacti-
vated when
>the engine is switched off
>the system detects that the driver's seat
is not occupied while the engine is run-
ning
>the hood is opened while the engine is
running
>the luggage compartment is opened
with the transmission in position R while
the engine is running, and
>when the parking brake is used to bring
the vehicle to a stop.
The indicator lamp changes from
green to red, and the AUTO P letters in the
Info Display disappear.
Before starting off again, briefly press the
button to disengage the parking brake
manually, refer to page64, or reactivate
Automatic Hold, refer to page65.
Before leaving the vehicle with the
engine running, always move the
automatic transmission's selector lever to
position P and ensure that the parking
brake is engaged. The vehicle could start to
roll if you fail to observe these precautions.
Never leave an unattended vehicle with the
engine running, as such a vehicle repre-
sents a potential safety hazard.<
Automatic Hold is automatically deac-
tivated whenever the system detects
any tendency for the wheels to spin in
response to slippery road surfaces. Note the status reports in the Check Control.
You can find additional information on the
Check Control on page83.<
Malfunction
If a malfunction occurs, the indicator
lamp lights up yellow in the Info Dis-
play and a status report will appear in the
Check Control. Please note any supple-
mentary information that appears on the
Control Display.
Releasing parking brake manually
You can respond to any interruptions in the
supply of electrical power, for instance, if
the battery is discharged or disconnected,
by releasing the parking brake manually.
Before proceeding to release the
parking brake manually, and each
time you park the vehicle without engaging
the parking brake, always ensure that the
automatic transmission's selector lever is in
position P, refer to page68. Note the range
indicated in the Info Display.
If the wheel must be changed on a surface
with a more severe slope, take additional
precautions to secure the vehicle from roll-
ing e.g. with a chock, refer to page204
Otherwise there is a danger that the vehicle
could start to roll if parked on a steep
slope.<
Should it also be necessary to release the
automatic transmission's lockout manually,
for instance, if the battery is discharged,
always adhere to the following sequence:
1.If necessary, start by manually releasing
the parking brake
2.Then release the automatic transmis-
sion's lockout manually, refer to
page70.
Jump-starting and towing, refer to
pages209 and210.
Page 69 of 239
Controls
67Reference
At a glance
Driving tips
Communications
Navigation
Entertainment
Mobility
What you will need
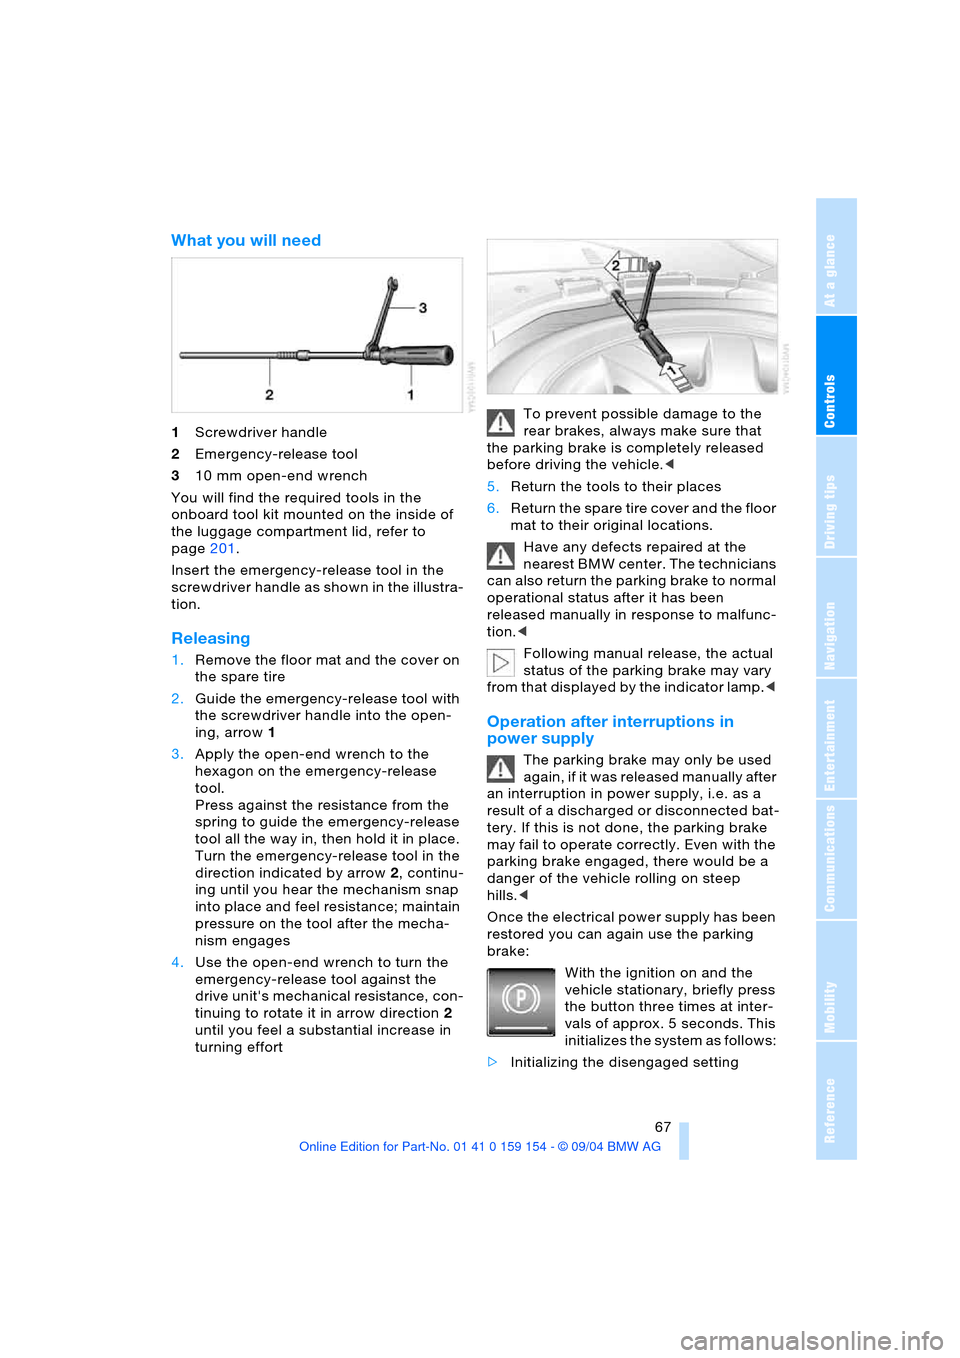
1Screwdriver handle
2Emergency-release tool
310 mm open-end wrench
You will find the required tools in the
onboard tool kit mounted on the inside of
the luggage compartment lid, refer to
page201.
Insert the emergency-release tool in the
screwdriver handle as shown in the illustra-
tion.
Releasing
1.Remove the floor mat and the cover on
the spare tire
2.Guide the emergency-release tool with
the screwdriver handle into the open-
ing, arrow1
3.Apply the open-end wrench to the
hexagon on the emergency-release
tool.
Press against the resistance from the
spring to guide the emergency-release
tool all the way in, then hold it in place.
Turn the emergency-release tool in the
direction indicated by arrow2, continu-
ing until you hear the mechanism snap
into place and feel resistance; maintain
pressure on the tool after the mecha-
nism engages
4.Use the open-end wrench to turn the
emergency-release tool against the
drive unit's mechanical resistance, con-
tinuing to rotate it in arrow direction2
until you feel a substantial increase in
turning effortTo prevent possible damage to the
rear brakes, always make sure that
the parking brake is completely released
before driving the vehicle.<
5.Return the tools to their places
6.Return the spare tire cover and the floor
mat to their original locations.
Have any defects repaired at the
nearest BMW center. The technicians
can also return the parking brake to normal
operational status after it has been
released manually in response to malfunc-
tion.<
Following manual release, the actual
status of the parking brake may vary
from that displayed by the indicator lamp.<
Operation after interruptions in
power supply
The parking brake may only be used
again, if it was released manually after
an interruption in power supply, i.e. as a
r esu lt o f a dis ch ar ged or d isc on ne cte d bat -
tery. If this is not done, the parking brake
may fail to operate correctly. Even with the
parking brake engaged, there would be a
danger of the vehicle rolling on steep
hills.<
Once the electrical power supply has been
restored you can again use the parking
brake:
With the ignition on and the
vehicle stationary, briefly press
the button three times at inter-
vals of approx. 5 seconds. This
initializes the system as follows:
>Initializing the disengaged setting
Page 70 of 239
Driving
68 >Engaging: the system registers the new
status and the brake setting is initial-
ized. The indicator lamp in the
Info Display lights up red.
>Releasing: the parking brake is ready
for operation. The indicator lamp
in the Info Display goes out.
Automatic transmission
with Steptronic
In addition to fully automatic operation, you
can also manually shift with the button on
the steering wheel, refer to page70.
Transmission range selection
P R N D
The selector lever position is indicated, and
in the manual mode the gear currently
engaged.
Program display
S or M1 – M6
Buttons on steering wheel
Press briefly to proceed through a selection
sequence consisting of the automatic pro-
gram, the Sport program, and the manual
mode.Steptronic:
Upshifting and downshifting, refer to Sport
program and manual operation.
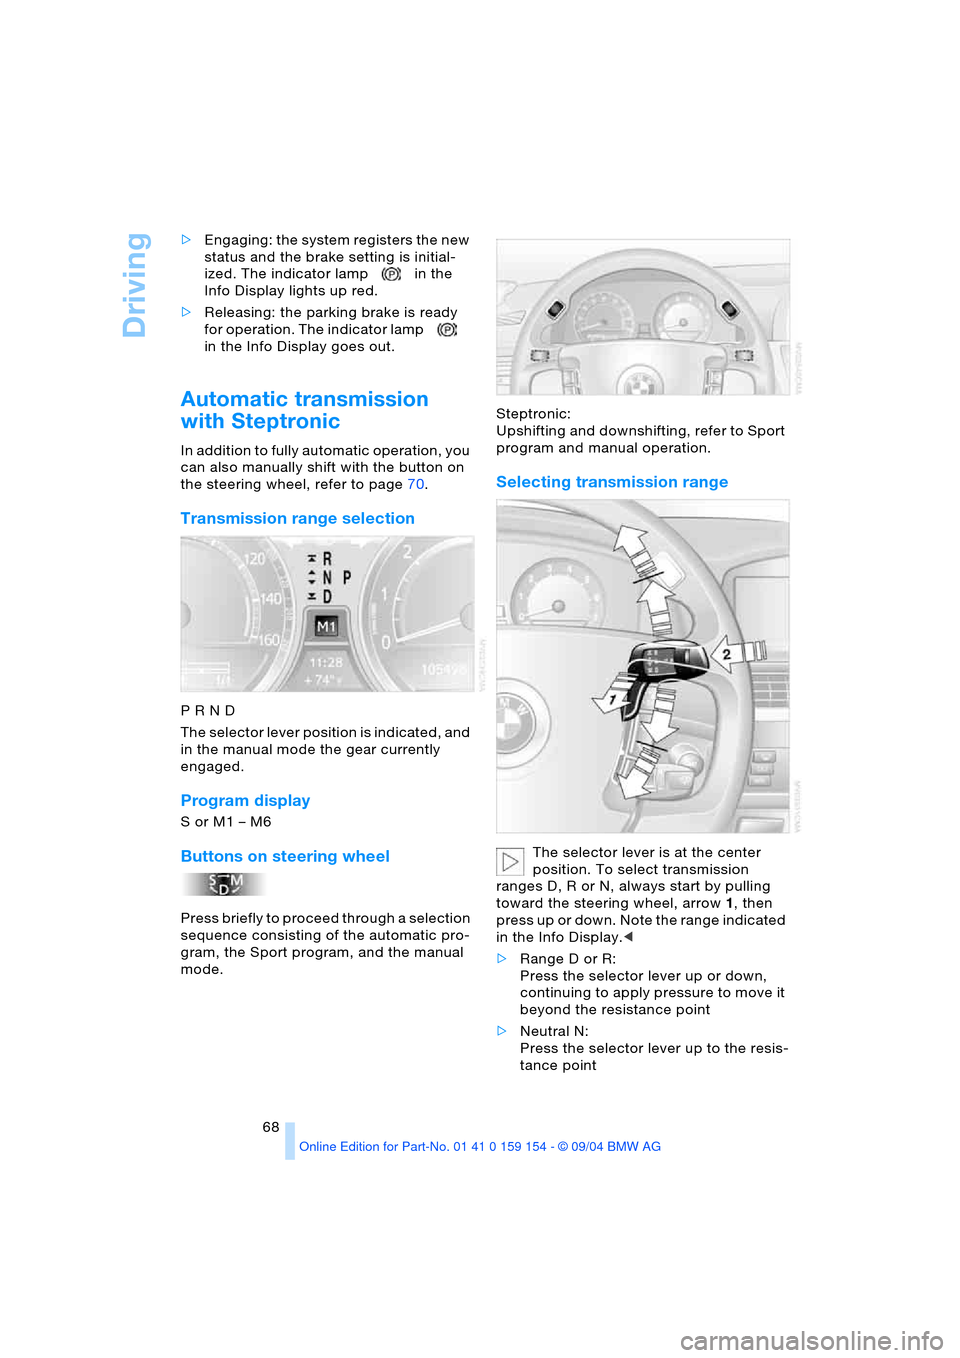
Selecting transmission range
The selector lever is at the center
position. To select transmission
ranges D, R or N, always start by pulling
toward the steering wheel, arrow1, then
press up or down. Note the range indicated
in the Info Display.<
>Range D or R:
Press the selector lever up or down,
continuing to apply pressure to move it
beyond the resistance point
>Neutral N:
Press the selector lever up to the resis-
tance point