change time BMW 760LI 2006 User Guide
[x] Cancel search | Manufacturer: BMW, Model Year: 2006, Model line: 760LI, Model: BMW 760LI 2006Pages: 247, PDF Size: 8.66 MB
Page 91 of 247
Controls
89Reference
At a glance
Driving tips
Communications
Navigation
Entertainment
Mobility
Deactivating DTC
Select "DTC" again and press the controller.
The LED on the Control Display and the DTC
indicator lamp on the Info Display go out.
Dynamic Drive
The concept
Dynamic Drive minimizes body roll and opti-
mizes vehicle stability during cornering and
evasive maneuvers.
Active stabilizers at the front and rear axles form
the basis for Dynamic Drive. Suspension com-
pliance adapts to suit driving conditions, vary-
ing from performance-oriented during corner-
ing to smooth and comfort-oriented when the
vehicle is traveling in a straight line. During vehi-
cle operation, the system continuously runs
through closed-loop control cycles lasting only
fractions of a second.
The system assumes operational status each
time you start the engine.
Malfunction
The warning lamp lights up yellow and
a message is shown on the Info Display.
A malfunction has occurred in the
Dynamic Drive system. Have the system
checked as soon as possible.
If a malfunction occurs, please remember
to adapt your speed accordingly, espe-
cially in curves.
The suspension will be noticeably softer and
the vehicle will display a greater tendency to tilt
during cornering and in crosswinds.
If a Check Control message stating that you
should stop is displayed, stop at a suitable loca-
tion and switch off the engine as soon as possi-
ble. In this case, the oil level in the reservoir may
have dropped below the minimum, possibly
owing to a leak in the hydraulic system.
Do not continue driving, but instead contact
your BMW center.<
Self-leveling suspension*
Malfunction
The warning lamp for self-leveling sus-
pension lights up yellow and a message
is shown on the Info Display.
A malfunction has occurred in the level control
system.
Stop driving and check the vehicle:
>The vehicle is considerably lower at the rear
than at the front, possibly also on one side,
at the rear left compared to the rear right.
>The ground clearance is reduced or the
driving comfort is noticeably reduced.
>The position of the vehicle is normal, but a
malfunction is indicated.
Drive to the nearest BMW center or a workshop
that works in accordance with BMW guidelines
and uses appropriately trained personnel. Drive
with appropriate caution in the meantime.
EDC Electronic Damping
Control*
If the influencing variables such as road surface
quality or operating conditions such as steer-
ing, braking etc. change, the damping automat-
ically adjusts to the new conditions.
iDrive, for principle details, refer to page16.
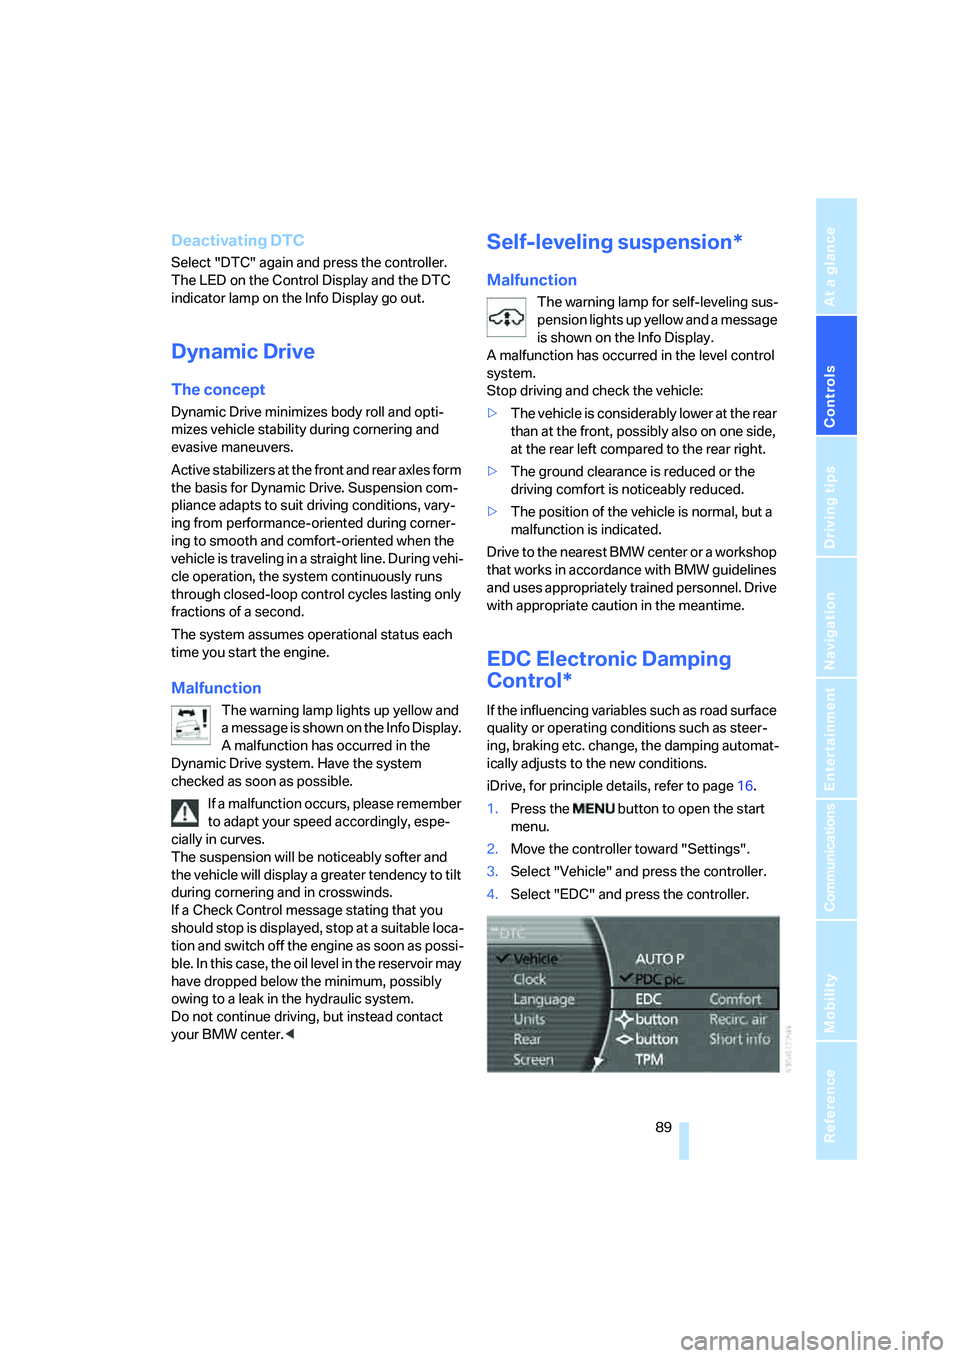
1.Press the button to open the start
menu.
2.Move the controller toward "Settings".
3.Select "Vehicle" and press the controller.
4.Select "EDC" and press the controller.
Page 92 of 247
Technology for comfort, convenience and safety
90 There are two programs.
With each press of the controller, you can
switch back and forth between "Comfort" and
"Sport".
Comfort program
The Comfort program is suitable for use
throughout the vehicle's entire speed range and
regardless of load.
Sport program
You should select the Sport program for consis-
tently performance-oriented response from
shock absorbers and steering.
FTM Flat Tire Monitor*
The concept
The Flat Tire Monitor keeps track of the infla-
tion pressures in the four mounted tires as you
drive. The system triggers an alert whenever
the inflation pressure drops significantly in rela-
tion to the pressure in another tire.
When a loss of pressure occurs, the rolling
radius changes and with it, the rotational speed
of the wheels. This change is detected and sig-
naled as a flat tire.
Functional requirements
To ensure the reliable signaling of a flat tire, the
system must be initialized at the correct tire
inflation pressure.
The initialization must be repeated after
every correction of the tire inflation pres-
sure and after every tire or wheel change.<
System limits
The Flat Tire Monitor cannot indicate
sudden severe tire damage caused by
outside factors and does not detect a natural,
even pressure drop in all four tires.<
In the following situations, the system could be
delayed or malfunction:
>When the system has not been initialized.>When driving on snow-covered or slippery
road surfaces.
>Sporty driving style: slip in the drive wheels,
high lateral acceleration.
>When driving with snow chains
*.
Initializing system
The initialization is completed during driv-
ing, which can be interrupted at any time.
The initialization automatically continues when
driving resumes. Do not initialize the system
when driving with snow chains
*.<
iDrive, for principle details, refer to page16.
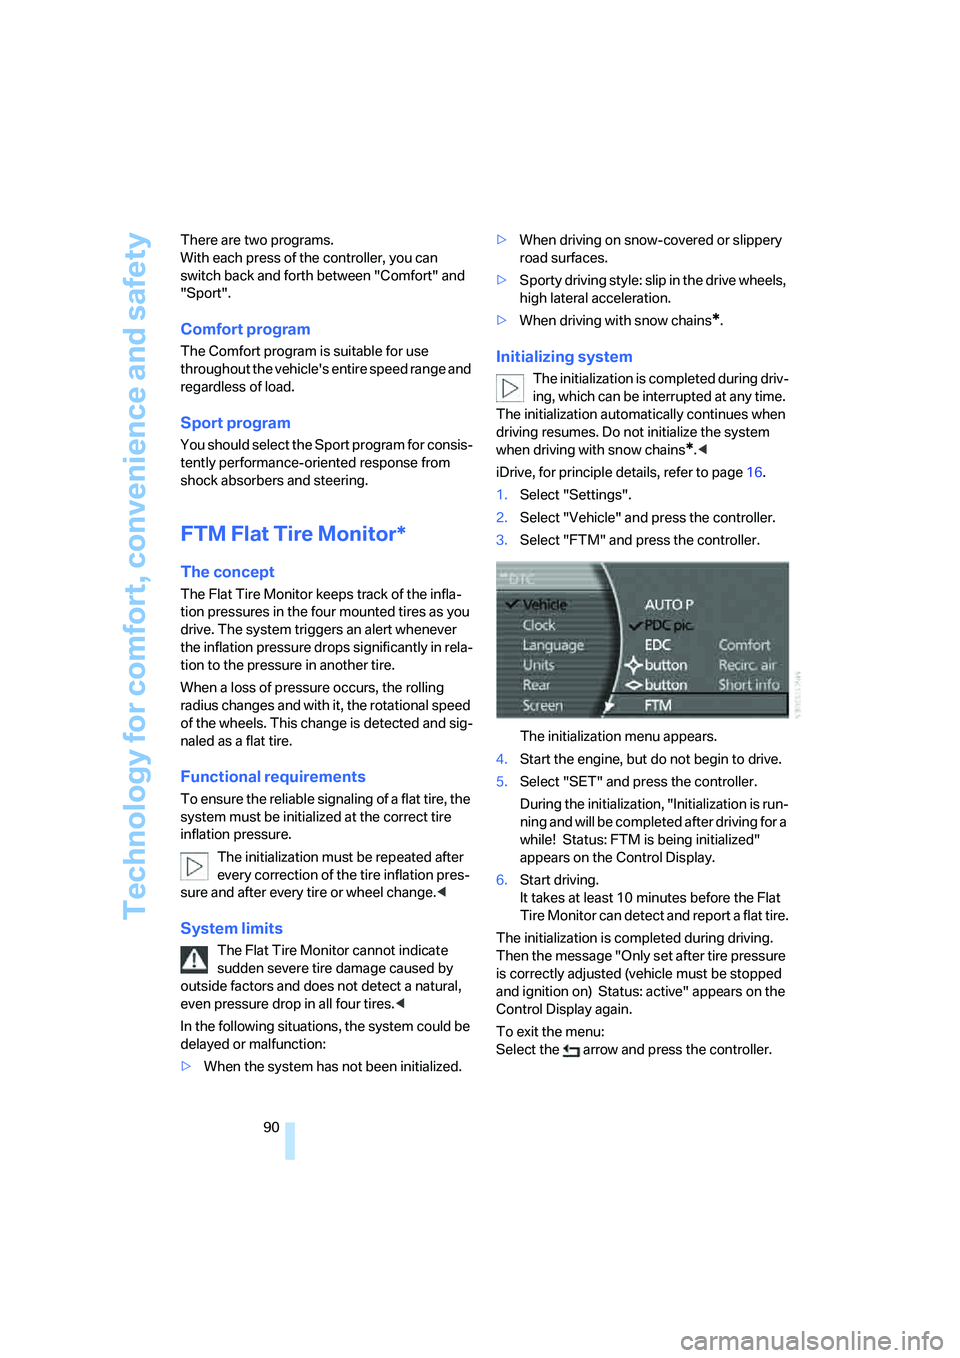
1.Select "Settings".
2.Select "Vehicle" and press the controller.
3.Select "FTM" and press the controller.
The initialization menu appears.
4.Start the engine, but do not begin to drive.
5.Select "SET" and press the controller.
During the initialization, "Initialization is run-
ning and will be completed after driving for a
while! Status: FTM is being initialized"
appears on the Control Display.
6.Start driving.
It takes at least 10 minutes before the Flat
Tire Monitor can detect and report a flat tire.
The initialization is completed during driving.
Then the message "Only set after tire pressure
is correctly adjusted (vehicle must be stopped
and ignition on) Status: active" appears on the
Control Display again.
To exit the menu:
Select the arrow and press the controller.
Page 94 of 247
Technology for comfort, convenience and safety
92 The system is inactive and cannot display a flat
tire if a wheel has been mounted without TPM
electronics or if TPM experiences temporary
interference from other systems or devices that
use the same radio frequency.
Status display on Control Display
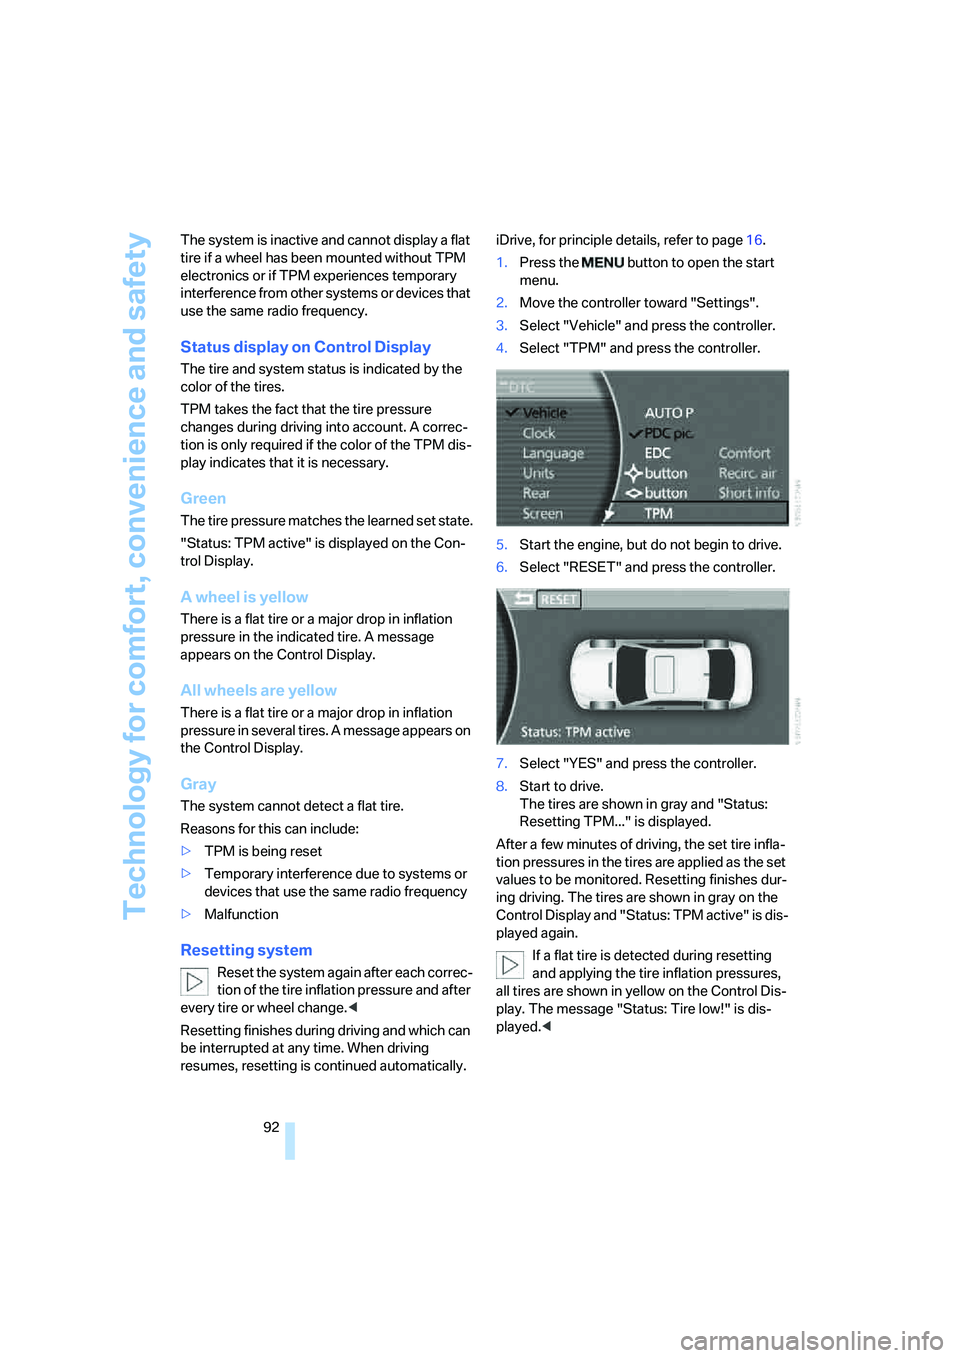
The tire and system status is indicated by the
color of the tires.
TPM takes the fact that the tire pressure
changes during driving into account. A correc-
tion is only required if the color of the TPM dis-
play indicates that it is necessary.
Green
The tire pressure matches the learned set state.
"Status: TPM active" is displayed on the Con-
trol Display.
A wheel is yellow
There is a flat tire or a major drop in inflation
pressure in the indicated tire. A message
appears on the Control Display.
All wheels are yellow
There is a flat tire or a major drop in inflation
pressure in several tires. A message appears on
the Control Display.
Gray
The system cannot detect a flat tire.
Reasons for this can include:
>TPM is being reset
>Temporary interference due to systems or
devices that use the same radio frequency
>Malfunction
Resetting system
Reset the system again after each correc-
tion of the tire inflation pressure and after
every tire or wheel change.<
Resetting finishes during driving and which can
be interrupted at any time. When driving
resumes, resetting is continued automatically.iDrive, for principle details, refer to page16.
1.Press the button to open the start
menu.
2.Move the controller toward "Settings".
3.Select "Vehicle" and press the controller.
4.Select "TPM" and press the controller.
5.Start the engine, but do not begin to drive.
6.Select "RESET" and press the controller.
7.Select "YES" and press the controller.
8.Start to drive.
The tires are shown in gray and "Status:
Resetting TPM..." is displayed.
After a few minutes of driving, the set tire infla-
tion pressures in the tires are applied as the set
values to be monitored. Resetting finishes dur-
ing driving. The tires are shown in gray on the
Control Display and "Status: TPM active" is dis-
played again.
If a flat tire is detected during resetting
and applying the tire inflation pressures,
all tires are shown in yellow on the Control Dis-
play. The message "Status: Tire low!" is dis-
played.<
Page 101 of 247
Controls
99Reference
At a glance
Driving tips
Communications
Navigation
Entertainment
Mobility
Lamps
Parking lamps/low beams
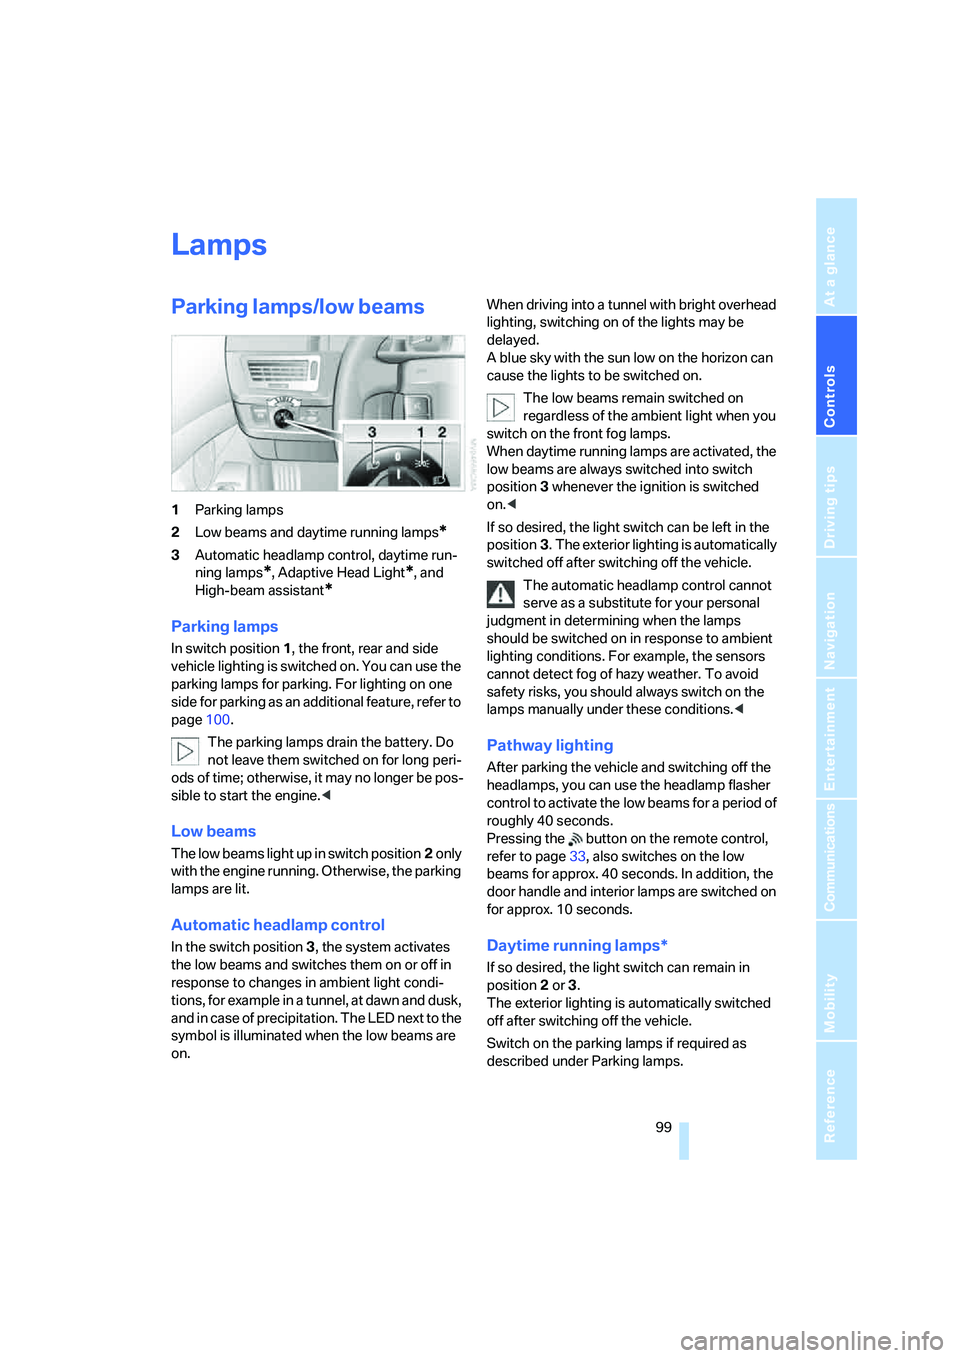
1Parking lamps
2Low beams and daytime running lamps
*
3Automatic headlamp control, daytime run-
ning lamps
*, Adaptive Head Light*, and
High-beam assistant
*
Parking lamps
In switch position1, the front, rear and side
vehicle lighting is switched on. You can use the
parking lamps for parking. For lighting on one
side for parking as an additional feature, refer to
page100.
The parking lamps drain the battery. Do
not leave them switched on for long peri-
ods of time; otherwise, it may no longer be pos-
sible to start the engine.<
Low beams
The low beams light up in switch position2 only
with the engine running. Otherwise, the parking
lamps are lit.
Automatic headlamp control
In the switch position3, the system activates
the low beams and switches them on or off in
response to changes in ambient light condi-
tions, for example in a tunnel, at dawn and dusk,
and in case of precipitation. The LED next to the
symbol is illuminated when the low beams are
on.When driving into a tunnel with bright overhead
lighting, switching on of the lights may be
delayed.
A blue sky with the sun low on the horizon can
cause the lights to be switched on.
The low beams remain switched on
regardless of the ambient light when you
switch on the front fog lamps.
When daytime running lamps are activated, the
low beams are always switched into switch
position3 whenever the ignition is switched
on.<
If so desired, the light switch can be left in the
position3. The exterior lighting is automatically
switched off after switching off the vehicle.
The automatic headlamp control cannot
serve as a substitute for your personal
judgment in determining when the lamps
should be switched on in response to ambient
lighting conditions. For example, the sensors
cannot detect fog of hazy weather. To avoid
safety risks, you should always switch on the
lamps manually under these conditions.<
Pathway lighting
After parking the vehicle and switching off the
headlamps, you can use the headlamp flasher
control to activate the low beams for a period of
roughly 40 seconds.
Pressing the button on the remote control,
refer to page33, also switches on the low
beams for approx. 40 seconds. In addition, the
door handle and interior lamps are switched on
for approx. 10 seconds.
Daytime running lamps*
If so desired, the light switch can remain in
position2 or 3.
The exterior lighting is automatically switched
off after switching off the vehicle.
Switch on the parking lamps if required as
described under Parking lamps.
Page 111 of 247
Controls
109Reference
At a glance
Driving tips
Communications
Navigation
Entertainment
Mobility
Ventilation in rear
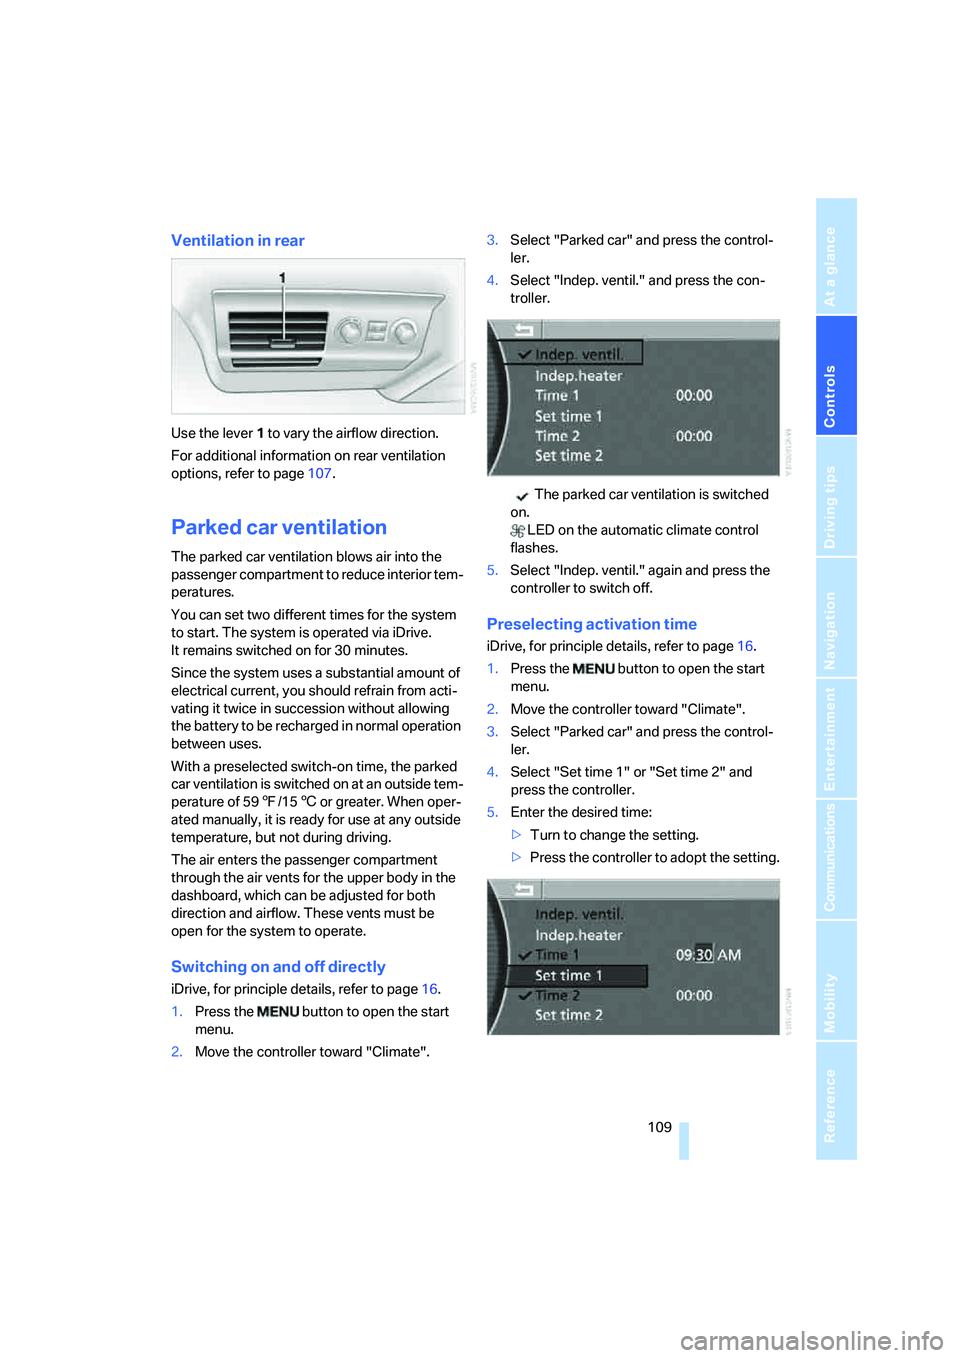
Use the lever1 to vary the airflow direction.
For additional information on rear ventilation
options, refer to page107.
Parked car ventilation
The parked car ventilation blows air into the
passenger compartment to reduce interior tem-
peratures.
You can set two different times for the system
to start. The system is operated via iDrive.
It remains switched on for 30 minutes.
Since the system uses a substantial amount of
electrical current, you should refrain from acti-
vating it twice in succession without allowing
the battery to be recharged in normal operation
between uses.
With a preselected switch-on time, the parked
car ventilation is switched on at an outside tem-
perature of 597/156 or greater. When oper-
ated manually, it is ready for use at any outside
temperature, but not during driving.
The air enters the passenger compartment
through the air vents for the upper body in the
dashboard, which can be adjusted for both
direction and airflow. These vents must be
open for the system to operate.
Switching on and off directly
iDrive, for principle details, refer to page16.
1.Press the button to open the start
menu.
2.Move the controller toward "Climate".3.Select "Parked car" and press the control-
ler.
4.Select "Indep. ventil." and press the con-
troller.
The parked car ventilation is switched
on.
LED on the automatic climate control
flashes.
5.Select "Indep. ventil." again and press the
controller to switch off.
Preselecting activation time
iDrive, for principle details, refer to page16.
1.Press the button to open the start
menu.
2.Move the controller toward "Climate".
3.Select "Parked car" and press the control-
ler.
4.Select "Set time 1" or "Set time 2" and
press the controller.
5.Enter the desired time:
>Turn to change the setting.
>Press the controller to adopt the setting.
Page 135 of 247
Navigation
Driving tips
133Reference
At a glance
Controls
Communications
Entertainment
Mobility
>To cancel selection:
Select the arrow and press the con-
troller.
4.Turn the controller to select place names in
the list and press the controller.
Entering destination with zip code*
You can enter the zip code if the navigation CD/
DVD supports this function.
1.Select "Town / ZIP" and press the control-
ler.
2.Enter the zip code:
Select numbers individually and press the
controller each time.
>To enter a blank space:
Select the symbol and press the
controller.
>To delete last digit or letter:
Select the symbol and press the con-
troller.
>To cancel selection:
Select the arrow and press the con-
troller.
3.Select the zip code and press the controller.
The corresponding destination is displayed.
4.Turn the controller to select place names in
the list and press the controller.
Entering street, house number, and
intersection
Entering street
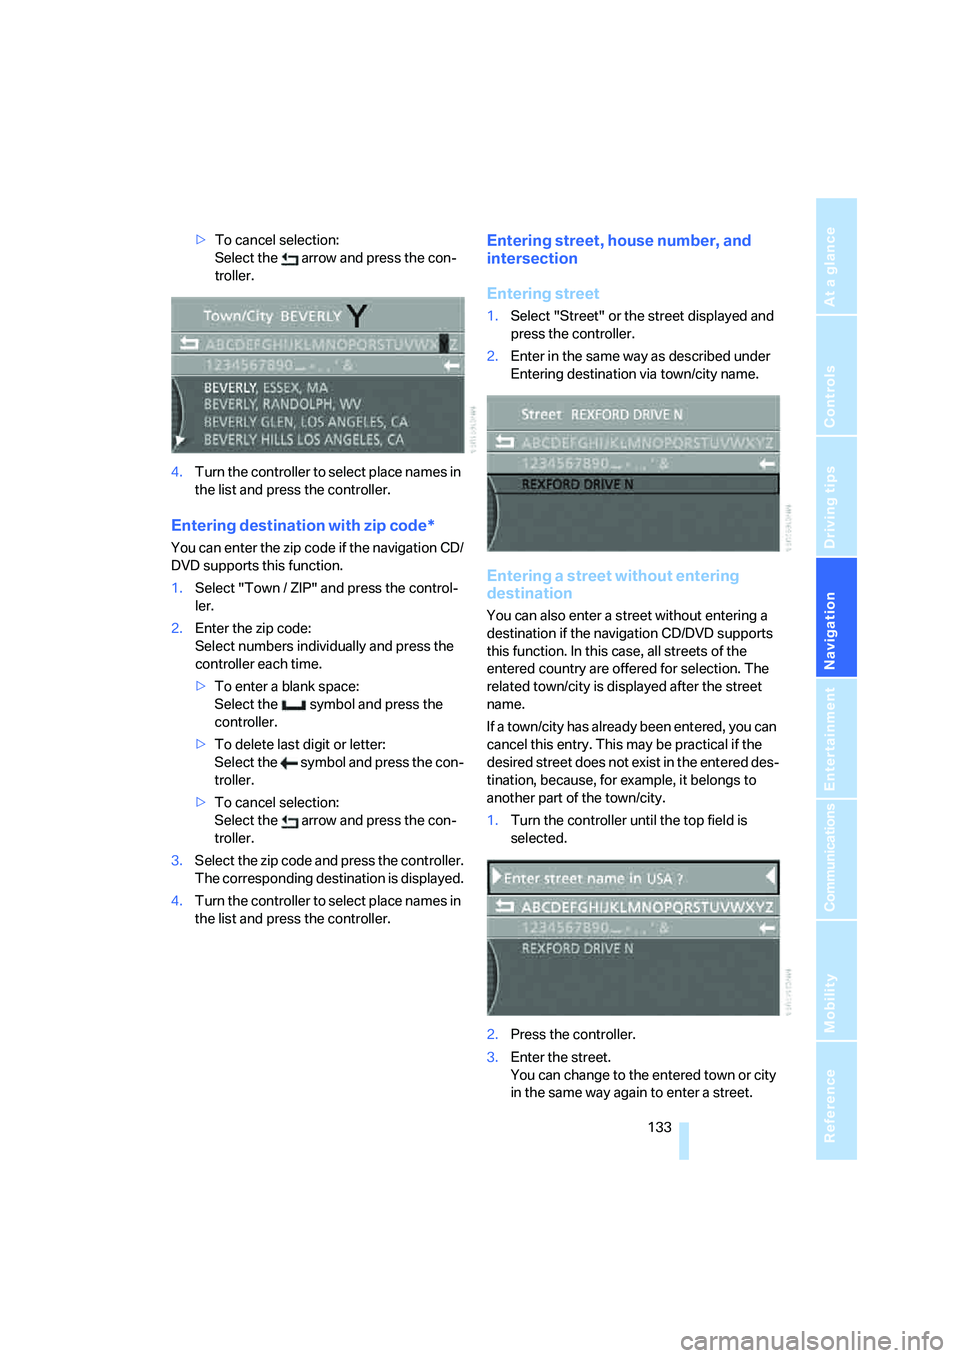
1.Select "Street" or the street displayed and
press the controller.
2.Enter in the same way as described under
Entering destination via town/city name.
Entering a street without entering
destination
You can also enter a street without entering a
destination if the navigation CD/DVD supports
this function. In this case, all streets of the
entered country are offered for selection. The
related town/city is displayed after the street
name.
If a town/city has already been entered, you can
cancel this entry. This may be practical if the
desired street does not exist in the entered des-
tination, because, for example, it belongs to
another part of the town/city.
1.Turn the controller until the top field is
selected.
2.Press the controller.
3.Enter the street.
You can change to the entered town or city
in the same way again to enter a street.
Page 144 of 247
Destination input
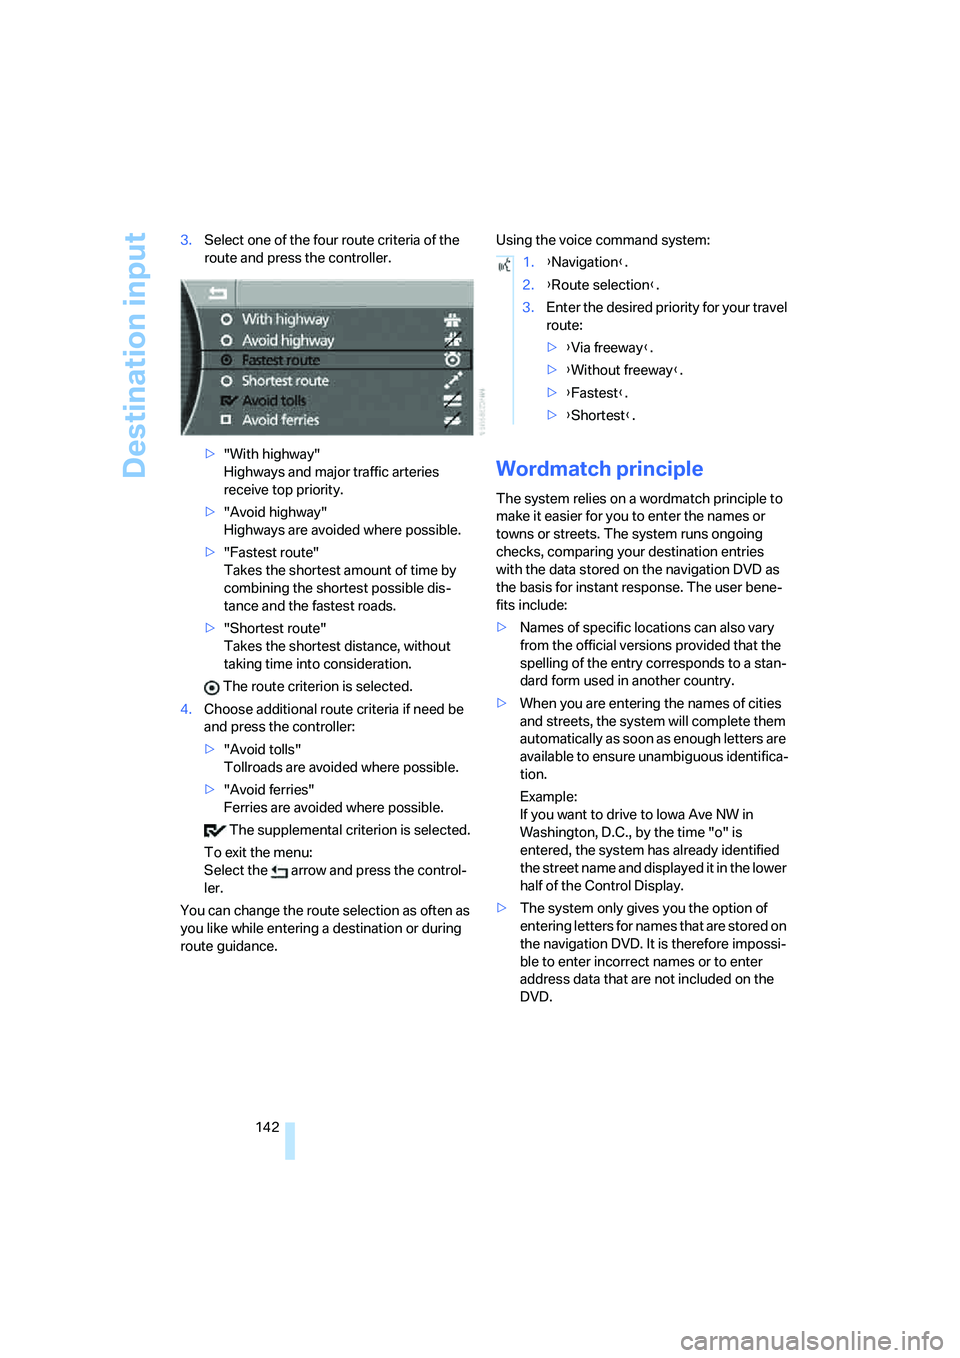
142 3.Select one of the four route criteria of the
route and press the controller.
>"With highway"
Highways and major traffic arteries
receive top priority.
>"Avoid highway"
Highways are avoided where possible.
>"Fastest route"
Takes the shortest amount of time by
combining the shortest possible dis-
tance and the fastest roads.
>"Shortest route"
Takes the shortest distance, without
taking time into consideration.
The route criterion is selected.
4.Choose additional route criteria if need be
and press the controller:
>"Avoid tolls"
Tollroads are avoided where possible.
>"Avoid ferries"
Ferries are avoided where possible.
The supplemental criterion is selected.
To exit the menu:
Select the arrow and press the control-
ler.
You can change the route selection as often as
you like while entering a destination or during
route guidance.Using the voice command system:
Wordmatch principle
The system relies on a wordmatch principle to
make it easier for you to enter the names or
towns or streets. The system runs ongoing
checks, comparing your destination entries
with the data stored on the navigation DVD as
the basis for instant response. The user bene-
fits include:
>Names of specific locations can also vary
from the official versions provided that the
spelling of the entry corresponds to a stan-
dard form used in another country.
>When you are entering the names of cities
and streets, the system will complete them
automatically as soon as enough letters are
available to ensure unambiguous identifica-
tion.
Example:
If you want to drive to Iowa Ave NW in
Washington, D.C., by the time "o" is
entered, the system has already identified
the street name and displayed it in the lower
half of the Control Display.
>The system only gives you the option of
entering letters for names that are stored on
the navigation DVD. It is therefore impossi-
ble to enter incorrect names or to enter
address data that are not included on the
DVD.
1.{Navigation}.
2.{Route selection}.
3.Enter the desired priority for your travel
route:
>{Via freeway}.
>{Without freeway}.
>{Fastest}.
>{Shortest}.
Page 145 of 247
Navigation
Driving tips
143Reference
At a glance
Controls
Communications
Entertainment
Mobility
Route guidance
Starting route guidance
The route guidance is started for the first desti-
nation in the destination list, refer to page137.
There must be at least one destination in the
destination list.
iDrive, for principle details, refer to page16.
1.Press the button to open the start
menu.
2.Move the controller toward "Navigation".
3.Press the controller as needed.
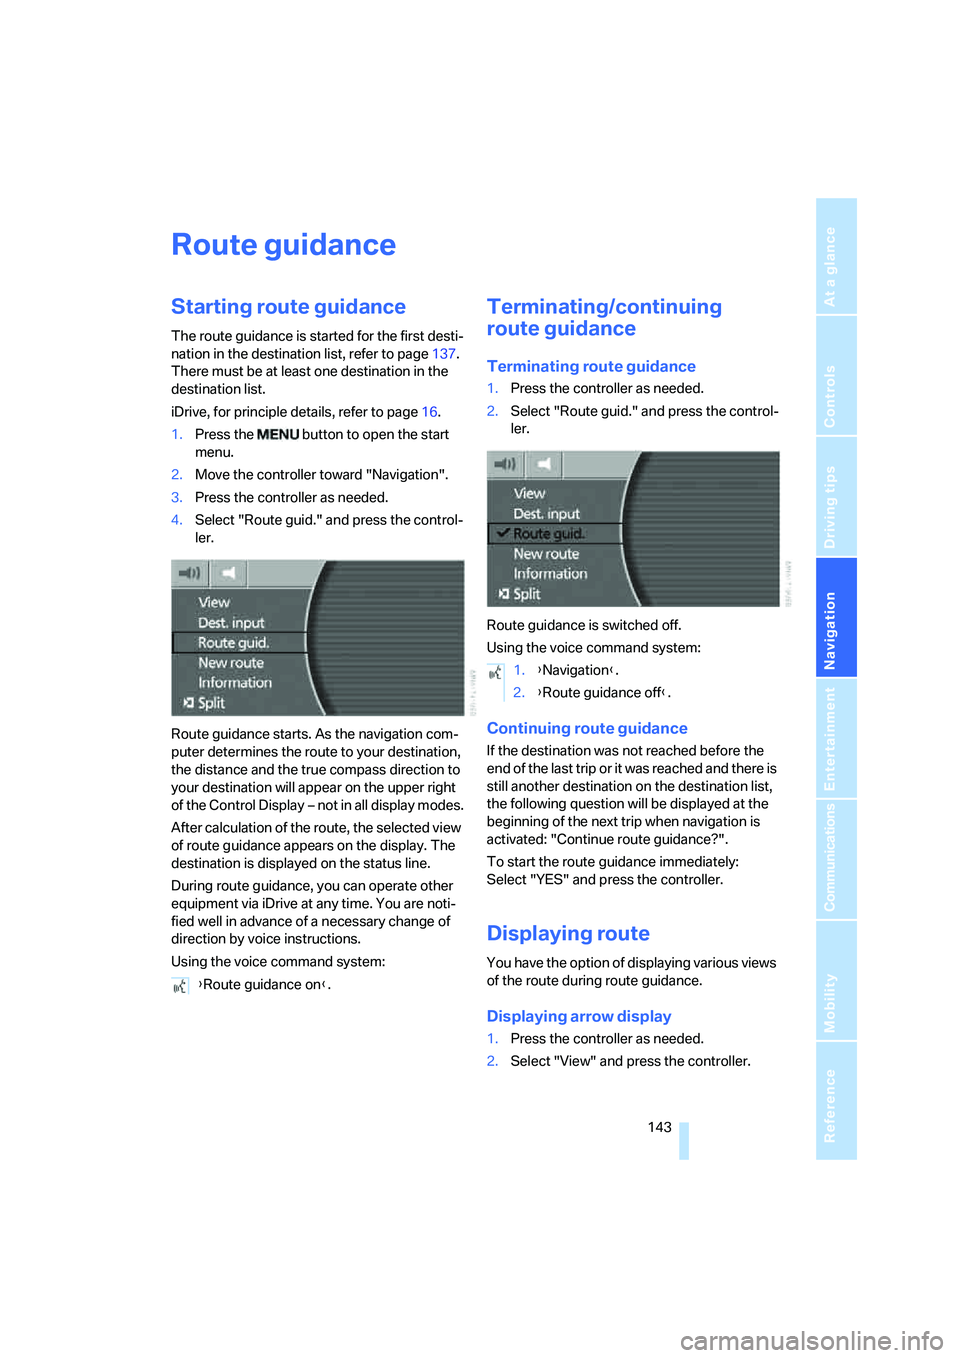
4.Select "Route guid." and press the control-
ler.
Route guidance starts. As the navigation com-
puter determines the route to your destination,
the distance and the true compass direction to
your destination will appear on the upper right
of the Control Display – not in all display modes.
After calculation of the route, the selected view
of route guidance appears on the display. The
destination is displayed on the status line.
During route guidance, you can operate other
equipment via iDrive at any time. You are noti-
fied well in advance of a necessary change of
direction by voice instructions.
Using the voice command system:
Terminating/continuing
route guidance
Terminating route guidance
1.Press the controller as needed.
2.Select "Route guid." and press the control-
ler.
Route guidance is switched off.
Using the voice command system:
Continuing route guidance
If the destination was not reached before the
end of the last trip or it was reached and there is
still another destination on the destination list,
the following question will be displayed at the
beginning of the next trip when navigation is
activated: "Continue route guidance?".
To start the route guidance immediately:
Select "YES" and press the controller.
Displaying route
You have the option of displaying various views
of the route during route guidance.
Displaying arrow display
1.Press the controller as needed.
2.Select "View" and press the controller. {Route guidance on}.
1.{Navigation}.
2.{Route guidance off}.
Page 171 of 247
Navigation
Entertainment
Driving tips
169Reference
At a glance
Controls
Communications
Mobility
3.Press the button to open the start
menu.
4.Move the controller toward "Entertain-
ment".
5.Select "DVD" and press the controller.
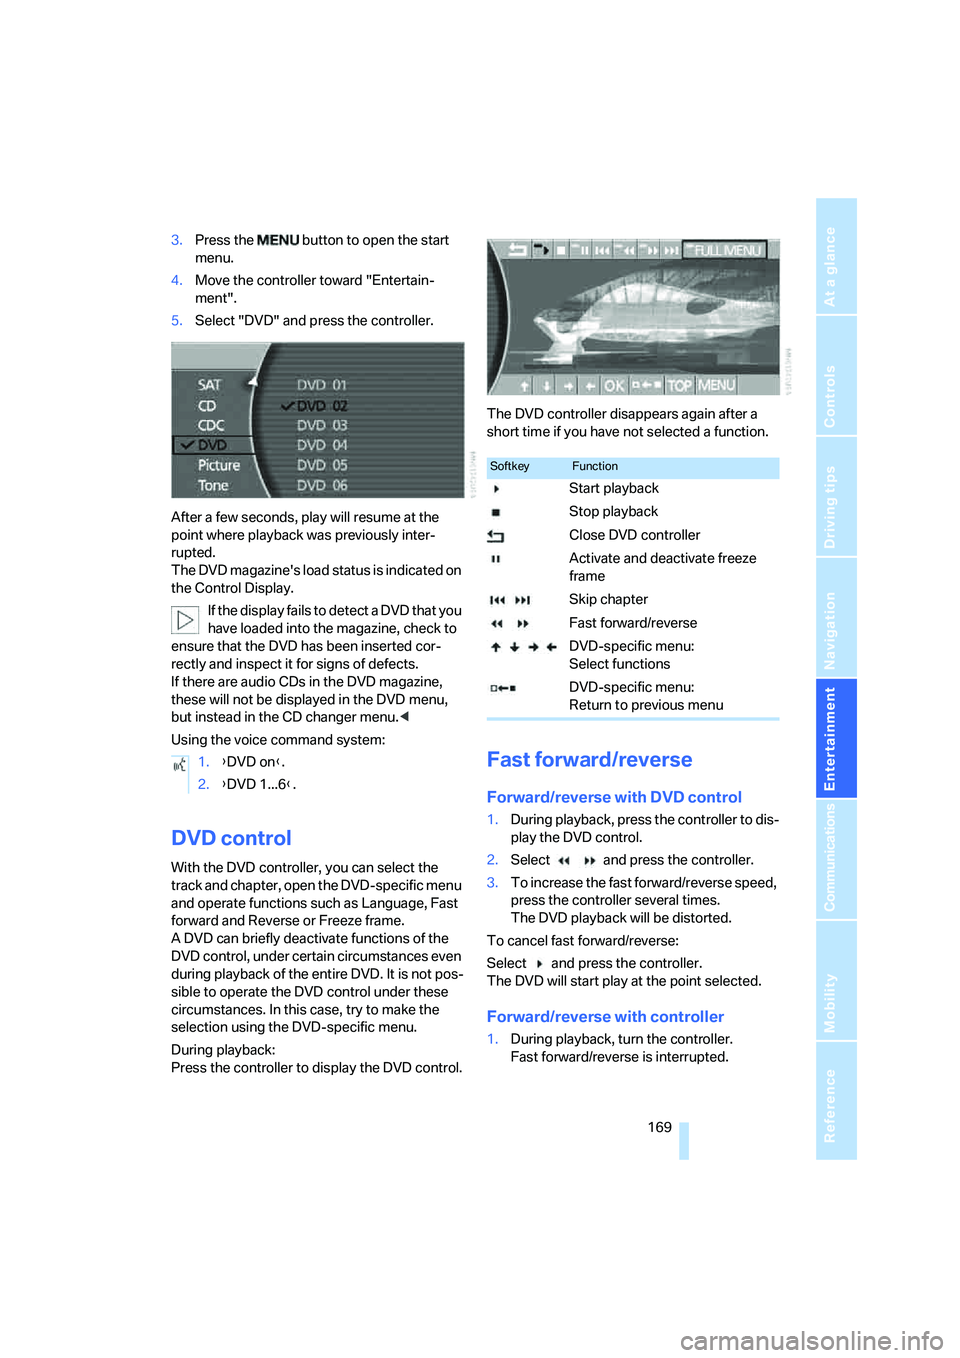
After a few seconds, play will resume at the
point where playback was previously inter-
rupted.
The DVD magazine's load status is indicated on
the Control Display.
If the display fails to detect a DVD that you
have loaded into the magazine, check to
ensure that the DVD has been inserted cor-
rectly and inspect it for signs of defects.
If there are audio CDs in the DVD magazine,
these will not be displayed in the DVD menu,
but instead in the CD changer menu.<
Using the voice command system:
DVD control
With the DVD controller, you can select the
track and chapter, open the DVD-specific menu
and operate functions such as Language, Fast
forward and Reverse or Freeze frame.
A DVD can briefly deactivate functions of the
DVD control, under certain circumstances even
during playback of the entire DVD. It is not pos-
sible to operate the DVD control under these
circumstances. In this case, try to make the
selection using the DVD-specific menu.
During playback:
Press the controller to display the DVD control.The DVD controller disappears again after a
short time if you have not selected a function.
Fast forward/reverse
Forward/reverse with DVD control
1.During playback, press the controller to dis-
play the DVD control.
2.Select and press the controller.
3.To increase the fast forward/reverse speed,
press the controller several times.
The DVD playback will be distorted.
To cancel fast forward/reverse:
Select and press the controller.
The DVD will start play at the point selected.
Forward/reverse with controller
1.During playback, turn the controller.
Fast forward/reverse is interrupted. 1.{DVD on}.
2.{DVD 1...6}.
SoftkeyFunction
Start playback
Stop playback
Close DVD controller
Activate and deactivate freeze
frame
Skip chapter
Fast forward/reverse
DVD-specific menu:
Select functions
DVD-specific menu:
Return to previous menu
Page 205 of 247
Mobility
203Reference
At a glance
Controls
Driving tips
Communications
Navigation
Entertainment
Possible displays
>"Update of engine oil level in process".
>"Engine oil level O.K.".
>"Oil level at minimum! Add 1 quart engine
oil": Add a maximum of 1 quart/1 liter of
engine oil at the earliest opportunity, refer
to Adding engine oil.
>"Oil level under min.! Add 1 quart engine
oil": Add a maximum of 1 quart/1 liter of
engine oil at the earliest opportunity, refer
to Adding engine oil.
>"Engine oil level too high".
Have vehicle checked immediately;
otherwise, overfilled oil can lead to
engine damage.<
>"No measurement possible at this time".
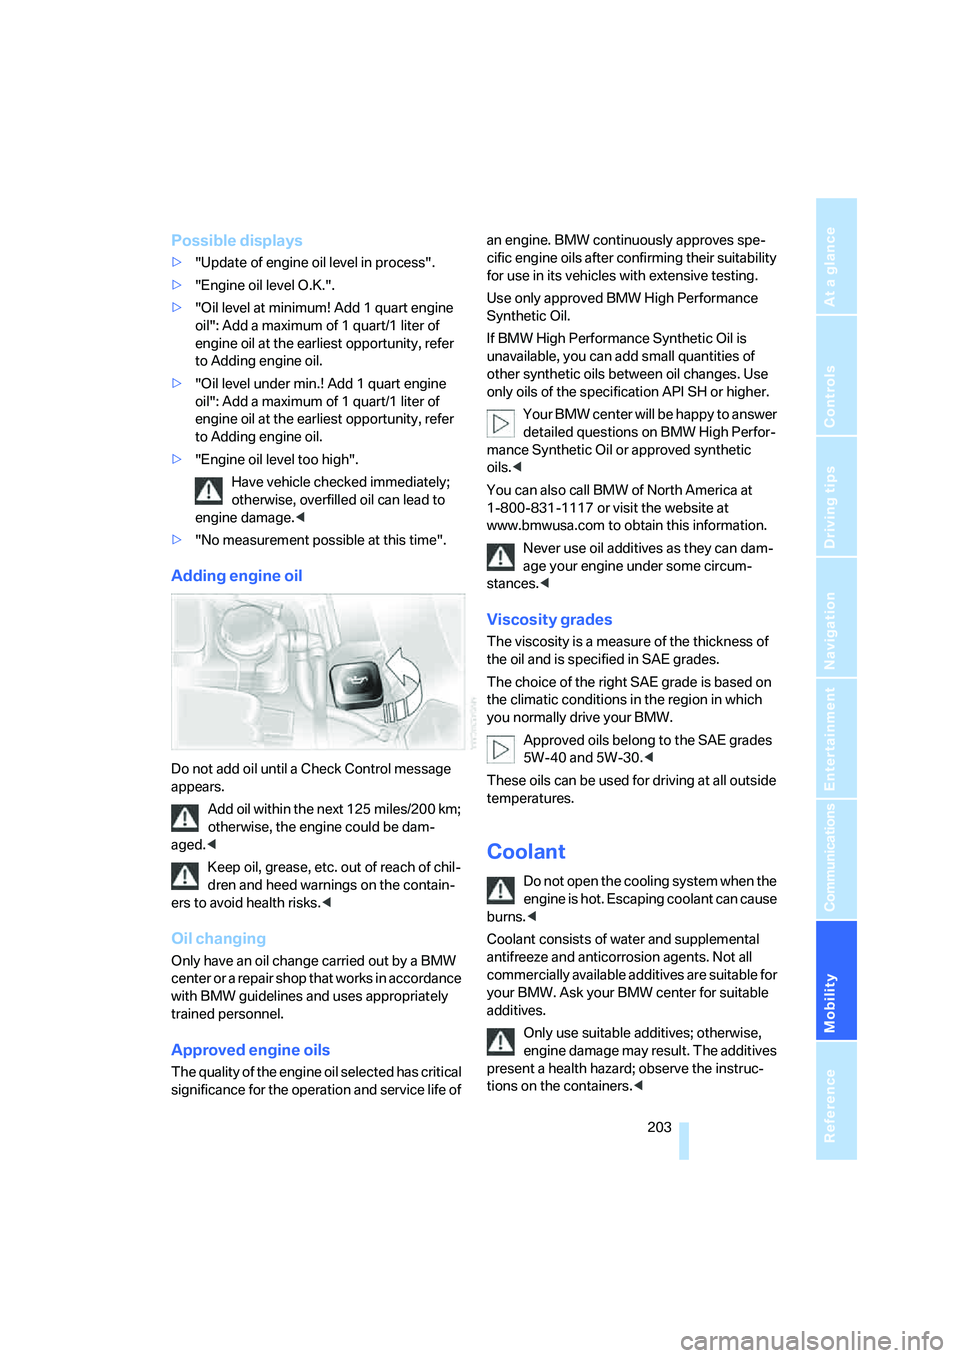
Adding engine oil
Do not add oil until a Check Control message
appears.
Add oil within the next 125 miles/200 km;
otherwise, the engine could be dam-
aged.<
Keep oil, grease, etc. out of reach of chil-
dren and heed warnings on the contain-
ers to avoid health risks.<
Oil changing
Only have an oil change carried out by a BMW
center or a repair shop that works in accordance
with BMW guidelines and uses appropriately
trained personnel.
Approved engine oils
The quality of the engine oil selected has critical
significance for the operation and service life of an engine. BMW continuously approves spe-
cific engine oils after confirming their suitability
for use in its vehicles with extensive testing.
Use only approved BMW High Performance
Synthetic Oil.
If BMW High Performance Synthetic Oil is
unavailable, you can add small quantities of
other synthetic oils between oil changes. Use
only oils of the specification API SH or higher.
Your BMW center will be happy to answer
detailed questions on BMW High Perfor-
mance Synthetic Oil or approved synthetic
oils.<
You can also call BMW of North America at
1-800-831-1117 or visit the website at
www.bmwusa.com to obtain this information.
Never use oil additives as they can dam-
age your engine under some circum-
stances.<
Viscosity grades
The viscosity is a measure of the thickness of
the oil and is specified in SAE grades.
The choice of the right SAE grade is based on
the climatic conditions in the region in which
you normally drive your BMW.
Approved oils belong to the SAE grades
5W-40 and 5W-30.<
These oils can be used for driving at all outside
temperatures.
Coolant
Do not open the cooling system when the
engine is hot. Escaping coolant can cause
burns.<
Coolant consists of water and supplemental
antifreeze and anticorrosion agents. Not all
commercially available additives are suitable for
your BMW. Ask your BMW center for suitable
additives.
Only use suitable additives; otherwise,
engine damage may result. The additives
present a health hazard; observe the instruc-
tions on the containers.<