transmission BMW 760LI SEDAN 2003 User Guide
[x] Cancel search | Manufacturer: BMW, Model Year: 2003, Model line: 760LI SEDAN, Model: BMW 760LI SEDAN 2003Pages: 229, PDF Size: 4.35 MB
Page 72 of 229
Driving
70 To obtain maximum acceleration, for
passing maneuvers, etc., during
operation in the manual mode, use the
kickdown or downshift manually.<
Malfunctions
A status report will appear in the Check
Control to alert you to any malfunctions in
the transmission-control system. Please
note any supplementary information that
appears in the Control Display. The direc-
tional arrows also start to flash in the Info
Display.
While it will remain still possible to move
the selector lever to any desired position,
the transmission will revert to operation in
its default mode with only a limited number
of forward gears.
Some types of malfunction will make it
impossible to engage all gears.
The engine may respond with reduced
output when accelerating from a standing
start.
If this happens, avoid extreme engine loads
and consult the nearest BMW center.
If no status messages appear in the
Info Display you should accelerate
carefully to confirm that you are driving in
the desired direction.
Never work in the engine compartment
with any of the forward or reverse gears
engaged, as the vehicle could start to
move. Engage the parking brake, refer to
page 62.<
Releasing transmission lockout
manually
You can respond to any interruptions in the
supply of electrical power, for instance, if
the battery is discharged or disconnected,
by releasing the transmission lockout man-
ually.
To prevent the drive wheels from
locking up and sliding, the transmis-
sion lockout must always be released man-
ually before the vehicle is towed.< Press the brake pedal before
releasing the transmission lockout
manually. If the brakes are not applied, the
vehicle could start to roll if parked on a
steep slope.
The transmission lockout should only be
released for towing. Remember to engage
the transmission lockout when you repark
the vehicle after moving it.
Should it also be necessary to release the
parking brake manually, owing to a dis-
charged battery, etc., always adhere to the
following sequence:
1.Start by manually releasing the parking
brake, refer to page 65
2.Then proceed to manually release the
transmission lockout.<
Jump-starting and towing, refer to
pages 202 and 203.
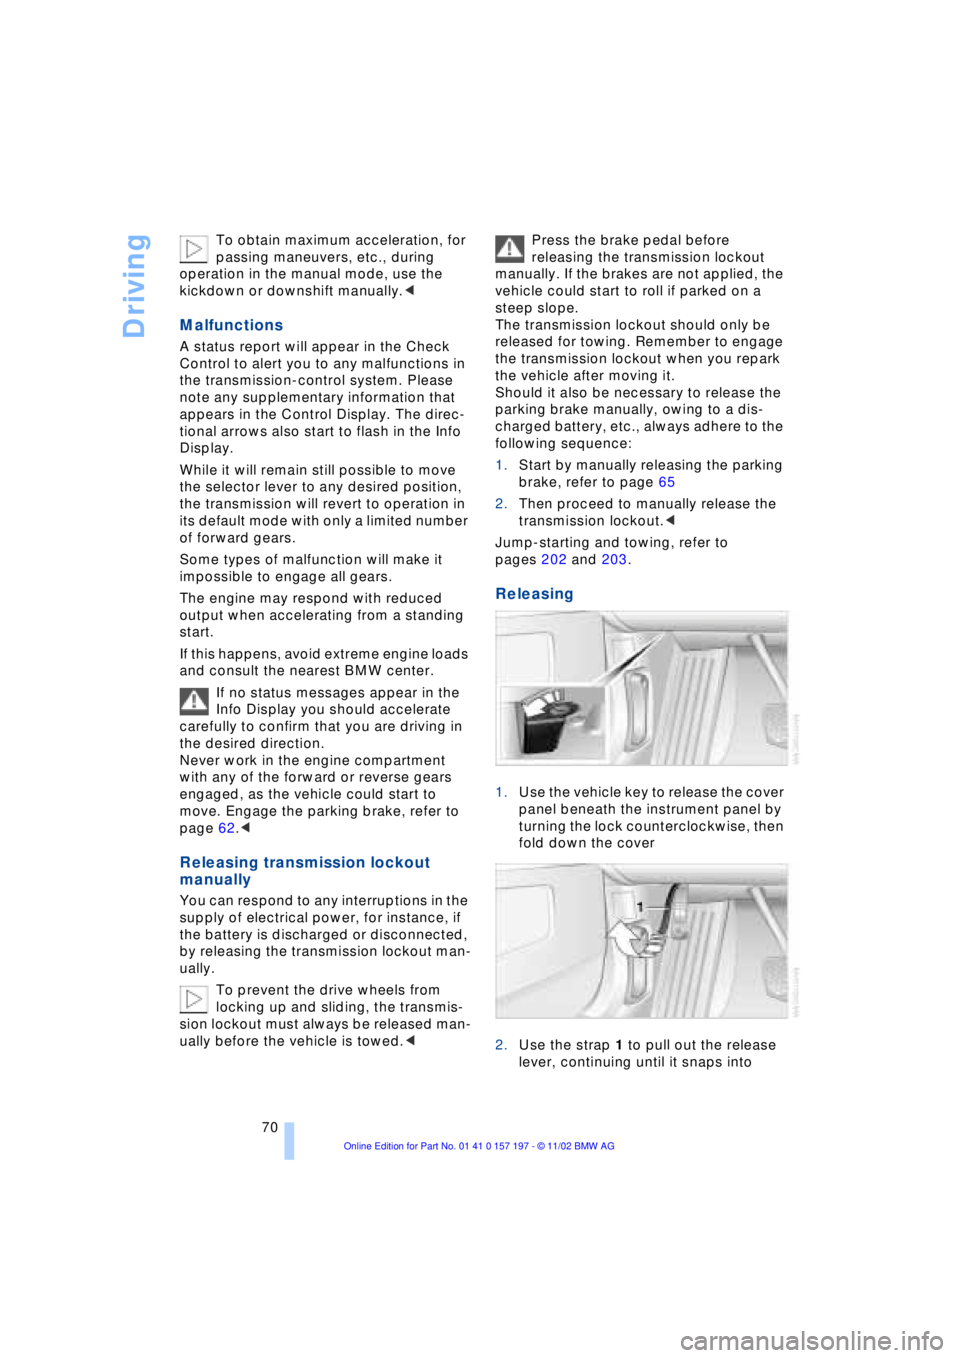
Releasing
1.Use the vehicle key to release the cover
panel beneath the instrument panel by
turning the lock counterclockwise, then
fold down the cover
2.Use the strap 1 to pull out the release
lever, continuing until it snaps into
Page 73 of 229
At a glance
Controls
Driving tips
Communications
Navigation
Entertainment
Mobility
Reference
71
place Ð the transmission lockout is
released.
Re-engage the transmission lockout
after parking the vehicle at its destina-
tion. Otherwise there is a danger that the
vehicle could start to roll if parked on a
steep slope.<
Engaging again
1.Disengage the release lever by pressing
it together with the red detent lever,
arrow 1
2.Guide the release lever all the way back
into its original position Ð the transmis-
sion lockout is again engaged
3.Fold up and lock the cover panel. Now Ð
and not before Ð the key may be
removed.
Once the transmission lockout has
been re-engaged, the warning in the
Check Control should disappear, and the
symbol in the Info Display should change
from N to P. Should this fail to happen,
there is a danger that the vehicle could
start to roll.<
Information on jump-starting, tow-starting
and towing begins on page 202.
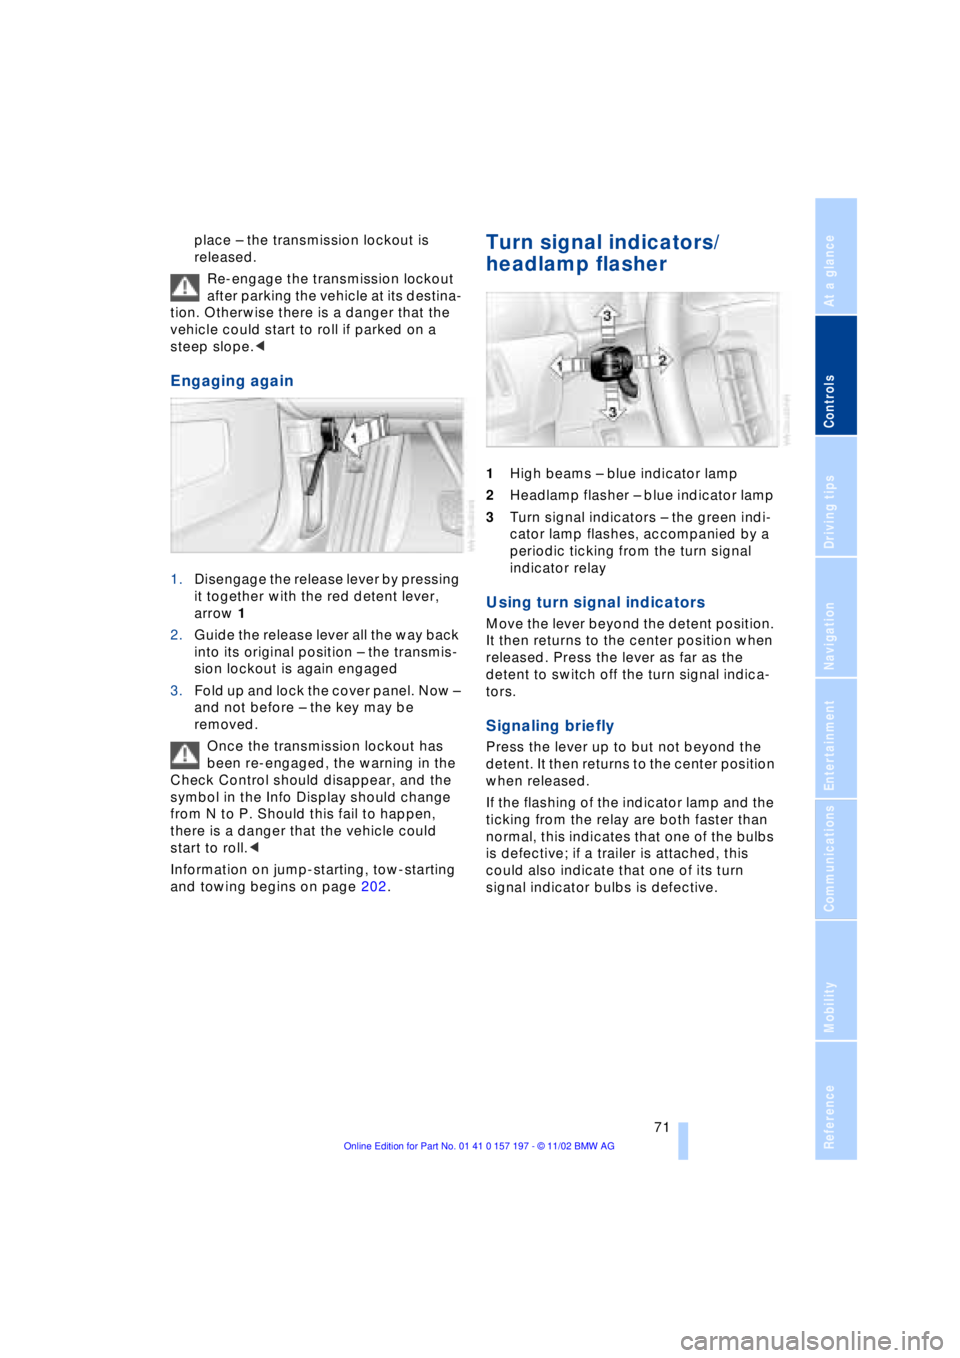
Turn signal indicators/
headlamp flasher
1High beams Ð blue indicator lamp
2Headlamp flasher Ð blue indicator lamp
3Turn signal indicators Ð the green indi-
cator lamp flashes, accompanied by a
periodic ticking from the turn signal
indicator relay
Using turn signal indicators
Move the lever beyond the detent position.
It then returns to the center position when
released. Press the lever as far as the
detent to switch off the turn signal indica-
tors.
Signaling briefly
Press the lever up to but not beyond the
detent. It then returns to the center position
when released.
If the flashing of the indicator lamp and the
ticking from the relay are both faster than
normal, this indicates that one of the bulbs
is defective; if a trailer is attached, this
could also indicate that one of its turn
signal indicator bulbs is defective.
Page 82 of 229
Driving
80 Be certain to deactivate the system
when you pull into an exit lane for a
highway off-ramp.<
Also, vehicles traveling in a staggered
manner on a highway may cause a delay in
the system's reaction to a vehicle in front of
you or may cause the system to react to a
vehicle actually in the lane next to you.
Always be ready to take action or apply the
brakes if necessary.
Active cruise control can only decelerate
the vehicle to approx. 20 mph (30 km/h). If
the system reduces vehicle speed below
20 mph (30 km/h) or if DSC/ABS is
engaged while driving, the system will
automatically deactivate.
Remember, the system cannot stop
your vehicle. In addition, the system is
deactivated whenever the driver applies
the vehicle brakes, shifts the transmission
from drive/D to neutral/N, or deactivates
DSC. After any deactivation, the system
will no longer automatically activate the
vehicle brakes, which means the driver
must intervene and resume manual
braking. You should then reactivate the
system only when you are fully aware of the
prior speed and distance settings.<
Active cruise control may brake when you
reduce the stored desired speed; however,
the driver must constantly monitor traffic
and intervene if necessary.
When you switch off the engine or ignition,
active cruise control is fully switched off,
too, and any settings you have selected are
canceled.
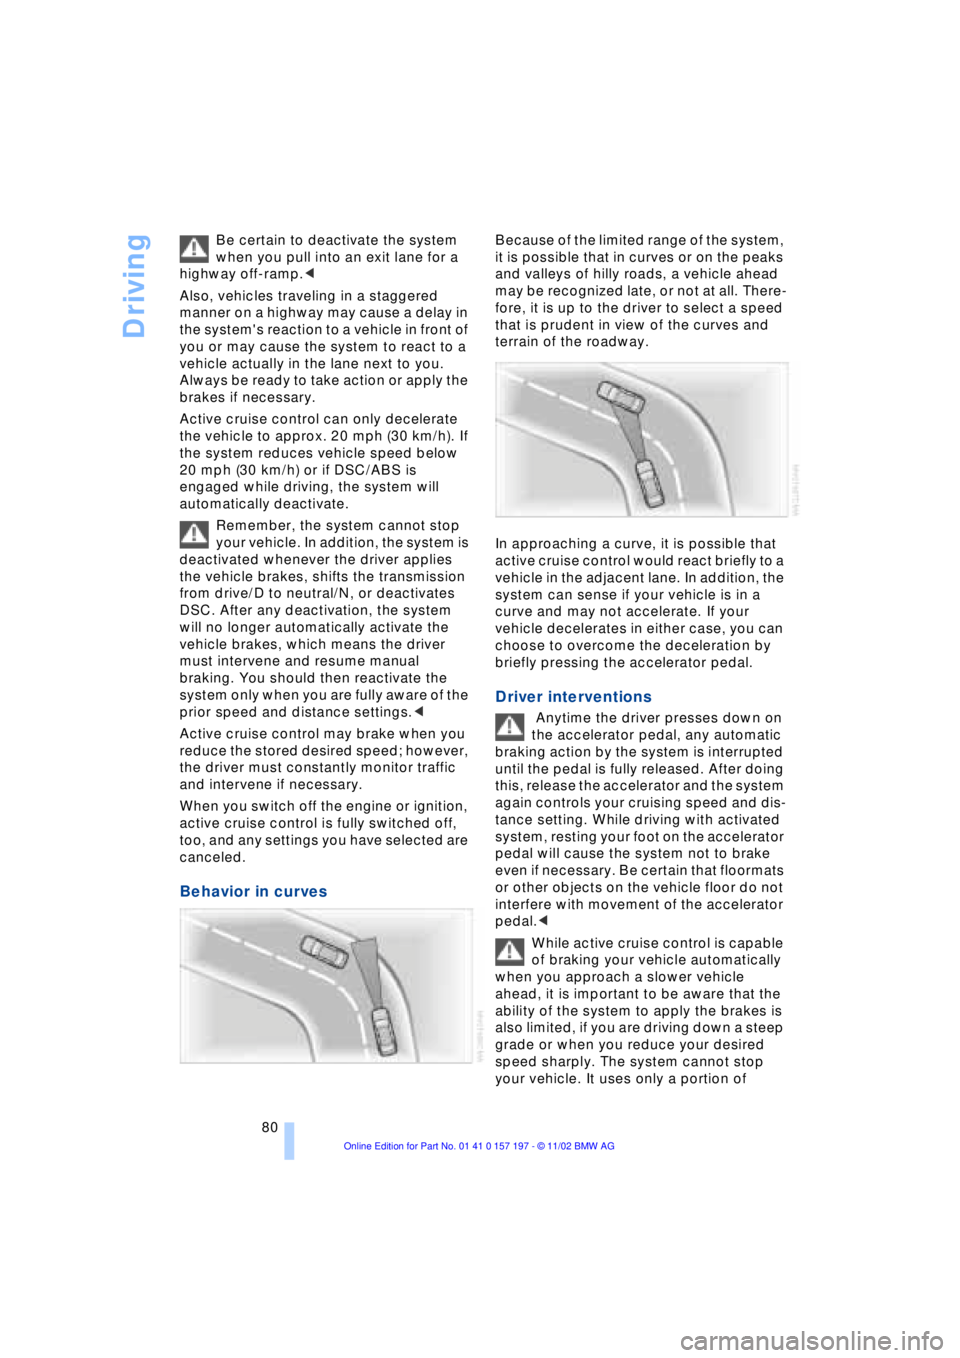
Behavior in curves
Because of the limited range of the system,
it is possible that in curves or on the peaks
and valleys of hilly roads, a vehicle ahead
may be recognized late, or not at all. There-
fore, it is up to the driver to select a speed
that is prudent in view of the curves and
terrain of the roadway.
In approaching a curve, it is possible that
active cruise control would react briefly to a
vehicle in the adjacent lane. In addition, the
system can sense if your vehicle is in a
curve and may not accelerate. If your
vehicle decelerates in either case, you can
choose to overcome the deceleration by
briefly pressing the accelerator pedal.
Driver interventions
Anytime the driver presses down on
the accelerator pedal, any automatic
braking action by the system is interrupted
until the pedal is fully released. After doing
this, release the accelerator and the system
again controls your cruising speed and dis-
tance setting. While driving with activated
system, resting your foot on the accelerator
pedal will cause the system not to brake
even if necessary. Be certain that floormats
or other objects on the vehicle floor do not
interfere with movement of the accelerator
pedal.<
While active cruise control is capable
of braking your vehicle automatically
when you approach a slower vehicle
ahead, it is important to be aware that the
ability of the system to apply the brakes is
also limited, if you are driving down a steep
grade or when you reduce your desired
speed sharply. The system cannot stop
your vehicle. It uses only a portion of
Page 95 of 229
At a glance
Controls
Driving tips
Communications
Navigation
Entertainment
Mobility
Reference
93
Technology for comfort, convenience
and safety
PDC Park Distance Control*
The concept
The PDC assists you when you are parking.
Signal tones indicate the current distance
to an object behind or in front of your
vehicle. Four ultrasonic sensors in both the
bumpers monitor the distance to the
nearest object. The sensors at the front and
at the two rear corners have a range of
approx. 2 ft (60 cm); the rear middle sen-
sors have approx. 5 ft (1.50 m).
PDC is a parking aid that can indicate
objects when they are approached
slowly, as is usually the case when parking.
Avoid approaching an object at high speed,
as otherwise the physical circumstances
would mean that the system warning was
too late.<
Automatic function
Whenever the ignition is on the system
automatically assumes operational status
after a few seconds each time you engage
the transmission position R.
Wait this short period before
reversing.<
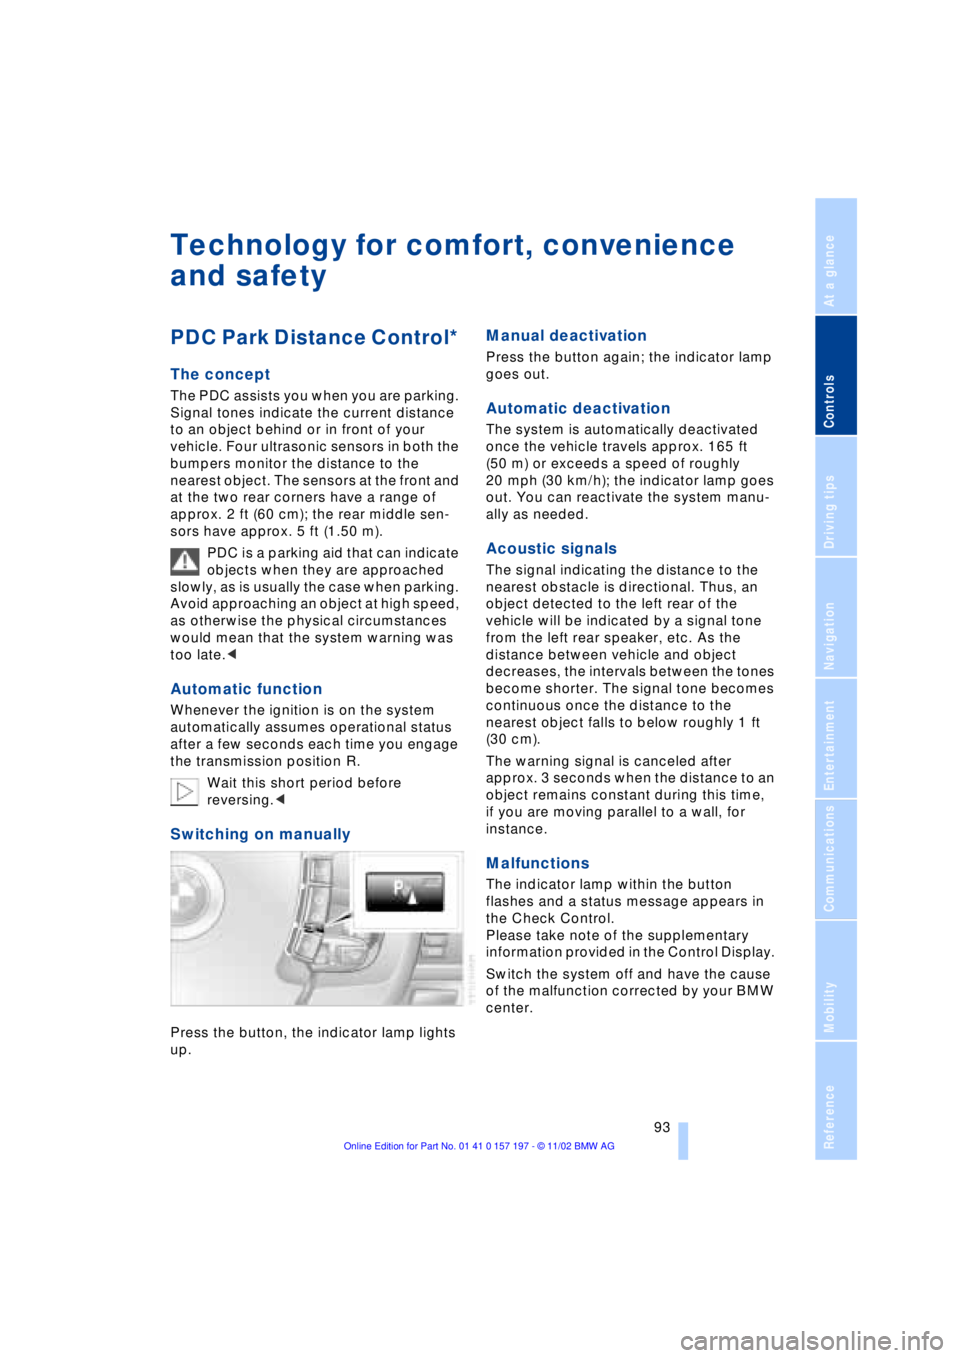
Switching on manually
Press the button, the indicator lamp lights
up.
Manual deactivation
Press the button again; the indicator lamp
goes out.
Automatic deactivation
The system is automatically deactivated
once the vehicle travels approx. 165 ft
(50 m) or exceeds a speed of roughly
20 mph (30 km/h); the indicator lamp goes
out. You can reactivate the system manu-
ally as needed.
Acoustic signals
The signal indicating the distance to the
nearest obstacle is directional. Thus, an
object detected to the left rear of the
vehicle will be indicated by a signal tone
from the left rear speaker, etc. As the
distance between vehicle and object
decreases, the intervals between the tones
become shorter. The signal tone becomes
continuous once the distance to the
nearest object falls to below roughly 1 ft
(30 cm).
The warning signal is canceled after
approx. 3 seconds when the distance to an
object remains constant during this time,
if you are moving parallel to a wall, for
instance.
Malfunctions
The indicator lamp within the button
flashes and a status message appears in
the Check Control.
Please take note of the supplementary
information provided in the Control Display.
Switch the system off and have the cause
of the malfunction corrected by your BMW
center.
Page 116 of 229
Practical interior accessories
114
Practical interior accessories
Integrated universal remote
control*
The concept
The integrated universal remote control
can replace as many as three hand-held
transmitters for various remote-controlled
accessories, such as door openers and
house alarm systems. The integrated uni-
versal remote control registers and stores
signals from the original hand-held trans-
mitters.
The signal of an original hand-held trans-
mitter can be programmed on one of the
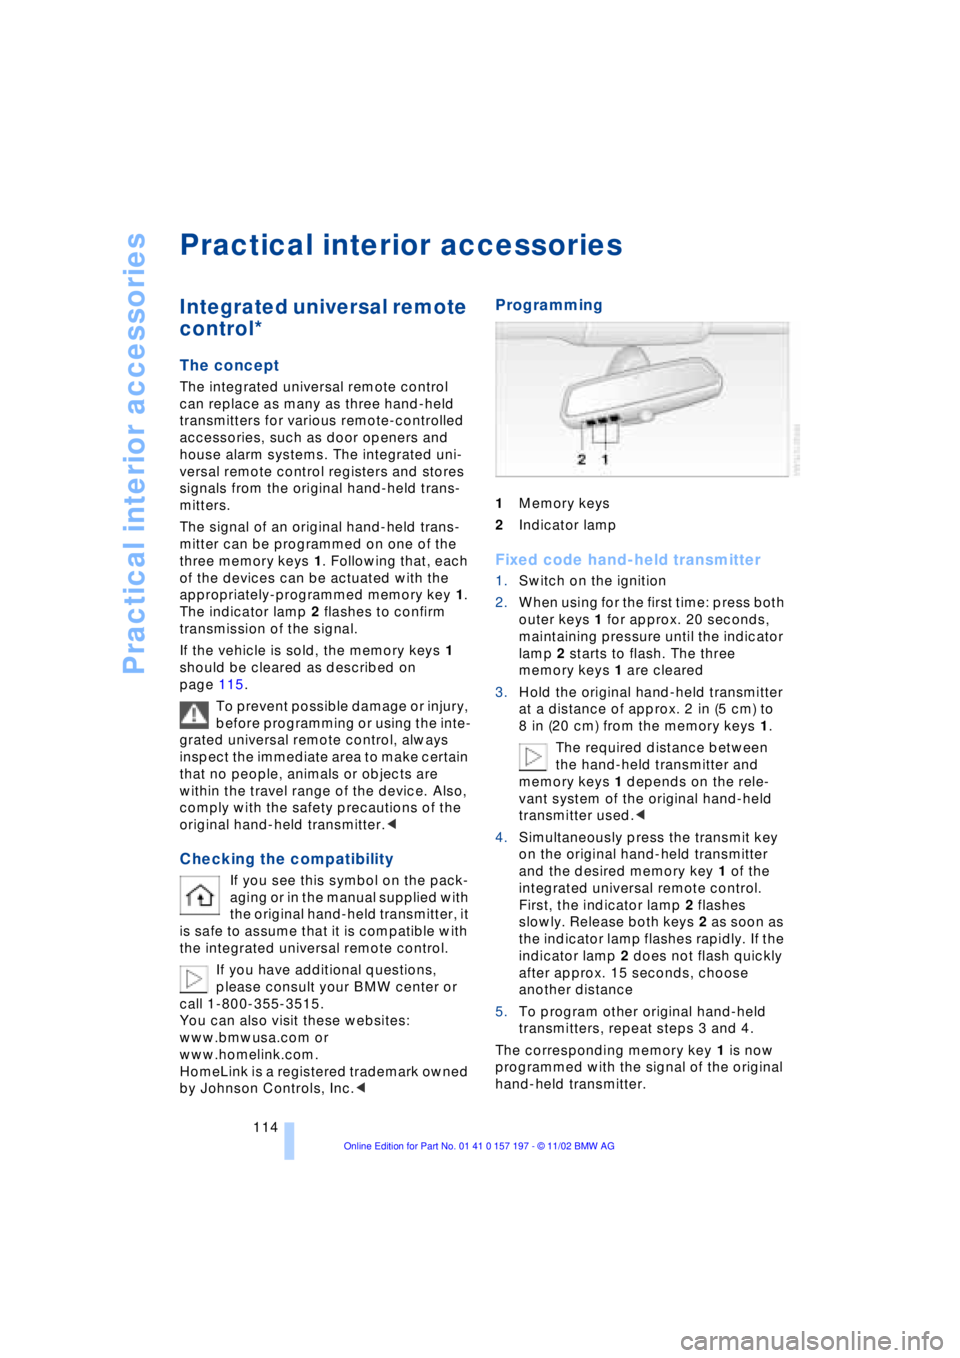
three memory keys 1. Following that, each
of the devices can be actuated with the
appropriately-programmed memory key 1.
The indicator lamp 2 flashes to confirm
transmission of the signal.
If the vehicle is sold, the memory keys 1
should be cleared as described on
page 115.
To prevent possible damage or injury,
before programming or using the inte-
grated universal remote control, always
inspect the immediate area to make certain
that no people, animals or objects are
within the travel range of the device. Also,
comply with the safety precautions of the
original hand-held transmitter.<
Checking the compatibility
If you see this symbol on the pack-
aging or in the manual supplied with
the original hand-held transmitter, it
is safe to assume that it is compatible with
the integrated universal remote control.
If you have additional questions,
please consult your BMW center or
call 1-800-355-3515.
You can also visit these websites:
www.bmwusa.com or
www.homelink.com.
HomeLink is a registered trademark owned
by Johnson Controls, Inc.<
Programming
1Memory keys
2Indicator lamp
Fixed code hand-held transmitter
1.Switch on the ignition
2.When using for the first time: press both
outer keys 1 for approx. 20 seconds,
maintaining pressure until the indicator
lamp 2 starts to flash. The three
memory keys 1 are cleared
3.Hold the original hand-held transmitter
at a distance of approx. 2 in (5 cm) to
8 in (20 cm) from the memory keys 1.
The required distance between
the hand-held transmitter and
memory keys 1 depends on the rele-
vant system of the original hand-held
transmitter used.<
4.Simultaneously press the transmit key
on the original hand-held transmitter
and the desired memory key 1 of the
integrated universal remote control.
First, the indicator lamp 2 flashes
slowly. Release both keys 2 as soon as
the indicator lamp flashes rapidly. If the
indicator lamp 2 does not flash quickly
after approx. 15 seconds, choose
another distance
5.To program other original hand-held
transmitters, repeat steps 3 and 4.
The corresponding memory key 1 is now
programmed with the signal of the original
hand-held transmitter.
Page 126 of 229
Things to remember when driving
124
Things to remember when driving
Break-in procedures
To ensure that your vehicle continues to
furnish optimal economy of operation
throughout an extended service life, we
request that you devote careful attention to
the following section.
Engine and differential
Up to 1,200 miles (2,000 km):
During this initial period you should attempt
to avoid constant, steady-state operation
and vary both vehicle and engine speeds
as often as possible. Until the break-in
period has been completed you should
also refrain from exceeding the following:
>4,500 rpm or 105 mph (170 km/h)
Always obey all official speed limits.
Avoid full-throttle operation and use of the
transmission's kickdown mode during
these initial miles.
Once you have driven 1,200 miles
(2,000 km), the engine and vehicle speeds
can be gradually increased.
You should also comply with these break-in
procedures should the engine or differen-
tial need to be replaced at a later point.
Tires
Due to technical factors associated with
their manufacture, tires do not achieve their
full traction potential until after an initial
break-in period. Therefore, drive reservedly
during the first 200 miles (300 km).
Brake system
Brakes require an initial break-in period of
approx. 300 miles (500 km) to achieve
optimal contact and wear patterns
between brake pads and rotors.
General driving notes
High temperatures
Extreme temperatures occur at the
catalytic converter on this and every
catalyst-equipped vehicle. Do not remove
the heat shields installed adjacent to
various sections of the exhaust system,
and never apply undercoating to them.
When driving, standing at idle and while
parking take care to avoid possible contact
between the hot exhaust system and any
highly flammable materials such as hay,
leaves, grass, etc. Such contact could lead
to a fire, and with it the risk of serious pro-
perty damage as well as personal injury.<
Parking the vehicle
Condensation forms in the air conditioner
system during operation, and then exits
under the vehicle. Traces of condensed
water under the vehicle are thus normal.
Before driving into the car wash
1.Fold in the door mirrors, refer to
page 52, as otherwise they could be
damaged due to the width of the vehicle
2.Leave the remote control in the ignition
lock, as otherwise the P position of the
automatic transmission will automati-
cally be selected when the remote con-
trol is removed. Also refer to page 68
3.Release the parking brake, especially
when you have activated Automatic
Hold. Refer to pages 63 and 64.
Hydroplaning
When driving on wet or slushy roads,
reduce road speed. If you do not, a
wedge of water can form between tires and
road surface. This phenomenon is referred
to as hydroplaning, and is characterized by
a partial or complete loss of contact bet-
ween tires and road surface, ultimately
Page 127 of 229
At a glance
Controls
Driving tips
Communications
Navigation
Entertainment
Mobility
Reference
125
undermining your ability to steer and brake
the vehicle.<
Driving through water
Do not drive through water on the
road if it is deeper than 1 ft (30 cm),
and then only at walking speed at the most.
Otherwise, the vehicle's engine, the elec-
trical systems and the transmission may be
damaged.<
Brake system
Braking with ABS
The best way to achieve optimal response
from the ABS is to apply maximum pres-
sure to the brake pedal during emergencyÐ
panic stops. Since the vehicle maintains
steering responsiveness, you can never-
theless avoid possible obstacles with a
minimum of steering effort.
Pulsation at the brake pedal combines with
sounds from the hydraulic circuits to indi-
cate to the driver that ABS is in its active
mode.
Do not drive with your foot resting on
the brake pedal. Even light but con-
sistent pedal pressure can lead to high
temperatures, brake wear and possibly
even brake failure.<
Disc brakes
Driving in wet conditions
While driving in wet conditions and in
heavy rain, it is a good idea to apply light
pressure to the brake pedal every few
miles. Monitor traffic conditions to ensure
that this maneuver does not endanger
other road users. The heat generated in this
process helps dry the pads and rotors to
ensure that full braking efficiency will then
be available when you need it.
Hills
You can retain full and unimpaired braking
efficiency by downshifting to a gear in
which only minimal brake applications are
needed when descending long or steep
downhill stretches.
You can further enhance the engine's bra-
king effect by selecting a lower gear in the
automatic transmission's manual mode,
downshifting as far as first gear on extre-
mely steep stretches, refer to page 68. This
strategy helps you avoid placing excessive
loads on the brake system.
Never allow the vehicle to coast with
the transmission in Neutral Ð or with
the engine switched off Ð there is no engine
braking when the transmission is in Neu-
tral, and no power-assist for brakes and
steering when the engine is not running.
Never allow floor mats, carpets or any other
objects to protrude into the area around the
accelerator and brake pedals and obstruct
their movement.<
Corrosion
When the vehicle is driven only occasio-
nally, during extended periods when the
vehicle is not used at all, and in operating
conditions where brake applications are
less frequent, there is an increased ten-
dency for corrosion to form on rotors, while
contaminants accumulate on the brake
pads. This occurs because the minimal
pressure which must be exerted by the
pads during brake applications to clean the
rotors is not reached.
Should corrosion form on the brake rotors,
the brakes will tend to respond with a pul-
sating effect that even extended applica-
tion will fail to cure.
Brake pads
If the brake pad wear warning lamp
appears in the Check Control,
accompanied by a text: please take
careful note of the additional information in
the Control Display.
Page 175 of 229
At a glance
Controls
Driving tips Communications
Navigation
Entertainment
Mobility
Reference
173
Hands-free system
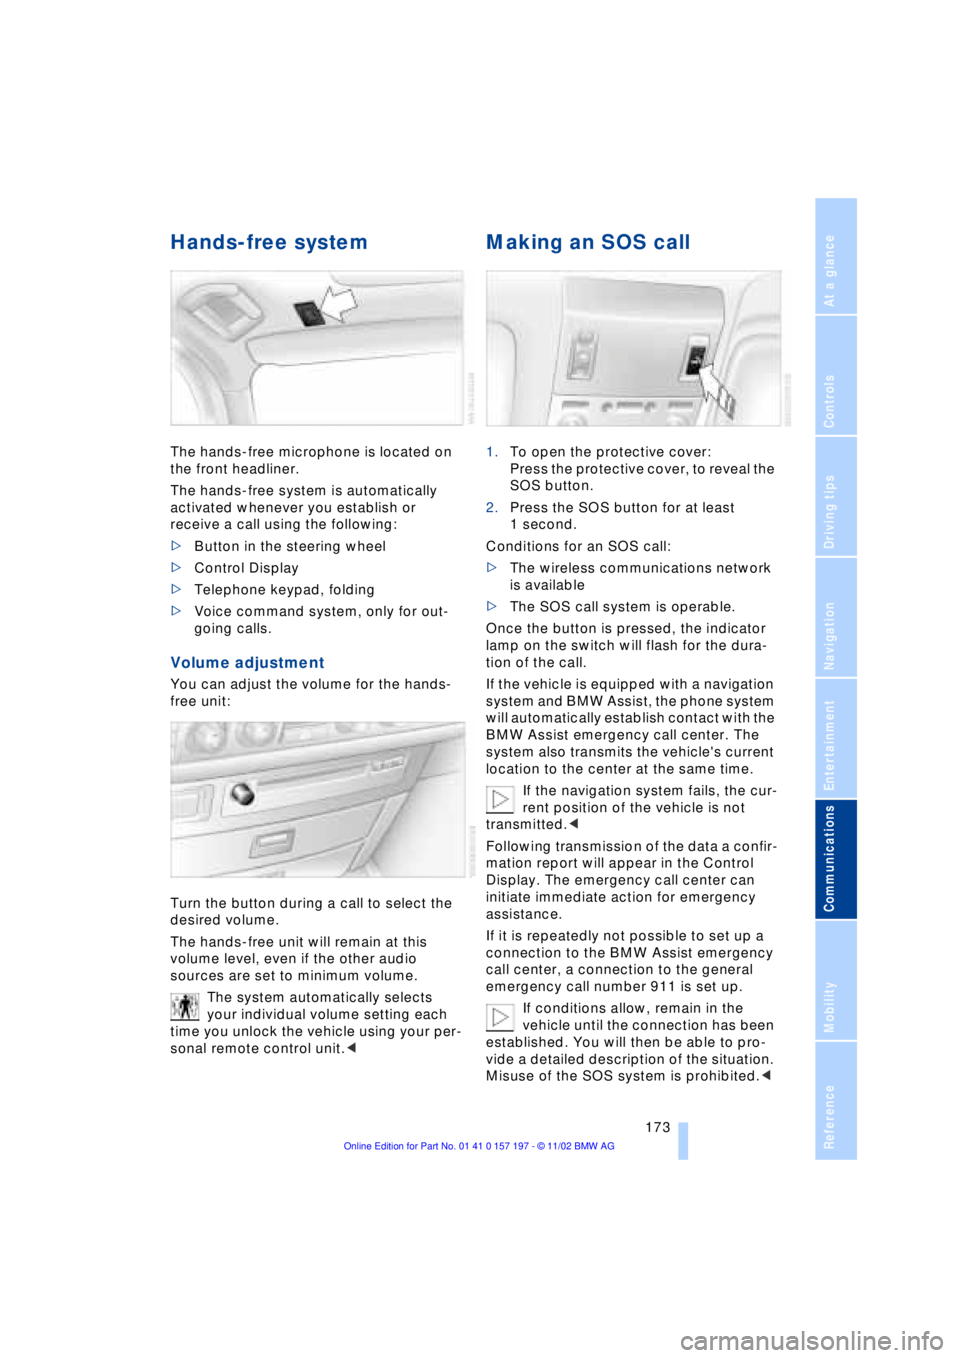
The hands-free microphone is located on
the front headliner.
The hands-free system is automatically
activated whenever you establish or
receive a call using the following:
>Button in the steering wheel
>Control Display
>Telephone keypad, folding
>Voice command system, only for out-
going calls.
Volume adjustment
You can adjust the volume for the hands-
free unit:
Turn the button during a call to select the
desired volume.
The hands-free unit will remain at this
volume level, even if the other audio
sources are set to minimum volume.
The system automatically selects
your individual volume setting each
time you unlock the vehicle using your per-
sonal remote control unit.<
Making an SOS call
1.To open the protective cover:
Press the protective cover, to reveal the
SOS button.
2.Press the SOS button for at least
1 second.
Conditions for an SOS call:
>The wireless communications network
is available
>The SOS call system is operable.
Once the button is pressed, the indicator
lamp on the switch will flash for the dura-
tion of the call.
If the vehicle is equipped with a navigation
system and BMW Assist, the phone system
will automatically establish contact with the
BMW Assist emergency call center. The
system also transmits the vehicle's current
location to the center at the same time.
If the navigation system fails, the cur-
rent position of the vehicle is not
transmitted.<
Following transmission of the data a confir-
mation report will appear in the Control
Display. The emergency call center can
initiate immediate action for emergency
assistance.
If it is repeatedly not possible to set up a
connection to the BMW Assist emergency
call center, a connection to the general
emergency call number 911 is set up.
If conditions allow, remain in the
vehicle until the connection has been
established. You will then be able to pro-
vide a detailed description of the situation.
Misuse of the SOS system is prohibited.<
Page 199 of 229
Overview
Controls
Driving tips
Communications
Navigation
Entertainment
Mobility
Reference
197
4.Extract the bulb for replacement.
Side marker lamps, front and rear
Please contact your BMW center for
replacement.
Tail lamps
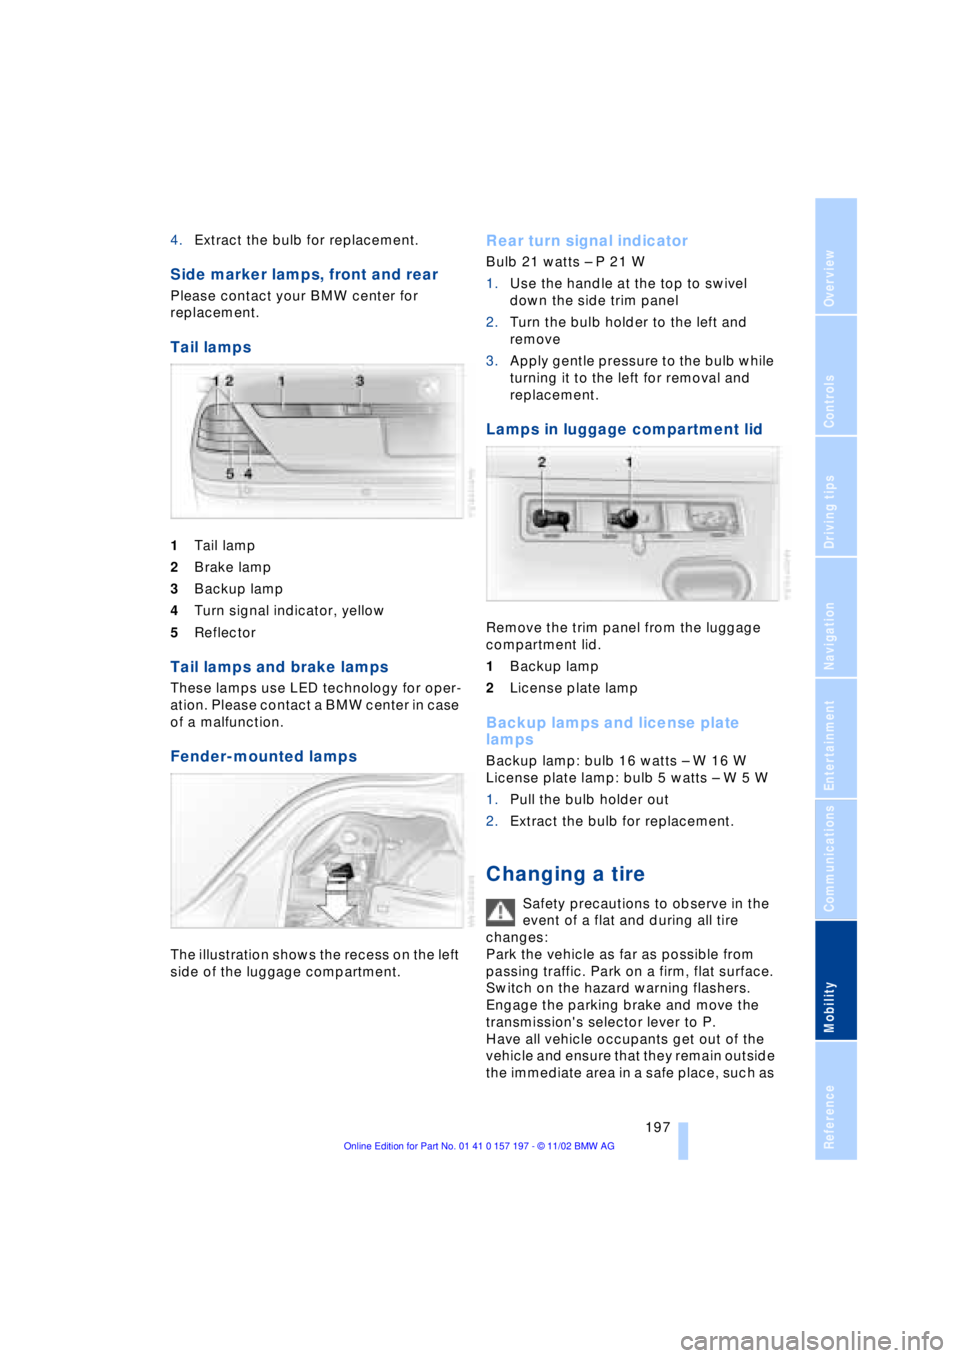
1Tail lamp
2Brake lamp
3Backup lamp
4Turn signal indicator, yellow
5Reflector
Tail lamps and brake lamps
These lamps use LED technology for oper-
ation. Please contact a BMW center in case
of a malfunction.
Fender-mounted lamps
The illustration shows the recess on the left
side of the luggage compartment.
Rear turn signal indicator
Bulb 21 watts Ð P 21 W
1.Use the handle at the top to swivel
down the side trim panel
2.Turn the bulb holder to the left and
remove
3.Apply gentle pressure to the bulb while
turning it to the left for removal and
replacement.
Lamps in luggage compartment lid
Remove the trim panel from the luggage
compartment lid.
1Backup lamp
2License plate lamp
Backup lamps and license plate
lamps
Backup lamp: bulb 16 watts Ð W 16 W
License plate lamp: bulb 5 watts Ð W 5 W
1.Pull the bulb holder out
2.Extract the bulb for replacement.
Changing a tire
Safety precautions to observe in the
event of a flat and during all tire
changes:
Park the vehicle as far as possible from
passing traffic. Park on a firm, flat surface.
Switch on the hazard warning flashers.
Engage the parking brake and move the
transmission's selector lever to P.
Have all vehicle occupants get out of the
vehicle and ensure that they remain outside
the immediate area in a safe place, such as
Page 205 of 229
At a glance
Controls
Driving tips
Communications
Navigation
Entertainment
Mobility
Reference
203
positive terminal of the support battery.
To do so:
Connect one terminal clamp to the pos-
itive terminal of the battery or to an aux-
iliary terminal for jump starting on the
support vehicle. Connect the second
terminal clamp on the positive terminal
of the battery or an auxiliary terminal for
jump starting of the vehicle to be
started.
On your BMW, there is a special nut as
body ground on the suspension strut
dome, see arrow 2 in the illustration
3.Use the second jumper cable to set up
the connection between the negative
terminals of both vehicles.
To do so:
Connect a terminal clamp to the nega-
tive terminal of the battery and/or to an
engine or body ground of the support
vehicle.Connect the second terminal
clamp to the negative terminal of the
battery or to an engine or body ground
of the vehicle to be started.
Starting the engine
1.Start the engine on the support vehicle
and allow it to run for several minutes at
a fast idle
2.Start the engine on the other vehicle in
the usual way.
If the first start attempt is not suc-
cessful, wait a few minutes before ano-
ther attempt in order to allow the
discharged battery to recharge
3.Allow the engines to run for several
minutes
4.Disconnect the jumper cables by
reversing the connection sequence.
If required, have the battery inspected and
recharged at your BMW center.
Never use spray fluids to start the
engine.<
Towing
Even if the transmission is in perfect
working order, remember to disen-gage the transmission lockout manually
before towing the vehicle. Failure to
observe this precaution could result in
automatic activation of the transmission
lockout while the vehicle is being towed.<
Releasing transmission lockout manually,
refer to page 70.
Tow fitting
The threaded tow fitting is stored in the tool
kit mounted on the inside of the luggage
compartment lid, refer to page 195, and
should always remain in the vehicle. This
fitting, which fits the tow sockets on both
the front and the rear of the vehicle, is
intended exclusively for use in towing the
vehicle on paved roads.
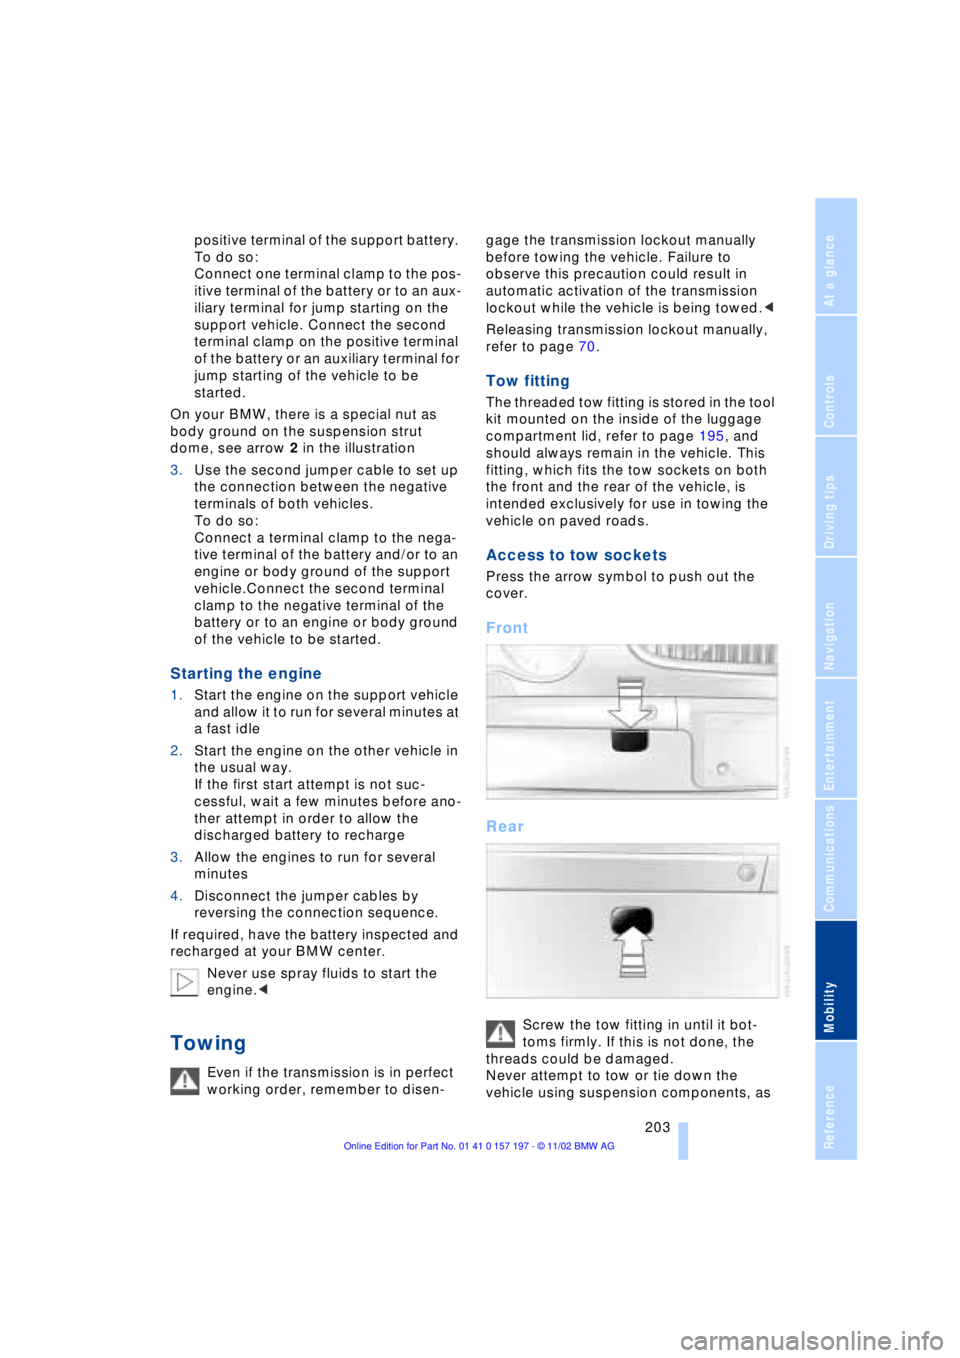
Access to tow sockets
Press the arrow symbol to push out the
cover.
Front
Rear
Screw the tow fitting in until it bot-
toms firmly. If this is not done, the
threads could be damaged.
Never attempt to tow or tie down the
vehicle using suspension components, as