door lock BMW 760LI SEDAN 2005 User Guide
[x] Cancel search | Manufacturer: BMW, Model Year: 2005, Model line: 760LI SEDAN, Model: BMW 760LI SEDAN 2005Pages: 239, PDF Size: 8.03 MB
Page 56 of 239
Adjustments
54 The mirrors automatically revert to their
clear, undimmed mode whenever you
engage transmission position R.
Illuminated vanity mirror in rear
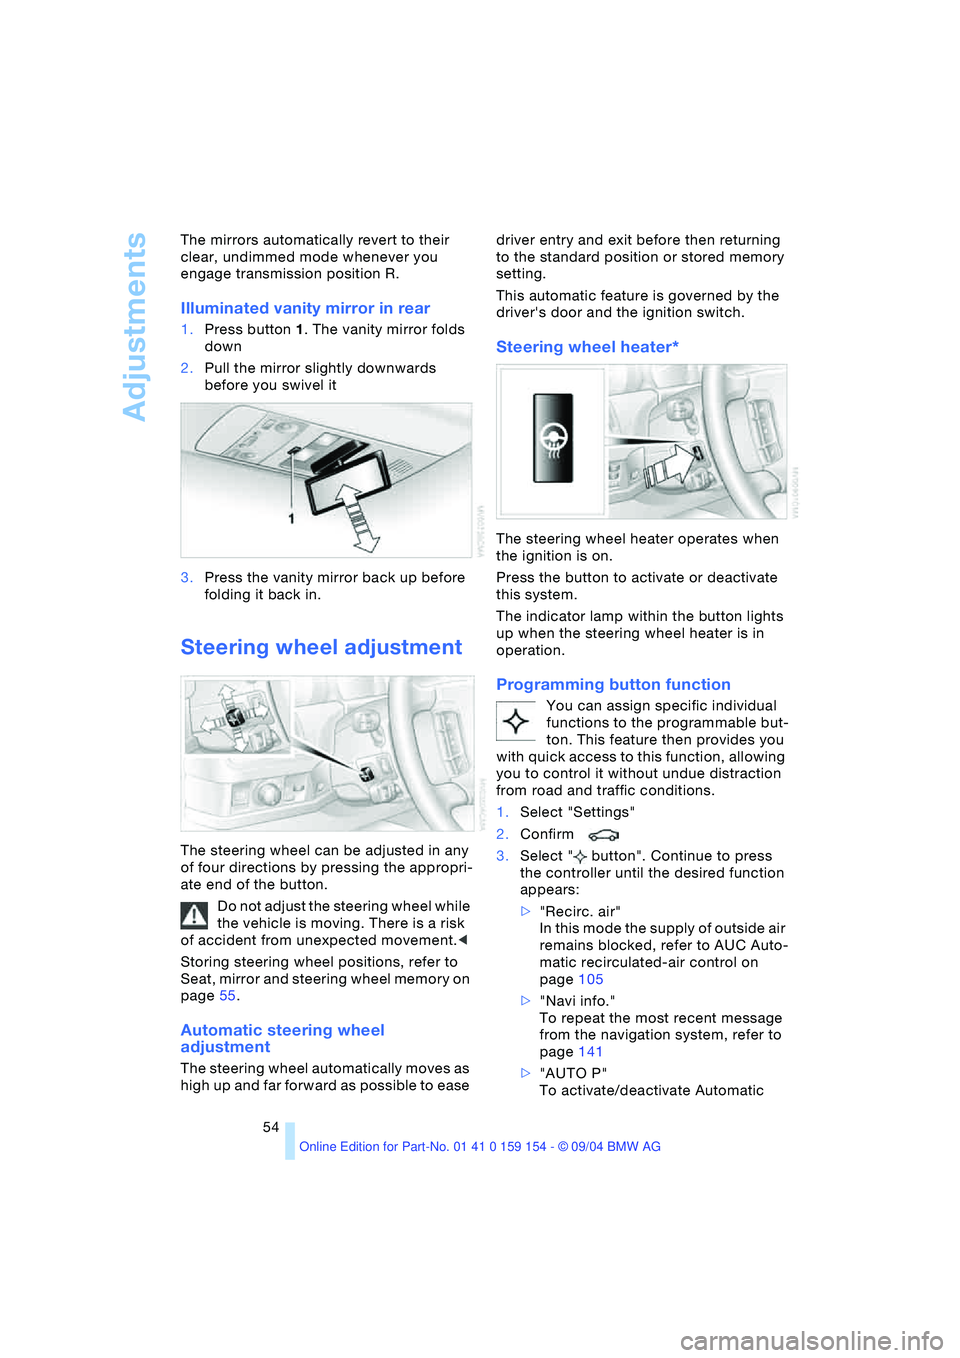
1.Press button1. The vanity mirror folds
down
2.Pull the mirror slightly downwards
before you swivel it
3.Press the vanity mirror back up before
folding it back in.
Steering wheel adjustment
The steering wheel can be adjusted in any
of four directions by pressing the appropri-
ate end of the button.
Do not adjust the steering wheel while
the vehicle is moving. There is a risk
of accident from unexpected movement.<
Storing steering wheel positions, refer to
Seat, mirror and steering wheel memory on
page55.
Automatic steering wheel
adjustment
The steering wheel automatically moves as
high up and far forward as possible to ease driver entry and exit before then returning
to the standard position or stored memory
setting.
This automatic feature is governed by the
driver's door and the ignition switch.
Steering wheel heater*
The steering wheel heater operates when
the ignition is on.
Press the button to activate or deactivate
this system.
The indicator lamp within the button lights
up when the steering wheel heater is in
operation.
Programming button function
You can assign specific individual
functions to the programmable but-
ton. This feature then provides you
with quick access to this function, allowing
you to control it without undue distraction
from road and traffic conditions.
1.Select "Settings"
2.Confirm
3.Select " button". Continue to press
the controller until the desired function
appears:
>"Recirc. air"
In this mode the supply of outside air
remains blocked, refer to AUC Auto-
matic recirculated-air control on
page105
>"Navi info."
To repeat the most recent message
from the navigation system, refer to
page141
>"AUTO P"
To activate/deactivate Automatic
Page 57 of 239
Controls
55Reference
At a glance
Driving tips
Communications
Navigation
Entertainment
Mobility
Hold refer to Automatic Hold on
page65.
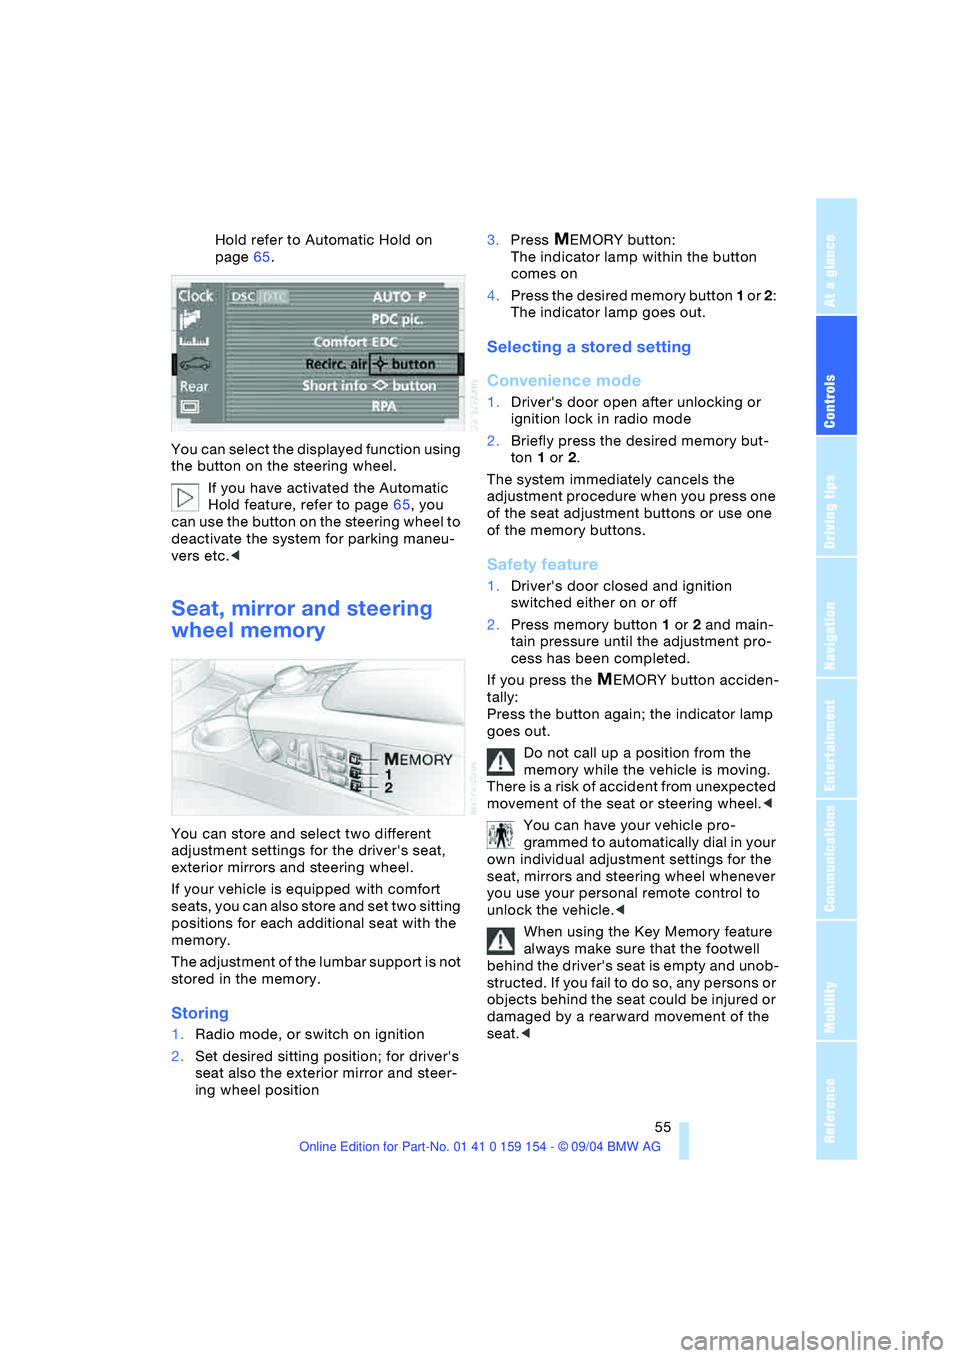
You can select the displayed function using
the button on the steering wheel.
If you have activated the Automatic
Hold feature, refer to page65, you
can use the button on the steering wheel to
deactivate the system for parking maneu-
vers etc.<
Seat, mirror and steering
wheel memory
You can store and select two different
adjustment settings for the driver's seat,
exterior mirrors and steering wheel.
If your vehicle is equipped with comfort
seats, you can also store and set two sitting
positions for each additional seat with the
memory.
The adjustment of the lumbar support is not
stored in the memory.
Storing
1.Radio mode, or switch on ignition
2.Set desired sitting position; for driver's
seat also the exterior mirror and steer-
ing wheel position 3.Press
MEMORY button:
The indicator lamp within the button
comes on
4.Press the desired memory button 1 or 2:
The indicator lamp goes out.
Selecting a stored setting
Convenience mode
1.Driver's door open after unlocking or
ignition lock in radio mode
2.Briefly press the desired memory but-
ton 1 or2.
The system immediately cancels the
adjustment procedure when you press one
of the seat adjustment buttons or use one
of the memory buttons.
Safety feature
1.Driver's door closed and ignition
switched either on or off
2.Press memory button 1 or2 and main-
tain pressure until the adjustment pro-
cess has been completed.
If you press the
MEMORY button acciden-
tally:
Press the button again; the indicator lamp
goes out.
Do not call up a position from the
memory while the vehicle is moving.
There is a risk of accident from unexpected
movement of the seat or steering wheel.<
You can have your vehicle pro-
grammed to automatically dial in your
own individual adjustment settings for the
seat, mirrors and steering wheel whenever
you use your personal remote control to
unlock the vehicle.<
When using the Key Memory feature
always make sure that the footwell
behind the driver's seat is empty and unob-
structed. If you fail to do so, any persons or
objects behind the seat could be injured or
damaged by a rearward movement of the
seat.<
Page 59 of 239
Controls
57Reference
At a glance
Driving tips
Communications
Navigation
Entertainment
Mobility
>Alarm system: set different acknowl-
edgment signals to confirm arming/dis-
arming
>Alarm system: activate/deactivate inte-
rior motion sensor and tilt alarm sensor
>Automatic headlamp control: adjust
sensitivity.
Examples of Key Memory functions
>Seat memory: activate/deactivate func-
tion
>Central locking system: vehicle is
locked as soon as you drive off or if you
have not opened a door or the luggage
compartment lid after unlocking. Acti-
vate/deactivate function
>Automatic climate control: key-specific
storage of the temperature, fan and air
conditioner setting. Activate/deactivate
function
>Check Control: set languages and units
>Seat heating: recall personal tempera-
ture distribution.
Page 62 of 239
Transporting children safely
60
LATCH child-restraint fixing*
LATCH: Lower Anchor and Tethers for
CHildren.
The rear outer sitting positions are pro-
vided with anchors for a LATCH child-
restraint fixing.
To fit the LATCH child-restraint fixing,
follow the operating and safety
instructions of the manufacturer.<
If the vehicle is equipped with power seats
in the rear, return these to their standard
adjustment setting before using a LATCH
child-restraint fixing, refer to page49.
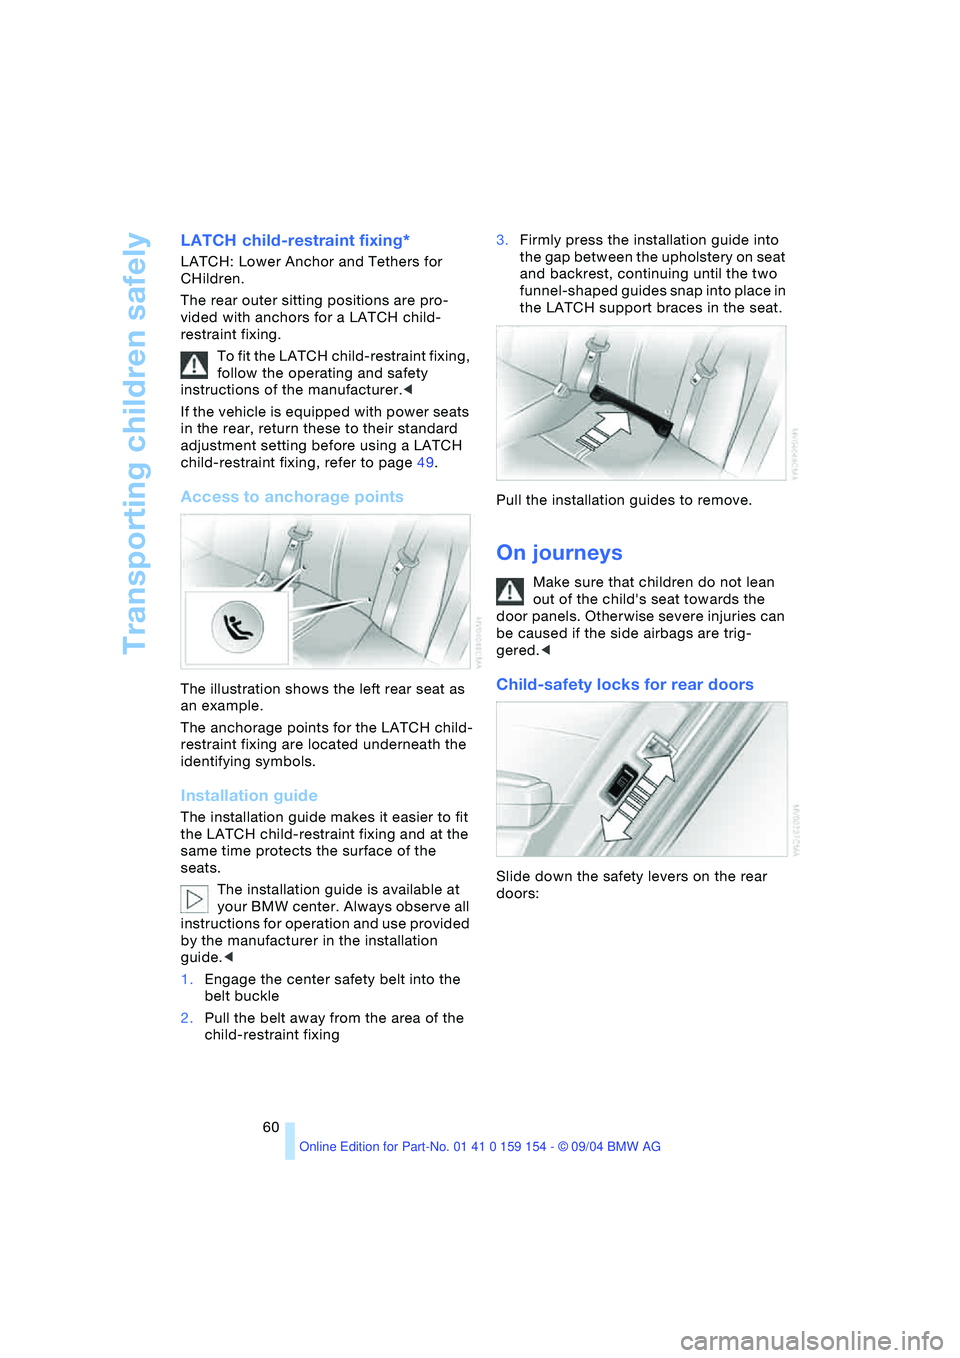
Access to anchorage points
The illustration shows the left rear seat as
an example.
The anchorage points for the LATCH child-
restraint fixing are located underneath the
identifying symbols.
Installation guide
The installation guide makes it easier to fit
the LATCH child-restraint fixing and at the
same time protects the surface of the
seats.
The installation guide is available at
your BMW center. Always observe all
instructions for operation and use provided
by the manufacturer in the installation
guide.<
1.Engage the center safety belt into the
belt buckle
2.Pull the belt away from the area of the
child-restraint fixing3.Firmly press the installation guide into
the gap between the upholstery on seat
and backrest, continuing until the two
funnel-shaped guides snap into place in
the LATCH support braces in the seat.
Pull the installation guides to remove.
On journeys
Make sure that children do not lean
out of the child's seat towards the
door panels. Otherwise severe injuries can
be caused if the side airbags are trig-
gered.<
Child-safety locks for rear doors
Slide down the safety levers on the rear
doors:
Page 64 of 239
Driving
62
Driving
Ignition lock
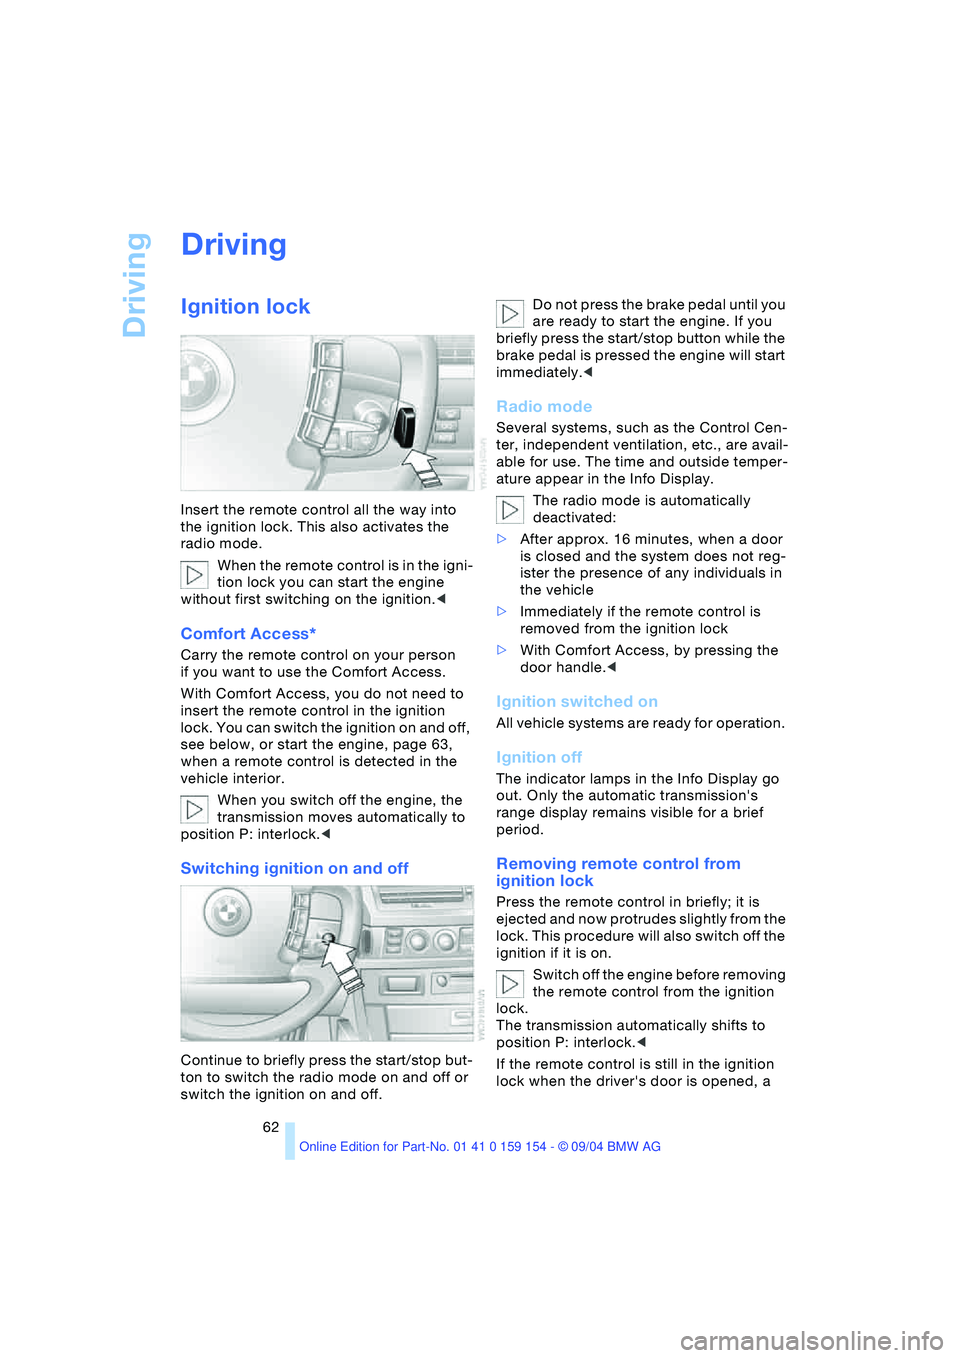
Insert the remote control all the way into
the ignition lock. This also activates the
radio mode.
When the remote control is in the igni-
tion lock you can start the engine
without first switching on the ignition.<
Comfort Access*
Carry the remote control on your person
if you want to use the Comfort Access.
With Comfort Access, you do not need to
insert the remote control in the ignition
lock. You can switch the ignition on and off,
see below, or start the engine, page 63,
when a remote control is detected in the
vehicle interior.
When you switch off the engine, the
transmission moves automatically to
position P: interlock.<
Switching ignition on and off
Continue to briefly press the start/stop but-
ton to switch the radio mode on and off or
switch the ignition on and off. Do not press the brake pedal until you
are ready to start the engine. If you
briefly press the start/stop button while the
brake pedal is pressed the engine will start
immediately.<
Radio mode
Several systems, such as the Control Cen-
ter, independent ventilation, etc., are avail-
able for use. The time and outside temper-
ature appear in the Info Display.
The radio mode is automatically
deactivated:
>After approx. 16 minutes, when a door
is closed and the system does not reg-
ister the presence of any individuals in
the vehicle
>Immediately if the remote control is
removed from the ignition lock
>With Comfort Access, by pressing the
door handle.<
Ignition switched on
All vehicle systems are ready for operation.
Ignition off
The indicator lamps in the Info Display go
out. Only the automatic transmission's
range display remains visible for a brief
period.
Removing remote control from
ignition lock
Press the remote control in briefly; it is
ejected and now protrudes slightly from the
lock. This procedure will also switch off the
ignition if it is on.
Switch off the engine before removing
the remote control from the ignition
lock.
The transmission automatically shifts to
position P: interlock.<
If the remote control is still in the ignition
lock when the driver's door is opened, a
Page 87 of 239
Controls
85Reference
At a glance
Driving tips
Communications
Navigation
Entertainment
Mobility
Confirm to hide the display.
Displays after completion of trip
Selected fault reports generated during the
trip are shown consecutively when you
switch off the ignition.
If indicated, the following message may
also appear:
"Parking lamps on!"
This message appears when you open the
driver's door after parking. A supplemen-
tary gong is also heard.
Even with the ignition and Info Display off,
you can reactivate the screen and display
the messages.
Press the CHECK button for approx.
8 seconds, refer to page84. The stored
status reports appear again in the display. If
several messages are present, you can
continue to briefly press the CHECK button
to view them in succession.
The Check Control function
>cancels itself automatically after a brief
period
>can be canceled by again pressing the
CHECK button for approximately
8seconds.
You can select the language in which
Check Control status reports and
messages from the computer will appear,
refer to page89.<
Computer
Requesting functions
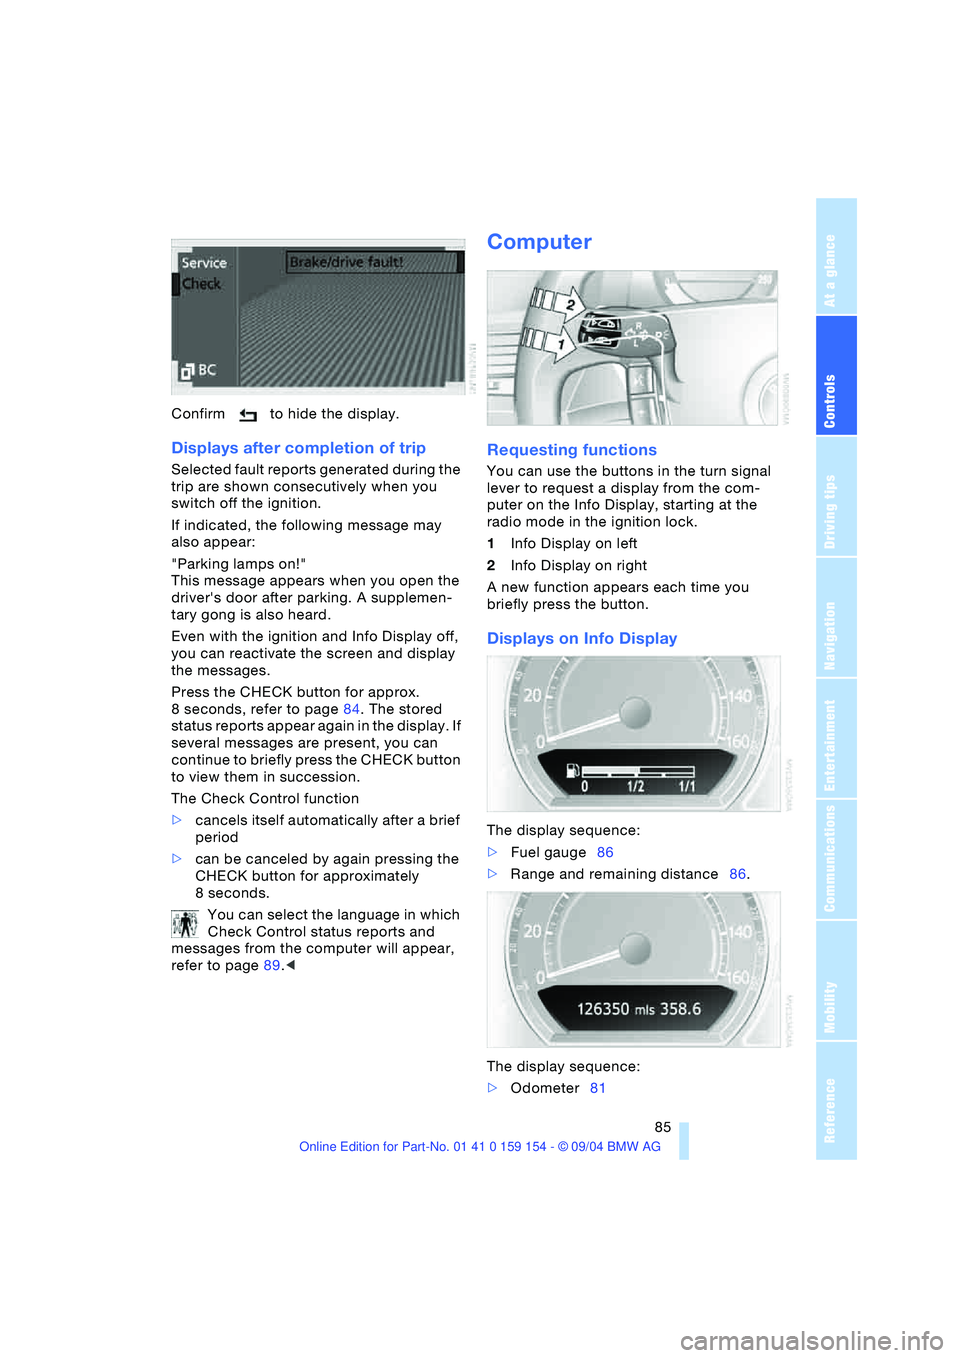
You can use the buttons in the turn signal
lever to request a display from the com-
puter on the Info Display, starting at the
radio mode in the ignition lock.
1Info Display on left
2Info Display on right
A new function appears each time you
briefly press the button.
Displays on Info Display
The display sequence:
>Fuel gauge86
>Range and remaining distance86.
The display sequence:
>Odometer81
Page 106 of 239
A congenial climate
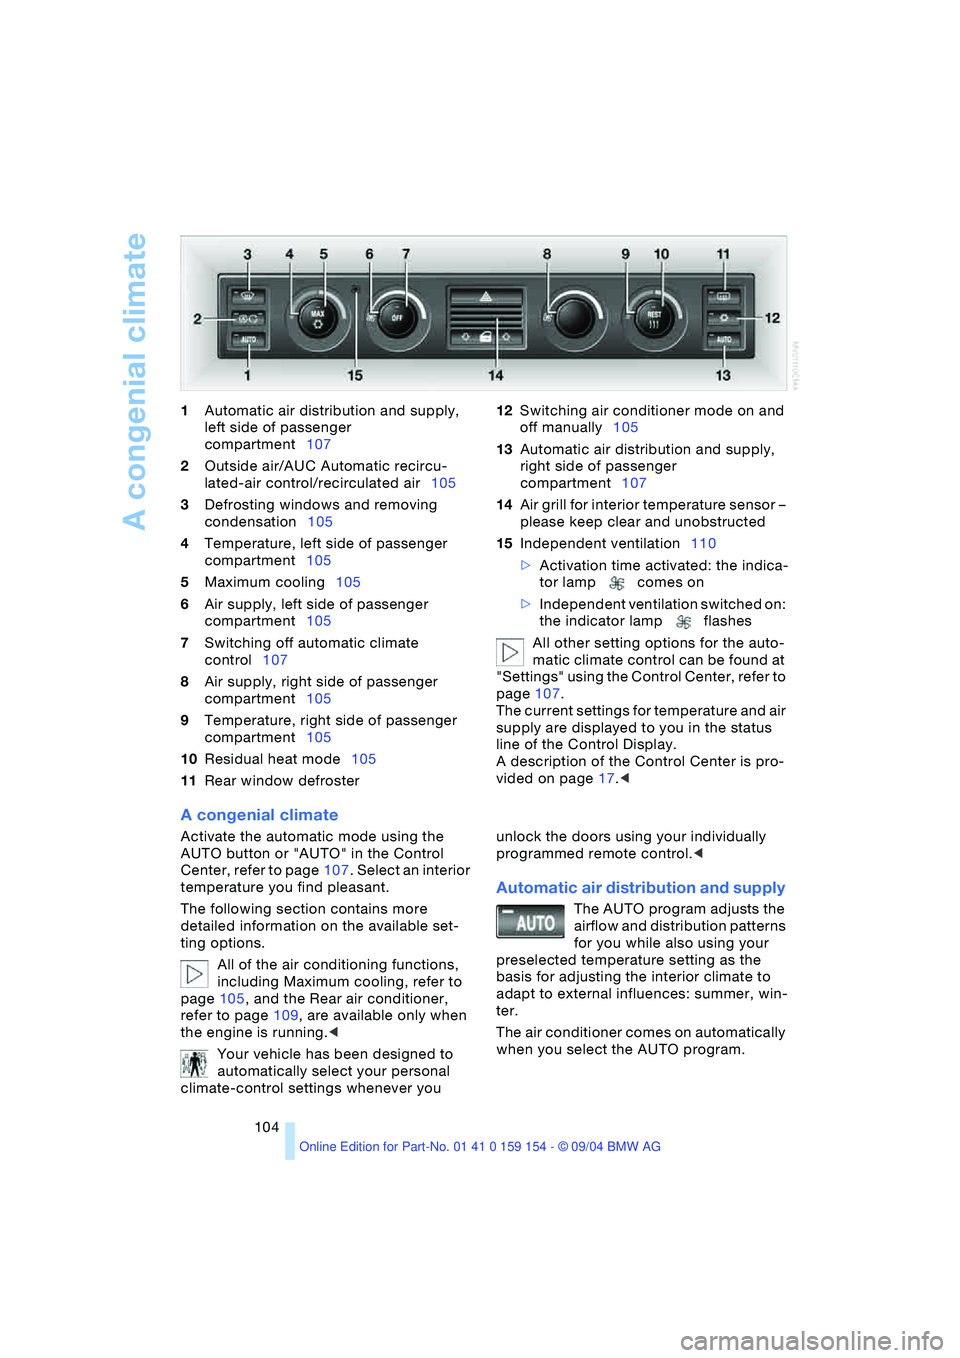
104 1Automatic air distribution and supply,
left side of passenger
compartment107
2Outside air/AUC Automatic recircu-
lated-air control/recirculated air105
3Defrosting windows and removing
condensation105
4Temperature, left side of passenger
compartment105
5Maximum cooling105
6Air supply, left side of passenger
compartment105
7Switching off automatic climate
control107
8Air supply, right side of passenger
compartment105
9Temperature, right side of passenger
compartment105
10Residual heat mode105
11Rear window defroster 12Switching air conditioner mode on and
off manually105
13Automatic air distribution and supply,
right side of passenger
compartment107
14Air grill for interior temperature sensor –
please keep clear and unobstructed
15Independent ventilation110
>Activation time activated: the indica-
tor lamp comes on
>Independent ventilation switched on:
the indicator lamp flashes
All other setting options for the auto-
matic climate control can be found at
"Settings" using the Control Center, refer to
page107.
The current settings for temperature and air
supply are displayed to you in the status
line of the Control Display.
A description of the Control Center is pro-
vided on page17.<
A congenial climate
Activate the automatic mode using the
AUTO button or "AUTO" in the Control
Center, refer to page107. Select an interior
temperature you find pleasant.
The following section contains more
detailed information on the available set-
ting options.
All of the air conditioning functions,
including Maximum cooling, refer to
page105, and the Rear air conditioner,
refer to page109, are available only when
the engine is running.<
Your vehicle has been designed to
automatically select your personal
climate-control settings whenever you unlock the doors using your individually
programmed remote control.<
Automatic air distribution and supply
The AUTO program adjusts the
airflow and distribution patterns
for you while also using your
preselected temperature setting as the
basis for adjusting the interior climate to
adapt to external influences: summer, win-
ter.
The air conditioner comes on automatically
when you select the AUTO program.
Page 107 of 239
Controls
105Reference
At a glance
Driving tips
Communications
Navigation
Entertainment
Mobility
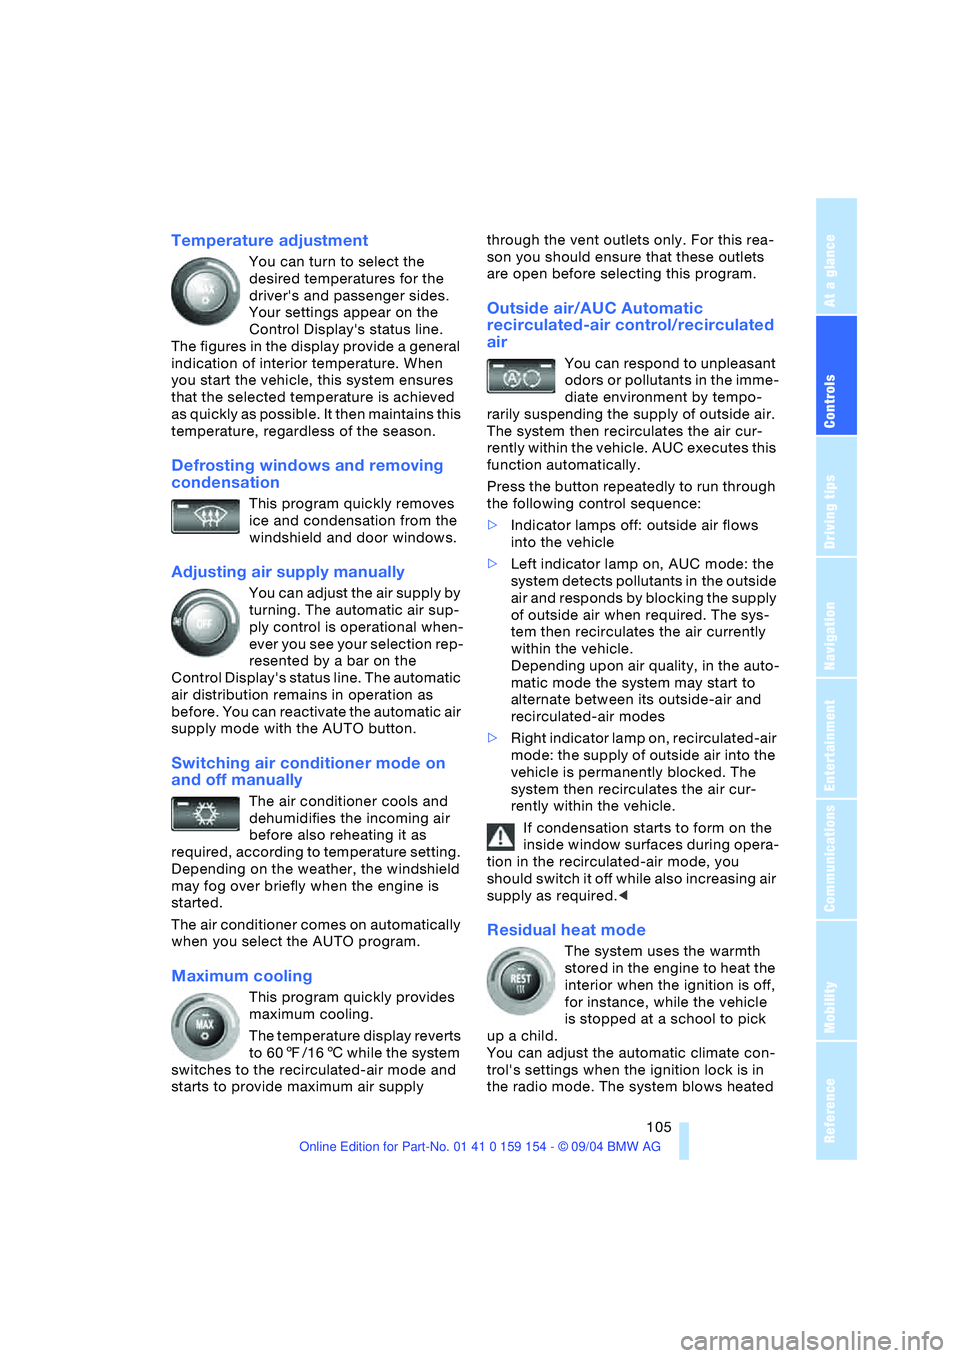
Temperature adjustment
You can turn to select the
desired temperatures for the
driver's and passenger sides.
Your settings appear on the
Control Display's status line.
The figures in the display provide a general
indication of interior temperature. When
you start the vehicle, this system ensures
that the selected temperature is achieved
as quickly as possible. It then maintains this
temperature, regardless of the season.
Defrosting windows and removing
condensation
This program quickly removes
ice and condensation from the
windshield and door windows.
Adjusting air supply manually
You can adjust the air supply by
turning. The automatic air sup-
ply control is operational when-
ever you see your selection rep-
resented by a bar on the
Control Display's status line. The automatic
air distribution remains in operation as
before. You can reactivate the automatic air
supply mode with the AUTO button.
Switching air conditioner mode on
and off manually
The air conditioner cools and
dehumidifies the incoming air
before also reheating it as
required, according to temperature setting.
Depending on the weather, the windshield
may fog over briefly when the engine is
started.
The air conditioner comes on automatically
when you select the AUTO program.
Maximum cooling
This program quickly provides
maximum cooling.
The temperature display reverts
to 607/166 while the system
switches to the recirculated-air mode and
starts to provide maximum air supply through the vent outlets only. For this rea-
son you should ensure that these outlets
are open before selecting this program.
Outside air/AUC Automatic
recirculated-air control/recirculated
air
You can respond to unpleasant
odors or pollutants in the imme-
diate environment by tempo-
rarily suspending the supply of outside air.
The system then recirculates the air cur-
rently within the vehicle. AUC executes this
function automatically.
Press the button repeatedly to run through
the following control sequence:
>Indicator lamps off: outside air flows
into the vehicle
>Left indicator lamp on, AUC mode: the
system detects pollutants in the outside
air and responds by blocking the supply
of outside air when required. The sys-
tem then recirculates the air currently
within the vehicle.
Depending upon air quality, in the auto-
matic mode the system may start to
alternate between its outside-air and
recirculated-air modes
>Right indicator lamp on, recirculated-air
mode: the supply of outside air into the
vehicle is permanently blocked. The
system then recirculates the air cur-
rently within the vehicle.
If condensation starts to form on the
inside window surfaces during opera-
tion in the recirculated-air mode, you
should switch it off while also increasing air
supply as required.<
Residual heat mode
The system uses the warmth
stored in the engine to heat the
interior when the ignition is off,
for instance, while the vehicle
is stopped at a school to pick
up a child.
You can adjust the automatic climate con-
trol's settings when the ignition lock is in
the radio mode. The system blows heated
Page 115 of 239
Controls
113Reference
At a glance
Driving tips
Communications
Navigation
Entertainment
Mobility
The corresponding memory key1 is now
programmed with the signal of the original
hand-held transmitter.
The device can be operated as of ignition
on.
If the device can not be operated
after repeated programming, check
whether the original hand-held transmitter
uses an alternating-code system. To do so,
either read the instructions of the original
hand-held transmitter or press and hold
down the programmed memory key1 of
the integrated universal remote control.
If the indicator lamp2 on the integrated
universal remote control flashes quickly
for a brief period and then remains lit up
for approx. two seconds, this indicates
that the original hand-held transmitter is
equipped with an alternating-code system.
In the case of an alternating-code system,
program the memory keys1 as described
at the section on alternating-code transmit-
ters.<
Alternating-code transmitters
Consult the operating instructions of the
unit you wish to set when programming the
universal remote control. You will find infor-
mation there on the possibilities for syn-
chronization.
When programming hand-held transmitters
that employ an alternating code, please
observe the following supplementary
instructions:
Programming will be easier with the
aid of a second person.<
1.Park your vehicle within the range of the
remote-controlled device
2.Program the integrated universal
remote control as described at the sec-
tion on fixed-code hand-held transmit-
ters
3.Localize the key on the receiver of the
device you want to set up, e.g. on the
upper section of the motor
4.Press the key on the receiver of the
device you want to set up. After step 4,
you have approx. 30 seconds for step 55.Press the programmed memory key1
on the integrated universal remote con-
trol three times.
The corresponding memory key1 is now
programmed with the signal of the original
hand-held transmitter.
If you have any additional questions,
please contact your BMW center.<
Clearing memory keys
Individual memory keys1 can not be
cleared. However, you clear all three mem-
ory keys1 together as follows:
Press both outer keys1 of the integrated
universal remote control for approx.
20 seconds, maintaining pressure until the
indicator lamp2 starts to flash.
Roller sun blinds*
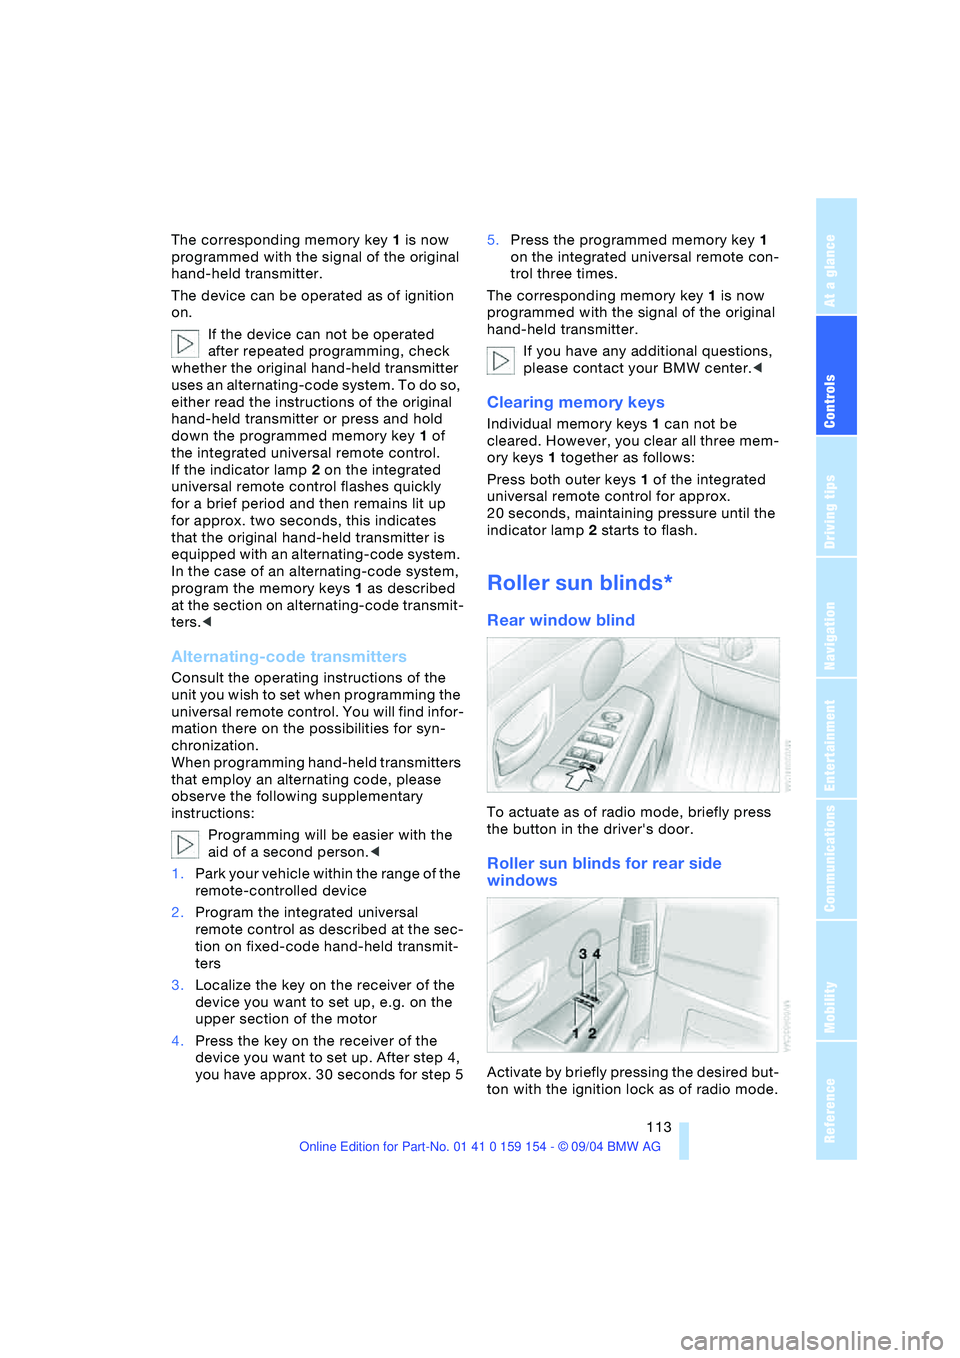
Rear window blind
To actuate as of radio mode, briefly press
the button in the driver's door.
Roller sun blinds for rear side
windows
Activate by briefly pressing the desired but-
ton with the ignition lock as of radio mode.
Page 116 of 239
Practical interior accessories
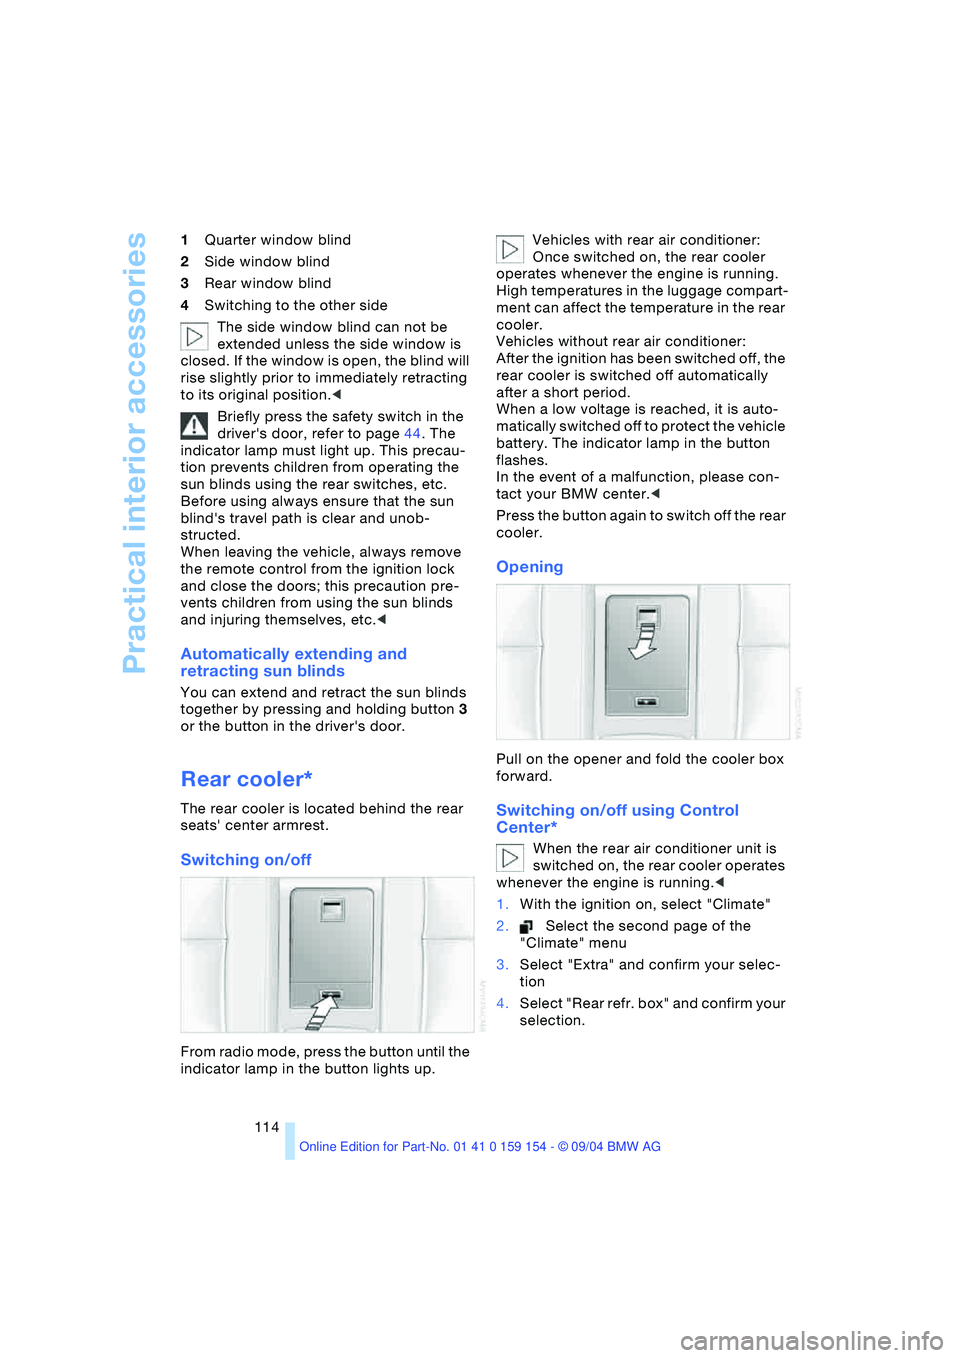
114 1Quarter window blind
2Side window blind
3Rear window blind
4Switching to the other side
The side window blind can not be
extended unless the side window is
closed. If the window is open, the blind will
rise slightly prior to immediately retracting
to its original position.<
Briefly press the safety switch in the
driver's door, refer to page44. The
indicator lamp must light up. This precau-
tion prevents children from operating the
sun blinds using the rear switches, etc.
Before using always ensure that the sun
blind's travel path is clear and unob-
structed.
When leaving the vehicle, always remove
the remote control from the ignition lock
and close the doors; this precaution pre-
vents children from using the sun blinds
and injuring themselves, etc.<
Automatically extending and
retracting sun blinds
You can extend and retract the sun blinds
together by pressing and holding button3
or the button in the driver's door.
Rear cooler*
The rear cooler is located behind the rear
seats' center armrest.
Switching on/off
From radio mode, press the button until the
indicator lamp in the button lights up. Vehicles with rear air conditioner:
Once switched on, the rear cooler
operates whenever the engine is running.
High temperatures in the luggage compart-
ment can affect the temperature in the rear
cooler.
Vehicles without rear air conditioner:
After the ignition has been switched off, the
rear cooler is switched off automatically
after a short period.
When a low voltage is reached, it is auto-
matically switched off to protect the vehicle
battery. The indicator lamp in the button
flashes.
In the event of a malfunction, please con-
tact your BMW center.<
Press the button again to switch off the rear
cooler.
Opening
Pull on the opener and fold the cooler box
forward.
Switching on/off using Control
Center*
When the rear air conditioner unit is
switched on, the rear cooler operates
whenever the engine is running.<
1.With the ignition on, select "Climate"
2.Select the second page of the
"Climate" menu
3.Select "Extra" and confirm your selec-
tion
4.Select "Rear refr. box" and confirm your
selection.