manual transmission BMW ACTIVE HYBRID 7 2015 F01H Owner's Manual
[x] Cancel search | Manufacturer: BMW, Model Year: 2015, Model line: ACTIVE HYBRID 7, Model: BMW ACTIVE HYBRID 7 2015 F01HPages: 262, PDF Size: 5.34 MB
Page 46 of 262
The windows and the glass sunroof are
opened, as long as the button on the remote
control is pressed.
Locking Locking from the outside
Do not lock the vehicle from the outside
with people inside the car, as the vehicle can‐
not be unlocked from inside without special knowledge.◀
The driver's door must be closed. Press button on the remote control.
All doors, the tailgate, and the fuel filler flap are
being locked.
Anti-theft protection is switched on. It pre‐
vents the doors from being unlocked using the
lock buttons or the door openers.
The alarm system, refer to page 51, is armed.
Switching on interior lights and
courtesy lights
Press button on the remote control with
the vehicle locked.
This function is not available, if the interior
lamps were switched off manually.
If the button is pressed again within 10 sec‐
onds after vehicle was locked, the interior mo‐
tion sensor and tilt alarm sensor of the anti-
theft warning system, refer to page 52, are
turned off. After locking, wait 10 seconds be‐
fore pressing the button again.
Panic mode
You can trigger the alarm system if you find
yourself in a dangerous situation.
Press button on the remote control for
at least 3 seconds.
To reel off the alarm: press any button.Opening the trunk lid Press button on the remote control for
approx. 1 second.
The trunk lid opens, regardless of whether the
vehicle was previously locked or unlocked.
During opening, the trunk lid pivots back and
up. Ensure that adequate clearance is available
before opening.
Depending on the features and the country
version, it is also possible to have door un‐
locked. Create the settings, refer to page 50.
If the doors were not unlocked, the trunk lid is
locked again as soon as it closes.
Do not place the remote control in the
cargo area
Take the remote control with you and do not
leave it in the cargo area; otherwise, the re‐
mote control is locked inside the vehicle when
the trunk lid is closed.◀
Switching on the headlight courtesy
delay feature
The headlight courtesy delay feature function
must be set for the remote control button. For
Settings, refer to page 50.
Briefly press the button on the remote
control.
The duration can be set in the Control Display. Malfunction
Remote control detection by the vehicle can
among others be malfunctioning under the fol‐
lowing circumstances:▷The battery of the remote control is dis‐
charged. Replace the battery, refer to
page 39.▷Interference of the radio connection from
transmission towers or other equipment
with high transmit power.Seite 42ControlsOpening and closing42
Online Edition for Part no. 01 40 2 954 204 - II/15
Page 86 of 262
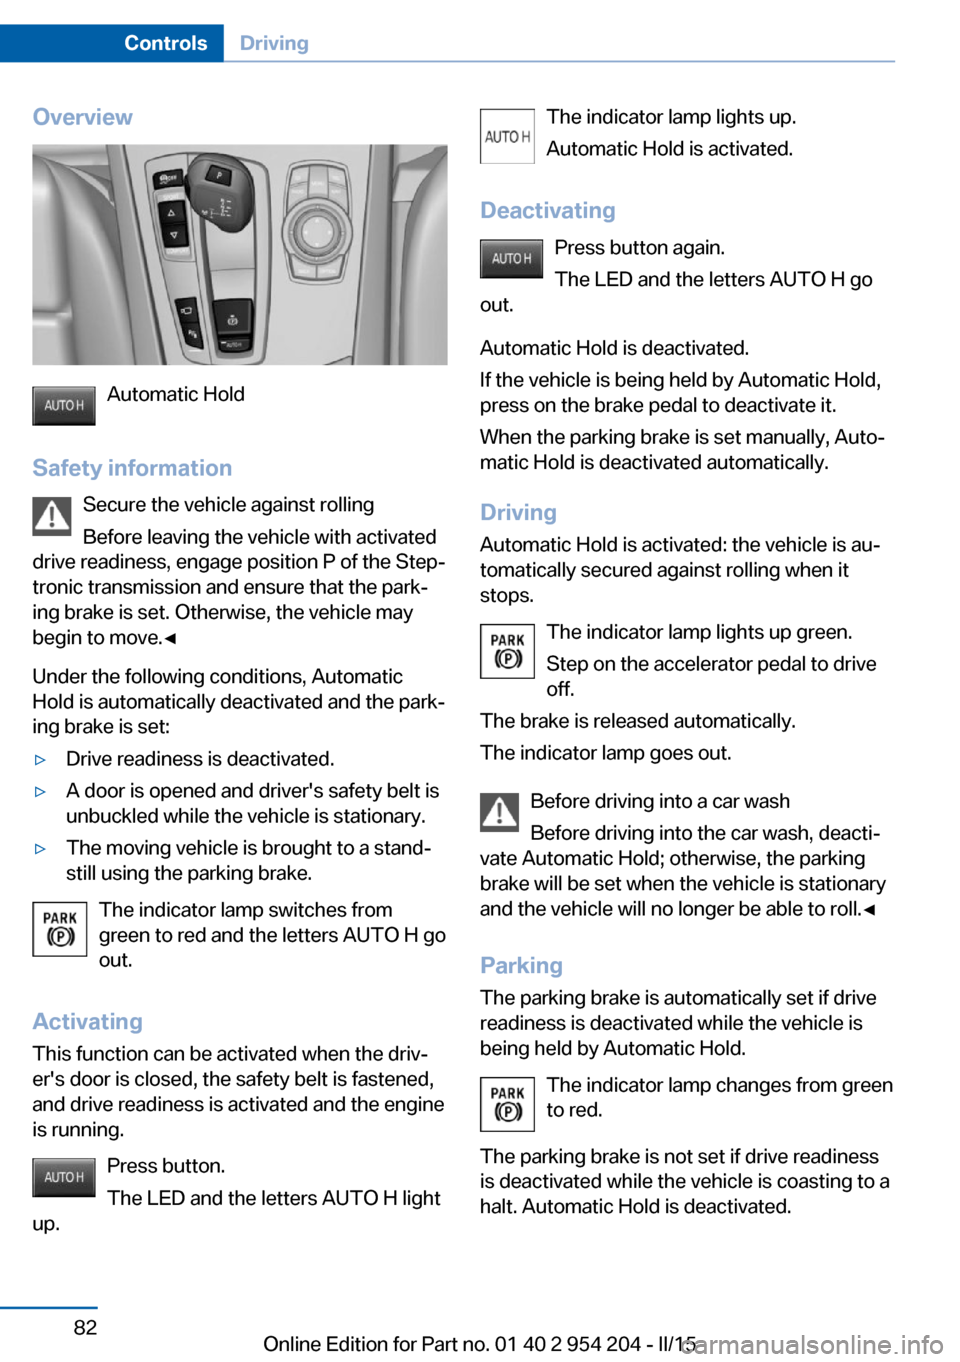
Overview
Automatic Hold
Safety information Secure the vehicle against rolling
Before leaving the vehicle with activated
drive readiness, engage position P of the Step‐
tronic transmission and ensure that the park‐
ing brake is set. Otherwise, the vehicle may
begin to move.◀
Under the following conditions, Automatic
Hold is automatically deactivated and the park‐
ing brake is set:
▷Drive readiness is deactivated.▷A door is opened and driver's safety belt is
unbuckled while the vehicle is stationary.▷The moving vehicle is brought to a stand‐
still using the parking brake.
The indicator lamp switches from
green to red and the letters AUTO H go out.
Activating
This function can be activated when the driv‐
er's door is closed, the safety belt is fastened,
and drive readiness is activated and the engine
is running.
Press button.
The LED and the letters AUTO H light
up.
The indicator lamp lights up.
Automatic Hold is activated.
Deactivating Press button again.
The LED and the letters AUTO H go
out.
Automatic Hold is deactivated.
If the vehicle is being held by Automatic Hold,
press on the brake pedal to deactivate it.
When the parking brake is set manually, Auto‐
matic Hold is deactivated automatically.
Driving Automatic Hold is activated: the vehicle is au‐
tomatically secured against rolling when it
stops.
The indicator lamp lights up green.
Step on the accelerator pedal to drive
off.
The brake is released automatically.
The indicator lamp goes out.
Before driving into a car wash
Before driving into the car wash, deacti‐
vate Automatic Hold; otherwise, the parking
brake will be set when the vehicle is stationary
and the vehicle will no longer be able to roll.◀
Parking
The parking brake is automatically set if drive
readiness is deactivated while the vehicle is
being held by Automatic Hold.
The indicator lamp changes from green
to red.
The parking brake is not set if drive readiness
is deactivated while the vehicle is coasting to a
halt. Automatic Hold is deactivated.Seite 82ControlsDriving82
Online Edition for Part no. 01 40 2 954 204 - II/15
Page 87 of 262
Take the remote control with you
Take the remote control with you when
leaving the vehicle so that children, e.g., can‐
not release the parking brake.◀
Malfunction
In the event of a failure or malfunction of the
parking brake, secure the vehicle against roll‐
ing using a wheel chock, e.g., when leaving it.
Manual release Before releasing, secure the vehicle
against rolling
Before releasing the parking brake manually,
and whenever you park the vehicle with the
parking brake released, ensure that position P
of the Steptronic transmission is set.
Secure the vehicle in a manner appropriate to
the inclination of the road, e.g., with a wheel
chock; otherwise, there is a danger of an acci‐
dent and injuries if the vehicle rolls uninten‐
tionally.◀
The parking brake can be released manually in
the event of a power failure or electrical fault.
Unlocking Have the malfunction corrected
If the parking brake has been released
manually in response to a malfunction, only
technicians can return it to operation.
Have the malfunction corrected by your serv‐
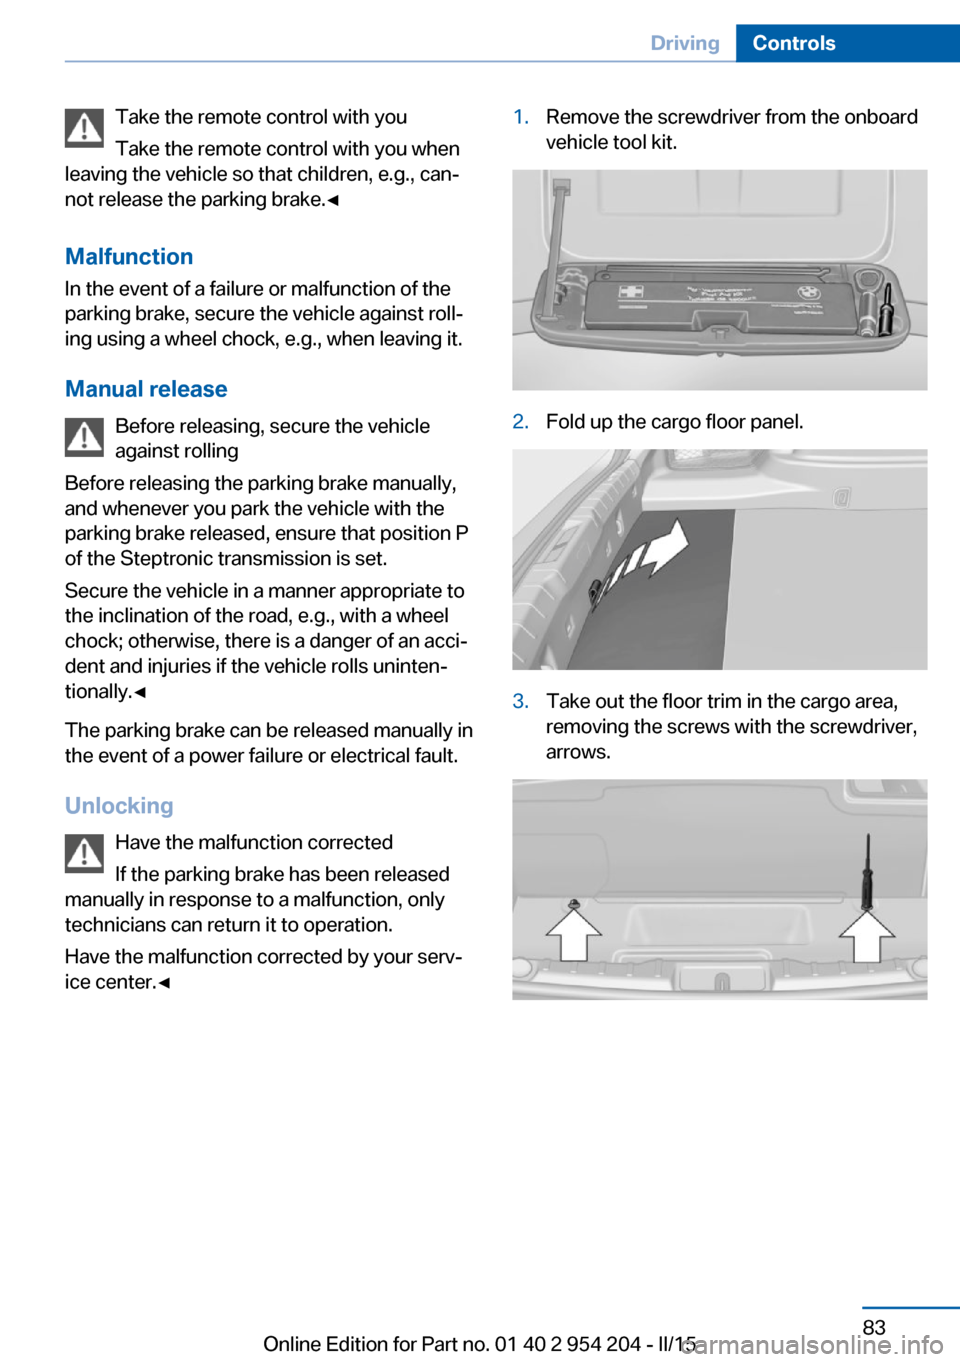
ice center.◀1.Remove the screwdriver from the onboard
vehicle tool kit.2.Fold up the cargo floor panel.3.Take out the floor trim in the cargo area,
removing the screws with the screwdriver,
arrows.Seite 83DrivingControls83
Online Edition for Part no. 01 40 2 954 204 - II/15
Page 93 of 262
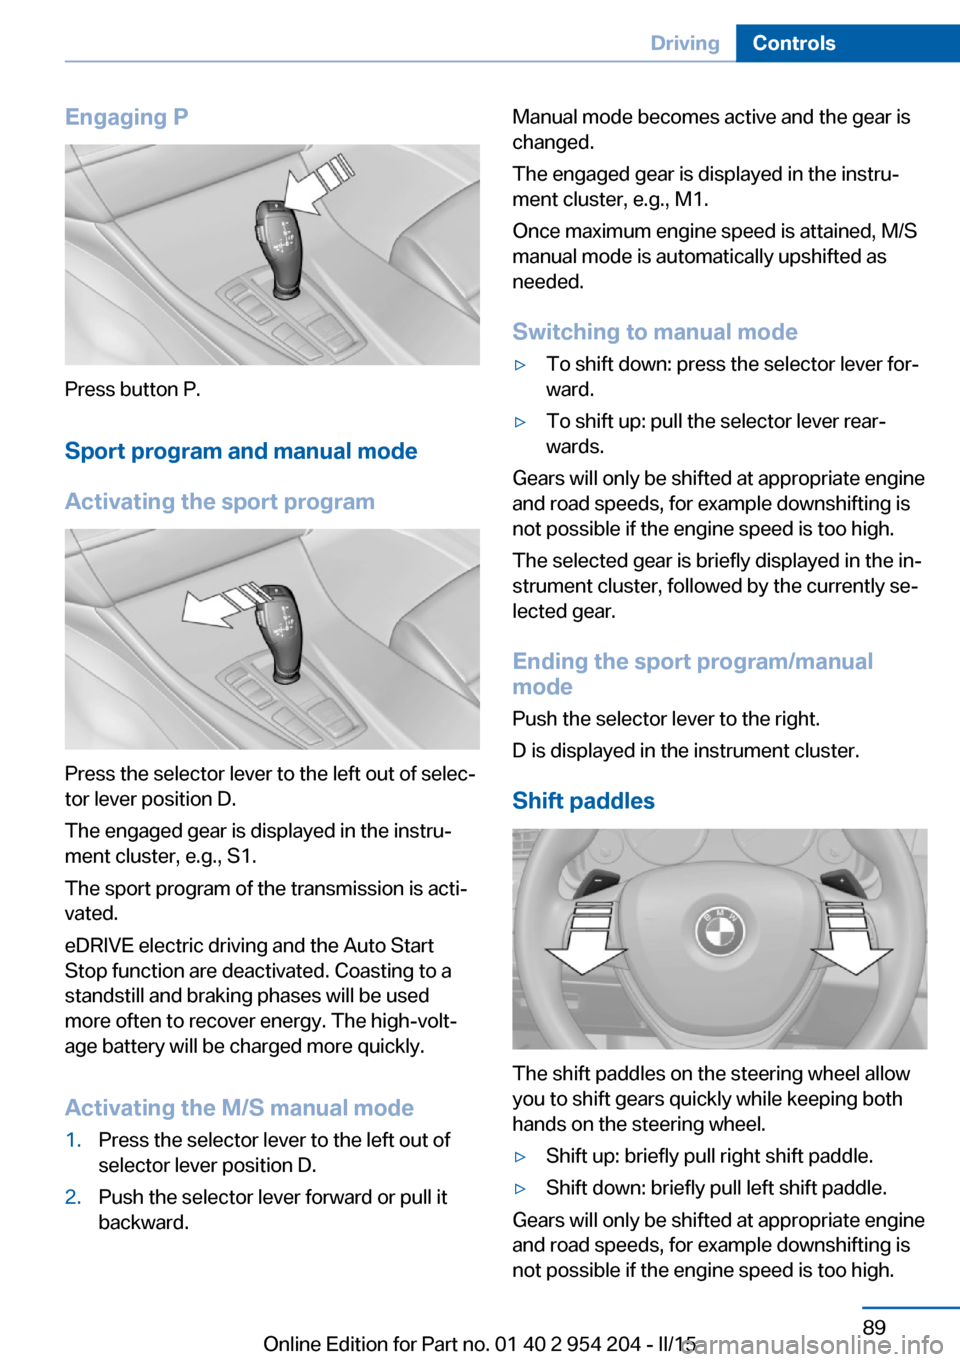
Engaging P
Press button P.Sport program and manual mode
Activating the sport program
Press the selector lever to the left out of selec‐
tor lever position D.
The engaged gear is displayed in the instru‐
ment cluster, e.g., S1.
The sport program of the transmission is acti‐
vated.
eDRIVE electric driving and the Auto Start
Stop function are deactivated. Coasting to a
standstill and braking phases will be used
more often to recover energy. The high-volt‐
age battery will be charged more quickly.
Activating the M/S manual mode
1.Press the selector lever to the left out of
selector lever position D.2.Push the selector lever forward or pull it
backward.Manual mode becomes active and the gear is
changed.
The engaged gear is displayed in the instru‐
ment cluster, e.g., M1.
Once maximum engine speed is attained, M/S
manual mode is automatically upshifted as
needed.
Switching to manual mode▷To shift down: press the selector lever for‐
ward.▷To shift up: pull the selector lever rear‐
wards.
Gears will only be shifted at appropriate engine
and road speeds, for example downshifting is
not possible if the engine speed is too high.
The selected gear is briefly displayed in the in‐
strument cluster, followed by the currently se‐
lected gear.
Ending the sport program/manual
mode
Push the selector lever to the right.
D is displayed in the instrument cluster.
Shift paddles
The shift paddles on the steering wheel allow
you to shift gears quickly while keeping both
hands on the steering wheel.
▷Shift up: briefly pull right shift paddle.▷Shift down: briefly pull left shift paddle.
Gears will only be shifted at appropriate engine
and road speeds, for example downshifting is
not possible if the engine speed is too high.
Seite 89DrivingControls89
Online Edition for Part no. 01 40 2 954 204 - II/15
Page 94 of 262
The selected gear is briefly displayed in the in‐
strument cluster, followed by the current gear.
If the shift paddles on the steering wheel are
used to shift gears in automatic mode, the
transmission temporarily switches to manual
mode.
In the manual mode, after conservative driving
for a certain amount of time or if there has
been no acceleration or shifting of the shift
paddles within a certain amount of time, the
transmission switches back to automatic
mode.
Displays in the instrument cluster The selector lever position is dis‐
played, e.g.: P.
Electronic unlocking of the
transmission lock
General information
Electronically unlock the transmission lock to
maneuver vehicle from the danger area.
Unlocking is possible, if the started can spin
the engine.
Engaging selector lever position N1.Depress the brake pedal.2.Press the Start/Stop button. The starter
must audibly start.3.Press and hold the selector lever into posi‐
tion N.
A corresponding Check Control message
is displayed.4.Press the selector lever again into posi‐
tion N within approx. 6 seconds.
Position N is displayed in the instrument
cluster.5.Release brake, as soon as the starter
stops.6.Maneuver the vehicle from the danger area
and secure it against moving on its own.Seite 90ControlsDriving90
Online Edition for Part no. 01 40 2 954 204 - II/15
Page 104 of 262
3. "Service required"
Required maintenance procedures and le‐
gally mandated inspections are displayed.4.Select an entry to call up detailed informa‐
tion.
Symbols
Sym‐
bolsDescriptionNo service is currently required.The deadline for scheduled mainte‐
nance or a legally mandated inspec‐
tion is approaching.The service deadline has already
passed.
Entering appointment dates
Enter the dates for the required inspections.
Make sure that the vehicle's date and time are
set correctly.
On the Control Display:
1."Vehicle info"2."Vehicle status"3. "Service required"4."§ Vehicle inspection"5."Date:"6.Adjust the settings.7.Confirm.
The entered date is stored.
Automatic Service Request
Data regarding the service status or legally
mandated vehicle inspections are automati‐
cally transmitted to your service center before
a service due date.
You can check when your service center was
notified.
On the Control Display:1."Vehicle info"2."Vehicle status"3.Open "Options".4."Last Service Request"
Gear shift indicator
The conceptThe system recommends the most fuel effi‐
cient gear for the current driving situation.
Depending on the vehicle's features and coun‐
try version of the vehicle, the gear shift indica‐
tor is active in the manual mode of the Step‐
tronic transmission.
Suggestions to shift gear up or down are dis‐
played in the instrument cluster.
On vehicles without a gear shift indicator, the
engaged gear is displayed.
Displays
ExampleDescriptionFuel efficient gear is set.Shift into fuel efficient gear.
Speed limit detection
The concept
Speed limit detection
Speed limit detection uses a symbol in the
shape of a traffic sign to display the currently
detected speed limit. The camera in the area of
the interior rearview mirror detects traffic signs
at the edge of the road as well as variable over‐
head sign posts. Traffic signs with extra sym‐
Seite 100ControlsDisplays100
Online Edition for Part no. 01 40 2 954 204 - II/15
Page 160 of 262
Switch the system back on if needed.
With front PDC: switching on/off
manually
Press button.▷On: the LED lights up.▷Off: the LED goes out.
Display
Signal tones When approaching an object, an intermittent
sound indicates the position of the object. E. g.
if an object is detected to the left rear of the
vehicle, a signal tone sounds from the left rear
speaker.
The shorter the distance to the object, the shorter the intervals.
If the distance to a detected object is less than
approx. 10 in/25 cm, a continuous tone is
sounded.
With front PDC: if objects are located both in
front of and behind the vehicle, an alternating
continuous signal is sounded.
An interval tone is interrupted with the appro‐
priate equipment after about 3 seconds:
▷If the vehicle stops in front of an object that
is detected by only one of the corner sen‐
sors.▷If moving parallel to a wall.
The signal tone is switched off, when selector
lever position P is engaged on vehicles with
Steptronic transmission.
Volume
The volume of the PDC signal tone can be ad‐
justed similar to the sound and volume set‐
tings of the radio.
Settings are stored for the profile currently in
use.
Visual warning
The approach of the vehicle to an object can
be shown on the Control Display. Objects that
are farther away are already displayed on the
Control Display before a signal sounds.
A display appears as soon as Park Distance
Control (PDC) is activated.
The range of the sensors is represented in the
colors green, yellow and red.
When the image of the rearview camera is dis‐
played, the reel can be made to PDC:
"Rear view camera"
System limits
Limits of ultrasonic measurement
Ultrasonic measuring might not function under
the following circumstances:
▷For small children and animals.▷For persons with certain clothing, e.g.
coats.▷With external interference of the ultra‐
sound, e.g. from passing vehicles or loud
machines.▷When sensors are dirty, iced over, dam‐
aged or out of position.▷Under certain weather conditions such as
high relative humidity, rain, snowfall, ex‐
treme heat or strong wind.▷With tow bars and trailer couplings of other
vehicles.▷With thin or wedge-shaped objects.▷With moving objects.▷With elevated, protruding objects such as
ledges or cargo.▷With objects with corners and sharp edges.▷With objects with a fine surface structure
such as fences.▷For objects with porous surfaces.Seite 156ControlsDriving comfort156
Online Edition for Part no. 01 40 2 954 204 - II/15
Page 250 of 262
Everything from A to Z
IndexA ABS, Antilock Brake Sys‐ tem 140
ACC, Active Cruise Control with Stop & Go 146
Accessories and parts 7
Activated-charcoal filter 170
Activate drive readiness 77
Active Blind Spot Detec‐ tion 135
Active Cruise Control with Stop & Go, ACC 146
ActiveHybrid, system 31
Active Protection 137
Active seat, front 59
Active seat ventilation, front 60
Active seat ventilation, rear 63
Adapting to the course of the road, hybrid system 94
Adaptive brake assistant 140
Adaptive brake lights, refer to Brake force display 137
Adaptive Light Control 109
Adaptive Light Control, bulb replacement 227
Additives, oil 219
Adjusting, steering wheel 70
Adjustments, seats/head re‐ straints 57
After washing vehicle 238
Airbags 113
Airbags, indicator/warning light 114
Air circulation, refer to Recir‐ culated-air mode 169
Air, dehumidifying, refer to Cooling function 169
Air distribution, manual 168 Air flow, automatic climate
control 168
Air outlets, see ventila‐ tion 170
Air pressure, tires 206
Alarm system 51
Alarm, unintentional 52
All around the center con‐ sole 16
All around the roofliner 17
All around the steering wheel 14
All-season tires, refer to Win‐ ter tires 211
Alternating-code hand-held transmitter 176
Alternative oil types 220
Ambient light 112
Animal detection, see Night Vision 131
Antifreeze, washer fluid 87
Antilock Brake System, ABS 140
Anti-slip control, refer to DSC 140
Approved axle load 245
Approved engine oils, see Suitable engine oil
types 220
Armrest, refer to Center arm‐ rest 182
Arrival time 103
Ashtray 177
Assistance for the combus‐ tion engine, ASSIST 80
Assistance for the combus‐ tion engine, eBOOST 80
Assistance when driving off 140
ASSIST, assistance for the combustion engine 80 Attentiveness assistant 137
AUTO H button 81
AUTO H button, refer to Au‐ tomatic Hold 81
AUTO intensity 168
Automatic car wash 237
Automatic climate con‐ trol 167
Automatic Cruise Control with Stop & Go 146
Automatic Curb Monitor 69
Automatic deactivation, front- seat passenger airbags 115
Automatic deactivation of the hybrid system 34
Automatic headlight con‐ trol 109
Automatic Hold 81
Automatic locking 50
Automatic recirculated-air control 169
Automatic Soft Closing, doors 44
Automatic Soft Closing, trunk lid 45
Automatic transmission, see Steptronic transmission 88
Automatic trunk lid 45
AUTO program, automatic cli‐ mate control 168
AUTO program, intensity 168
Auto Start/Stop function 78
Auxiliary air conditioning 174
Average fuel consump‐ tion 103
Average speed 103
Axle loads, weights 245 Seite 246ReferenceEverything from A to Z246
Online Edition for Part no. 01 40 2 954 204 - II/15
Page 254 of 262
Fuel, tank capacity 245
Functions, hybrid system 31
Fuse 231
G
Garage door opener, refer to Universal Integrated Remote
Control 175
Gasoline 204
Gear change, Steptronic transmission 88
Gear shift indicator 100
General driving notes 190
Gentleman function 59
Glare shield 177
Glass sunroof, powered 55
Glove compartment 181
Gross vehicle weight, ap‐ proved 245
H
Handbrake, refer to Parking brake 80
Hand-held transmitter, alter‐ nating code 176
Hazard warning flashers 232
Head airbags 113
Headlight control, auto‐ matic 109
Headlight courtesy delay fea‐ ture 109
Headlight courtesy delay fea‐ ture, remote control 51
Headlight courtesy delay fea‐ ture via remote control 42
Headlight flasher 85
Headlight glass 226
Headlights, care 238
Headlight washer system 85
Head restraints 57
Head restraints, front 64
Head restraints, rear 65
Head-up Display 106
Head-up Display, care 240 Heavy cargo, stowing 194
Height, vehicle 244
High-beam Assistant 110
High beams 85
High beams/low beams, refer to High-beam Assistant 110
High-voltage battery, charge indicator 92
High-voltage battery, dis‐ charge 189
High-voltage system, safety 34
Hills 192
Hill start assistant, refer to Drive-off assistant 140
Hints 6
Holder for beverages 183
Homepage 6
Hood 216
Horn 14
Hotel function, trunk lid 47
Hot exhaust system 190
HUD Head-up Display 106
Hybrid system, adapting to the course of the road 94
Hybrid system, at a glance 31
Hybrid system, automatic de‐ activation 34
Hybrid system, contact with water 34
Hybrid system, displays 92
Hydroplaning 191
I Ice warning, see External temperature warning 98
Icy roads, see External tem‐ perature warning 98
Identification marks, tires 208
Identification number, see ve‐ hicle identification num‐
ber 9
iDrive 18
Ignition key, refer to Remote control 38 Ignition off 76
Ignition on 76
Indication of a flat tire 117 , 119
Indicator and alarm lamps, see Check Control 94
Indicator lamp, see Check Control 94
Individual air distribution 168
Individual settings, refer to Personal Profile 39
Inflation pressure, tires 206
Inflation pressure warning FTM, tires 116
Info display, refer to On- Board computer 102
Initialize, Tire Pressure Moni‐ tor TPM 119
Initializing, Flat Tire Monitor FTM 116
Instrument cluster 91
Instrument cluster, electronic displays 91
Instrument lighting 111
Integrated key 38
Integrated Owner's Manual in the vehicle 29
Intelligent Emergency Re‐ quest 232
Intelligent Safety 121
Intensity, AUTO pro‐ gram 168
Interior equipment 175
Interior lights 111
Interior lights during unlock‐ ing 41
Interior lights with the vehicle locked 42
Interior motion sensor 52
Interior rearview mirror, auto‐ matic dimming feature 70
Interior rearview mirror, man‐ ually dimmable 70
Internet page 6
Interval display, service re‐ quirements 99 Seite 250ReferenceEverything from A to Z250
Online Edition for Part no. 01 40 2 954 204 - II/15
Page 255 of 262
Interval mode 86
J Jacking points for the vehicle jack 229
Joystick, Steptronic transmis‐ sion 88
Jump-starting 233
K
Key/remote control 38
Keyless Go, refer to Comfort Access 47
Key Memory, refer to Per‐ sonal Profile 39
Kickdown, Steptronic trans‐ mission 88
Knee airbag 114
L Lamp replacement, rear 228
Lane departure warning 134
Lane margin, warning 134
Language on Control Dis‐ play 105
Lashing eyes, securing cargo 194
LATCH child restraint sys‐ tem 74
Leather, care 238
LED front fog lights, bulb re‐ placement 228
LED headlights, bulb replace‐ ment 228
LED light 228
LEDs, light-emitting di‐ odes 226
Length, vehicle 244
Letters and numbers, enter‐ ing 24
License plate lamp, bulb re‐ placement 228
Light alloy wheels, care 239 Light bulb replacement, see
Lamp and bulb replace‐
ment 225
Light control 109
Light-emitting diodes, LEDs 226
Lighter, rear 178
Lighting 108
Lighting, speaker 112
Lights 108
Lights and bulbs, see Lamp and bulb replacement 225
Light switch 108
Load 194
Loading 193
Lock, door 43
Locking/unlocking via door lock 43
Locking/unlocking with re‐ mote control 41
Locking, automatic 50
Locking, settings 50
Locking via trunk lid 45
Lock, power window 53
Locks, doors, and win‐ dows 75
Low beams 108
Low beams, automatic, refer to High-beam Assistant 110
Lower back support 58
Lug bolt lock 230
Luggage rack, see Roof- mounted luggage rack 194
Lumbar support 58
M
Maintenance 223
Maintenance require‐ ments 223
Maintenance, service require‐ ments 99
Maintenance system, BMW 223
Make-up mirror 177 Malfunction displays, see
Check Control 94
Malfunction, self-leveling sus‐ pension 142
Manual air distribution 168
Manual air flow 168
Manual brake, refer to Parking brake 80
Manual mode, Steptronic transmission 89
Manual operation, door lock 43
Manual operation, exterior mirrors 69
Manual operation, fuel filler flap 203
Manual operation, Park Dis‐ tance Control PDC 156
Manual operation, parking brake 83
Manual operation, rearview camera 158
Manual operation, Side View 160
Manual operation, Top View 162
Manual operation, trunk lid 45
Marking on approved tires 211
Marking, run-flat tires 212
Massage seat, front 59
Massage seat, rear 62
Master key, refer to Remote control 38
Maximum cooling 169
Maximum speed, display 100
Maximum speed, winter tires 212
Measure, units of 106
Medical kit 233
Memory for seat, mirrors, steering wheel 67
Menu in instrument clus‐ ter 102
Menus, operating, iDrive 18 Seite 251Everything from A to ZReference251
Online Edition for Part no. 01 40 2 954 204 - II/15