transmission BMW ACTIVEHYBRID 5 2012 Owner's Guide
[x] Cancel search | Manufacturer: BMW, Model Year: 2012, Model line: ACTIVEHYBRID 5, Model: BMW ACTIVEHYBRID 5 2012Pages: 319, PDF Size: 12.54 MB
Page 210 of 319

Connect the Apple iPod/iPhone
to the USB interface.
The Apple iPod/iPhone menu
structure is supported by the
USB audio interface.
Connection of a USB device via the
USB audio interface
USB audio interface is located in the center arm‐
rest.
Connect using a flexible adapter cable to protect
the USB audio interface and the USB device
against physical damage.
Connect the USB device to the
USB interface.
After connecting for the first time
Information on all music tracks, e.g. artist or type
of music, as well as playback lists are transmit‐
ted into the vehicle. This may take some time,
depending on the USB device and the number
of tracks.
During transmission, the tracks can be called up
via the file directory.
Number of tracks
Information from up to four USB devices or for
approx. 36,000 tracks can be stored in the ve‐
hicle. If a fifth device is connected or if more than
36,000 tracks are stored, information on exist‐
ing music tracks may be deleted.
Copy protection
Music tracks with integrated Digital Rights Man‐
agement (DRM) cannot be played.
Playback1."CD/Multimedia"2."External devices"3.Select the or symbol.
The playback starts with the first track.
On the split screen, the CD cover for the music
track might be displayed after a few seconds.
Track search
Selection is possible via:
▷Playback lists.▷Information: type of music, artist, and, if
available, composer, album, track.▷In addition, for USB devices: file directory
and, if available, composer.
Tracks are displayed if they have been saved in
the Latin alphabet.
Starting the track search
1."CD/Multimedia"2."External devices"3.Select the or symbol.4. "Search"5.Select the desired category, e.g., "Genre" or
"Artist".
All entries are displayed in a list.▷Open "A-Z search" and input the de‐
sired entry. When a letter is entered, theSeite 210EntertainmentCD/multimedia210
Online Edition for Part no. 01 40 2 900 579 - 03 12 490
Page 211 of 319

results are filtered using this letter as the
first letter. If multiple letters are entered,
all results that contain that sequence are
displayed.▷Select the desired entry from the list.6.Select other categories if you wish.
Not all categories need to be selected. For
example, if all of the tracks by a certain artist
are to be displayed, call up that artist only.
All of the tracks by that artist are then dis‐
played.7."Start play"
Restarting a track search
"New search"
Playback lists
Calling up playback lists.
1."CD/Multimedia"2."External devices"3.Select the or symbol.4. "Playlists"
Current playback
List of tracks currently being played.
1."CD/Multimedia"2."External devices"3.Select the or symbol.4. "Current playback"Random playback
The current list of tracks is played back in ran‐
dom order.1."CD/Multimedia"2."External devices"3.Open "Options".4."Random"
Fast forward/reverse
Press and hold the button.
Video playback
At a glance
Video playback via snap-in adapter is possible.
Operation can be performed via iDrive. The
sound is output on the vehicle loudspeakers.
Playback
The video image is displayed on the front Con‐
trol Display up to a speed of approx.
2 mph/3 km/h; in some countries, it is only dis‐
played if the parking brake is set or if the auto‐
matic transmission is in position P.
1."CD/Multimedia"2."External devices"3. Select the symbol.4. "Video"5.Select the directory if necessary.
To go up a level in the directory: move the
controller to the left.6.Select the desired video file to begin play‐
back.Seite 211CD/multimediaEntertainment211
Online Edition for Part no. 01 40 2 900 579 - 03 12 490
Page 218 of 319

Notes▷Do not cover lower screen edge, since this
is where the sensors and the infrared inter‐
face are installed.▷When loading the rear seats and adjusting
the backrest of the front seat, fold in the
screens.▷When cleaning the screen, follow the care
instructions, refer to page 292.
Remote control
In the center armrest in the rear
Storage is possible in a horizontal position in the
center armrest.
Menu navigation
Press the but‐
tonFunctionOperating concept as for the
front controller.
Turn the wheel: highlight a
menu item.
Press the center knob: con‐
firm the selection.
Pressing arrow keys corre‐
sponds to moving controller:
switching between panels.Open the main menu.Press the but‐
tonFunctionDisplays the previous menu.Opens the "Options" menu.Changes the station, track or
chapter.
Press and hold the button:
fast forward/reverse.Adjusts the volume.Switches the volume adjust‐
ment to the left/right.
With Professional rear enter‐
tainment: Toggles between
the screens.
The transmission time of the remote control is
limited by law. To execute a function again,
press or turn the required button again.
Replacing the batteries No rechargeable batteries
Do not use rechargeable batteries, as
damage may result from the substances in the
batteries.◀
1.Remove the cover. Press on the cover, ar‐
row 1, and push forward, arrow 2.2.Insert batteries of the same type.3.Close the cover.Seite 218EntertainmentRear entertainment218
Online Edition for Part no. 01 40 2 900 579 - 03 12 490
Page 230 of 319

▷Transmission of the phone book entries is
not yet complete.▷It is possible that only the phone book en‐
tries of the mobile phone or the SIM card are
transmitted.▷It may not be possible to display phone book
entries with special characters.▷The number of phone book entries being
stored is too high.▷Is the data volume of the contact too large,
e.g., due to stored information such as
notes? Reduce the data volume of the con‐
tact.▷Is the mobile phone connected as an audio
source? The mobile phone must be con‐
nected as a telephone.▷Is the mobile phone connected as an audio
source or additional telephone? The mobile
phone must be connected as a telephone.
The phone connection quality is poor.
▷The strength of the Bluetooth signal on the
mobile phone can be adjusted, depending
on the mobile phone.▷Insert the mobile phone into the snap-in
adapter or place it in the area of the center
console.▷Adjust the volume of the microphone and
loudspeakers separately.
If all points in this list have been checked and the
required function is still not available, contact
the hotline or service center.
Controls
Adjusting the volume
Turn the knob until the desired volume is se‐
lected. The setting is stored for the remote con‐
trol currently in use.
The vehicle automatically adjusts the volume of
the microphone on the telephone and the vol‐
ume of the called party. Depending on the mo‐
bile phone, the volumes may need to be ad‐
justed. The settings can only be created during
a call and must be adjusted separately for each
telephone. The settings are deleted when the
telephone is unpaired.1."Settings"2."Tone"3."Volume settings"4.Select the desired setting: "Microphone" or
"Loudspeak."5.To adjust: turn the controller.6.To store: press the controller.
Incoming call
Receiving calls
If the number of the caller is stored in the phone
book and is transmitted by the network, the
name of the contact is displayed. Otherwise,
only the phone number is displayed.
If more than one phone number is assigned to a
contact, only the name of the contact is dis‐
played.
For calls on the additional telephone, the num‐
ber is only displayed if it is transmitted by the
network.
An incoming call to the additional telephone is
automatically rejected if there is an active call on
the other telephone.
Accepting a call
Via iDrive
"Accept"
Seite 230CommunicationTelephone230
Online Edition for Part no. 01 40 2 900 579 - 03 12 490
Page 241 of 319
\"3.\"Options\"4.\"Configure Bluetooth®\"5.\"Show image")
tures depends on the mobile phone. The mobile
phone must support this function.1."Telephone"2."Bluetooth® (phone)"3."Options"4."Configure Bluetooth®"5."Show images"
Display of all contact pictures is activated or de‐
activated.
Exporting/importing contacts
Contacts can be exported and imported via the
Personal Profile, refer to page 33. The contacts
stored in the vehicle are exported, but not those
from the mobile phone.
Deleting contacts
Only contacts that are stored in the vehicle are
deleted. The contacts on the mobile phone can‐
not be deleted.
1."Office"2."Contacts"3.Highlight the contact.4.Open "Options".5."Delete contact"or "Delete all contacts".6.If necessary "Yes"
Messages
General information
Whether or not text messages and e-mails from
the mobile phone are displayed depends on
whether transmission from the mobile phone to
the vehicle is supported. Text messages and e-
mails may not be supported by the service pro‐
vider, or the function may need to be enabled
separately. After the mobile phone is first paired,
transmission may take several minutes. Mes‐
sages are only displayed in full length when the
vehicle is stationary. Messages from the addi‐
tional telephone are not transmitted.
Displaying messages1."Office"2."Messages"
A symbol identifies the type of message.
SymbolMessage type Text messages. My Info Message from the Concierge serv‐
ice. E-mail from mobile phone.
Filtering the message list
The message list can be filtered when more than
one type of message exists.
1."Filter:"2.Select the type of message.▷"All"
All messages are displayed.▷"E-mail"
Only e-mails from the mobile phone are
displayed.▷"Service message"
Only messages from the BMW Assist
Concierge service and My Info are dis‐
played.▷"Text message"
Only text messages from the mobile
phone are displayed.Seite 241OfficeCommunication241
Online Edition for Part no. 01 40 2 900 579 - 03 12 490
Page 249 of 319

ConnectedDriveVehicle equipment
All standard, country-specific and optional
equipment that is offered in the model series is
described in this chapter. Therefore, equipment
is also described that is not available in a vehicle,
e. g., because of the selected optional equip‐
ment or country variant. This also applies for
safety-related functions and systems.
BMW Assist
General information
BMW Assist provides you with certain services,
e.g., transmission of the position data of your
vehicle to the BMW Assist Response Center if
an Emergency Request has been initiated.
Many BMW Assist services depend on the indi‐
vidually agreed upon contract.
After your contract has expired, the BMW Assist
system will be deactivated by the BMW Assist
Response Center without your having to visit a
service center. After the BMW Assist system
has been deactivated, no BMW Assist services
will be available. The BMW Assist system can be
reactivated by a service center after you sign a
new contract.
Requirements▷The installed BMW Assist system is logged
in to a wireless communications network.
This network must be capable of transmit‐
ting the services.▷To transmit position data, the vehicle must
be able to determine the current position.▷The BMW Assist service contract was
signed with your service center or with the
BMW Assist Response Center. Enabling
must have been completed.▷BMW Assist is activated.Services offered▷Emergency Request: when you press the
SOS button, a connection to the BMW As‐
sist Response Center is established. The
BMW Assist Response Center then speaks
with you and takes further steps to help you.▷Automatic Collision Notification: under cer‐
tain conditions, a connection is established
to the BMW Assist Response Center after a
serious accident. If possible, the BMW As‐
sist Response Center then speaks with you
and takes further steps to help you.▷Enhanced Roadside Assistance: BMW
Roadside Assistance can be contacted if as‐
sistance is needed in the event of a break‐
down. If possible, the vehicle and position
data are transmitted in the process.▷Customer Relations: connection with Cus‐
tomer Relations for information on all as‐
pects of your vehicle.▷TeleService: data on your vehicle's service
status or required inspections are transmit‐
ted to your service center, either automati‐
cally before a service due date or when you
request a BMW service appointment.▷Remote Door Unlock: the BMW Assist Re‐
sponse Center provides assistance if, for ex‐
ample, the remote control is not available
and the vehicle needs to be opened.▷Stolen Vehicle Recovery: after you report
that your vehicle was stolen to the police, the
BMW Assist Response Center can deter‐
mine its position.▷In addition to these services, the optional
Convenience Plan offers Concierge service
and information for route planning, traffic,
and weather. A limited number of calls can
be made via the BMW Assist Response
Center with Critical Calling if, for example,
the mobile phone is not available or dis‐
charged.Seite 249ConnectedDriveCommunication249
Online Edition for Part no. 01 40 2 900 579 - 03 12 490
Page 251 of 319

nection is established to Roadside Assis‐
tance.
Start Roadside Assistance with BMW
Assist or TeleServices
General information
If the vehicle is equipped with TeleServices,
support is first offered through TeleService Di‐
agnosis and, where applicable, then through
TeleService Help.
1."BMW Assist" or "ConnectedDrive"2."Roadside Assistance"3."Start service"
TeleService Diagnosis
TeleService Diagnosis enables the wireless
transmission of detailed vehicle data that are
important for vehicle diagnosis. These data are
transmitted automatically.
After the data are transmitted, the voice con‐
nection to Roadside Assistance is reestab‐
lished.
BMW Search
At a glance
A business search can be opened via BMW
Search.
License conditions
This product contains NetFront Browser soft‐
ware of ACCESS Co., Ltd. Copyright © 2007
ACCESS Co., Ltd. All rights reserved.
NetFront is a trademark or registered trademark
of ACCESS CO., LTD., in Japan and other coun‐
tries.
This software is based in part on the work of the
Independent JPEG Group.
Requirements▷Subscription to the optional Convenience
Plan.▷The date setting, refer to page 86, on the
Control Display is current.▷The vehicle is located within wireless net‐
work coverage.
Starting BMW Search
1."BMW Assist" or "ConnectedDrive"2."BMW Online"3.If necessary, "OK".
The BMW Search home page is displayed.
Operating BMW Search
To start a search:
▷Turn the controller to highlight an element.▷Press the controller to display an element.Seite 251ConnectedDriveCommunication251
Online Edition for Part no. 01 40 2 900 579 - 03 12 490
Page 255 of 319
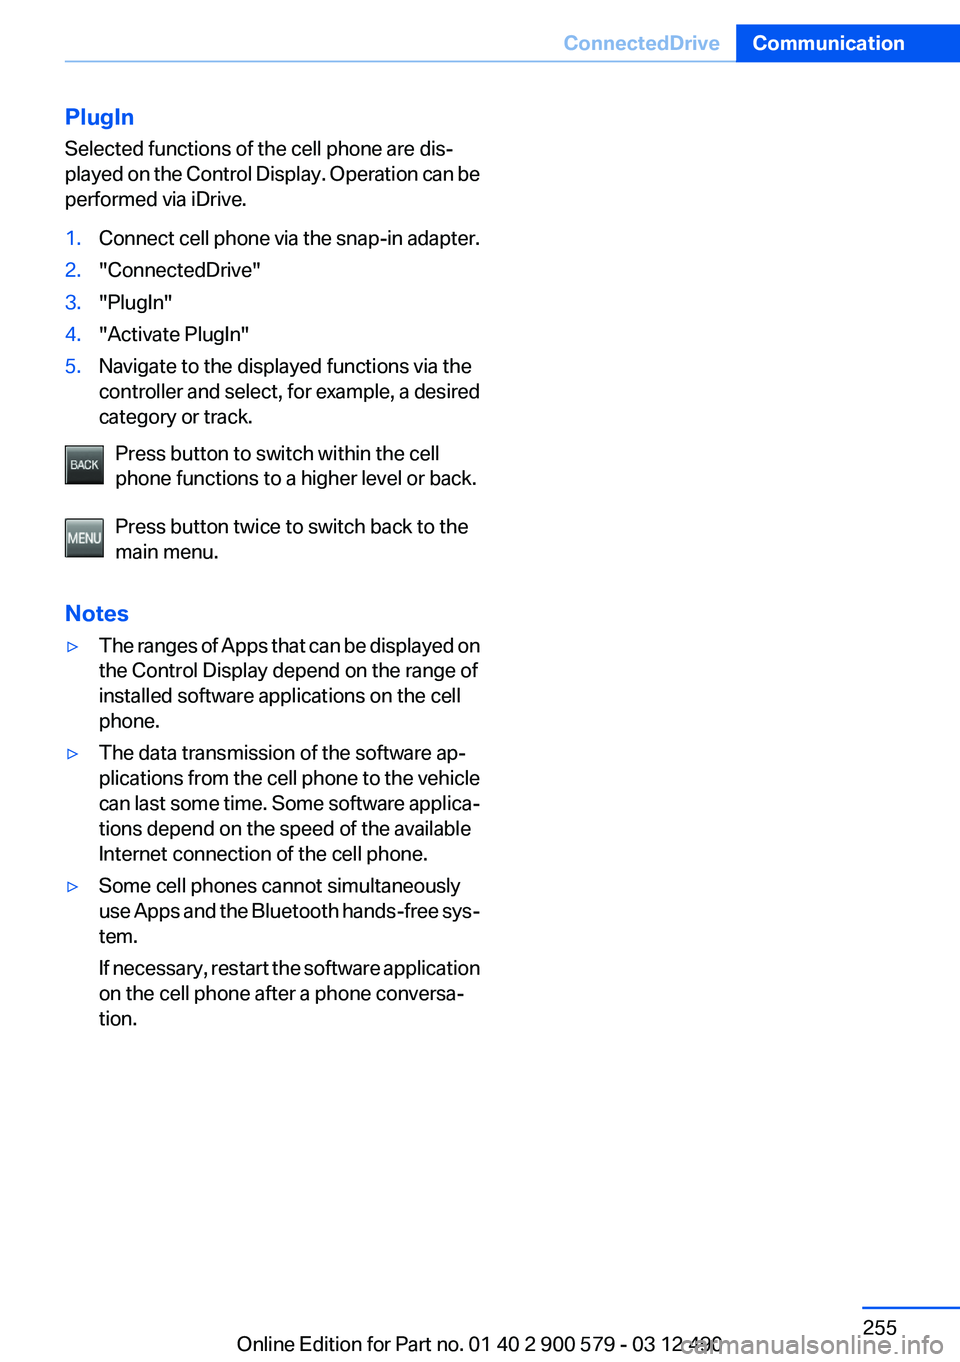
PlugIn
Selected functions of the cell phone are dis‐
played on the Control Display. Operation can be
performed via iDrive.1.Connect cell phone via the snap-in adapter.2."ConnectedDrive"3."PlugIn"4."Activate PlugIn"5.Navigate to the displayed functions via the
controller and select, for example, a desired
category or track.
Press button to switch within the cell
phone functions to a higher level or back.
Press button twice to switch back to the
main menu.
Notes
▷The ranges of Apps that can be displayed on
the Control Display depend on the range of
installed software applications on the cell
phone.▷The data transmission of the software ap‐
plications from the cell phone to the vehicle
can last some time. Some software applica‐
tions depend on the speed of the available
Internet connection of the cell phone.▷Some cell phones cannot simultaneously
use Apps and the Bluetooth hands-free sys‐
tem.
If necessary, restart the software application
on the cell phone after a phone conversa‐
tion.Seite 255ConnectedDriveCommunication255
Online Edition for Part no. 01 40 2 900 579 - 03 12 490
Page 270 of 319

Engine oilVehicle equipment
All standard, country-specific and optional
equipment that is offered in the model series is
described in this chapter. Therefore, equipment
is also described that is not available in a vehicle,
e. g., because of the selected optional equip‐
ment or country variant. This also applies for
safety-related functions and systems.
General information
The engine oil consumption is dependent on the
driving style and driving conditions.
Therefore, regularly check the engine oil level
after refueling.
Checking the oil level
The concept
The oil level is monitored electronically during
driving and shown on the Control Display.
If the oil level reaches the minimum level, a
check control message is displayed.
Displaying the oil level1."Vehicle Info"2."Vehicle status"3. "Engine oil level"
Possible messages
▷"Engine oil level OK"▷"Engine oil at minimum. Add 1 quart of
engine oil!"
When the display appears in the instrument
cluster, add 1 US quart/liter of oil within the
next 125 miles/200 km.▷"Engine oil level below minimum. Add 1
quart!"Immediately add 1 US quart/liter of oil.
Detailed measurement
Requirements:
▷Vehicle is on a level road and the engine is
running at operating temperature.▷Automatic transmission: Selector lever in
transmission position N or P and gas pedal
not depressed.
In order to perform a detailed measurement of
the engine oil level:
1."Vehicle Info"2."Vehicle status"3. "Measure engine oil level"4."Start measurement"
The oil level is checked and displayed via a scale.
During the detailed measurement, the idle
speed is increased somewhat.
Duration: approx. 1 minute.
Adding engine oil
Filler neck
Only replenish the maximum oil amount of
1 US quart/liter if the message is displayed in the
instrument cluster or the oil level has dropped to
just at the lower mark of the dipstick.
Seite 270MobilityEngine oil270
Online Edition for Part no. 01 40 2 900 579 - 03 12 490
Page 286 of 319

If the first starting attempt is not successful,
wait a few minutes before making another
attempt in order to allow the discharged bat‐
tery to recharge.3.Let both engines run for several minutes.4.Disconnect the jumper cables in the reverse
order.
Check the battery and recharge if necessary.
Tow-starting and towing
Automatic transmission: transporting
your vehicle
Note
Your vehicle is not permitted to be towed.
Therefore, contact a service center in the event
of a breakdown.
Do not have the vehicle towed
Have your vehicle transported on a loading
platform only; otherwise, damage may occur.◀
Tow truck
Do not lift the vehicle
Do not lift the vehicle by the tow fitting or
body and chassis parts; otherwise, damage may
result.◀
Use the tow fitting screwed in at the front for
maneuvering the vehicle only.
Towing other vehicles
General information Light towing vehicle
The towing vehicle must not be lighter
than the vehicle being towed; otherwise, it will
not be possible to control the vehicle re‐
sponse.◀
Attaching the tow bar/tow rope correctly
Attach the tow bar or tow rope to the tow
fitting; connecting it to other vehicle parts may
cause damage.◀▷Switch on the hazard warning system, de‐
pending on local regulations.▷If the electrical system has failed, clearly
identify the vehicle being towed by placing
a sign or a warning triangle in the rear win‐
dow.
Tow bar
The tow fittings used should be on the same
side on both vehicles.
Should it prove impossible to avoid mounting
the tow bar at an offset angle, please observe
the following:
▷Maneuvering capability is limited during cor‐
nering.▷The tow bar will generate lateral forces if it
is secured with an offset.
Tow rope
When starting to tow the vehicle, make sure that
the tow rope is taut.
To avoid jerking and the associated stresses on
the vehicle components when towing, always
use nylon ropes or nylon straps.
Attaching the tow rope correctly
Only secure the tow rope on the tow fit‐
ting; otherwise, damage can occur when it is se‐
cured on other parts of the vehicle.◀
Seite 286MobilityBreakdown assistance286
Online Edition for Part no. 01 40 2 900 579 - 03 12 490